


Wow!! I've been out of the house on two consecutive days - think it might be a first since we moved up here!!!
This afternoon, we decided to get out of the house and do a bit of exploring and we decided to go to Skegness. My goodness - what an experience. A real old-fashioned seaside town, pier and all!!!
Had a walk along the beach (equipped with cardy, jacket and hat - wish I'd worn my warm coat though!!) Looked completely windswept by the time we got back to the pier!
Monday, 31 May 2010
Sunday, 30 May 2010
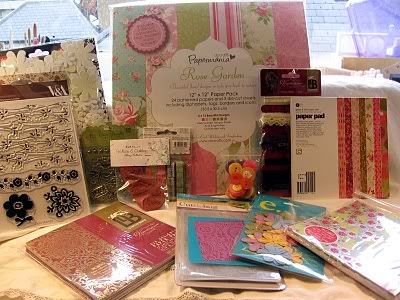
Off to The Lincoln Craft Show
Well, having said I was going to be in bed by midnight, it's now 1am and I'm still up!
Got to get up in seven hours to get ready to go to the Lincoln Craft Show. I'm going prepared with my rucksack and not taking a coat - I made that mistake at Farnborough and had to carry it around for most of the day!!
So, hopefully I'll find some bargains and some new stash to play with.
I'm also hoping to meet up with some Docrafts forum buddies - so hopefully I'll see you at midday at the coffee place!! As I said, I'll be the one hoiking around a red rucksack shivering and wishing I'd brought my coat!!!
Thursday, 27 May 2010
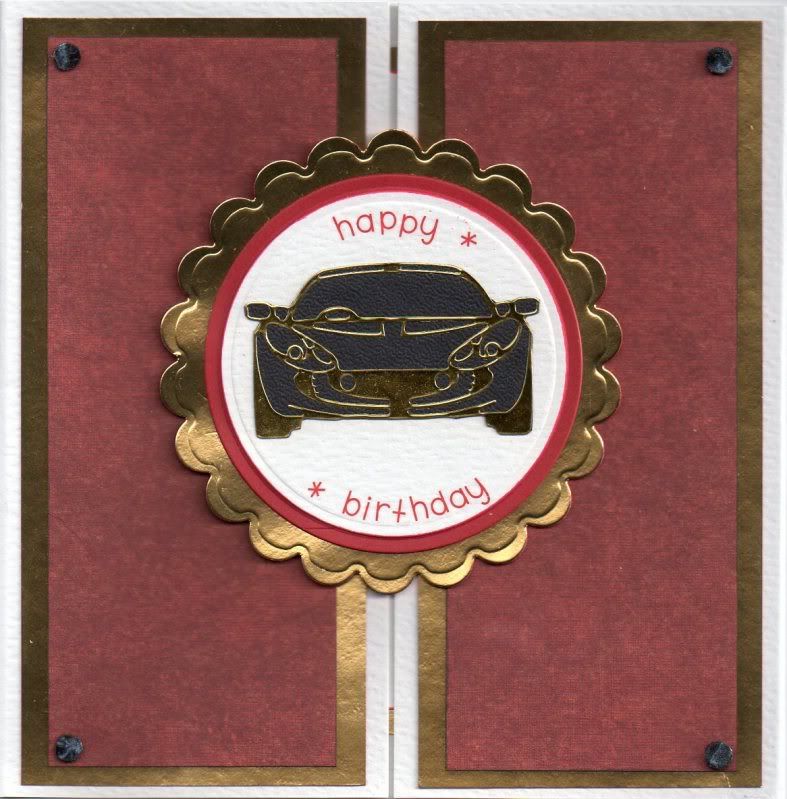
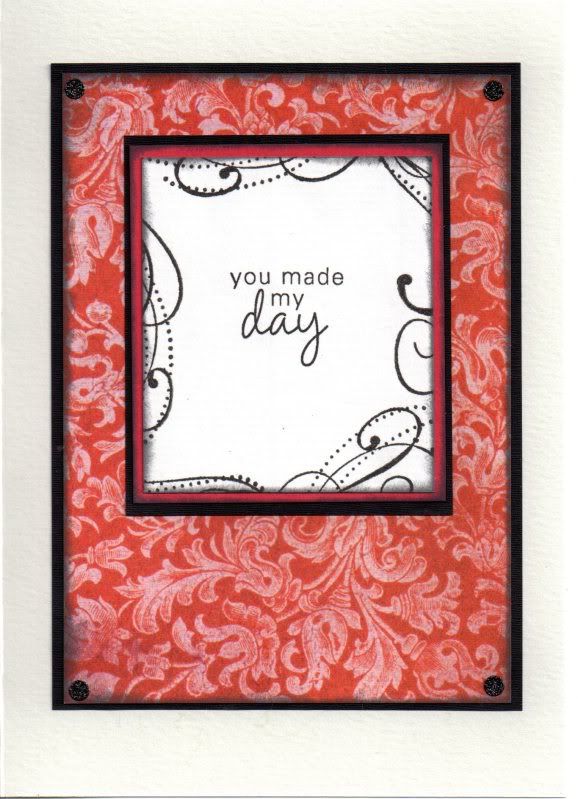
Red, Black and Gold Car Gatefold
This is the card I made for my cousin's husband who's a car mechanic, hence the subject of the card. At the time, I didn't have a suitable stamp so raided my peel-offs for the image.
I am entering this card into this week's Charisma Cardz blog challenge, which has a theme of Going Round In Circles.
I am entering this card into this week's Charisma Cardz blog challenge, which has a theme of Going Round In Circles.
Firstly, the topper for the card was created. A gold Anita's car peel-off was adhered to black paper and cut out. This was then adhered using 3D foam pads to a white circle of card, a larger red circle and a gold mirror card scalloped circle, all cut out using Nestabilities dies.
A gatefold card was created from white card and panels were created for the front from gold mirror card and red patterned paper from the HOTP Ultimate Floral Cardmaker's Creative Pack.
Circular 3D foam pads were added to the corners of the panels and covered with marbled black transfer foil. The sentiment was added to the image panel using red Doodlebug Simply Sweet rub-on lettering, and the panel attached across the opening of the card.
Wednesday, 26 May 2010
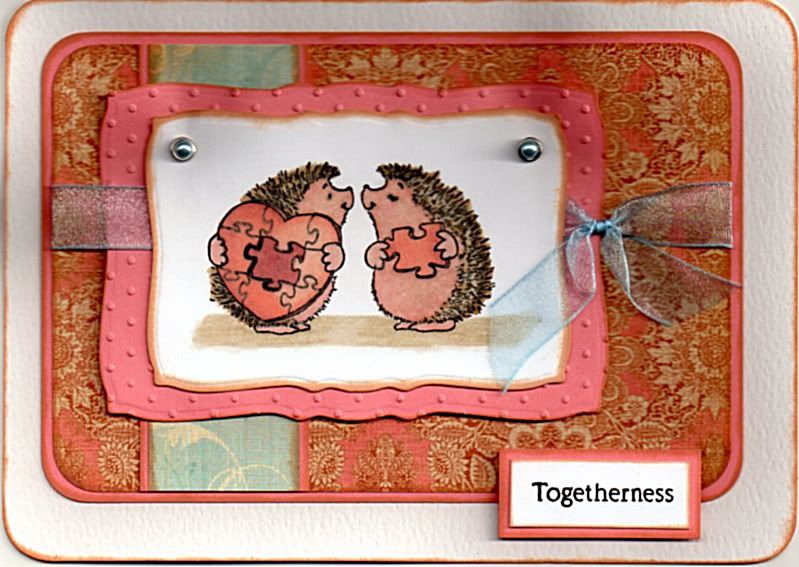
Coral Pink and Blue Jigsaw Piece Hedgehogs Anniversary
This is the card I made for the lovely Alex and her husband for their wedding anniversary recently. I am also entering it into a couple of challenges:
- Stamp Something Challenge: Two of Something
- My Time To Craft: #93 Vivid Colours
- Penny Black Saturday Challenge: #102 Lots of Dots
I started by stamping the image from the Penny Black Piece of My Heart stamp set using Versafine Onyx Black archival pigment ink and coloured using the Copic Sketch markers.
Hedgehogs: E57, E43, E40, E02, E00, R20
Jigsaw: E04, E02, E00, N9
Shadow: E43, E40
The image was then cut out using the Mega Curved Rectangles Nestabilities die, and aqua pearl brads from Papermania were added in the top corners.
A panel of the coral pink card was cut out and a panel of the salmon pink Brocade paper from the K&Co Classic K Bailey paper pad was matted onto it. A strip of the light blue Flourish paper from the same paper pad was matted onto the coral pink card and attached across the larger panel.
A panel of the coral pink card was cut out using the Mega Curved Rectangles die and embossed using the Cuttlebug Swiss Dots embossing folder. This was attached to the larger panel and a tied length of light blue organza ribbon was wrapped around the panel. The image panel was attached over the ribbon.
The sentiment panel was created by stamping the word stamp from the Making Memories Express It stamp set using the Onyx Black ink onto the white card and matted onto the coral pink card.
Tuesday, 25 May 2010
More Blog Candy from Zoe - CLOSED
Zoe is being very generous at the moment as there is yet more blog candy over on her blog at the moment.
Available as candy is:
The blog candy with end 13th June Australian EST, and the winner will be drawn on the 14th June.
The candy will be shipped internationally if necessary and so is open to everyone.
Available as candy is:
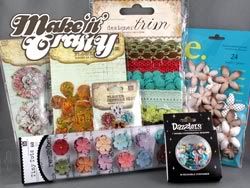
- The new range of Webster’s Pages designer trim
- Alchemy Prima Flowers
- Belle Artes Script Prima Flowers
- E Line Brown Prima Flowers
- Prima Tiny Tots
- Assorted Monarch Prima Flower Centres
- Dazzlers by Petaloo
The blog candy with end 13th June Australian EST, and the winner will be drawn on the 14th June.
The candy will be shipped internationally if necessary and so is open to everyone.
Zoe's Big News Blog Candy - CLOSED
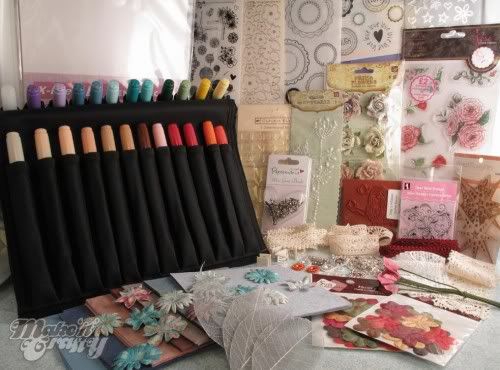
- 24 Ciao Copic Markers in a Copic fold up fabric case (the colours were hand-piced by Zoe as a good starter set) (W1, E00, E02, E11, E31, E33, E37, R20, R27, R29, YR04, YR07, Y11, Y15, G21, G28, BG15, BG49, B00, B95, B97, BV00, V17 and Blender 0)
10 A4 sheets of X-Press It blending paper
Papermania Rose clear stamp set
Clear flourish stamp (great for backgrounds)
Wags ‘n Whiskers unmounted stamp – Angel Whispers
7 colours of hand made paper. 5 sheets each.
3 ply wood stars
5 Silver skeleton leaves
1 sheet of gold edged flower and leaf stickers
I sheet of silver hearts, flower and star stickers
1 sheet 3 dimensional square stickers
Basic Kaisercraft Love/dream circle rub ons
140 x 305mm rub on sheet – doilies
140 x 305mm rub on sheet – grunge floral
4 mini spring boards
5 lengths of lace
Length of Rhinestone chain
Papermania Mini Gem Brads
Rhinestone buckle
3 min pearl ribbon sliders
6 Prima bling flower centres
1 pack of Prima Pearls
Small bunch of flowers
2 packs of heavy silk flowers
Small selection of Prima Ornement de Floraz flowers
1 pack of Prima glitter Roses
There could be extras added as well!!!
To be in with a chance to win, there are a few stipulations.
Have a look at the three projects that Zoe has chosen and pick your favourite.
Add a NEW POST to your blog announcing Zoe's big news giveaway candy and add at least one link to her home page http://www.makeitcrafty.com.au/
Mention which one of the three projects you liked best and why in your post.
After you have added your post, pop back to Zoe's blog candy post and leave a comment with a link to your post.
ZOE WILL SHIP INTERNATIONALLY so everyone is welcome to enter.
So, to comply with the rules, my favourite of the three chosen projects by Zoe is:
the Carousel Horse - it's beautiful and it actually works. Amazing. I really wouldn't have the patience to make it - I'm a right now kind of crafter. I want instant gratification!!!
Monday, 24 May 2010
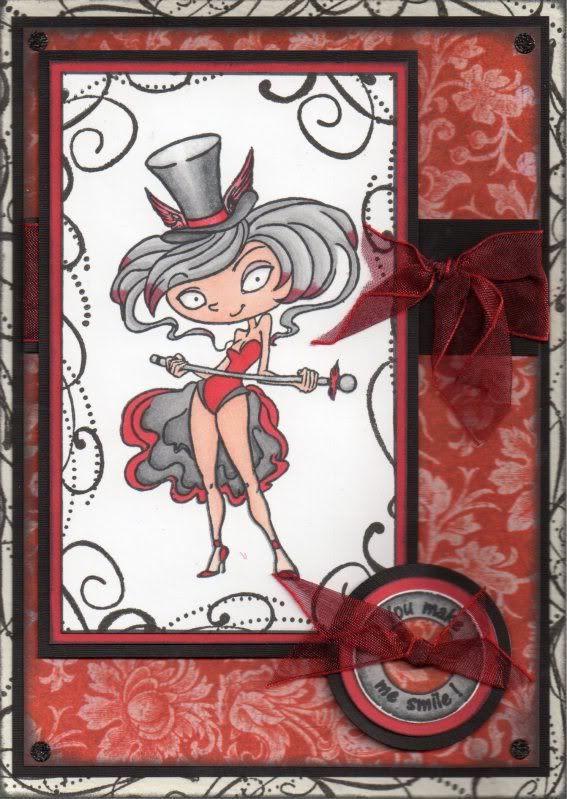
Red and Black Flourish Monique
Here is my entry for this week's Cupcake Craft Challenge, which specifies a colour challenge of black, grey and one other colour. I have gone for red as the extra colour.
The card I made is for Natalie to accompany a swap we did. I decided to use the Monique stamp from Kraftin' Kimmie - one of my recent purchases.
The card I made is for Natalie to accompany a swap we did. I decided to use the Monique stamp from Kraftin' Kimmie - one of my recent purchases.
I started by stamping the edges of the card blank using one of the flourish stamps from the Autumn Leaves Flourish v1 by Rhonna Farrer stamp set with Versafine Onyx Black archival pigment ink. The edges of the card were than distressed using ColorBox Charcoal Fluid Chalk ink.
A panel of the red cabbage rose paper from the Papermania Red Hot Capsule paper pad was also distressed around the edges using the Charcoal ink and matted onto black linen paper.
A length of dark red organza ribbon was then tied in a knot and wrapped around a strip of the black linen paper and matted onto the red patterned paper.
The Monique image was stamped onto white card using Memento Tuxedo Black dye ink and coloured using the Copic sketch markers.
- Hat: R20, R24, R29, N1, N3, N5, N7
- Hair: N1, N3, R29
- Skin: E00, E02, E21
- Eyes: N1
- Dress: R24, R29, N1, N3, N5
- Shoes: R24, R29
- Cane: N1, N3, N5, R24, R29
I was really pleased with the way I got the colour shading on the hat, but not so much with the red tips of the hair - it was harder to get the gradation of colour there.
The flourish stamp used on the card blank was then used to stamp a pattern around the image panel using the Onyx Black ink. This panel was then matted onto red card and the black linen paper.
The circle sentiment, from Aud Designs, was stamped using the Tuxedo Black ink, cut out using the circle Nestabilities die and coloured using the Copic markers.
- Sentiment: N1, N3, N5
This was matted onto circles of red card and black paper also cut out using the Nestabilities. A small circle of the red patterned paper was cut using the Nestabilities was added to the centre of the sentiment and a length of the red ribbon was tied through the centre and adhered over the bottom corner of the image panel.
As an added embellishment, and to add a touch of sparkle, black Glitterations circles from Anita's were added in the corners of the red patterned paper panel.
I also decorated the inside of the card, using the red patterned paper and a sentiment panel again stamped with the flourish stamp and a sentiment stamp from the Hero Arts Anytime Messages stamp set, both stamped using the Onyx Black ink. The black Glitterations stickers were again added in the corners of the red patterned paper.
Monday, 17 May 2010
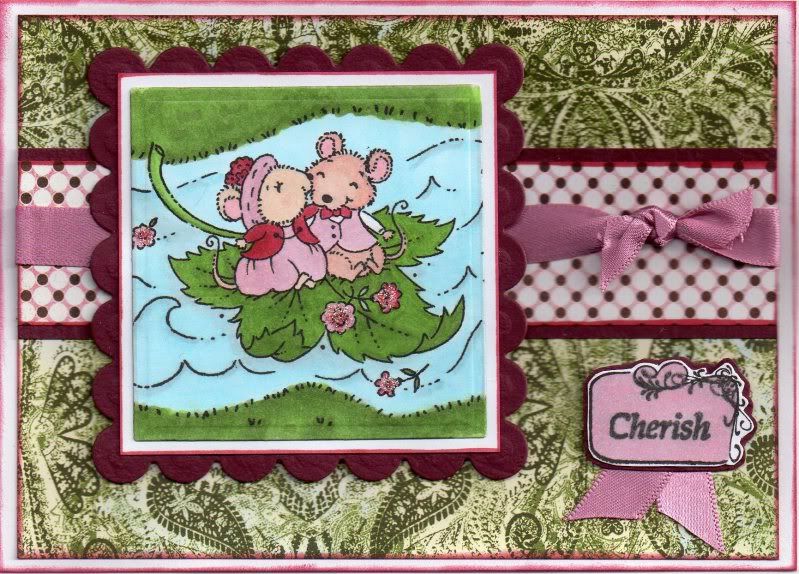
Burgundy, Pink and Green Mice Couple on Leaf Anniversary
Here is the card I made for my cousin's wedding anniversary. I decided to go with the colour scheme as dictated by the blog challenge over at A Gem Of A Challenge, which is burgundy, pink and green, and use one of my recent purchases, a Stampavie stamp by Tina Wenke.
I am also entering this card into the Stamp Something blog challenge, which has Celebrations as this week's theme, and the My Time To Craft challenge, which has Too Cute as its theme.
I am also entering this card into the Stamp Something blog challenge, which has Celebrations as this week's theme, and the My Time To Craft challenge, which has Too Cute as its theme.
I started by stamping the "Mice Couple on Leaf" image, from Stampavie/Tina Wenke onto white card using Versafine Onyx Black archival pigment ink and coloured it using the Copic Sketch markers.
- Grass/Leaf: G12, G85, YG07, YG67
- Water: B00, BG02, N1
- Mice: E00, E51, R20
- Clothes: R39, R59, RV21, N1
- Flowers: R39, RV21
The image was then cut out using a square Nestabilities die and matted onto another white square. This in turn was matted onto a panel of burgundy leather effect card cut out with a scalloped square Nestabilities die.
A panel of the Elite paper from the Basic Grey Sultry paper pad was matted onto a strip of the burgundy card and a length of Anita's pink satin ribbon was tied across it. This was then matted onto a panel of the Fedora paper from the Basic Grey Boxer paper pad.
The flourish frame from the Studio G Journalling Blocks mini stamp set was stamped onto white card using the Onyx Black ink, coloured using the Copic markers and cut out.
- Sentiment: RV21
This was then matted onto the burgundy card, and a small piece of the pink ribbon was attached behind it.
The image panel was added to the left of the card and the sentiment to the bottom right.
Small touches of pink Craft Planet glitter glue were then added to the flowers in the image to highlight them, although this doesn't show up very well in the scanned image.
Small touches of pink Craft Planet glitter glue were then added to the flowers in the image to highlight them, although this doesn't show up very well in the scanned image.
Sunday, 16 May 2010
Tutorial For Watercolouring Images With Markers
I have discovered a new tutorial for watercolouring with marker pens. This tutorial shows how to watercolour by adding the colour directly to watercolour paper. The tutorial is very easy to follow, with numbered step-by-steps with photographs to see exactly what to do.
The card created is beautiful and I'd recommend a trip to see Laurie's blog to see her wonderful creations.
Blog Candy From Charmed Cards and Craft - CLOSED
I've just discovered a great blog candy from the lovely Karen from Charmed Cards and Crafts. It consists of:
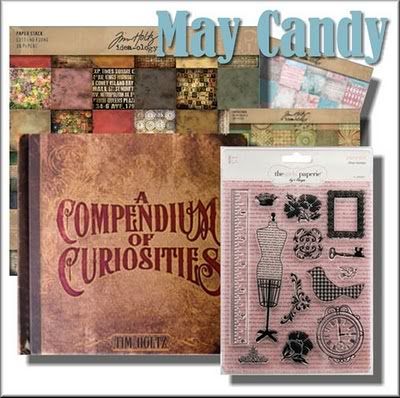
- Tim Holtz Compendium of Curiosities book
- Tim Holtz 12x12 Idea-ology paper pad
- The Girls Paperie stamp set ' Paper Girl'
To be in with a chance of winning this amazing blog candy, then all you have to do is:
- add a post about the candy on your blog with a link back to Karen's post here
- enter your blog link to the candy in Mr Linky at the bottom of Karen's post here (once only please)
The winner of the blog candy will be chosen via random.org at the end of May 2010.
Wednesday, 12 May 2010
Green and Gold Floral Anniversary
This is the card I made for my in-laws to send to my hubby's aunt and uncle for their golden wedding anniversary in June.
I was a bit stumped at first as I was asked to make a flowery card, and after a look through my stamps, I couldn't find anything that inspired me. I did a bit of a google search and found a bit of inspiration in the following places:
I took small elements from both cards and then added my own touches.
I am entering this card into the following blog challenges:
Our Creative Corner - Anniversary
Daring Cardmakers - The Emerald Isle
By The Cute and Girly - Celebrations
Creative Inspirations - Congratulations
I am entering this card into the following blog challenges:
Our Creative Corner - Anniversary
Daring Cardmakers - The Emerald Isle
By The Cute and Girly - Celebrations
Creative Inspirations - Congratulations
I started by creating a square cream card blank and rounded the corners of it using the large XCut corner rounder punch.
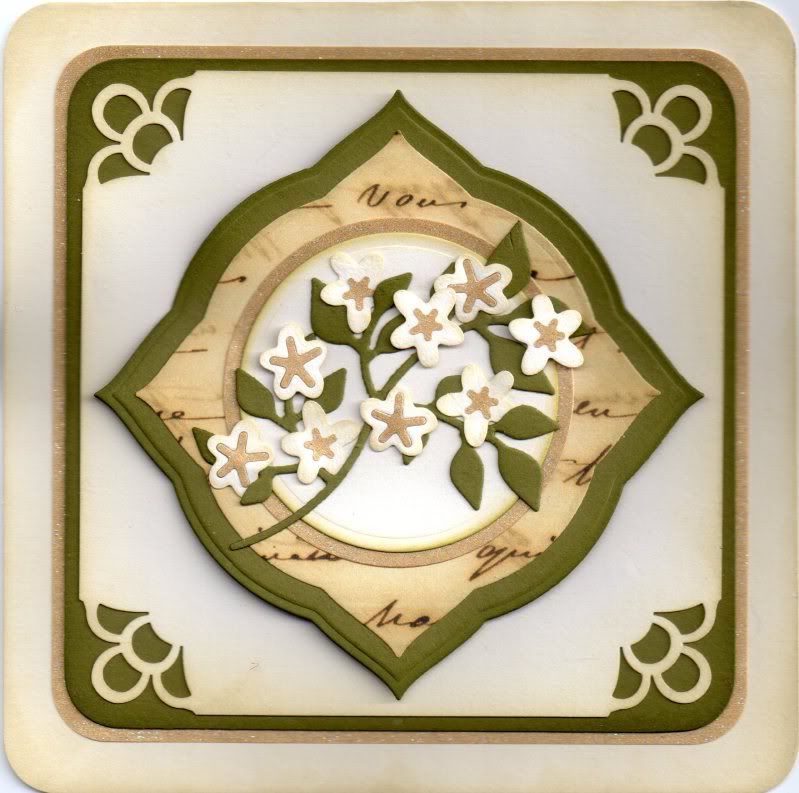
I then created panels from the gold glitter paper and the olive green card, and rounded the corners of those.
A panel of the cream card was then created and the corners of this were punched using the Martha Stewart Double Loop corner punch.
To create the topper, panels were cut using the Labels 3 Nestabilities dies from the green card and the script paper from the K&Co Life's Journey Map paper pad. Circles were then cut using the Nestabilities dies from the gold glitter paper and the cream card.
Using the Sizzix Medium Flowers and Branch die and Branch with Leaves die, flowers were cut from the cream card and gold glitter paper and the branch cut from the green card. I added the gold flower centres to the flowers, and added half flat to the card and half raised up on 3D foam. I added some of the flowers tucked behind the leaves to add dimension and a more realistic look.
All of the pieces were distressed with either the Tim Holtz Antique Linen or Peeled Paint distress ink using Cut 'n' Dry foam.
I decided to keep the inside of the card simple and in line with the front of the card, so panels were cut using the Label 3 die, with the sentiment being computer generated. Again, the panels were distressed with the Tim Holtz distress inks.

I hope that this is what my in-laws were thinking of when they requested a floral golden wedding anniversary card. Just got to come up with a design for a card that we can send now!!!
Tuesday, 4 May 2010
Julie's Blog Candy - CLOSED
The very lovely and talented Julie is celebrating her 100 followers and 10,000 hits on her blog by offering some lovely blog candy.
I have to admit there's some lovely stash up for grabs so I'm keeping my fingers crossed for this one!!!
Up for grabs is:
I've been a follower of Julie's blog right from the start, and remember encouraging her to publish it so we could all get to see her lovely creations rather than her keeping them to herself!!
So, nearly two years on and we've come a long way. Julie's one of my bestest crafting mates and if fate conspires to help us, we'll meet up in the future for more crafting sessions!!!
So, head over to her blog to check out her beautiful creations and enter her blog candy.
I have to admit there's some lovely stash up for grabs so I'm keeping my fingers crossed for this one!!!
Up for grabs is:
- Green at Heart pad from Basic Grey
- Whiff of Joy Willow stamp
- couple of LLB paper pads and ribbon set
- Floral Fantasy Cuttlebug Folder
- V&A stamps
- Prima Flowers
- My Mind's Eye ribbon
- some buttons (all the colours of the rainbow)
- Papermania 12x12 Rose pad
I've been a follower of Julie's blog right from the start, and remember encouraging her to publish it so we could all get to see her lovely creations rather than her keeping them to herself!!
So, nearly two years on and we've come a long way. Julie's one of my bestest crafting mates and if fate conspires to help us, we'll meet up in the future for more crafting sessions!!!
So, head over to her blog to check out her beautiful creations and enter her blog candy.
Monday, 3 May 2010
Red, White and Blue Juliette's Leap Of Faith
This is my latest offering and is also my entry to this week's High Hopes blog challenge. The theme of this week's challenge, #74, is Home Country Flag. The idea is to take inspiration either from the flag itself or its colours. So, being from Britain, this clearly means red, white and blue.
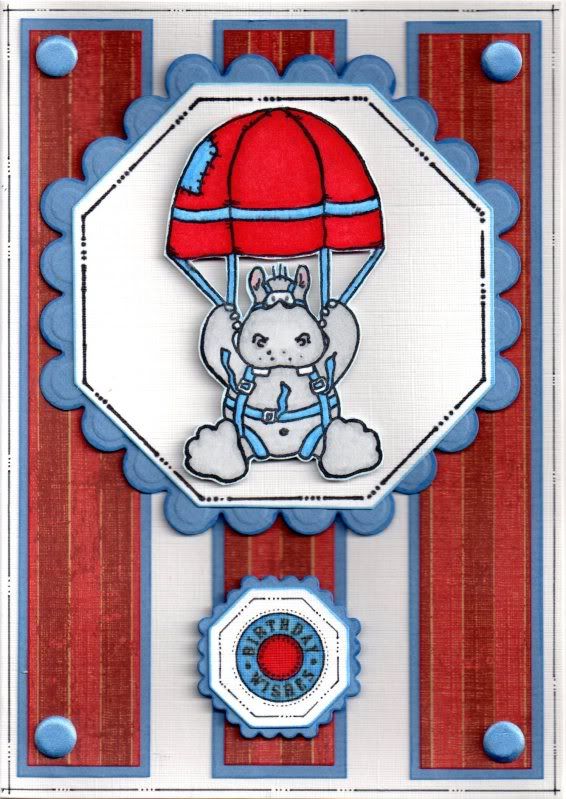 I decided to use the 'Juliette's Leap of Faith' stamp. The card is for a male but I don't think the hippo image is particularly feminine!
The image was very kindly donated by Vicky as part of a PIF blog candy back in July 2008.
I coloured the image using Copic Sketch Markers:
An octagon was then cut from white linen card using a standard octagon Nestabilities die and matted onto a scalloped octagon cut from blue card. A faux stitch line was added around the octagon using the inside of the die as a guide. The cut out image was then adhered in the centre of the octagons.
Three strips of red stripe paper from the K&Co The Best of K&Co Too paper pad were matted onto the blue card and attached to the base card and blue card candy from Craftwork Cards were then attached to the corners.
The 'Birthday Wishes' circle sentiment, from the Hero Arts Birthday Messages stamp set, was stamped using Versafine Onyx Black archival pigment ink in the centre of a small octagon cut from the white linen card and coloured using the Copic markers (R24, R29, B24, B41). Faux stitching was added around the edges again using the die as a guide. This was then matted onto a blue scalloped octagon.
Faux stitching was also added around the edges of the card blank.
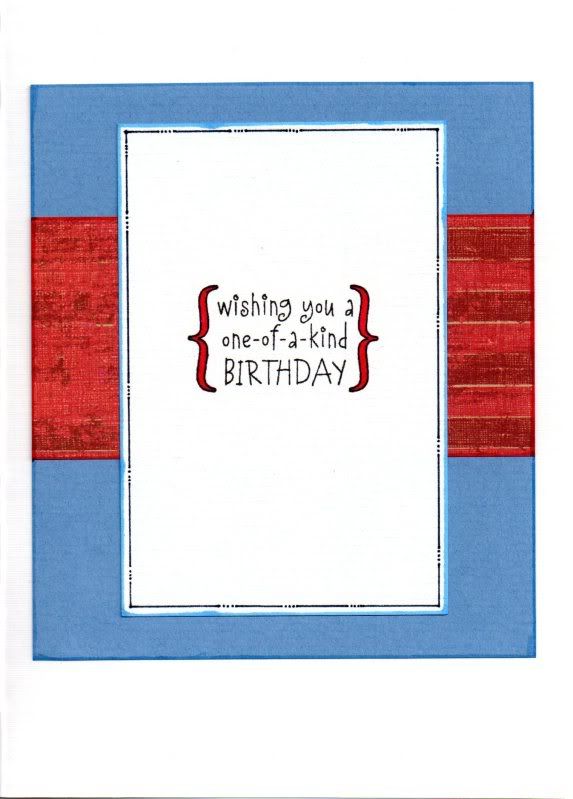 The inside of the card was also decorated using the K&Co red stripe paper and the blue card. The sentiment was added using a stamp from the Hero Arts Birthday Messages stamp set, stamped using the Onyx Black ink and coloured using the Copic R29 marker. Faux stitching was added around the sentiment panel.
I decided to use the 'Juliette's Leap of Faith' stamp. The card is for a male but I don't think the hippo image is particularly feminine!The image was very kindly donated by Vicky as part of a PIF blog candy back in July 2008.
I coloured the image using Copic Sketch Markers:
- Parachute: R24, R29, B41, B24
- Hippo: N1, N3, C0, R20
- Goggles: C0, B41
An octagon was then cut from white linen card using a standard octagon Nestabilities die and matted onto a scalloped octagon cut from blue card. A faux stitch line was added around the octagon using the inside of the die as a guide. The cut out image was then adhered in the centre of the octagons.
Three strips of red stripe paper from the K&Co The Best of K&Co Too paper pad were matted onto the blue card and attached to the base card and blue card candy from Craftwork Cards were then attached to the corners.
The 'Birthday Wishes' circle sentiment, from the Hero Arts Birthday Messages stamp set, was stamped using Versafine Onyx Black archival pigment ink in the centre of a small octagon cut from the white linen card and coloured using the Copic markers (R24, R29, B24, B41). Faux stitching was added around the edges again using the die as a guide. This was then matted onto a blue scalloped octagon.
Faux stitching was also added around the edges of the card blank.
The inside of the card was also decorated using the K&Co red stripe paper and the blue card. The sentiment was added using a stamp from the Hero Arts Birthday Messages stamp set, stamped using the Onyx Black ink and coloured using the Copic R29 marker. Faux stitching was added around the sentiment panel.
Subscribe to:
Posts (Atom)


