Pages

WELCOME

This blog was created to act as a record of the cards and other projects that I have made. It is for both my own reference and to help inspire anyone who wants to take a look.

I'd love it if you'd leave me a comment so that I know what you think of my projects and that you've been to visit!

Anyone can comment, even those who don't have a blog. (Just look for the word 'Comments' under the three little pictures at the end of each post). Readers without a blog can add an anonymous comment, but please leave your name (and docrafts username if applicable) so I know who you are!

Slideshows of all the cards I've uploaded to my blog can be found at the bottom of the page.


PEOPLE WHO FOLLOW MY BLOG

Showing posts with label Edwin. Show all posts

Tuesday, 27 October 2015

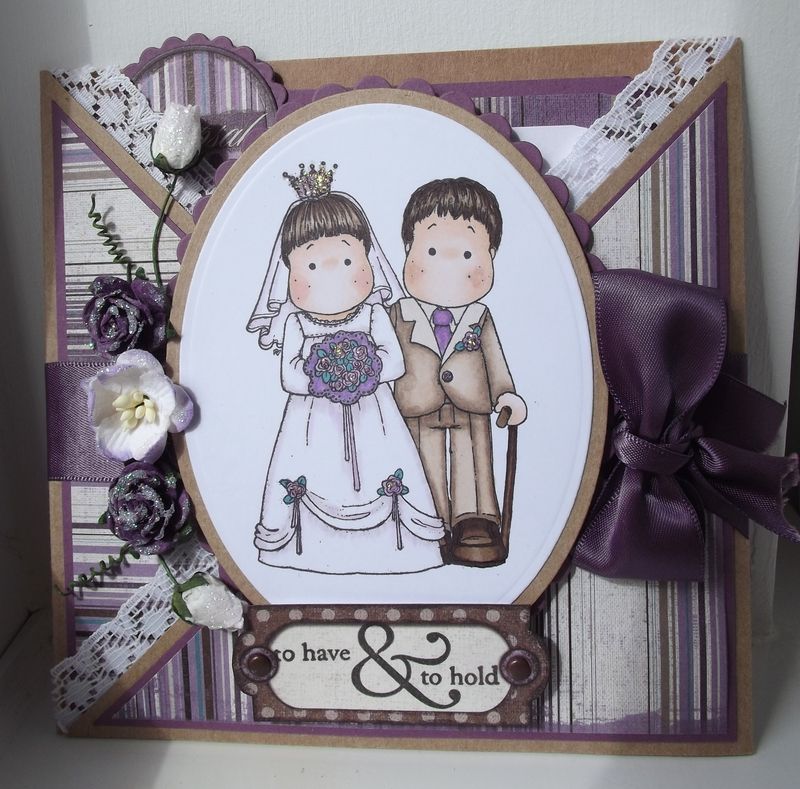
Mauve and Brown Tilda and Edwin Wedding Criss-Cross Card

This is the first of two wedding cards that I made for hubby's cousin and her new husband.
 
They had an amazing reception on board HMS Warrior. It really was remarkable (if a little dark) eating your meal at the tables in the same conditions as the seamen. The kids thought it was great as well, as they had the run of the ship for the whole evening.
 
The inspiration for this card came from this card by Christine, that you can see on her blog here.
 
 
This is a style of card that I've been wanting to make for a number of years now, especially having seen the wonderful cards that Teresa makes!!!

The card in question is a criss-cross card, that actually requires a stand in order to actually stand up, or needs to be leant up against the wall.

Two pieces of craft card were cut to 5.75" x 11.5" and scored in half to create two 5.75" square card blanks. The upper triangle was then cut away from each piece, one on the left flap, the other the right. The two pieces were then adhered together in the centre to create the basis of the criss-cross card.

Each of the front panels were then decorated with mauve card and striped patterned paper from the HOTP Vintage paper pad. A length of ivory lace was then attached to the inside of both of the flaps.

The next step was to stick down the two flaps, but ensuring that they created a pocket to enable a tag to be slotted into the card at a later date. This was done by adding red-liner tape to the lower edge of the left flap and adhering down to the centre panel. The right hand panel had red-liner tape added to the lower edge and a little way up the diagonal side.
 

The image, Classic Bridal Couple by Magnolia, was then stamped using Memento Tuxedo Black ink and coloured using Copic markers:
 
Tilda
Hair: E41, E43, E44, E49
Skin:  E000, E00, E21, R20
Crown: W1, V12, V15
Veil/Dress: V12, W1
Flowers: V04, V12, V15
Leaves: BG09
Lace Frill (Bouquet): V17
Ribbons: V15
 
Edwin
Skin: E000, E00, E21, E13
Hair: E41, E43, E44, E49
Suit: E40, E41, E43, E44, E49
Shoes/Cane: E43, E44, E49
Shirt: E40
Tie: V12, V15
Button: V15
 
The image was diecut using a Classic Oval Nestabilities die and matted onto a Kraft oval and mauve Scalloped Nestabilities Oval.
 
A length of mauve satin ribbon was wrapped around the whole card and the image panel adhered on the front of the card. A bow was tied in a length of the ribbon and added to the side of the image panel.
 
 
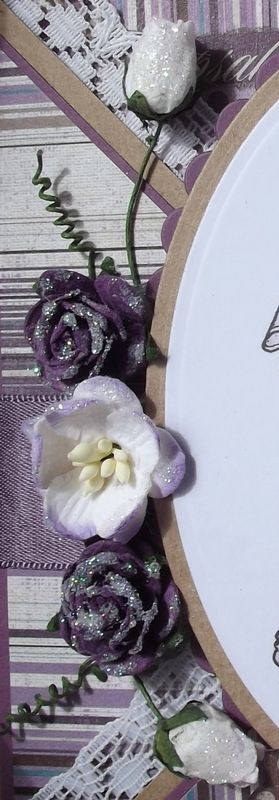
A bouquet of paper flowers from Wild Orchid Crafts were then added to the left of the image panel, which were dusted in DecoArt Crystal Glamour Dust. 
 

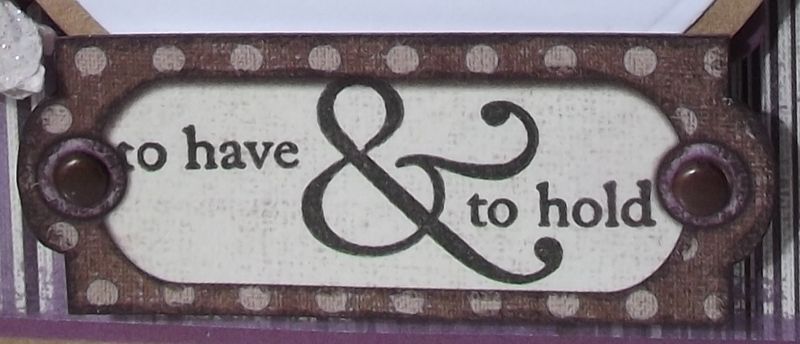
The last step for the front of the card was to add the sentiment. The panel was taken from the Vintage paper pad, and stamped using the 'To Have & To Hold' stamp from the American Crafts Wedding stamp set. A couple of brads were added to the sentiment panel and this was then added below the image panel.
  
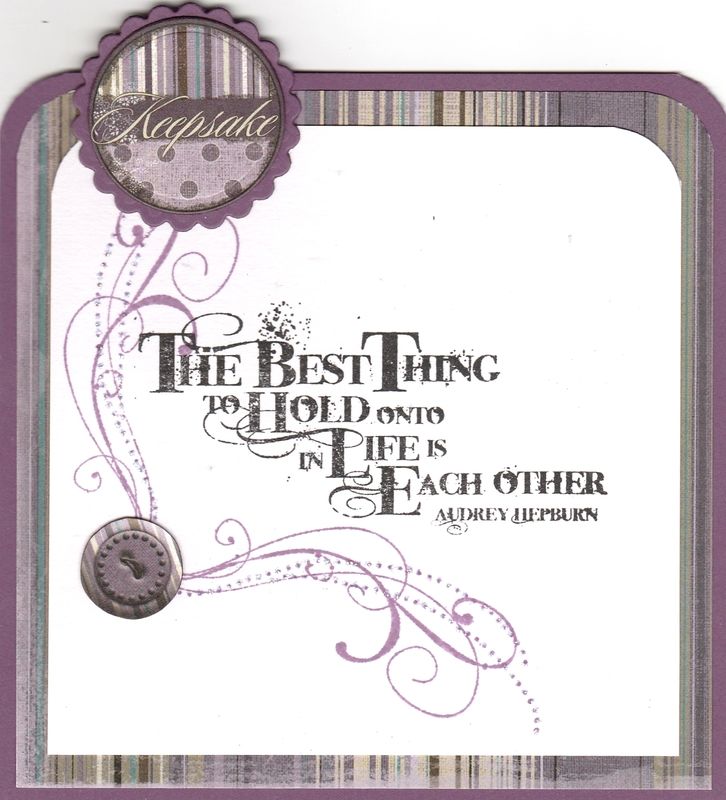
To finish the card, a tag was created using papers and tags from the Vintage paper pad. The front of the tag was stamped using a Lili of the Valley sentiment stamp and Versafine Onyx Black archival pigment ink and a flourish stamp from the Autumn Leaves Rhona Farrer Flourishes v2 stamp set, stamped with Memento Sweet Plum ink.
 

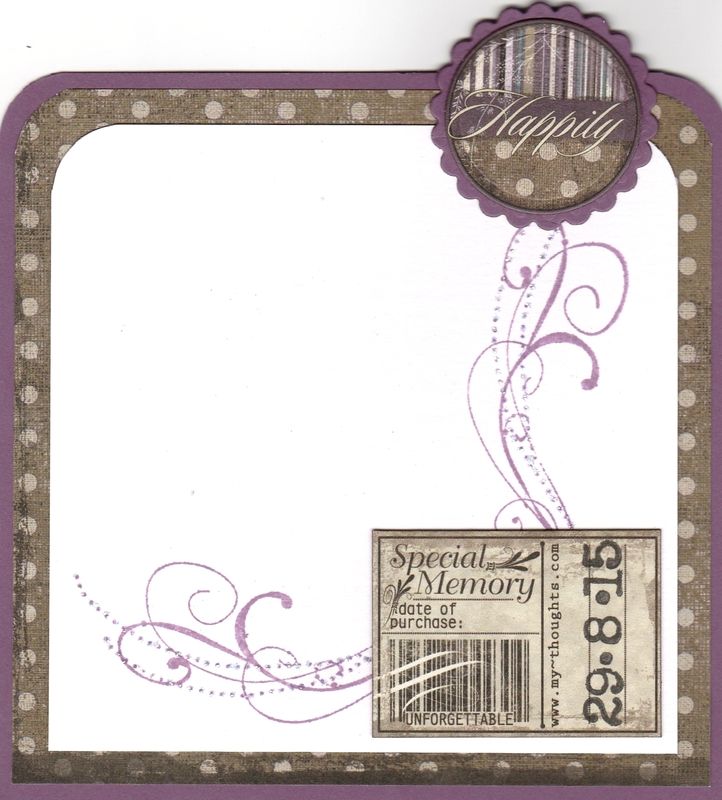
The reverse was also stamped using the flourish stamp and a tag from the Vintage paper pad was added in the corner. The date of the wedding was stamped onto the tag using number stamps from the Labelled With Love  stamp set that was free with the Simply Homemade magazine.
 
 
To accompany the card, a tag was created to go on to the wedding present. This was made using papers from the Vintage paper pad, a short length of lace and the mauve satin ribbon.
 
The bride and groom's initials were added to a tag from the paper pad using a Dovecraft mini alphabet stamp set. A brad to match the front of the card was added to the initialled tag before it was attached to the front of the tag.
 

Thursday, 30 June 2011

Red, White and Blue Dangling Sea Edwin with Shaving Brush Clouds

Well, I have finally had a go at the shaving brush clouds with the Distress Inks and I have to say I love the technique. A couple of tips I will give however are add a little ink at a time and dab your brush on some scrap paper before applying to your project to check you don't have too much ink on the brush..


Firstly, the Dangling Sea Edwin image, from Magnolia, was stamped using Memento Tuxedo Black dye ink and coloured with Copic markers:
  • Hair: YR00, YR14, YR24, E35
  • Skin: E00, E13, E21, E51
  • Hat: R20, R24, R27, R29, B00, 0
  • Matelot Jacket: B23, B24, B00, 0
  • Shorts/Tie: B21, B23, B24, B26
  • Buttons: B24
  • Socks: B00, C0
  • Shoes: R20, R24, R27, R29. B26
The anchor in the image was highlighted with a clear Sakura Stardust pen, and highlights were added to Edwin's cheeks with a Papermania Snow White gel pen. Tthe image was then cut out.

A circle was cut from white card using a circle Nestabilities die and clouds were created using Tim Holtz Faded Jeans Distress Ink, a hand-cut mask cut from a Post-It note and a shaving brush. Basically, the brush with very little ink, was swirled over the edge of the mask, pinching the bristles of the brush together, focusing them on a smaller area.

A frame was also die cut from white card using two circle Nestabilities dies positioned on a piece of magnetic paper. The shape was then embossed and lightly coloured with Tim Holtz Weathered Wood Distress Ink. The edges of the circle were then coloured with a Copic marker (R29) to make them stand out more and small gold Papermania eyelets were set around the circle to create a porthole.

The cloud background, Edwin image and porthole were then all layered up.


A strip of the Wide Tie paper from the Basic Grey Boxer paper pad was matted onto a strip of navy
shimmer card and matted across a panel of the Oxford paper from the same paper pad. This was then also matted onto the navy shimmer card.

A red and blue button (items I've had in my stash for a very long time now!) were threaded with white embroidery thread and a white button with blue thread and positioned in the top right hand corner.

The 'Happy Birthday' sentiment, from the Personal Impressions Paula Pascual Mixed Sentiments stamp set, was stamped onto a die cut circle of the white card using Versafine Majestic Blue archival pigment ink and matted onto a circle of the navy shimmer card.

Here are the challenges I am entering this card into:

Friday, 24 June 2011

Red, Black and Grey Captain Edwin

This card was based on a layout in Issue 68 of Papercraft Essentials magazine.


The Captain Edwin image, from Magnolia, was stamped using Memento Tuxedo Black dye ink and coloured with Copics:
  • Hat/Trousers/T-Shirt/Belt: N1, N3, N5, N7
  • Jacket/Bandana: R20, R24, R27, R29, R32, R37, R39
  • Sash/Patch: R32, R37, R39
  • Boots/Sword Hilt: W1, W3, W5, W7
  • Sword Blade/Buckle: C0, C2, C4
  • Buttons: N5
  • Hair: W3, W5, W7
  • Skin: E00, E13, E21, E51
  • Shadow: W1, W3
  • Outline: C2
The image was then matted onto black card.

Patterned papers from the Dovecraft Charcoal Designer paper pack (Dots and Squares), Papermania Monochrome Capsule Collection paper pad (gingham) and Papermania Red Hot Capsule Collection paper pad (red Clover Leaf) were cut to size and matted on the black card and layered up.


A length of black grosgrain ribbon was knotted and added across the layers and the image panel added over the top.

The Birthday Wishes circle sentiment, from the Hero Arts Birthday Messages stamp set, was stamped using Brilliance Graphite Black pigment ink and coloured using Copics:
  • Sentiment Circle: R24, R27, R29, C2
This was then added beneath the knot of the ribbon.

Three dark grey polka dot Card Candi, from Craftwork Cards, were then added in the top left corner.

The sword blade in the image and the circle sentiment were then both highlighted with Anita's 3D gloss.

Here are the blog challenges that I am entering this card into:

Saturday, 28 May 2011

I Made The Top 3 At The C.R.A.F.T. Challenge

I have just discovered that I've made the top 3 over on the C.R.A.F.T. Challenge.


You can see my original post for this card here.

Saturday, 21 May 2011

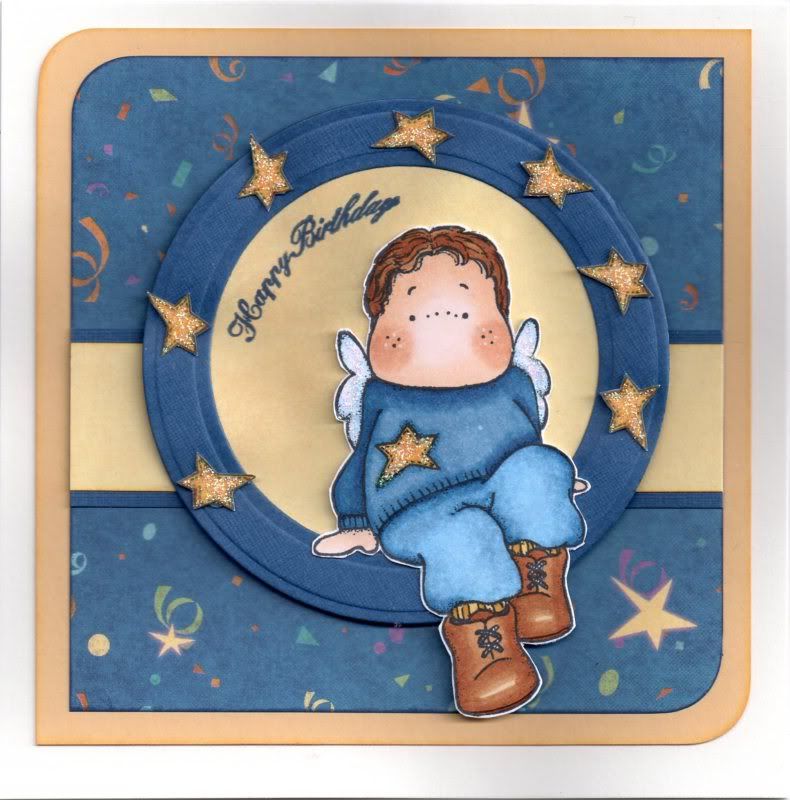
Blue and Yellow Sitting Edwin with Stars

Here is another of my masculine cards. I enjoyed making this one, and finally used the magnetic paper that
the lovely Carol S on the docrafts forum sent to me to create a frame using my Nestabilities dies and Bigshot machine.


The Edwin image, from Magnolia, was stamped with Memento Tuxedo Black dye ink and coloured with Copic markers:
  • Hair: E35, E37, E39
  • Skin: E00, E13, E21, E51
  • Jumper: B34, B37, B39
  • Trousers: B32, B34, B37
  • Stars/Socks: Y21, Y26
  • Wings: B32
  • Shoes: E31, E35, E37, E39
Edwin's cheeks were then highlighted with a Papermania Snow White gel pen and the image was cut out.

Using magnetic paper, two circle dies were positioned and a circle frame was cut from dark blue card and a circle of yellow paper from the HOTP Ultimate Cardmaker's Creative Pack was matted behind.

The Edwin image was matted over the circle panel and the 'Happy Birthday' sentiment, from the Papermania Mix and Match Scrolls and Sentiments stamp set, was stamped on the yellow panel using Versafine Majestic Blue archival pigment ink.


A strip of the yellow paper was matted onto the blue card and across a panel of the dark blue stars paper from the same paper pad and then onto a panel of yellow card.

Seven stars (the jumper detail from the image) were stamped out and coloured with Copic markers:
  • Stars: Y21, Y26
The stars were cut out and attached around the circle frame using 3D foam. These were then highlighted with Craft Planet Yellow glitter glue, as was the star on the jumper. Craft Planet Iridescent Sparkle glitter glue was added to highlight the wings on the image.

This card uses some of my old stash (HOTP papers) with some of my new stash (Edwin stamp, new Copic colours, Papermania Mix & Match stamps and of course my magnetic paper).

Here are the blog challenges that I am entering this card into:

Friday, 3 December 2010

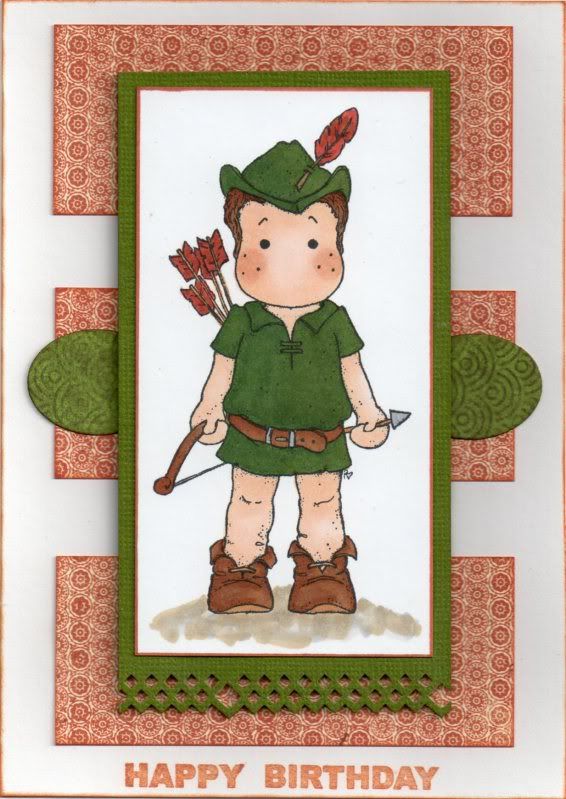
Green and Terracotta Sherwood Edwin

I fell in love with this image as soon as I saw it - and I think I probably paid over the odds for it when I saw it at the Lincoln Sincerely Yours Show back in May.


The Sherwood Edwin image from Magnolia was stamped using Memento Tuxedo Black dye ink and coloured using Copic Sketch markers:
  • Hat/Tunic: YG67, G29, G85
  • Shoes: E35, E39, E57
  • Hair: E39, E57
  • Belt: E35, E39, E57, C4
  • Feather/Arrows: E07, E35, E39, C4
  • Skin: E00, E21, E51, E13
  • Shadow: N1, N3, E43
The image panel was then matted onto a panel of olive green card from the Core'dinations Elements card pack, punched along the bottom edge using the XCut Diamonds border punch.

Three equal panels were cut from the Vintage Tee paper from the Basic Grey Boxer paper pad and matted onto the card blank. Two small ovals were die cut from the Henley paper from the same paper pad using a Nestabilities die and matted to the sides of the image panel.

The sentiment was stamped below the panels using a greeting stamp from the Elzybells Swirly Sentiments stamp set and ColorBox Burnt Sienna fluid chalk ink.

Here are the challenges that I am entering this card into:

Thursday, 21 October 2010

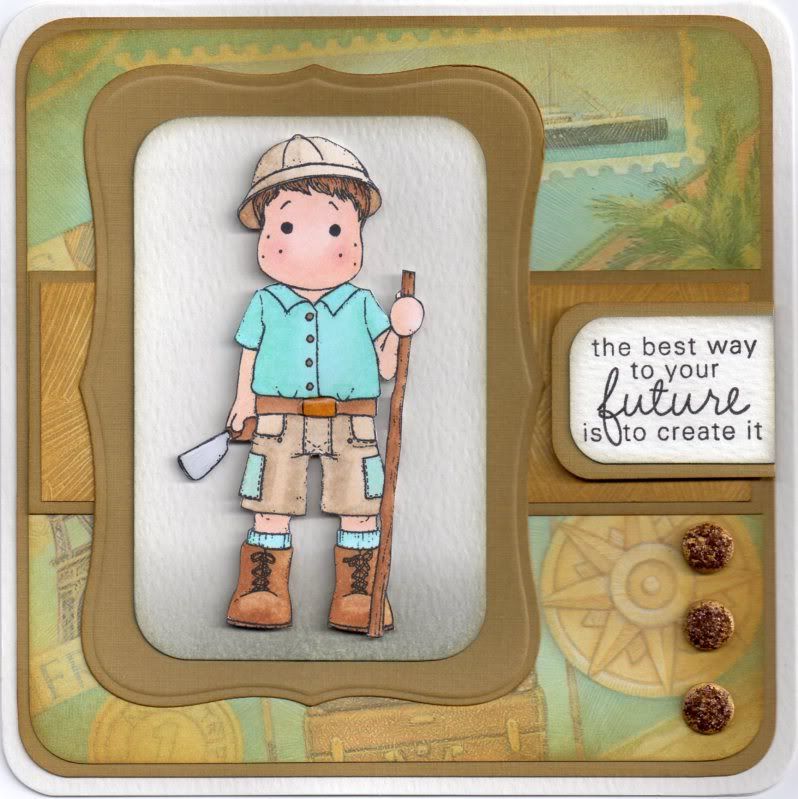
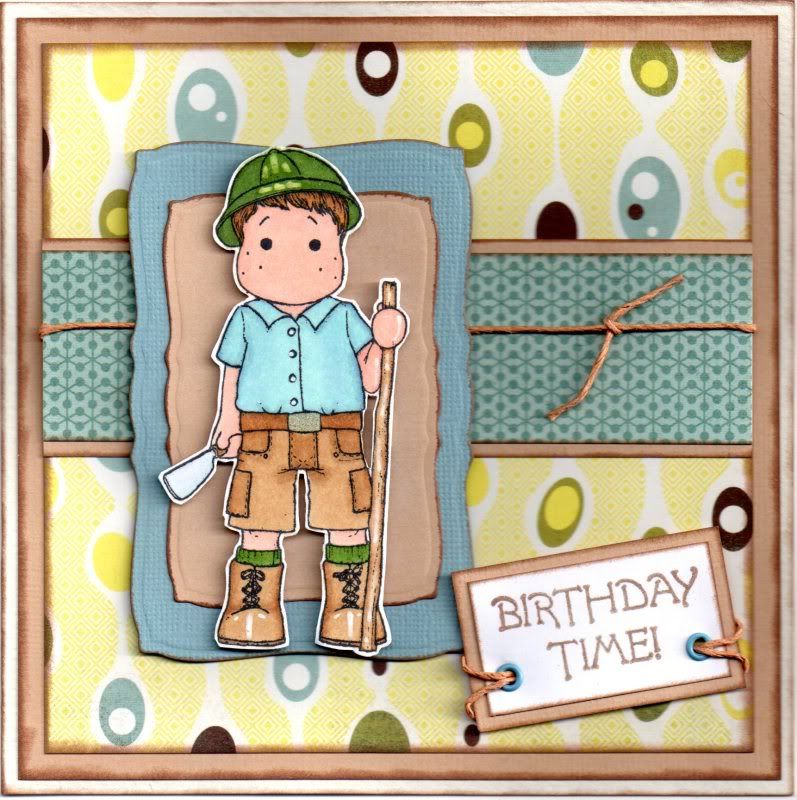
Blue and Brown Jungle Edwin

Another card using the great Jungle Edwin image, once again coloured using Copic Sketch markers.


The Jungle Edwin image, from Magnolia, was stamped using Memento Tuxedo Black dye ink and coloured using Copic Sketch markers:
  • Hat: E35, E41, E43
  • Hair/Stick: E35, E57
  • Skin: E00, E21, E51, R20
  • Shirt/Socks: BG11, BG32, B00
  • Belt: E35, E43, Y17
  • Boots: E35, E41, Y17
  • Shorts: E41, E43, BG11, B00
  • Knife: E35, E57, C0, C2
The image was then cut out and matted onto a panel of white card coloured with Tim Holtz Weathered Wood distress ink, and a panel die cut using a Labels 8 Nestabilities die from Papermania Gold textured cardstock.

A strip of Brown Brushstroke 'Our Vacation' paper from the K&Co Tim Coffey Vacation paper pad was matted onto a strip of the gold card and adhered across a panel of the Vacation Images paper from the same paper pad.

The image panel was added over the strip and three gold card candy from Craftwork Cards, coloured with the Tim Holtz Frayed Burlap, Scattered Straw and Brushed Corduroy distress inks and highlighted with Tim Holtz Vintage Photo Distress Stickles.

The sentiment, from the Fiskars Make A Wish stamp set, was stamped onto white card using Versafine Onyx Black archival pigment ink. The corners were rounded using the small Avec corner rounder punch and matted onto the gold card.


The inside of the card was also decorated. A panel of the brown compass points paper, also from the Vacation paper pad, was matted onto the gold card. A panel was cut from white writing paper and the sentiment stamped in the centre using stamps from the Elzybells Swirly Sentiments stamp set with the Onyx Black ink. The edges were distressed using the Brushed Corduroy ink and matted onto a panel die cut from the gold card using a Labels 8 Nestabilities die.

Here are the challenges I am entering this card into:

Sunday, 5 September 2010

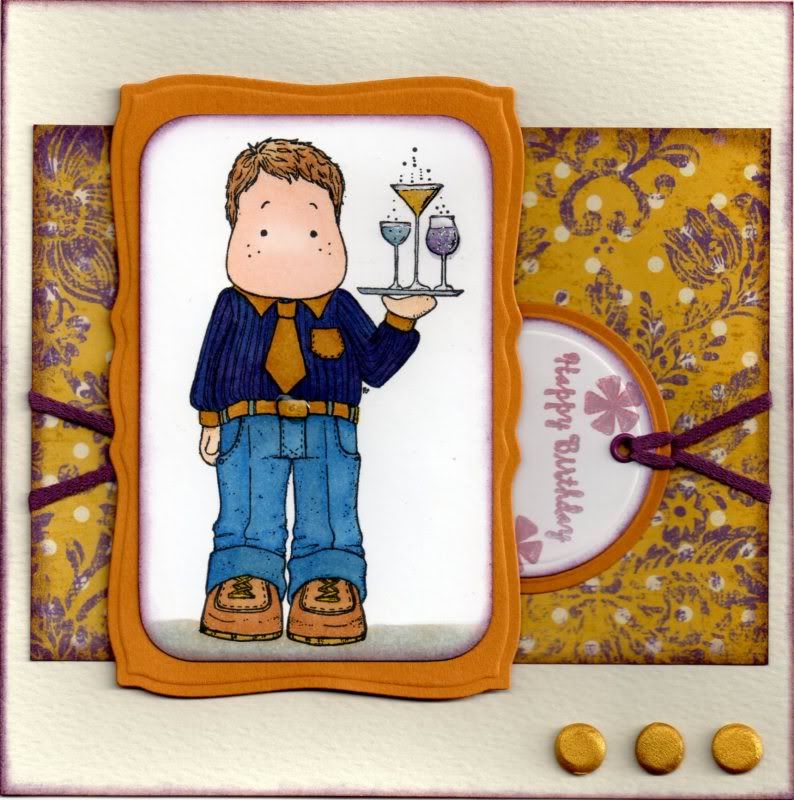
Mustard and Purple Bartender Edwin

Here's a card I made for my sister's fiancé - he's actually a Spanish waiter so thought this image was perfect for a card for him.


I picked the papers first, from the Papermania Persimmon paper pad, and coloured the image to match.

The Bartender Edwin image from Magnolia was stamped using Memento Tuxedo Black dye ink and coloured using Copic sketch markers:
  • Hair: E31, E35,E57
  • Skin: E00, E21, E51
  • Collar/ Tie/Cuffs/Belt/Shoes: Y08, E31, E35
  • Shirt: B18, B45, V17
  • Trousers: B18, B24, B45
  • Tray: C4, C6
  • Glasses: C0, C2
  • Cocktails: BV31 & B45; Y08 & E31; V17 & C2
  • Shadow: E31, C0, C2
The image was then cut out and the corners rounded using the large XCut corner rounder punch, and the edges of the image panel were distressed using Tim Holtz distress inks in Aged Mahogany and Dusty Concord. The image panel was then matted onto a panel of mustard coloured card die cut using the Mega Curved Rectangles die from Nestabilities.

Circles were die cut from white and mustard yellow card using standard circle Nestabilities dies and the sentiment, from the Papermania Clare Curd Sentiments stamp set, was stamped on the white circle using a combination of Wisteria and Warm Violet ColorBox Fluid Chalk inks. Asterisks, from the Fiskars Make A Wish Quotes stamp set, were also stamped using the same chalk inks.

The edge of the white circle was distressed using the Aged Mahogany and Dusty Concord inks and matted onto the mustard circle. A hole was punched in the circles and a small mauve Papermania eyelet set and a length of purple fibre was threaded through. This was then attached to the reverse of a panel of the mustard and purple flourish polka dot paper from the Papermania Persimmon paper pack. A second length was then attached to the left side of the panel to give the appearance of being wrapped all around the panel.

The patterned paper panel was then adhered to the centre of a square card blank and the image panel was adhered over the circles.

Three gold card candy from Craftwork Cards were coloured using the Tim Holtz Scattered Straw, Wild Honey and Walnut Stain distress inks and added in the bottom right hand corner.

Anita's 3D Gloss was then added to the glasses and the belt buckle, and DecoArt Crystal Glamour Dust was sprinkled into the gloss on the glasses.


I shall be entering this card into a few challenges this week:

Friday, 6 August 2010

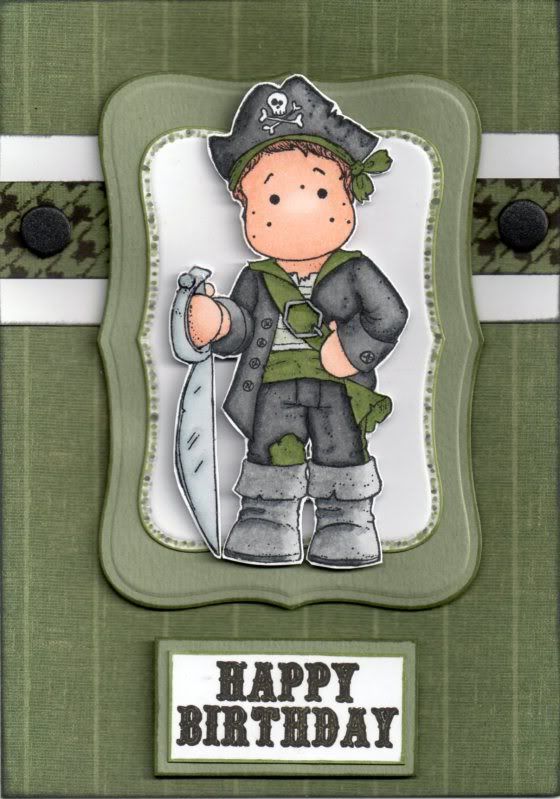
Green and Grey Captain Edwin

Here is the card I made for a young man who has reached the grand age of 16. Oh to be 16 again......or maybe not!!!

I used the lovely Captain Edwin stamp that I treated myself to at the Lincoln Sincerely Yours show.

Anyway, I've entered this card into a couple of blog challenges this week:


The Captain Edwin image, from Magnolia, was stamped using the Memento Tuxedo Black dye ink, coloured using the Copic markers and cut out:
  • Hat: N1, N3, N5, N7
  • Bandana/Sash/Collar/Patch: G85, G00, C0
  • Jacket/Trousers: N1, N3, N5, N7
  • T-Shirt: G85, G00, C0
  • Skin: E00, E02, E21
  • Sword: C0, C2, C4
  • Boots: N1, N3, N5
Two mats were cut from white and sage green card using the Labels 8 Nestabilities dies and the image was attached in the centre.

A strip of the green and black stripe and herringbone paper from the HOTP Heritage paper pad was matted onto a strip of white card. This was matted across a larger panel of the same paper and used to cover the card blank.

The sentiment, from the Papermania Hampstead Icons and Sentiments stamp set, was stamped onto a rectangle of white card using the Versafine Onyx Black archival pigment ink. This was coloured with a green Copic marker and matted onto the sage green card.

The image panel was attached over the paper strip and the sentiment attached below it.

The sword and buckle on the image were then highlighted with Anita's 3D gloss, and black card candy, from Craftwork Cards, were added to the herringbone strip.

Saturday, 10 April 2010

Blue, Green and Brown Jungle Edwin

So, I thought it was about time I uploaded another card.

This time it is my dear hubby's birthday card and I decided I wanted to use my new Edwin stamp.

I have decided to enter this card into a couple of blog challenges this week.

The first is the Creative Inspirations blog challenge, which this week, Challenge #55, has a colour theme of blue, green and brown. Hopefully you think this fits into the theme!!

The second is the A Spoonfull of Sugar blog challenge, which this week, Challenge #98, asks for a card For The Boys.

I started by stamping the Jungle Edwin image onto smooth white card using Memento Tuxedo Black dye ink and coloured it in using the Copic Sketch markers.
  • Hat/Socks: YG07, YG17, N3
  • Shorts/Boots/Stick: E31, E35, E57
  • Shirt: BG11, B41, B45
  • Knife: C0, N3, BG11, E57
  • Hair: E35, E57
  • Skin: E00, E02, E21
I then added highlights to the image using a white Sakura Souffle gel pen (although these didn't look right on the hat so I coloured over them with the green Copic marker).


The image was then cut out and mounted onto blue Core'dinations card and beige card panels that had been die cut using the Mega Curved Rectangle Nestabilities.


A strip of the Light-Hearted paper from the Basic Grey Offbeat paper pad was matted onto a panel of the beige card and a length of beige hemp cord was tied around it. This was then layered onto a square panel of the Impromptu paper, also from the Offbeat paper pad and the beige card.


The sentiment, from the Daisy and Dandelion 'Marshmallow Does DIY' stamp set, was stamped onto the smooth white card using Versafine Vintage Sepia archival pigment ink and matted onto the beige card. A couple of small blue eyelets were set either side of the sentiment and short lengths of the beige hemp cord were threaded through them and attached to the underside of the panel.

Wednesday, 2 September 2009

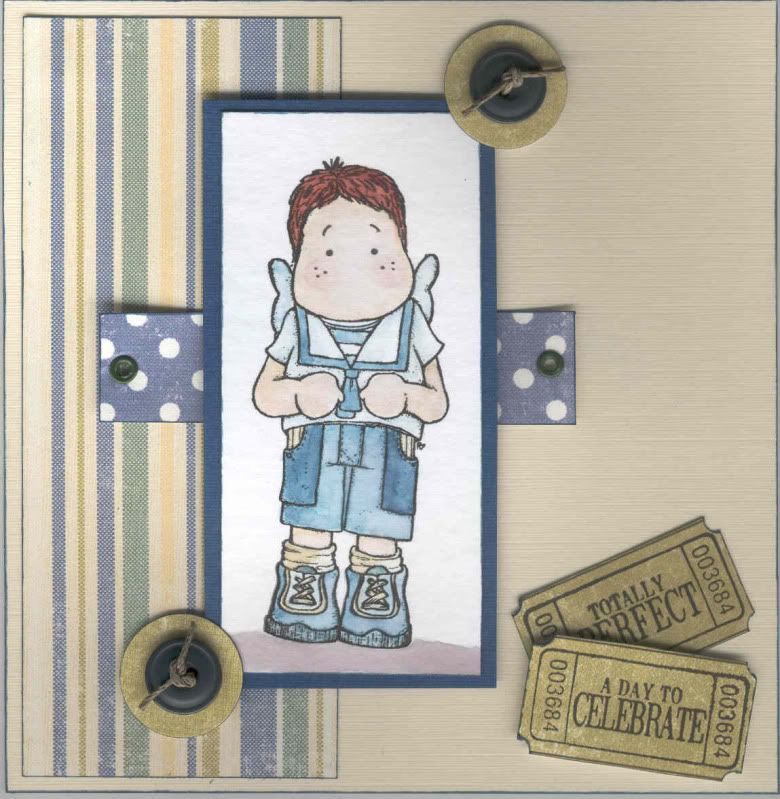
Blue, Green and Yellow Sailor Edwin

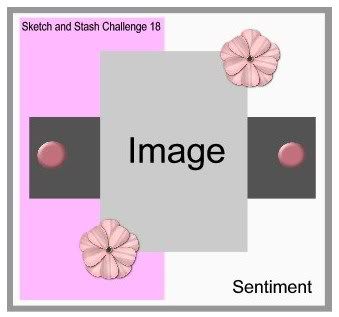
This is my entry to this week's Sketch and Stash blog challenge (#18). This is another of the NEW blog challenges that I discovered the other day and I love the idea behind this one.


The idea is to use something new and something that's been neglected from your stash. Well, I'm sure we've all got LOADS of neglected items, especially those ones we had to have but once Mr Postie brought them we had no idea how to use them!!!

Well, the sketch looked like this:

My new item is actually the papers, which are from the Making Memories Fresh Anthology Sydney paper pad. I bought these the other week, and was inspired to buy these (amongst others) by my visit to Julie's. The one I was looking for was the Ruby pad, but saw these and had to get them as well.

My neglected items are the buttons (that I bought about 4 years ago).

The Edwin stamp and the ticket stamps are also slightly neglected as this is the first time I've used the Edwin stamp that I bought months ago, and the ticket stamps that I haven't used as much as I should have!!

Anyway, the Sailor Edwin image from Magnolia was stamped using Versafine Onyx Black archival pigment ink and watercoloured using Whispers Brushstrokes markers and was then matted onto blue cardstock.

A panel of the blue stripe paper from the Sydney paper pad was attached to the left of the card blank. Two small green eyelets were set in a strip of the blue polka dot paper and attached across the centre of the card. The Edwin image was then layered over the patterned paper.

Green hemp cord (that I bought in Hobbycraft if you're interested) was threaded through two green buttons and layered onto the green brocade paper from the Sydney paper pad and added at the corners of the Edwin image.

Two of the stamps from the Autumn Leaves Ticketed stamp set were stamped using the Onyx Black ink on the green brocade paper. Holes were punched at the corners of each of the tickets using the Big Bite and then cut up. To see the tutorial on doing this from Aud Designs, click here. It's very clever.

I also decorated the inside of the card using strips of the patterned papers used on the front of the card and the Happy Birthday sentiment was taken from the Papermania Clare Curd Sentiments stamp set using the Onyx Black ink. Faux stitch doodling was added around the panel of paper to emphasize the edges.

This card was made for a friend with not a hint of irony. As you can see, there is a ticket that says 'Totally Perfect'. Well, he's not, but he thinks he is. He also thinks he's always right, but I didn't have a ticket that said that!!!

Tuesday, 3 March 2009

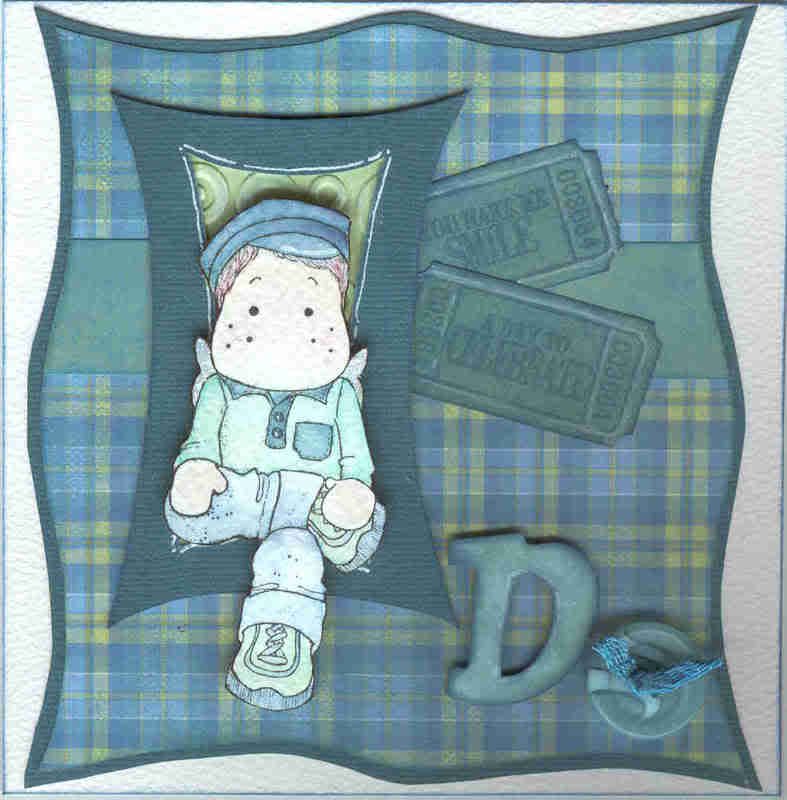
Peacock Blue Traveller Edwin

I finally got my table back up yesterday and managed to make a birthday card for my 'little' brother (he's 25 this year!!!). I think I might have to get more of my stash out and down than I'd hoped as it's completely unworkable as it is. I'm having to move everything slightly just so I can get something out. It's a complete nightmare!!!


Anyway, here is my creation. I love these colours at the moment, and I'm really pleased with my watercolouring on the Edwin image, even if I do say so myself!!!

The Edwin image, 'Traveller Edwin', was kindly donated by Alex K (Eisbaerin).

Edwin was watercoloured using the Whispers Brushstroke markers and highlighted with white gel pen. The wings were then highlighted with Craft Planet Iridescent Sparkle glitter glue.

A curvy frame was cut from peacock blue cardstock from the DCWV Brights mat stack, and matted over a piece of green cardstock embossed using the Cuttlebug 'Spots and Dots' folder (kindly donated by Tara W (Kania)). The Edwin image was cut out and 3D'd onto the frame.

A wavy mat was cut from a patterned paper from the HOTP Ultimate Creative Pack and a strip of matching paper was adhered across it. This was then matted onto the peacock blue card from the DCWV Brights mat stack.

Two tickets from the Autumn Leaves Tickets stamp set were stamped using ColorBox Prussian Blue Fluid Chalk ink onto the matching piece of paper from the HOTP paper and cut out. These were edged with ColorBox Prussian Blue Fluid Chalk ink and highlighted with white gel pen, then attached to the mat beneath the frame.

A letter 'D' from the Colorbok Letters set was coloured using ColorBox Celadon Pigment ink and edged with ColorBox Prussian Blue Fluid Chalk ink. Highlights are added using white gel pen. A teal blue button was threaded with a matching fibre from the HOTP Sarabooks Sapphire fibre pack and both were attached to the bottom right hand side of the card.

Friday, 6 February 2009

Three Birthday Cards

As promised, here are the three birthday cards I made this week.

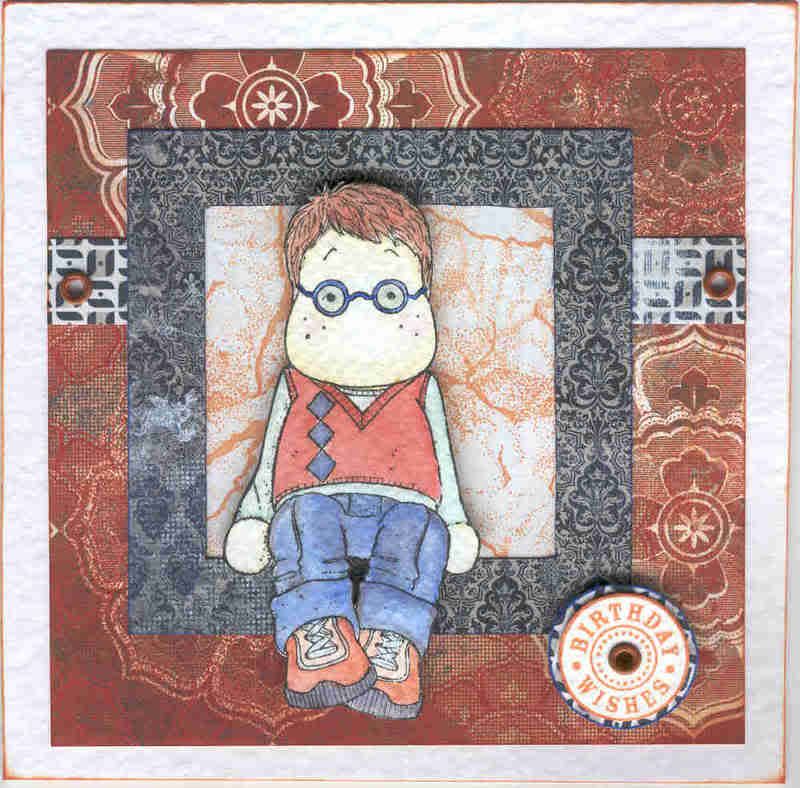
Red and Blue Edwin with Glasses

The first was an Edwin card that I made for my cousin. I used one of the images that was kindly donated to me by Alex (Eisbaerin). I wanted to use my Basic Grey Boxer papers and watercoloured the image using the Whispers Brushstroke markers to match the colours. The glasses were highlighted with clear Sakura glaze pen.


A strip of blue/grey geometric paper from the Basic Grey Boxer pad was matted onto a red floral paper from the same paper pad and mini eyelets were attached at the edges. A frame was cut from a third paper from the paper pad and matted over a piece of paper stamped with the Stone Texture stamp from the Judikins Artefacts cube and Whispers Caramel Delight Permanent Dye ink.


The 'Birthday Wishes' stamp, from the Hero Arts Birthday Greetings stamp set, was stamped using Whispers Caramel Delight Permanent Dye ink, matted onto a matching patterned paper from the Boxer paper pad and a matching mini eyelet was set in the centre.


The Edwin image was attached over the frame and the greeting in the corner.


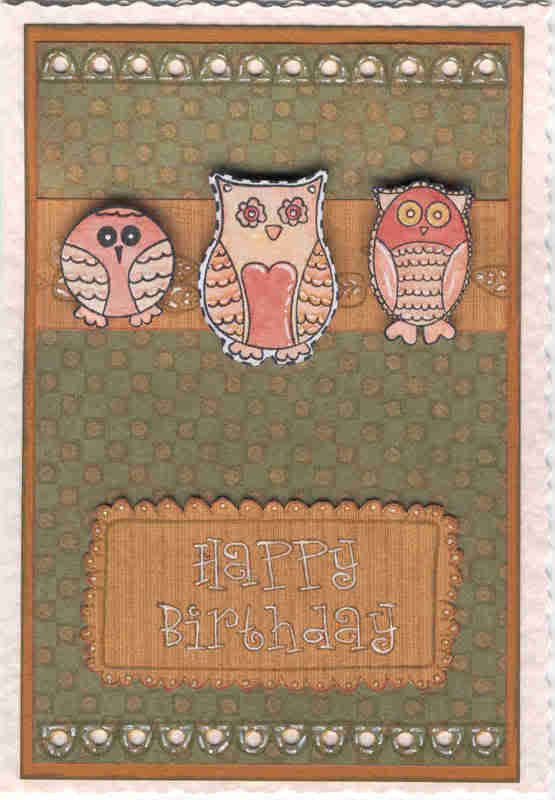
Green and Yellow Owls


The second was a card for another of my cousins. This time I used the owl images from the Papermania Secret Garden stamp set. They were stamped using Versafine Onyx Black ink and watercoloured using Whispers Brushstroke markers. These were then highlighted with white gel pen.


A piece of green patterned paper from the HOTP Earth's Palette Creative Pack was stamped with the scallop border stamp. A co-ordinating strip of yellow paper, from the same paper pack, was stamped with the leaves stamp and highlighted with white gel pen. This strip was attached across the green panel and then attached to a piece of mustard yellow paper. Holes were punched in the scallop borders and highlighted with white gel pen. The owl images were attached over the yellow strip of paper.


The scallop frame, from the Papermania Sweet Nothings stamp set, was stamped onto the yellow patterned paper and the Happy Birthday greeting was stamped in the centre. The lettering and scallops were highlighted with white gel pen. The frame was cut out and attached at the bottom of the panel. The panel was attached to a cream deckle-edged A6 card.

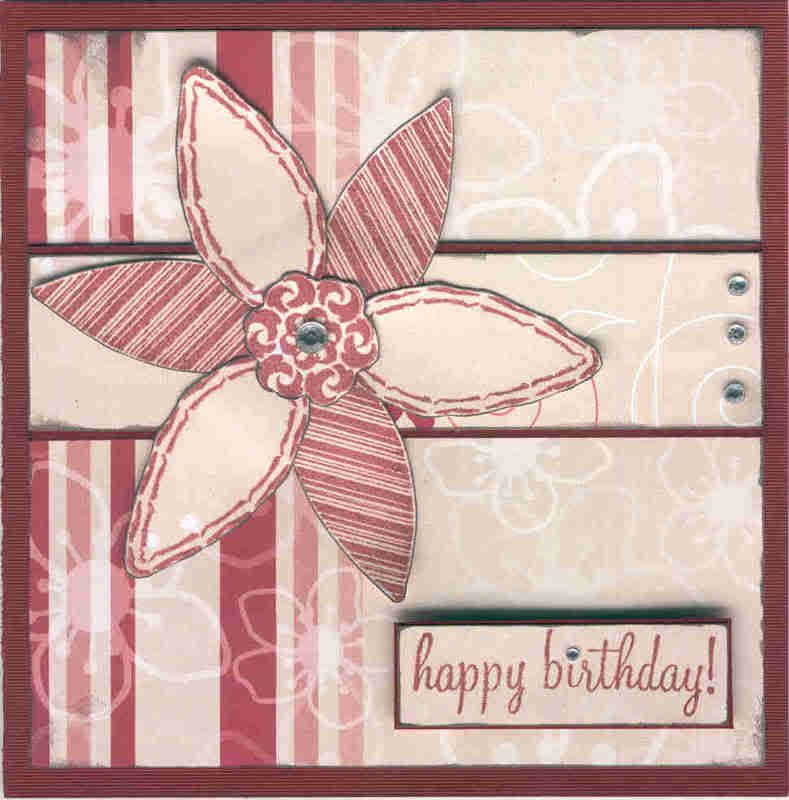
Raspberry and Champagne Flower


The third and final card was made using the Autumn Leaves Build-a-Flower stamp set. Three each of the pinstripe petals and wiggly petals and a decorative centre were stamped out using Versafine Crimson Red ink. These were cut out, edged using Ancient Page Flannel Grey ink and assembled to create a flower.

A strip of cherry blossom and swirls paper from the Raspberry and Champagne Creative Tones paper pad was attached to a strip of burgundy card and then attached to a square of cherry blossom and stripes paper from the same paper pad. This panel was attached to a square burgundy card blank.

A 'Happy Birthday' greeting, from the HOTP Sentiments stamp set, was stamped onto matching patterned paper and matted onto the burgundy card. The greeting and flower were attached to the card, and gems were added to the flower, greeting and the paper strip.

Apologies for the long absence

Well, I'm back - although there's no guarantee my postings will be very regular from now on. There really don't seem to be very many hours in the day at the moment.
We got back from Dublin on the 9th of January to a much colder England than we left. As we got to Oxfordshire, we hit freezing fog, which isn't much fun when your water jets freeze up too!!!
Last week we finally got round to having a look at the TV we won at the Christmas Ball - only to discover that there's no remote with it and you need a remote to tune it all in. Typical. Bet they got it at a discounted price due to the fact there's no remote!!! Just our luck! So, it's back in the box for now.
We were also supposed to have the 2.5 and 5 yearly electrical test done on our house. This was originally supposed to happen back in October but we had to cancel it, so it was rescheduled for the start of December. We both spent ages cleaning the house and making sure all the plug sockets were accessible (which isn't easy when you've got a room full of craft stash and removal boxes around the house that still haven't been unpacked since last January!!!). To cut a long story short, that was then cancelled by them and rescheduled for the 18th January - and then the 2nd of February - and then again til the 20th February. I wouldn't mind but I have to clean each time. It's exhausting!!!!
So, hence the lack of cardmaking. I've been trying to sort out the carnage of my craft room after the mad cardmaking spree of December for Christmas. (It really was horrendous - and to be honest doesn't seem that much better even now!!!)
I've only managed to make three cards since I returned from Ireland - not at all productive!!

And each of those three cards were belated birthday cards as I didn't manage to finish them until the day before their birthdays!!
Now, more for my own reference, although there might be the odd mad person out there who is still making Christmas cards and wants some inspiration (I'm certainly not one of them!!) I shall upload the rest of the Christmas cards that I made last year.
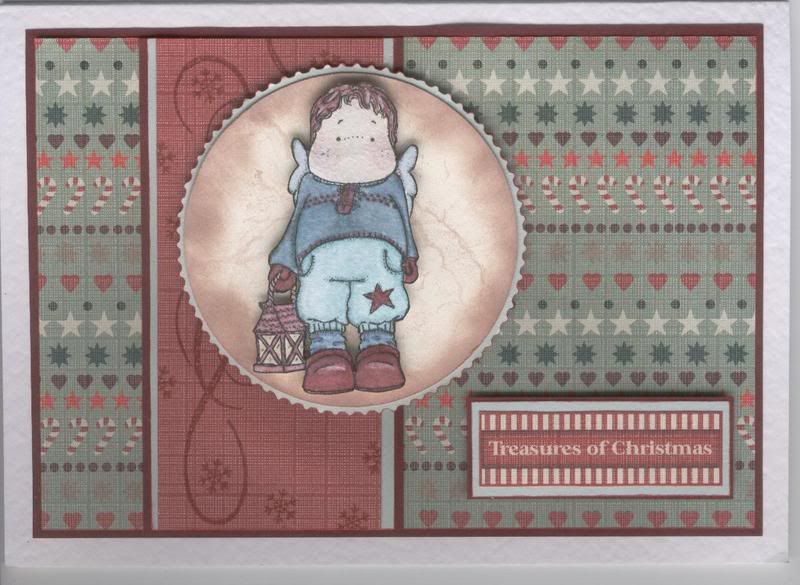
Red and Blue Edwin with Lantern

This was actually the last card I made but it's the card I made for my darling husband. I think he was actually quite impressed with it, and if I say so myself, so am I.
The image is one that was very kindly donated by Alex (Eisbaerin) that I watercoloured using the Whispers Brushstroke markers and then cut out.

The glass on the lantern was highlighted with a clear Sakura glaze pen.
A circle was cut out and stamped using the Stone Texture stamp from the Judikins Artefacts Cube using Whispers Chestnut Permanent Dye ink, which was also used to distress the edges of the circle. This was matted onto blue paper cut out with the Dovecraft Postage Stamp decorative scissors.
Patterned papers from the HOTP Christmas Ultimate paper pack were matted onto the card blank. The red paper was stamped using one of the swirl stamps from the HOTP Swirl stamp set and a mini snowflake stamp from the HOTP Christmas Motifs stamp set, both using Versafine Crimson Red Archival Pigment ink.

The greeting was cut out from the art in the HOTP Christmas Ultimate pack and matted onto the blue and red papers.
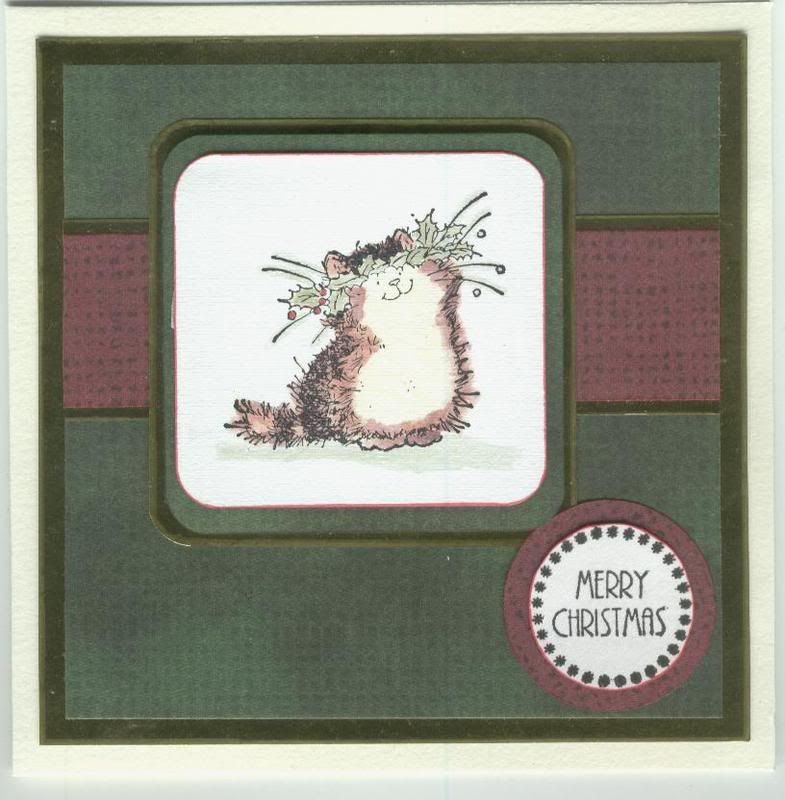
Red and Green Holly Jolly


This was the last of the Penny Black cards that I made using the images swapped with Judith B from the docrafts cardmaking forum.

I watercoloured the image the using Whispers Brushstroke markers.

Red and green papers were taken from the HOTP Christmas Creative Pack and matted onto gold mirror card.

The 'Merry Christmas' greeting circle, from the HOTP Christmas Sentiments stamp set, was stamped and matted onto the red paper.

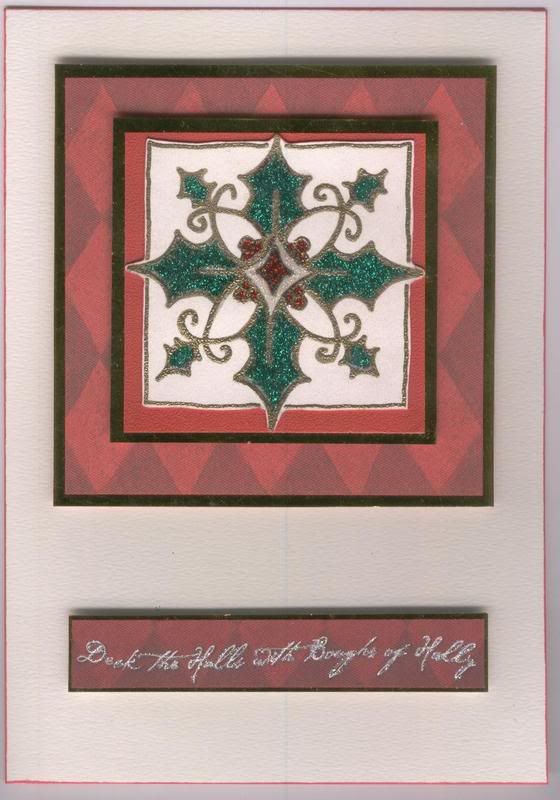
Glittered Holly Medallion


Now this was a bit of a cheat card. I was going to just send the card that was left over from last year, but then I discovered that there was an insert stuck inside it. So, I chopped the front of the original card up and stuck the parts onto the front of an A5 card.

When I made the original card back in 2007, it was something a bit different for me.

The design was traced from a book called the Crafters' Design Library - Florals. I traced the image in pencil and then went back over the lines with an embossing pen and then heat embossed it in gold. I then coloured in the image using the Whispers Brushstroke markers and added glitter over the top. The glitter was then covered with Anita's 3D Gloss, to stop it from shedding.

The image was cut out and matted onto red and gold card, and then on to patterned paper from the K&Co Tim Coffey Christmas paper pad. Crystal Glamour Dust was then added over the top of the text on a sheet of patterned paper from the same paper pad and attached to the bottom of the card.

The last of my Christmas cards for 2008 consisted of a series of cards made using the Penny Black Twelve Days of Christmas stamp set.

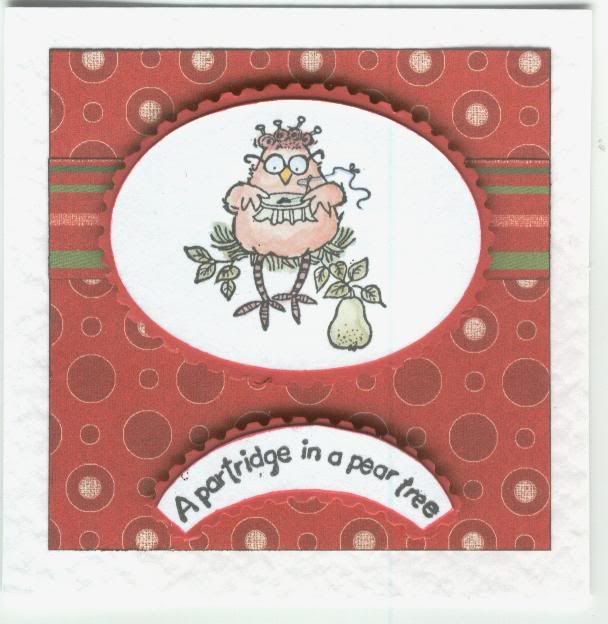
Red and Green Partridge in a Pear Tree

HOTP Ultimate Christmas Creative pack
Versafine Onyx Black Archival Pigment ink
Whispers Brushstroke markers
Dovecraft Postage Stamp decorative scissors

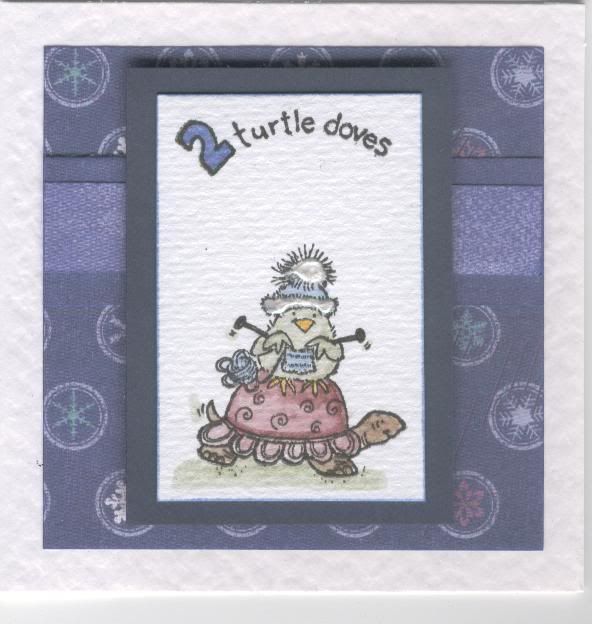
Blue Two Turtle Doves


HOTP Ultimate Christmas Creative pack
Versafine Onyx Black Archival Pigment ink
Whispers Brushstroke markers
Anita's Metallic White 3D Dimensional Paint

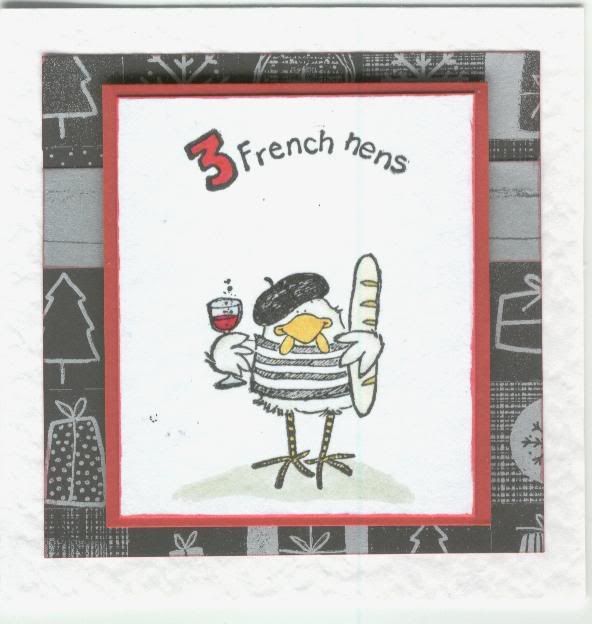
Red and Black Three French Hens


Anita's Classic Christmas Black Paper pack
Versafine Onyx Black Archival Pigment ink
Whispers Brushstroke markers
Clear Sakura Glaze pen

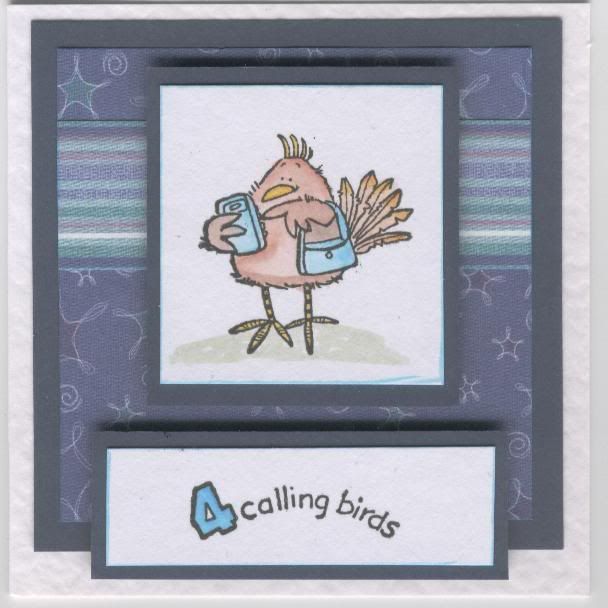
Blue Four Calling Birds


HOTP Ultimate Christmas Creative pack
Versafine Onyx Black Archival Pigment ink
Whispers Brushstroke markers

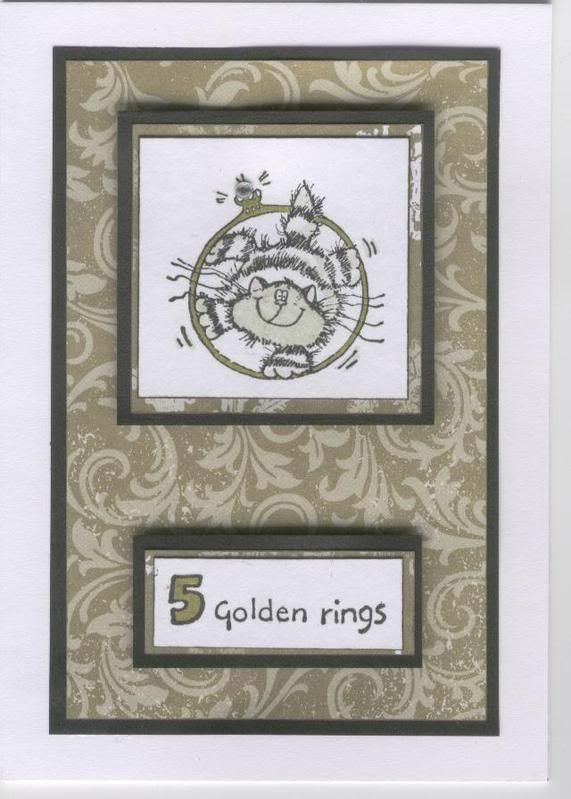
Black and Gold Five Golden Rings


Anita's Tradional Designs paper pack
Versafine Onyx Black Archival Pigment ink
Whispers Brushstroke markers
Clear faux gem

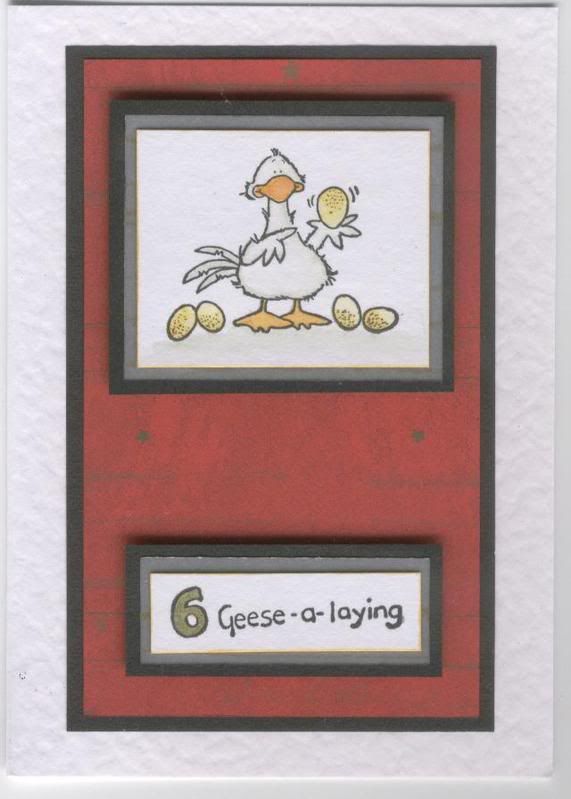
Red Six Geese-a-Laying


Anita's Traditional Designs paper pack
Anita's Classic Christmas Gold Vellum pack
Versafine Onyx Black Archival Pigment ink
Whispers Brushstroke markers

Blue Seven Swans-a-Swimming

HOTP Ultimate Christmas Creative pack
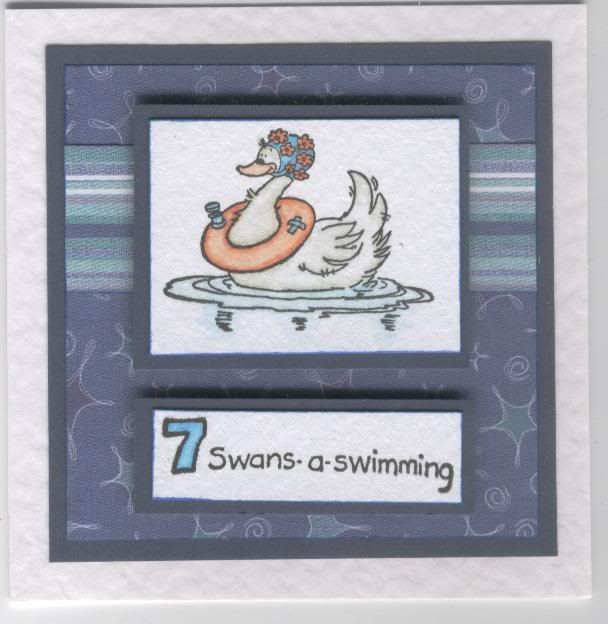
Versafine Onyx Black Archival Pigment ink
Whispers Brushstroke markers

Blue Eight Maids-a-Milking

HOTP Ultimate Christmas Creative pack
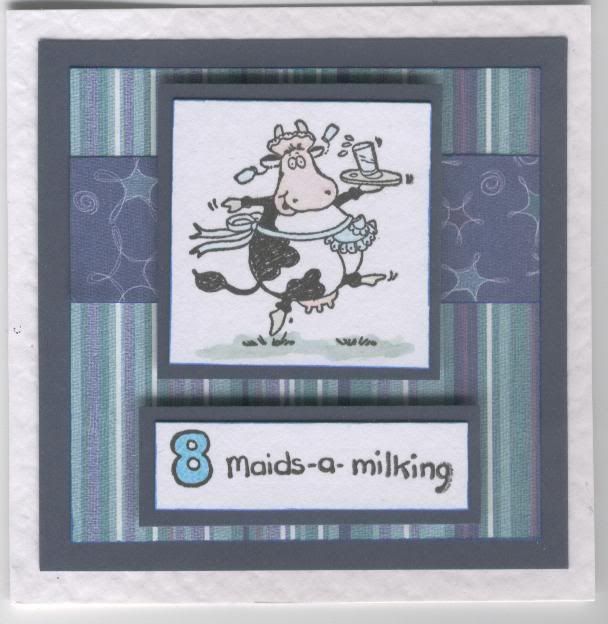
Versafine Onyx Black Archival Pigment ink
Whispers Brushstroke markers

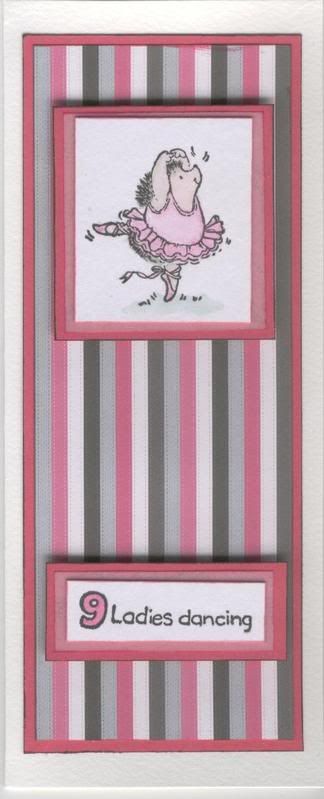
Pink/Grey/Black Nine Ladies Dancing

DCWV Rose Tinted Christmas Multi Stack
Anita's Classic Christmas Silver Vellum pack
Versafine Onyx Black Archival Pigment ink
Whispers Brushstroke markers
Pink Sakura Stardust pen

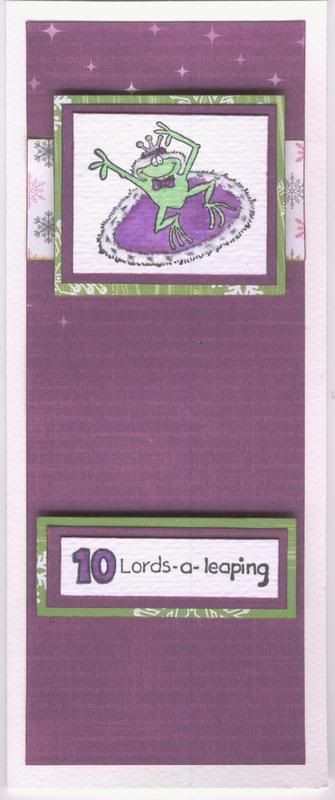
Purple and Green Ten Lords-a-Leaping

Anita's Naughty and Nice Christmas Paper pack
DCWV Rose Tinted Christmas Multi Stack
Versafine Onyx Black Archival Pigment ink
ColorBox Lime Pastel Fluid Chalk ink
Whispers Brushstroke markers
Papermania White Glitter Flock

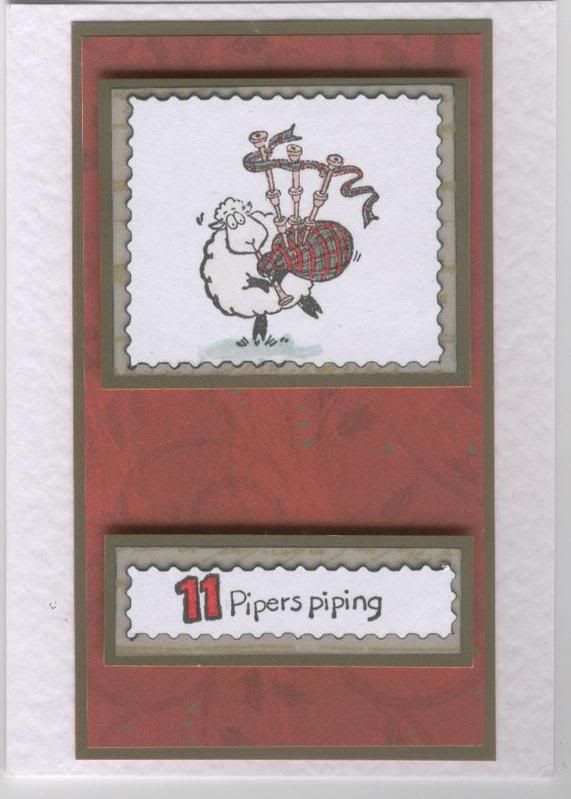
Red and Gold Eleven Pipers Piping

Anita's Traditional Christmas Paper pack
Anita's Classic Christmas Gold Vellum pack
Versafine Onyx Black Archival Pigment ink
Whispers Brushstroke markers
Dovecraft Postage Stamp decorative scissors

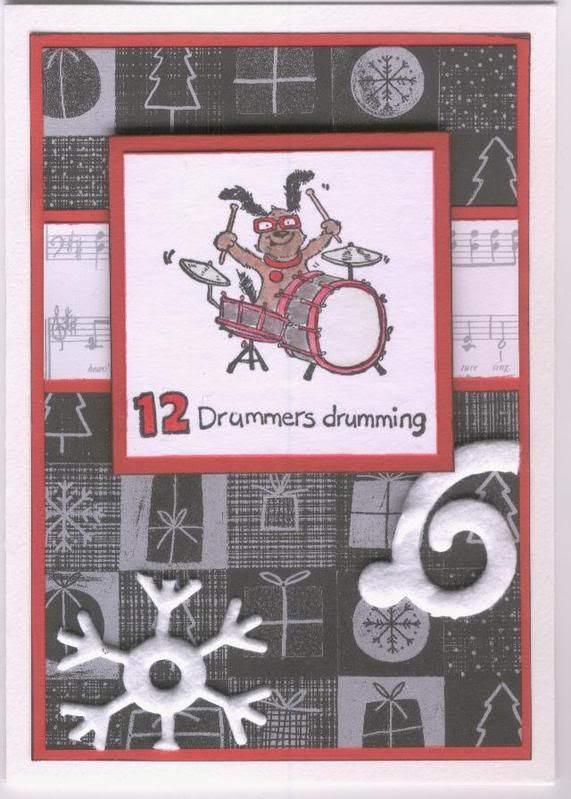
Red and Black Twelve Drummers Drumming

Anita's Classic Christmas Black Paper pack
Versafine Onyx Black Archival Pigment ink
Whispers Brushstroke markers
Papermania White Snowflake Felt Ribbon

Well, that's should be enough to tide you over for now!!!
I'll upload the three birthday cards that I made this week later on today if I get a chance.
Also, if anyone can tell me why it is almost impossible to centre only a paragraph of text on here without altering random other paragraphs I'd be very grateful. Might have to get my html-writing hat on again - it's been a while!!!

Tuesday, 7 October 2008

Lovely Card From Alex

Just wanted to show the world this lovely card that I received from the great Alex. She has just set up her own blog (FINALLY!!!) and I know that I shall look forward to how it develops.

The card was part of an image swap. I am as yet to reciprocate but I'm working on the 'it'll be a surprise when she gets it' theory!!! Alex sent me some great images from the Heavenly and School Tilda and Edwin collections. I'm really looking forward to using them.
I love the paper-piecing that Alex has done, and love the embossing - I'm definitely putting the Big Shot and some embossing folders on my Christmas list.
Blog Widget by LinkWithin