Pages

WELCOME

This blog was created to act as a record of the cards and other projects that I have made. It is for both my own reference and to help inspire anyone who wants to take a look.

I'd love it if you'd leave me a comment so that I know what you think of my projects and that you've been to visit!

Anyone can comment, even those who don't have a blog. (Just look for the word 'Comments' under the three little pictures at the end of each post). Readers without a blog can add an anonymous comment, but please leave your name (and docrafts username if applicable) so I know who you are!

Slideshows of all the cards I've uploaded to my blog can be found at the bottom of the page.


PEOPLE WHO FOLLOW MY BLOG

Saturday 9 July 2016

30 Day Colour Challenge - Day #4

Well, it's still technically Day #4 as Day #5 hasn't been announced yet!!!
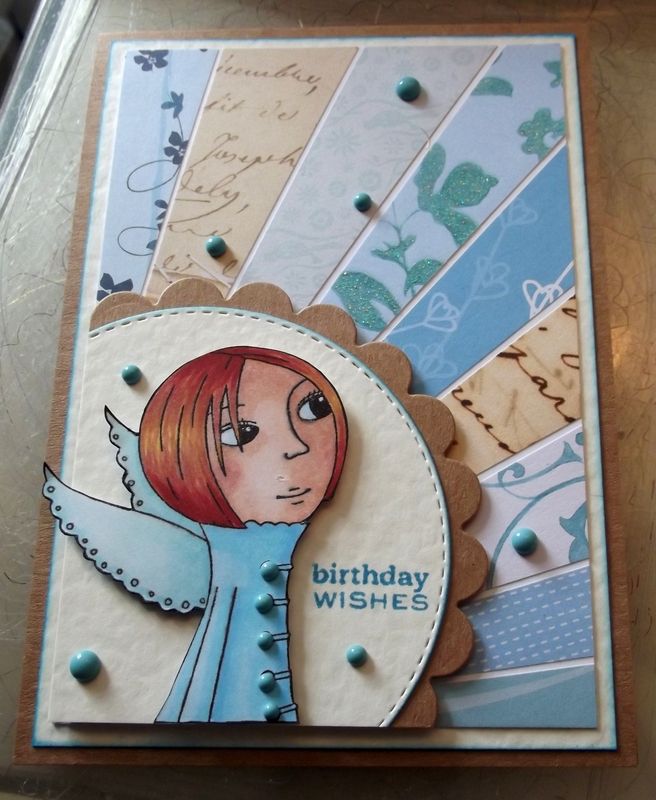
Anyway, here is today's colouring.

I decided to go with some WHSmith's pencils today on Kraft cardstock. It's a nice and simple New Home card for a friend of mine.

I decided to use my set of Jofy #15 stamps that I've had for well over a month now, if not a few months. They have been used, just not by me!!!


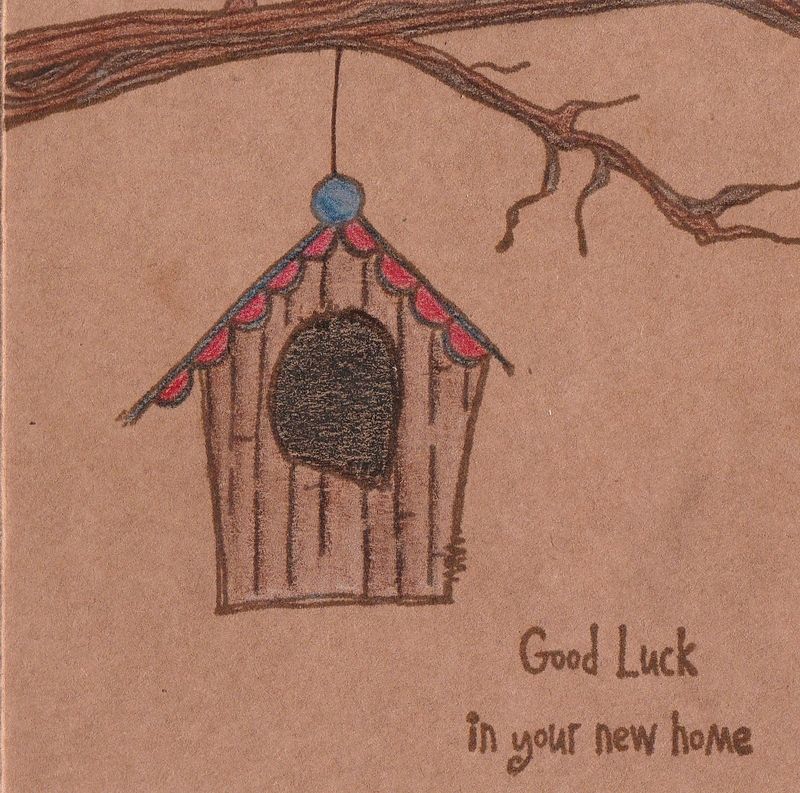
I started by stamping the smaller of the two birdhouses on the front of the card where I wanted it positioned, using Versafine Vintage Sepia archival pigment ink, and then stamped the branch image from the same stamp set and the same ink above it. I joined the two images with a brown Whispers brushstroke marker.


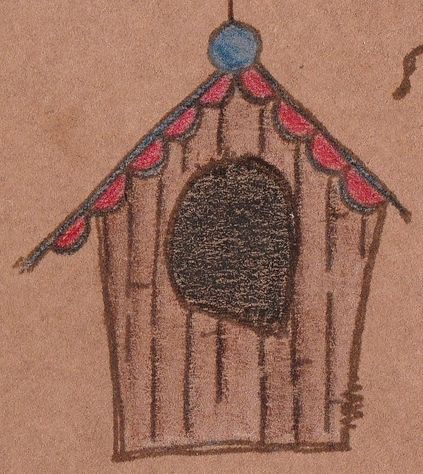
I then coloured the images with the WHSmith pencils that I managed to get when they were reduced down to £3.99 some months ago. I firstly laid down a layer of white pencil all over the image and then coloured it in with the colours. Hopefully the white makes the colours ping off the card a bit more. I decided not to blend the pencil with baby oil this time as I wanted a more rustic look to the image.


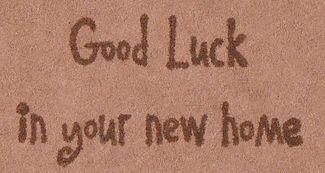
Finally I added the 'New Home' sentiment. I used an old Elzybells stamp for this and the Vintage Sepia ink. This is a stamp that I've owned for many years, from back when Elzybells were having a closing down sale, and I'm not entirely sure it's ever been inked up other than when I recently mounted it and created a laminated storage sheet for it. It's so nice to give these old stamps a new lease of life having been living in a 'to be mounted' box for a couple of years now.

Thursday 7 July 2016

30-Day Colouring Challenge - Day #3

Here is my entry for Day #3 of the 30-Day Colouring Challenge
I was out all day yesterday so didn't get a chance to do any colouring, but I did today. Yippee!


The image I coloured was from a stamp set that I bought at the Newbury Show on Saturday. I think it was a set of stamps that came free in Creative Stamping magazine but not sure.

Anyway, I began by creating a 'bridge' card. I covered the card front with a beautiful piece of foiled cardstock from the Kaisercraft Up Up and Away paper pad. Then I chopped the right had side of the card front off and a section to the right of that panel the width of the gap I wished to create.

As I was using the Sizzix Mini Filmstrip and Mini Tickets Decorative Strip die, this meant the gap was only 1.5cm.

The filmstrip was diecut using copper pearl cardstock and adhered to the card front. The loose section of cardstock was temporarily taped down using masking tape so it was level with the edge of the card stock and the other side of the filmstrip die was adhered to this piece to complete the card front once again.

A second diecut was added to the inside of the card front to strengthen it.


Now to the colouring part. The hot air balloon image from the stamp set was stamped using Memento Rich Cocoa dye ink and coloured using Copic markers:

Hot Air Balloon
E11, E15, BG11, G12, W3, B34


Unfortunately, I didn't have quite the right colour to match the papers so I had to experiment with the colours I have.

I also stamped the 'Always Explore' ticket stamp from the Autumn Leaves Ticketed stamp set onto a ticket die cut from Memory Box's Double Ticket die using the Rich Cocoa ink and coloured it with Copics:

Ticket
W3, BG10, BG11, G12, E15


The hot air balloon image was fussy-cut and adhered to the card front, along with the ticket.

A strip of the duck-egg blue script paper from the same paper pad was then added to the inside right of the card so that it shows through the 'bridge', along with the narrow strip cut from the card front.

Using the aperture sections of the filmstrip die cut from cream card, the sentiment was stamped using parts of stamps from a selection of the Personal Impressions Paula Pascual sentiment stamp sets (Double Sayings, Mixed Sentiments, All Year Round and Mix and Match Sentiments). One of the panels was adhered through one of the apertures on the inside of the card and two further panels were adhered alongside.


To replicate the copper foiling on the patterned paper, four copper card candi were taken and Zig 2-way glue pen was added to the front of them all. When this had gone clear, a sheet of copper foil was applied to the card candi to create foiled card candi. These were added through the remaining apertures on the front of the card. The glue was then also added to a star die from the Penny Black Sweet Wishes stamp set and stamped over the 'TO' word on the inside of the card. Once again, the foiling was added to this.


Tuesday 5 July 2016

30-Day Colouring Challenge - Day #1

I know as I type this that I won't be able to participate in the 30-Day Colouring Challenge set by Kathy Racoosin over on her blog every day as I have my in-laws arriving on the 15th for 2 weeks, but I will try my hardest to participate when I can.

This image, Dreamer from Leanne Ellis/Sugar Nellie, began life as part of my indexing system, but it didn't stamp very well, but the girl part of the image was salvageable. Unfortunately, that meant that she was stamped with Versafine, which isn't very Copic friendly, and on Ryman's cardstock which I find is more inclined to bleed with too much pen ink. Ho-hum!


I coloured her to match the starburst background that I made last week at the craft group that I go to.

Copics:
Skin: E000 E00 E11 E13 (Cheeks: E04 R20)
Eyes: B00
Hair: Y15 E07 E09 E15
Coat: B00 B01 B02
Wings: BG02 BG10 BG11


I fussy-cut her out and matted her onto a double-stitched circle die from Crealies XXL #33 die set cut from ivory hammer card. This was then matted onto a Nestabilities scalloped circle. The circle was cropped to fit into the corner of the card.

The 'Birthday Wishes' sentiment, from the Personal Impressions Paula Pascual Mixed Sentiments stamp set, was stamped using Tim Holtz Mermaid Lagoon ink, to match the sponging around each of the cream panels.


The starburst background was created using a bunch of papers from my stash - some of which haven't been used in a very long time!!!

The paper pads used were:
Papermania Venetian Skies Creative Tones
Papermania Birdsong
Papermania Henbury Lane
K&Co Life's Journey Script
K&Co Life's Journey Map
Daisy & Dandelion Picnic Patch


To finish the card, I added some dots of the Cosmic Shimmer Teal PVA.


Tuesday 19 January 2016

Red, Teal and Green Katy Sue Hat and Stand

My apologies for the lateness of this post but I have been having issues with Internet Explorer all day. I can't upload pictures of my cards using Microsoft Edge and today IE has just not wanted to play ball. Anyway, it seems to be working at the moment, so I'll get on with uploading this as quickly as possible.

This is a card that I made, finally using the beautiful set of stamps by Katy Sue Designs that I bought at the Newbury Artstamps Show. Yet another of those 'must have' purchases that have been sitting in my stash unused.

I decided to use the Prima Madeline paper pad as I really love the colours and they matched the guide illustration on the packaging.

 
The hat and stand image, from the Katy Sue Designs Gerbera stamp set, was stamped using Memento Tuxedo Black dye ink and coloured using Copic markers:

Copics:
Hat: R27, R37, R39, BG10, BG11, BG32;
Flowers: BG10, BG11, BG32;
Leaves/Stems: G00, YG91, YG95;
Fronds: YG91;
Butterfly: BG11, BG32;
Hatstand: E43, E44, E57;
 
The image was diecut using a Classic Oval Nestabilities die and matted on to a Scalloped Classic oval diecut from red cardstock.

The cardblank was covered using the border paper and the cream script papers from the Prima Madeline paper pad, and the join was covered with a strip of card diecut using the Solid Bracket die from MFT Die-Namics.

 
The image panel was then added in the centre of the cardblank.

The 'Happy Birthday' sentiment, from the Personal Impressions Paula Pascual Mix & Match stamp set, was stamped using Emboss clear embossing ink and white heat embossed using Stampendous Detail White Opaque embossing powder. This was then diecut using a tag die from the Sizzix Tags, Sentiments Framelits die set. The tag was threaded with aqua embroidery thread and added over the image panel.

 
Details of the hat image were then highlighted using the clear Wink of Stella brush pen, and three teal pearls from Hobby House Sea Charm pearls.


Tuesday 12 January 2016

I'm back!!!!

HAPPY NEW YEAR!!!!

Just to let you know that I have now returned and am trying to get myself organized. I still haven't properly unpacked and need to get some sort of semblance of normality back in my life.

But, hopefully, I will return with my blogging as of Monday 18th January. Hopefully!!!

Hope to see you then.
Blog Widget by LinkWithin