Pages

WELCOME

This blog was created to act as a record of the cards and other projects that I have made. It is for both my own reference and to help inspire anyone who wants to take a look.

I'd love it if you'd leave me a comment so that I know what you think of my projects and that you've been to visit!

Anyone can comment, even those who don't have a blog. (Just look for the word 'Comments' under the three little pictures at the end of each post). Readers without a blog can add an anonymous comment, but please leave your name (and docrafts username if applicable) so I know who you are!

Slideshows of all the cards I've uploaded to my blog can be found at the bottom of the page.


PEOPLE WHO FOLLOW MY BLOG

Showing posts with label EK Success. Show all posts

Friday, 4 December 2015

Lilac and Brown Chapel Road Bramble

Firstly, I have to announce that this is my 500th blog post - wow!!!
 
More impressive is that I have managed to maintain this blogging schedule for well over a month now!!! I'm hoping to keep it up over the Christmas period but it's more likely that it will have to go on sabbatical for a few weeks over the holiday period.
 
Anyway, here is another 'throwback' card from 2011.
This card uses one of those 'must-have' stamp sets that in actual fact has only been used the once - here!!!
 
I saw some beautiful samples using this stamp set at the Newbury Stamp Show back in 2011 by the Snazzy's team, and of course had to buy it. Of course, once I got home, all that inspiration had disappeared from my head. I really should get this stamp set out again in the New Year - somebody remind me!!!
 
Anyway, back to this card.
 
 
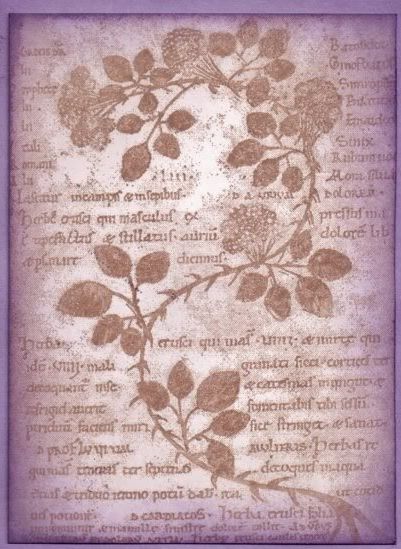
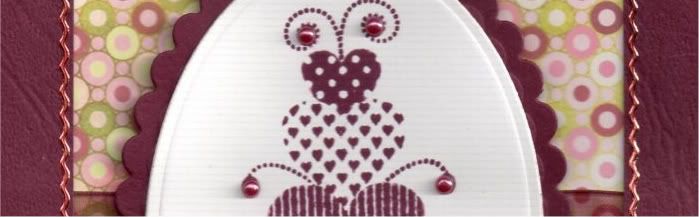
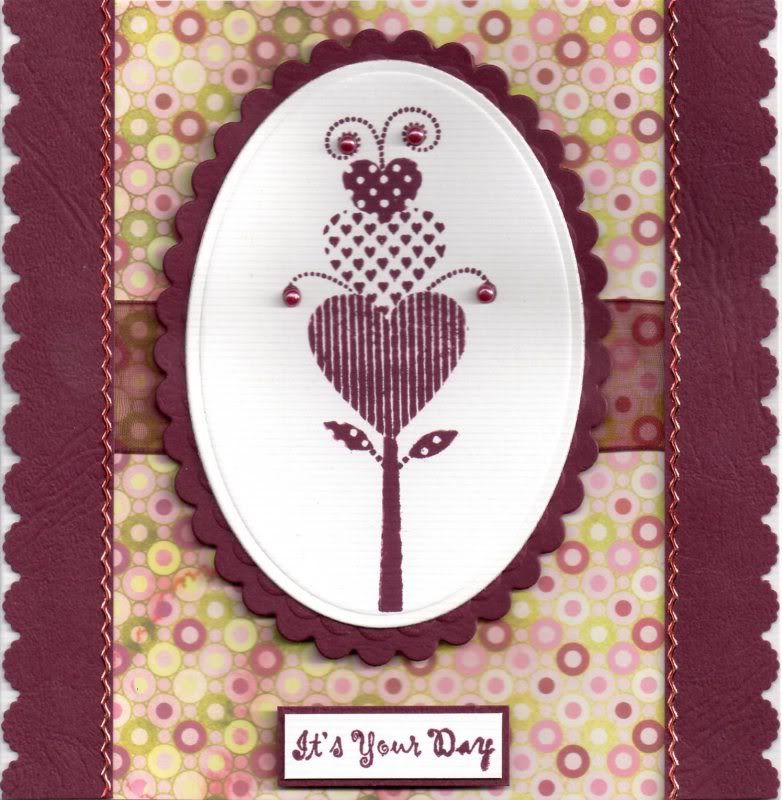
Firstly, the Bramble Collage image from the Chapel Road Artstamps Bramble stamp set was stamped onto white card using Memento Rich Cocoa dye ink and then distressed using Tim Holtz Milled Lavender and Dusty Concord inks. The image panel was then matted onto lilac cardstock.
 
A strip of the Violet paper from the Basic Grey Wisteria paper pad was matted onto a strip of the lilac card that was punched using the EK Success Scalloped Scallop border punch, and then a length of Dovecraft lilac grosgrain ribbon was wrapped around.
 
Next, the Bramble image from the same stamp set, was stamped in the corners of the card blank using the Rich Cocoa ink. The patterned paper strip was then added across the centre of the card and the image panel matted over the top.
 
 
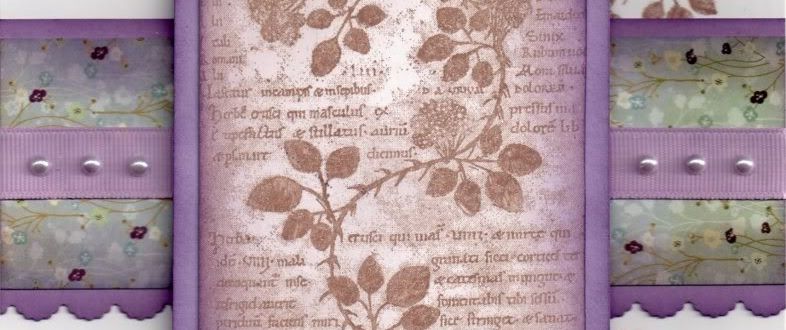
Once the image panel was in place, lavender pearls from Kort & Godt were added either side of the panel, and the sentiment, from the Personal Impressions Paula Pascual Mix and Match stamp set was stamped below the image using the Rich Cocoa ink.
 

Thursday, 29 October 2015

Burgundy, Pink and Green Pink Gem Heart Flower

So, in the spirit of #TBT, I have decided to post one card each week that is a few years old and still waiting to be blogged.

This particular card was made back in 2011 I believe, using a stamp set that I won from Pink Gem Designs, called Funky Flowers.

The Heart Flower image, from the Pink Gem Funky Flowers stamp set, was stamped using Adirondack Currant dye ink and die cut using a Petite Oval die from Nestabilities, and matted onto a burgundy Petite Scalloped Oval.

A length of burgundy organza ribbon was wrapped around a panel of the Courtier paper from the Basic Grey Eva paper pad and adhered to the card blank.

Two borders were punched from the burgundy cardstock using the EK Success Scalloped Scallop border punch and adhered over the edges of the patterned paper.


The 'It's Your Day' sentiment, from the Papermania Clare Curd Sentiments stamp set, was stamped using the Currant dye ink and matted onto the burgundy cardstock.

Burgundy self-adhesive pearls, from the Hobby House Ruby Mix, were added to the Heart Flower image, and gold border peel-offs, from Lakeland/Starform were coloured with a red Copic marker and added along the edge of the border strips.

Yes, I know, peel-offs!!!! I wonder if they will make more appearances in these throwback posts???

Tuesday, 8 March 2011

Blue and Silver Mad Hatter Side Fold

Well, I am keeping with my love affair with digis at the moment. This card was made for my docrafts buddy Sarah/Kozmik for her birthday.


The digi image, Mad About You from TiddlyInks, was coloured using Copic sketch markers:
  • Hat/Jacket/Trousers: N1, N3, N5, B12, B24
  • Waistcoat/Tie/Handkerchief: B12, B24
  • Skin: E00, E21, E51, R20
  • Hair: Y08, Y17, E31, E35, E57
  • Pocket Watch: Y17
  • Shadow: E31, N1, N3

The image was then die cut using the classic oval Nestabilities die and matted onto a bright blue oval from the Core'dinations Elements card pack and a scalloped oval diecut from silver mirror card.

Strips of the floating hearts paper from the Papermania Venetian Skies paper pack were matted onto strips of the silver mirror card, all punched with the EK Success Scalloped Scallop punch. Light blue organza ribbon was then wrapped around the panels and a knot was tied along the longer panel.

These were then matted onto panels of the blue and grey floral stripes paper, from the same paper pack.

Half of the card front was then chopped off and the panels added, one to the front and one to the inside of the card.

The sentiment, which was computer-generated, was coloured using Copic markers:
  • B12, N1, N3
It was then cut out and matted onto the blue and silver cardstocks.

The image panel was then matted over the edge of the card front, with the sentiment adhered to the inside of the card just behind the image panel.

Grey faux gems, from the Papermania Monochrome Capsule Collection, were added in the corners.


I also added a sentiment panel to the inside of the card using a sentiment stamp from the Hero Arts Anytime Messages stamp set and Versafine Onyx Black archival pigment ink. This, and the mats and layers, were die cut using the classic oval and scalloped classic oval Nestabilities dies.

Here are the blog challeges that I am entering this card into:

Thursday, 24 February 2011

Yellow and Orange Duck In Boots

Here is the card I made for my docrafts matey Kay/Incy for her birthday.


The Duck in Boots image, from Sugar Nellie/Rachelle Anne Miller was stamped using Memento Tuxedo Black dye ink and coloured using Copic Sketch markers:
  • Duck: Y08, Y17, YR02, RV06
  • Flower: Y17, RV06
  • Boots: RV06, Y17, N3
  • Shadow: N1, N3, E41
The image was die cut using a classic oval Nestabilities die and matted onto a big scalloped oval die cut from orange card.

A strip of the golden yellow leaves paper from the DCWV Pocket Full of Posies stack was punched along the bottom edge using the scalloped scallop punch from EK Success. This was then matted onto a strip of the orange card.

The sentiment, from Elzybells, was stamped using Ink It Up! Pumpkin pigment ink and heat embossed using the Heat It Up! Enchanted Gold embossing powder. This was matted onto the golden yellow leaves paper and the orange card.

The image was then highlighted with Craft Planet Yellow glitter glue and a clear dew drop from Patti's Pretties was added to the centre of the flower image.

Here are the blog challenges that I am entering with this card:

Saturday, 11 December 2010

Green and Glitter Wee with Christmas Tree

Here is the first of my Christmas cards that I've actually managed to scan in!!!

I love this image and decided, due to time constraints, to stamp and colour it in using just one inkpad.


The Wee With Christmas Tree image, from Whiff of Joy, was stamped using Tim Holtz Peeled Paint distress ink and watercoloured by dragging the colour from the outline and adding extra colour where needed.

The tree image was then highlighted using Glitz It Pear Green glitter glue and matted onto olive green card.

A panel of the cream glitter flourish paper from the Dovecraft Noel paper pad was adhered to the card blank. A strip of the green flourish paper from the same paper pad was then punched using the scalloped scallop border punch from EK Success and matted over the join.

The sentiment, from the Dovecraft Studio G Stylized Tree stamp set was stamped using the Peeled Paint ink and matted onto the olive green card and positioned at the bottom of the card, and the image panel over the strip of punched paper.

Here are the challenges that I'll be entering this card into:

Sunday, 7 February 2010

Valentine's Hearts and Polka Dots

Well, I have finally got around to entering a couple of blog challenges.

The first is the Stamp Something blog challenge and the theme for this week is Love Something. The second is the Stampin' For The Weekend blog challenge and their theme is Love and Valentine's. So, I decided to enter the Valentine's card that I made for my hubby into both.

I decided to go for a fairly simple design for this card and decided to use some of my new goodies, in particular my new border punch that I won on ebay recently.

I started by punching the edges of a strip of red card using my new punch, an EK Success Scalloped Scallop punch. A strip of the black and white polka dot paper from the Papermania Claire Curd The Big One paper pad was then matted on top.

The 'From The Heart' stamp from Dovecraft Studio G was then stamped onto white and red card using Versafine Onyx Black archival pigment ink. Just the sentiment centre part was cut from the white card and the whole frame was cut from the red card. The little heart was stamped again onto red card, cut out and attached to the white panel. The white panel was matted onto the red panel and then onto a panel of black card with the corners rounded.

Using the heart stamps from the Dovecraft Studio G Love and Be Mine mini stamp set, the images were stamped onto red card using the Onyx Black ink. The images were highlighted using a white gel pen and a red Sakura glitter gel pen. The circle sentiments were cut out using a circle Nestie die and matted onto black circles. The sentiment panel and the hearts were positioned across the polka dot border.


The inside of the card was also decorated, using the frame part of the 'From The Heart' stamp and the 'Be Mine' stamp from the mini stamp set. This was also layered onto the polka dot paper and punched red card.
Blog Widget by LinkWithin