Pages

WELCOME

This blog was created to act as a record of the cards and other projects that I have made. It is for both my own reference and to help inspire anyone who wants to take a look.

I'd love it if you'd leave me a comment so that I know what you think of my projects and that you've been to visit!

Anyone can comment, even those who don't have a blog. (Just look for the word 'Comments' under the three little pictures at the end of each post). Readers without a blog can add an anonymous comment, but please leave your name (and docrafts username if applicable) so I know who you are!

Slideshows of all the cards I've uploaded to my blog can be found at the bottom of the page.


PEOPLE WHO FOLLOW MY BLOG

Friday 25 February 2011

Green Blog Candy - CLOSED

Patricia has a second blog candy up for grabs - this one is some pretty green candy.

You can see what's up for grabs here:


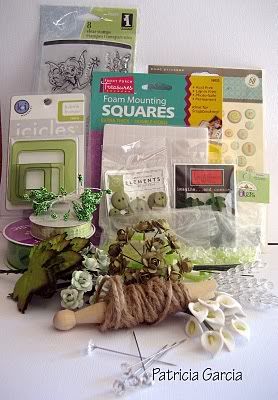
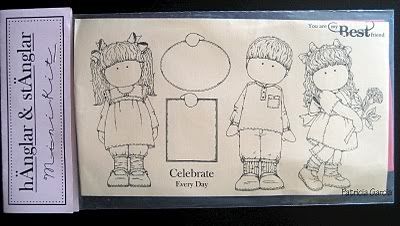
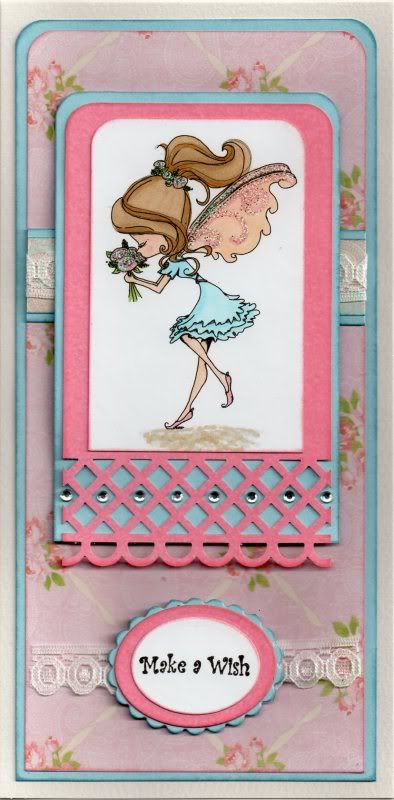
1x Stamp Set Beautiful Fairies by Inkadinkado
200x Foam Mounting Squares
1 pack Heidi Grace Leaves
60x Dome Stickers by Marcella K
1 pack Bubble Frames by KI Memories
21x Round Buttons by American Crafts
1 pack of eyelets by Doodlebug
2x spools of Green Ribbon
Some twine on a wooden dolly peg
7x Fun Frames
Green Dew Drops
12x small Olive Green Roses
12x small Mint Green Roses
12x Cala Lilies
10x large Green Leaves
27x double ended Flower Stamens
6x clear Chandelier Garland
5x clear Pins

The blog candy will run until 7th March and the winner will be drawn on the 8th.

There are a few rules that apply to enter this blog candy:
  1. Enter your Name with Mr.Linky (or add a comment if Mr. Linky has gone walkabout!)
  2. Add Patricia's photo of the blog candy on your Blog Roll with a link back to Patricia's blog. (email entries will be accepted if you do not have a blog)
  3. Become a follower of Patricia's blog if you are not already one

Super Cute Hanglar and Stanglar Blog Candy - CLOSED

I've discovered some super-cute Hanglar and Stanglar Blog Candy up for grabs over on Patricia's blog - but I'd rather you didn't enter because then I'll have a better chance of finally owning some of these stamps. I've hankered after these for YEARS now, but refuse to pay the highly inflated prices they always seem to go for on ebay - so I'm putting my name down for this one - and crossing my fingers (and  toes, and eyes!) in the hope I'll get lucky!!!

Anyway, here is the amazing stamp set that's up for grabs:


I just love this set - the best one I've seen so far!!

The blog candy is open to everyone and available to enter until the 21st March and the winner will be announced on the 22nd.

There are a few rules for you - so here they are:
  1. Enter Your Name With Mr. Linky
  2. Upload Patricia's blog candy photo to your blog roll, with a link back to her blog.
  3. Become a follower of Patricia's blog, if you have not already done so.

Thursday 24 February 2011

Yellow and Orange Duck In Boots

Here is the card I made for my docrafts matey Kay/Incy for her birthday.


The Duck in Boots image, from Sugar Nellie/Rachelle Anne Miller was stamped using Memento Tuxedo Black dye ink and coloured using Copic Sketch markers:
  • Duck: Y08, Y17, YR02, RV06
  • Flower: Y17, RV06
  • Boots: RV06, Y17, N3
  • Shadow: N1, N3, E41
The image was die cut using a classic oval Nestabilities die and matted onto a big scalloped oval die cut from orange card.

A strip of the golden yellow leaves paper from the DCWV Pocket Full of Posies stack was punched along the bottom edge using the scalloped scallop punch from EK Success. This was then matted onto a strip of the orange card.

The sentiment, from Elzybells, was stamped using Ink It Up! Pumpkin pigment ink and heat embossed using the Heat It Up! Enchanted Gold embossing powder. This was matted onto the golden yellow leaves paper and the orange card.

The image was then highlighted with Craft Planet Yellow glitter glue and a clear dew drop from Patti's Pretties was added to the centre of the flower image.

Here are the blog challenges that I am entering with this card:

Tuesday 22 February 2011

Blue and Pink Fairy Fae Trellis

Here is my latest project - using another of the really cute TiddlyInks images.


The image, from TiddlyInks was coloured using Copic markers:
  • Hair: E35, E43, E51
  • Dress: B00, R20
  • Wings: R20, E51
  • Shoes/Roses: R20
  • Skin: E00, E21, E51, R20
  • Foliage: G14, YG17
  •  Shadow: E43, N1
The wings and flowers were then highlighted with Craft Planet Iridescent glitter glue.


The image was then mounted onto a panel of pink card punched with the Martha Stewart Garden Trellis deep-edge border punch and then onto a panel of blue card.

A strip of the blue and pink paisley paper from the Papermania Blueberry Hill paper pad was matted onto the blue card and a length of cream lace was wrapped around the strip. This was then matted onto a panel of the pink roses and ribbons paper.

The sentiment, from the Papermania Clare Curd Sentiments stamp set was stamped onto an oval of white card die cut using a classic ovals die from Nestabilities and matted onto pink and blue ovals, classic and scalloped, also using Nestabilities.

A length of the cream lace was adhered behind the ovals before matting below the image panel, and clear faux gems were added in the holes of the Garden Trellis border punched layer.

Here are the blog challenges that I am entering this card into:

Sunday 20 February 2011

Green and Terracotta Penny Black Cupcake Mice Anniversary

Here is the card I made for my hubby for our anniversary. Unfortunately, due to us moving house the day after, it didn't really get any mantlepiece time!! So, I packed it with the 'going to Ireland' stuff and put it up at the in-laws!!
This was an unusual colour combination for me but I really liked the plaid paper so coloured everything to match it.

The Cupcake Box Mouse image, from the Penny Black Piece Of My Heart stamp set, was stamped using Versafine Onyx Black archival pigment ink to the left of the panel and the single mouse from the Mice Chasing Cat stamp from the same set was stamped to the right, masking off the extra detail from the image.

The images were coloured using Copic Sketch markers:
  • Mice: E13, E51, E35, R20
  • Box: G05, YG17, E07, YR02, C4
  • Cupcake Cases/Ribbon: E07, YR02
  • Cupcakes: E57, E07, YR02, E41
  • Label: YG11, YG17, G05
  • Shadow: N3, E41
The cupcakes were then highlighted with Anita's 3D Gloss.

The sentiment from the same stamp set was then stamped into the tag on the image using ColorBox Terracotta pigment ink.

The edges of the panel were then stamped using the heart border stamp from the Autumn Leaves 'On The Edge' stamp set and the Terracotta ink.

The image panel was matted onto terracotta card from the Core'dinations Elements card pack, and onto a panel die cut from green card from the same pack using a Mega Curved Rectangle die from Nestabilities.

A strip of the Pistachio Almond paper from the Basic Grey Two Scoops paper pad was matted onto the terracotta and green cardstocks and then across a panel of the Waffle Cone paper from the same paper pad.

The image panel was matted to the top of the card and three orange card candy, from Craftwork Cards, were coloured with Copic markers (E07), and added below the image along the strip.

The circle sentiment, from Aud Designs, was stamped using Memento Tuxedo Black dye ink and coloured using the Copic markers:
  • Sentiment panel: YG11, YG17, G05, E07, YR02
This was die cut using the standard circle Nestabilities die and matted onto circles of the terracotta and green cardstocks. This was then adhered in the bottom right corner of the card and highlighted with Anita's 3D Gloss.

Here are the challenges that I am entering this card into:

Friday 18 February 2011

Lilac and Turquoise Magnolia Snowman

Well, here it is - the very last of my Christmas cards from last year! This is the card I made for hubby using one of the really cute Magnolia snowman stamps.


The Snowman image, from Magnolia, was stamped during a fun day at Alex's a couple of years ago - and I've finally got around to using it! (I can't believe that was two and a half years ago now!!)

The image was stamped using Versafine Onyx Black archival pigment ink. It was actually stamped onto card not designed for Copics but I gave it a go and it worked, mainly because it didn't require much colouring.
  • Scarf/Ear Muffs: BG11, BG13
  • Wings: BV00, C0
  • Arms: E13
  • Star/Buttons: BV00
  • Snow Highlights: B00
The image, once coloured with the Copics, was highlighted with Craft Planet Iridescent Sparkle glitter glue and the corners rounded with the large XCut corner rounder punch. The panel was then matted onto lilac card and a panel of turquoise card cut using the Labels 8 Nestabilities die.

A strip of the blue snowflake dots paper from the HOTP Ultimate Christmas Creative Pack was matted onto the lilac and turquoise card and then across a panel of the blue, turquoise and lilac stripes and snowflakes paper, from the same paper pad.

The sentiment, from the Daisy and Dandelion Percy & Penelope Christmas Greetings stamp set, was stamped using Brilliance Pearlescent Purple pigment ink and matted onto the lilac and turquoise card.

Wednesday 16 February 2011

Lilac and Olive Build-a-Flower Swirls

Here's a card I made last year following an idea in a magazine. If I find out which one it was, I'll update!

Plum and Lilac floral border paper from the Papermania 'The Big One' Temptations paper pad was attached to the upper part of the card blank and a panel of lilac paper was added below. A length of olive green grosgrain ribbon was attached over the join.


Using the Autumn Leaves Build-a-Flower stamp set, a flower was created by stamping on the lilac paper using Versafine Imperial Purple archival pigment ink. The petals were then overstamped using another of the build-a-flower stamps and the 'Happy Birthday' Multi-text stamp by Whispers using the ColorBox Eggplant pigment ink to create the patterns on the petals.

A swirly flourish was stamped over the edge of the lilac paper using a stamp from the HOTP Swirls stamp set and the Versafine Spanish Moss archival pigment ink.

The stamped petals were adhered to the back of a circle of olive green card cut using a Nestabilities circle die. The flower was attached over the ribbon and a clear faux gem was added in the centre of the green circle.

The 'Happy Birthday' sentiment, from Whispers,  was stamped using the Imperial Purple ink.
Clear faux gems were then added along the edge of the lilac paper.

Here are the challenges I am entering this card into:

Tuesday 15 February 2011

I Am A Winner Over On The Kaboodle Doodle Blog Challenge

My Blue and Yellow Floral Alice card has been (randomly) chosen as a winner over on the Kaboodle Doodles challenge blog.


I am not sure what my prize is as yet, but it is from The Stamping Boutique. The challenge was "Break out that Ribbon Stash".


You can see my original post for this card here.

Monday 14 February 2011

Duck Egg Blue and Brown Bird in Heart Valentine

Well, after a VERY late night, I finally got hubby's Valentine's card made. I decided to go with an unconventional colour scheme of duck-egg blue and brown.


The image, a freebie from Craft Stamper Magazine designed by Graphicus, was stamped using Memento Rich Cocoa dye ink and then die cut using a square Nestabilities die. This was then matted onto blue paper.

A second square of the blue paper was stamped using part of the bird stamp using the Rich Cocoa ink and matted in the centre of a Labels 1 die cut.

Two mini tags were die cut using the Sizzix Sizzlits Hearts, Stars and Tags die and stamped using the 'With Love' stamp from the Woodware Jane's Script Sentiments stamp set with the Rich Cocoa ink. Two small hearts were die cut from the brown card and covered with brown glitter from the Lakeland glitter kit and covered with Anita's 3D Gloss. These were attached using brown embroidery thread between the two blue square layers.


A strip of the duck egg blue mottled paper, from the HOTP Vintage paper pad, was embossed using the dots border embossing folder from the Just My Type set of border folders from Cuttlebug. This was then matted onto a strip of the brown card.

A panel of the duck egg blue and brown polka dot paper, from the same paper pad, was stamped around the edge using the floral and scroll background stamp from the Aspects of Design Memories of Italy stamp plate from The Stampman using the Rich Cocoa ink. This was also colour tinted around the edges using the Rich Cocoa ink and the ColorBox Chestnut Roan fluid chalk ink.

The embossed strip was then matted across the square panel and onto the brown card.


The inside of the card was also decorated using hearts punched from the polka dot paper. The sentiment was computer generated, using the Callie Hand font, which was the nearest one I could find to the Jane's Script font of the sentiment stamps.

Here are the challenges that I am entering this card into:

Hot Pink and Sage Green Asterisk Christmas Tree

Here is a variation on the lime and pink Christmas tree card that I uploaded the other day, this one using a more muted green tone.


The Asterisk Christmas Tree image, from the Papermania Honey and Hugs Festive Frolics stamp set, was stamped using Ink It Up! Bright green pigment ink and embossed using Heat It Up! Moss Embossing powder, as were the edges of the image panel. This was matted onto bright pink handmade paper and then a sage green panel die cut using a Labels 8 Nestabilities die.

A strip of green snowflake paper, from the Papermania Traditional Christmas Colossal paper pack, was embossed with clear pigment ink and holographic powder. This was matted onto a strip of the sage green card punched using the Martha Stewart Scallop Dot border punch.

The sentiment was stamped at the bottom of the card using Brilliance Pearlescent Orchid pigment ink. Circles were punched using the border punch from the handmade paper and adhered onto the Christmas tree image.

Saturday 12 February 2011

Green, Cream and Gold Christmas Tree

Here is the green version of the earlier red version of this card.


The Christmas Tree image, from the Papermania Silent Night Icons stamp set, was stamped using Versacolor Black pigment ink and then embossed using Heat It Up! gold embossing powder.

The panel was then distressed using Tim Holtz Forest Moss and Peeled Paint Distress inks and then overstamped using the Pine Cones and Branch stamp from the Silent Night Icons stamp set and the Forest Moss ink. The image was then matted onto olive green card.

The decorative border image from the same stamp set was stamped using the black ink and gold embossed and matted onto the olive green card.

A panel of the green and cream stripe paper from the Dovecraft Noel paper pad was embellished with Glitz It Pear Green glitter glue and the border strip was matted over the join. The image panel was then matted over the top.

The sentiment, from the HOTP Christmas Sentiments stamp set, was stamped using the black ink and gold embossed.

Friday 11 February 2011

Blue and Yellow Floral Alice

Well, I'm on a bit of a digi stamp roll at the moment. This is one that I won from TiddlyInk in a blog challenge and I think she's really cute. You can find this image here on their site.


 Having printed out the image, it was coloured using Copic markers:

  • Skin: E00, E21, E51, R20
  • Hair: Y08, Y17, E36
  • Dress: B00, B12, B18, B24
  • Clock: B00, B18, B24

The image was then highlighted with a Papermania Snow White gel pen and Anita's 3D Gloss. Once the gloss was dry, the image was die cut using an oval Nestabilities die and matted onto a blue scalloped oval panel, also die cut using a Nestabilities die.

A panel of the blue stripe paper from the HOTP Dots and Stripes Use 'Em For Anything paper pad (that I received from HOTP for a tip I submitted to their forum) was matted onto yellow card.

A small panel of the yellow circle mesh paper, from the HOTP Ultimate Cardmaker's Creative Pack, was matted onto blue card and three holes were punched along the edge with the Cropadile Big Bite and short lengths of yellow gingham ribbon were tied through the holes. The yellow panel was matted to the left of the image panel and paper flowers were matted over the top.

A computer-generated sentiment was coloured using the Copic markers:
  • Sentiment: B12, B24
and lengths of the gingham ribbon were added either side of the sentiment.

Faux yellow gems were added to the centres of the flowers and either end of the sentiment.

Here are the challenges that I'm entering this card into:

Wednesday 9 February 2011

Blue and Tan Floating Monkey

This is the first time I've used a digi stamp image and what a great image it is. It's one of the lovely freebies from the Dustin Pike blog.

I needed to make a card for my cousin and decided to have a go with this image, which you can find here.


I started by colouring the image using my Copic sketch markers:
  • Monkey: E00, E21, E35, E51
  • Balloon: B00, B12
  • Sky: B00
  • Clouds: N1
Once the image was coloured, it was then trimmed up and Anita's 3D Gloss was added over the balloon.
The image, once dried, was then matted onto tan handmade paper and a panel of blue card that was embossed using the Moroccan Screen embossing folder from Cuttlebug.

A strip of the Crunchy paper, from the Basic Grey Granola paper pad was matted onto the tan handmade paper and the blue card and then across a panel of the Natural paper from the same paper pad.
This was then matted onto larger panels of the tan paper and blue card.

The sentiment, from the Woodware Jane's Script Sentiments stamp set, was stamped using Versafine Onyx Black Archival pigment ink and trimmed. The panel was then coloured using Copic markers:
  • Panel: B00, E13
This was then matted onto the tan paper and embossed blue card and matted onto the card below the image panel.

Here are the challenges that I am entering this card into:

Tuesday 8 February 2011

Burgundy and Gold Snowflake Panel

Here are the next two of my Christmas cards.I became very creative with this card as I actually made my own stamp!!!


A panel was die cut from cream card using the Nestabilities Labels 1 die and a line was drawn along the inside edge of the die using a Whispers Brushstroke marker. (I have to say I really like this effect!)

Having had a look through my many Christmas stamps, I realized that I didn't have a large snowflake stamp and so decided that the only way to get one was to create one using my Marianne Creatables die.

I die-cut some funky foam with the die and then stamped it onto the die cut panel using Brilliance Crimson Copper pigment ink. A deep red pearl, from The Hobby House Ruby Mix set of pearls was added in the centre.

A panel of the deep red text paper from the Papermania Silent Night paper pad was matted onto a panel of gold mirror card and matted across the card blank.

The sentiment, using the Papermania 'Merry Christmas' swirl stamp, was stamped at the bottom of the card blank using the Crimson Copper ink, and the image panel was matted over the patterned paper panel.


I also made a green version of this card, using Whispers Pine Green permanent dye ink and a green pearl from the Green To Go pearl set from The Hobby House.

A panel of the cream holly paper from the Papermania Silent Night paper pad was matted onto green card across the card blank.

Sunday 6 February 2011

Blue Baubles

And so to the next Christmas card.


The Baubles image, a free stamp from Craft Stamper/Elusive Images, was stamped using ColorBox Aqua pigment ink and watercoloured using the same ink. This was then matted onto dark blue shimmer card.

The sentiment, from the HOTP Christmas Sentiments stamp set, was also stamped using the Aqua ink and matted onto the blue shimmer card.

The blue glitter dots paper from the Dovecraft Let It Snow paper pad was adhered to the card blank and a length of light blue grosgrain ribbon was adhered across the patterned paper with the image panel added over the top.

Saturday 5 February 2011

Glitter Snowflake Aperture

Here is the next in the line of Christmas cards from the 2010 collection!!!

I was rather pleased with these designs. I like the effect of the aperture in the shaped panel.


A panel was die cut from white card using the Labels 8 Nestabilities die and a snowflake, using a Marianne Creatables die, was die cut at the top of the panel.

The sentiment, from the Dovecraft Studio G Snow Words stamp set, was stamped at the bottom of the Label die cut using Versafine Onyx Black archival pigment ink.

A knot was then tied in a length of green gingham ribbon and wrapped around the die cut panel.

A small panel of silver mirror card was adhered to the card blank and the die cut panel matted over the top with the mirror card showing through the aperture.

The snowflake and the sentiment were then highlighted with Craft Planet Iridescent glitter glue.

I also made this card in a red colourway, using deep red organza ribbon, Anita's Lime Green pearlescent paper behind the aperture, and DecoArt Crystal Glamour Dust to highlight the snowflake and the sentiment.

Thursday 3 February 2011

Pink and Black Visage Eyes

Well, here is my first card of 2011!

I needed to make a couple of cards in double-quick time and decided to use this beautiful stamp that came free with the September 2010 Craft Stamper magazine.


The image, from The Stampman, was stamped using Versafine Onyx Black archival pigment ink and die cut using a square Nestabilities die. This was matted onto cerise and black card panels, also die cut using Nestabilities.

A strip of the black Scroll Border paper from the Papermania Mono Capsule Collection pad was matted onto the black card and across a panel of the cerise Dahlia and Fern paper from the Papermania Red Hot Capsule Collection pad.

Pink and black paper flowers, from the Prima Botanicals Mix, were added to the panel using a large black Papermania brad.

The stamped image was highlighted with Craft Planet Iridescent Sparkle glitter glue, and Glitz It Black glitter glue was added to the centre of the brad and around the large black panel.

Here are the challenges that I am entering this card into:

Green and Red Three Kings

And so onto the next in the series of Christmas cards. This was the only card design I made using my Copics and is the design I sent to the parents.


The Three Kings image, from Elzybells, was stamped using Memento Tuxedo Black dye ink and coloured using Copic sketch markers:
  • Crowns/Gifts: Y08, Y17, R29, E07
  • Green Robes: YG67, G05, Y17
  • Red Robes: R24, R29
  • Skin: E00, E21, E51, E13
  • Shadow: N1
Highlights were added to the crowns and gifts using the yellow and orange Sakura Stardust pens, and the robes were highlighted with Craft Planet Red glitter glue and Glitz It Pear Green glitter glue.

The image was then matted onto red card.

A strip of the red flourish paper from the Dovecraft Noel paper pad was matted onto the red card. Two panels of the multi stripe paper were matted onto olive green card and the red panel matted across it.

The sentiment, also from Elzybells, was stamped using the Tuxedo Black ink and matted onto the red card. The image panel was matted over the red panel, and the sentiment below it.

I also made this in the reverse colourway:

Wednesday 2 February 2011

Lime Green and Pink Asterisk Christmas Tree

Well, here's the next in the series of Christmas cards. This one has a more contemporary feel to it with the colours. When I measured this out, I didn't do a very good job and so the middle panel is too wide.


The Asterisk Christmas Tree image, from the Papermania Honey and Hugs Festive Frolics stamp set, was stamped using Ink It Up! Bright Pink pigment ink and embossed using Heat It Up! Pink Embossing powder, as were the edges of the image panel. This was matted onto bright pink handmade paper and then a lime green panel die cut using a Labels 8 Nestabilities die.

A strip of pink and lime green spiral paper, from the Papermania Naughty and Nice paper pad was matted onto a strip of the lime green card punched using the Martha Stewart Scallop Dot border punch.

The sentiment, from the HOTP Christmas Sentiments stamp set, was stamped at the bottom of the card using the bright pink ink and embossed with the pink embossing powder. The circles punched using the border punch were then adhered onto the Christmas tree image.

Tuesday 1 February 2011

Blue and Cream and Green Snowflakes

So, here are the next Christmas cards!!!

I made the cards using the Marianne Creatables snowflake die and a selection of papers from the Dovecraft Let It Snow paper pad.

All the cards were made in the same way, using different papers and different sentiment stamps.

The first card was created by die-cutting a snowflake from white card using the Marianne Creatables die and covering it with Craft Planet Iridescent Sparkle glitter glue. This was then matted onto circles of light blue and white card, die cut using Nestabilities circle dies.


A panel of the lime green and cream stripe paper, from the Dovecraft Let It Snow paper pad, was matted onto the light blue card and the Noël sentiment, from Dovecraft Studio G, was stamped at the bottom of the panel using Versafine Majestic Blue archival pigment ink.

The second version of the card used the light blue and cream stripe paper from the same paper pad:


and the third version used the cream swirl and snowflakes paper and the Seasons Greetings stamp from the Papermania Home For Christmas by Jesse Edwards stamp set:

Blog Widget by LinkWithin