Pages

WELCOME

This blog was created to act as a record of the cards and other projects that I have made. It is for both my own reference and to help inspire anyone who wants to take a look.

I'd love it if you'd leave me a comment so that I know what you think of my projects and that you've been to visit!

Anyone can comment, even those who don't have a blog. (Just look for the word 'Comments' under the three little pictures at the end of each post). Readers without a blog can add an anonymous comment, but please leave your name (and docrafts username if applicable) so I know who you are!

Slideshows of all the cards I've uploaded to my blog can be found at the bottom of the page.


PEOPLE WHO FOLLOW MY BLOG

Thursday 31 March 2011

Green and Brown Lookin' For Clues

Well, another card made with a beautiful digi image.

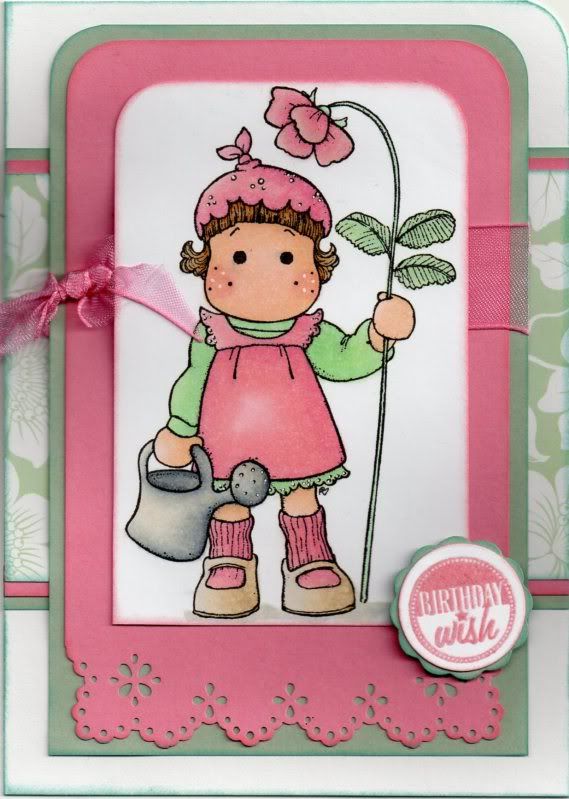
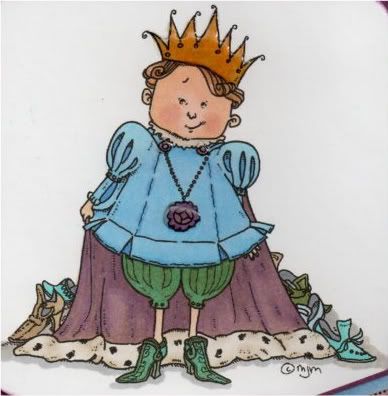
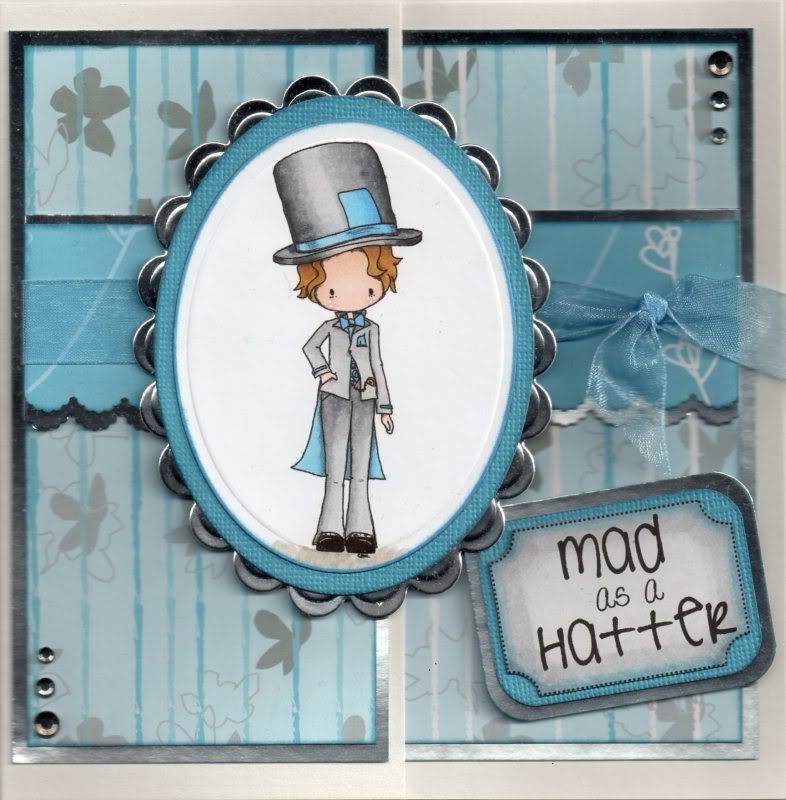
This one was made using the Lookin' For Clues image from Mo's Digital Pencil.


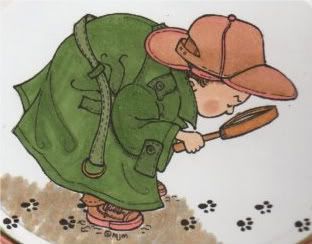
The image was coloured using Copic sketch markers:
  • Hat/Shoes: YR02, E13, E35
  • Skin: E00, E21, E51, E13
  • Coat: YG67, G85, N3
  • Belt: G85, N3
  • Buckle: Y17, E35
  • Trousers: E35
  • Magnifying Glass: Y17, E35, N3
  • Shadow: N3, E43, E13
The image was then die cut using a classic oval Nestabilities die and matted onto a copper oval and dark green big scalloped oval.


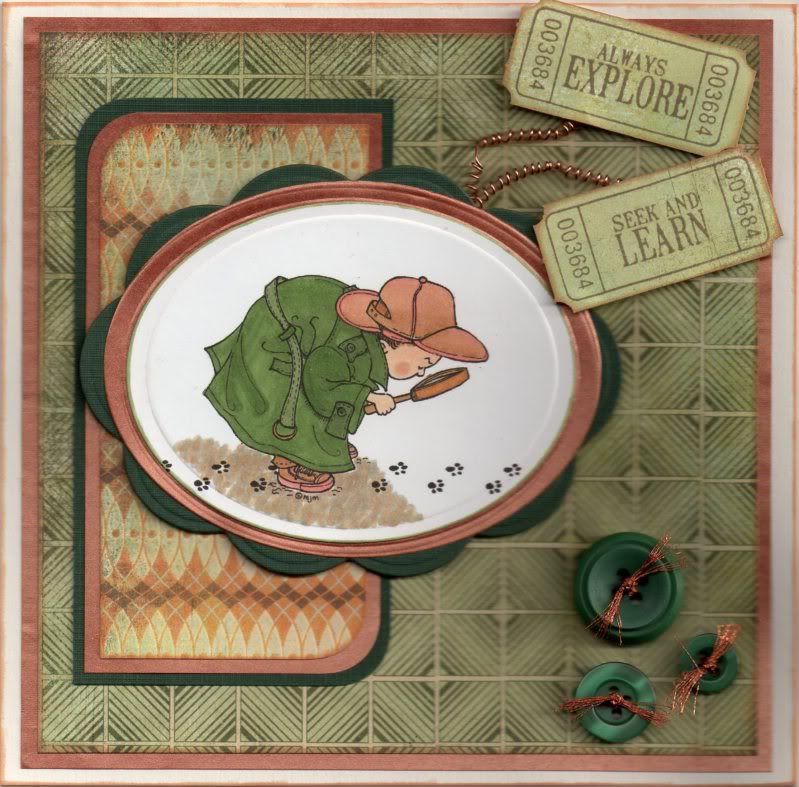
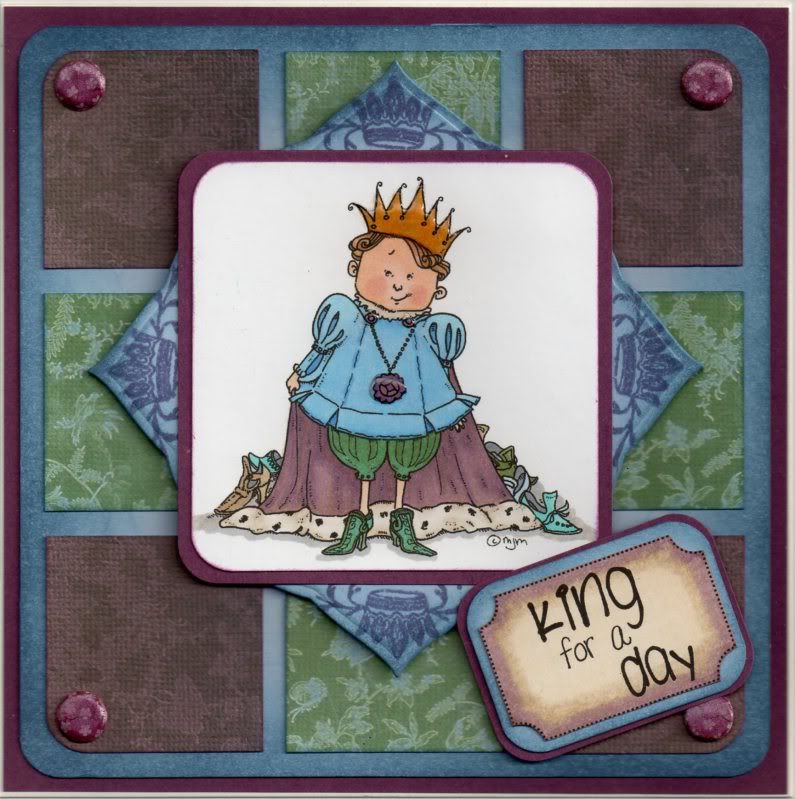
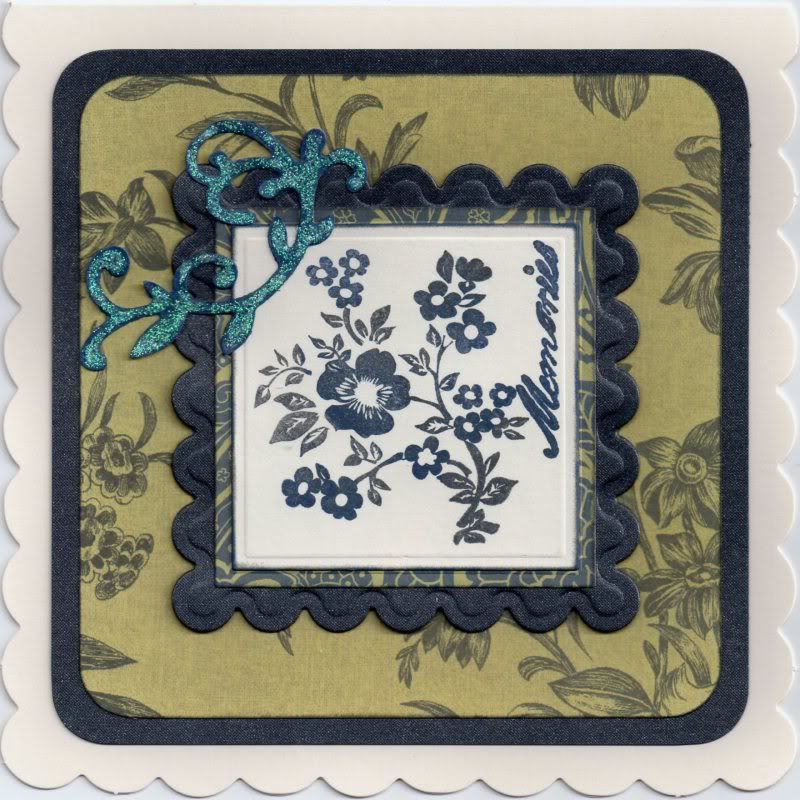
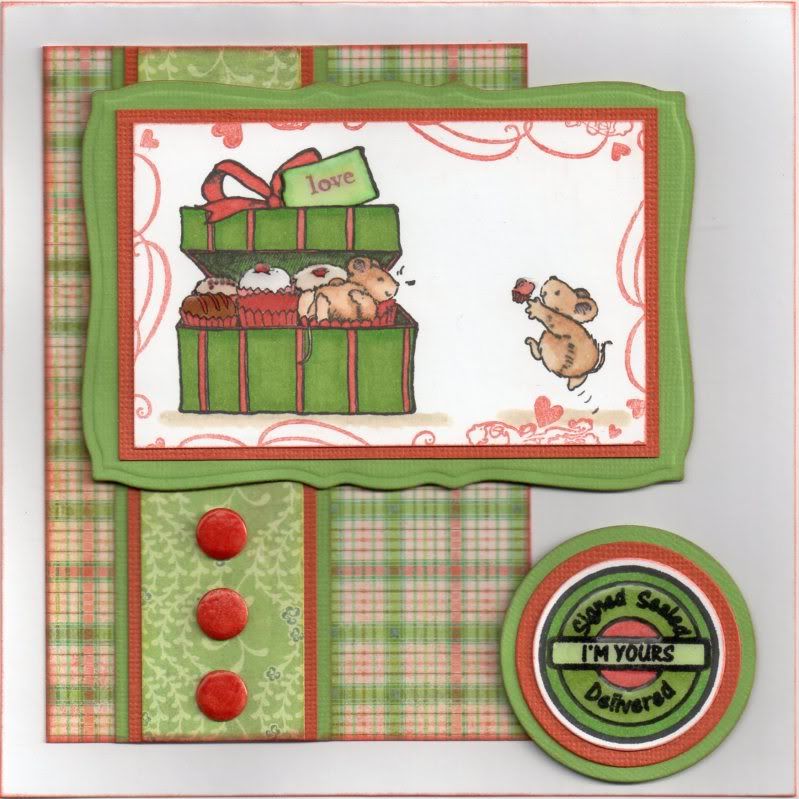
Two corners of a panel of the Fossil paper, from the Basic Grey Archaic paper pad, were rounded using the large XCut corner rounder and matted on the copper paper and green cardstock. A panel of the Passe paper, also from the Archaic paper pad, was matted onto the copper paper and centred on the card blank.

The tickets, from the Autumn Leaves Ticketed stamp set, were stamped onto the Earth Worm paper from the same paper pad using Memento Rich Cocoa dye ink. Using a small hole punch and a perforating blade, the strips were transformed into tickets. Copper wire was wound around a pricking tool and attached to the reverse of the tickets and the oval panel.

The panels were then added to the card blank and three green buttons were threaded with metallic copper thread and added in the bottom right hand corner.

Here are the blog challenges I am entering this card into:

Sunday 27 March 2011

Pink and Burgundy Heart Flower and Sparkler Mother's Day

Here are the Mother's Day cards that I made this year for my mum and my Mother-in-Law using the lovely stamps that I won from the lovely Janet when she hosted a Pink Gem blog candy. I also wanted to use my new inkpads (you'll see more of them soon I'm sure!) from Adirondack.

This is the card that I made for my mum:


The Heart Flower image, from the Pink Gem Funky Flowers stamp set, was stamped using Adirondack Raisin dye ink and die cut using a Petite Oval Nestabilities die. This was then pierced around the edge using the Stampin' Up piercing template (Mat Pack) and matted onto a Petite Scalloped Oval die cut from burgundy shimmer card.

A panel of the Extravagance paper from the Basic Grey Eva paper pad was punched along the edges using the  XCut Sparkler border punch and matted onto a panel of the burgundy card.

A length of burgundy organza ribbon was wrapped around the panel and matted onto the front of the card blank.

The sentiment, from a free stamp from Craft Stamper magazine designed by Personal Impressions, was also stamped using the Raisin ink and matted onto the burgundy card. Both the image and sentiment panels were then positioned centrally over the ribbon.

Burgundy self-adhesive pearls, from the Hobby House Ruby Mix, were then added to the Heart Flower image.

And here is the variation on this that I made for my Mother-in-Law:


This one was made in exactly the same way, except the edges of the Extravagance paper was punched with the EKSuccess Scalloped Scallop border punch.

I'm really quite pleased with these!

Here are the blog challenges that I am entering these cards into:

Thursday 24 March 2011

Chartreuse Green and Purple Moroccan Mosaic Tiles

Another of those pesky men's cards! And a nice and simple one at that!


Three tile shapes were punched into purple paper using the XCut Moroccan Ornate punch, and then die cut using a standard square Nestabilities die. These were then matted onto gold satin card, also die cut.

A strip of the green and purple damask paper from the Papermania Persimmon paper pad was matted onto the gold card and across a panel of the green foliage paper, from the same paper pad.

The mosaic tiles were added across the strip and clear dew drops from Patti's Pretties were added in between them.

The scrolly 'Happy Birthday' stamp from the HOTP Sentiments stamp set was stamped at the bottom of the patterned paper using Versafine Imperial Purple archival pigment ink. 

Here are the blog challenges I am entering this card into:

Monday 21 March 2011

Digistamp Boutique March Giveaway - CLOSED

Digistamp Boutique have got a great giveaway this month. A lovely digi image has been included as well as a £5 voucher to spend in their shop.


I love the images from Digistamp Boutique, especially what Kerry does with them!!

Three lucky people will win the prize, but please only enter once.

To enter, all you have to do is:
  • leave a comment on the giveaway post
  • become a follower, if not already
  • post about the giveaway on your blog and link back to it.
You can also enter if you don't have a blog (details are included in the giveaway post).

This competition will close 31st March at 6pm (BST), and the winners will be announced on the 1st April.

Coral, Red and Brown Visage Eyes

I really liked the effect of the first card I made using this stamp so I decided to have a go at a new one, this time using more muted colours.

The Visage Eyes image, from The Stamp Man/Craft Stamper magazine was stamped using Versafine Vintage Sepia archival pigment ink and distressed with ColorBox Alabaster Fluid Chalk ink. This was matted onto red and brown paper.


A length of the cream stitched satin ribbon, from the Chatterbox Chocolate ribbon pack was wrapped around a panel of the coral circles paper, from the K&Co McKenna paper pad and then matted onto the red and brown paper.

A small panel of the cream floral paper, from the same paper pad, was also matted up and layered up with the image panel.

Cream self-adhesive pearls, from the Hobby House Chocolate Heaven pack, were added in the bottom right corner of the coral paper and in the top left corner of the cream patterned paper.

Here are the blog challenges I am entering this card into:

Sunday 20 March 2011

Angelwood's Amazing Blog Candies - CLOSED

WOW!!!!


I've just come across this amazing blog candy over on Angelwood's blog.
But, not only that, she has THREE blog candy packs up for grabs.

Candy 1 includes:


- Easter and butterfly charms
- 4.5 x 6.5 DCWV Pocket Full of Posies Matstack
- 2 stamps by Sweat Pea
- 1 Paper Makeup stamp (Christi fairy)
- 2 Kenny K stamps from Whimsy (Rock Chick) and (Download Diva)
- 1 Cornish Heritage Farms stamp (Man's Best Friend)
- 1 Magnolia stamp (bride and groom)
- 1 Whiff of Joy stamp (Fruity Willow)
- 1 Clear butterfly stamp set (Martha Stewart)
- Chipboard buttons
- Chipboard frame
- Making Memories canvas brads
- Making Memories stick pins
- 2 packages of self adhesive pearls
- 1 Spellbinder Pendants Die (Fleur De Lis)
- 1 package Prima Flowers - sticker flower
- Martha Stewart glitter (set of 3)
- 2 Cuttlebug embossing folders (Candy Cane stripes and Stars)
- Moon Glow Starburst Stains spray (rambling rose pink)
- Moon Glow Moon Shadow mist (pegleg pete purple)
- Moon Shadow Ink (ethereal emerald)

Candy 2 includes:


- Glue Glider Pro
- 2 Spellbinder Pendant dies (Fleur De Lis and Renaissance Hearts)
- EK Success Snowflake Border punch
- 1 Basic Grey 6x6 paper pad (Wander)
- Maya Road clear stamp set (Wildflowers)
- Stampology clear stamp ink pad
- Inkadinkado Glam Gold glitter powder
- 1 clear flourish stamp
- 1 Paper Makeup stamp set (Starstruck)
- Cornish Heritage Farms (Wild Turkeys Roosting)
- 1 Stampology clear stamp set (Autumn leaves)
- 2 stamps from Whimsy ( Cat and Fish - and Winter's Joy by Chrissy Armstrong)
- 1 Magnolia stamp (Tilda w/Candy canes)
- 3 Magnolia mini stamps (Pasta Edwin, Blueberry Tilda, Little Yummy For Your Tummy sentiment)
- Making Memories buttons (Sabrina)
- 2 packets of self adhesive pearls
- 3 bunches of Wild Orchid flowers

Candy 3 includes:


- Tim Holtz Sizzix die (Movers & Shapers)

- Stampendous Fuzzy flock
- 1 Spellbinder Shapeabilities dies (Fancy Tags)
- 1 Whiff of Joy stamp (Willow Summer Breeze)
- 1 Magnolia stamp (Dalecarlia Coat)
- 2 small packages of pearls
- 1 package of flower rhinestones
- 1 K&Co Cupcake brads
- 1 small bunch of Wild Orchid flowers

There are a few rules for  you to follow to be able to win one of these:

  1. leave a comment on Angelwood's blog candy post.
  2. leave a comment on Elena's post at her blog to have your name entered twice.
  3. become a follower of Anglewood's blog if you are not already.
  4. become a follower of Angelwood's Magnolia Only blog.
  5. post the blog candy on your sidebar.
  6. add a post about Angelwood's candy on your blog to have your name entered a third time.
Winners will be announced on April 18th 2011.

Saturday 19 March 2011

Pink and Tea Green Strawberry Tilda

The Tilda image was stamped during a craft playday at Julie's. Alex very kindly let me stamp a few of her. I really love this image, and in an ideal world, I'd own her!


The Strawberry Tilda image from Magnolia was stamped using Versafine Onyx Black archival pigment ink and coloured using Copic sketch markers:
  • Hair: E13, E35, E43, E57
  • Skin: E00, E21, E51, R20
  • Flower/Hat/Dress/Socks: RV21, RV34, R20, E40
  • Shoes: E40, E41, E43
  • Watering Can: C0, C2, C4, C6, E40
  • Jumper/Leaves/Stem: G00, G12, YG11, YG41, E40
  • Shadow: C2, E40
The top corners of the image panel were then rounded using the large XCut corner rounder punch. A panel of pink card, punched using the Martha Stewart Eyelet Lace corner and border punches was matted onto a panel of green paper and pink organza ribbon was knotted around it. The image panel was then matted on top.


A panel of the tea green floral paper from the Dovecraft Eastern Promise paper pack was matted onto the pink card and green paper and adhered across the card blank and the image panel was matted over the top.

The sentiment, from the HOTP Sentiments stamp set, was stamped using ColorBox Old Rose pigment ink and clear embossed. This was then die cut using a circle Nestabilities die and then matted on a big scalloped circle cut from the green paper.

Here are the blog challenges I am entering this card into:

Thursday 17 March 2011

Green, Brown and Coral St Patrick's Day

This year's St. Patrick's Day cards are a little bit different for me. I didn't want to try and create shamrocks with hearts again, so decided to just make a card with a green and orange theme - although the orange turned into a more coral-orange colour.


Three strips of the green flourish border paper from the K&Co Roam paper pad were matted onto brown paper and then onto green paper. A length of coral picot-edge organza ribbon, from the Chatterbox Tangerine ribbon pack, was then wrapped around the panel and attached to the card blank.

A flower was die cut from the coral brushstroke paper from the same paper pad using the Flowers, Daisies #2 Sizzix Bigz die and layered up with a scalloped circle and a computer-generated circle sentiment die cut with a standard circle die, both Nestabilities.

The flower embellishment was then added over the ribbon.

The sentiment circle was created thanks to a great tutorial by Karen/Redrottie over on her blog. However, thanks to an empty ink cartridge, my printer refused to work so the file was sent to work with my hubby but I forgot that the font I'd used wouldn't necessarily be on his computer so they didn't look like they should have done. Typical!

Anyway, here are the blog challenges I am entering this card into:

Tuesday 15 March 2011

Saturday 12 March 2011

New Blog For Bloggers

OK - so I have been bullied, talked into setting up a new blog that intends to help all you crafters (and maybe some others) to set up and maintain a blog. Lots of questions seem to be asked on a daily basis about how to blog, and so hopefully some, if not all of those questions will be addressed over time.

I have added about ten posts so far so hopefully that will keep you going for now and I'll try and add to it next week.

Please visit and let me know what you think. And don't be afraid to let me know if something doesn't work or doesn't make sense. I want it to be simple to understand, written in a way that anyone can understand it, whether you are computer literate or not. Of course, the best way would be to test it on my mum - if she could grasp it then anyone could. She still struggles with programming a video recorder!!!

So, the big question - where can you find this new blog?? HERE. It's called Crafty Bloggers, but the URL is http://craftbloggers.blogspot.com/

HAPPY BLOGGING!

Friday 11 March 2011

Plum and Blue Prince Charming Tiles

Here is the card I made for my not-so-little brother (he's 27 now!) He reckons that's not old, so that means I'm "not old + 10"!!

I chose the patterned papers and coloured the image to match, and it wasn't until I'd made it I realized it was in Villa colours, which is handy because that's the football team he supports (that's soccer for all you Americans reading this!)


The Prince Charming image, from Mo's Digital Pencil, was coloured using Copic markers:
  • Crown: Y17, E41, E43
  • Blouson: B12, B21, B24
  • Breeches/Shoes: G85, BG45, E43
  • Robe/Medallion: V15, E43
  • Ermine/Collar: E40, E43
  • Skin: E00, E21, E51, E13
  • Hair: E13, E35, E57
  • Extra Shoes: BG45, G85, B21, E43, C6
  • Shadow: N3, E41
The image was then punched with the large XCut corner rounder punch and matted onto plum card. A Labels 3 shape was cut using a Nestabilities die from blue card and distressed using Tim Holtz Faded Jeans distress ink, then overstamped in the corners with the Crown Flourish stamp from the Fiskars Harlequin Charms stamp set with the Versafine Imperial Purple archival pigment ink. The image panel was then matted over the top.

Two papers from the DCWV The Old World mat stack were cut into 4cm tiles and the plum tiles were punched using the large XCut corner rounder punch. These were positioned onto the blue card also distressed with the Faded Jeans ink.


Four violet card candi from the Pot Pourri set by Craftwork Cards were coloured using Copic markers:
  • Candi: V15, E43
These were then added in the corners.

The sentiment was computer generated and coloured with Copic markers:
  • Sentiment: V15, E43, E40
It was then cut out and matted onto panels of the plum and blue card and punched with the large XCut corner rounder. The image was then highlighted with Anita's 3D Gloss.

Here are the blog challenges I am entering this card into:

Wednesday 9 March 2011

Red and Green Vintage Lady

Here's another of my older cards from last year that I didn't get around to uploading.

I am loving this colour combo and will have to get these papers out again!


The Vintage Lady image, from the Vintage Postage Ladies stamp set from Crafty Individuals, was stamped onto cream card using Versafine Crimson Red archival pigment ink and cut out using the Square Stamp die from Cuttlebug. This was then matted onto a square of beige Core'dinations card and a scalloped red square, both cut using Nestabilities.

A strip of the multi ribbon strips paper from K&Co Classic K McKenna paper pad was matted onto the beige and red card, and then onto a panel of the green large floral paper also from the McKenna paper pad.

The stamped image was attached over the ribbon strip paper and three olive green card candy from Craftwork Cards were attached along the ribbon paper panel. The card candy were covered with Glitz It Pear Green glitter glue to make them nice and sparkly.

The sentiment panel was created by stamping the sentiment from the Hero Arts Birthday Messages stamp set using the Crimson Red ink onto the cream card which was then matted onto the beige and red card.

Here are the blog challenges I am entering this card into:

Tuesday 8 March 2011

Blue and Silver Mad Hatter Side Fold

Well, I am keeping with my love affair with digis at the moment. This card was made for my docrafts buddy Sarah/Kozmik for her birthday.


The digi image, Mad About You from TiddlyInks, was coloured using Copic sketch markers:
  • Hat/Jacket/Trousers: N1, N3, N5, B12, B24
  • Waistcoat/Tie/Handkerchief: B12, B24
  • Skin: E00, E21, E51, R20
  • Hair: Y08, Y17, E31, E35, E57
  • Pocket Watch: Y17
  • Shadow: E31, N1, N3

The image was then die cut using the classic oval Nestabilities die and matted onto a bright blue oval from the Core'dinations Elements card pack and a scalloped oval diecut from silver mirror card.

Strips of the floating hearts paper from the Papermania Venetian Skies paper pack were matted onto strips of the silver mirror card, all punched with the EK Success Scalloped Scallop punch. Light blue organza ribbon was then wrapped around the panels and a knot was tied along the longer panel.

These were then matted onto panels of the blue and grey floral stripes paper, from the same paper pack.

Half of the card front was then chopped off and the panels added, one to the front and one to the inside of the card.

The sentiment, which was computer-generated, was coloured using Copic markers:
  • B12, N1, N3
It was then cut out and matted onto the blue and silver cardstocks.

The image panel was then matted over the edge of the card front, with the sentiment adhered to the inside of the card just behind the image panel.

Grey faux gems, from the Papermania Monochrome Capsule Collection, were added in the corners.


I also added a sentiment panel to the inside of the card using a sentiment stamp from the Hero Arts Anytime Messages stamp set and Versafine Onyx Black archival pigment ink. This, and the mats and layers, were die cut using the classic oval and scalloped classic oval Nestabilities dies.

Here are the blog challeges that I am entering this card into:

Monday 7 March 2011

Sunday 6 March 2011

Dark Blue and Green Scalloped Florals

Here is an anniversary card that I made for a couple of pals over on the docrafts forum, both of whom celebrated their anniversaries on Valentine's Day. This is something a little different for me and was inspired by the very talented Ikki. The inspiration for this card is here.


I have just noticed that I managed to choose exactly the same papers as Ikki, which wasn't my intention, it's just that those two seemed to go together best when I looked through all the papers. Just goes to show we both have a great eye for co-ordination!

A square was die cut using a Nestabilities die and the image, from the Papermania Jesse Edwards Memories stamp set, was stamped in the centre and the sentiment, from the same stamp set, along the edge using a combination of Charcoal and Blue Iris ColorBox Fluid Chalk inks.


This was then matted onto a die cut panel of dark blue and green paisley paper from the Laura Ashley Traditional paper pack and a panel of dark blue shimmer card, die cut with a scalloped square Nestabilities die.

A panel of the green and dark blue etched botanicals paper, from the same paper pack, was matted onto a panel of the shimmer card and onto the card blank, from Craftwork Cards. I bought these last year at the Make It show at Farnborough, and this is the first time I've used them!

The flourish, cut using the Vine #2 Sizzix Sizzlits die from cream card, was coloured using the blue and grey chalk inks and adhered over the corner of the image panel. It was then highlighted with Craft Planet Iridescent Sparkle glitter glue.

Here are the challenges that I am entering this card into:

Saturday 5 March 2011

I Got Top 5 at Fussy and Fancy Friday

My Green and Terracotta Penny Black Cupcake Mice Anniversary card has been chosen as a Top 5 over on the Fussy and Fancy challenge blog.


The challenge was "Sweet Treats" which this image seemed to fit perfectly!


You can see my original post for this card here.

Thursday 3 March 2011

Pink, Blue and Green Posh Milly

Here is another of the cards I made last year and didn't get around to blogging so thought I'd blog it now!


The Posh Milly image from Pink Gem, kindly donated by Judith B in the September 2008 docrafts image  swap, was watercoloured using the Tim Holtz Distress Inks and highlighted using Craft Planet Iridescent Sparkle glitter glue. The edges of the image panel were coloured using the Worn Lipstick and Milled Lavender distress inks. This was then matted onto green and blue paper.

A panel of the multi-floral paper from the K&Co Sparkly Sweet paper pad was also matted onto the green and blue paper and a length of light blue organza ribbon was wrapped around it and the image matted over the top.

A pink card candy from Craftwork Cards was added over the ribbon and covered with the Iridescent Sparkle glitter glue.

The 'It's Your Birthday' circle sentiment from the Hero Arts Birthday Messages stamp set was stamped onto white linen card and green paper. The inner section of the sentiment was cut out from the white linen card and edged with the Worn Lipstick and Milled Lavender inks. The whole sentiment panel was cut from the green paper and all matted onto a circle cut from the blue paper. The sentiment panel was then adhered over the bottom corner of the image panel.

Here are the blog challenges I am entering this card into:

Wednesday 2 March 2011

I Am A Winner Over On The Top Tip Tuesday Blog Challenge

My Blue and Pink Fairy Fae Trellis card has been (randomly) chosen as a winner over on the Top Tip Tuesday challenge blog.
My prize is a $10 gift certificate at Digital Delights. I will have to have a look-see at their images to see what I will get! The challenge was "Bling It On" which I definitely did with this card!


You can see my original post for this card here.

Tuesday 1 March 2011

Lilac and Apple Lazy Summer Tilda Ovals

Firstly, before I blog this card, I want to say a big thank you to Elaine at Quixotic Cards for drawing my attention to the great tutorial on colouring blonde hair with Copics that Mary J did on her blog and the Quixotic Paperie blog.

I found that, with my three yellow markers, my blonde  hair didn't look right. But with some help from Elaine and Mary J, I've worked out which E markers to use and I think it looks really good - even if I say so myself!!!


The Lazy Summer Tilda image from Magnolia, (which I managed to borrow from Alex during a playday at Julie's) was stamped using Versafine Onyx Black archival pigment ink and coloured using Copic sketch markers:
  • Skin: E00, E21, E51, R20
  • Hair: E40, E41, E43, E51, E57
  • Wings: BV00, BV23, B41
  • Jumper: G12, G14, YG11
  • Pinafore: BV00, BV04, BV31
The image was die cut using a classic oval Nestabilities die and matted onto a green oval and lilac scalloped oval, also die cut using Nestabilities.


A strip of the lilac cherry blossom paper from the Dovecraft Aquamarine Kate Knight paper pack was matted onto green and lilac card. A panel of the green and lilac leaves paper, from the same paper pack, was punched using the Doilly Lace border punch by Martha Stewart, and then matted onto a punched panel of the green card and the lilac card.

The sentiment, from the Papermania Clare Curd Sentiments stamp set was stamped onto a Cuttlebug Oval Stamp die using the Onyx Black ink and matted onto a lilac die cut. I think if I were to make this again, I'd use either a grey or lilac ink for the sentiment - the black looks a little bit too harsh. 

The Tilda image was then highlighted with Craft Planet Iridescent Sparkle glitter glue and a Papermania Snow White gel pen.

Here are the blog challenges that I am entering this card into:
Blog Widget by LinkWithin