Pages

WELCOME

This blog was created to act as a record of the cards and other projects that I have made. It is for both my own reference and to help inspire anyone who wants to take a look.

I'd love it if you'd leave me a comment so that I know what you think of my projects and that you've been to visit!

Anyone can comment, even those who don't have a blog. (Just look for the word 'Comments' under the three little pictures at the end of each post). Readers without a blog can add an anonymous comment, but please leave your name (and docrafts username if applicable) so I know who you are!

Slideshows of all the cards I've uploaded to my blog can be found at the bottom of the page.


PEOPLE WHO FOLLOW MY BLOG

Monday 30 November 2015

Blue and Yellow Aeroplane in Clouds

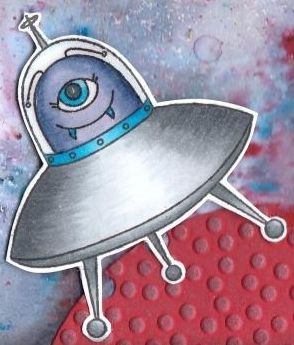
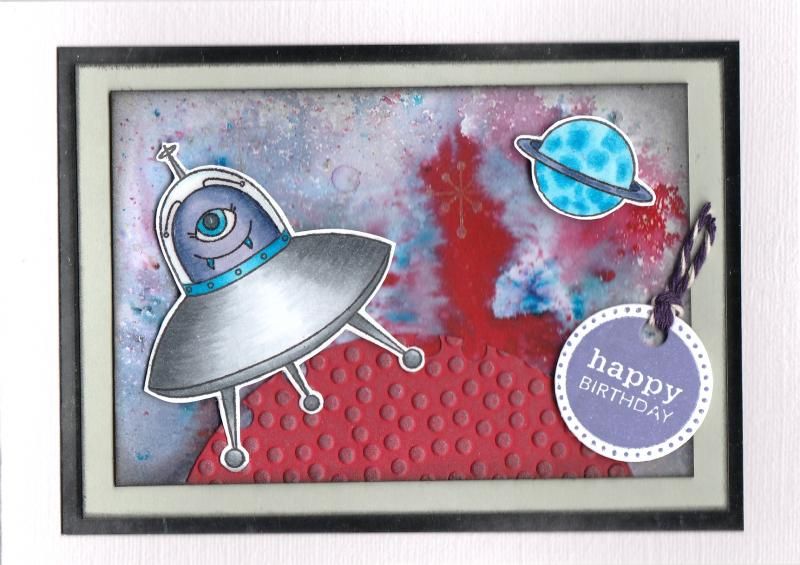
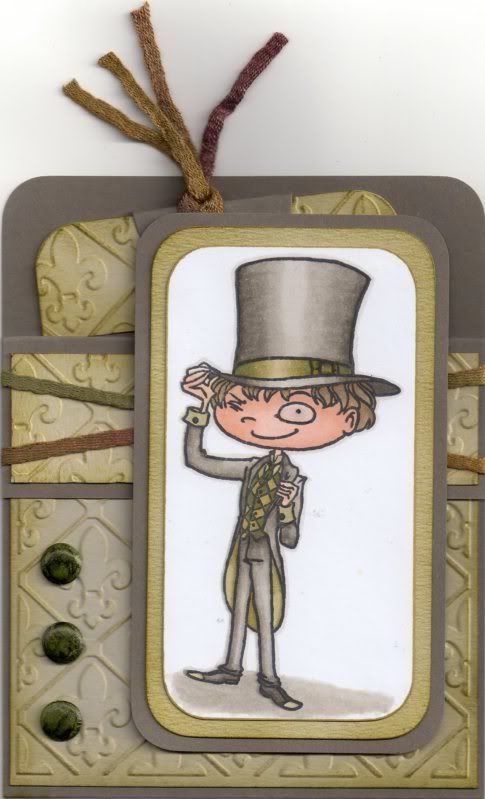
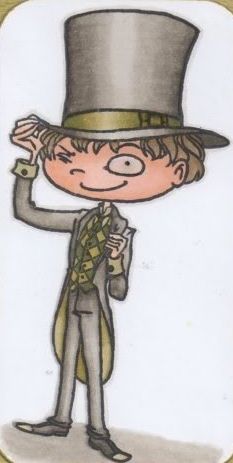
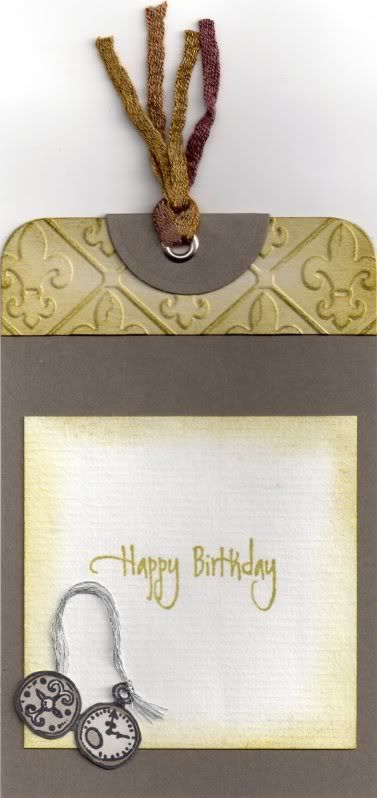
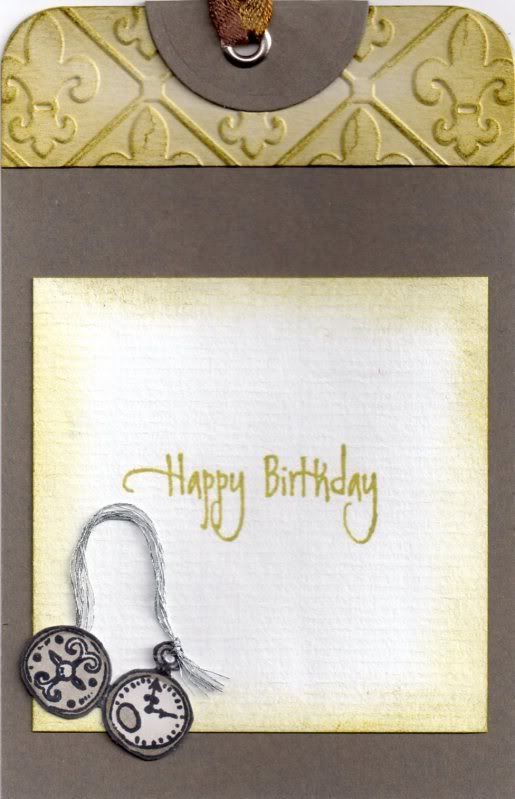
This is the card that I made for my 'little' brother this year. He's actually 31 but being 10 years younger than me he'll always be my 'little' brother.
 
I really liked this aeroplane stamp from the Kaisercraft Little Man stamp set, so decided to make a nice simple card with it.
 
 
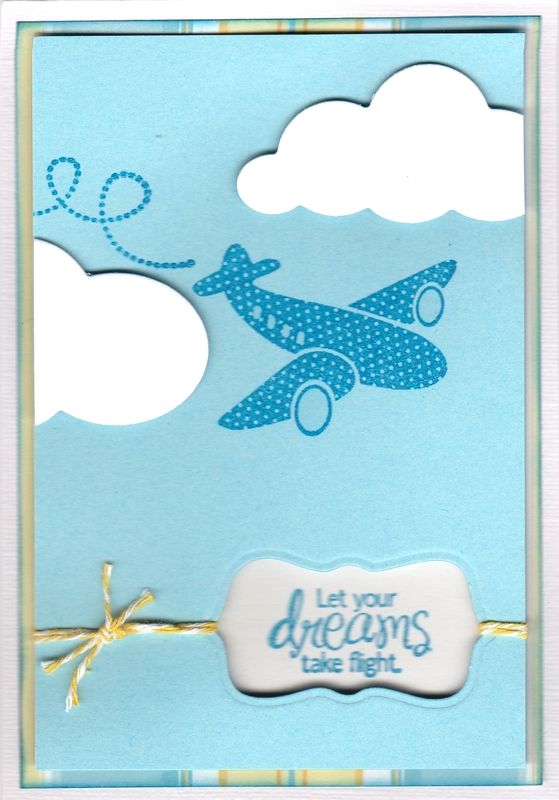
I started by creating the front panel of the card. I stamped both the aeroplane and trail from the Little Man stamp set using Versafine Deep Lagoon archival pigment ink. I then die cut an aperture from the panel using a label die from the XCut Tags and Bookplates set of dies.
 
A couple of clouds were die cut from white card using the Memory Box Puffy Clouds dies and adhered to the card front using 3D foam to create dimension.
 
Lengths of yellow Baker's twine from the Dovecraft Riverbank Rivals twine pack was tied around the card front threaded through the aperture.
 
The sentiment, from the Amy R Be Happy set of stamps was then stamped onto a scrap of white card using the Deep Lagoon ink and matted behind the aperture using 3D foam.
 
The front panel was then matted over a panel of the blue and yellow striped paper from the DCWV Floral Prints paper stack.


The inside of the card was also decorated using the same patterned paper and cardstock as the front of the card.

A circle and big scalloped circle were die cut using Nestabilities dies and the sentiment, also from the Be Happy stamp set, was stamped onto the label cut out from the front panel using the Deep Lagoon ink.

Friday 27 November 2015

Cream and Blue Tatty Teddy Panels

Another look back into the past here with a couple of old cards from 2011!!!

These are a couple of quick cards I made for a couple of 8-year old girls using the printed panels in the Me To You Especially For You paper pack.


The corners of the printed image were rounded using the large XCut corner rounder punch and matted onto light blue and cream card.

A strip of the blue polka dot paper from the same paper pack was matted onto the light blue card and a length of cream satin ribbon was wrapped around and matted onto a panel of the yellow stars and balloons paper. This was then matted onto the light blue card.

A tag was die cut from the light blue card using the Cuttlebug round tag die. A big scalloped circle was die cut from cream card using a Nestabilities die and stamped with the 'Birthday Wishes' circle sentiment from the Hero Arts Birthday Messages stamps set using ColorBox Aqua pigment ink. The scalloped circle was matted onto the tag and a blue Papermania flower gem was added in the centre. A short length of the cream satin ribbon was threaded through the tag and added in the top right corner of the image panel.

All the edges of the blue layers and the centre of the flower gem were highlighted with Craft Planet Ice Blue glitter glue.

A similar card was made with a different image panel from the same paper pack.

Wednesday 25 November 2015

Taupe, Aqua and Sage Green Honeycomb Trevor and Emma

Today's card is actually two versions of the same card. Both cards use the Spring Couple stamp from CC Designs and are anniversary cards.
 
The images were stamped using Memento Tuxedo Black dye ink and coloured with Copic markers.
 
Here are the details for the first card:
 
 
Copics:
 
Trevor - Hair: E43, E44, E49
Trevor - Skin: E00, E11, E21
Trevor - Shirt: BG11
Trevor - Jacket: YG91, W3, W5, W7
Trevor - Trousers: W3, W5, W7
Trevor - Shoes: YG91, W9
 
Emma - Hair: E41, E43, E44
Emma - Skin: E000, E00, E11, E21, R02
Emma - Flower: BG18
Emma - Top: BG10
Emma - Shoes: YG91, W9
 
The other parts of the image were paper-pieced using papers from the First Edition Isabelle paper pad.
 
Using the Sizzix Framelits Hexagon die, a series of hexagons were cut from a variety of the papers from the Isabelle paper pad and arranged in a honeycomb pattern on the card blank. A larger couple of hexagons were die cut from white cardstock and a patterned paper and the image, having been fussy cut, was adhered onto them.
 
 
The sentiment was stamped onto a diecut hexagon using the Happy circle sentiment stamp and the Anniversary stamp from the Personal Impressions Paula Pascual All Year Round stamp set with Tim Holtz Pumice Stone distress ink. A frame was created from another patterned paper from the Isabelle paper pad and added over the top of the sentiment hexagon.
 
Here is a picture of the finished card.
 
 
To finish the front of the card, highlights were added to Emma's cheeks using a Papermania Snow White gel pen and small faux gems were added to the centres of the flowers on the patterned papers and the flower in Emma's hair.
 
The inside of the card was also decorated, using hexagon diecuts. The sentiment banner was created by stamping the Basic Banner by Clearly Besotted using the Pumice Stone ink and diecutting with the co-ordinating die. The sentiment was stamped within the banner shape using the Have a Beautiful Day stamp from the Personal Impressions Paula Pascual Mix & Match stamp set.
 
 
The second version of the card gave the characters different hair colours.
 
 
Copics:
 
Trevor - Hair: YR14, YR23, YR24
Trevor - Skin: E00, E11, E21
Trevor - Shirt: BG11
Trevor - Jacket: YG91, W3, W5, W7
Trevor - Trousers: W3, W5, W7
Trevor - Shoes: YG91, W9
 
Emma - Hair: E41, E43, E44, E49
Emma - Skin: E000, E00, E11, E21, R02
Emma - Flower: BG18
Emma - Top: BG10
Emma - Shoes: YG91, W9
 
 
Again, the inside of the card was also decorated.


Monday 23 November 2015

Coral and Green Dressy Miss Anya

A pretty girlie card for today. This one features the cute Dirndl-wearing Dressy Miss Anya from The Greeting Farm.

The image was stamped using Memento Tuxedo Black dye ink and coloured using Copic markers.
 
 
Copics:
Skin: E000, E00, E11, R20
Hair/Apron: E11, E13, E15
Shoes/Dress: E11, R02, R08
Polka Dot Trim/Socks: YG03, YG11

Highlights were added to the cheeks using a Papermania Snow White gel pen.
 
 
The papers used to decorate the front of the card were from the My Mind's Eye Wild Asparagus paper pack.  The card-edge die cut, created using the Sizzix Card Edges #2 Decorative Strip die was cut from the polka dot paper and added to a panel of ivory card. This was then diecut with a circle Nestabilities die to create an aperture, and a frame was created from the coral coloured polka dot paper from the paper pack using a scalloped circle and plain circle Nestabilities die and added around the aperture.
 
The corners of this panel were punched with the inverted corner rounder from Woodware, and then matted to the card front over a panel of a floral paper from the paper pack.
 
The Miss Anya image was then fussy cut and added over the aperture.
 
,
 
 A couple of flowers were created using the Sizzix Tattered Floral Garland Decorative Strip die and added to the card front with a small orange pearl in their centres.
 
Two tags were die cut from vellum and the polka dot patterned paper cut using a die from the Sizzix Framelits Tags, Sentiments die set. The sentiment, from the Kanban Moulin Divas Très Chic stamp set, was stamped onto the vellum tag using Versamark ink and heat embossed using Heat It Up! Seafoam White embossing powder.
 
The two tags were joined together using a small orange eyelet and threaded with cream hemp cord. The tags were added inside the aperture and decorated with the small flower dies from the Tattered Floral Garland die.
 
 
 The inside of the card was also decorated using matching papers and dies, and a sentiment stamp also from the Très Chic stamp set.
 

Friday 20 November 2015

Burgundy and Aqua Anniversary Doodle Butterfly

Here are a couple of anniversary cards that I made back in 2011 using the Papermania Clare Curd Doodles stamp set.


For the first card, the butterfly image was stamped using Memento Rhubarb Stalk dye ink and highlighted with Craft Planet Iridescent Sparkle glitter glue.

The image was matted onto aqua cardstock.

The patterned papers, from the Papermania Clare Curd The Big One paper pad were matted onto a panel of aqua cardstock and added to the card front.


The sentiment, from the Elzybells Swirly Sentiments stamp set, was stamped using the Rhubarb Stalk ink and matted onto aqua and added over the image panel.

Silver shimmer dots from Papermania were added in the corners of all the panels.

 
The same card was made reversing the colours.


Wednesday 18 November 2015

Rust Green and Brown Fox

This is a nice simple masculine card made using a free set of stamps that came with the first issue of Get Stamping. (I've not seen whether there was an Issue 2 or not).


The fox image was stamped onto white card using Memento Potter's Clay die ink and die cut using a Nestabilities circle die. This was then matted onto a rust-coloured cardstock diecut with a Labels 3 Nestabilities die.

A strip of the striped paper from the First Edition New Leaf paper pad was also matted onto the rust cardstock and added across the centre of the card, with the image panel matted over the top to the left hand side.

 
The sentiment, from the Amy R Be Happy sentiments stamp set, was stamped using the Potter's Clay ink and die cut using a Classic Oval Nestabilities die. The oval was shaded using the Potter's Clay ink with the die still in place over the die cut, creating a white frame. This was then matted onto a Labels 25 die cut and added in the bottom right corner.

 
To finish the front of the card, copper coloured Card Candi by Craftwork Cards were added in the top right and bottom left corners of the card.
 
The inside of the card was also decorated, using almost an identical layout as the front.
 
The sentiment, from the Bo Bunny Sentiments stamp set, was used to add the greeting to the inside of the card.

Monday 16 November 2015

Red Grey and Purple Brusho Aliens

OK - I'll admit it. I had a go with some Brushos. These are definitely not my type of crafting. Far too messy and uncontrollable!!
 
But, I made a background using my friend's set and I decided to make it into a card. When looking at the background, I decided it looked a bit space-like, so I thought I'd make a kids' card and use my alien stamp set.
 
So, to create the background, I used quite a few different Brusho colours onto a sheet of white card, namely black, grey, crimson, scarlet, cobalt blue and then these were spritzed with some water. Once the colour was almost dry, some white Brusho was sprinkled over the top and no water added to create some contrast.
 
The background was then over-stamped with a dotty star stamp from the Kirsty Wiseman Terrestrial Friends stamp set using the Heat It Up! Metallic Silver pigment ink.

 
The next stage was to select the best area of the background for the card. This piece had a flare of red which I thought fitted well with my idea of the card. The edge of the panel was then distressed using Tim Holtz Black Soot distress ink.
 
The alien and spacecraft stamp and the planet stamp, also from the Terrestrial Friends stamp set, were stamped using Memento Tuxedo Black dye ink and coloured with Copics:
 
Copics

 
Monster/Planet: B01, B02, B05, B06, BV00, BV04, BV08
Spaceship: C1, C3, C5, C7, B02, B05, B06
 
 
These images were then fussy cut and Ranger's Glossy Accents were added to the glass section of the spacecraft image.
 
To ground the image and create a foreground, a planet was created by cutting a piece of red card into a circle using a Nestabilities die and then embossed using the Crafts-Too Polka Dots embossing folder. Silver-Blue and Golden White metallic wax rub-ons from Craf-T Color Kit #3 were rubbed over the embossed detail to highlight it. The circle was trimmed into a semi-circle and adhered to the Brusho panel, after a few 'craters' were cut from the edge of the circle using a single hole punch.
 
 
The sentiment, from the Personal Impressions Paula Pascual Mixed Sentiments stamp set, was stamped onto white card using the Versafine Majestic Purple archival pigment ink and die cut using the circle tag die from the XCut Tags and Bookplates set of dies. This was then threaded with purple Baker's twine from Gorjuss.


All the components were then adhered to the card front, matted and layered onto grey and silver mirror card.


The inside of the card was also decorated, using the It's Your Birthday circle sentiment stamp from the Hero Arts Birthday Messages stamp set. The sentiment was coloured using Copics to match the images on the front of the card, and then diecut using a circle Nestabilities die and matted onto red and silver mirror circles.

Friday 13 November 2015

Green and Grey Chester Pocket Card

This is a different type of card for me. It is based on a project that I found on the Splitcoaststampers tutorials page here, a Pocket Card.

With this design of card, the card doesn't actually open, but the sentiment and handwritten greeting go onto a tag that is placed within the pocket section of the card.
 
 
To begin with, the image, Chester by Kraftin' Kimmie, was stamped using Memento Tuxedo Black dye ink and coloured using Copic markers.
 
Copics:
Skin: E00, E11, E21
Hair: E41, E43, E44
Hat/Jacket/Trousers: W1, W3, W5, W7
Hat Band: YG91, YG95, YG99
Tie: G99
Waistcoat: YG95, G99
Inside Jacket: YG91, YG95
Shirt: YG91
Shoes: W5, W7, YG91
Shadow: W1, W3
Outline: W1
 
 
The image panel was then matted onto green and then grey cardstock.
 
The next step was to create the Pocket Card.
 
A piece of card measuring 4" x 11" was then scored in half and then scored again 1.25" from one edge. A panel of white card was embossed using the Cuttlebug Fleur de Lis embossing folder and distressed with Tim Holtz Crushed Olive and Forest Moss distress inks. This panel was adhered to the large front panel of the card. A smaller strip of white card was also embossed and inked with the Crushed Olive and Forest Moss inks and this panel was then adhered to the front flap panel.
 
A couple of lengths of green fibres from the HOTP Sarabooks Emerald Fibres set were then wrapped around the front flap and the flap then adhered down to the front panel.
 
 
Three green card candi were then coloured using the G99 Copic marker and added to the front panel, as was the image panel. Glossy accents were added to the monocle in the image.
 
 
To complete the card, a tag was created. A strip of the embossed and coloured white card was added across the top of the tag, as was a circle of grey cardstock, diecut using a Nestabilities circle die, and then folded in half.
 
A silver eyelet was set in the top of the tag and more of the green fibres were threaded through it.
 
The pocket watch image was stamped using the Tuxedo Black ink and coloured with the W1, W3 and W5 Copic markers. A length of silver embroidery thread was threaded through the image and added to the tag. The sentiment, from the Elzybells Swirly Sentiments stamp set was stamped onto the tag using Versafine Spanish Moss archival pigment ink.
 
 
The tag was then slotted into the pocket on the front of the card.

Wednesday 11 November 2015

Orange and Green Gingerbread Tilda

These are a couple of cards that I made using the Gingerbread Tilda stamp from Magnolia. I really like this stamp and I really ought to use it more. I made two versions of this card using different hair colours.

Here is the first with a more blond colouring:

 
To begin with, the Tilda image was stamped using Memento Tuxedo Black dye ink and coloured with Copics:
 
Hair: Y21, Y26, YR23
Skin: E000, E00, E11, E21, R02
Hat: YG11,YG13, YG17, YR04
Trousers: YG11, YG13, YG17, Y11, YR02
Top: YR02, YR04, YR07, YG11, YG13, Y11
Shoes/Basket: E31, E35, E37, E39
Hearts: YR02, YR23, YR24
Hairbobbles: YR13
 
Highlights were added to here cheeks with a Papermania Snow White gel pen, and to the buttons and hearts with Ranger Glossy Accents.
 
 
The image was then fussy cut and layered onto an oval and scalloped oval die cut using the Spellbinders Petite Ovals and Petite Scalloped Ovals Nestabilities.
 
A floral paper from the My Mind's Eye Bloom and Grow paper pack was matted onto the orange cardstock and the Birthday sentiment, from the Papermania Clare Curd Sentiments stamp set, was white heat embossed in the corner using Versamark and the Stampendous Detail Opaque White embossing powder. A length of the orange baker's twine from Divine Twine was wrapped around the panel and tied and this was then adhered to the card front with the image panel positioned to the right.
 
 
Using the small fishtail banner die from the Sizzix Framelits Banners #2 die set, five banners were diecut from patterned papers from the Bloom and Grow paper pack and stamped with the letters of the word Happy using the Hero Arts Fine Lines Alphabet stamp set and then heat embossed with the white detail powder.
 
These were then adhered across a length of the orange baker's twine across the corner of the card.
 
Small green and orange pearls from Papermania and Kort and Godt were then randomly placed around the card front.
 
The inside of the card was also decorated, adding a panel of the orange spotty paper from the Bloom and Grow paper pack onto orange card stock. A white oval was matted onto an orange scalloped oval and the sentiment, from the Papermania Clare Curd Sentiments stamp set white embossed onto the green stripe paper and tucked behind the oval panel.


The card was also produced with a Tilda with a more brown shade of hair and a more yellow top.
 
 
Copics
Hair/Basket/Shoes: E31, E35, E37, E39
Skin: E000, E00, E11, E21, R02
Hat: YG11, YG13, YG17, YR23
Trousers: YG11, YG13, YG17
Top: Y08, YR23, YR24, YG11, YG13
Hearts: YR02, YR23, YR24
Hairbobbles: yr13
 

Monday 9 November 2015

Red and Brown Escutcheon and Keys Tri-Shutter Fold

Today's card is the card that I made for hubby last year. We were playing with Tri-Shutter fold cards at the cardmaking group that I go to, and I decided to have a go at one for hubby.


The first decision to be made was which papers to use. In the end, the K-Ology Hannah papers from the K&Co The Best of K&Co Too paper pad were used, matted onto chocolate brown card.

The next decision was which images would be used. The starting point was the escutcheon image from the Papermania Bird Prints Urban stamp set, which was stamped onto ivory cardstock using Memento Espresso Truffle dye ink. The image was then stamped again onto a Post-It not and cut away, creating a stencil. Ink was then blended through the stencil using Tim Holtz Aged Mahogany and Vintage Photo distress inks.


The keyhole was then cut away from the image and a couple of gold eyelets set in the panel. Natural twine from the My Mind's Eye Follow Your Heart Be Happy twines was then threaded through the eyelets and the panel matted onto the chocolate card.

A number of padlocks and keys were then diecut using the Sizzix Bigz Heart Lock and Keys die from the ivory cardstock. The diecuts were then distressed with the Aged Mahogany and Vintage Photo inks.


The padlocks were threaded with the twine and added in opposite corners on the card.

The keys were joined together with gold jump rings and added in the larger central panels.


A number of scalloped hearts were then diecut using the Sizzix Framelits Scallop Hearts #2 die set from the ivory card and distressed.


These were then added in the smaller squares on the card.

To complete the card, the sentiment, from the Woodware Happy Anniversary stamp set was stamped using the Espresso Truffle ink and matted over a larger scalloped heart diecut in the central section of the card.


Here is a view of the closed card:

Friday 6 November 2015

Turquoise and Orange Songbird Tree

So, here we are again with one of my older cards. This one is from 2011.
 
I bought this set of papers and stamps when they first came out, full of great ideas. They are the Papermania Birdsong papers. Of course, as soon as I got them home, all ideas fled from my mind and they've been sat in various boxes every since!!!


The patterned paper was chosen firstly and the image stamped to match. The Floral Bird Tree stamp, from the Papermania Birdsong Blossom stamp set, was stamped using Memento Tangelo dye ink and coloured using Copic sketch markers:
    Tree/Leaves/Bird 1: YR00, YR02
    Bird 2: BG11, BG45, BG49
    Flowers: YR00, YR02, BG11, BG45, BG49
    The image was then die cut using a Nestabilities Octagon die and the Tangelo ink was lightly applied through the die, leaving the white edge. A larger pale orange octagon was also die cut and the edges stamped using the Floral Flourish stamp from the Papermania Birdsong stamp set with ColorBox Aqua pigment ink. These were then matted onto a dark orange scalloped octagon die cut.


A strip of the dark orange card was punched with the XCut Lace Trim border punch and a strip of turquoise floral swirl paper from the Papermania Songbird paper pad was added across it, as was a length of teal seam binding. A bow was created from the teal seam binding with a bowmaker and attached over the length using a glue dot. This wasn't as successful as I'd hoped though as the knot wouldn't lie flat!!

The paper strip was then attached across the card blank and the image panel added to the left of the card blank.

The sentiment, from the Papermania Birdsong Blossom stamp set, was stamped in the bottom right corner using the Tangelo ink, as was the Floral Flourish in the other corners.


Clear faux gems were added to the main image and to the sentiment.
Blog Widget by LinkWithin