Pages

WELCOME

This blog was created to act as a record of the cards and other projects that I have made. It is for both my own reference and to help inspire anyone who wants to take a look.

I'd love it if you'd leave me a comment so that I know what you think of my projects and that you've been to visit!

Anyone can comment, even those who don't have a blog. (Just look for the word 'Comments' under the three little pictures at the end of each post). Readers without a blog can add an anonymous comment, but please leave your name (and docrafts username if applicable) so I know who you are!

Slideshows of all the cards I've uploaded to my blog can be found at the bottom of the page.


PEOPLE WHO FOLLOW MY BLOG

Saturday 23 August 2014

Mixed Media Canvas For My Gran's 90th Birthday

This is a post I've been promising to get finished for an age now.

Way back in May I think it was, I suggested to the members of a cardmaking group that I go to that maybe we would all like to have a go at making a mixed media canvas. I was prompted to do this as I was unable to attend the monthly Bristol Playday and this was their planned project and I had really been looking forward to having a go. Purely selfish reasons!! I was aware that not only was it an ambitious project for us all, but also that it wouldn't get finished in just one evening so we agreed to set aside about 3 weeks to get it done.

Inspiration for my canvas was taken from this Youtube video by Gabrielle Pollacco.

The first week consisted of die cutting a load of shapes from chipboard and mountboard in readiness for the next week when we would begin in earnest.

That was when my project hit a snag. My printer started to play up and I figured it needed a new ink cartridge. So I went to the next group meeting with a very purply tinged photograph of myself and my brother and sister so that I could use it for placement in the hope that I could get another one printed in time for the next week.

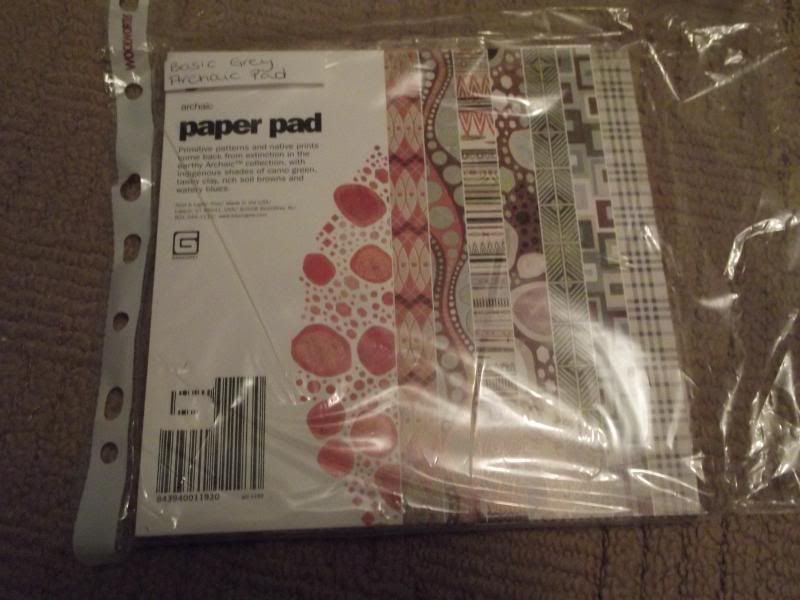
The canvas was started and I added a few different pieces of patterned paper from the Basic Grey Sugared paper pad.

Some additional items were then also adhered to the canvas, including skeleton leaves, some crêpe bandage, a heart doily, some crochet lace, some jute and some of the builders' scrim cut into irregular shapes.

The crêpe bandage was adhered down, along with all the other layers, using Mod Podge. I felt like the bandage needed more glue in order for it to stay attached, but it took forever to dry!!!!

Once the Mod Podge had finally dried, I was then able to proceed by applying some homemade texture paste through a Plaid polka dot stencil and a mask diecut using the Sizzix Brick Wall decorative strip die onto the canvas, overlapping some of the elements. I also used a strip of builders' scrim as a stencil with the texture paste.


Whilst waiting for the texture paste to dry on the canvas, I then decided to prepare some silk flowers and some bottle tops ready to be used the following week. These were covered in a layer of gesso.

When the texture paste had dried, I could then add some crochet lace, a Sizzix flourish diecut and a couple of the silk flowers.  The whole thing was then covered in a layer of gesso. In retrospect, I think this should have been watered-down gesso, but you learn from your mistakes, right??


On returning to the project the next week, I was pretty pleased with the way it was looking. However, despite new ink cartridges, I was still unable to print off the photograph so I was having to try and plan it all without the photograph being attached to the canvas.

So, the first thing I did on starting on the canvas was to adhere the flowers and bottle tops to the canvas using silicon glue. I then took a selection of buttons that have been in my stash for a very long time and coated them all in gesso. I then cut small squares of the jute fabric and adhered these inside the bottle tops, mainly because some of the buttons looked a bit lost just sitting in the bottle tops, and this helped to fill them out a little. Once the jute was well stuck into the bottle tops, I could then add the buttons.

I then die cut some circle frames from cardboard using circle and scalloped circle Nestabilities dies and added these around both buttons and flowers on the canvas.

Once the glue had set on all of the embellishments, a layer of gesso was added over all of the embellishments and diecuts that had been added.

When the gesso was dry, then I could start on the fun part........adding some colour.

I started by mixing some of the pink acrylic paint that I had (Artiste Tea Pink) with some water in a misting bottle with a small amount of the Artiste Pearl Medium paint. However, when I sprayed this onto the canvas, it hardly showed up as it was so pale. So, I added some of the Artiste Dusky Pink acrylic paint to the bottle and this gave a much better effect.


Once I was happy with the coverage of the pink paint, I then added some of the Burnt Umber paint from the same range into the mister bottle and oversprayed the canvas with that.


I was pretty pleased with the effect, but, that, unfortunately is how my canvas remained until the start of August. The printer was still out of action, despite my varied efforts to try and get it to work. After I gave up on that as a bad job, we then had to wait until after my in-laws had been for their annual visit to go and purchase a new one. On top of that, it was now only four days until we were due to go to the Midlands to celebrate my gran's 90th birthday with the whole family who were travelling from all corners of the globe and the country to help her celebrate.

So, with a new printer to try and learn how to use, after a couple of aborted attempts to print the photograph out, I succeeded and proceeded to attempt to finish my gran's canvas.

The first thing I did was to add the photograph. However, that was not as straightforward as it should have been. The photograph would have to lay over one of the diecut shapes and silk flowers that I had already affixed to the canvas, so I had to find a way to add the photograph but raise it up. I decided to cut a piece of mount board to the size of the photograph, but just a shade smaller so it wouldn't be seen, and then trim off the corners so that it would fit around the embellishments. The photograph was adhered to the mount board and was finally added to the canvas.

To draw attention to the photograph, I also added some die cut photo corners and a decorative border. To do this with the dies I have, I cut several layers of the same die and glued them together to create a sort of faux chipboard.


Whilst that was drying, I then decided I needed a few more diecuts to add around both the photograph and the edges of the canvas. I used some Sizzix Sizzlits dies and some XCut dies, creating the faux chipboard shapes. Once the shapes had been created, they were each coated in gesso and then sprayed with the Burnt Umber, Tea Pink and Pearl Medium paint mixture.

Cream pearl brads by Papermania were then added to the larger Sizzix latch die cuts and all the shapes added to the canvas, including a second Sizzix Flourish diecut. Some pink paper flowers from my stash were also added.


The next stage was to add some definition around all of the embellishments, so some of the watered-down Burnt Umber and Tea Pink acrylic was painted around the embellishments. Then another coat of the gesso was added to the embellishments so they would stand out a bit more. Some of the pink acrylic was added to some of the elements, and some metallic rub-ons were added to some of the chipboard shapes.


The next stage was to paint some of the small cotton spools by Bare Basics that I had in my stash from an earlier project with gesso and then to wrap them with some pink embroidery threads. These were then adhered to the canvas, as were a selection of pearls from Kort & Godt and Say It In Crystals. Also added was a key charm from an old HOTP kit I had. I added it using a jump ring and some of the pink embroidery thread.


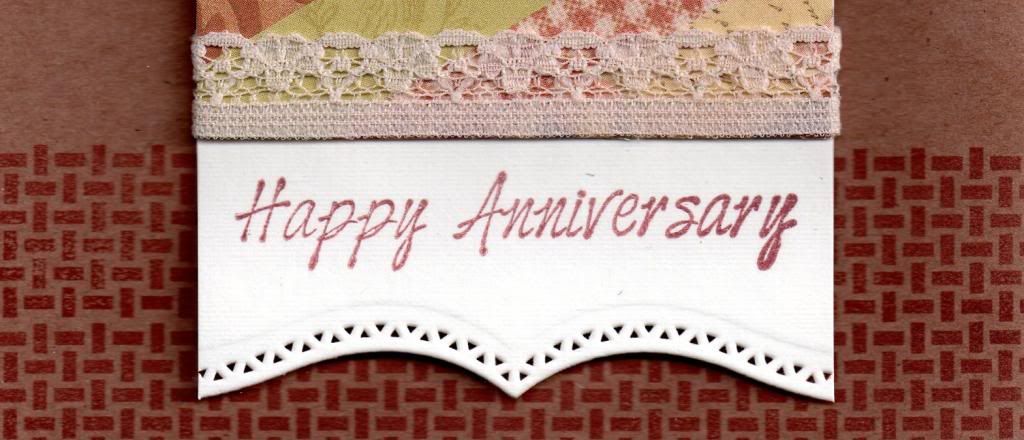
The final step was to decide on a sentiment. As I hoped that this would be displayed permanently, I didn't want anything too 'birthday related' to be on it, and originally I was going to add a banner die with the words ;With Love' on it. But, once I had made it, the words weren't particularly clear, so I had to have a rethink. That's when I remembered all the word tiles that I had in an old K&Co embellishment kit that I've never used!! And I managed to find two that were perfect. Us and You.


To complete the sentiment, I used my mft small lower case alphabet die set to die cut 'from' and 'to' from medium weight card. The letters were painted with gesso and the Burnt Umber acrylic paint. The chipboard word embellishments were originally just slightly the wrong colours for the project, so I added a thin coat of gesso to them and then sprayed them with the brown acrylic paint mix used on the rest of the diecut embellishments. This helped to tie them in with the rest of the project. The letter die cuts and the edges of the chipboard word embellishments were then embellished using the metallic rub-ons.

And so here is the completed canvas in all its glory.


Thankfully, my gran really seemed to really like it, which was a big relief. My brother also seemed to like it, as I had told him earlier that I had signed the card on the gift from all three of us, but not told him what the gift actually was. (Unfortunately, my sister was unable to fly over from Spain as this is the busiest time of year for her in her shop).

And, everyone else there seemed to like it as well, and my aunt insisted on taking down one of my gran's pictures on the wall and putting it up for all to see. I've just got to pray now that bits don't start dropping off!!!!


Wednesday 2 April 2014

Dark Blue and Brown Landmarks and Tickets 40th

So, my latest upload is a card I made for a friend who was turning 40. He has always called me 'aunty Kathleen' ever since I used to feed him curry when we were based in Germany. Even though he is actually older than me!!


I pulled out the trusty Landmarks image, from Crafty Individuals, and stamped it onto the Honey paper from the Basic Grey Granola paper pad using Memento Paris Dusk dye ink and trimmed it up into a square. The image was then matted onto cream and navy shimmer cardstocks.

A panel of the Wild Oats paper from the same paper pad was also matted onto the cream and navy cardstocks.

A file folder was die cut from cream card using the Sizzix Sizzlits die and coloured using Tim Holtz Frayed Burlap distress ink and stamped with a sentiment from the Making Memories Express It! stamp set using the Paris Dusk ink.


The Travel Tickets stamp, also from Crafty Individuals, was then stamped onto cream card using the Versafine Vintage Sepia archival pigment ink and the individual tickets were cut out. Tim Holtz Old Paper and Frayed Burlap distress inks were then added to distress them. The tickets were arranged inside the file folder and added at the bottom right corner of the image panel.


Three large old gold brads from Papermania were then added in the top right of the panel and the panel was then added to the card blank.


The inside of the card was also decorated using strips of the papers used on the front of the card. The sentiment was stamped across the Honey paper using the Paris Dusk ink, the Happy Birthday stamp from the Personal Impressions Paula Pascual Mix and Match Sentiments stamp set and the '4', '0' and 'th' stamps from the See D's Lower Case Script Alphabet stamp set. The '40th' text was stamped using the second generation of ink, giving it a more faded look.


Here are the blog challenges I am entering this card into:

Tuesday 25 March 2014

Kristina Werner Inspired #3

Well, here we are again. This time I decided to try something different. I went through all of Kristina's blog, from start to finish, and made a note of the cards that I wouldn't mind having a go at at some stage. I wrote the dates of the posts onto a slip of paper and popped them all into a tub. This is the card idea that I pulled out of the tub to be the inspiration for this card. I am hoping that Ali will play along with me on this one. When she posts her version, I'll add a link to her card somewhere in this post. If you want to play along too, add a link to your creation in the comments below. I'd love to see what you come up with.


So, the first change I made to my version of this card was to create an embossed panel rather than embossing the card blank. I wasn't sure if the cardstock I was using would hold up to the embossing. I think I was right to be cautious, as the embossing folder I used (Sizzix Diamonds) did push through the card in a couple of spots which I think would have been more obvious on a card blank.


The next step was to create the coloured panel. This consisted of a rectangle of the same white hessian cardstock, with the corners rounded using the WRMK Corner Chomper. I wanted to create a Spring coloured card, so the panel was then coloured using Tim Holtz Shaded Lilac distress ink (I'm ashamed to say I think this is the first time I've used this colour!) I decided I wanted to add a bit more detail to this panel, so I pulled out my Stampin' Up! Mat Stack and pierced a border around the panel.


Then I created the die cut flowers using the Memory Box Prim Poppy die. The flowerbud was snipped off the second diecut and the diecuts arranged on the panel. To create dimension, the flowerheads were adhered using 3d foam and the stems using Zig glue.


To create the greeting panel, the multi-folded banner from Clearly Besotted Basic Banners was die cut and then stamped on top using the matching stamp from the co-ordinating stamp set using Versamark ink. The banner was then heat embossed using Stampendous Detail White embossing powder. The sentiment, from the same stamp set, was then stamped and embossed within the banner shape. Once the embossing powder had cooled, the Shaded Lilac ink was applied to the diecut to help the detail stand out.
Here is a picture of the finished card in all of its glory.


Saturday 22 March 2014

Owl Lots of Pops 30th Birthday

This is a card that I made at my local cardmaking group. It's a cute pop-up card using a die to create the mechanism. It was pretty simple to make, although you do have to ensure that whatever you put on the pop-up will remain within the card when closed.


I needed a 30th birthday card for my 'little' brother (how did that happen?) and thought this would make a good "special card".

The die used to create this card is the new Lots of Pops die by Karen Burniston for Elizabeth Crafts.


Firstly, the card blank and inner panel were created, with the inner panel being slightly smaller than the card blank. In this instance, the inner panel was created using a panel of paper from the First Edition Sweet Owl paper pad. To create the pop-up, place the die along the centre fold of the inner panel. Work the folds of the pop-up and then adhere to the card blank.


I decided that I would use the free owl stamp by Sugar Nellie that came with the July 2009 issue of Craft Stamper Magazine. The image was stamped using Memento Tuxedo Black dye ink and coloured using Copic markers. Highlights were added using Ranger Glossy Accents. The image was then fussy cut.

The Copic markers used are:
E41, E43, E44, E49, YR14

In the set of dies there is also a post die and a couple of different banner dies. Two of each of these were die cut, the banners being cut from patterned papers from the Sweet Owl paper pad.

The two fishtail banners were stamped on he reverse of the patterned paper using the Whimsy Letters and Numbers stamp set by See D's using Memento Teal Zeal dye ink. The banners were then attached to a length of brown embroidery thread which was then tied and adhered to the two post die cuts and these were then in turn attached to the pop-up mechanism.


The longer fishtail ended banner was then stamped using the PSX Buttons Pixie alphabet stamps and the Teal Zeal ink. This was placed on the front pop-up, and the owl placed sitting on branches and leaves, die cut using the Sizzix Sizzlet Flowers and Branches die and the Joy! Crafts Branches die.


A strip of the brown circle paper from the Sweet Owl paper pad was matted onto the beige card and added across the inner panel. Ranger Crystal Stickles were added to the circle pattern on the patterned paper. The 'Have A Hoot...' sentiment, from the Woodware Owl stamp set, was then stamped using the Teal Zeal ink and die cut using the Nestabilities Classic Ovals die and matted onto a Labels Thirty-One shape.


Once the inside of the card was completed, the front of the card was created using the same owl stamped image and the branch and leaves die cuts. The owl image was adhered to panels of oval and Labels Thirty-One shapes.


The fishtail banner from the Sizzix Framelits Banners #2 set was die cut from the beige card. The matching stamp was stamped onto white card using a pale ink and fussy cut. The 'All of a Twitter' sentiment, also from the Woodware Owl stamp set, was stamped onto the reverse of the shape and matted onto the diecut shape.

All panels and diecuts were distressed using Tim Holtz Walnut Stain distress ink.


For an area to write the greeting, a large classic oval diecut was matted onto a Labels Thirty-One diecut with a few of the leaf diecuts and adhered to the reverse of the card. The 'Happy Birthday' sentiment, from the Kanban Farmyard Animal Wobblers stamp set, was created in the same way as the 'All of a Twitter' sentiment on the front of the card.

I'm rather pleased with this card, even if I do say so myself. I love the combination of the die cut elements and the stamped elements.

Here are the blog challenges I'd like to enter this card into:

A Creative Romance - Seeing Double
Brown Sugar - #86 - Anything Goes
Craftitude - #61 - Anything Goes
Crafts4Eternity - #168 - Anything Goes
Cut It Up - #41 - Anything Goes
Fairytale - #87 - An Old Stamp
Pattie's Creations - #88 - Anything Goes
QKR Stampede - #80 - A Little Birdie Told Me
Simply Create Too - #57 - Animals
Sister Act - #49 - Anything Goes
Stampin' For The Weekend - Anything Goes
Crafty Girls - #14 - Anything Goes
Aud Sentiments - #102 - Anything Goes
Copic Marker Europe - Birthday
Red Rubber Inspirationals - #112 - Colour In The Lines
Crafter's Café - #55 - Make A Square Card
Inklings and Yarns - #48 - Anything Goes
Stampotique Designers - #139 - Masculine
Fan-Tastic Tuesday - #27 - Anything Goes
Oldie But A Goodie - Bunting (Owl Stamp)
Through The Craftroom Door - Anything Goes 18/3-24/3
Aurora Wings - #1 - Anything Goes
Crafty Bloggers Network - Nature
Crafty Boots - Feathers
Fitztown - #27 - Anything Goes
Lexi's Creations - #112 - Punches and Dies
Shabby Tea Room - #210 - Anything Goes
Paper Nest Dolls - #6 - Anything Goes
613 Avenue Create - #63 - Anything Goes
Challenges 4 Everybody - #39 - Anything Goes
Eclectic Ellapu - Wings (Pink Team)
Penny Black and More - So Sweet
Pile It On - #11 - For A Guy
Sentimental Sundays - #198 - Cute and Cuddly
Cards Galore Encore - #3 - Use Stamp or Digi
Crafts & Me - #146 - Anything Goes
Flat Friends - #18 - Cards For Men
Just B Creative Crazy - Anything Goes

Tuesday 18 February 2014

How I Store My Paper and Cardstock and Patterned Papers

I have often been asked the question "What is the best way to store paper and card?" especially by new crafters and so I thought I'd share with you the way that I store mine and the way I've done it since I started crafting nearly ten years ago.
The fact that I have stuck with it does seem to suggest that it works, at least it does for me.
So, the majority of the cardstock I have was picked by me in the Papermill Shop and stuffed into a box. The cardstock didn't have a fancy name, so I gave it one! I'd separate out all the different types of card and paper and put each one into its own polypocket and write out a Post-It note with its new given name and how many full sheets of it I had.
Once it had been used, I'd also make a note of whether or not there were any offcuts.
The polypockets were then sorted into colour families (red, orange, yellow, green, blue, purple, lilac, pink, brown, gold, silver, grey, black, white and cream) and then those were then sub-divided into card, special card (linen, hammer, pearl, other special finish or texture), paper and special paper.
Each of these sub-categories were then given a foolscap suspension file and these were placed in 35litre Really Useful Boxes. These boxes have a section on the inside where the hooks of the suspension files can run, making them perfect!
I currently have three of the 35litre boxes and they live in front of my desk next to one another. The first box has red-blue, the second has purple-black and the third has white and cream.
I should mention that I also have larger boxes containing the cardstocks I mostly use for cardblanks, as there are too many sheets of those to store this way. They are to the side of my desk.
I also store my packs of patterned papers (6x6, 8x8, UK A5 and UK A4) in the same way. I put the pad or pack of paper into the polypocket and also put any offcuts into the back of the polypocket.
My patterned papers are then stored in cardboard CD and shoeboxes sourced from WHSmiths and Dunelm. You might also find them in Wilkinsons. They are the perfect size to store the pads stood up so that I can flick through them. I forgot to take a picture of them though! They sit on top of my rollcarts behind my desk on top of the drawers that hold my brads, eyelets and gems.
I have found that by putting the offcuts in with the full sheets of either cardstock, paper or patterned papers, I can look to see if I have a suitably sized small piece that I can use before cutting into a larger or new sheet. I keep any sized offcut that I think I can use in the future, whether that be a thin decorative strip or a panel that can be used for a small sentiment.
I hope this has helped you in your decision making process as to how to store all of your paper and cardstock and patterned papers.

Monday 17 February 2014

Kristina Werner Inspired Card #2

Well, here we are again. This time it was my turn to choose the card from Kristina that we were to CASE and here is the link to the video showing the card I chose and a link here to Kristina's blog post showing this card.

In need of a few anniversary cards, that's what I decided to make based on this card design.


To begin with, create the patterned paper panels. To make these, cut up strips of various papers from the K&Co Brianna paper pad in varying widths. I found the easiest way to adhere these to the panel and ensure they stay attached was to cover the panel entirely with adhesive, making sure the adhesive goes right up to the edges. This is particularly important if you have small bits in the corners. Once covered, turn the panel over and trim away the overhanging bits.

Panels of cream cardstock were then stamped using the Happy Anniversary stamp from the Kaisercraft Occasion's stamp set and the Brilliance Cocoa Bean pigment ink. The lower edge of the panel was then diecut using one of the Spellbinders Bracket Borders dies. The paper strip panel was then adhered to this diecut panel and a length of lace adhered to hide the edge of the paper strips.


The next step was to add some detail to the card blank. Using the basket weave stamp from the Waltzing Mouse Picnic Patterns stamp set and the Cocoa Bean ink, the border stamp was stamped three times across the bottom of the cardblank. Remember to mask off the left panel of the card first so the reverse of your card is protected.

Once the ink is dry, adhere the paper strip panel to the card using 3d foam.


To create the banner detail, two different designs of pennants were stamped from the Whimsy Stamps Celebration Circle Pennants stamp set using the Cocoa Bean ink and die cut using the frilly Whimsy Stamps Shapeology Circle Pennants die. These were connected together using cream embroidery thread and placed across the card.


As a finishing touch, the top right corner was then punched using the WRMK Corner Chomper, using the 1/2" corner. 

Here is an image of the front of the finished card.


The inside of the card was also decorated to match and complement the front of the card. This time the greeting was stamped using the Congratulations stamp from the Papermania Mix and Match Scrolls and Sentiments stamp set with the Cocoa Bean ink.


Once Ali has uploaded her version, I will add a link to her creations which I'm sure are stunning!

Here is a link to Skipper's take on this card. It's a beauty!

Friday 17 January 2014

Kristina Werner Inspired Card #1

So, I am trying to blog more, and so here goes!

This project is one that was inspired by a lady whose youtube videos I watch religiously. Namely, Kristina Werner. You can find her blog here and her youtube channel here.

 I am not the only person who appreciates her work and the very talented Ali and I decided we'd challenge ourselves to select one of her projects and do our own takes on it.

So, Ali chose the first project that we'd attempt and here is the video of the project that she chose, and here is the blog post.

I decided to make birthday cards based on her design and to make a masculine and feminine version of it.

The first design was the feminine version, using the First Edition Spring Feast paper pad. These papers are perfect for girlie cards!


Having chosen the papers I wanted to use, I die cut a number of banners from them using a die from the Sizzix Banners #2 Framelits die set. Using an old XCut daisy punch, I punched a daisy from some of the banners, leaving a couple of the banners plain.


Each of the banner shapes were edged using ColorBox Chestnut Roan Fluid Chalk ink.

Two more panels of patterned papers were chosen and matted onto each other. The sentiment, from the Paper Smooches Sentiment Sampler stamp set, was stamped onto the smaller panel using the Chestnut Roan ink. A design was also pierced in two of the cornes using the Stampin' Up! Mat pack.

A thin line of Aleene's Tacky glue was run across the two panels and a length of green embroidery thread was run along it. Once dried, the ends were trimmed and the panel attached to the card blank. The banners, each trimmed to fit the panel so as not to obscure the sentiment, were then 3d mounted along the thread, and a brown Kort & Godt faux pearl was added in three corners of the smaller panel.


For the inside of the card, a panel of writing paper was matted onto a panel of matching patterned paper and adhered to the left hand side of the card. Using another of the banner dies from the Banners #2 die set and the Sentiment Sampler stamp set, the sentiment panel was stamped using the Chestnut Roan ink and placed to the right of the panel. A selection of the daisy punchouts from the banners on the front of the card were then placed around the sentiment panel.

The masculine card was made in a similar fashion, using the DCWV Retro Prints paper pad.


The smaller panel on the front of the card was this time created from white card and run through the Cuttlebug Basket Weave embossing folder. A large blue brad from Papermania was added in the top right corner. Stars were punched from the banners using a small punch I got in Tescos many years ago!

The sentiment was stamped onto a strip of the striped paper using Memento Bahama Blue dye ink and a fishtail banner was handcut at the end.


The inside of the card was created in much the same way as the feminine card, using the star punch outs around the sentiment. The sentiment was stamped onto the patterned paper using Versamark ink and heat embossed using Stampendous Detail Opaque White embossing powder.


I'm liking this idea of choosing a card and making your own version of it.

You can see Ali's versions of the card here.

It's my turn to choose the next card to be inspired by, so I'm off now to choose one.


Blog Widget by LinkWithin