





Pages

WELCOME

This blog was created to act as a record of the cards and other projects that I have made. It is for both my own reference and to help inspire anyone who wants to take a look.

I'd love it if you'd leave me a comment so that I know what you think of my projects and that you've been to visit!

Anyone can comment, even those who don't have a blog. (Just look for the word 'Comments' under the three little pictures at the end of each post). Readers without a blog can add an anonymous comment, but please leave your name (and docrafts username if applicable) so I know who you are!

Slideshows of all the cards I've uploaded to my blog can be found at the bottom of the page.


PEOPLE WHO FOLLOW MY BLOG

Showing posts with label Natalie. Show all posts

Wednesday, 6 October 2010

Duck-Egg Blue and Cream Sugar Nellie Fly Free

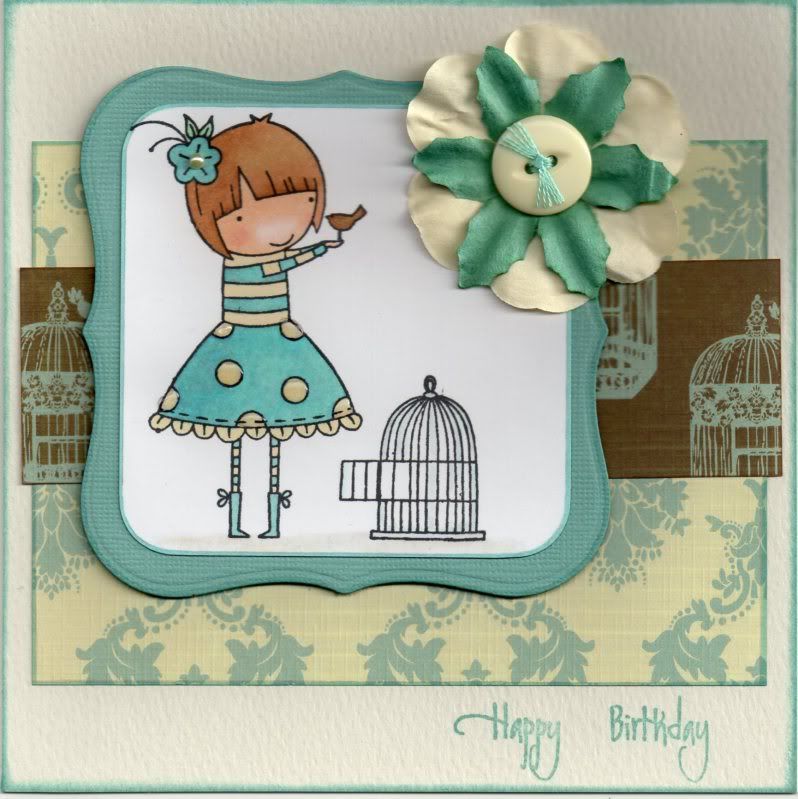
Here is the card that I made for Natalie for her birthday. I know that she has received it now so I can post it without spoiling the surprise!!


I love this cute Leanne Ellis image, available form Funky Kits. It's called Fly Free image, and it was stamped using Memento Tuxedo Black dye ink and coloured using Copic Sketch markers:
  • Hair: E13, E31, E35
  • Skin: E00, E21, E51, R20
  • Flower: BG02, BG11, N3,
  • Leaf: BG32, YG41
  • Top/Skirt/Socks: E41, Y00, BG02, BG11, N3
  • Boots: BG02, BG11, N3
  • Bird: E35, E39, N3
  • Cage: C2, BG11
  • Shadow: E41, N1, 0
The image was matted onto a panel die cut using the Labels 1 Nestabilities die from duck-egg blue Core'dinations card from the Elements card pack.

A panel of the cream and blue flourish paper from the Papermania Chatsworth paper pad was added to the centre of the card blank with a strip of the brown and blue bird cage paper from the same paper pad over the top.

Embroidery thread was tied through a cream button and assembled with a cream Papermania paper flower and a blue Prima paper flower and added to the top right corner of the image panel.

The spots on the image were then highlighted using Anita's 3D Gloss, and a cream self-adhesive pearl from The Hobby House was added to the centre of the flower in her hair.

The sentiment, from the Elzybells Swirly Sentiments stamp set, was then stamped in the bottom right corner of the card blank using ColorBox Celadon pigment ink.

Here are the challenges that I will be entering this card into:

Monday, 24 May 2010

Red and Black Flourish Monique

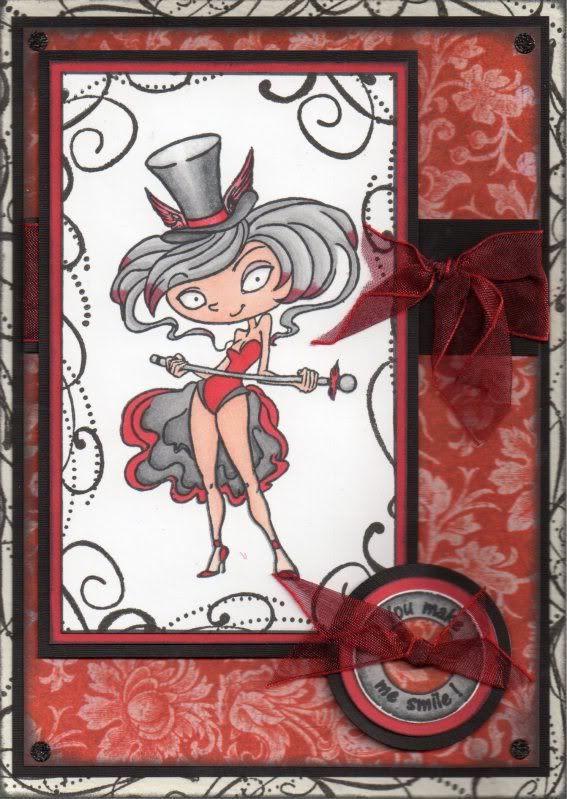
Here is my entry for this week's Cupcake Craft Challenge, which specifies a colour challenge of black, grey and one other colour. I have gone for red as the extra colour.

The card I made is for Natalie to accompany a swap we did. I decided to use the Monique stamp from Kraftin' Kimmie - one of my recent purchases.


I started by stamping the edges of the card blank using one of the flourish stamps from the Autumn Leaves Flourish v1 by Rhonna Farrer stamp set with Versafine Onyx Black archival pigment ink. The edges of the card were than distressed using ColorBox Charcoal Fluid Chalk ink.

A panel of the red cabbage rose paper from the Papermania Red Hot Capsule paper pad was also distressed around the edges using the Charcoal ink and matted onto black linen paper.

A length of dark red organza ribbon was then tied in a knot and wrapped around a strip of the black linen paper and matted onto the red patterned paper.

The Monique image was stamped onto white card using Memento Tuxedo Black dye ink and coloured using the Copic sketch markers.
  • Hat: R20, R24, R29, N1, N3, N5, N7
  • Hair: N1, N3, R29
  • Skin: E00, E02, E21
  • Eyes: N1
  • Dress: R24, R29, N1, N3, N5
  • Shoes: R24, R29
  • Cane: N1, N3, N5, R24, R29
I was really pleased with the way I got the colour shading on the hat, but not so much with the red tips of the hair - it was harder to get the gradation of colour there.

The flourish stamp used on the card blank was then used to stamp a pattern around the image panel using the Onyx Black ink. This panel was then matted onto red card and the black linen paper.

The circle sentiment, from Aud Designs, was stamped using the Tuxedo Black ink, cut out using the circle Nestabilities die and coloured using the Copic markers.

  • Sentiment: N1, N3, N5

This was matted onto circles of red card and black paper also cut out using the Nestabilities. A small circle of the red patterned paper was cut using the Nestabilities was added to the centre of the sentiment and a length of the red ribbon was tied through the centre and adhered over the bottom corner of the image panel.

As an added embellishment, and to add a touch of sparkle, black Glitterations circles from Anita's were added in the corners of the red patterned paper panel.

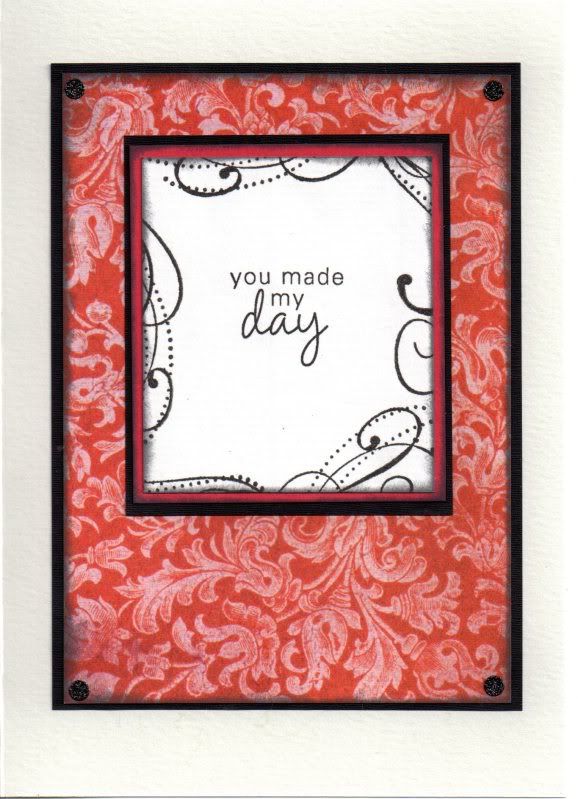
I also decorated the inside of the card, using the red patterned paper and a sentiment panel again stamped with the flourish stamp and a sentiment stamp from the Hero Arts Anytime Messages stamp set, both stamped using the Onyx Black ink. The black Glitterations stickers were again added in the corners of the red patterned paper.

Blog Widget by LinkWithin