



Pages

WELCOME

This blog was created to act as a record of the cards and other projects that I have made. It is for both my own reference and to help inspire anyone who wants to take a look.

I'd love it if you'd leave me a comment so that I know what you think of my projects and that you've been to visit!

Anyone can comment, even those who don't have a blog. (Just look for the word 'Comments' under the three little pictures at the end of each post). Readers without a blog can add an anonymous comment, but please leave your name (and docrafts username if applicable) so I know who you are!

Slideshows of all the cards I've uploaded to my blog can be found at the bottom of the page.


PEOPLE WHO FOLLOW MY BLOG

Showing posts with label Imaginisce. Show all posts

Friday, 10 June 2011

Light Blue Embossed Inkadinkado Swan

Here is a card I made for a good friend's birthday. We met at uni 17 years ago and are still in touch today.


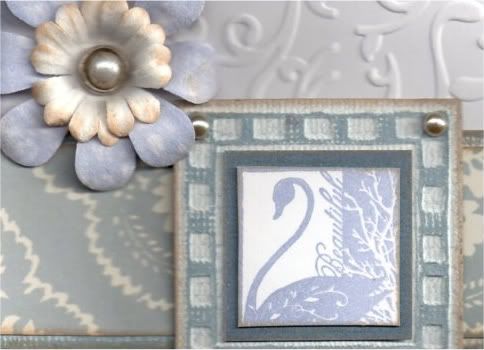
The image, from the Inkadinkado Butterflies and Birds stamp set was stamped using ColorBox Smoke Blue pigment ink and cut out. It was then matted onto the reverse of blue Core'dinations Whitewash card.

A square was die cut with a Nestabilities die from the blue Whitewash card and embossed with a square embossing folder from the Cuttlebug Decorative Squares #3 set. The detail was then sanded and the image matted onto it.

A panel of white card was embossed using the Papermania Victorian Fleur embossing folder and coloured around the edges with the Smoke Blue pigment ink and ColorBox Creamy Brown fluid chalk ink.

A strip of the light blue medallion paper from the Papermania Persimmon paper pad was matted onto the blue whitewash card and matted across the embossed card and then matted onto navy blue shimmer card.
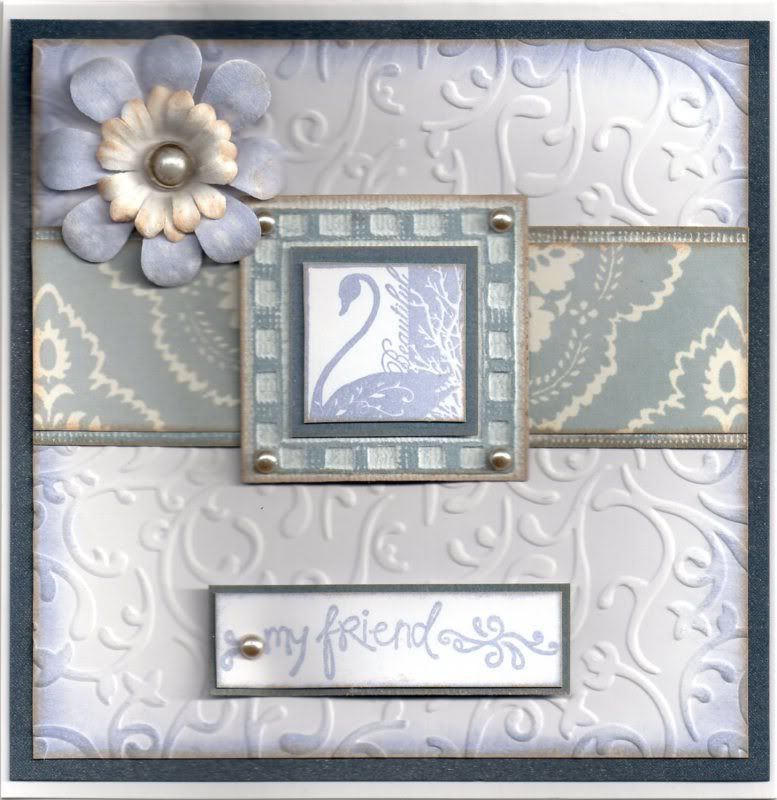

A large white Papermania Imaginisce paper flower was coloured with the Smoke Grey ink and the Creamy Brown fluid chalk ink. A small white flower was highlighted with the Creamy Brown ink and layered with a white pearl Papermania brad coloured with a W3 Copic marker.  The flower was added in the top corner of the panel.

The sentiment, from the Studio G 'Friends For Life' mini stamp set was stamped with the Smoke Blue ink and matted on the blue whitewash card.

Champagne coloured pearls from the Kort and Godt Autumn selection and added to the embossed square and sentiment panel.

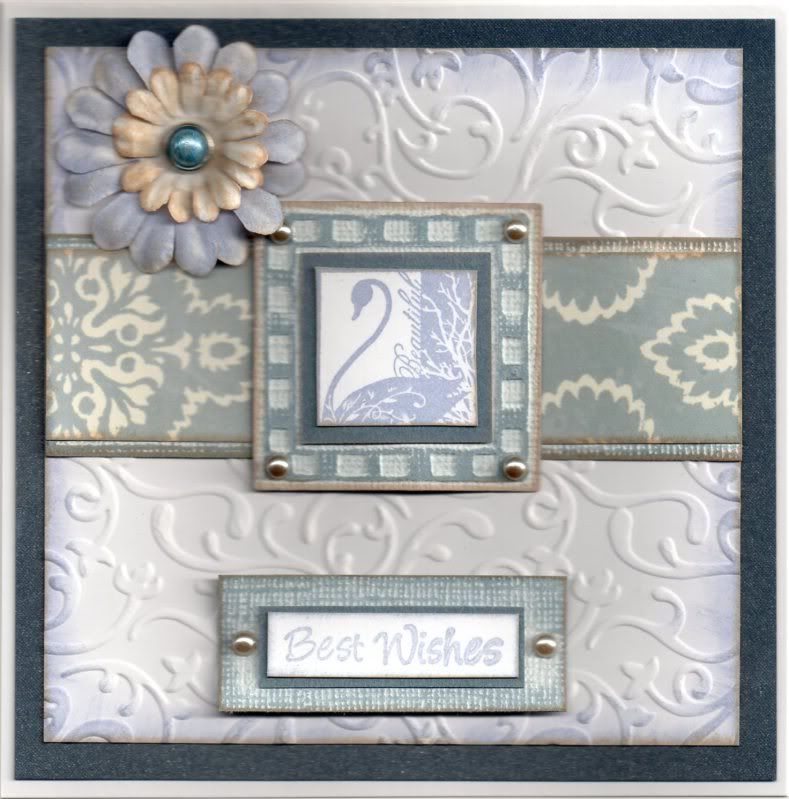
I also made a lightly different card using a 'Best Wishes' sentiment from the Papermania Just For You stamp set:

Here are the blog challenges I am entering this into:

Sunday, 29 May 2011

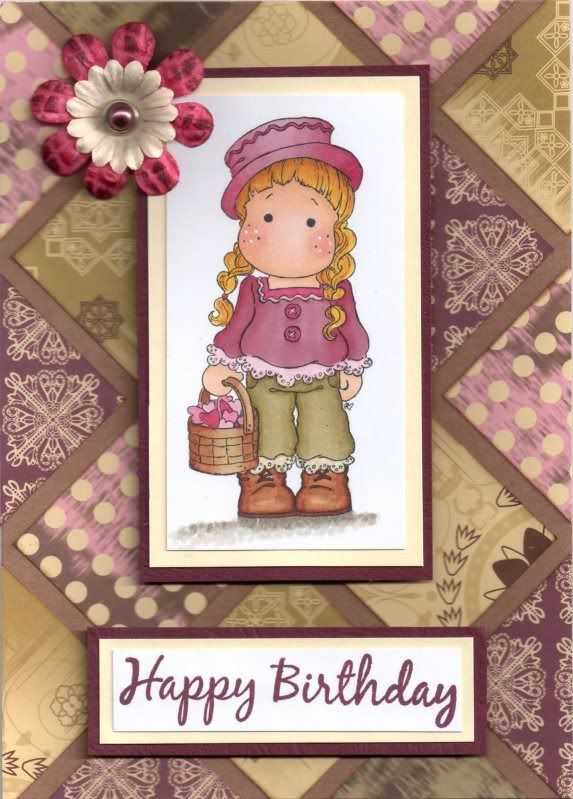
Olive and Plum Gingerbread Tilda with Quilted Background

This card was based on a card I saw at a docrafts demo by Clare Bennett. A similar card of hers was also in the Creativity magazine, using the Liquorice and Sherbet papers.


This is one of my new Tilda images from Magnolia, the Gingerbread Tilda  - I really love her. I think she is supposed to be a Christmas image, but I think she works all year round. The image was stamped with Memento Tuxedo Black dye ink and coloured with Copic markers:
  • Hat/Hearts: RV11, RV19, RV34
  • Hair: YR23, YR24, Y13, Y15
  • Skin: E00, E21, E51, R20
  • Top: RV11, RV19, RV34, R20
  • Trousers: YG91, YG95
  • Shoes/Basket: E31, E33, E29
Highlights were added to Tilda's cheeks with a Papermania Snow White gel pen and the image was then matted onto cream and burgundy card.

Squares were cut from a variety of papers from the Papermania Simply Elegant paper pad, distressed along the edges with ColorBox Chestnut Roan Fluid Chalk ink and arranged in a quilt pattern on a Kraft card blank. The image panel was then added to the centre of the card blank.


The 'Happy Birthday' sentiment, from the Papermania Clare Curd Sentiments stamp set was stamped using Adirondack Currant dye ink and matted onto the cream and burgundy cardstock, and adhered to the card below the image panel.

A cream paper flower, from Papermania Imaginisce, was coloured with a Copic marker (RV19) and the currant ink and layered up with a smaller cream flower and a Papermania plum pearl brad.

Here are the challenges that I am entering this card into:

Thursday, 28 April 2011

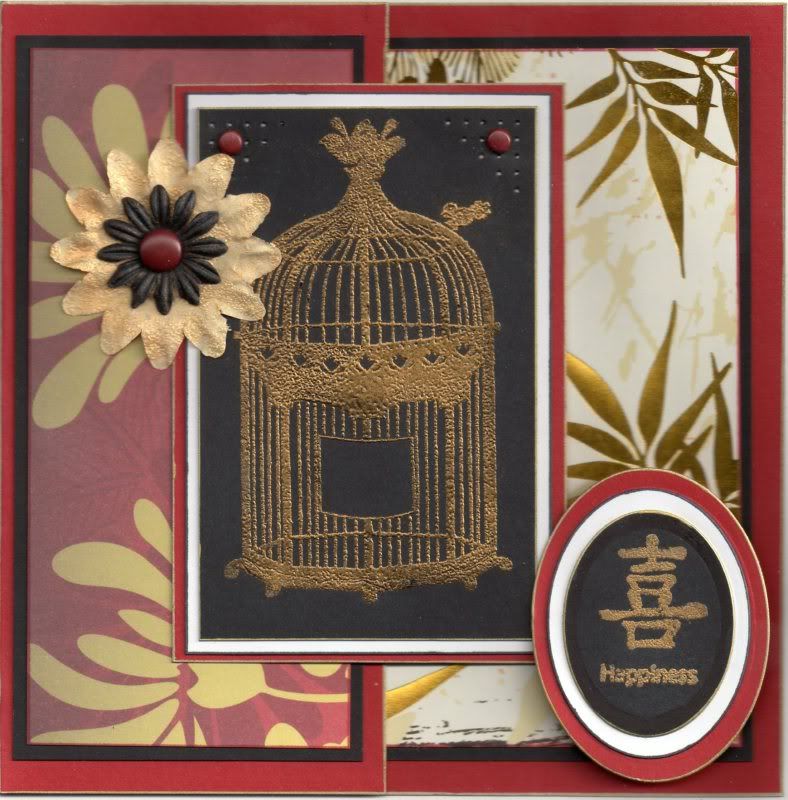
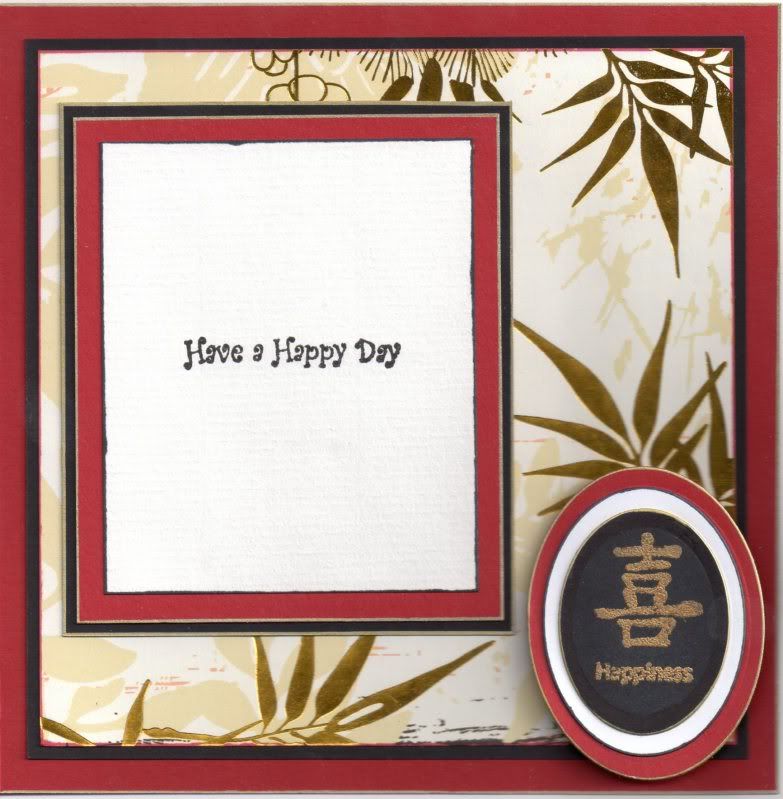
Red, Black and Gold Oriental Birdcage

Here's the card I made for my mother-in-law for her birthday. I wanted to use my oriental papers and after using the mica powder on hubby's birthday card, I wanted to try the Stamp 'n' Bond powder with it to see how it works.


The Birdcage image, from the Papermania Tweet stamp set and the Little Bird image from the Papermania Chatsworth Furnishings stamp set were stamped using Versacolor Black pigment ink onto black card and Stampendous Stamp 'n' Bond embossing powder was added and heated. The Gold Lustre Iridescent Mica Pigment Powder from Stamps Away was then dusted over the sticky powder and left to set. (It tends to stay a bit sticky for a while but does set hard eventually).


Holes were pricked in the top corners of the image panel, using the Stampin' Up piercing template (Mat Pack) and small red brads from Papermania were added in the corners. This was then matted onto white and red card.

A half-front card blank was created from red card. The white and gold foiled bamboo paper from the Papermania Oriental Treasures paper pad was matted onto the black card and adhered to the inside of the card.


A white paper flower from Papermania Imaginisce was covered in Emboss Clear Pigment ink and then the Stamp 'n' Bond powder was added and heated to melt. The Gold Lustre mica powder was then dusted over the top. A smaller white paper flower from the Prima Botanicals Mix was coloured using a dark grey Copic marker (N9) and the Gold Lustre mica powder was lightly dusted over the top. The flowers were then layered up and a large red Papermania brad was added in the centre and attached to a panel of the red and gold chrysanthemum paper matted onto the black card. This was then adhered to the card front.


The sentiment panel was created by stamping the Happiness symbol and word from the Papermania Oriental Treasures Lanterns stamp set using the Versacolor Black ink onto a black oval die cut using a classic oval Nestabilities die. The Stamp 'n' Bond was added and heated and the gold mica powder dusted over. The sentiment panel was then matted onto larger red and white ovals, also die cut using the Nestabilities dies. The sentiment was added in the bottom right hand corner of the inside of the card, overlapping the image panel.


Here are the blog challenges I am entering this card into:

Saturday, 25 September 2010

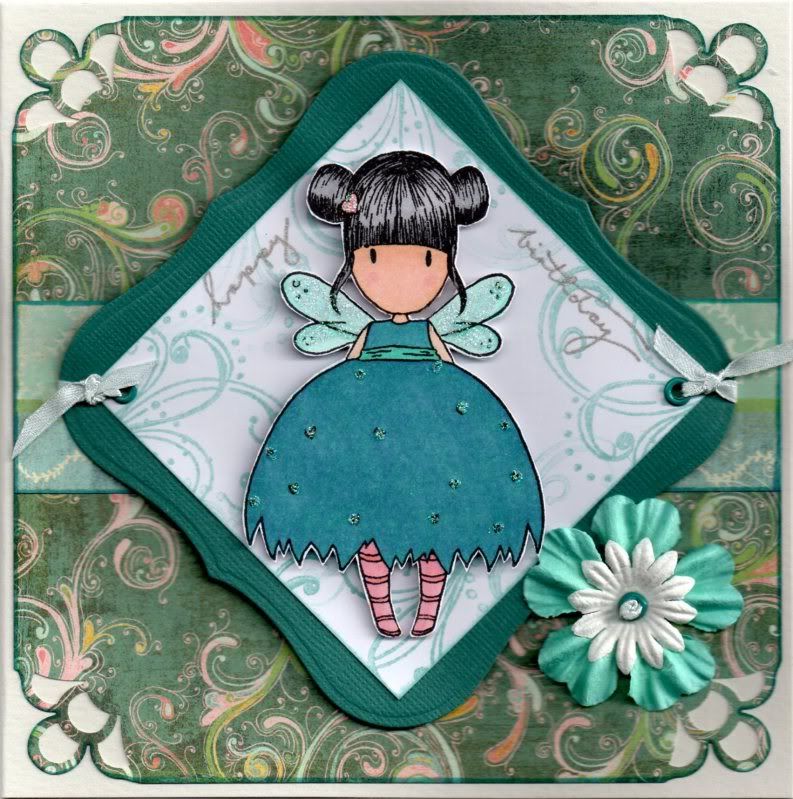
Teal, Pink and Turquoise Bumble Bee Gorjuss Girl

This is one of my favourite Gorjuss Girl images. This image was stamped at Julie's house last August using one of Julie's stamps! I really can't believe how long ago that was now - over 13 months!!!


The Bumble Bee Gorjuss Girl image was stamped using Versafine Onyx Black archival pigment ink, coloured using Copic sketch markers:
  • Hair: N1, N3, N5
  • Skin: E00, E21, E51, R20
  • Socks/Hearts: R20, YR02
  • Dress: BG13, B45
  • Wings: BG11, BG13

and cut out.

A panel of white card was cut out and stamped using one of the flourish stamps from the Autumn Leaves  v1 Flourish Rhonna Farrer stamp set and ColorBox Celadon pigment ink. This was then matted onto a panel of blue Core'dinations card die cut using a Labels 1 Nestabilities die.

A panel of the Spumoni paper from the much underused Basic Grey Two Scoops paper pad was cut and the corners punched using the Martha Stewart Double Loops corner punch.

A strip of the Ice-Cream Parlour paper, from the same paper pad, was adhered across the centre of the punched panel and matted on to the card blank.

The Gorjuss Girl image was placed over the white stamped panel and the 'Happy Birthday' words, from the Woodware Jane's Script sentiments stamp set were stamped either side of the image using the Versafine Smokey Gray archival pigment ink and traced over using the Sakura clear Stardust pen.

Holes were punched in two corners of the Label shape using the Big Bite and small teal Papermania eyelets were set in the holes and light blue satin ribbon was knotted through them.

The Gorjuss Girls image was then added to the centre of the panel using 3D foam pads and Craft Planet Iridescent Sparkle glitter glue was added over the wings, small heart and dress hearts of the image.

A white Papermania Imaginisce paper flower was layered over an aqua Prima flower and a small teal Papermania eyelet was added to the centre. A length of the light blue ribbon was knotted and threaded through the centre as a finishing touch.

Tuesday, 7 September 2010

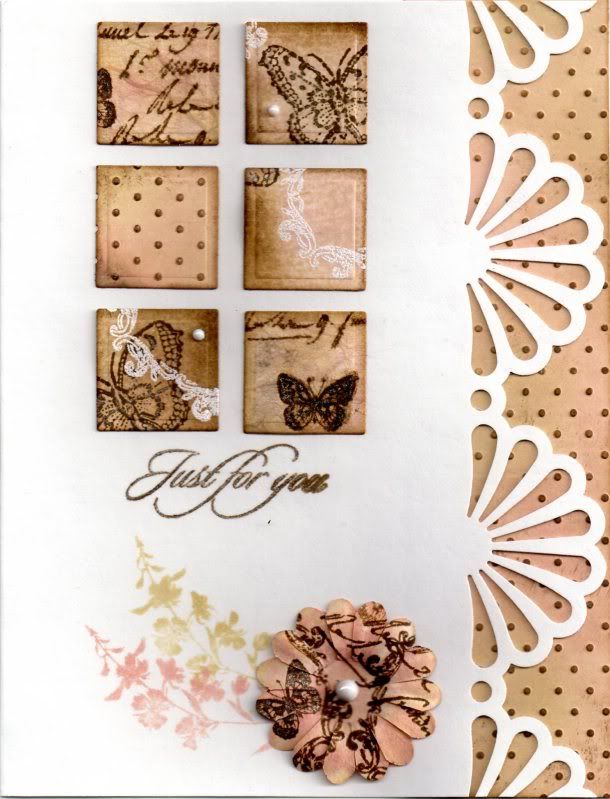
Pink and Brown Daisy Fan Tiles

This card was based on a project in the June 2010 issue of the Craft Stamper magazine.

It is created by making what is called a Serigraph. This consists of a colourful background made with a brayer and three or four co-ordinating colours.

This was something a little out of my comfort zone but I loved the look of the card in the magazine and wanted to give it a try!! I think it makes a nice anniversary card for the in-laws!


To create the serigraph background, a piece of cream card was coloured using the Tim Holtz Tattered Rose and Antique Linen distress inks. This was overstamped with the circle flourish frame image from the Papermania Chatsworth Frames stamp set using Emboss Clear ink and heat embossed with Stampendous Detail White Opaque embossing powder. The Tim Holtz Walnut Stain distress ink was then used to fill in areas of the card that weren't already coloured with the other two colours. The embossing was then wiped with a tissue to remove any excess ink.

Using the Walnut Stain ink, the two butterfly stamps from the Penny Black Enjoy Life stamp set and the Crafty Individuals Wildflowers stamp set were randomly stamped over the sheet. The butterflies were then highlighted with the Sakura clear Stardust pen.

A second sheet was created by colouring a piece of white mulberry paper with the Tattered Rose and Antique Linen inks, and then over stamped with the Hero Arts Old Writing stamp and the Crafty Individuals Butterfly stamps with the Walnut Stain ink.

A third sheet was created by colouring the cream card with the Tattered Rose and Antique Linen inks and then embossed with the Cuttlebug Swiss Dots embossing folder. The raised dots were then coloured with the Walnut Stain ink.

The mulberry paper was backed with cream card and small squares were cut from all three sheets using a standard square Nestabilities die.

The edge of a 5"x7" card blank was punched using the Martha Stewart Daisy Fan deep-edge punch and a panel of the embossed card was adhered to the inside of the card so it can be seen through the punched edge.

Six of the small tiles were adhered to the front of the card and a small white Papermania adhesive pearl was added to a couple of the tiles.

The 'Just For You' sentiment, from the HOTP Sentiments stamp set, was stamped below the tiles using the Walnut Stain ink and traced over with the Sakura clear Stardust pen.
 
Using the Tattered Rose and Antique Linen inks, the larkspur image from the Crafty Individuals Wildflower stamp set was stamped at the bottom of the card blank.
 
A cream Papermania Imaginisce paper flower was coloured with the same inks and overstamped with the small butterfly, flourish frame and Old Writing stamps using the Walnut Stain ink. A large white adhesive pearl was added in the centre of the paper flower and adhered to the card over the edge of the larkspur stamped images.

I would like to enter this card into a few challenges:

Sunday, 25 July 2010

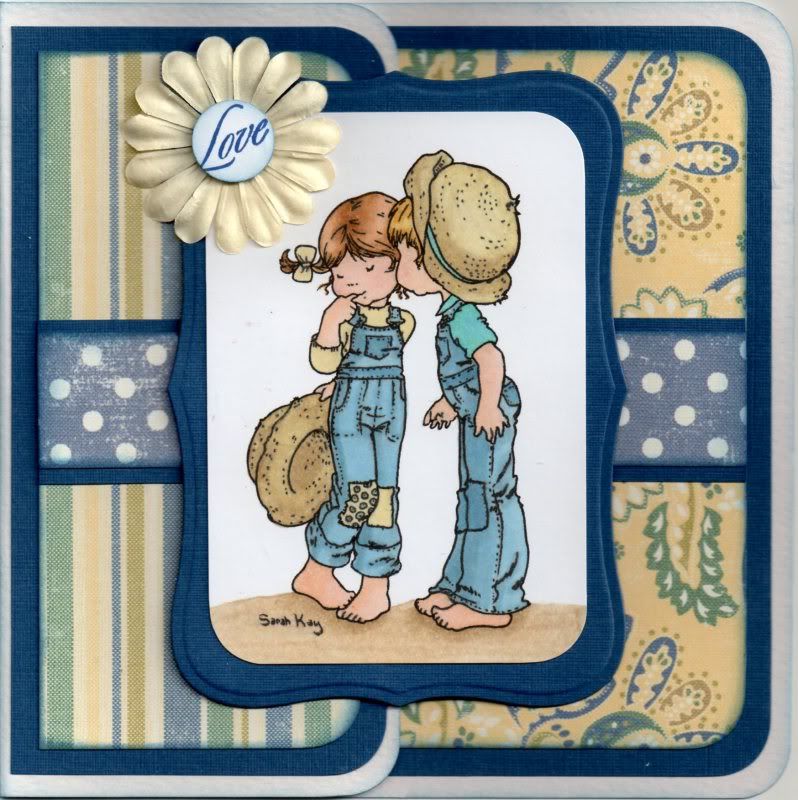
Blue, Green and Yellow Kiss For Chloe

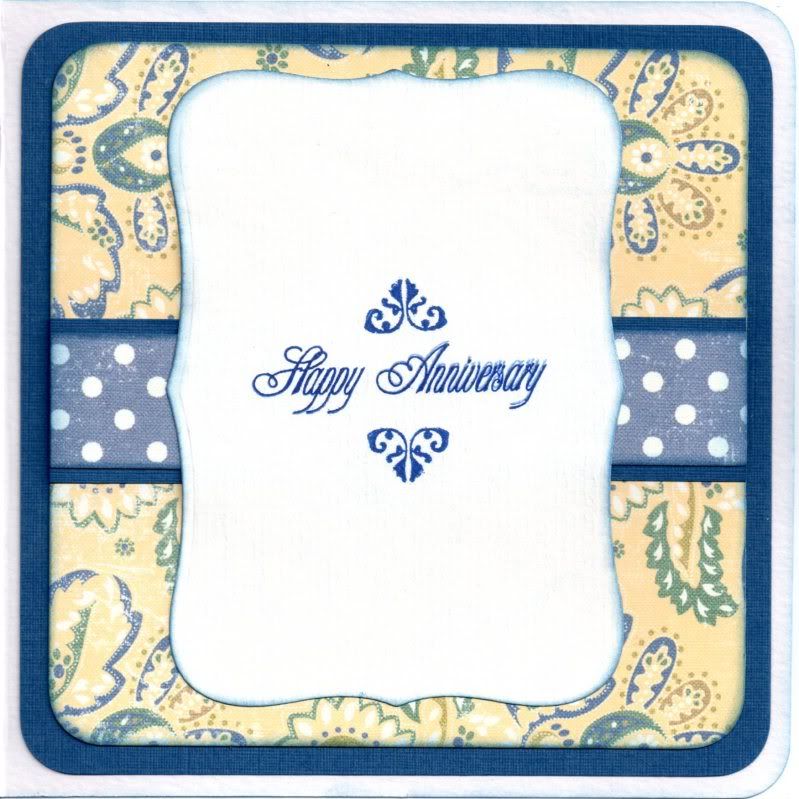
Here is the anniversary card I made for my cousin and her husband, for their second anniversary. I love this image and think it's great for a young couple.

I have also entered it into a few blog challenges:


The Kiss For Chloe image, from Stampavie, was stamped using Versafine Onyx Black archival pigment ink and coloured with Copic sketch markers.
  • Dungarees: B41, B45, B93
  • Hats: Y00, E21, E41, E43
  • Patches/Jumper: Y00, B41
  • Shirt: BG13, B41, G02
  • Girl's Hair: E21, E35, E57
  • Boy's Hair: Y00, Y17, E41
  • Skin: E00, E21, E51, R20
  • Shadow: E41, E43
The image was then cut out and the corners rounded with the large XCut corner rounder punch. This was then matted onto a panel of blue card cut out using the Labels 8 die from Nestabilities.


A square card blank was created from white card and half of the front panel was cut off. The corners were rounded with the XCut punch.

Panels of the blue card were cut to fit the front panel and the inside of the card. A strip of the blue polka dot paper from the Making Memories Fresh Anthology Sydney paper pad was matted onto the blue card and matted onto panels of the blue and green stripe paper and the yellow paisley paper from the same paper pad.

A 15mm circle of white card was punched out using a Craft Planet punch and stamped with the Love stamp from the HOTP Sentiments stamp set using the Versafine Majestic Blue ink. The edges of the circle were then distressed with Tim Holtz Faded Jeans distress ink. The circle was then adhered to the centre of a cream Papermania Imaginisce paper flower and attached to the corner of the image panel.
 
A sentiment panel was then added to the inside of the card using a panel of white paper cut out using the Nestabilities Labels 8 die and adhering it to the inside of the card directly behind the panel on the front of the card so it is not visible when the card is closed.

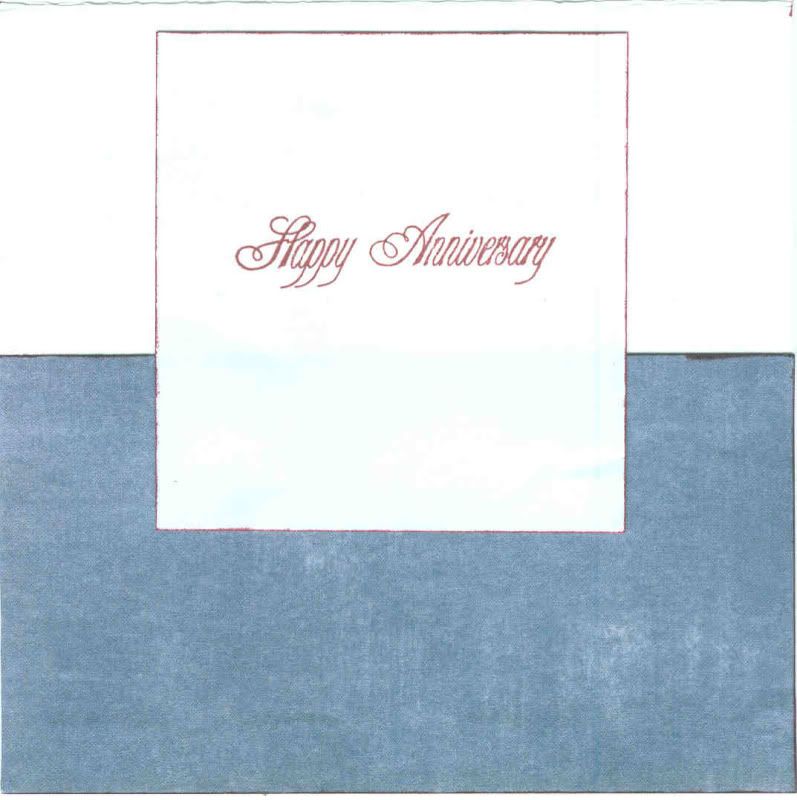
The sentiment was stamped using the Stamps Away Happy Anniversary stamp with the Majestic Blue ink. The mini flourish corner stamp, from the Fiskars Friends stamps set, was added above and below the sentiment using the same ink.

Tuesday, 20 July 2010

Red, Yellow and Blue Loves Me Tilda

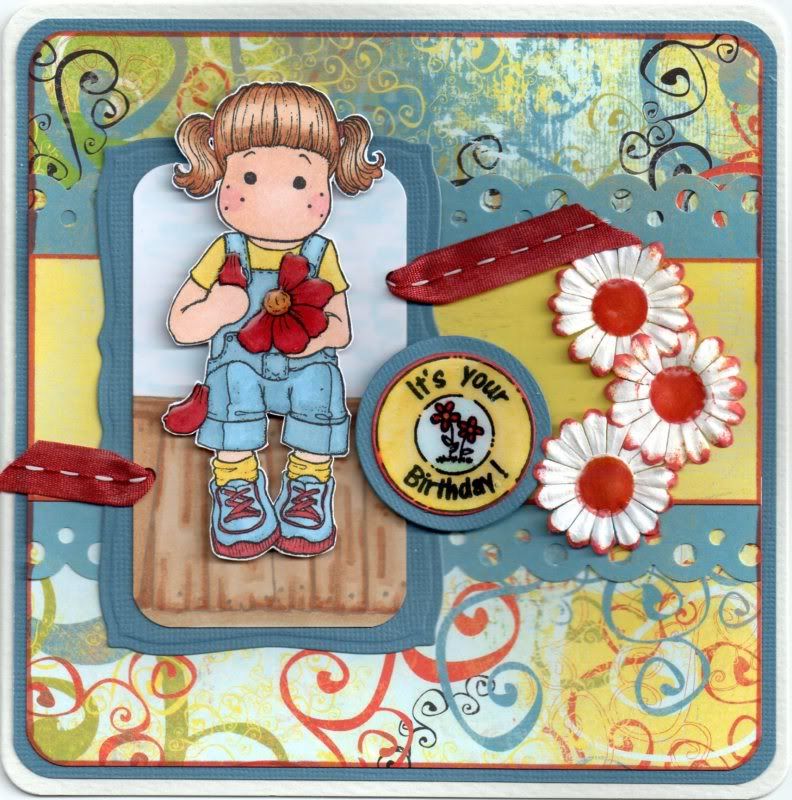
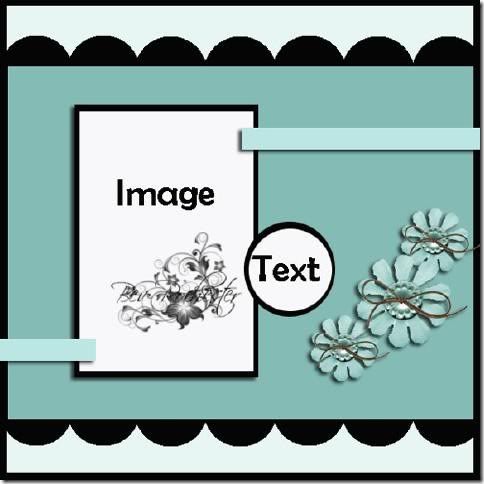
Here is my entry to this week's Just Magnolia blog challenge, which this week is a sketch challenge by Bev.


The Loves Me Tilda image was stamped using Versafine Onyx Black archival pigment ink, coloured using Copic markers and cut out.
  • Hair: E21, E35, E39
  • Skin: E00, E21, E51, R20
  • Top/Socks: Y00, Y08, E41
  • Shoes: B41, B93, E04, E07, R24, YR02
  • Dungarees: B41, B45, B93
  • Flowers: E04, E07, E41, R24, YR02, Y08
A panel was cut from white card and the Magnolia Old Wooden Stand image was stamped using Versafine Vintage Sepia archival pigment ink and coloured using Copic markers.
  • Fence: E21, E35, E39, E43
A sky was coloured also using a blue Copic marker and the blender pen. This was matted onto a panel cut from blue Core'dinations card using a Mega Curved Rectangle Nestabilities die.

The card was then constructed to match the sketch supplied by Bev for the challenge:


A strip of the Surprise paper from the Basic Grey Cupcake paper pad was matted onto a strip of the Kazoo Blue paper from the same paper pad punched using the Scallop Dot border punch from Martha Stewart. This was matted onto a panel of the Streamers paper which was in turn matted onto the blue card.

The Tilda image was matted onto the background panel and two holes were punched and red stitched organza ribbon from the Chatterbox Scarlet Ribbon pack was threaded through them.

The circle greeting sentiment from Aud Designs was stamped using the Tuxedo Black ink and coloured with the Copic markers, cut out with Nestabilities and matted onto blue card.

Three white Papermania Imaginisce paper flowers were stamped in the centres using the circle stamp from the Aud Designs circle sentiments set using ColorBox Warm Red and Burnt Sienna fluid chalk inks. The same inks were used to colour the petal tips.

The sentiment panel was added to the card front to overlap the image and the flowers to the right. Anita's 3D Gloss was added over the flower and petals in the Tilda image, over the sentiment and in the flower centres.

Friday, 12 February 2010

Pink and Brown Penny Black Hedgehog Stroll

This is the card that I made for my mate and docrafts demonstrator Becky James. I wanted to make something special for her as I won't be able to go to her demos anymore having moved 'up north'. I have loved going to her demos over the past few years, as I always learn new techniques and get great inspiration, and I have certainly put on some miles to see her, travelling to Southampton, Salisbury and Swindon. It was all worth it (although I'm not sure my chauffeur would agree!!)

It is also my entry to this week's Stamp Something blog challenge, which is Stamp Something Cute this week, and I think this card fits the bill perfectly!

I decided to make her a card using a Penny Black Hedgie image that I received from Judith B in the docrafts September '08 image swap.


The Penny Black 'Hedgehog Stroll' image was watercoloured using Whispers Brushstroke markers and highlighted with Craft Planet Iridescent Sparkle glitter glue. The corners of the image were rounded using the large XCut corner rounder punch and matted onto pink card.


A strip of the Delectable paper from the Basic Grey Sugared paper pad was punched using the Honor Multishaper punch, adhered to a strip of the pink card and highlighted with a pink Whispers Brushstroke marker and the Iridescent Sparkle glitter glue. A length of pink organza ribbon was tied around the pink panel and attached across a panel of the Luscious paper from the Sugared paper pad.


A large white Papermania Imaginisce paper flower was colour tinted with the pastel pink Whispers Brushstroke marker and highlighted with the Iridescent Sparkle glitter glue. The 'Birthday Wishes' circle sentiment, from the Hero Arts Birthday Messages stamp set, was stamped onto white card using Versafine Vintage Sepia archival pigment ink, cut out using a circle Nestabilities die and matted onto a larger circle of the pink card. A large Papermania bronze brad was used in the centre of the message and flower and attached in the top right corner of the card.


The Hedgie image was then attached over the pink panel to the left of the card, and the Luscious patterned paper panel matted onto pink card.


I also decorated the inside of the card, using squares of the Luscious paper with the corners rounded and matted over a strip of the Delectable paper. The sentiment, stamped using the Vintage Sepia ink, was one of the many free stamps I received with my order from Crafty Individuals.
Monday, 14 September 2009

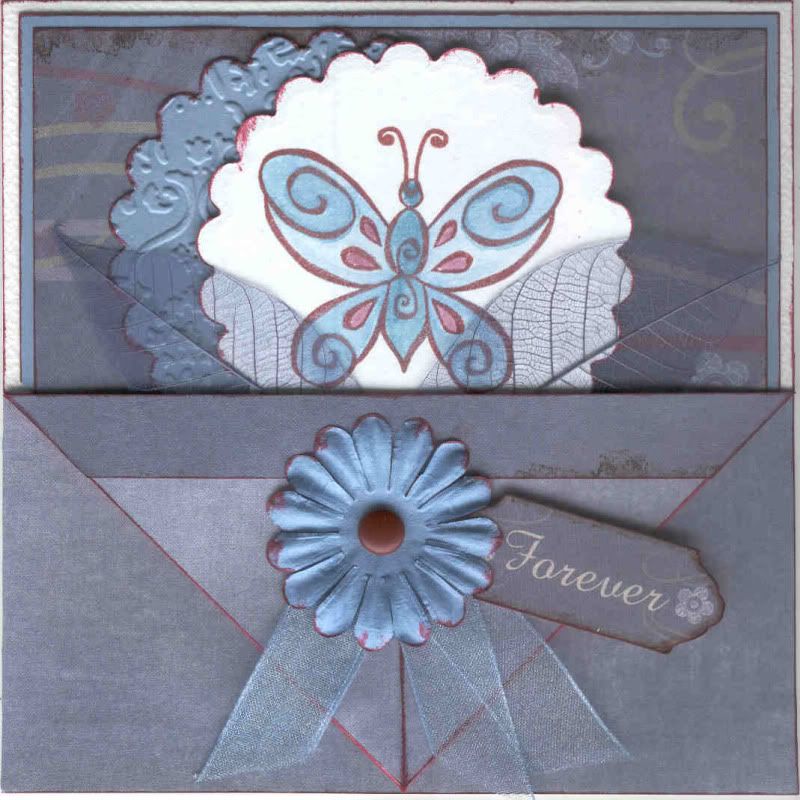
Blue Hot Off The Press Butterfly Anniversary

This card was inspired by a card I saw in Crafty Katy's docrafts gallery and on her blog.

I decided to use a butterfly stamp that I've had for a while, and inadvertantly made it in Villa colours, the team the recipients both support. (They'll come to their senses one day!!)


The corners of the card were scored and folded back. The front of the card, the inside of the card and flaps were covered with paper from the HOTP Pretty Cardmakers Creative Pack.
The butterfly image from Anita's was stamped using Versafine Crimson Red archival pigment ink, and watercoloured using the Whispers Brushstroke markers. The butterfly was cut out using a scalloped circle Nestabilities die. A second scalloped circle was cut from lavender card and then embossed using the Cuttlebug Textile embossing folder. These were attached to the front of the card and blue skeleton leaves were attached over the top.


The flaps were folded up and stuck down. A large red Papermania brad was attached through a large blue Papermania Imaginisce paper flower and attached over a length of pale blue organza ribbon.


The 'Forever' art, also from the HOTP Pretty Creative Pack, was attached under the paper flower.

I also decorated the inside of the card with co-ordinating paper from the HOTP Pretty Creative Pack and the 'Happy Anniversary' stamp from Stamps Away, using the Crimson Red ink.

Wednesday, 5 August 2009

Some Cards For The Ladies

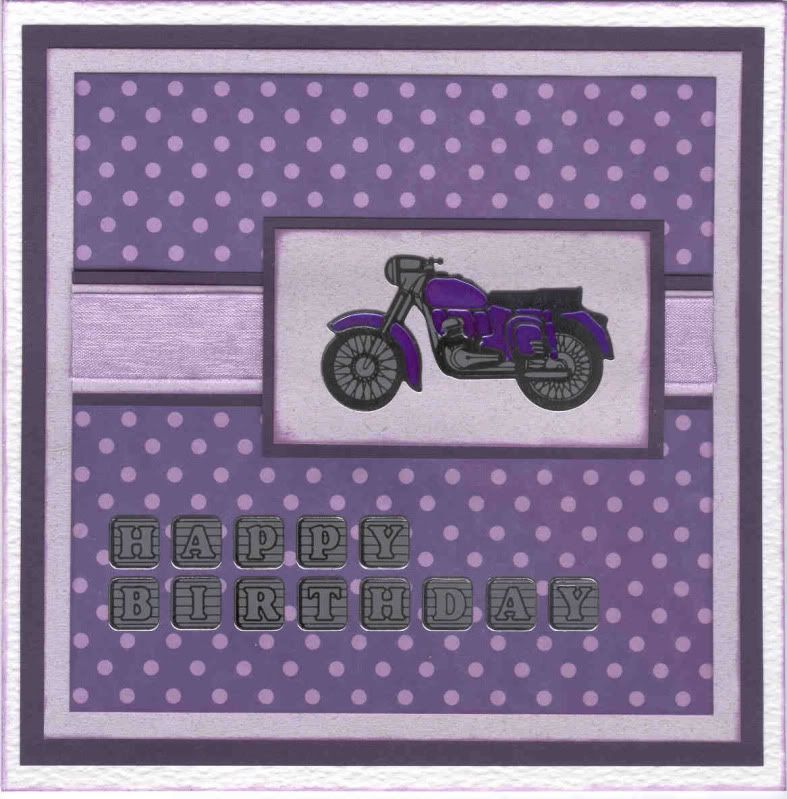
Here are a few cards I've made recently for the ladies in my life. The first was for my mum's 60th birthday. I have also made a lady's card with a difference, namely that it is a motorbike card, but purple!!

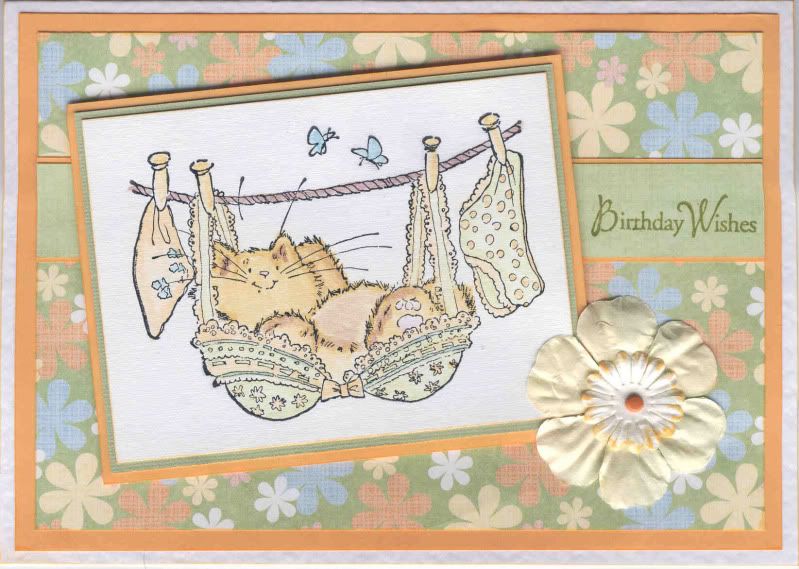
GREEN AND ORANGE PENNY BLACK UPLIFTING OCCASION


The image used on this card was very kindly donated by Judith B in the Sep '08 Docrafts Image Swap, and was watercoloured using Whispers Brushstroke markers.

STAMPS
Uplifting Occasion - Penny Black
Birthday Wishes - Hero Arts (Birthday Messages set)

PATTERNED PAPERS
Hot Off The Press Ultimate Cardmakers Creative Pack

INKS ETC
Versafine Spanish Moss archival pigment ink
Whispers Brushstroke markers

EMBELLISHMENTS
White paper flower - Papermania Imaginisce
Cream paper flower - Papermania Imaginisce
Mini orange brad

PURPLE POLKA DOT MOTORCYCLE


PATTERNED PAPERS
Papermania Spring Burst paper pad

INKS ETC
Sakura glaze gel pen
Whispers Brushstroke markers
ColorBox Wisteria fluid chalk ink

EMBELLISHMENTS
Motorcycle peel-off - Anita's
Happy Birthday peel-off - Anita's
Lilac organza ribbon

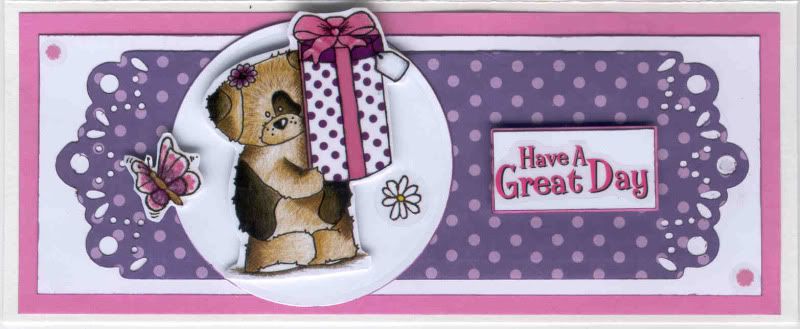
PINK AND PURPLE DAISY DECORATIVE PANEL

I used one of my recent purchases to make this card - an Impress panel die. However, it wasn't large enough to fill the panel, so I cut it into two pieces and hid the join behind the circular panel.
The Daisy image was 3D'd by concertina folding a piece of card and attaching it behind the image that was stuck onto a piece of white card and cut out.
PATTERNED PAPERSPapermania Spring Burst paper pad

INKS ETCWhispers Brushstroke markers
ColorBox Wisteria fluid chalk ink

EMBELLISHMENTSDaisy stickers - Daisy and Dandelion
Have A Great Day sticker - Papermania Birthday Sentiments sheet
DIE CUTS/PUNCHESXCut Impress Panel die
The next installment will be some of the hardest cards of all to make - cards for the men!!!

Friday, 5 June 2009

Another Amazing Gadget

WOW!!

Don't know how many of you have already come across this amazing gadget, but I think it's really innovative. It will be interesting to see how much the brads will be to buy, and if other companies will make some that will fit this gadget.
There is a video here to show you exactly what I'm talking about. It's a tool that allows you to make your own designer brads using paper, material etc to cover your brads.

There are projects using it over on the imaginisce website.

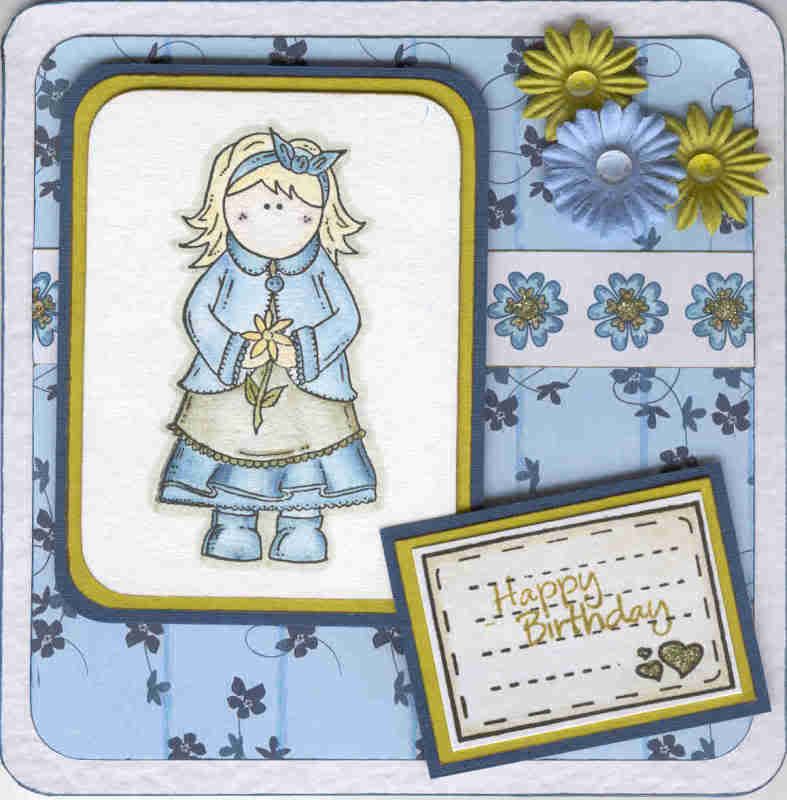
Monday, 20 April 2009

Blue, Green and Yellow Nellie with Spring Flower

Here is my entry for this week's Stamp Something blog challenge. The theme for this challenge is a colour one - blue, green and yellow.

The Nellie with Spring Flower image by Sugar Nellie was kindly donated by Alex K.
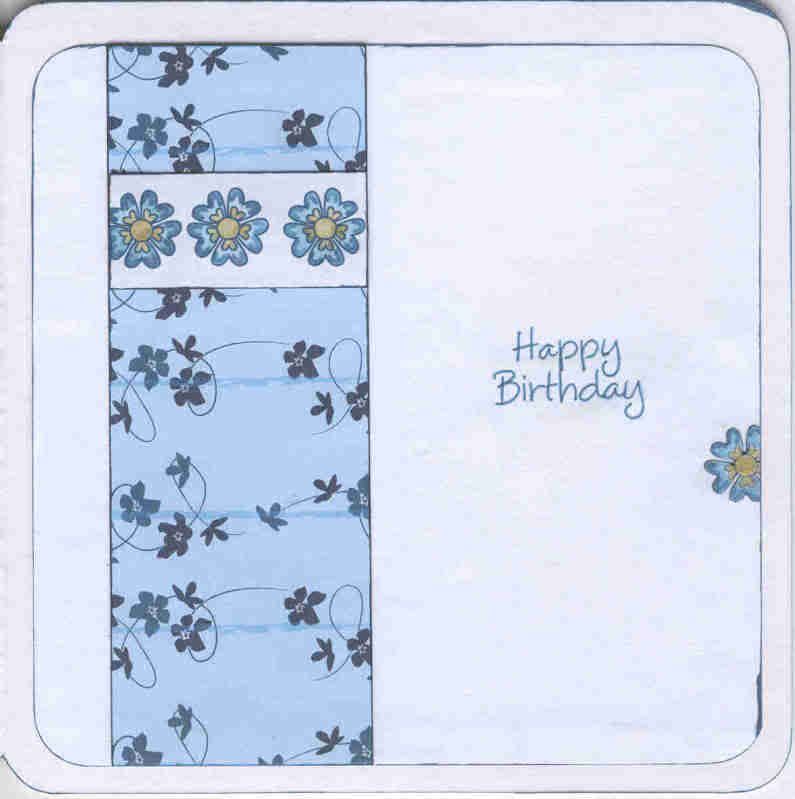
The image was watercoloured using the Whispers Brushstroke markers and the blender pen. This was matted onto green paper and blue card. The blue flower and stripe paper from the Papermania Venetian Skies Creative Tones paper pad was matted onto the card blank and a strip of the outline flower paper from the same paper pad was watercoloured and matted onto it.
The journalling panel from the Papermania Sweet Nothings stamp set was stamped using Versafine Onyx Black Archival pigment ink, and watercoloured. The hearts were then highlighted with Glitz It Pear Green glitter glue and the sentiment was stamped onto the journalling panel using Versafine Spanish Moss Archival pigment ink. This was also matted onto the green paper and blue card.

The Pear Green glitter glue was added to the coloured flowers on the paper strip as well as the flower on the image panel.

Paper flowers (green from The Crafty Cow and Faded Jeans Blue from Papermania Imaginisce), were adhered to the top corner and Patti's Pretties (glass pebbles) were added to their centres.

I also decorated the inside of the cards, using a strip of the blue flower and stripe paper and the watercoloured outline flower paper as used on the front of the card.

The sentiment was stamped using the 'Happy Birthday' stamp from the Hero Arts Birthday Messages stamp set and ColorBox Prussian Blue Fluid Chalk ink.

Blog Widget by LinkWithin