


Hubby and I are off for a few days to the Lake District to visit the family later today. I'll be packing my brolly and raincoat - well, it is August!!
I know it's unlikely, but if anyone spots I've won any challenges, can you let them know that I'm away and will contact them when I get back.
Don't know why I'm saying that - I won't win!!!
Behave yourselves whilst I'm away and I'll see you all when I return. Happy Crafting!!
Thursday, 26 August 2010
Tuesday, 24 August 2010
Purple and Lilac Bird Tags
I bought these tag stamps a while ago because I just had to have them - and I think this is only the third time I've used them!! Shame on me!!
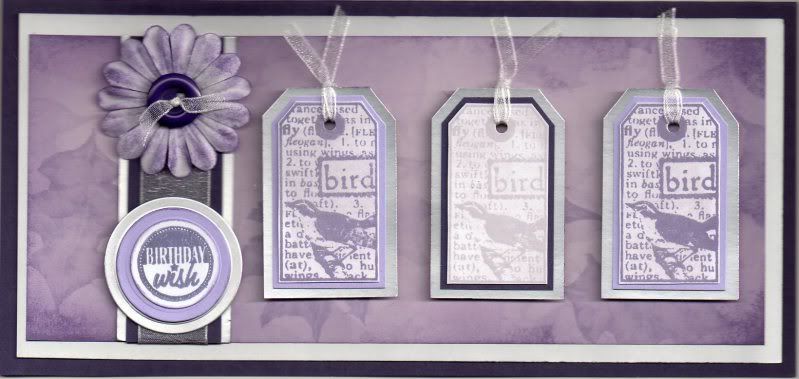
I decided to go with a monochrome look for this card and so the three bird tags from the Invoke Arts Nature Tags stamp set were stamped using Tim Holtz Dusty Concord and Milled Lavender distress inks. The tags were then matted onto lilac and purple card and then onto Craft Planet Silver Satin card. The holes were punched at the top of the tags and white organza ribbon was threaded through.
A panel of lilac patterned paper from a docrafts goody bag was matted onto the silver satin card and then the card blank. A length of wider white organza ribbon was wrapped around a strip of purple card and matted onto the Silver Satin card.
Narrow white organza ribbon was tied through a purple button and adhered to a paper flower coloured using the Dusty Concord ink.
The circle sentiment, from the HOTP Sentiments stamp set, was stamped onto white card using Versafine Imperial Purple archival pigment ink and matted onto the lilac and silver card, all die cut using the circle Nestabilities dies.
The inside of the card was also decorated using a strip of the lilac patterned paper matted onto a strip of the Silver Satin card. The sentiment was added using a stamp from the HOTP Sentiments stamp set and the Imperial Purple ink.
I am entering this card into a few challenges:
****************************************************************
ETA: This card won Top 3 at the Incy Wincy Challenge
Sunday, 22 August 2010
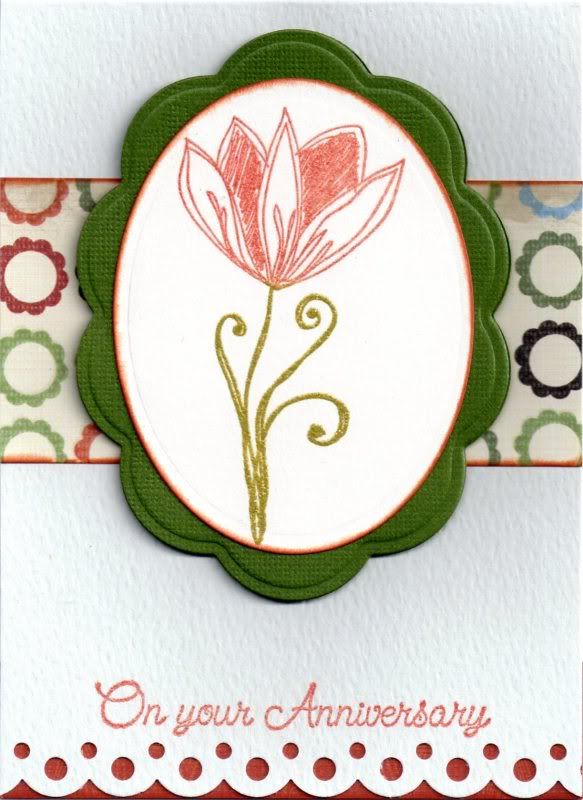
Russet and Green Hampstead Tulip Oval Anniversary
This card was actually inspired by the lovely Kerry. I popped over to her blog yesterday and loved the style of her 'clean and simple' cards. Her style is quite different from my usual cards and so I decided to take some inspiration and have a go at a CAS card.
Here is the result:
Here is the result:
The Tulip image, from the Papermania Hampstead Sketch Flower stamp set, was inked up with Papermania Olive Green pigment ink and ColorBox Terra Cotta pigment ink and stamped onto cream card. The image was then heat embossed using Heat It Up! Enchanted Gold embossing powder. You can't see it in the picture, but this gives the image a lovely sheen and a hint of glitter.
The image was then die cut using a standard oval Nestabilities die and the edges coloured with the ColorBox Burnt Sienna fluid chalk ink. This was then matted onto a big scalloped oval die cut from dark olive green Core'dinations card from the Elements card pack.
The card base was created to form a top fold tent card and the bottom edge was punched using the Martha Stewart Scallop Dot border punch. The sentiment, from Elzybells, was stamped along the border using the Terra Cotta ink and heat embossed with the Enchanted Gold embossing powder.
The edges of a strip of the scalloped circles paper from the Papermania Hampstead paper pack were coloured with the Burnt Sienna ink and adhered across the card blank and the image panel was matted over the top.
A strip of the russet geometrics paper from the same paper pack was adhered to the inside of the card to show through the punched detail.
I am entering this card into a few challenges:
Saturday, 21 August 2010
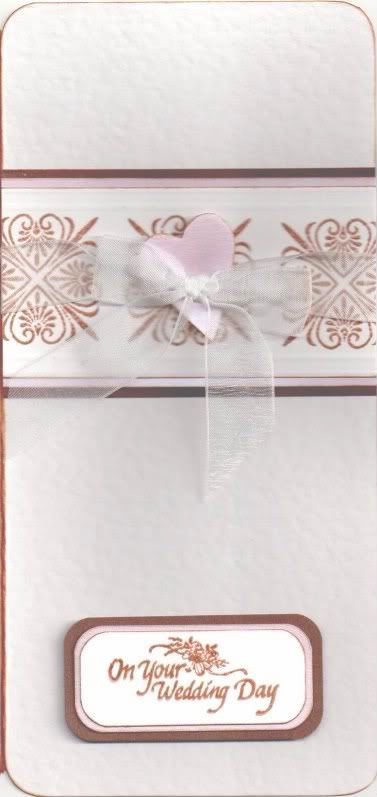
Pink and Brown Wedding Tiles and Heart
Here is the wedding card I made for our friends who got married on the same date as we did - just eleven years later!! It's a card I made that was inspired by a card I saw in a magazine. If I find out which magazine it was I'll add it here later!!
Unfortunately, the card didn't scan in brilliantly so apologies for the picture quality.
I'm entering this card into a few challenges:
- Stampin' For The Weekend - Anything Goes
- Charisma Cardz - Die Cuts
- Digi Doodle Shop Best - Anything Goes
- Crazy Challenge - All About Hearts and Love
- Sentimental Sundays - Ribbon or Lace (and sentiment)
- Andrea's Stampin' Moments - Simply White
A heart was die cut using the Sizzix Sizzlets Hearts, Stars and Tag die from pink pearl card, and a length of white organza ribbon was tied around the panel and knotted over the heart.
Using a Stamps Away stamp, the sentiment was stamped using the Vintage Sepia pigment ink and clear embossed. The corners of the panel were punched using the large XCut corner rounder punch and then matted onto the pink and brown card.
Thursday, 19 August 2010
Pink, Red and Green Tilda with Marguerites
Here is my latest offering for you all. She's a real cutie pie isn't she!!
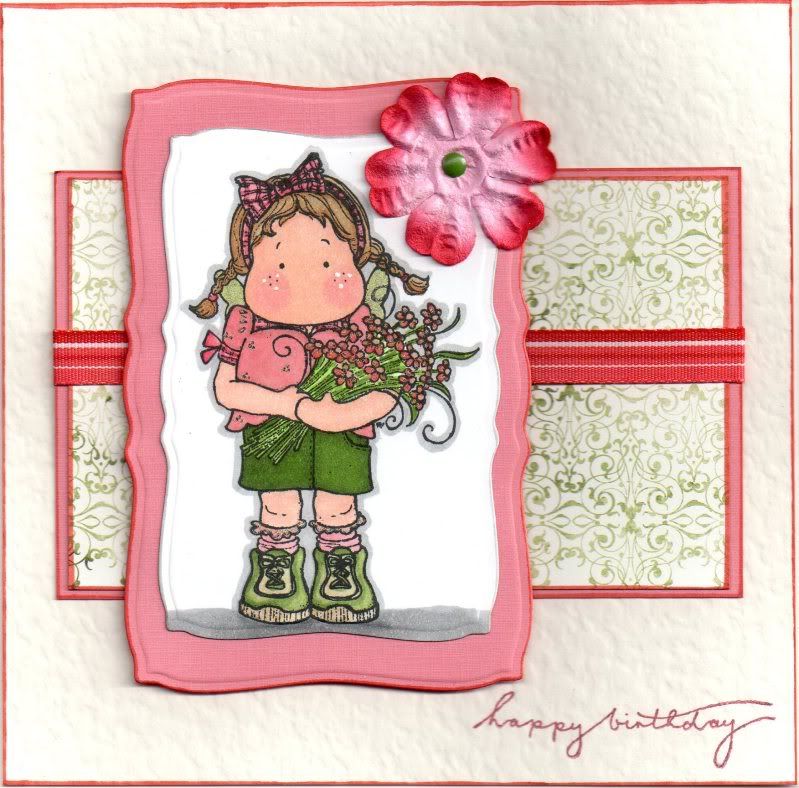
The Tilda with Marguerites image, from Magnolia, was stamped using Memento Tuxedo Black dye ink and coloured using the Copic Sketch markers:
- Hair: E35, E43, E57
- Skin: E00, E02, E21, R20
- Shirt: R20, E43
- Bow: R20, R24
- Shorts: G85, YG17, YG67
- Socks: R20, E43
- Shoes: YG11, YG17, YG67, E41, E43
- Flowers: G85, YG17, YG67, R20, R24, E43
- Wings: YG11
- Shadow: N3, N5
- Outline: N3
The image was cut out using a Mega Curved Rectangles Nestabilities die and matted onto a larger pink panel. A red and white Prima flower was attached to the corner of the panel with a small green brad.
A panel of the Chintz paper from the Basic Grey Porcelain paper pad was matted onto the pink card and a length of the striped red grosgrain ribbon from the Chatterbox Scarlet ribbon pack was adhered across the centre. The sentiment, from the Woodware Jane's Script sentiments stamp set was stamped in the bottom right hand corner using Versafine Crimson Red archival pigment ink
Tuesday, 17 August 2010
Shabby Fabric Flowers Tutorial
I flagged up this amazing tutorial for making shabby fabric flowers over on the docrafts forum the other day and it went down a treat. I thought I had better add the link here on my blog so that I will be able to find it again in the future when I am brave enought to try making one of them myself!!
I really should point out that I haven't made this tutorial, but it is the work of the very talented Roben-Marie.
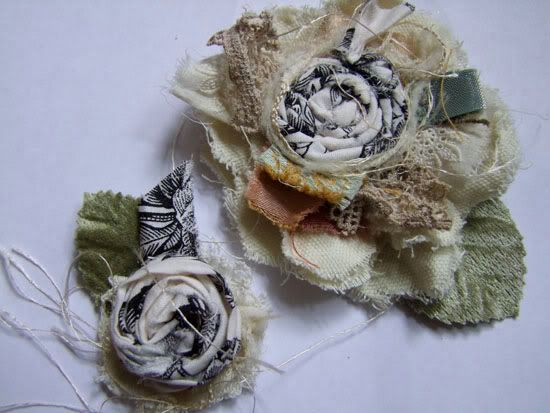
You can find the tutorial here!
I really should point out that I haven't made this tutorial, but it is the work of the very talented Roben-Marie.
You can find the tutorial here!
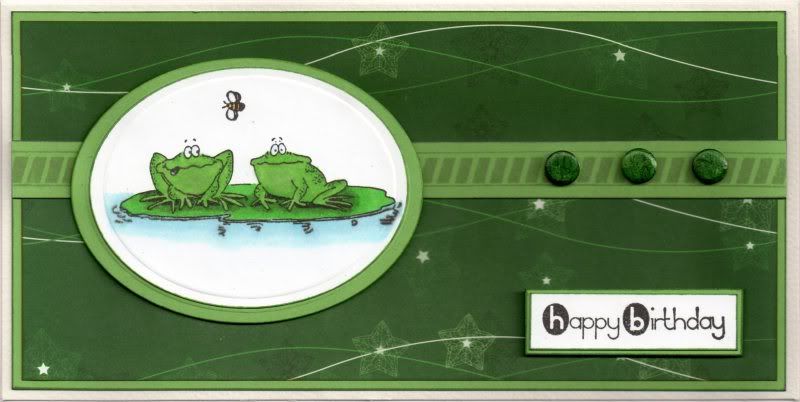
Green Lilypad Frogs
Here is the card I made for my cousin. I love this image and think I'll be getting good use out of this stamp set.
I am entering this card into a few challenges:
I am entering this card into a few challenges:
- Stamps R Us - All Male Theme
- Kenny K's Krafty Girlz Challenges - Bold and Bright
- Totally Gorjuss - Aqua
- Crafty Catz - Animals
- I Did It Creations - Anything Goes
- Penny's Paper-Crafty - Anything Goes
- Everybody Art - In The Garden
An oval was cut from white card using a Nestabilities classic oval die and the two frogs on lilypad image, from the Penny Black Toadily stamp set, was stamped centrally using Versafine Onyx Black archival pigment ink and coloured using Copic sketch markers, as was the mini bee image:
- Frogs: G05, G14, E41, BV00, B00
- Lilypad: G05, G29, YG17
- Water: B00, B41, B12
- Bee: B00, Y17
A strip of green card was stamped using the stripy border stamp from the Papermania Hampstead Icons and Sentiments stamp set using Versafine Smokey Gray archival pigment ink and matted across a panel of the filigree stars paper from the Papermania 'The Big One' Temptations paper pad.
Three green card candy, from Craftwork Cards, were coloured with a Copic marker (G29), and adhered to the right of the stamped strip.
The sentiment, from the Dovecraft Studio G Make A Wish mini stamp set, was stamped onto a scrap of white card using the Onyx Black ink and matted onto the green card.
I Made The Top 5 At The Scrapmaster's Paradise

I made Top 5 at The Scrapmaster's Paradise for their Colour Combo challenge.
Here is the card I entered into their challenge #60.
Sunday, 15 August 2010
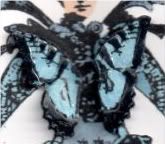
Blue and Grey Pantaloon
This is the card that I made for the very talented Katy (CraftyKaty) for her birthday. She seems to be going through it a bit at the moment and I hope this cheered her up a little. She is a tremendously talented cardmaker and I knew I had to make an extra-special card to be worthy of sending it to her!!! Please head over to her blog to see her amazing creations.
I hope no-one minds me entering it into quite so many challenges, but I'm rather proud of this one and want to show it off as much as possible!!!

The image, from Stampington & Co, is called Pantaloon, and was stamped onto white card using Memento Tuxedo Black dye ink and coloured using Copic sketch markers:
- Skin: E00, E51
- Hat/Dress: B41, B45, BV23, N1
- Tights: N1, BV23
The corner swirl image, from the Studio G Friends For Life mini stamp set, was stamped in the top right corner with Versafine Onyx Black archival pigment ink and coloured with the Copic markers:
- Swirl: B41, B45, BV23, N1
This panel was matted onto dark grey card.
A length of light blue organza ribbon was tied around the light blue panel and a square 'K' brad, from the ColorBok Alpha Accents kit was added in the bottom right hand corner. The three layers were then matted up.
Colour was added to the brad using a Copic marker (B45) to tie it in with the rest of the card.
Friday, 13 August 2010
I've Been Featured In Ikki's Cupboard!!
I've been featured over in Ikki's amazing Cuttlebug Cupboard for my use of one of the Cuttlebug border embossing folders in her regular feature of Friday Followers' Gallery.
Please head over to her amazing blog to not only see my card but also to see all the great tips, techniques and tutorials that she has on there.
If you want to see the original posts that I made with this card and one similar you can find them below:
Ikki's Featured Card
Similar Card
Please head over to her amazing blog to not only see my card but also to see all the great tips, techniques and tutorials that she has on there.
If you want to see the original posts that I made with this card and one similar you can find them below:
Ikki's Featured Card
Similar Card
Thursday, 12 August 2010
Shades of Grey Enjoy Life Tree
Here is the birthday card I made for my father-in-law earlier this month. I used a set of stamps I treated myself to at the Sincerely Yours show in Lincoln back in May.
I am also entering it into a few blog challenges:
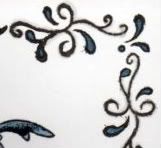
A panel was cut from white card using a standard octagon Nestabilities die and the tree image from the Penny Black Enjoy Life stamp set was stamped in the centre using the Versafine Smokey Gray archival pigment ink. With the die in place, the edges of the panel were distressed using the Tim Holtz Weathered Wood and Black Soot distress inks.
I am also entering it into a few blog challenges:
A panel was cut from white card using a standard octagon Nestabilities die and the tree image from the Penny Black Enjoy Life stamp set was stamped in the centre using the Versafine Smokey Gray archival pigment ink. With the die in place, the edges of the panel were distressed using the Tim Holtz Weathered Wood and Black Soot distress inks.
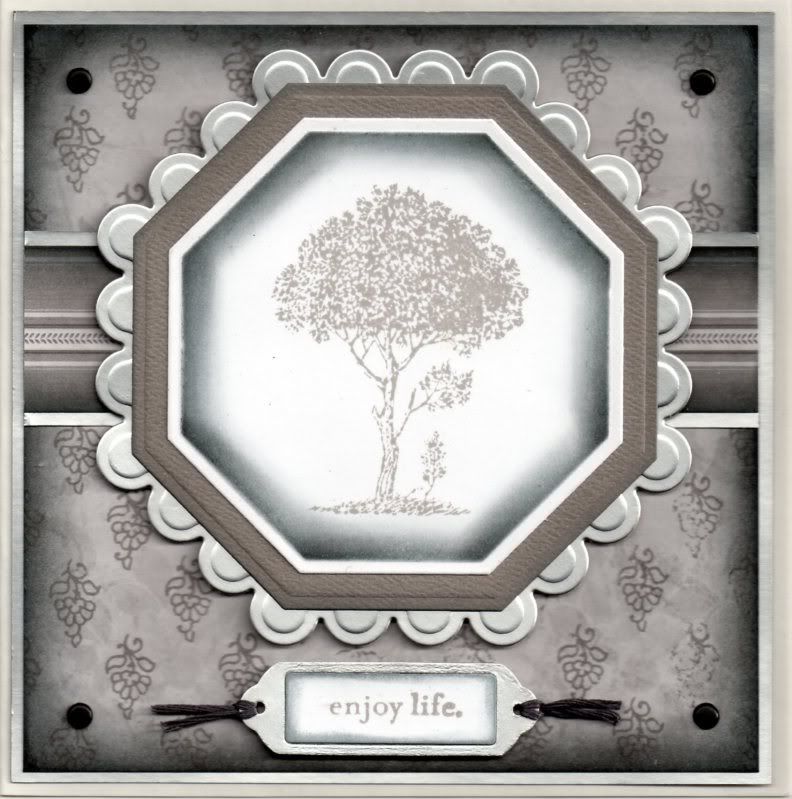
The stamped panel was matted onto a larger octagon cut from grey card and a larger scalloped octagon panel cut from Craft Planet Silver Satin card.
A panel of the grey hanging vine paper from the Papermania Monochrome Capsule Collection paper pad was distressed with the Weathered Wood and Black Soot inks. A strip of the herringbone stripe paper from the same paper pad was also distressed and matted onto a strip of the silver satin card and matted on to the larger panel and a panel of silver satin card.
Small black Papermania brads were added to the corners of the panel.
The Sizzix Sizzlets Bookplate #2 die was used to die cut silver satin and white cardstocks. The white panel was distressed with the Weathered Wood and Black Soot inks and stamped with the 'Enjoy Life' sentiment stamp from the Penny Black stamp set using the Smokey Gray ink. The bookplate was assembled and dark grey embroidery thread was threaded through the holes.
Tuesday, 10 August 2010
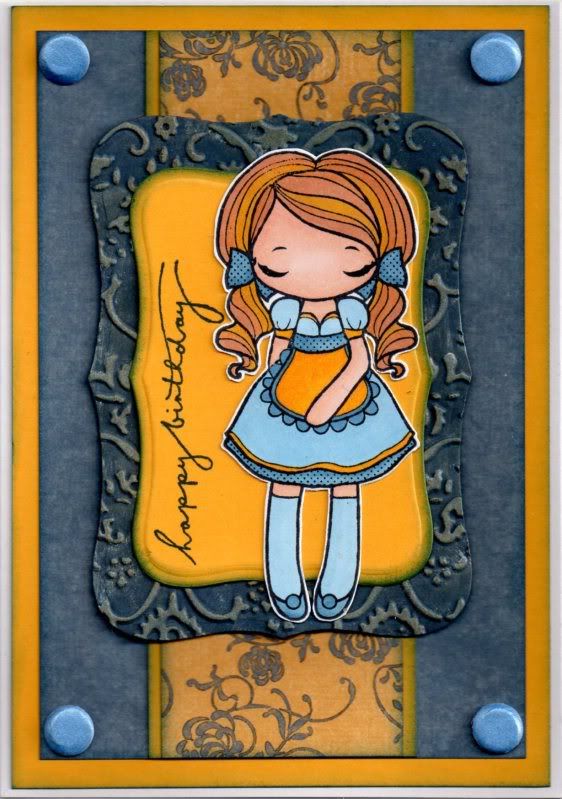
Blue and Yellow Pinafore Dressy Miss Anya
Here is one of my latest creations - I made it for a friend who I haven't seen for a while but we manage to keep in touch via the wonders of Facebook!!!
The Pinafore Dressy Miss Anya image, from The Greeting Farm, was stamped using Memento Tuxedo Black dye ink and coloured using Copic markers:
- Hair: E21, Y08, Y17
- Shoes/Bows: B41, B45
- Dress: B41, B45, Y17
- Socks: B41
- Skin: E00, E02, E21
Mats for the image were cut using the Nestabilities Labels 8 dies. The larger blue panel was embossed using the Cuttlebug Textile embossing folder. Brilliance Moonlight White pigment ink was then rubbed over the embossed detail to highlight it and ColorBox Amber Clay Fluid Chalk was added over the top.
The coloured image was attached onto the yellow panel and then the blue.
The sentiment, from the Woodware Jane's Script Sentiments stamp set, was stamped up along the edge of the yellow panel using the Versafine Majestic Blue archival pigment ink.
A strip of the yellow and blue flourish paper from the HOTP Earth's Palette Creative Cardmaker's Pack was matted onto a strip of the yellow card. This was in turn matted onto a panel of the dark blue mottle paper from the same paper pack and a larger panel of the yellow card.
Light blue card candy from Craftwork Cards were added in the corners of the blue panel.
*****************************************************************
ETA: This card was awarded Top 5 by The Scrapmaster's Paradise Colour Combo Blog Challenge
*****************************************************************
Saturday, 7 August 2010
I Won A Blog Challenge!!!
I have just found out that I have won a blog challenge.

It was the One Stop Craft Challenge, and the theme was Patterns, and this card was randomly picked to win:
It was the One Stop Craft Challenge, and the theme was Patterns, and this card was randomly picked to win:
You can see my original post here.
Not sure what my prize is yet, still waiting to hear - will update later to let you know!!!
ETA: I have now discovered that I have won 3 digi sets/images from Wink Wink Ink to the value of $15 - off to make my choices!!!
Friday, 6 August 2010
Green and Grey Captain Edwin
Here is the card I made for a young man who has reached the grand age of 16. Oh to be 16 again......or maybe not!!!
I used the lovely Captain Edwin stamp that I treated myself to at the Lincoln Sincerely Yours show.
Anyway, I've entered this card into a couple of blog challenges this week:
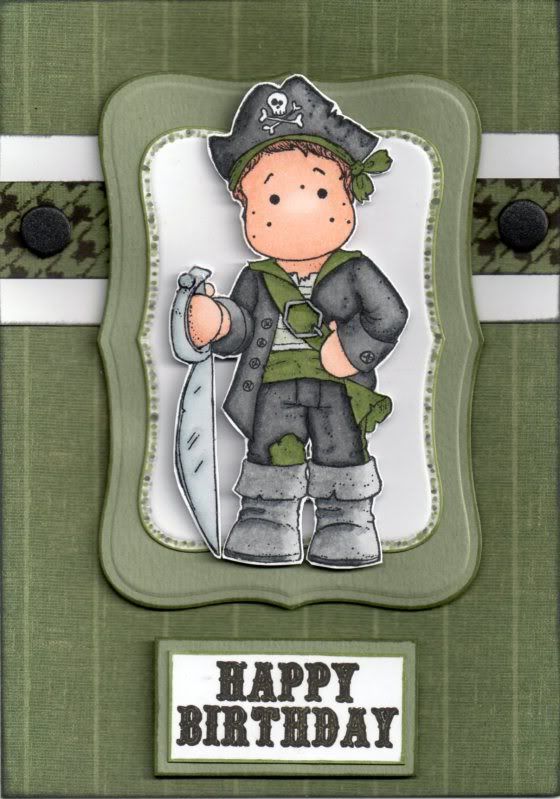
The Captain Edwin image, from Magnolia, was stamped using the Memento Tuxedo Black dye ink, coloured using the Copic markers and cut out:
- Hat: N1, N3, N5, N7
- Bandana/Sash/Collar/Patch: G85, G00, C0
- Jacket/Trousers: N1, N3, N5, N7
- T-Shirt: G85, G00, C0
- Skin: E00, E02, E21
- Sword: C0, C2, C4
- Boots: N1, N3, N5
Two mats were cut from white and sage green card using the Labels 8 Nestabilities dies and the image was attached in the centre.
A strip of the green and black stripe and herringbone paper from the HOTP Heritage paper pad was matted onto a strip of white card. This was matted across a larger panel of the same paper and used to cover the card blank.
The sentiment, from the Papermania Hampstead Icons and Sentiments stamp set, was stamped onto a rectangle of white card using the Versafine Onyx Black archival pigment ink. This was coloured with a green Copic marker and matted onto the sage green card.
The image panel was attached over the paper strip and the sentiment attached below it.
The sword and buckle on the image were then highlighted with Anita's 3D gloss, and black card candy, from Craftwork Cards, were added to the herringbone strip.
Wednesday, 4 August 2010
Lilac Up, Up and Away Gorjuss Girl
This is my entry to this week's Simon Says blog challenge, which has a theme of 'Sing It Baby'.
Now, apparently, Nancy Sinatra sang 'Up, Up & Away' so this seems perfect!!
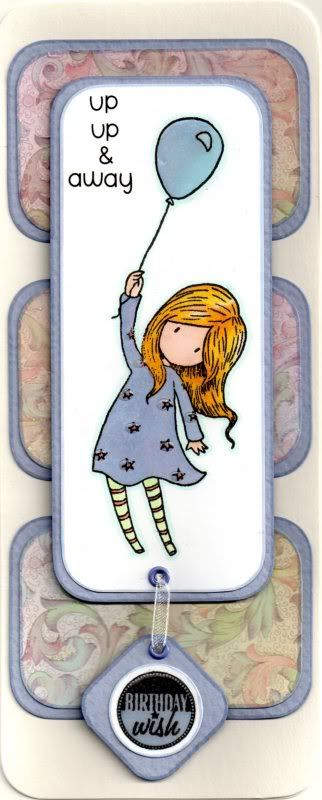
The Up, Up and Away Gorjuss Girl image, from Sugar Nellie, was stamped (at Julie's) using Versafine Onyx Black archival pigment ink and coloured using Copic Sketch markers:
- Hair: Y08, Y17, YR02, E41
- Skin: E00, E21, E51, R20
- Balloon: B41, BV00
- Dress: B41, BV00, R20, YR02
- Socks: YG11, R20, YR02
- Outline: BG11
Three panels were cut form the lilac, pink and green botanical flourish paper from the DCWV Once Upon A Time mat stack and matted onto the lilac card.
The 'Birthday Wish' circle sentiment was stamped onto white card using the Onyx Black ink and coloured using the Copic markers
- Circle Sentiment: BV00, B41
The image panel was matted over the three panels and Anita's 3D Gloss was added over the balloon, dress stars and circle sentiment.
Colouring "Black" Tutorial
I've found another great blog and this one has a great tutorial on colouring "black" with Copics that you can find here.
The blog is the Copic Oz blog and has tutorials and challenges.
Here is the picture that has been coloured in this tutorial:

The blog is the Copic Oz blog and has tutorials and challenges.
Here is the picture that has been coloured in this tutorial:
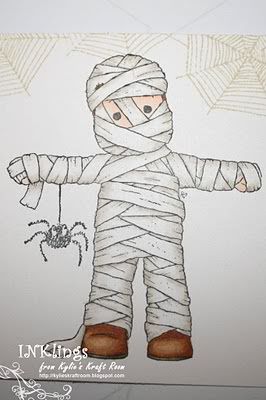
Colouring "White" Copic Tutorial
I've just discovered a new-to-me blog from a lovely lady called Kylie from down-under.
Her cards are lovely and she has a great tutorial for colouring in things that are white using the Copic markers.
You can find the tutorial here.
Here's one of the images she has coloured:

Her cards are lovely and she has a great tutorial for colouring in things that are white using the Copic markers.
You can find the tutorial here.
Here's one of the images she has coloured:
Here's another example of her work:
Tuesday, 3 August 2010
Lilac, Blue and Green Tilda with Ruffled Skirt
The Tilda with Ruffled Skirt image, one of my all-time favourite Tilda images, was kindly donated by Tara Welch in an image swap we did some time ago. I think the dress looks like a perfect party dress!
I made the card for my young cousin and am entering it into a few blog challenges:
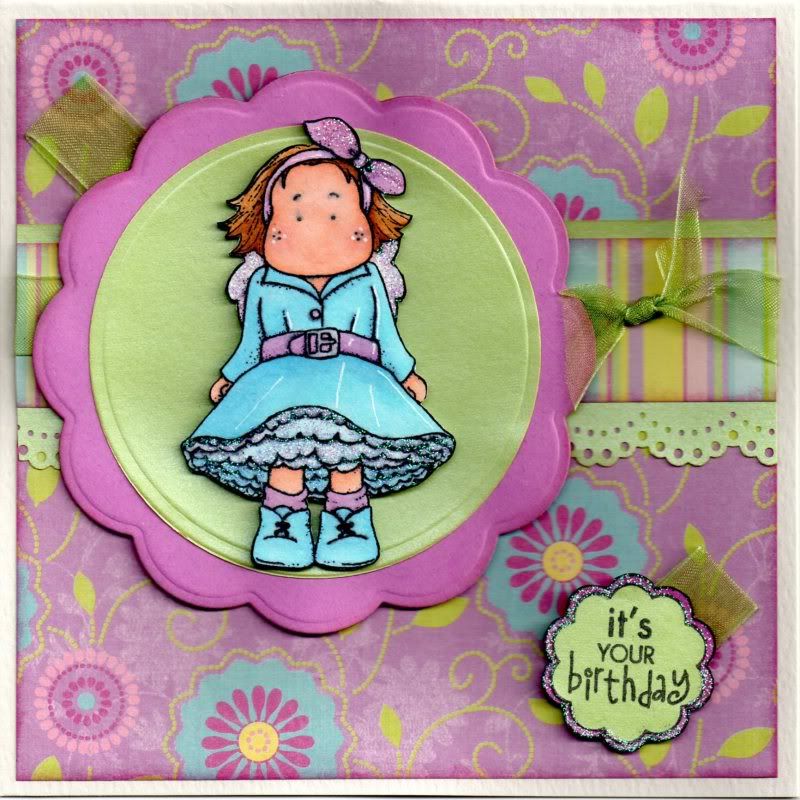
- Hair: E21, E35, E57
- Skin: E00, E02, E21, R20
- Bow/Belt/Socks: RV21, V12, BV31
- Wings: RV21, BV31, C0
- Dress/Shoes: B00, B12, B41
A strip of the multi-stripe paper from the K&Co Sparkly Sweet paper pad was matted onto a strip of Anita's Lime Green pearlescent paper that was punched along the lower edge using the Martha Stewart Doily Lace border punch. A length of Dovecraft Spring Green organza ribbon was tied around the panel and then adhered across a larger panel of the lilac floral swirl paper from the same paper pad.
A circle of the green pearlescent paper was cut and embossed using a Nestabilities die, and matted onto a Big Scalloped Circle cut from lilac card, also cut and embossed using a Nestabilities die. A loop of the green ribbon was added to the reverse of the panel and the image panel was attached over the ribbon panel.

The Tilda image and the sentiment panel were then highlighted with Glitz It Lilac glitter glue.
Sunday, 1 August 2010
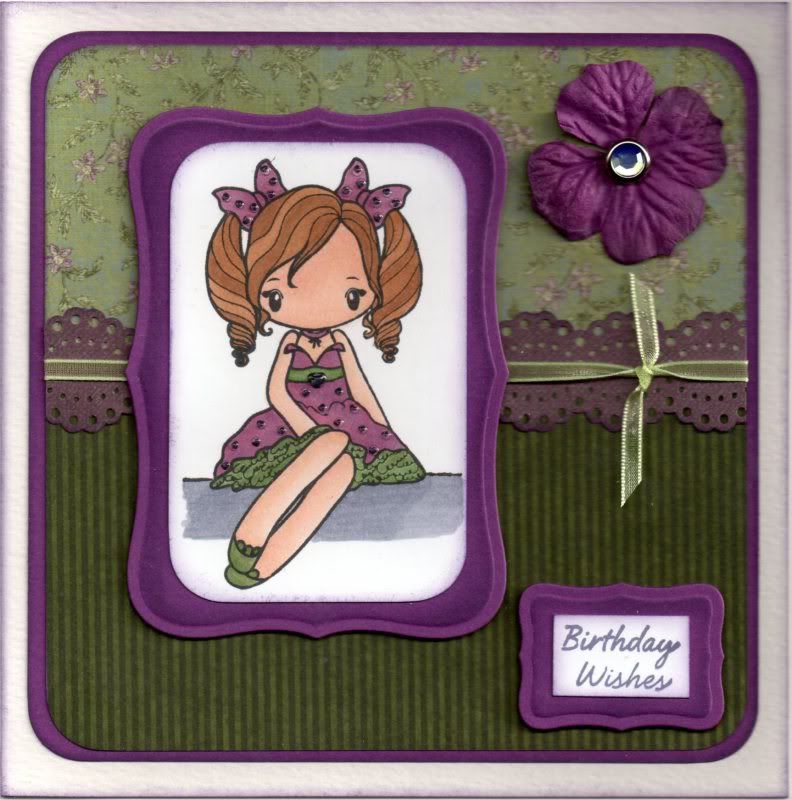
Green and Purple Sitting Love Miss Anya
Here is the card I made for my mum earlier last month. I really love this set of Miss Anya stamps, and this particular one is lovely to colour.
I am also entering this card into a couple of blog challenges:
The Sitting Love Miss Anya image from The Greeting Farm was stamped using Memento Tuxedo Black dye ink and coloured using Copic sketch markers:
- Hair: E21, E35, E57
- Skin: E00, E02, E21
- Bows: RV21, RV34, V12, V15
- Dress: G85, YG67, RV21, RV34, V12, V15
- Shoes: G85, YG67
- Shadow: BV00, BV23
The green patterned papers from the HOTP Earth's Palette Creative Cardmaker's Pack were pieced together to make a rectangular panel. A strip of the purple paper from the same paper pack was punched along both edges with the Martha Stewart Doily Lace punch. A length of narrow green organza ribbon was knotted and attached across the punched purple strip which was then attached across the join of the two green papers.
This was then matted onto a panel of the purple card.
The rectangular sentiment panel was stamped using the 'Birthday Wishes' stamp from the See D's Celebration Messages stamp set and the Versafine Imperial Purple archival pigment ink. The smallest Labels 8 shape was die cut from purple card, coloured with the Dusty Concord ink and the sentiment panel matted in the centre.
A purple Prima flower was added to the panel using a pale green Papermania gem brad before it was added to the card blank.
Anita's 3D Gloss was then added over the hearts on the dress and hair bows of the Miss Anya image.
Subscribe to:
Posts (Atom)


