Pages

WELCOME

This blog was created to act as a record of the cards and other projects that I have made. It is for both my own reference and to help inspire anyone who wants to take a look.

I'd love it if you'd leave me a comment so that I know what you think of my projects and that you've been to visit!

Anyone can comment, even those who don't have a blog. (Just look for the word 'Comments' under the three little pictures at the end of each post). Readers without a blog can add an anonymous comment, but please leave your name (and docrafts username if applicable) so I know who you are!

Slideshows of all the cards I've uploaded to my blog can be found at the bottom of the page.


PEOPLE WHO FOLLOW MY BLOG

Saturday 12 June 2010

Pink and Lilac Candyfloss First Birthday

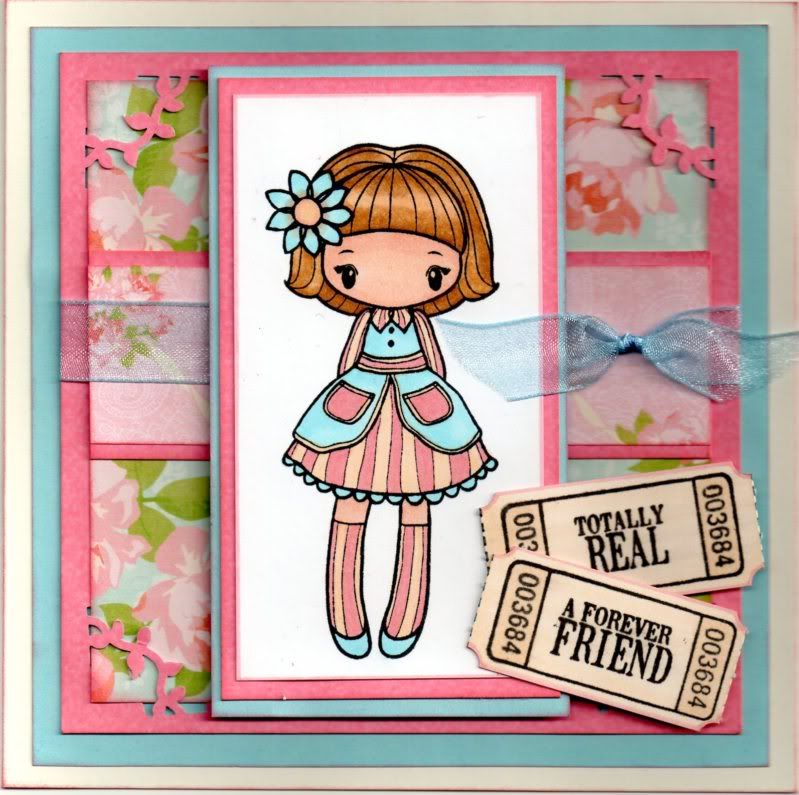
This is the card I made for my cousin's little baby girl for her first birthday.

It is also my entry to this week's following blog challenges:

I figured a one-year old still counts as a baby, so here's my card:


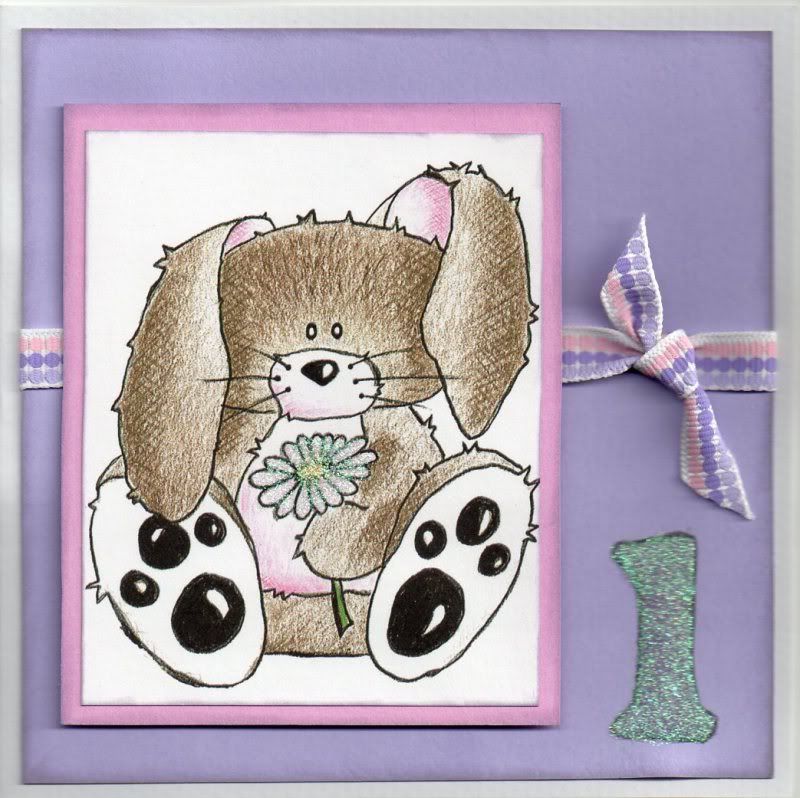
To begin with, the Candyfloss image was cut into a rectangular panel from the paper from the Daisy and Dandelion Picnic Patch paper pad and matted onto pink card.

A length of pink and lilac spotty ribbon from Hobbycraft was tied around a panel of lilac card and matted onto the card blank.

The '1' stamp from the Papermania Large Sheet Numbers foam stamp set was stamped onto the lilac card using ColorBox Wisteria Fluid Chalk ink, traced around with a purple colouring pencil and then coloured over the top with Craft Planet Iridescent Sparkle glitter glue.


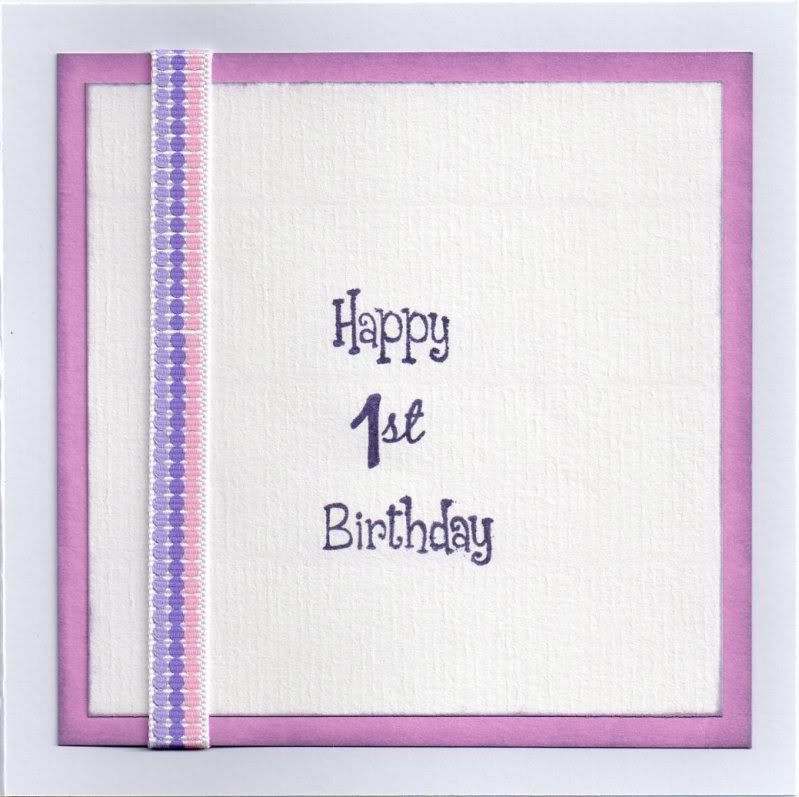
The inside of the card was simply decorated with a length of the spotty ribbon and a mixture of stamps from the Papermania Claire Curd Sentiments stamp set and the See D's Script Lower Case Letters and Numbers stamp set using the Wisteria ink

Friday 11 June 2010

Brown and Grey Mercedes Racing Car Chequers

Here is my latest masculine offering. I bought this car stamp at the Make It show in Farnborough - I was especially looking for stamps I can use on men's cards and thought this one could be used for all ages.

I am entering  this card into a couple of blog challenges this week:


So, to begin with, the Racing Car image, from Stamps Away, was stamped using Versafine Vintage Sepia archival pigment ink and coloured using the Copic sketch markers.
  • Car: E43, E51, E57, C0, C2
  • Clothing: C0, C2
  • Skin: E51
  • Shadow: C0, C2
The image was then matted onto two cardstocks of two different shades of brown.

The base card was stamped using the Chequers stamp from the Creative Imaginations foam stamp set and the Vintage Sepia ink to represent the chequered flag (quite imaginative for me I thought - and quite impressive that I remembered I had that stamp hidden away somewhere).

The Chequers stamp was also stamped across a piece of the distressed brown paper from the DCWV The Old World paper stack and matted onto the darker brown card.

The bookplate was cut using the Sizzix Sizzlit Bookplates #2 die and the two brown cardstocks. The sentiment was stamped using a sentiment from the Making Memories Express It stamp set and the Vintage Sepia ink.

Wednesday 9 June 2010

Blue and Green Miss Anya Dressy Hat

Here is my latest creation, and also my entry into a number of this week's blog challenges:

To begin with, the Miss Anya image by The Greeting Farm, one of my recent purchases from the lovely Sam_from_Lancs over on the docrafts site, was stamped using Memento Tuxedo Black dye ink and coloured using Copic sketch markers.
  • Hat/Dress: B00, B21, B24, G12, G14, YG07, Y00
  • Hair: E21, E35, E57
  • Shoes: B00, B21, B24
  • Skin: E00, E02, E21
  • Seat: E21, E35, E57
The image was cut out using a Labels 8 Nestabilities die and matted onto a larger shape cut from Kingfisher Blue Alchemy Pearl card. A pale green paper flower, from The Crafty Cow, was attached to the top corner of the label panel using a large light blue Papermania gem brad.

A strip of the Elation paper from the Basic Grey Euphoria paper pad was matted onto a panel of the blue pearl card, punched along the lower edge with the Martha Stewart Doily Lace border punch. This was then matted across a panel of the Eden paper from the same paper pad.

A decorative frame stamp from the Hero Arts Frames and Messages stamp set was stamped onto white card using a bright blue Ink It Up! pigment ink pad, and a sentiment from the Hero Arts Birthday Messages stamp set was stamped in the centre using the same ink pad and the whole panel clear embossed. The shape was cut out and the swirl and frame areas of the image coloured using a couple of Copic markers:
  • Sentiment panel: YG07, G12
The sentiment panel was then adhered to the card overlapping the bottom corner of the label panel.

Saturday 5 June 2010

Celtic Knot Father's Day

Here are the cards I made this year as the two Father's Day cards for my dad and my father-in-law.

As always, I made two similar but different cards. They both use the same papers but different Celtic knot stamps to distinguish themselves from one another.

I am entering these cards into the following challenges this week:


The square Celtic knot image, from a boxed set of Celtic stamps I bought a few years back at a gift shop in Avebury by the stone circles, was stamped onto olive green card using Versacolor Black pigment ink and heat embossed with Heat It Up! copper embossing powder. The images were then cut out using standard square Nesties and matted onto larger squares of russet coloured paper.

A panel of the green mesh paper from the Papermania Hampstead paper pack was matted onto the russet paper and large copper eyelets were set in the corners. A strip of the russet geometric paper, also from the Hampstead paper pack, was punched using the Fiskars Rope border punch along both edges and matted onto the green panel.

Double lengths of green hemp cord were threaded through the eyelets and the stamped images were adhered centrally to the panel.

The sentiment was stamped using the 'Happy Father's Day' stamp by Personal Impressions from the Craft Stamper magazine and the black pigment ink and copper heat embossed. The individual words were cut from the image and matted onto the green card and russet paper. Holes were punched either end of each word panel and the green hemp cord threaded through. Each word was adhered to the front of the card below the Celtic knot panels.


The second card was constructed in exactly the same way but a circular dragon Celtic knot stamp was used for the focal images.

Thursday 3 June 2010

Anniversary Starburst Trees

Here is my entry for this week's Daring Cardmaker's blog challenge, which this week is 'Anniversary Waltz'.

I decided to use one of my purchases from the Farnborough Make-It show - the Kanban Garden Vistas Spring Silhouette stamp set, and the card I made was based on a card that was on display at the Make-It show. I wanted to make a clean and simple card, and I think I achieved it.


Firstly, the large tree image from the stamp set was stamped onto white card using Brilliance Pearlescent Purple pigment ink. The corners were then rounded using the large XCut corner rounder punch.

Two slits were cut either side of the tree trunk to the width of the chosen ribbon and the purple grosgrain ribbon from Dovecraft was threaded through. A small length of the ribbon was knotted to the left of the stamped image.

The sentiment, also from the Kanban stamp set, was stamped below the ribbon in the Pearlescent Purple ink.

The image panel was then matted onto lilac card. A panel of the lilac glitter dot paper from the Papermania Henbury Lane paper pack was matted onto the lilac card and attached to the card blank. The image panel was added on top and clear faux gems were adhered to the tree image and the ribbon.

I also made a version in blue and pink.

The blue version was stamped using Brilliance Pearlescent Sky Blue pigment ink, Dovecraft blue metallic woven ribbon and light blue faux gems,


and the pink version was stamped using Brilliance Pearlescent Orchid pigment ink, Anita's pink organza ribbon and pink faux gems.

Wednesday 2 June 2010

Blue, Pink and Cream Flowery Dressy Miss Anya

Here is my entry to this week's Pink Elephant blog challenge, which has Bright Colours as its theme.


I recently bought two sets of the Miss Anya stamps (Dressy and Love) from someone having a bit of a crafty clear-out so I decided I'd use one of them for this card. I've been after these stamps since they were released but couldn't really justify the cost, so thank you to Sam for having a clear-out and allowing me to get them!!!


The Flowery Dressy Miss Anya image was stamped using Memento Tuxedo Black dye ink and coloured using Copic sketch markers:


  • Hair: E51, E35, E57

  • Skin: E00, E02, E21

  • Dress/Pinafore: B00, E51, R20, RV21

  • Socks: E51, R20, RV21

  • Shoes: B00

  • Flower: B00, R20, E51
The image was then matted onto pink and blue card.

A strip of the pink mini roses and ribbons paper from the Papermania Blueberry Hill paper pack was matted onto the pink card and across the centre of a panel of the blue and pink bold roses paper from the same paper pack.

The corners of a square of the pink card were punched using the XCut Vine Silhouette corner punch and the square panel of patterned paper was slotted behind the punched corners.

A length of blue organza ribbon was tied around the panel and the Miss Anya panel was attached in the centre.

Two ticket images from the Autumn Leaves Ticketed stamp set were stamped out onto the white card using Versafine Onyx Black archival pigment ink and turned into tickets using the Aud Designs Ticket tutorial. The tickets were coloured using the Copic sketch markers:
  • Tickets: E51, R20, RV21
and cut apart using a perforating cutter, ripped apart and attached at the corner of the image panel.

Tuesday 1 June 2010

Cute Blog Candy From Charmed Cards and Craft - CLOSED

Karen from Charmed Cards and Craft has some more blog candy available - this time there's a stamp of a little cutie called Annie up for grabs.

To be in with a chance of winning this little cutie, just mention the blog candy on your blog and leave a link to your blog with Mr Linky here.

The blog candy will run until June 6th 2010.
Blog Widget by LinkWithin