Pages

WELCOME

This blog was created to act as a record of the cards and other projects that I have made. It is for both my own reference and to help inspire anyone who wants to take a look.

I'd love it if you'd leave me a comment so that I know what you think of my projects and that you've been to visit!

Anyone can comment, even those who don't have a blog. (Just look for the word 'Comments' under the three little pictures at the end of each post). Readers without a blog can add an anonymous comment, but please leave your name (and docrafts username if applicable) so I know who you are!

Slideshows of all the cards I've uploaded to my blog can be found at the bottom of the page.


PEOPLE WHO FOLLOW MY BLOG

Showing posts with label Craftwork Cards. Show all posts

Thursday, 7 July 2016

30-Day Colouring Challenge - Day #3

Here is my entry for Day #3 of the 30-Day Colouring Challenge
I was out all day yesterday so didn't get a chance to do any colouring, but I did today. Yippee!


The image I coloured was from a stamp set that I bought at the Newbury Show on Saturday. I think it was a set of stamps that came free in Creative Stamping magazine but not sure.

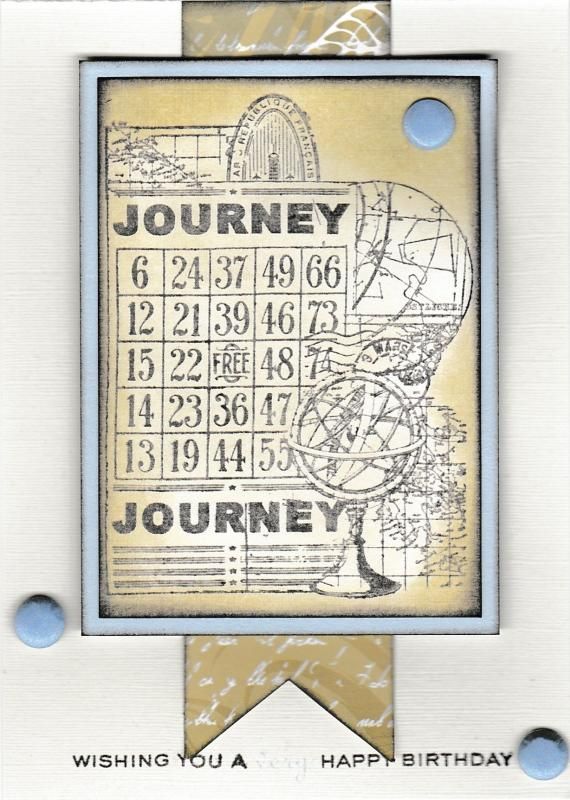
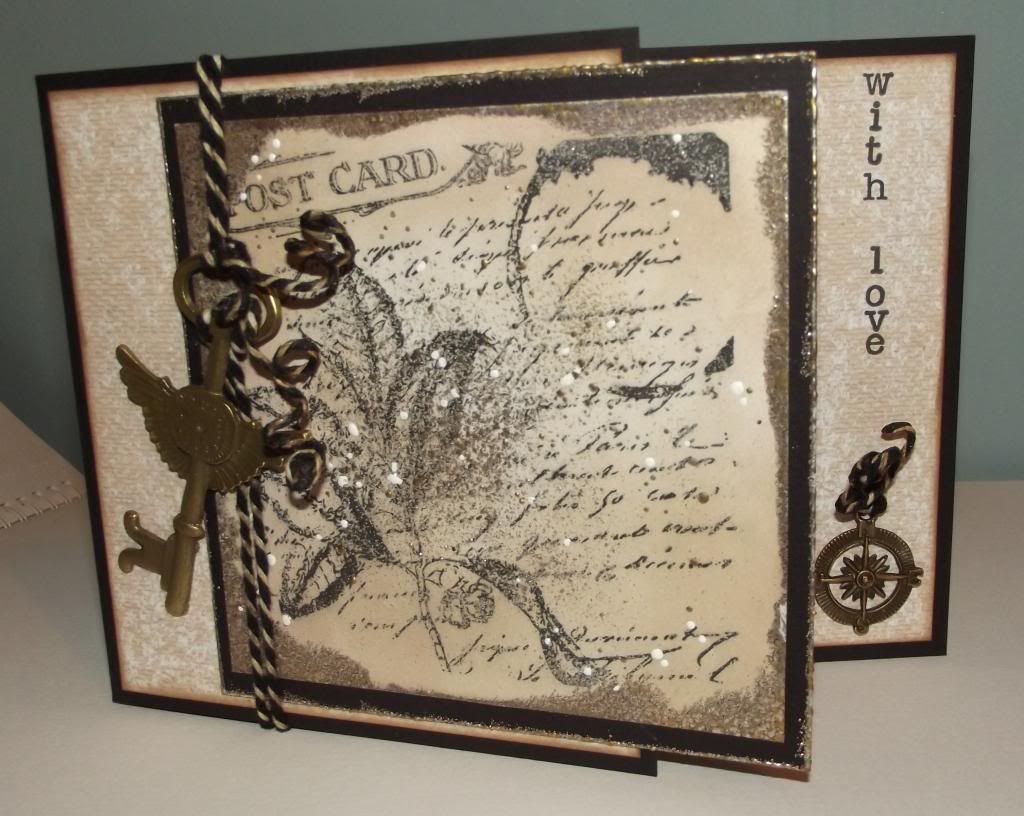
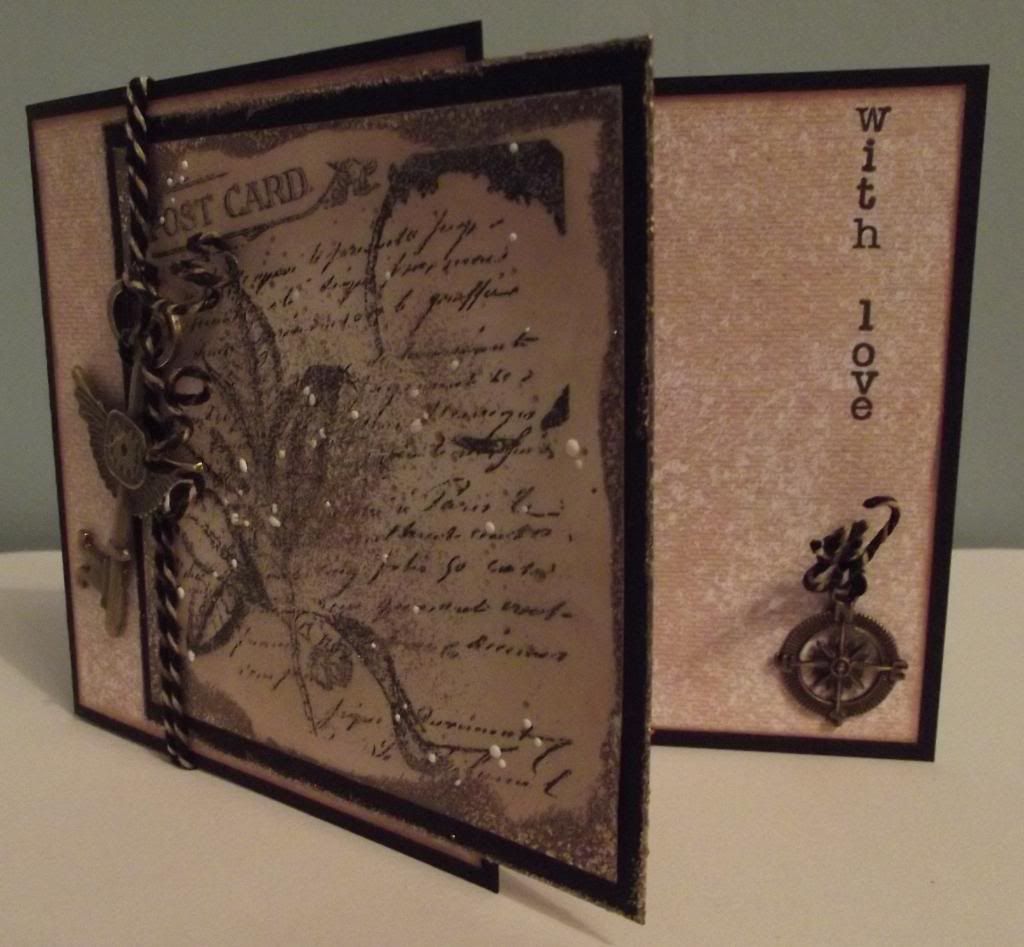
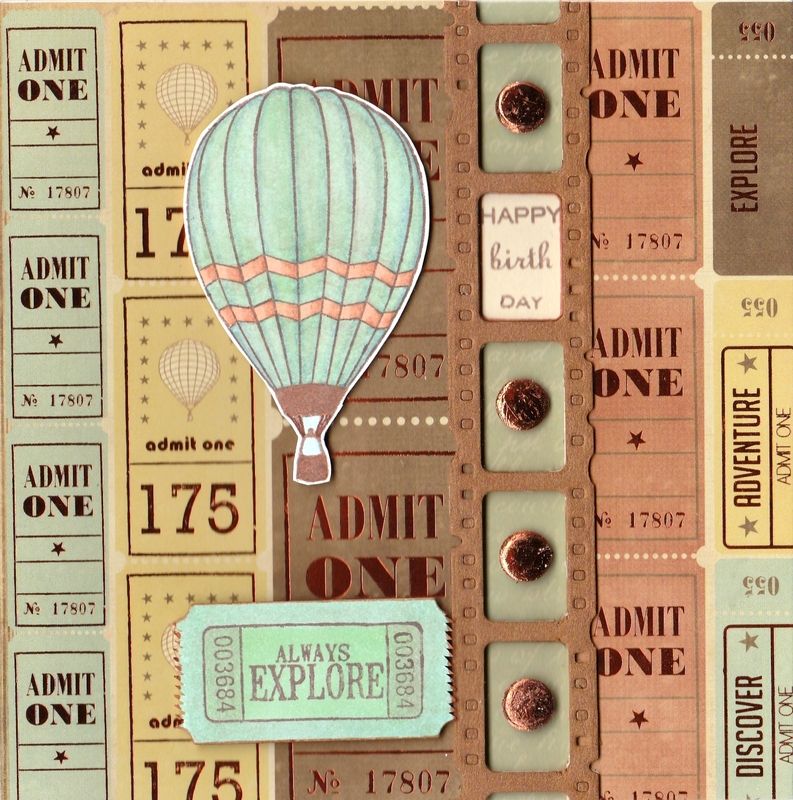
Anyway, I began by creating a 'bridge' card. I covered the card front with a beautiful piece of foiled cardstock from the Kaisercraft Up Up and Away paper pad. Then I chopped the right had side of the card front off and a section to the right of that panel the width of the gap I wished to create.

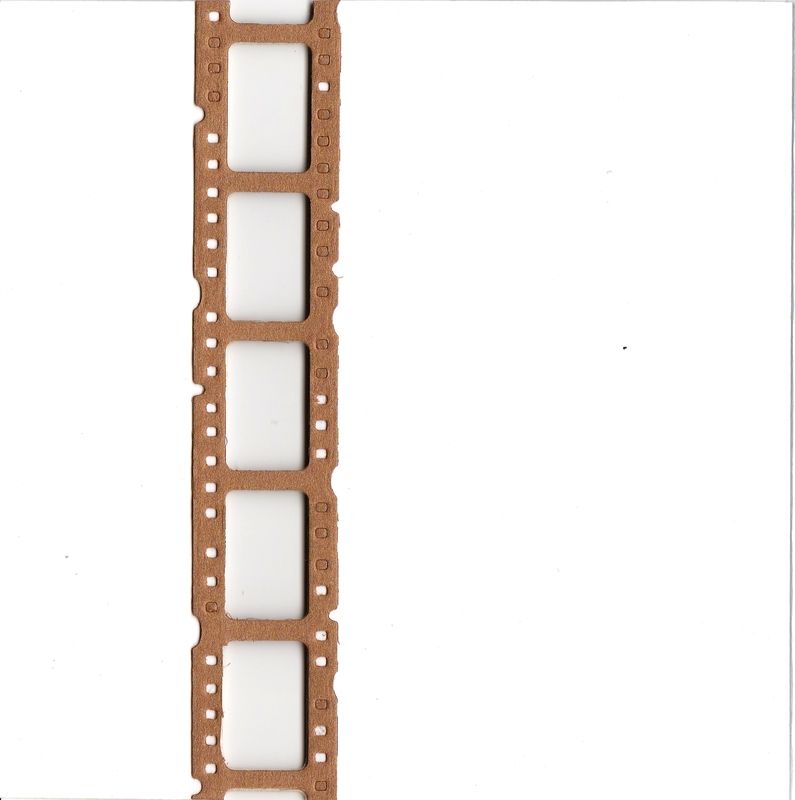
As I was using the Sizzix Mini Filmstrip and Mini Tickets Decorative Strip die, this meant the gap was only 1.5cm.

The filmstrip was diecut using copper pearl cardstock and adhered to the card front. The loose section of cardstock was temporarily taped down using masking tape so it was level with the edge of the card stock and the other side of the filmstrip die was adhered to this piece to complete the card front once again.

A second diecut was added to the inside of the card front to strengthen it.


Now to the colouring part. The hot air balloon image from the stamp set was stamped using Memento Rich Cocoa dye ink and coloured using Copic markers:

Hot Air Balloon
E11, E15, BG11, G12, W3, B34


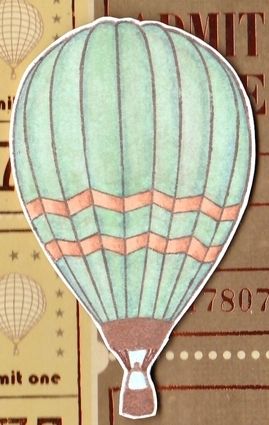
Unfortunately, I didn't have quite the right colour to match the papers so I had to experiment with the colours I have.

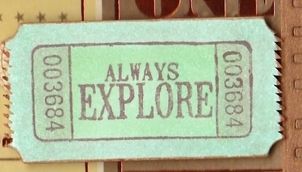
I also stamped the 'Always Explore' ticket stamp from the Autumn Leaves Ticketed stamp set onto a ticket die cut from Memory Box's Double Ticket die using the Rich Cocoa ink and coloured it with Copics:

Ticket
W3, BG10, BG11, G12, E15


The hot air balloon image was fussy-cut and adhered to the card front, along with the ticket.

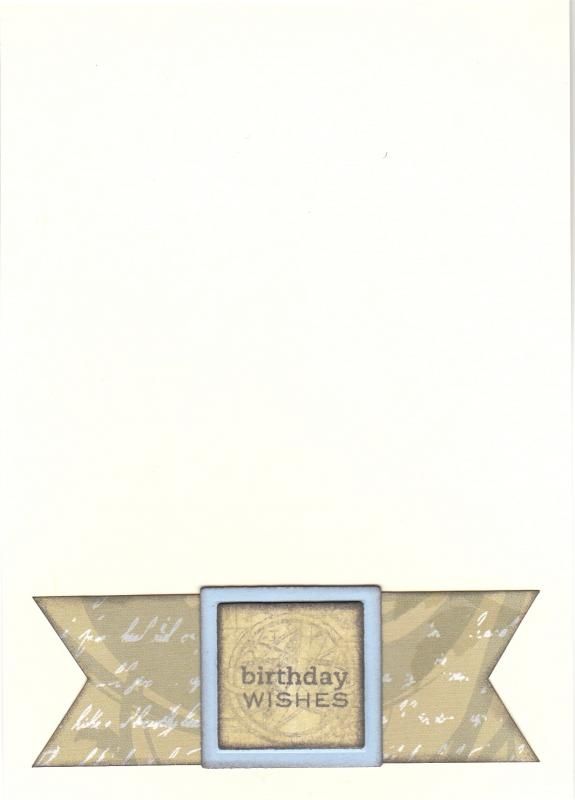
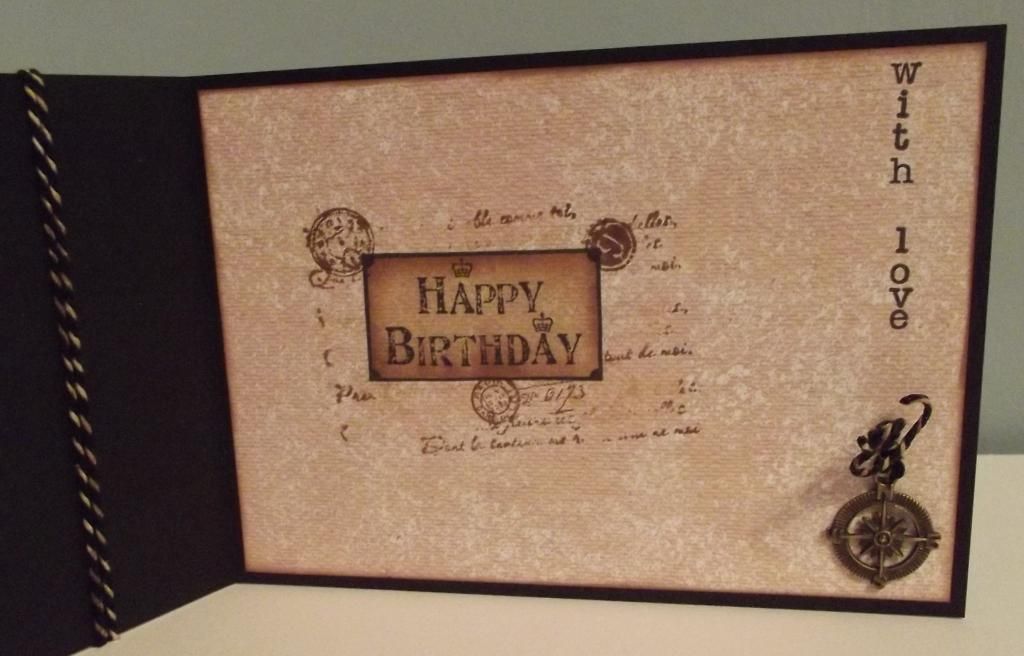
A strip of the duck-egg blue script paper from the same paper pad was then added to the inside right of the card so that it shows through the 'bridge', along with the narrow strip cut from the card front.

Using the aperture sections of the filmstrip die cut from cream card, the sentiment was stamped using parts of stamps from a selection of the Personal Impressions Paula Pascual sentiment stamp sets (Double Sayings, Mixed Sentiments, All Year Round and Mix and Match Sentiments). One of the panels was adhered through one of the apertures on the inside of the card and two further panels were adhered alongside.


To replicate the copper foiling on the patterned paper, four copper card candi were taken and Zig 2-way glue pen was added to the front of them all. When this had gone clear, a sheet of copper foil was applied to the card candi to create foiled card candi. These were added through the remaining apertures on the front of the card. The glue was then also added to a star die from the Penny Black Sweet Wishes stamp set and stamped over the 'TO' word on the inside of the card. Once again, the foiling was added to this.


Wednesday, 18 November 2015

Rust Green and Brown Fox

This is a nice simple masculine card made using a free set of stamps that came with the first issue of Get Stamping. (I've not seen whether there was an Issue 2 or not).


The fox image was stamped onto white card using Memento Potter's Clay die ink and die cut using a Nestabilities circle die. This was then matted onto a rust-coloured cardstock diecut with a Labels 3 Nestabilities die.

A strip of the striped paper from the First Edition New Leaf paper pad was also matted onto the rust cardstock and added across the centre of the card, with the image panel matted over the top to the left hand side.

 
The sentiment, from the Amy R Be Happy sentiments stamp set, was stamped using the Potter's Clay ink and die cut using a Classic Oval Nestabilities die. The oval was shaded using the Potter's Clay ink with the die still in place over the die cut, creating a white frame. This was then matted onto a Labels 25 die cut and added in the bottom right corner.

 
To finish the front of the card, copper coloured Card Candi by Craftwork Cards were added in the top right and bottom left corners of the card.
 
The inside of the card was also decorated, using almost an identical layout as the front.
 
The sentiment, from the Bo Bunny Sentiments stamp set, was used to add the greeting to the inside of the card.

Monday, 2 November 2015

Blue and Beige Journey Collage Masculine

Another masculine card for you today.
 
This card uses one of the Kaisercraft Collage stamps, this one being Journey.
 
The image was stamped onto ivory cardstock using Memento Espresso Truffle dye ink and distressed with Tim Holtz Old Paper distress ink. The image panel was then matted onto baby blue cardstock.
 
A fishtail banner was cut from a strip of the beige script paper from the Perfect Prints Vintage 2 paper pad and added to the centre of the cardblank.
 
The sentiment, from the Personal Impressions Paula Pascual Double Saying stamp set was stamped at the bottom of the cardblank using the Espresso Truffle ink and Memento Summer Sky dye ink was used on the 'very' word in the sentiment. (Although that doesn't show up very well in the image). The image panel was then added over the top of the fishtail banner.
To add some more interest to the card, some baby blue card candi from Craftwork Cards were added, creating a 'visual triangle'.
 
 
For the inside of the card, a double ended fishtail banner was created from the script paper and added to the lower sector of the card.

The Journey image was stamped again onto ivory card using the Old Paper ink and die cut using a Nestabilities square die. This was then overstamped with the 'Birthday Wishes' stamp from the Personal Impression Paula Pascual Mixed Sentiments stamp set using the Espresso Truffle ink, and then matted onto a square of the baby blue cardstock and then onto the fishtail banner.

Sunday, 1 November 2015

Brown and Beige Felicity Bloom

Here is a  card I made recently using the lovely Woodware Felicity Bloom stamp set. I've had my eye on these card candi stamps for a long time and I finally treated myself to one.

It's a simple image that you can embellish to your hearts content.
 
For this card, I stamped the image using Versafine Vintage Sepia archival pigment ink. The leaves were coloured using Promarkers - namely Shale, Sandstone and Tan.

 
All the circles of the design were coloured using the same pens. Brown, beige and ivory spotty Card Candi, from Craftwork Cards, were added to the larger circles and a combination of Papermania ivory pearls and Ranger Platinum Stickles were added to some of the smaller circles.
 
 
The sentiment, from the Hero Arts Anytime Messages stamp set, was stamped onto ivory card using  the Vintage Sepia ink and matted onto brown card, as was the main image panel.

Sunday, 18 January 2015

Frantaged Collage and Charms Masculine Birthday

This is the card that I made for my hubby's birthday this year. It involved using the Frantage embossing powders which were new to me before making this card, although I have of course watched the demos on Create & Craft.


To begin with, I stamped the collage image of Folium from Papermania using Versafine Onyx Black archival pigment ink. The panel was then distressed using Tim Holtz Antique Linen and Walnut Stain inks. Once the distress ink was dry, Versamark was added around the edge of the panel and Aged Taupe Frantage powder was added. Once that was heat set, extra Aged Taupe and White powders were sprinkled over the centre of the panel to give a speckled appearance.

To create the card blank, a sheet of A4 card was trimmed to 5" wide and then scored at 7". Panels of beige mottled paper by Craftwork Cards were cut to fit both the front and inside of the card, the edges first being distressed with the Walnut Stain ink.

The stamped and Frantaged panel was matted onto the black card as used for the card blank and adhered overlapping the edge of the front panel.


The next stage was to add the charms. These were very kindly donated by Donna at the cardmaking group that I attend. The large key charm was looped onto a length of black and white Gorjuss twine that was coloured with the Antique Linen and Walnut Stain inks, to tie it in with the rest of the card. The twine was wrapped around the front of the card and tied to the top of the charm.


The ends of the twine were then wiped with Aleene's Tacky Glue and wound around a paintbrush until the glue was dry, allowing the twists in the twine to remain. The same was done to the twine threaded through the compass charm.


The next stage was to work on the inside of the card.


The first step was to add some sentiments.


Firstly, the 'Happy Birthday' panel stamp, from the Papermania Portabello range, was stamped on the inside of the card using the Onyx Black ink. The panel was reverse masked and coloured using the Antique Linen and Walnut Stain inks. Using the positive mask, the panel was covered and overstamped using the postmark and clock stamps from the Tim Holtz Stampers Anonymous Visual Artistry stamp set, and the script stamp and number stamp from the Bo Bunny It's In The Words stamp set, all stamped using the two brown distress inks.


The final stage was to add a sentiment that could be read both when the card was open and closed. A line was drawn down the side of the card using a T-square ruler and a pencil, and, using individual alphabet stamps from a Studio G/Hampton Art alphabet stamp set and a Stamp-a-ma-jig, the sentiment 'with love' was stamped down the side of the card using Memento Tuxedo Black dye ink.


Versafine Onyx Black ink would have been better, but the Memento was out on my desk from when I had stamped the alphabet stamps onto the plastic sheet of the Stamp-a-ma-jig, and was used by mistake!

Here are the challenges that I am entering this card into:

A Girl Who Crafts - Anything Goes
Crafts Galore Encore - Anything Goes
Crafty Hazelnuts Patterned Paper - Anything Goes (Not Square)
Creative Craft Cottage - #31 - Anything Goes
Mema's Crafts - Anything Goes
Seema Crafts - Anything Goes
The Sisters Of Crafts - Anything Goes
Bastel - Traum - Anything Goes
Vandicrafts Artistry - Anything Goes
Sweet Stampin' - Masculine
Art By Miran - Anything Goes
Jo's Scrap Shack - #71 - Anything Goes
Sister Act - #89 - Anything Goes
Wags 'n' Whiskers - #145 - Anything Goes
Aud Sentiments - #123 - Anything Goes
Dream It Up! - Birthdays
Little Miss Muffet - #102 - Anything Goes
Scrap & Craft - #1 - Anything Goes
Baffies Kreativladen - #40 - Anything Goes
The House That Stamps Built - #114 - Black, Brown and White
Penny's Paper-Crafty - #210 - Anything Goes
Simon Says Stamp - It's A Guy Thing
Whimsy Stamps - #78 - Anything Goes
Cardz 4 Guyz - Happy Birthday
Inky Chicks - #45 - Anything Goes
Party Time Tuesdays - #194 - Anything Goes
Through The Craft Room Door - Anything Goes
Crafting From the Heart - #42 - Anything Goes
Sparkle N Sprinkle - Anything Goes (Glitter, Embossing Powders, Flock)
Squigglefly - #2 - Anything Goes
The Paper Nest Dolls - #1 - Anything Goes
Whoopsi Daisy - Anything Goes
Robyn's Fetish - #247 - Vintage Look

Wednesday, 21 September 2011

Brown and Blue Floral Chandelier Tags Anniversary

This is a second version of the anniversary card I made recently using the Chandelier stamp that came free with the July 2011 issue of Craft Stamper Magazine.


I went for more muted tones with this version, using one of my favourite colour combinations of blue and brown.

The Chandelier image was stamped using Adirondack Stream dye ink and matted onto the blue diamonds paper from the Prima Madeline paper pad.


The card blank was completely covered with the Brown Script Floral paper from the same paper pad and the image panel added to the right.

A strip of the Alphabet paper was added to a strip of the Multi Border paper and this was then added over the image panel. Faux stitching was then added over the joins of the paper pieces using the Zigzag Stitch stamp from the HOTP Stitches stamp set and ColorBox Chestnut Roan Fluid Chalk ink.

Two mini tags were coloured around the edges using the Chestnut Roan ink and letters were stamped using the Stream ink and a Studio G mini alphabet stamp set. The tags were attached to some teal embroidery thread and added to the card and a brown Card Candi from Craftwork Cards was added over the ends of the threads.


Highlights were added to the Chandelier image using Glossy Accents and DecoArt Crystal Glamour dust.
All papers were distressed with the Chestnut Roan ink.

The inside of the card was also decorated using a photo corner stamp from the Stamps Away Bookplates, Corners and Anchors stamp set, stamped onto the blue diamonds paper used on the front of the card using the Stream ink and cut out


Slits were cut into the photo corners and the writing paper inserted into the corners, and a strip of the Brown Script Floral paper used on the front of the card was added across the paper and the sentiment, from Elzybells, was stamped using the Stream ink.

Here are the blog challenges I am entering this card into:

Monday, 29 August 2011

Red Yellow and Blue Superduper Boy Aged Four

I really enjoyed making this one!! It's for a friend's little boy. We went to stay with them down in Devon a few weeks back and he was constantly dressing up in super-hero costumes so I knew straight away which image I was going to use on his card.


The Superduper Boy image from Mo's Digital Pencil was coloured using Copic Sketch markers:
  • Cape: R20, R24, R27, R29, E09, Y00, Y21, Y26
  • Shorts: R24, R27, R29, Y21, Y26
  • Gloves/Mask: Y21, Y26
  • S & Panel: R24, R27, R29, Y21
  • Boots: R20, R24, R27, R29
  • Body Suit: B32, B34, B37
  • Hair: E43, E51, E57
  • Skin: E00, E21, E51
The image was then cut out.

A strip of the dark blue stars and banners paper from the HOTP Ultimate Cardmaker's Creative Pack was matted onto dark cream card and a panel of red card embossed with the Cuttlebug Herringbone embossing folder.


Lengths of yellow hemp cord were wrapped around the panel to form a cross and the panel was adhered to the card blank.

A star was die cut from the cream card using the Sizzix Sizzlit Hearts, Stars and Tags die and the number 4, die cut from red card using the Ellison Curlie Girlie alphabet set, was adhered in the centre of the star. A hole was punched in the top of the star using the Big Bite and was then threaded with more of the hemp cord and tied to the cord across the card.


Three soft white Card Candi from Craftwork Cards were coloured yellow with a Copic marker:
  • Card Candi: Y21
These were then attached in the top right corner of the patterned paper.

Here are the blog challenges I am entering this card into:

Wednesday, 10 August 2011

Pink and Blue Floral Chandelier Tags Anniversary

Here is an anniversary card that I made for a couple of friends. I really like the design (I actually adapted it from one of the projects in the July 2011 issue of Craft Stamper magazine using this particular stamp).


I absolutely love the Chandelier image tht came with the July 2011 issue of Craft Stamper magazine. The image was stamped using Adirondack Stream dye ink and matted onto the blue diamonds paper from the Prima Madeline paper pad.


The card blank was completely covered with the Floral Bird paper from the same paper pad and the image panel added to the right.

A strip of the Alphabet paper was added to a strip of the Multi Border paper (both from the Madeline paper pad), and this was then added over the image panel.

Faux stitching was then added over the joins of the paper pieces using the Zigzag Stitch stamp from the HOTP Stitches stamp set and ColorBox Chestnut Roan Fluid Chalk ink.

Two mini tags, that have been in my stash since the beginning of time, were coloured around the edges using the Chestnut Roan ink and letters were stamped using the Stream ink and a Studio G mini alphabet stamp set (also underused!!). The tags were attached to some teal embroidery thread and added to the card and a brown Card Candi from Craftwork Cards was added over the ends of the threads.


Highlights were added to the Chandelier image using Glossy Accents and DecoArt Crystal Glamour dust.

All papers were distressed with the Chestnut Roan ink.

The inside of the card was also decorated using a photo corner stamp from the Stamps Away Bookplates, Corners and Anchors stamp set, stamped onto the blue diamonds paper used on the front of the card using the Stream ink and cut out.


Slits were cut into the photo corners and  the writing paper inserted into the corners, and a strip of the Floral Bird paper used on the front of the card was added across the paper and the sentiment, from Elzybells, was stamped using the Stream ink.

Here are the blog challenges I am entering this card into:

Friday, 24 June 2011

Red, Black and Grey Captain Edwin

This card was based on a layout in Issue 68 of Papercraft Essentials magazine.


The Captain Edwin image, from Magnolia, was stamped using Memento Tuxedo Black dye ink and coloured with Copics:
  • Hat/Trousers/T-Shirt/Belt: N1, N3, N5, N7
  • Jacket/Bandana: R20, R24, R27, R29, R32, R37, R39
  • Sash/Patch: R32, R37, R39
  • Boots/Sword Hilt: W1, W3, W5, W7
  • Sword Blade/Buckle: C0, C2, C4
  • Buttons: N5
  • Hair: W3, W5, W7
  • Skin: E00, E13, E21, E51
  • Shadow: W1, W3
  • Outline: C2
The image was then matted onto black card.

Patterned papers from the Dovecraft Charcoal Designer paper pack (Dots and Squares), Papermania Monochrome Capsule Collection paper pad (gingham) and Papermania Red Hot Capsule Collection paper pad (red Clover Leaf) were cut to size and matted on the black card and layered up.


A length of black grosgrain ribbon was knotted and added across the layers and the image panel added over the top.

The Birthday Wishes circle sentiment, from the Hero Arts Birthday Messages stamp set, was stamped using Brilliance Graphite Black pigment ink and coloured using Copics:
  • Sentiment Circle: R24, R27, R29, C2
This was then added beneath the knot of the ribbon.

Three dark grey polka dot Card Candi, from Craftwork Cards, were then added in the top left corner.

The sword blade in the image and the circle sentiment were then both highlighted with Anita's 3D gloss.

Here are the blog challenges that I am entering this card into:

Monday, 16 May 2011

Green and Brown Time and Tide Collage Repost

Another of my masculine cards now for you. This one didn't actually stamp out properly but thought it might look like it was supposed to look like that!!! Well, that's my excuse!!


The Time Piece Collage image, from the Paper Artsy Clocks 3 stamp set, was stamped using Papermania Olive Green ink and heat embossed with Heat It Up! Moss embossing powder. The image was then die cut using a standard square Nestabilities die and distressed using Tim Holtz Antique Linen and Walnut Stain distress inks. This was then matted onto squares of green glimmer paper and brown card.

A panel of the beige and cream chequerboard paper from the HOTP Earth Tones Cardmaker's Creative Pack was distressed around the edges using the Antique Linen and Walnut Stain distress inks. The sentiment, also from the Clocks 3 stamp set, was stamped in the lower corner of the patterned paper using the Versafine Vintage Sepia archival pigment ink and a length of brown woven ribbon was adhered across the centre of the panel.

The patterned panel was matted onto the green paper and brown card. The image panel was then added over the ribbon and two brown card candy from Craftwork Cards were added in diagonal corners.
I did enter this card into lots of challenges but as Blogger decided to delete this post, I'm reposting the original version I had saved witohut all the challenges - hopefully Blogger will restore the latest version, but knowing my luck they won't as I had it saved before. This also means I have no idea which challenges I entered - D'oh!!

Here are the ones I've found:

Sunday, 24 April 2011

Aqua Lace Boy Age One

Here is the card I made for my cousin's little boy's first birthday.


I decided to use the digi stamp image, Boy Age One, that I recently purchased from The Clipart Fairy. It's a really cute image and perfect for a little boy. The image was printed onto Xerox Colotech Gold card and coloured using Copic markers:
  • '1st': BG02, BG11. BG32, B00, Y17
  • Hat/Jumper: BG02, BG11, BG32, B00
  • Skin: E00, E21, E51, R20
  • Little Boy: E11, E13
The image panel was then matted onto aqua card.

The aqua stripe paper and aqua glittered bubble paper from the DCWV Nana's Nursery Baby Boy mat stack were joined and then wrapped with cream broderie anglaise and aqua Dovecraft grosgrain ribbon and matted onto aqua cardstock.


The 'Happy Birthday' sentiment, from the Papermania Clare Curd Sentiments stamp set, was stamped using Versafine Onyx Black archival pigment ink and matted onto the blue bubble paper and the aqua cardstock.

The floral aqua card candi from Craftwork Cards was added to the card either side of the sentiment panel below the image panel.

I also decorated the inside of the card using a panel of the striped paper and a stamp from the Papermania Clare Curd Sentiments stamp set using ColorBox Celadon pigment ink.


Here are the blog challenges I am entering this card into:

Friday, 11 March 2011

Plum and Blue Prince Charming Tiles

Here is the card I made for my not-so-little brother (he's 27 now!) He reckons that's not old, so that means I'm "not old + 10"!!

I chose the patterned papers and coloured the image to match, and it wasn't until I'd made it I realized it was in Villa colours, which is handy because that's the football team he supports (that's soccer for all you Americans reading this!)


The Prince Charming image, from Mo's Digital Pencil, was coloured using Copic markers:
  • Crown: Y17, E41, E43
  • Blouson: B12, B21, B24
  • Breeches/Shoes: G85, BG45, E43
  • Robe/Medallion: V15, E43
  • Ermine/Collar: E40, E43
  • Skin: E00, E21, E51, E13
  • Hair: E13, E35, E57
  • Extra Shoes: BG45, G85, B21, E43, C6
  • Shadow: N3, E41
The image was then punched with the large XCut corner rounder punch and matted onto plum card. A Labels 3 shape was cut using a Nestabilities die from blue card and distressed using Tim Holtz Faded Jeans distress ink, then overstamped in the corners with the Crown Flourish stamp from the Fiskars Harlequin Charms stamp set with the Versafine Imperial Purple archival pigment ink. The image panel was then matted over the top.

Two papers from the DCWV The Old World mat stack were cut into 4cm tiles and the plum tiles were punched using the large XCut corner rounder punch. These were positioned onto the blue card also distressed with the Faded Jeans ink.


Four violet card candi from the Pot Pourri set by Craftwork Cards were coloured using Copic markers:
  • Candi: V15, E43
These were then added in the corners.

The sentiment was computer generated and coloured with Copic markers:
  • Sentiment: V15, E43, E40
It was then cut out and matted onto panels of the plum and blue card and punched with the large XCut corner rounder. The image was then highlighted with Anita's 3D Gloss.

Here are the blog challenges I am entering this card into:

Wednesday, 9 March 2011

Red and Green Vintage Lady

Here's another of my older cards from last year that I didn't get around to uploading.

I am loving this colour combo and will have to get these papers out again!


The Vintage Lady image, from the Vintage Postage Ladies stamp set from Crafty Individuals, was stamped onto cream card using Versafine Crimson Red archival pigment ink and cut out using the Square Stamp die from Cuttlebug. This was then matted onto a square of beige Core'dinations card and a scalloped red square, both cut using Nestabilities.

A strip of the multi ribbon strips paper from K&Co Classic K McKenna paper pad was matted onto the beige and red card, and then onto a panel of the green large floral paper also from the McKenna paper pad.

The stamped image was attached over the ribbon strip paper and three olive green card candy from Craftwork Cards were attached along the ribbon paper panel. The card candy were covered with Glitz It Pear Green glitter glue to make them nice and sparkly.

The sentiment panel was created by stamping the sentiment from the Hero Arts Birthday Messages stamp set using the Crimson Red ink onto the cream card which was then matted onto the beige and red card.

Here are the blog challenges I am entering this card into:

Sunday, 6 March 2011

Dark Blue and Green Scalloped Florals

Here is an anniversary card that I made for a couple of pals over on the docrafts forum, both of whom celebrated their anniversaries on Valentine's Day. This is something a little different for me and was inspired by the very talented Ikki. The inspiration for this card is here.


I have just noticed that I managed to choose exactly the same papers as Ikki, which wasn't my intention, it's just that those two seemed to go together best when I looked through all the papers. Just goes to show we both have a great eye for co-ordination!

A square was die cut using a Nestabilities die and the image, from the Papermania Jesse Edwards Memories stamp set, was stamped in the centre and the sentiment, from the same stamp set, along the edge using a combination of Charcoal and Blue Iris ColorBox Fluid Chalk inks.


This was then matted onto a die cut panel of dark blue and green paisley paper from the Laura Ashley Traditional paper pack and a panel of dark blue shimmer card, die cut with a scalloped square Nestabilities die.

A panel of the green and dark blue etched botanicals paper, from the same paper pack, was matted onto a panel of the shimmer card and onto the card blank, from Craftwork Cards. I bought these last year at the Make It show at Farnborough, and this is the first time I've used them!

The flourish, cut using the Vine #2 Sizzix Sizzlits die from cream card, was coloured using the blue and grey chalk inks and adhered over the corner of the image panel. It was then highlighted with Craft Planet Iridescent Sparkle glitter glue.

Here are the challenges that I am entering this card into:
Blog Widget by LinkWithin