



Pages

WELCOME

This blog was created to act as a record of the cards and other projects that I have made. It is for both my own reference and to help inspire anyone who wants to take a look.

I'd love it if you'd leave me a comment so that I know what you think of my projects and that you've been to visit!

Anyone can comment, even those who don't have a blog. (Just look for the word 'Comments' under the three little pictures at the end of each post). Readers without a blog can add an anonymous comment, but please leave your name (and docrafts username if applicable) so I know who you are!

Slideshows of all the cards I've uploaded to my blog can be found at the bottom of the page.


PEOPLE WHO FOLLOW MY BLOG

Showing posts with label Chatterbox. Show all posts

Monday, 6 June 2011

Dark Blue and Green Inkadinkado Anniversary Butterflies

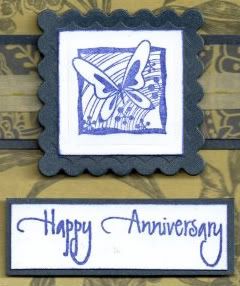
The Butterfly Rainbow image from the Inkadinkado Butterflies and Birds stamp set was stamped using ColorBox Midnight Pigment ink and die cut using square Nestabilities dies. These were then matted onto scalloped squares, also die cut with Nestabilities, from navy blue shimmer card.

Here is a close-up view of the image and sentiment:

A strip of the dark blue and green paisley paper from the Laura Ashley Traditional paper pack was matted onto the navy shimmer card and a length of olive green stitched woven ribbon from the Chatterbox Olive ribbon pack was wrapped around the panel.

This was matted onto a panel of the green and dark blue etched botanical paper from the same paper pad and matted onto a panel of the navy blue shimmer card.
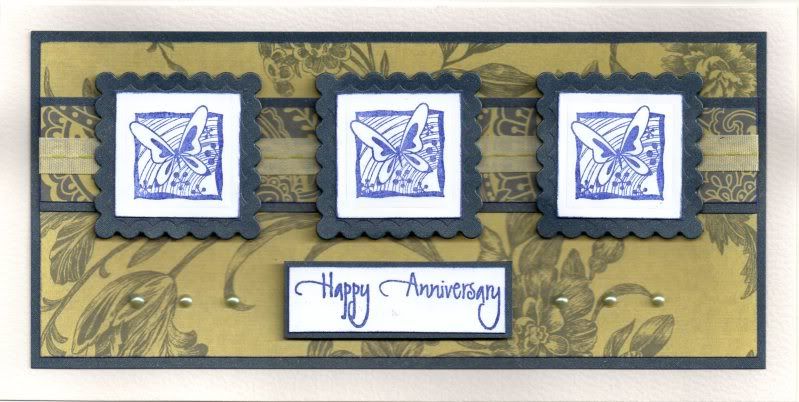

The sentiment, from the Elzybells Swirl Sentiments stamp set was stamped using the Midnight ink and matted onto the shimmer card. The image panels were matted over the ribbon and the sentiment placed beneath it.

Green pearls, from the Kort and Godt Pastels set, were added to either side of the sentiment panel, lined up using the Stampin' Up Mat Pack template.

I have to say I'm rather pleased with it!!!

Here are the challenges I am entering this card into:

Monday, 21 March 2011

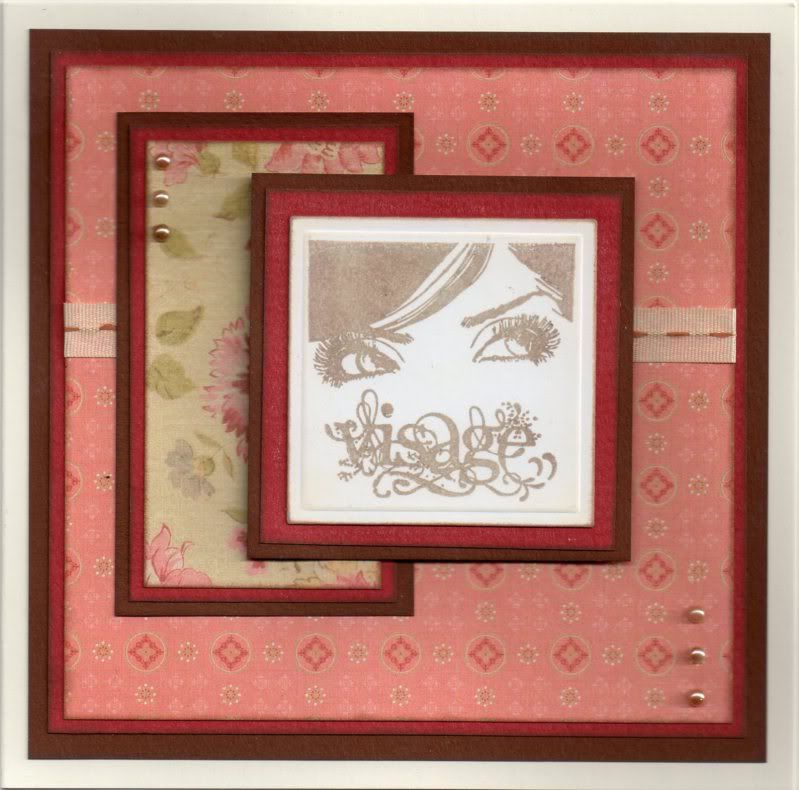
Coral, Red and Brown Visage Eyes

I really liked the effect of the first card I made using this stamp so I decided to have a go at a new one, this time using more muted colours.

The Visage Eyes image, from The Stamp Man/Craft Stamper magazine was stamped using Versafine Vintage Sepia archival pigment ink and distressed with ColorBox Alabaster Fluid Chalk ink. This was matted onto red and brown paper.


A length of the cream stitched satin ribbon, from the Chatterbox Chocolate ribbon pack was wrapped around a panel of the coral circles paper, from the K&Co McKenna paper pad and then matted onto the red and brown paper.

A small panel of the cream floral paper, from the same paper pad, was also matted up and layered up with the image panel.

Cream self-adhesive pearls, from the Hobby House Chocolate Heaven pack, were added in the bottom right corner of the coral paper and in the top left corner of the cream patterned paper.

Here are the blog challenges I am entering this card into:

Thursday, 17 March 2011

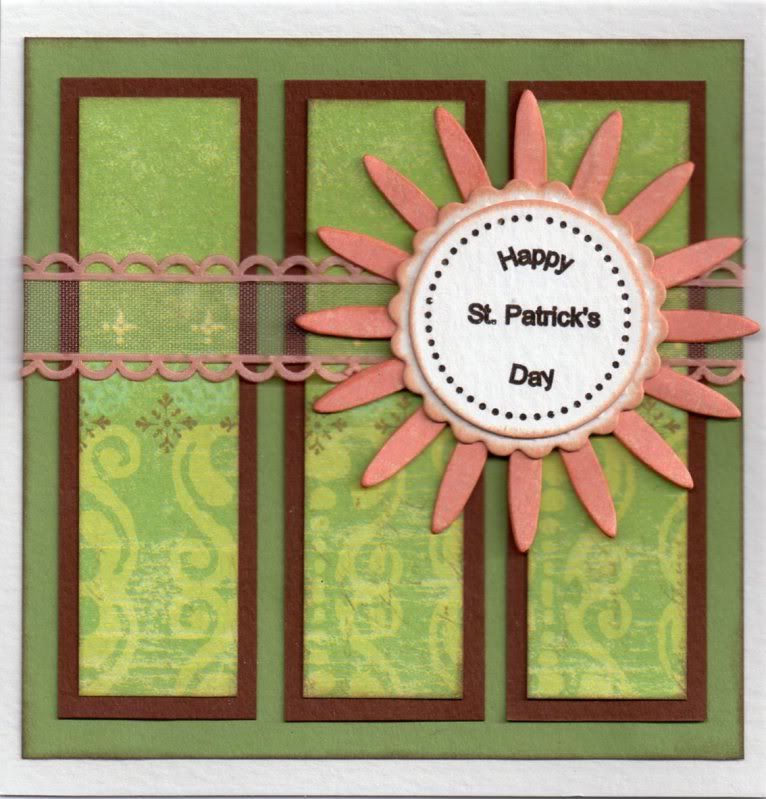
Green, Brown and Coral St Patrick's Day

This year's St. Patrick's Day cards are a little bit different for me. I didn't want to try and create shamrocks with hearts again, so decided to just make a card with a green and orange theme - although the orange turned into a more coral-orange colour.


Three strips of the green flourish border paper from the K&Co Roam paper pad were matted onto brown paper and then onto green paper. A length of coral picot-edge organza ribbon, from the Chatterbox Tangerine ribbon pack, was then wrapped around the panel and attached to the card blank.

A flower was die cut from the coral brushstroke paper from the same paper pad using the Flowers, Daisies #2 Sizzix Bigz die and layered up with a scalloped circle and a computer-generated circle sentiment die cut with a standard circle die, both Nestabilities.

The flower embellishment was then added over the ribbon.

The sentiment circle was created thanks to a great tutorial by Karen/Redrottie over on her blog. However, thanks to an empty ink cartridge, my printer refused to work so the file was sent to work with my hubby but I forgot that the font I'd used wouldn't necessarily be on his computer so they didn't look like they should have done. Typical!

Anyway, here are the blog challenges I am entering this card into:

Tuesday, 5 October 2010

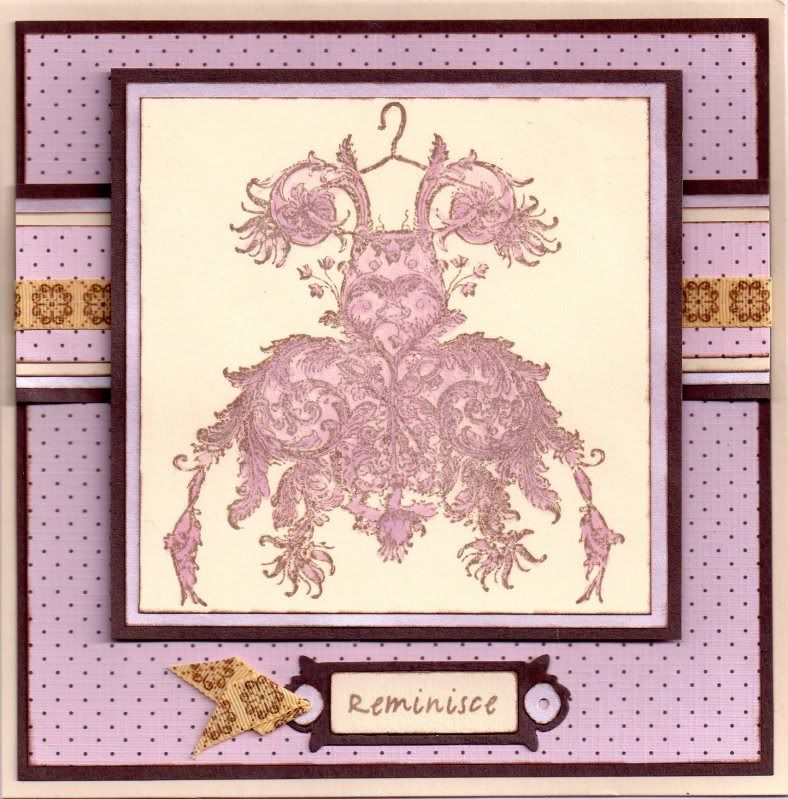
Pink and Brown Apron Dress

Another delayed upload again - but I seem to be catching up a bit on my older cards. Here is the card I made for my cardmaking matey Julie for her birthday in May. I decided to make something a bit different for me and used one of my new Stampington & Co stamps.


Firstly, the Apron image, from Stampington & Co, was stamped onto cream card using Versafine Vintage Sepia archival pigment ink and watercoloured using the Whispers Whisper Pink and Whisper Lilac permanent dye inks.

The image was matted onto a panel of Anita's pink pearlescent paper and brown card.

A panel of the pink and brown polka dot paper from the Papermania Chatsworth paper pack was matted onto the brown card. A smaller strip of the polka dot paper was matted onto the pink pearlescent paper and the brown card and a length of cream and brown medallion ribbon from the Chatterbox Chocolate ribbon pack was wrapped around the panel and attached over the larger panel towards the top.

The stamped image was then attached over the top of the ribbon panel.

The sentiment panel was created by die cutting the bookplate from the Sizzix Sizzlit Bookplate #2 die using cream and brown card and the pearlescent pink paper. The word, from the Making Memories Express It stamp set, was stamped onto the cream panel using the Vintage Sepia ink and the bookplate was assembled. A short length of the cream and brown ribbon was attached to one side of the bookplate.

Here are the challenges that I will be entering this card into:
ETA:
This card was picked by the randon number generator as the winner of the Scrap Creations Think Pink blog challenge.

Tuesday, 14 September 2010

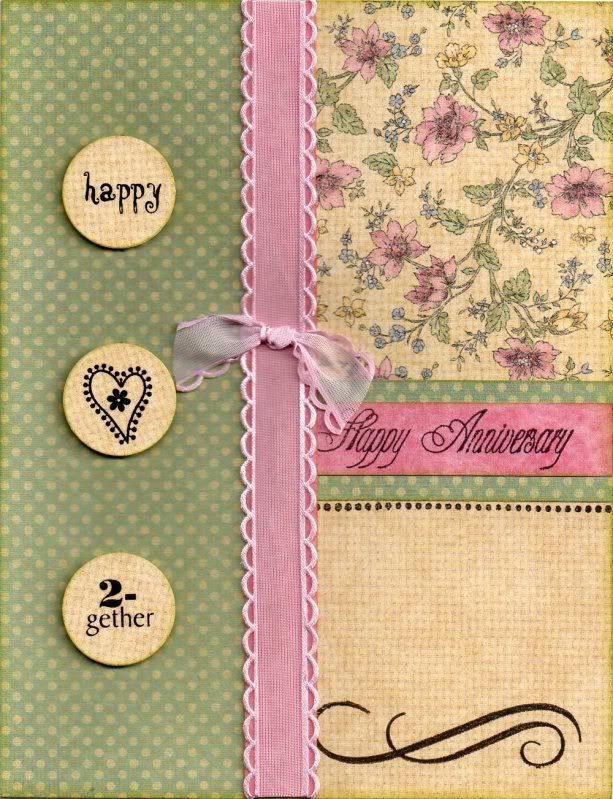
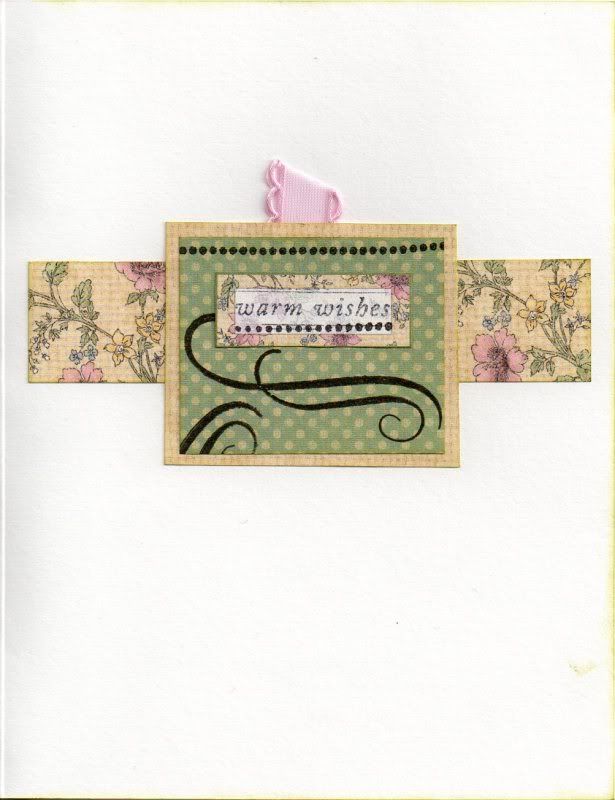
Pink, Yellow and Green HOTP Anniversary

This card was based on one of the designs shown in the HOTP Ultimate Floral Cardmaker's Creative Pack. For that reason, I won't be entering it into any challenges, but will post it 'for fun'.

This is the card that I made for my dad and his wife for their wedding anniversary.


Firstly, the front of the card blank was covered using panels of green and yellow papers from the HOTP Ultimate Floral Cardmaker's Creative Pack. A swirl, from the HOTP Christmas Swirls stamp set, was stamped at the bottom of the yellow panel using Versafine Onyx Black archival pigment ink.

The 'Happy Anniversary' stamp from Stamps Away was stamped onto a strip of pink paper also from the Ultimate Floral paper pack and adhered onto a strip of the green polka dot paper.

A length of pink picot-edge ribbon from the Chatterbox Rosey ribbon pack was attached along a length of the pink paper and attached along the card front with a knot of the pink ribbon adhered on to it.

Three circles were cut from scrap card using Nestabilities and covered with the yellow weave patterned paper. Rub-ons from the HOTP Words, Hearts and Flowers rub-on sheet were added to the circles and attached to the left of the panel.

I also decorated the inside of the card, using small pieces of the matching papers from the front of the card. The green polka dot paper was stamped using the dot border stamp from the HOTP Stitches stamp set and one of the swirls from the HOTP Christmas Swirls stamp set.


The 'Warm Wishes' stamp, from the HOTP Sentiments stamp set, was stamped and the dot border stamped below it using the Onyx Black ink, and cut out and matted onto the patterned paper.

A small loop of the pink ribbon was attached behind the yellow panel of paper before attached to the card.

Thursday, 19 August 2010

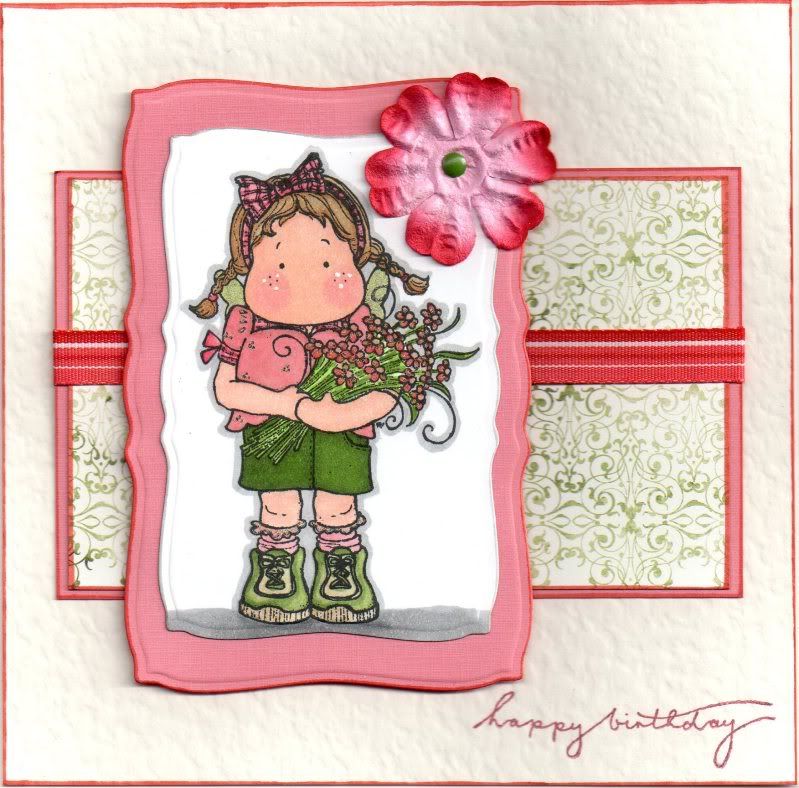
Pink, Red and Green Tilda with Marguerites

Here is my latest offering for you all. She's a real cutie pie isn't she!!


The Tilda with Marguerites image, from Magnolia, was stamped using Memento Tuxedo Black dye ink and coloured using the Copic Sketch markers:
  • Hair: E35, E43, E57
  • Skin: E00, E02, E21, R20
  • Shirt: R20, E43
  • Bow: R20, R24
  • Shorts: G85, YG17, YG67
  • Socks: R20, E43
  • Shoes: YG11, YG17, YG67, E41, E43
  • Flowers: G85, YG17, YG67, R20, R24, E43
  • Wings: YG11
  • Shadow: N3, N5
  • Outline: N3
Highlights were added to her cheeks with a Papermania Snow White gel pen, and highlights were added to the flowers and the wings using a Sakura clear Stardust pen.

The image was cut out using a Mega Curved Rectangles Nestabilities die and matted onto a larger pink panel. A red and white Prima flower was attached to the corner of the panel with a small green brad.

A panel of the Chintz paper from the Basic Grey Porcelain paper pad was matted onto the pink card and a length of the striped red grosgrain ribbon from the Chatterbox Scarlet ribbon pack was adhered across the centre. The sentiment, from the Woodware Jane's Script sentiments stamp set was stamped in the bottom right hand corner using Versafine Crimson Red archival pigment ink

Thursday, 29 July 2010

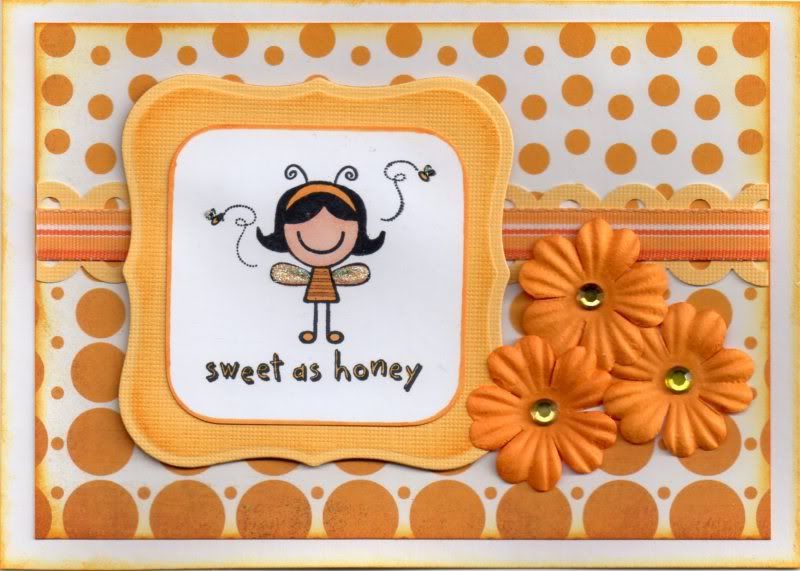
Yellow and Orange Honey Smirk

Here is one of my recent makes for a good friend's little girl. I love this cute image and I'm surprised  this is the only time I've used it.

I am also entering it into a few blog challenges:

The 'Sweet As Honey' image from Smirk was stamped using Memento Tuxedo Black dye ink and coloured using Copic markers:
  • Hair: C8
  • Dress: Y17, E57
  • Wings: E21, E51
  • Skin: E00, E02, E21
  • Shoes/Bees/Headband: Y17
A mat was created for the image panel using the Nestabilities Labels 1 die. I prefer to do this as you can create a smaller increment rather than matting two of the Labels shapes together.

The panel was coloured using the Tim Holtz Wild Honey distress ink whilst keeping the die in place, creating a non-coloured edge.

A strip of the butter yellow card from the DCWV Brights card mat stack was punched along both edges using the Scallop Dot border punch by Martha Stewart to create a border strip. A length of the yellow and orange striped grosgrain ribbon from the Chatterbox Tangerine ribbon pack was then attached across it.

This was then matted across a panel of the Informal paper from the Basic Grey Offbeat paper pad, and distressed around the edges with the Wild Honey ink.

The image panel was attached over the ribbon and highlighted with Craft Planet Yellow glitter glue.

Three paper flowers from The Crafty Cow were added to the right hand side of the panel and faux yellow gem stones were added to their centres.

Tuesday, 20 July 2010

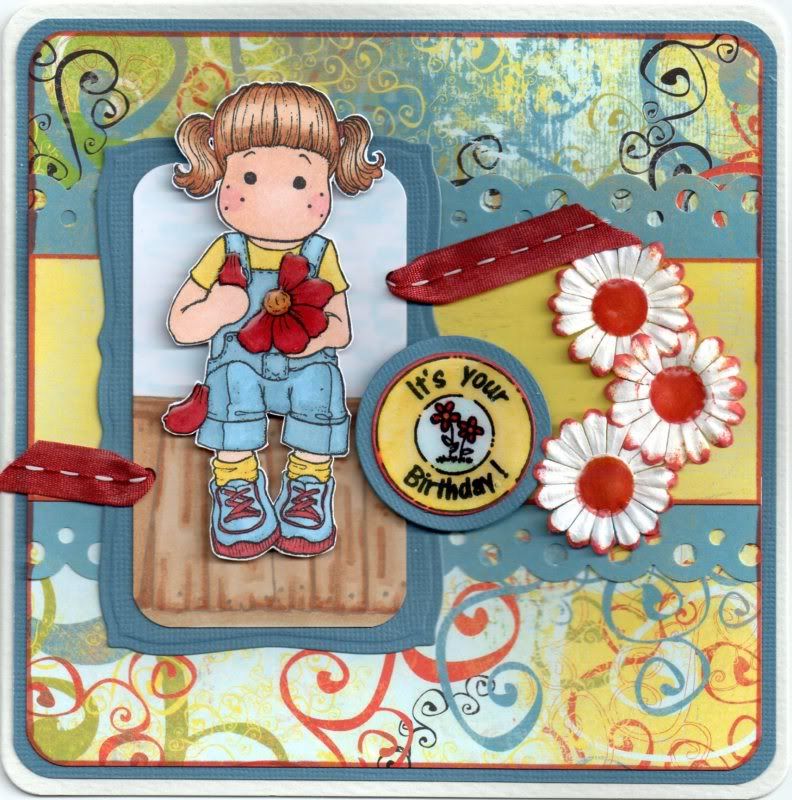
Red, Yellow and Blue Loves Me Tilda

Here is my entry to this week's Just Magnolia blog challenge, which this week is a sketch challenge by Bev.


The Loves Me Tilda image was stamped using Versafine Onyx Black archival pigment ink, coloured using Copic markers and cut out.
  • Hair: E21, E35, E39
  • Skin: E00, E21, E51, R20
  • Top/Socks: Y00, Y08, E41
  • Shoes: B41, B93, E04, E07, R24, YR02
  • Dungarees: B41, B45, B93
  • Flowers: E04, E07, E41, R24, YR02, Y08
A panel was cut from white card and the Magnolia Old Wooden Stand image was stamped using Versafine Vintage Sepia archival pigment ink and coloured using Copic markers.
  • Fence: E21, E35, E39, E43
A sky was coloured also using a blue Copic marker and the blender pen. This was matted onto a panel cut from blue Core'dinations card using a Mega Curved Rectangle Nestabilities die.

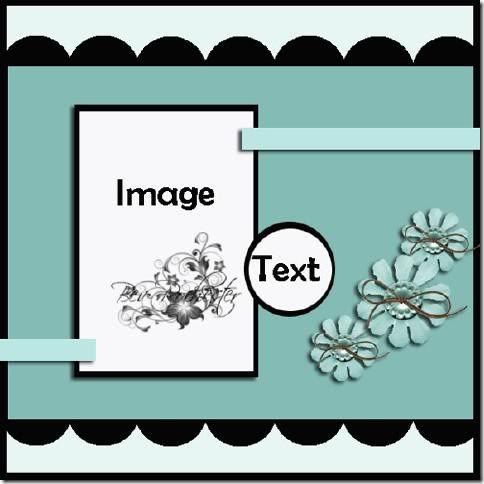
The card was then constructed to match the sketch supplied by Bev for the challenge:


A strip of the Surprise paper from the Basic Grey Cupcake paper pad was matted onto a strip of the Kazoo Blue paper from the same paper pad punched using the Scallop Dot border punch from Martha Stewart. This was matted onto a panel of the Streamers paper which was in turn matted onto the blue card.

The Tilda image was matted onto the background panel and two holes were punched and red stitched organza ribbon from the Chatterbox Scarlet Ribbon pack was threaded through them.

The circle greeting sentiment from Aud Designs was stamped using the Tuxedo Black ink and coloured with the Copic markers, cut out with Nestabilities and matted onto blue card.

Three white Papermania Imaginisce paper flowers were stamped in the centres using the circle stamp from the Aud Designs circle sentiments set using ColorBox Warm Red and Burnt Sienna fluid chalk inks. The same inks were used to colour the petal tips.

The sentiment panel was added to the card front to overlap the image and the flowers to the right. Anita's 3D Gloss was added over the flower and petals in the Tilda image, over the sentiment and in the flower centres.

Thursday, 25 March 2010

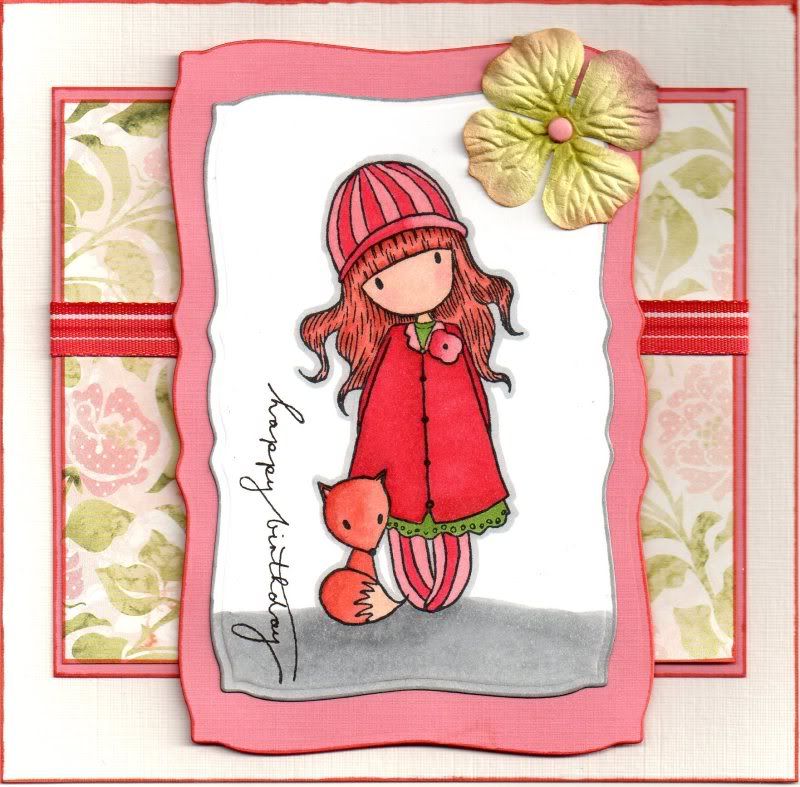
Pink, Red and Green Gorjuss Girl with Fox

Here is my latest Copic project using the lovely Gorjuss Girl with Fox from Sugar Nellie.

It is also my entry to the current Quirky Crafts blog challenge, which is Flowers this fortnight.


I started by stamping the Gorjuss Girl image with Memento Tuxedo Black dye ink and coloured using my Copic Sketch markers.
  • Hair: E02, E07, YR02
  • Face: E00, E02, E11, R20
  • Coat: R24, R29, E07
  • Hat/Socks/Flower: R20, R24
  • Dress: YG17, G85
  • Fox: YR02, E07, E51
  • Shadows: N3, N5
  • Highlights: N3
The image was then cut out using a mega rectangle Nestabilities die and matted onto a larger pink panel. The sentiment was then stamped up the side of the image using the 'Happy Birthday' stamp from the Woodware Jane's Script Sentiment stamp set with Versafine Onyx Black archival pigment ink.
A green Prima hydrangea paper flower was attached to the top corner using a small pink brad.
A panel of the Rochelle paper from the Basic Grey Porcelain paper pad was matted onto the pink card and a length of the red striped grosgrain ribbon from the Chatterbox Scarlet ribbon pack was adhered across the centre.

Monday, 21 September 2009

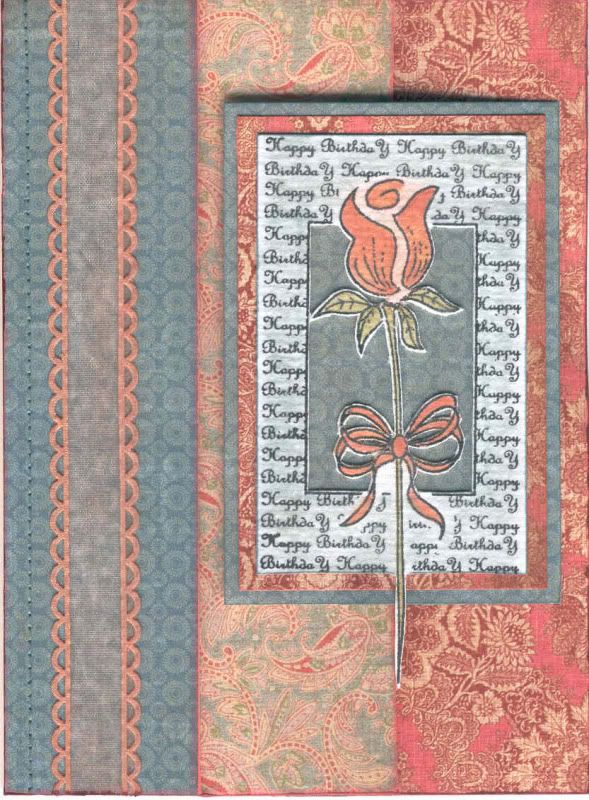
Coral Pink and Dark Grey Birthday Rose Concertina - Secret Crafter Challenge #50

Here is my entry to this week's Secret Crafter Saturday Blog Challenge. The theme this week, #50, is:
'One For The Girls', and I think this fits the bill perfectly!

I've had this salmon pink concertina card blank for many years, but never knew what to do with it, because of the colour. Then, when I decided to use these papers, I knew exactly which card blank to turn to. I think I received it as part of a subscription gift for Quick Cards Made Easy.

To make the card, I started by covering the panels with papers from the K&Co Bailey paper pad. A length of coral pink picot edge organza ribbon from Chatterbox was attached along the front panel and a dressmaker's tracer wheel was run along the edge of the panel and faux stitching was added using a blue fineliner pen.
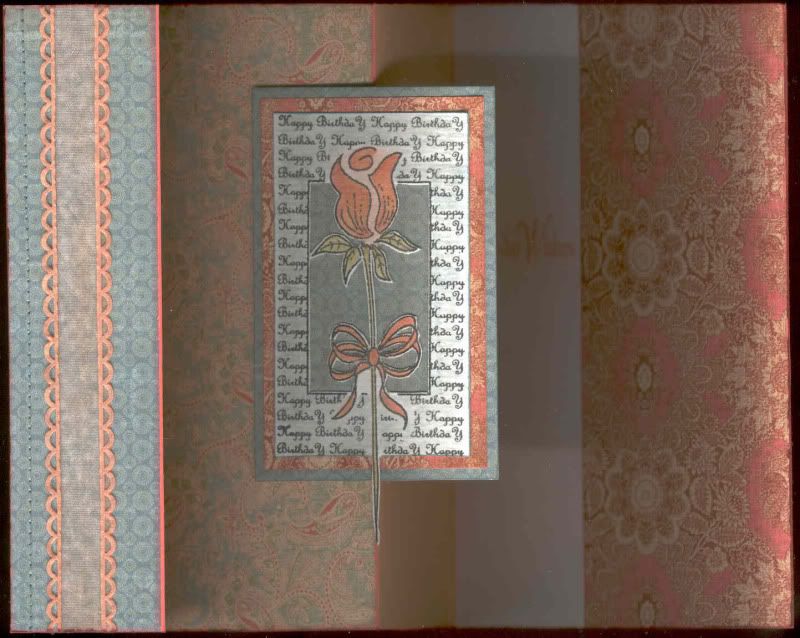
The birthday rose image from Anita's was stamped using Versafine Onyx Black archival pigment ink and watercoloured using Whispers Brushstroke markers and highlighted with Papermania Earth Tones Shimmer Chalks. The image was cut out, including the centre area, and matted onto matching papers from the Bailey paper pad. This was attached to the centre panel.

Here is a view of the open card, showing the inside of the panels.

I was rather pleased with this card, even if I say so myself!!

Friday, 14 August 2009

A Few Cards For The Men!


Well, as promised, here are a few cards I made for the men in my life.
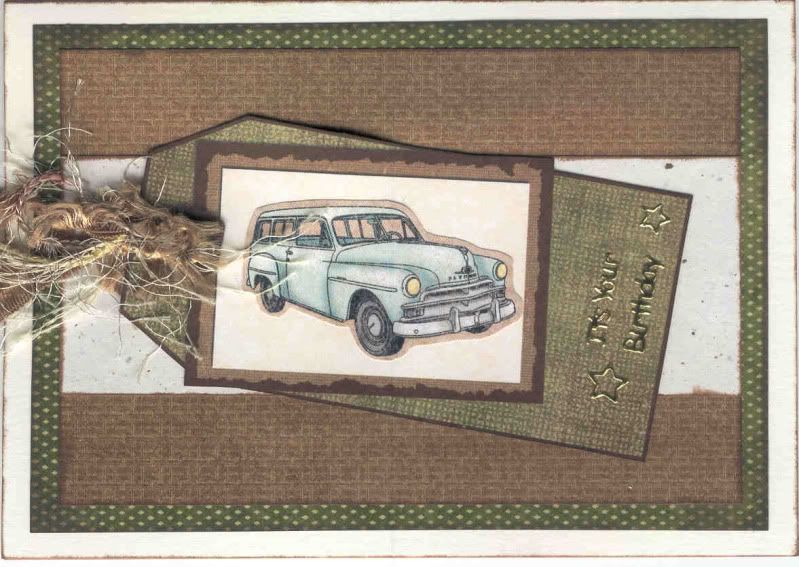
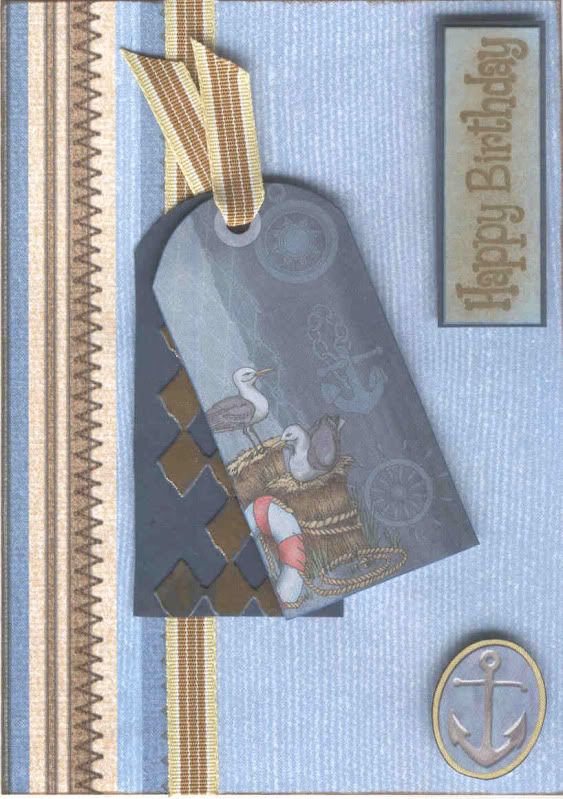
All three of these cars are made using Hot Off The Press products including the Cardmakers Creative Packs and Artsy Collage.
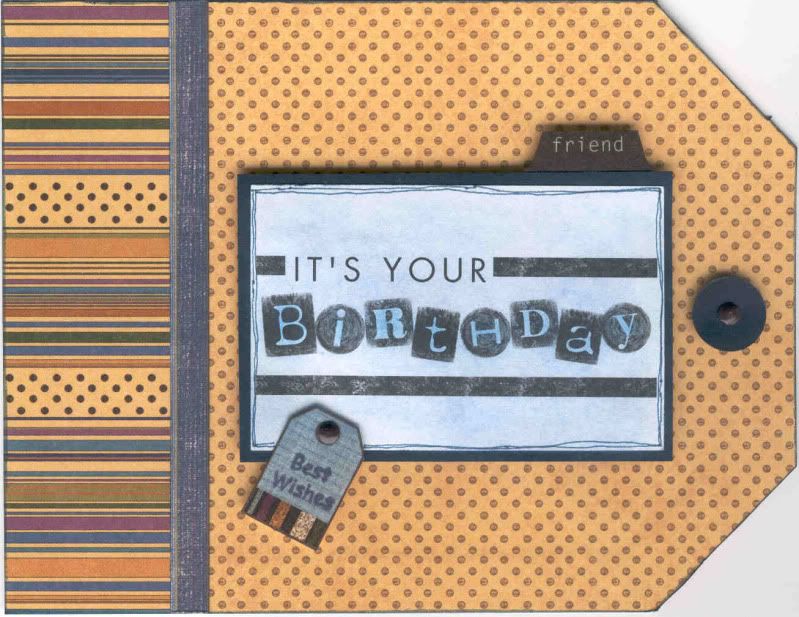
GREEN AND BROWN VINTAGE CAR TAG
PATTERNED PAPERS
Heritage Paper pad - Hot Off The Press
Masculine Artsy Collage - Hot Off The Press
INKS etc
ColorBox Chestnut Roan fluid chalk ink
EMBELLISHMENTS
Green and brown fibres
OTHER
Gold 'It's Your Birthday' peel-offs - Anita's
BLUE SEAGULLS TAGS
The blue tag on the card was embossed using the Diamonds in the Rough Cuttlebug embossing folder. The raised design elements were coloured using a clear embossing pen and the shimmer chalks were added over the top of the ink.
The greeting was created in the same way, using a coloured pigment ink and the shimmer chalks.
STAMPS
Happy Birthday stamp - Papermania (Clare Curd Sentiments set)
PATTERNED PAPERS
Ultimate Cardmakers Creative Pack - Hot Off The Press
INKS ETC
ColorBox Chestmut Roan fluid chalk ink
Earth Tones Shimmer Chalks - Papermania
EMBELLISHMENTS
Brown/beige stripe ribbon - Chatterbox
OTHER
Diamonds In The Rough embossing folder - Cuttlebug
YELLOW POLKA DOT TAG
STAMPS
Best Wishes - Papermania (Clare Curd Sentiments set)
PATTERNED PAPERS
Earth Tones Cardmakers Creative Pack - Hot Off The Press
INKS ETC
Versafine Onyx Black archival pigment ink
EMBELLISHMENTS
Brown mini brads
DIE CUTS/PUNCHES
3/4" circle punch - Craft Planet

Wednesday, 25 March 2009

Pink and Brown Garden Gossip Hedgie

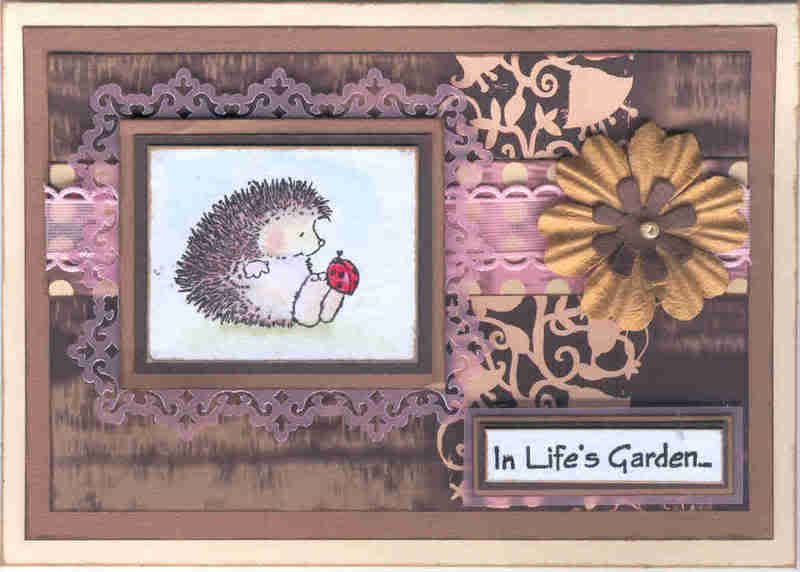
Here's the card I made for the lovely Tara's birthday. Now I know that she has received it, I can put it on my blog!!


The brown/pink flourish border paper from the Papermania Simply Elegant paper pack was matted onto a piece of light brown paper. A length of Chatterbox pink picot-edged organza ribbon was matted onto the pink/cream spot paper from the same paper pad and was then matted onto the larger piece.
The Penny Black Garden Gossip image, from the Bubbly stamp set, was watercoloured using the Whispers Brushstroke markers and matted onto dark brown card, light brown paper and pink vellum punched with the Fiskars Lace border punch. This was matted over the ribbon strip.
Two co-ordinating paper flowers from The Crafty Cow were sewn together using cream embroidery thread and a pearl bead in the centre. These were attached to the other end of the ribbon strip.
The sentiment, from the See D's Garden Of Friendship stamp set, was stamped in Onyx Black Versafine ink and matted onto the dark brown card, light brown paper and pink vellum.
Blog Widget by LinkWithin