Pages

WELCOME

This blog was created to act as a record of the cards and other projects that I have made. It is for both my own reference and to help inspire anyone who wants to take a look.

I'd love it if you'd leave me a comment so that I know what you think of my projects and that you've been to visit!

Anyone can comment, even those who don't have a blog. (Just look for the word 'Comments' under the three little pictures at the end of each post). Readers without a blog can add an anonymous comment, but please leave your name (and docrafts username if applicable) so I know who you are!

Slideshows of all the cards I've uploaded to my blog can be found at the bottom of the page.


PEOPLE WHO FOLLOW MY BLOG

Thursday, 29 July 2010

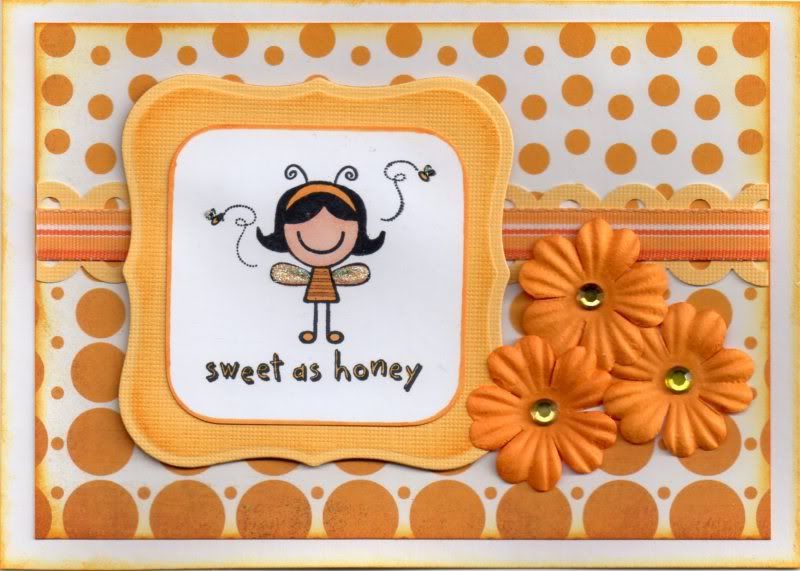
Yellow and Orange Honey Smirk

Here is one of my recent makes for a good friend's little girl. I love this cute image and I'm surprised  this is the only time I've used it.

I am also entering it into a few blog challenges:

The 'Sweet As Honey' image from Smirk was stamped using Memento Tuxedo Black dye ink and coloured using Copic markers:
  • Hair: C8
  • Dress: Y17, E57
  • Wings: E21, E51
  • Skin: E00, E02, E21
  • Shoes/Bees/Headband: Y17
A mat was created for the image panel using the Nestabilities Labels 1 die. I prefer to do this as you can create a smaller increment rather than matting two of the Labels shapes together.

The panel was coloured using the Tim Holtz Wild Honey distress ink whilst keeping the die in place, creating a non-coloured edge.

A strip of the butter yellow card from the DCWV Brights card mat stack was punched along both edges using the Scallop Dot border punch by Martha Stewart to create a border strip. A length of the yellow and orange striped grosgrain ribbon from the Chatterbox Tangerine ribbon pack was then attached across it.

This was then matted across a panel of the Informal paper from the Basic Grey Offbeat paper pad, and distressed around the edges with the Wild Honey ink.

The image panel was attached over the ribbon and highlighted with Craft Planet Yellow glitter glue.

Three paper flowers from The Crafty Cow were added to the right hand side of the panel and faux yellow gem stones were added to their centres.

Sunday, 25 July 2010

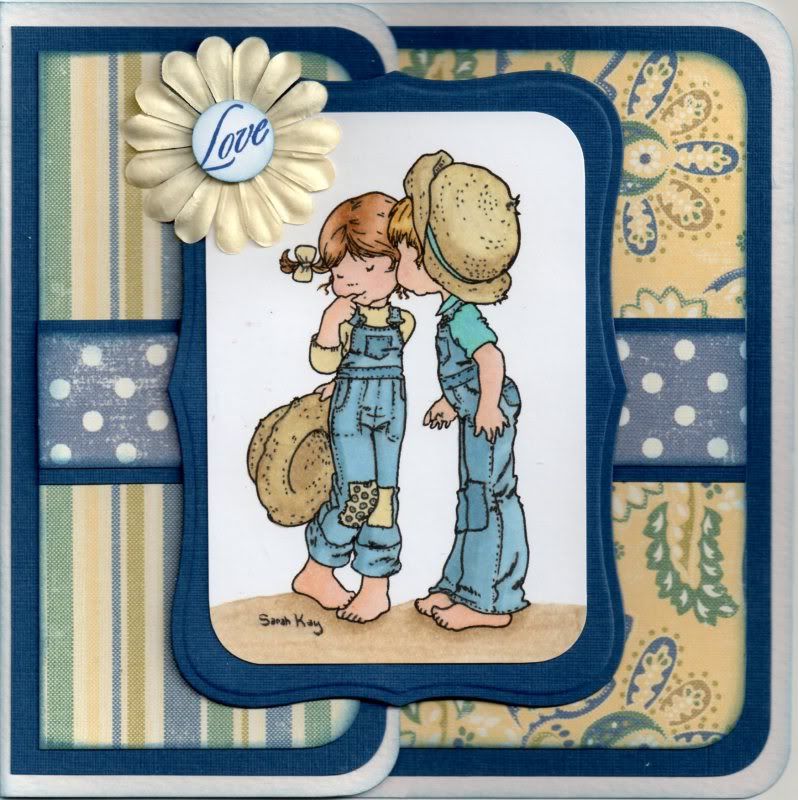
Blue, Green and Yellow Kiss For Chloe

Here is the anniversary card I made for my cousin and her husband, for their second anniversary. I love this image and think it's great for a young couple.

I have also entered it into a few blog challenges:


The Kiss For Chloe image, from Stampavie, was stamped using Versafine Onyx Black archival pigment ink and coloured with Copic sketch markers.
  • Dungarees: B41, B45, B93
  • Hats: Y00, E21, E41, E43
  • Patches/Jumper: Y00, B41
  • Shirt: BG13, B41, G02
  • Girl's Hair: E21, E35, E57
  • Boy's Hair: Y00, Y17, E41
  • Skin: E00, E21, E51, R20
  • Shadow: E41, E43
The image was then cut out and the corners rounded with the large XCut corner rounder punch. This was then matted onto a panel of blue card cut out using the Labels 8 die from Nestabilities.


A square card blank was created from white card and half of the front panel was cut off. The corners were rounded with the XCut punch.

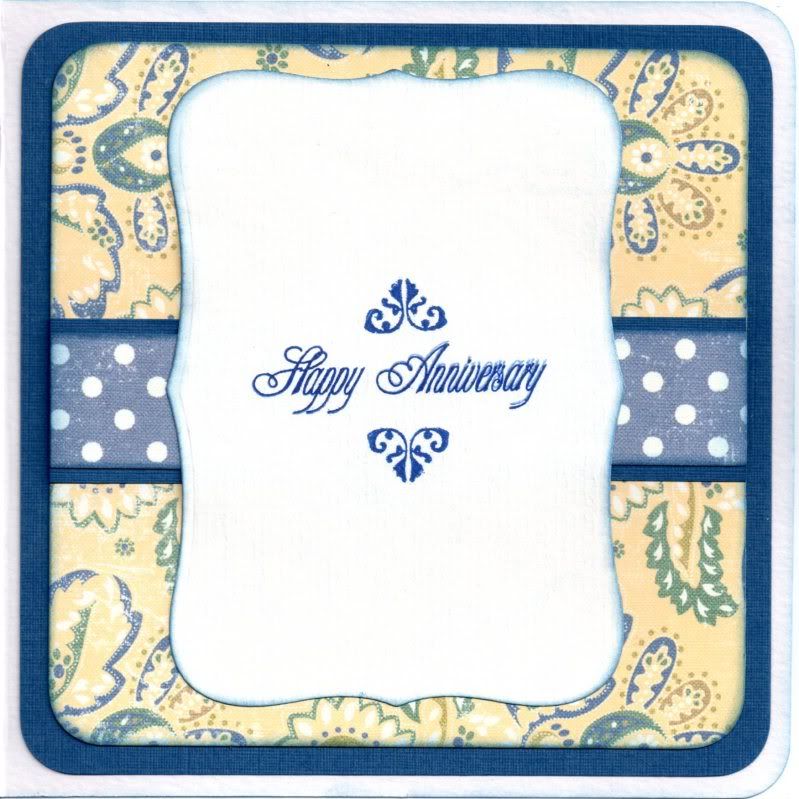
Panels of the blue card were cut to fit the front panel and the inside of the card. A strip of the blue polka dot paper from the Making Memories Fresh Anthology Sydney paper pad was matted onto the blue card and matted onto panels of the blue and green stripe paper and the yellow paisley paper from the same paper pad.

A 15mm circle of white card was punched out using a Craft Planet punch and stamped with the Love stamp from the HOTP Sentiments stamp set using the Versafine Majestic Blue ink. The edges of the circle were then distressed with Tim Holtz Faded Jeans distress ink. The circle was then adhered to the centre of a cream Papermania Imaginisce paper flower and attached to the corner of the image panel.
 
A sentiment panel was then added to the inside of the card using a panel of white paper cut out using the Nestabilities Labels 8 die and adhering it to the inside of the card directly behind the panel on the front of the card so it is not visible when the card is closed.

The sentiment was stamped using the Stamps Away Happy Anniversary stamp with the Majestic Blue ink. The mini flourish corner stamp, from the Fiskars Friends stamps set, was added above and below the sentiment using the same ink.

Saturday, 24 July 2010

Blue and Orange Puppies

Here are a couple of cards I made for a couple of my younger male cousins using a lovely stamp from Little Claire. This particular design I call the Woof Puppy because it comes with an extra stamp that says 'Woof'.

These are also my entries to the current Cupcake Craft blog challenge, which has a theme of Cats and Dogs this week. (Unfortunately, this week's challenge doesn't have a title so I can't add a direct link to the post).


The Woof puppy image was stamped using Versafine Onyx Black archival pigment ink and coloured using Copic markers.
  • Puppy: N1, N3, N5, R20
  • Ball: B00, BG02, Y17, YR02
The ball and the puppy's nose were then covered with the Anita's 3D Gloss to give them a realistic shine.

A panel was cut from white card using the Labels 1 Nestabilities die and embossed with the Swiss Dots Cuttlebug folder. The dots were then coloured with the Copic markers.
  • Dots: N3, N5
This was then matted onto an orange square and a blue big scalloped square both cut using Nestabilities dies.

A strip of the blue retro squares paper from the DCWV Retro Prints paper pad was matted onto the orange and blue card. This was then matted onto a larger panel of orange mini dots paper from the same paper pad.

The sentiment, from the See D's Celebration Messages stamp set, was stamped onto a rectangle of white card using the Onyx Black ink and matted onto the orange and blue card.

I also made a version with a brown puppy:


Again, the puppy and dots were coloured with the Copic Sketch markers:

  • Puppy: E02, E11, E13, R20

  • Ball: B00, BG02, Y17, YR02

  • Dots: E11, E13
This card was actually made for a colour combo challenge (hence the unusual colours used) but of course I missed the deadline so I decided to enter it into this challenge instead.

ETA: This card is now in the Little Claire's Gallery here and here. For some reason they've put the image into the wrong individual image gallery.

Thursday, 22 July 2010

Blog Candy From Pink Gem - CLOSED

Janet over at Pink Gem has a great blog candy up for grabs.

For some reason I can't save a copy of the picture of the blog candy to be able to add it here but you can see a picture of it here.

Up for grabs is:
  • ProMarker Stamping Pack 2
  • Two Pink Gem Stamps of your choice (subject to availability)
  • Pack of 6 Petaloo Wild Roses - Baby Blue
  • Adhesive Pearl Floral & Vines
  • 20 Mulberry Paper Flowers Grey/Black Petals
  • 20 Mulberry Paper Flowers Soft Tan Petals
  • Craftime Mini Crystals - Pink
  • Double Sided Adhesive Pads
To be in with a chance of winning, here's what you've got to do:


  • Post the picture of the blog candy on your blog with a link back to Janet's blog and post a bit about the candy.
  • Leave a link with Mr Linky and then add a comment in case Mr Linky stops working.
The draw for one lucky winner will take place at 6pm on the 30th July

Copic Colour Swatch Idea

I've just discovered this really clever idea over on the Splitcoaststampers forum and wanted to share it with you all. Obviously, it can also be used by the Promarker users as well.

It's a very clever way of seeing which colour pens you have and facilitates colour matching your pens to your patterned papers.

You can see the forum post with pictures to illustrate the idea HERE.

Tuesday, 20 July 2010

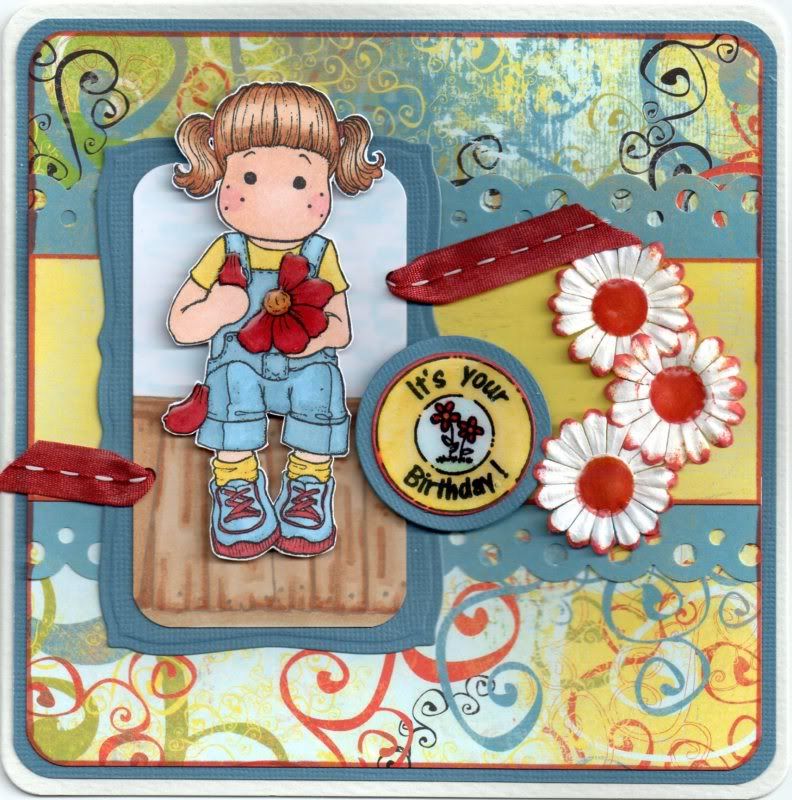
Red, Yellow and Blue Loves Me Tilda

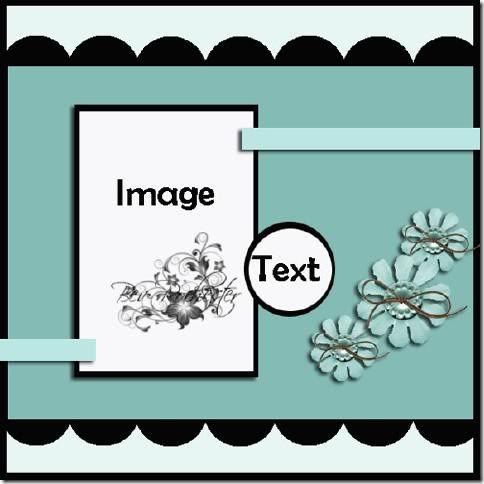
Here is my entry to this week's Just Magnolia blog challenge, which this week is a sketch challenge by Bev.


The Loves Me Tilda image was stamped using Versafine Onyx Black archival pigment ink, coloured using Copic markers and cut out.
  • Hair: E21, E35, E39
  • Skin: E00, E21, E51, R20
  • Top/Socks: Y00, Y08, E41
  • Shoes: B41, B93, E04, E07, R24, YR02
  • Dungarees: B41, B45, B93
  • Flowers: E04, E07, E41, R24, YR02, Y08
A panel was cut from white card and the Magnolia Old Wooden Stand image was stamped using Versafine Vintage Sepia archival pigment ink and coloured using Copic markers.
  • Fence: E21, E35, E39, E43
A sky was coloured also using a blue Copic marker and the blender pen. This was matted onto a panel cut from blue Core'dinations card using a Mega Curved Rectangle Nestabilities die.

The card was then constructed to match the sketch supplied by Bev for the challenge:


A strip of the Surprise paper from the Basic Grey Cupcake paper pad was matted onto a strip of the Kazoo Blue paper from the same paper pad punched using the Scallop Dot border punch from Martha Stewart. This was matted onto a panel of the Streamers paper which was in turn matted onto the blue card.

The Tilda image was matted onto the background panel and two holes were punched and red stitched organza ribbon from the Chatterbox Scarlet Ribbon pack was threaded through them.

The circle greeting sentiment from Aud Designs was stamped using the Tuxedo Black ink and coloured with the Copic markers, cut out with Nestabilities and matted onto blue card.

Three white Papermania Imaginisce paper flowers were stamped in the centres using the circle stamp from the Aud Designs circle sentiments set using ColorBox Warm Red and Burnt Sienna fluid chalk inks. The same inks were used to colour the petal tips.

The sentiment panel was added to the card front to overlap the image and the flowers to the right. Anita's 3D Gloss was added over the flower and petals in the Tilda image, over the sentiment and in the flower centres.

Sunday, 18 July 2010

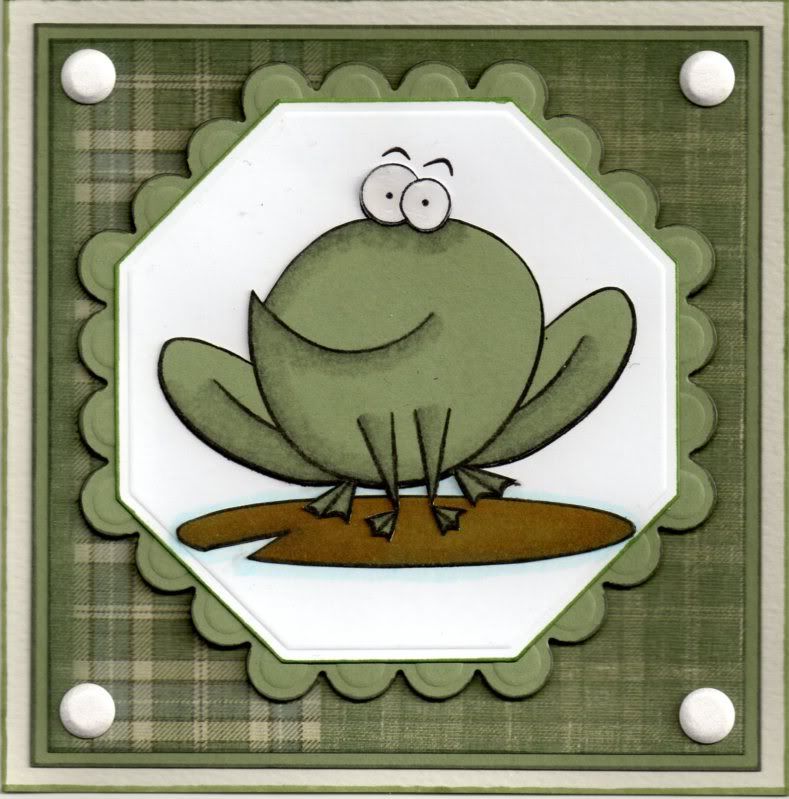
Green and Grey Frog and Lilypad

This is one of my favourite cards that I've made over the past few weeks. It was made for a good friend (he was actually our best man).

I bought the stamp at the Sincerely Yours show at Lincoln from the Ali-Craft stall. They are a set of stamps made exclusively for them, and this particular character is called Filbert!!

This is also my entry to the following challenges:


So, to begin with I stamped the Filbert image, from the Angel Art Ugly Bugs Filbert stamp set, using Versafine Onyx Black archival pigment ink onto sage green card and cut him out. The eyes part of the image was stamped onto white card and the lilypad image was also stamped onto the sage green card and cut out.

The frog image was shaded using a selection of grey Copic markers, and the lilypad was coloured using yellow and grey Copic markers.

A white octagon was die cut using a Nestabilities die and the frog image was stamped in the centre of it so that the eyebrows can be seen. The cut out frog, eyes and lilypad were then adhered over the stamped image and the white octagon was then matted onto a sage green scalloped octagon, also cut out using a Nestabilities die.

The outside of the lilypad image was then highlighted using a blue Copic marker.

A panel of the green and grey plaid paper from the HOTP Heritage paper pad was matted onto the sage green card and attached to the card blank. White card candy from Craftwork Cards were added at the corners. Anita's 3D gloss was added to the eyes to highlight them.

What I didn't yet mention is that this is version two of my little frog - the first one had to be scrapped as the bottle of 3D gloss decided to explode all over the first one and wasn't recoverable!! And glossing the eyes was a bit of an afterthought and I was starting to think it was a really bad idea, but I was really pleased with the final result.

Friday, 16 July 2010

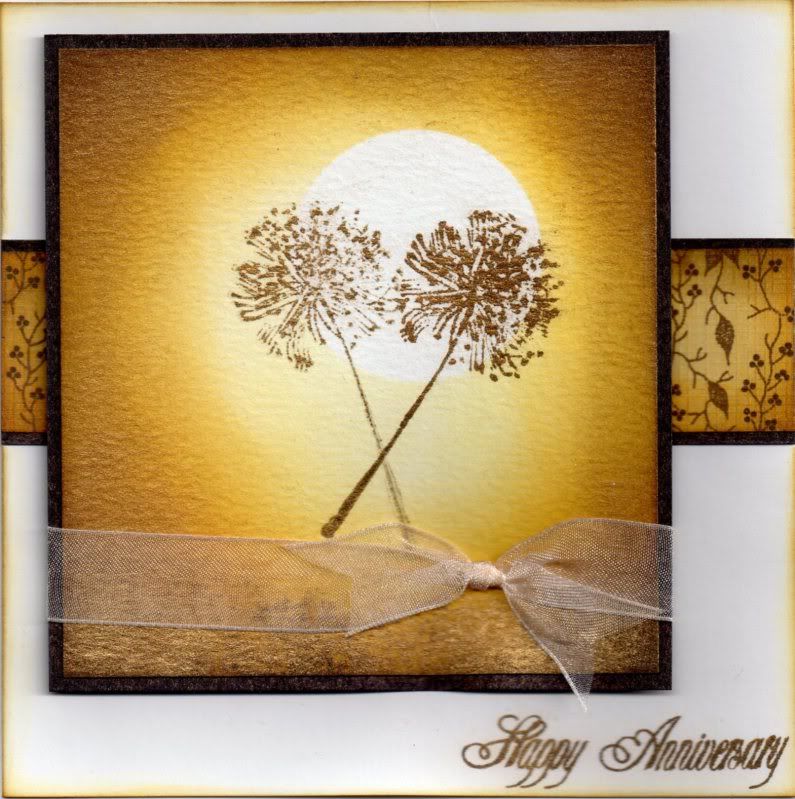
Brown and Gold Mica Agapanthus Golden Wedding Anniversary

This is the card I made for my hubby's aunt and uncle who recently celebrated their Golden Wedding Anniversary.  I had already made a card for my in-laws to send and decided to use my new set of Penny Black stamps to make this card.

I was actually inspired by someone demonstrating the Penny Black stamps at the Lincoln Craft Show (Sincerely Yours) at the end of May so thank you to whoever that was.

I am also entering this card into the following blog challenges:


I began by die-cutting a circle mask from a Post-It note and placing it off-centre on a square of white card. Using Cut 'n' Dry foam, the edges of the panel and up to the mask were colour distressed using the Mustard Seed, Wild Honey and Walnut Stain Tim Holtz Distress inks.

The Post-It note mask was then removed and the flower images were then stamped over the white area using the Agapanthus stamp from the Penny Black Allegro stamp set and the Walnut Stain ink. Gold Lustre mica powder from Stamps Away was then dusted over the whole image highlighting the flower images and the the distressing around the edges. Unfortunately, the shimmer that the mica powders give to the image wasn't captured by the scanned image.

The image panel was then matted onto a panel of brown glimmer card and a length of white organza ribbon was knotted and wrapped around the panel.

A strip of the beige and brown vines paper from the Docrafts V&A Quilts paper pad was distressed using the Wild Honey and Walnut Stain inks and matted onto the brown glimmer card. The image panel was attached over the V&A paper strip and the sentiment was stamped in the bottom right corner of the card blank using the Stamps Away 'Happy Anniversary' stamp and the Walnut Stain ink.

Thursday, 15 July 2010

I've Got My Craft Room Back!!

Managed to get my craft room back yesterday and it's never looked so tidy!! Actually managed to make a start on a card too. Coloured a beautiful Gorjuss Girl image using my Copics - will upload the card when it's finished!!

I will hopefully manage to upload some older cards this week too!

I've also recently discovered that my camera is broken. The cover of the battery bit has broken and it switches on but switches straight back off again. Need to take it to a camera shop and see if it can be repaired or if I am in the market for a new one.

Friday, 9 July 2010

I Am Returned!!!!

After over three weeks of to-ing and fro-ing with BT, my phone and Internet connection has finally been repaired after a lightning strike hit the line and fried it!!!!
They took two weeks to replace the cable (having spent a week of that asking for permission to dig up the road apparently) and then a week of texts from them to us saying the fault was fixed and mobile calls to them saying "Oh no it isn't!!" We eventually managed to drag the BT engineer off the street into the house to show him it wasn't working and it turns out the socket was also fried!!! So, I am now back online!

I am also entertaining the out-laws. They've been with us for nearly two weeks and I've seen quite a lot of Lincolnshire now - including a second trip to Skeg-Vegas (where amazingly I got sunburned!!) Went up on to the roof of Lincoln Cathedral today, having done the floor tour yesterday and I have to say it was very impressive.
I have had to pack up my craft room to put up the sofa bed so haven't made any cards for a couple of weeks, but I have a few to upload from before the phone line problems. Out-laws are heading off on Monday, so will be back with you properly from Monday.
Blog Widget by LinkWithin