Pages

WELCOME

This blog was created to act as a record of the cards and other projects that I have made. It is for both my own reference and to help inspire anyone who wants to take a look.

I'd love it if you'd leave me a comment so that I know what you think of my projects and that you've been to visit!

Anyone can comment, even those who don't have a blog. (Just look for the word 'Comments' under the three little pictures at the end of each post). Readers without a blog can add an anonymous comment, but please leave your name (and docrafts username if applicable) so I know who you are!

Slideshows of all the cards I've uploaded to my blog can be found at the bottom of the page.


PEOPLE WHO FOLLOW MY BLOG

Saturday, 9 November 2013

Bright Green Dillon

So, I have decided it is high time I posted something on my blog. This is actually a card  I made a while back but as I'd sort of already written it up, it'll be easier for me to post.


So, this is a card I was particularly pleased with from last year. It is a first birthday card I made for the son of some friends of ours. He is a lovely little boy and always so cheerful. I've only ever known him to grizzle once and only seen him cry once too (and that was only because he was hungry!)

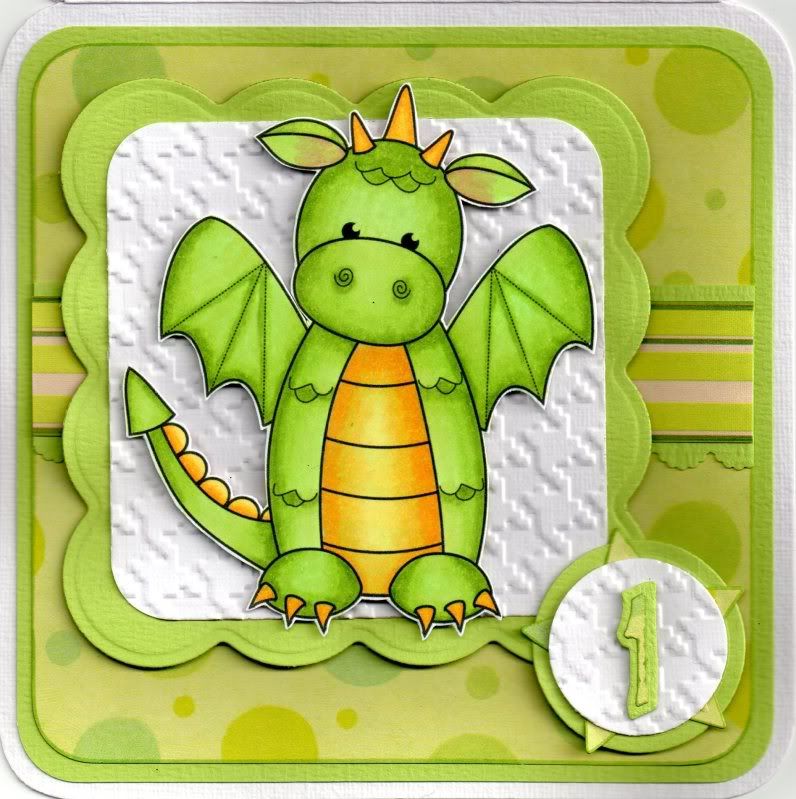
Anyway, here is the card:


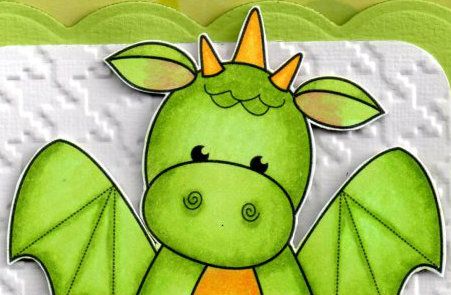
The image is a digi image called Dillon by Janet Roberts at Pink Gem Designs. It's a lovely image and I think I got it when she offered it as a freebie but you can now buy it here.

The digi image was coloured using Copic markers:
  • YG03, YG11, YG13, YG17, Y13, Y15, Y17, R02
The image was then closely cut out.

A strip of green stripe paper from the K&Co Amy Butler Belle paper pad was matted onto a strip of lime green card punched using the EK Success Scalloped Scallop border punch. This was then matted onto a panel of the green spots paper from the K&Co Tim Coffey Birthday paper pad, and also matted onto the lime green card.

Another panel of the green card was then die cut using the Big Scalloped Square Nestabilities die, and a panel of white hessian card (also used for the card blank) was embossed using the Cuttlebug Houndstooth embossing folder.

The Dillon image was then mounted onto the embossed panel using 3D foam.

To create the number 'badge', the number and shadow were cut from the spot paper and the green card using the '1' die from the Sizzix Bounce alphabet sizzlets die set. These were in turn matted onto a circle of embossed card, a star die cut from the spots paper using an XCut die and a circle of the green card.

I was really pleased with the way the image looked after I'd coloured it so hopefully Zack and his mum and dad liked it too!!!

I would like to enter this card into the following challenges:

Brown Sugar - #67 - Anything Goes
Creative Corner - Sing, Sing A Song
Jo's Scrap Shack - Things With Wings
Pattie's Creations - #79 - Birthdays
Sister Act Card Challenge - #32 - Anything Goes
Stampin With The Dragon - Dragons
Crafty Girls - #5 - Anything Goes
Milk Coffee - Fairytales (WINNER)
Seize The Birthday - Birthday + Texture
Divas By Design - Use A Digi
Inklings and Yarns - #35 - Anything Goes
Inky Impressions - #133 - Dies and Punches
Bearly Mine - #111 - Anything Goes
Crafty Sentiments Designs - For The Guys
Our Daily Bread Designs - #177 - Inspired By A Song (Puff The Magic Dragon)
Paperminutes - #294 - Movie/Cinema (Puff The Magic Dragon)
Papertake Weekly - Anything Goes
Through The Craft Room Door - Nov 5-11 - Anything Goes
Card Mania - #33 - Anything Goes
Craftin Desert Divas - #18 - Anything Goes
Love To Scrap - #17 - Anything Goes
Make It Monday - #165 - Anything Goes
My Craft Creations - 4-16/11 - Anything Goes (WINNER)
Scrapbook Stamp Society - #26 - Anything Goes
The Paper Nest Dolls - #16 - Anything Goes
613 Avenue Create - #44 - Anything Goes
Hobbycutz - #23 - Inspired By A Song/Music (Puff The Magic Dragon)
Pile It On - #44 - Animals With Character
The Squirrel and the Fox - #56 - Animal Antics
Cards Galore - Animals
Doodle Pantry - #40 - Any Digi Goes
Natalie and Amy - #14 - For The Boys
Seemacrafts - Bright and Colourful
Catch The Bug - Anything Goes
Whimsy Stamps - #65 - Anything Goes

Goodness, I'd forgotten just how time consuming this is!!!! It's taken me about 3 hours to go through all those challenges!!!!

Wednesday, 15 May 2013

Congratulations On Becoming A Priest

Well, this is an unusual card for me. It was actually requested by a customer of my sister's over in Spain. It's for a man who is about to be ordained as a priest. It threw me a bit because I don't make religious cards and I was racking my brain trying to think what I could use on it. Then it dawned on me.....my brand new Small Gothic Window die from Poppystamps.


So, I then had to decide on a patterned paper, and having decided I wanted to add vellum behind the window, the paper sort of chose itself as I have the Papermania Exquisite Vellum pack and the matching Exquisite paper pad.

As the papers have cream as a base colour I decided to make the window gold. I had originally decided on silver, but all that changed once the papers were chosen.

So, having cut out the window shape from gold satin cardstock, I roughly cut a piece of the script vellum to fit behind.

I then cut a strip of the scroll leaf paper and matted it onto the gold satin card.


The next part was the fun part.......the Spellbinders Bracket Borders 1 dies. These are my most favourite of dies at the moment, at least until I buy some new ones, I'm very fickle like that!

I opted for the lattice inset die as that one seemed the most masculine of the three and the dot dash edge die to go with it. Both were placed against the edge of the card blank and die cut. Not as easy as you might think in a Bigshot as these would benefit from being run through the machine lengthwise but I didn't have that luxury so I placed them on my baseplate at a slight angle and ran them through as far as they would go without damaging the edge of the card blank. I then turned the whole thing around and ran it through again. Because the rollers have a tendency to jump over the dies when they are parallel to the die, it took a few passes to get it completely cut out, but the effect it gave was well worth it.

The sentiment, from the Woodware Jane's Script sentiment stamp set, was then stamped onto the patterned paper strip using Memento Espresso Truffle dye ink. The same ink was also used to stamp the cross, a Katie & Co image, directly onto the cardblank. The image was positioned using a Stamp-a-ma-jig to ensure it was in the centre of the window once it was added over the top.

All the pieces were edged using the Y26 Copic marker to match in with the gold card stock.


For the inside, I die cut another window shape and matted my writing paper behind it that I use for the insert panels in my cards. A panel of the scroll leaf paper was die cut using the dot dash edge bracket die, as was a panel of the gold satin card. These were layered together and added to the bottom edge of the card, so that the pattern on the paper shows through the lattice design on the front.


Here are the challenges I'd like to enter this card into:

Sunday, 6 January 2013

First Post From My Tablet

So, if you are a regular reader of my blog then you will know that I haven't posted anything new on my blog for over a year. The reason being my laptop died on me and I have to compete with hubby for the main computer which meant not being able to regularly check up on my posts, comments and blog challenges.

However, my nice kind hubby bought me a tablet for Christmas which means I could load up my blog from the main computer but keep track with the tablet.

So, from tomorrow I shall try and upload a card everyday. I've got plenty to upload as I have all of last year's cards to do!!
On a different note, if any of you have a Nook tablet, let me know in the comments. I've only been using mine for a couple of days now so starting to get to grips with it. Hubby also got me a stylus which makes using it much easier.

Anyway, here's hoping I can get back into posting regularly as I've really missed it and, of course, all of you in blogland!
Blog Widget by LinkWithin