Well, things are moving apace now. We are off up to Lincoln in the next hour and tomorrow morning we sign for the new house. I'm keeping my fingers crossed that they have chosen a nice house for us, but most importantly one that is big enough to fit all our junk, I mean stuff in.
In the nearly eleven years that I've been married, I'm about to move into 5th house, and the MOD have decided that each time they assign us a house it will be smaller than the one before, so I'm hoping they've bucked the trend because we can't fit all our stuff in the one we're in as it is!!!
So, I'll be away until tomorrow evening and then there'll be lots of sorting and packing so I don't know when I'll be back on.
Not sure if Crafting Gill from the docrafts forum comes on here, but I just wanted to let her know that I have made the Wallet Card for the swap, just haven't stamped anything to go in it as yet, and I'm not sure I've got enough white card at the moment so that probably won't get sent out until after we move. I'll be in touch with you soon about that though!!
Well, better go and finish the packing.
Wish me luck!!!
Wednesday, 30 September 2009
Tuesday, 29 September 2009
Pink and Green Regency Chair
This is the card that I made for my nan's birthday using the beautiful Papermania Signature Regency paper pad. I actually cut out the chair image from one of the papers.
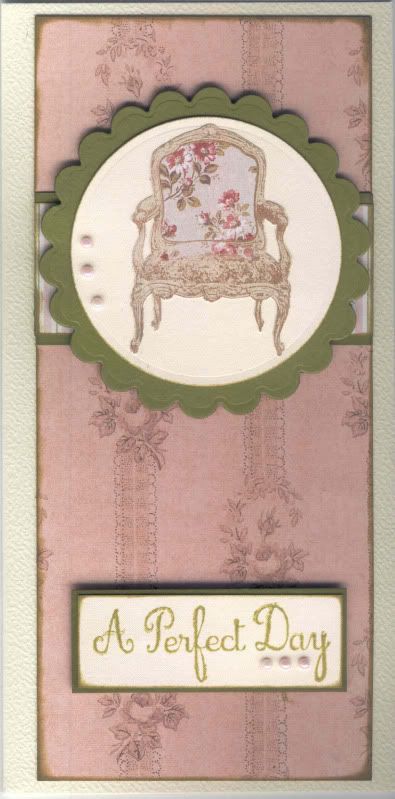
This is a very simple card to make. The chair image was cut out from the patterned paper and adhered to a circle of cream card cut into a circle using the Nestabilities die. This was then matted onto a green scalloped circle, also using the Nestabilities.
A strip of the striped paper from the Regency paper pad was matted onto the green card and then across a panel of the pink paper and attached to the card blank.
The greeting was stamped using the 'A Perfect day' stamp from the Papermania Jesse Edwards Boutique stamp set and the Versafine Spanish Moss archival pigment ink. This was cut out and matted onto the green card. The chair panel was attached at the top of the card and the sentiment to the bottom.
Lavender self-adhesive pearls were then added to the edge ofthe chair panel and the sentiment panel.
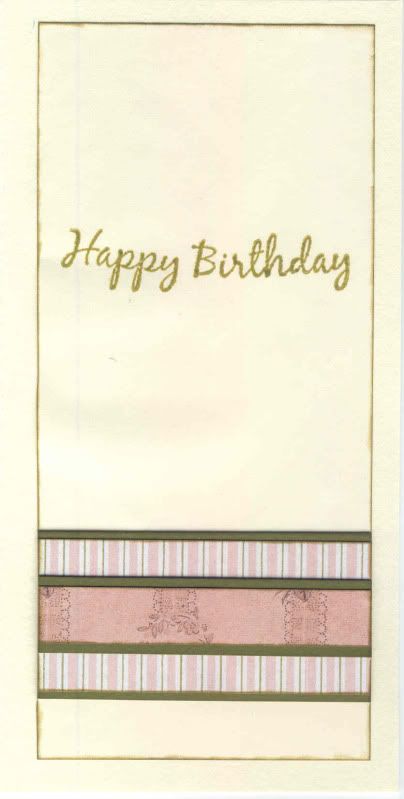
The inside of the card was then decorated using the Regency papers and the 'Happy Birthday' stamp from the Papermania Clare Curd Sentiment stamp set.

Saturday, 26 September 2009
Green and Heather Penny Black Water Lily Skiing
This week I decided to have a go at the Secret Crafter blog challenge #51. The theme this week is Animal Antics.
I decided to use an image kindly donated by Donna/Princesskarra over on docrafts in an image swap.
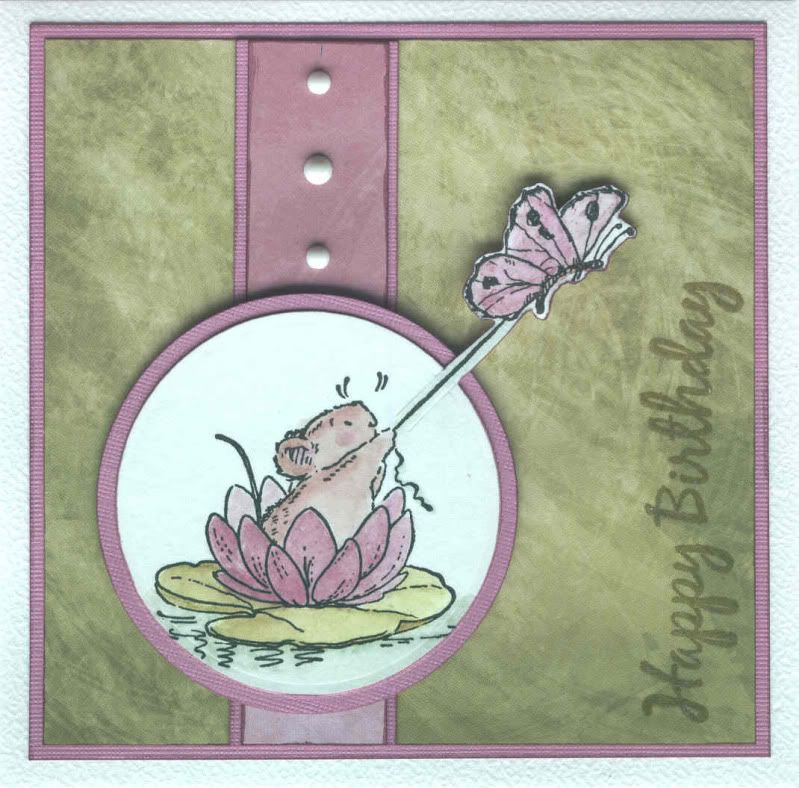 The Penny Black Water Lily Skiing image was watercoloured using the Whispers Brushstroke markers and the butterfly and water lily was highlighted using Crayola Baby Pink pearlescent glitter glue.
The image was then cut out using one of the standard circle Nestabilities dies and the 'out of the box' technique. This was then matted onto heather cardstock from the DCWV Brights Mat Stack.
A square of olive green Brushstroke paper from the Papermania Oriental Spice paper pad was matted onto the heather cardstock, and a strip of the plum Brushstroke paper from the same paper pad was matted onto a strip of the heather card was matted onto the green panel with the image panel matted over the top.
The 'Happy Birthday' sentiment, from the Papermania Clare Curd Sentiments stamp set, was stamped on the green panel using ColorBox Dark Moss fluid chalk ink. This was traced over with the pink glitter glue.
Papermania white adhesive pearls were added to the plum paper strip.
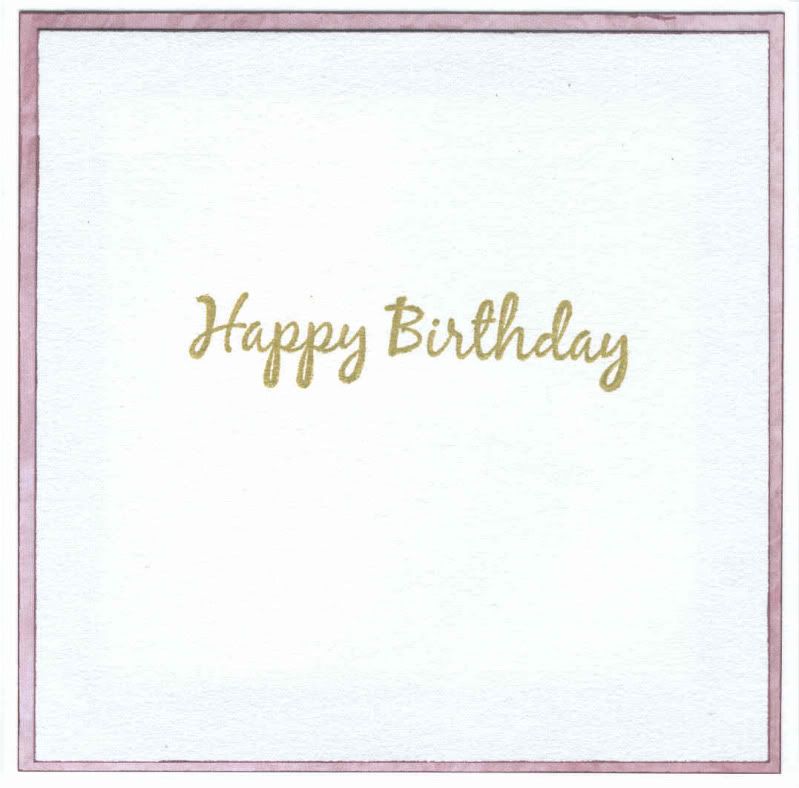 The inside of the card was only minimally decorated using the plum Brushstroke paper, and the 'Happy Birthday' stamp with the ColorBox Dark Moss fluid chalk ink.
I decided to use an image kindly donated by Donna/Princesskarra over on docrafts in an image swap.
 The Penny Black Water Lily Skiing image was watercoloured using the Whispers Brushstroke markers and the butterfly and water lily was highlighted using Crayola Baby Pink pearlescent glitter glue.
The image was then cut out using one of the standard circle Nestabilities dies and the 'out of the box' technique. This was then matted onto heather cardstock from the DCWV Brights Mat Stack.
A square of olive green Brushstroke paper from the Papermania Oriental Spice paper pad was matted onto the heather cardstock, and a strip of the plum Brushstroke paper from the same paper pad was matted onto a strip of the heather card was matted onto the green panel with the image panel matted over the top.
The 'Happy Birthday' sentiment, from the Papermania Clare Curd Sentiments stamp set, was stamped on the green panel using ColorBox Dark Moss fluid chalk ink. This was traced over with the pink glitter glue.
Papermania white adhesive pearls were added to the plum paper strip.
 The inside of the card was only minimally decorated using the plum Brushstroke paper, and the 'Happy Birthday' stamp with the ColorBox Dark Moss fluid chalk ink.
Posted by
Kathleen
at
1:07 pm
Thursday, 24 September 2009
Blue and Brown Penny Black Cat with Balloons
I love this cute cat image - perfect for any cards you have to make for the men in your life.
The cat image is from the Penny Black B for Bubbly stamp set. The image was stamped in Versafine Onyx Black archival pigment ink and watercoloured using Whispers Brushstroke markers. Anita's 3D Gloss was added over the balloons.
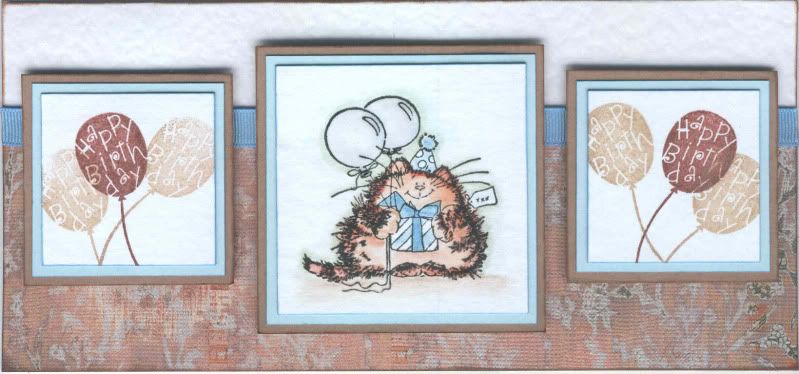 The 'Happy Birthday' balloons from the Hero Arts Birthday Messages stamp set were stamped using the two brown inks in the Brilliance Tiramisu triple inkpad. All the image panels were matted onto blue and brown cardstock.
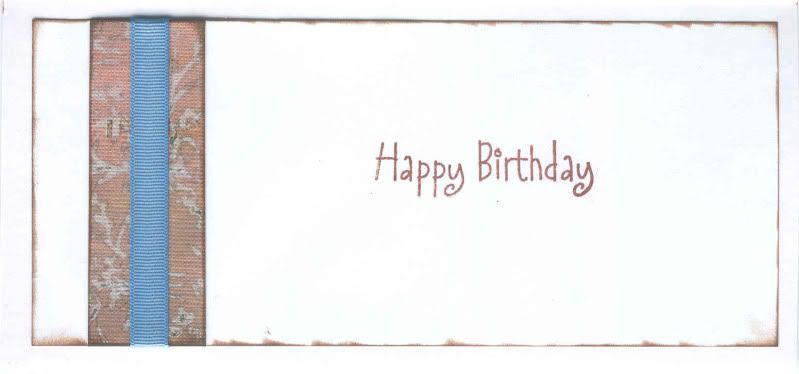
Patterned paper from the DCWV Old World mat stack was adhered to the lower part of the card blank and a length of light blue grosgrain ribbon from Dovecraft was attached over the join.
The cat image is from the Penny Black B for Bubbly stamp set. The image was stamped in Versafine Onyx Black archival pigment ink and watercoloured using Whispers Brushstroke markers. Anita's 3D Gloss was added over the balloons.
 The 'Happy Birthday' balloons from the Hero Arts Birthday Messages stamp set were stamped using the two brown inks in the Brilliance Tiramisu triple inkpad. All the image panels were matted onto blue and brown cardstock.
Patterned paper from the DCWV Old World mat stack was adhered to the lower part of the card blank and a length of light blue grosgrain ribbon from Dovecraft was attached over the join.
Tuesday, 22 September 2009
Brown and Teal Penny Black Garden Buggy
Here is my entry to this week's Stamp Something Blog Challenge. The theme this week is to use your favourite colours on your card. My favourite colours at the moment are teal blue and chocolate brown, which seem to be featuring increasingly in home decor.
I decided to use a new paper pad that I bought as a result of my trip to Julie's. Yes, she made me buy something else!! I saw the papers in her pad and thought 'I've got to get me some of them!'
The paper pad in question is the Making Memories Funky Vintage Ruby Collection pad. It has some beautiful bold patterned papers in there!
So, here is my card:
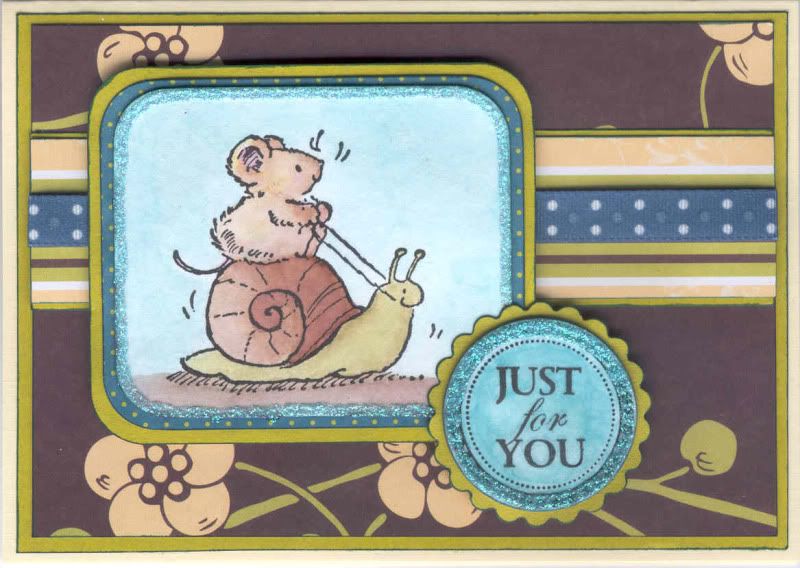
I started by picking out the papers that I wanted to use and coloured my image to match. The image is a Penny Black image called 'Garden Buggy' that I received from Princesskarra over on the docrafts forum. I watercoloured the image using the Whispers Brushstroke markers.
The image was matted onto a panel of the teal mini dots paper from the paper pad and green paper.
A strip of the multi stripe paper was matted onto the green paper and a length of Anita's spotted teal grosgrain ribbon was adhered across the striped paper and attached across a panel of the brown flower and berry paper.
The 'Just For You' sentiment from the Papermania 'Just For You' stamp set was stamped using Versafine Onyx Black archival pigment ink onto white card and watercoloured using the teal Whispers Brushstroke marker. This was cut out using a standard circle Nestie die and matted onto a scalloped circle of the green paper.
Craft Planet Ice Blue glitter glue was used to trace around the edge of the image panel and the sentiment circle.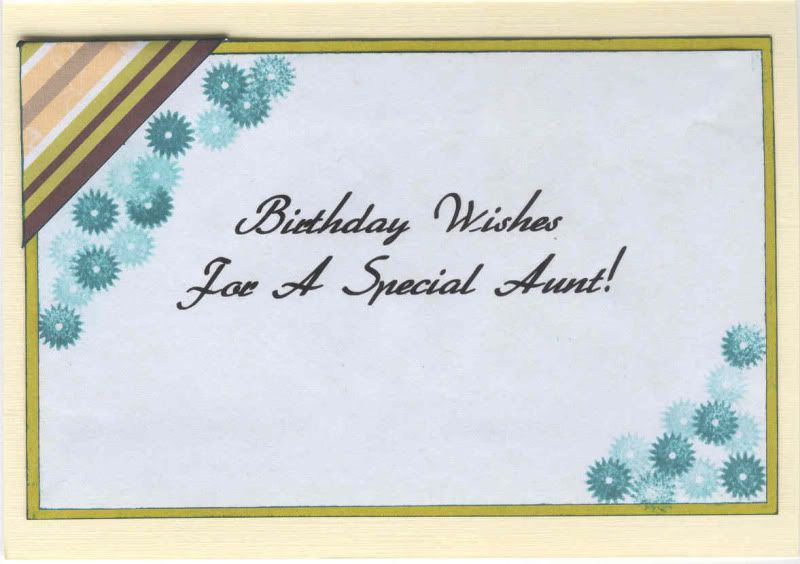

I also decorated the inside of the card. This was decorated slightly differently to how I had intended to decorate it, mainly because I managed to smudge the blue ink used to edge the panel onto the white paper. So, I decided to overstamp the area with the daisy stamp from the Papermania 'Just For You' stamp set with Marvy Matchables Turquoise dye ink. A folded corner was created using the multi stripe paper from the Ruby paper pad.
Posted by
Kathleen
at
6:20 pm
Monday, 21 September 2009
Coral Pink and Dark Grey Birthday Rose Concertina - Secret Crafter Challenge #50
Here is my entry to this week's Secret Crafter Saturday Blog Challenge. The theme this week, #50, is:
'One For The Girls', and I think this fits the bill perfectly!
I've had this salmon pink concertina card blank for many years, but never knew what to do with it, because of the colour. Then, when I decided to use these papers, I knew exactly which card blank to turn to. I think I received it as part of a subscription gift for Quick Cards Made Easy.
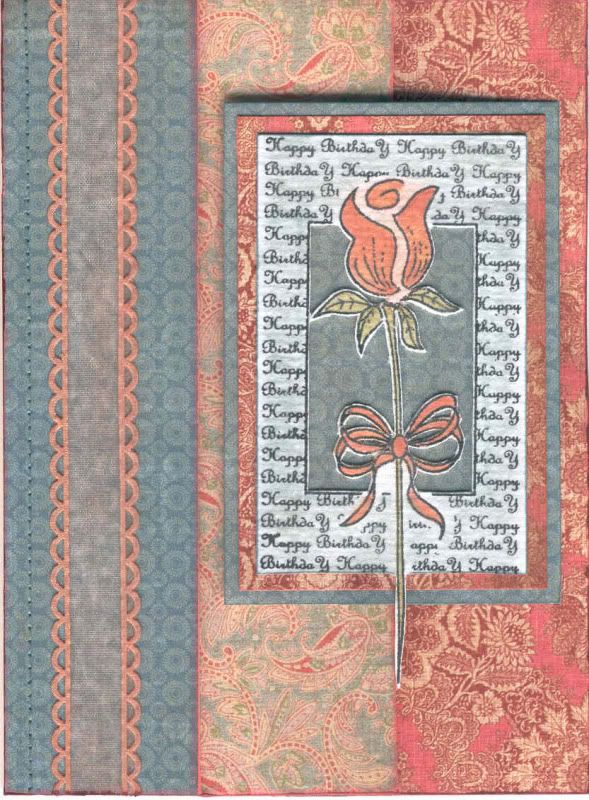 To make the card, I started by covering the panels with papers from the K&Co Bailey paper pad. A length of coral pink picot edge organza ribbon from Chatterbox was attached along the front panel and a dressmaker's tracer wheel was run along the edge of the panel and faux stitching was added using a blue fineliner pen.
The birthday rose image from Anita's was stamped using Versafine Onyx Black archival pigment ink and watercoloured using Whispers Brushstroke markers and highlighted with Papermania Earth Tones Shimmer Chalks. The image was cut out, including the centre area, and matted onto matching papers from the Bailey paper pad. This was attached to the centre panel.
Here is a view of the open card, showing the inside of the panels.
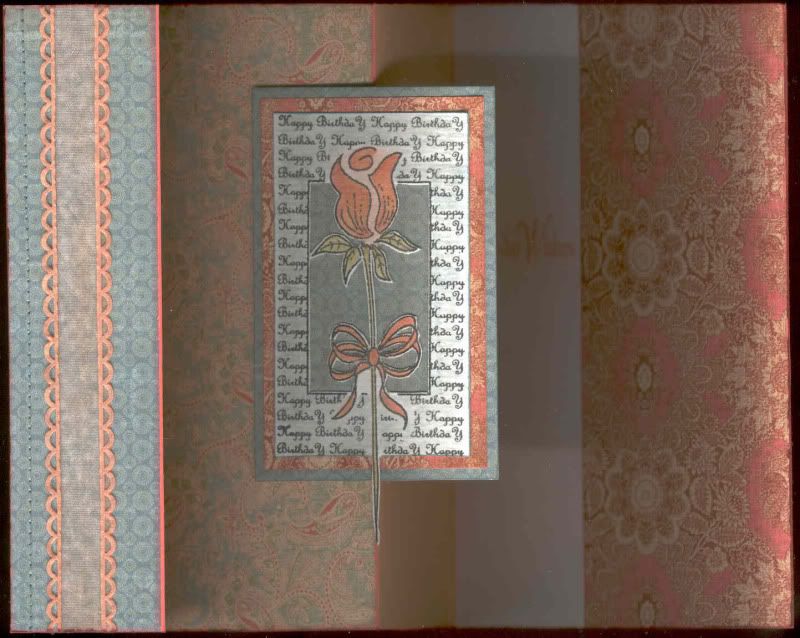 I was rather pleased with this card, even if I say so myself!!
'One For The Girls', and I think this fits the bill perfectly!
I've had this salmon pink concertina card blank for many years, but never knew what to do with it, because of the colour. Then, when I decided to use these papers, I knew exactly which card blank to turn to. I think I received it as part of a subscription gift for Quick Cards Made Easy.
 To make the card, I started by covering the panels with papers from the K&Co Bailey paper pad. A length of coral pink picot edge organza ribbon from Chatterbox was attached along the front panel and a dressmaker's tracer wheel was run along the edge of the panel and faux stitching was added using a blue fineliner pen.
The birthday rose image from Anita's was stamped using Versafine Onyx Black archival pigment ink and watercoloured using Whispers Brushstroke markers and highlighted with Papermania Earth Tones Shimmer Chalks. The image was cut out, including the centre area, and matted onto matching papers from the Bailey paper pad. This was attached to the centre panel.
Here is a view of the open card, showing the inside of the panels.
 I was rather pleased with this card, even if I say so myself!!
Posted by
Kathleen
at
12:27 am
Thursday, 17 September 2009
Blue and Brown Italian Architecture
These cards are made with a couple of my new Crafty Individuals stamps.
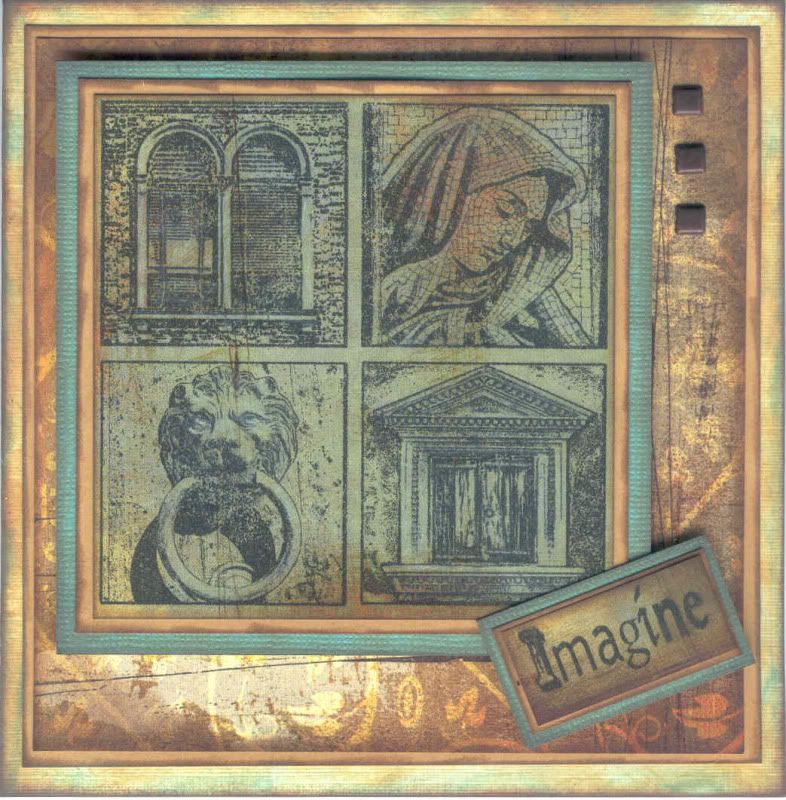
I decided to stamp the image using Versafine Onyx Black archival pigment ink onto the blue patterned paper from the K&Co Basic Grey Motifica paper pad. The images were highlighted with white pencil.
Four of the six images were cut out as a square and matted onto golden brown card and blue Core'dinations cardstock. The paper and cardstock were distressed with ColorBox Amber Clay, Tangerine and Chestnut Roan fluid chalk inks. The 'Imagine' text (one of 5 freebie stamps from Crafty Individuals - how cool is that!!) was also stamped onto the blue paper from the Motifica paper pad and matted on the brown and blue cardstocks.
A panel of the beige vine patterned paper from the Motifica paper pad was matted onto the golden brown cardstock and embellished with brown metallic square brads from Dovecraft.
The edges of the card blank were distressed with the brown inks and ColorBox Celadon pigment ink.
The inside of the card was also decorated.
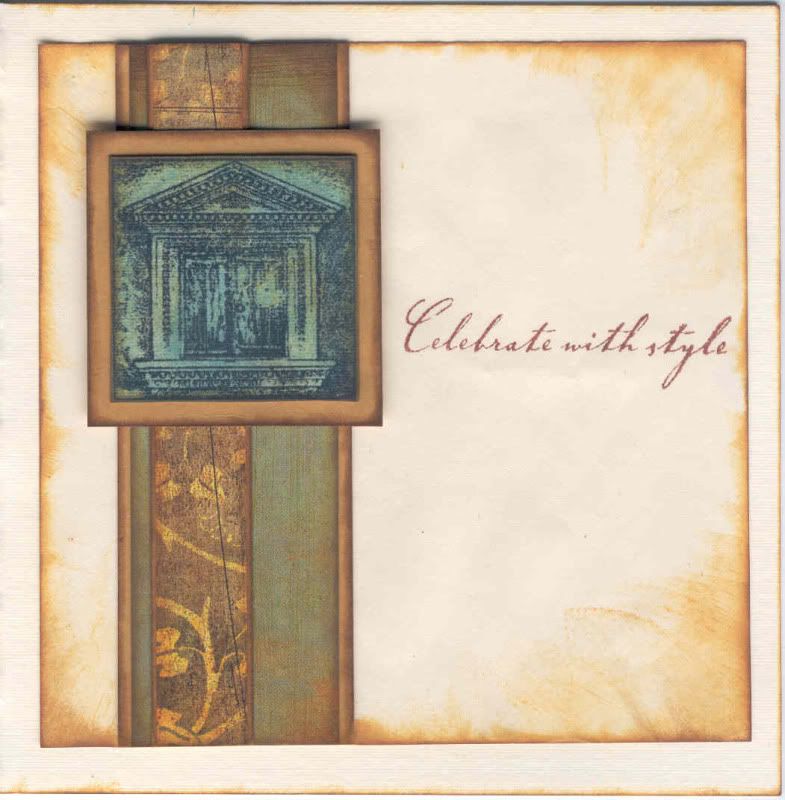
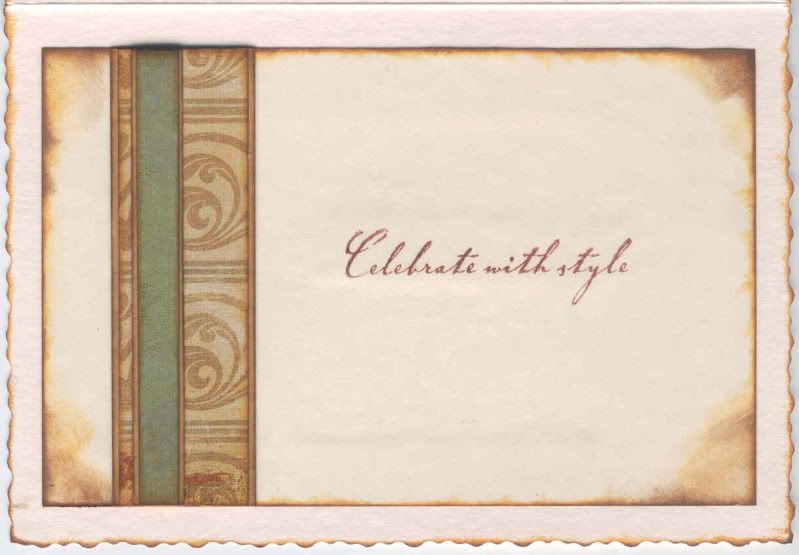
Another of the images was stamped out and matted onto the golden brown cardstock and layered over strips of the papers from the Motifica paper pad. The 'Celebrate with Style' sentiment, from the Hero Arts Birthday Messages stamp set, was stamped on the inside using the Coffee Bean ink from the Brilliance Tiramisu triple inkpad.
The remaining two images were then used to make a second card. The same golden brown and blue cardstocks were used to mat the images and text panels. A scroll paper from the Motifica paper pad was used as the main background paper with the Dovecraft brads in the corners.
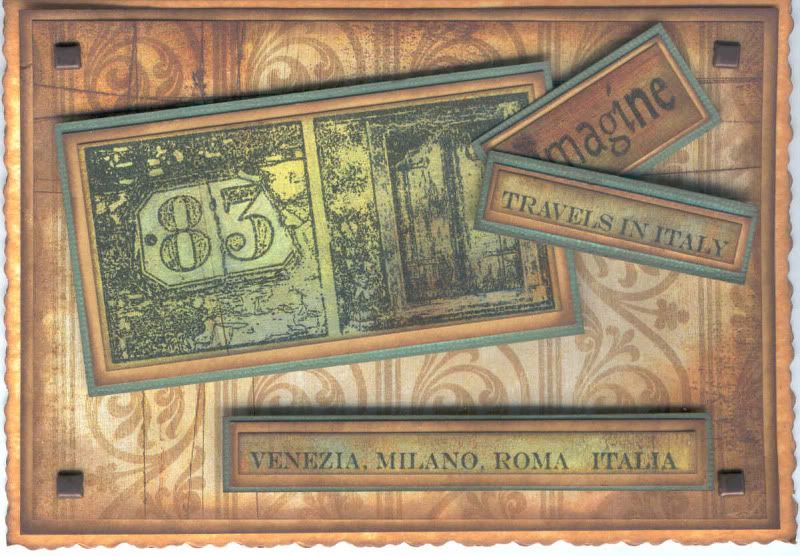 The patterned papers were also used to decorate the inside of the card.

I decided to stamp the image using Versafine Onyx Black archival pigment ink onto the blue patterned paper from the K&Co Basic Grey Motifica paper pad. The images were highlighted with white pencil.
Four of the six images were cut out as a square and matted onto golden brown card and blue Core'dinations cardstock. The paper and cardstock were distressed with ColorBox Amber Clay, Tangerine and Chestnut Roan fluid chalk inks. The 'Imagine' text (one of 5 freebie stamps from Crafty Individuals - how cool is that!!) was also stamped onto the blue paper from the Motifica paper pad and matted on the brown and blue cardstocks.
A panel of the beige vine patterned paper from the Motifica paper pad was matted onto the golden brown cardstock and embellished with brown metallic square brads from Dovecraft.
The edges of the card blank were distressed with the brown inks and ColorBox Celadon pigment ink.
The inside of the card was also decorated.

Another of the images was stamped out and matted onto the golden brown cardstock and layered over strips of the papers from the Motifica paper pad. The 'Celebrate with Style' sentiment, from the Hero Arts Birthday Messages stamp set, was stamped on the inside using the Coffee Bean ink from the Brilliance Tiramisu triple inkpad.
The remaining two images were then used to make a second card. The same golden brown and blue cardstocks were used to mat the images and text panels. A scroll paper from the Motifica paper pad was used as the main background paper with the Dovecraft brads in the corners.
 The patterned papers were also used to decorate the inside of the card.
I really like these stamps and think they are great for the dreaded men's cards. Crafty Individuals has a great range of stamps to choose from!!
Posted by
Kathleen
at
9:00 am
Monday, 14 September 2009
Blue Hot Off The Press Butterfly Anniversary
This card was inspired by a card I saw in Crafty Katy's docrafts gallery and on her blog.
I decided to use a butterfly stamp that I've had for a while, and inadvertantly made it in Villa colours, the team the recipients both support. (They'll come to their senses one day!!)
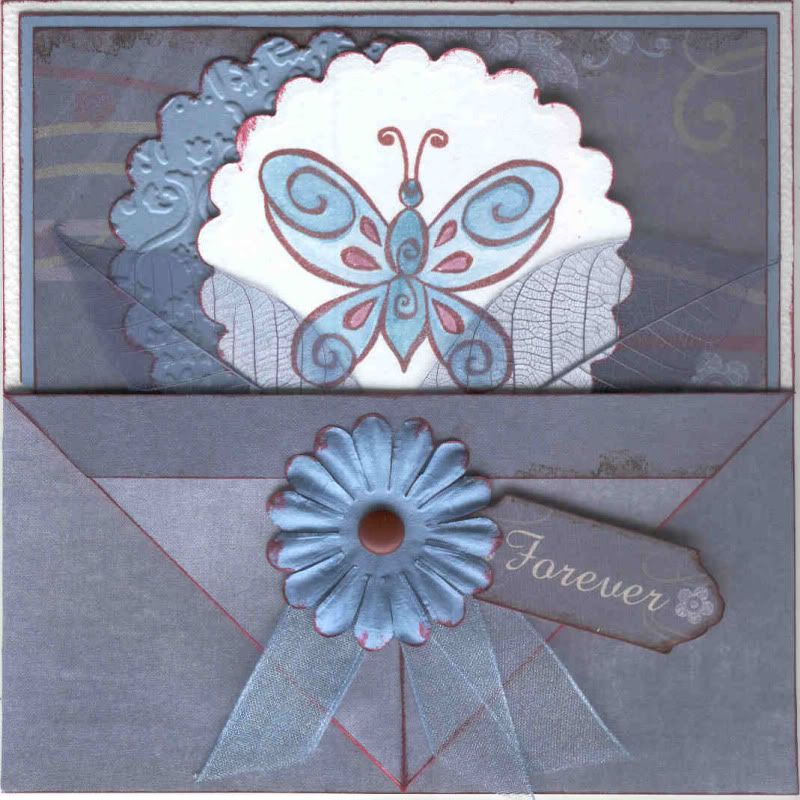 The corners of the card were scored and folded back. The front of the card, the inside of the card and flaps were covered with paper from the HOTP Pretty Cardmakers Creative Pack.
The butterfly image from Anita's was stamped using Versafine Crimson Red archival pigment ink, and watercoloured using the Whispers Brushstroke markers. The butterfly was cut out using a scalloped circle Nestabilities die. A second scalloped circle was cut from lavender card and then embossed using the Cuttlebug Textile embossing folder. These were attached to the front of the card and blue skeleton leaves were attached over the top.
The flaps were folded up and stuck down. A large red Papermania brad was attached through a large blue Papermania Imaginisce paper flower and attached over a length of pale blue organza ribbon.
The 'Forever' art, also from the HOTP Pretty Creative Pack, was attached under the paper flower.
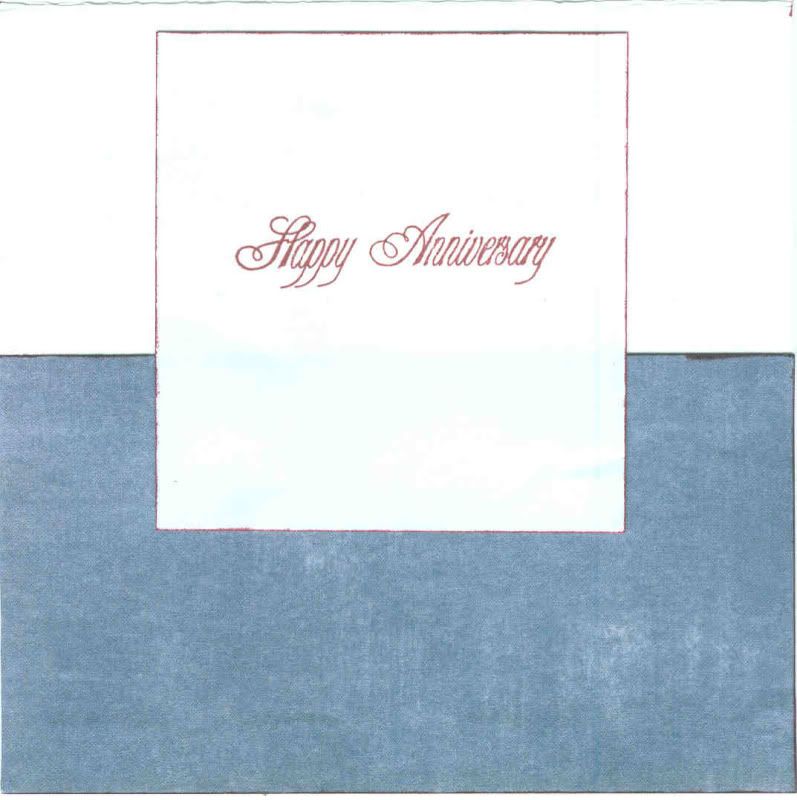
I also decorated the inside of the card with co-ordinating paper from the HOTP Pretty Creative Pack and the 'Happy Anniversary' stamp from Stamps Away, using the Crimson Red ink.
I decided to use a butterfly stamp that I've had for a while, and inadvertantly made it in Villa colours, the team the recipients both support. (They'll come to their senses one day!!)
 The corners of the card were scored and folded back. The front of the card, the inside of the card and flaps were covered with paper from the HOTP Pretty Cardmakers Creative Pack.
The butterfly image from Anita's was stamped using Versafine Crimson Red archival pigment ink, and watercoloured using the Whispers Brushstroke markers. The butterfly was cut out using a scalloped circle Nestabilities die. A second scalloped circle was cut from lavender card and then embossed using the Cuttlebug Textile embossing folder. These were attached to the front of the card and blue skeleton leaves were attached over the top.
The flaps were folded up and stuck down. A large red Papermania brad was attached through a large blue Papermania Imaginisce paper flower and attached over a length of pale blue organza ribbon.
The 'Forever' art, also from the HOTP Pretty Creative Pack, was attached under the paper flower.
I also decorated the inside of the card with co-ordinating paper from the HOTP Pretty Creative Pack and the 'Happy Anniversary' stamp from Stamps Away, using the Crimson Red ink.

Posted by
Kathleen
at
9:00 am
Friday, 11 September 2009
Pink, Orange and Teal Doodle Butterfly - Stampin' For The Weekend Challenge #14
I decided to have a go at this week's Stampin' For The Weekend blog challenge, #14, which was a colour challenge to use pink, orange and teal. But, I forgot it was a Friday challenge, so of course I missed the deadline. PANTS!!
Anyway, here are the cards I made. I decided to make two cards, similar but different, if you know what I mean.
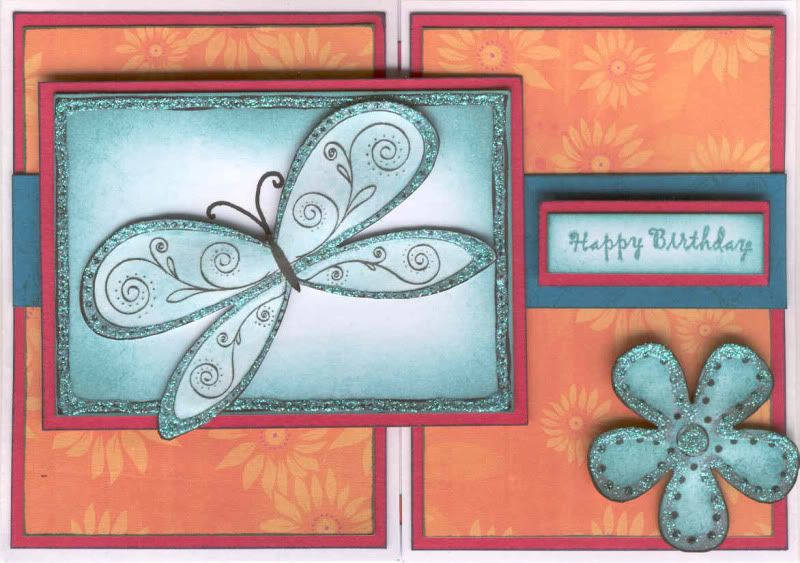
I started by creating an A6 landscape gatefold card from white card.blank.
I then stamped out the doodle butterfly and the large flower from the Papermania Clare Curd Doodles stamp set using Versafine Onyx Black archival pigment ink onto white card, and then watercoloured them using Marvy Matchables Turquoise dye ink. Both images were then highlighted with Craft Planet Ice Blue glitter glue.
A panel of the white card was coloured using the Turquoise ink with a piece of sponge, and a doodled dotty border was drawn around the panel using a black fineline marker. The Ice Blue glitter glue was then used to create a glittery border.
Pink card and orange daisy paper from the Dovecraft Designer Wild Blossom paper pack were then matted onto the gatefold panels of the card blank, and strips of teal blue card were added across the two sides.
The mini 'Happy Birthday' stamp from the Papermania Clare Curd Sentiments stamp set was stamped using the Turquoise ink and the panel was colour tinted around the edges. This was then matted on to pink card and attached to the right of the teal blue strip. The butterfly was 3D'd onto the blue panel and the flower was attached to the bottom right of the card.
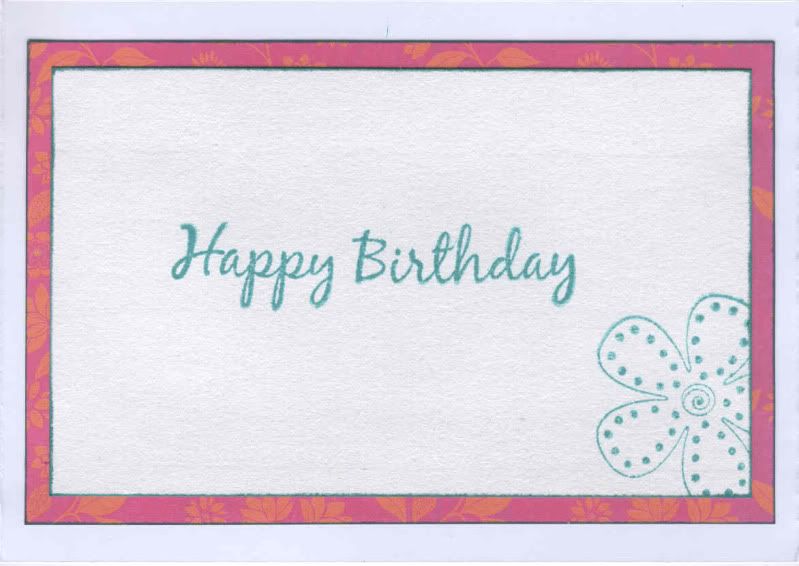
The inside of the card was also decorated, using the pink and orange floral paper from the Wild Blossom paper pack. The white paper, taken from a writing pad, was stamped using the Turquoise ink and the large 'Happy Birthday' stamp from the Papermania Clare Curd Sentiments stamp set and the large flower used on the front.
I am very grateful to Alex for her tip of rubbing over the acrylic stamps with a rubber to ensure that the dye ink 'sticks' to the stamps rather than pooling up.
I made a second card using the same images and papers but making a portrait bottom opening card, or tent card.
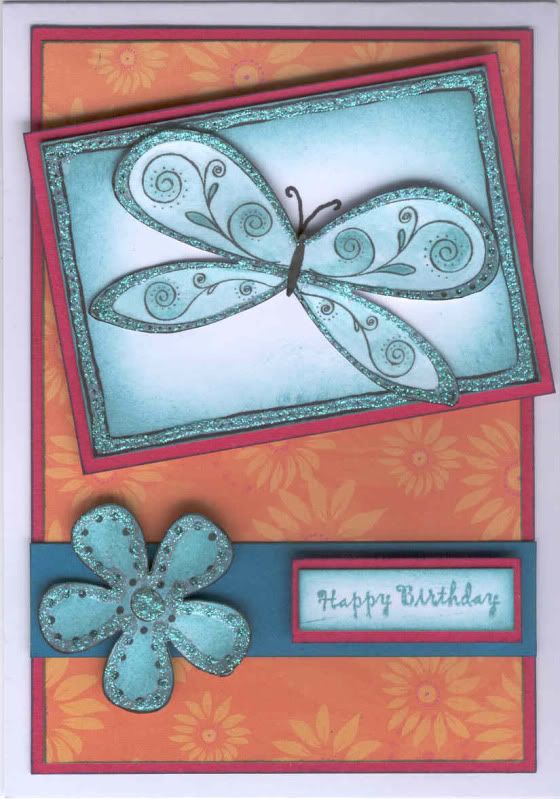
The butterfly panel was attached at an angle and the flower was attached to the left hand side of the teal strip.
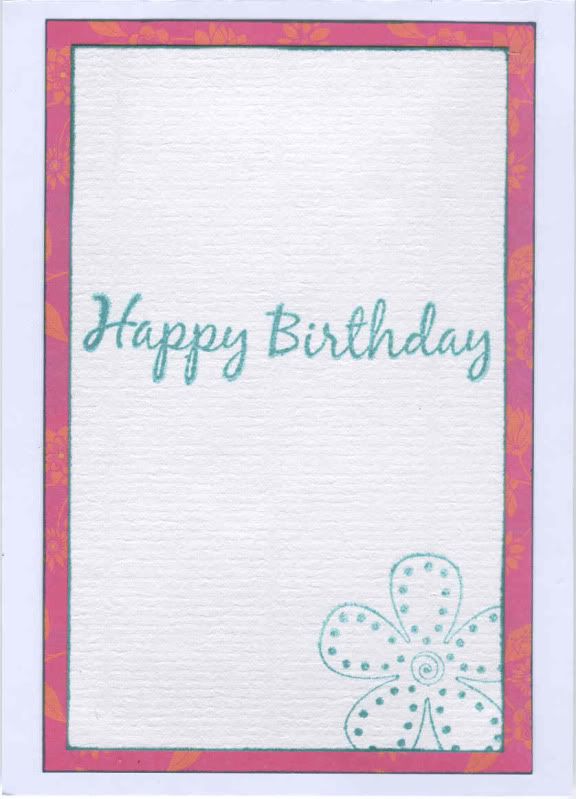
The inside of the card was decorated in a similar way to the previous card.
Anyway, here are the cards I made. I decided to make two cards, similar but different, if you know what I mean.

I started by creating an A6 landscape gatefold card from white card.blank.
I then stamped out the doodle butterfly and the large flower from the Papermania Clare Curd Doodles stamp set using Versafine Onyx Black archival pigment ink onto white card, and then watercoloured them using Marvy Matchables Turquoise dye ink. Both images were then highlighted with Craft Planet Ice Blue glitter glue.
A panel of the white card was coloured using the Turquoise ink with a piece of sponge, and a doodled dotty border was drawn around the panel using a black fineline marker. The Ice Blue glitter glue was then used to create a glittery border.
Pink card and orange daisy paper from the Dovecraft Designer Wild Blossom paper pack were then matted onto the gatefold panels of the card blank, and strips of teal blue card were added across the two sides.
The mini 'Happy Birthday' stamp from the Papermania Clare Curd Sentiments stamp set was stamped using the Turquoise ink and the panel was colour tinted around the edges. This was then matted on to pink card and attached to the right of the teal blue strip. The butterfly was 3D'd onto the blue panel and the flower was attached to the bottom right of the card.
The inside of the card was also decorated, using the pink and orange floral paper from the Wild Blossom paper pack. The white paper, taken from a writing pad, was stamped using the Turquoise ink and the large 'Happy Birthday' stamp from the Papermania Clare Curd Sentiments stamp set and the large flower used on the front.
I am very grateful to Alex for her tip of rubbing over the acrylic stamps with a rubber to ensure that the dye ink 'sticks' to the stamps rather than pooling up.

I made a second card using the same images and papers but making a portrait bottom opening card, or tent card.

The butterfly panel was attached at an angle and the flower was attached to the left hand side of the teal strip.
The inside of the card was decorated in a similar way to the previous card.

Posted by
Kathleen
at
2:39 pm
New Background Design
As you can see, I've changed the background of my blog.
I got the background, which is free, from the Template Mama.
Please can you let me know if there is any text that you can't read very well due to the colours or the font. It's difficult to gauge as the font colours apply to both the main part and the sidebars where the background colours are different.
I've spent literally hours changing widgets and fonts and colours, so hopefully it won't need much more work so I can dedicate more time to the actual cards!!!
Thursday, 10 September 2009
Great blog candy from Squiggle Stamps - CLOSED
The Squiggle Stamps blog is celebrating its launch and new DT with an amazing blog candy.
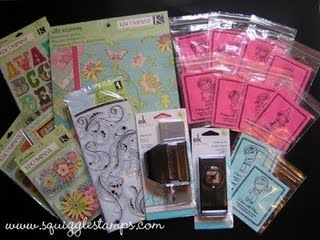
Up for grabs is:
1. Full Set of Oscar & Daisy Designs - 10 stamps in total
2. K&Co Wild Raspberry Paper Pad
3. K&Co Wild Raspberry Alphabet Rub Ons
4. K&Co Wild Raspberry Clearly Yours Dome Stickers
5. K&Co Wild Raspberry Layered Floral Accents
6. K&Co Wild Raspberry Chipboard Frames
7. Inkadinkado Clear Stamps set - Dot Flourishes
8. EKSuccess Edger Punch - Zig Zag Stitch
9. EKSuccess Medium Punch - Scallop Photo Corner
I LOVE the K&Co Wild Raspberry range, so personally I'd love to win this, not to mention those amazing stamps!!!
To be in with a chance of winning this blog candy, you will need to do the following:
1. Leave a comment on the blog candy post.
2. Add a link on your blog telling people about the blog candy.
3. Become a follower of the Squiggle Stamps Blog - this will get you one entry.
In addition all orders place on http://www.squigglestamps.com/will also have their names entered so this can double your chances of winning!!
The Squiggle Candy will stay open until Saturday 26th September at mid-day. The winner will be announced sometime after that.
Wednesday, 9 September 2009
Green and Copper Landmarks
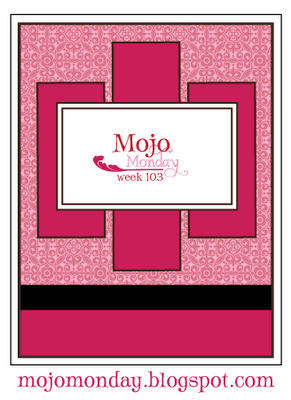
This is my entry to this week's Mojo Monday Blog Challenge, which follows a sketch from Mojo Monday as shown below.
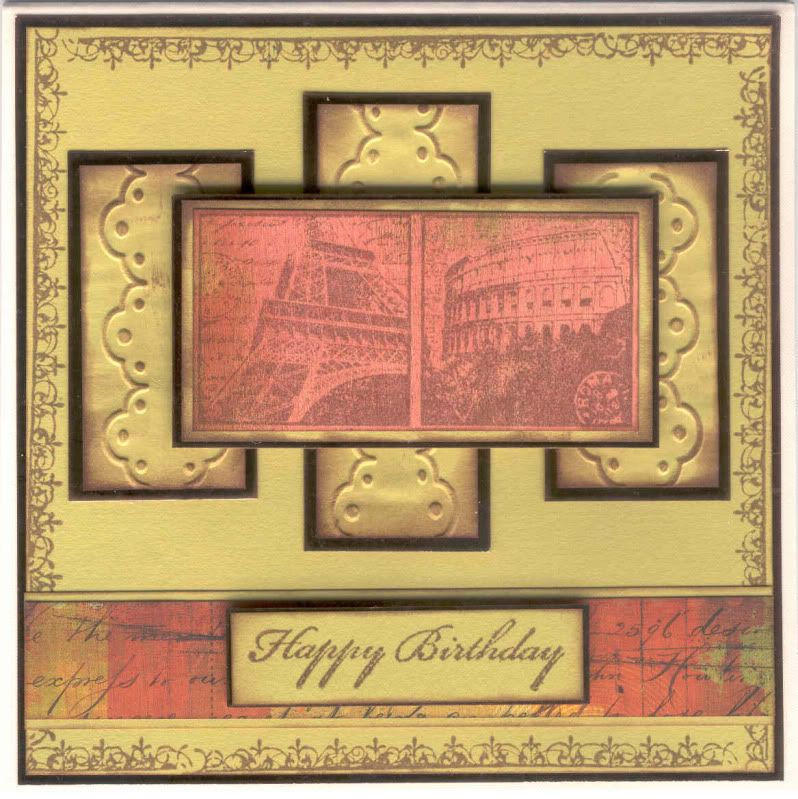
Panels of the green paper were embossed using the Cuttlebug hinge border embossing folder, and the ColorBox Chestnut Roan Fluid Chalk inkpad was swiped over the top to pick out the embossed details. These were then matted onto the copper mirror card.
A panel of the green paper was stamped around the edge using the Fleur de Lys border stamp from the Autumn Leaves On The Edge stamp set and the Vintage Sepia ink. A panel of the collage script paper from the Sublime paper pad was matted onto the green paper and then across the bottom of the large green panel.
The 'Happy Birthday' sentiment, from the Papermania 'Just For You' stamp set, was stamped using the Vintage Sepia ink onto a piece of the green paper and matted onto the copper mirror card.
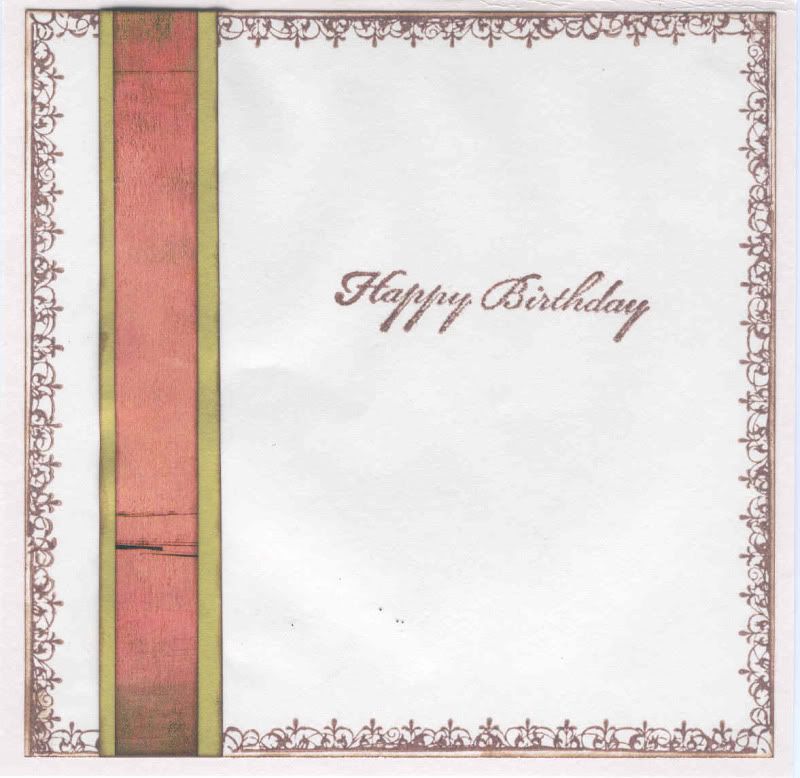
I also decorated the inside of the card using the Fleur de Lys border stamp with the Vintage Sepia ink and a strip of the orange brushstroke paper.
Posted by
Kathleen
at
3:03 pm
Tuesday, 8 September 2009
Purple and Green Heart Dazzles
This is my entry to this week's Secret Crafter Blog Challenge. This week's challenge, #48, is 'Hearts and Flowers' and so I decided to use my prize from the Paper Wishes Forum, which I won in a competition set when the forum was first launched.
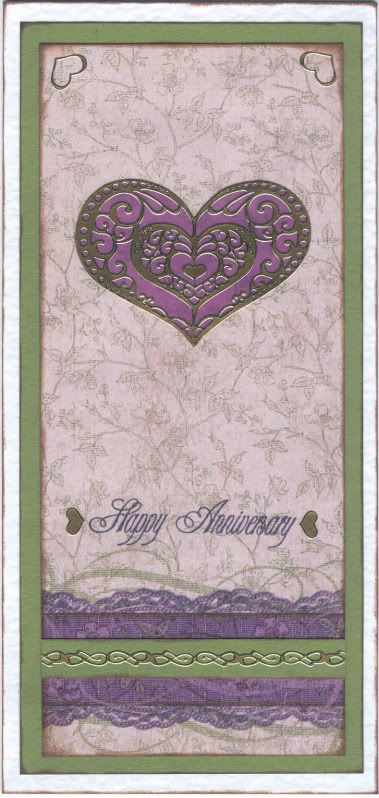 Firstly, the heart Dazzles sticker was layered onto violet vellum from Papermania. This was then cut out and attached to a panel of lilac floral paper from the Hot Off The Press Dazzles and More paper book.
A greeting was stamped towards the bottom of the panel using the 'Happy Anniversary' stamp from Stamps Away using Versafine Imperial Purple archival pigment ink. Other Dazzles stickers were attached in the corners of the panel and either side of the stamped greeting.
A strip of green paper was attached across the purple lace section of the paper and a Dazzles border sticker was attached across it.
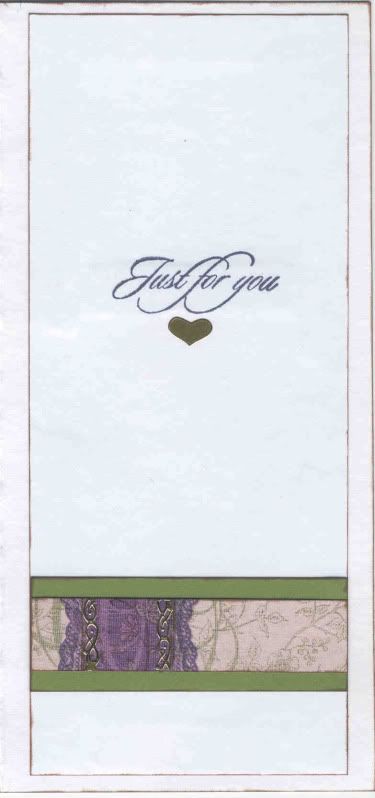
The inside of the card was decorated using matching papers and Dazzles and the 'Just For You' greeting from the Hot Off The Press Sentiments stamp set, stamped using the Imperial Purple ink.
 Firstly, the heart Dazzles sticker was layered onto violet vellum from Papermania. This was then cut out and attached to a panel of lilac floral paper from the Hot Off The Press Dazzles and More paper book.
A greeting was stamped towards the bottom of the panel using the 'Happy Anniversary' stamp from Stamps Away using Versafine Imperial Purple archival pigment ink. Other Dazzles stickers were attached in the corners of the panel and either side of the stamped greeting.
A strip of green paper was attached across the purple lace section of the paper and a Dazzles border sticker was attached across it.

The inside of the card was decorated using matching papers and Dazzles and the 'Just For You' greeting from the Hot Off The Press Sentiments stamp set, stamped using the Imperial Purple ink.
Posted by
Kathleen
at
6:00 pm
Amazing Blog Candy from Rowena - CLOSED
Rowena, over on her Craftypagan blog, has reached 20,000 hits and has some amazing blog candy up for grabs..
Up for grabs is £20 to spend at Quixotic Paperie in the form of a gift voucher, and any Sugar Nellie stamp of your choice.

To be in with a chance, you must do the following:
1. Become a follower of Rowena's blog (if you're not already)
2. Post a link on your blog about this candy on your sidebar or in a blog post (please use the Quixotic voucher picture)
3. Tell Rowena what craft item is top of your wish list
There are a few rules for participating in this blog candy:
This is only open to those with blogs.
One post per person.
This blog candy closes on Tuesday 29th September at 12 noon GMT.
The winner will be announced on Wednesday 30th September and will be picked by random.org
Up for grabs is £20 to spend at Quixotic Paperie in the form of a gift voucher, and any Sugar Nellie stamp of your choice.

To be in with a chance, you must do the following:
1. Become a follower of Rowena's blog (if you're not already)
2. Post a link on your blog about this candy on your sidebar or in a blog post (please use the Quixotic voucher picture)
3. Tell Rowena what craft item is top of your wish list
There are a few rules for participating in this blog candy:
This is only open to those with blogs.
One post per person.
This blog candy closes on Tuesday 29th September at 12 noon GMT.
The winner will be announced on Wednesday 30th September and will be picked by random.org
Brown and Blue Two Today Dandelion
I decided to enter the Pollycraft Blog Challenge #23 this week, and the theme this week is 'Furry Friends'. I decided to use one of the lovely Dandelion stamps from the Daisy and Dandelion stamp set.
The card is for a little two-year-old boy, the son of a friend of mine.
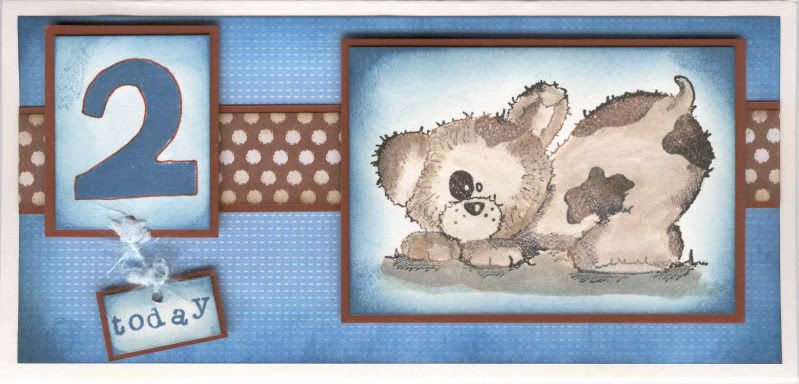 I started by stamping the Dandelion image onto cream cardstock using Versafine Onyx Black and Vintage Sepia archival pigment inks, giving the image a mottled effect. The image was then watercoloured using Tim Holtz Frayed Burlap distress ink.
The edges of the image panel were then distressed using the Tim Holtz Faded Jeans distress ink, and matted onto brown cardstock.
The number '2' was stamped using the Faded Jeans ink and a foam stamp from the Papermania Large Sheet Numbers stamp set. The number was outlined using the fine end of a brown Whispers Brushstroke marker.
The word 'today' was also stamped onto cream card using the Faded Jeans ink and a Studio G mini alphabet stamp set. The two panels were then distressed around the edges using the Faded Jeans ink. Both were then matted onto brown cardstock and a length of pale blue fibre was tied between both of the panels to suggest movement.
The card blank was covered using the blue mesh paper from the Daisy and Dandelion Picnic Patch paper pad, first distressed with the Faded Jeans ink. A strip of the brown polka dot paper, also from the Picnic Patch paper pad, was distressed with the Frayed Burlap ink and then matted onto the brown cardstock, was attached across the blue paper and the image panels adhered on top using 3D foam pads.
The card is for a little two-year-old boy, the son of a friend of mine.
 I started by stamping the Dandelion image onto cream cardstock using Versafine Onyx Black and Vintage Sepia archival pigment inks, giving the image a mottled effect. The image was then watercoloured using Tim Holtz Frayed Burlap distress ink.
The edges of the image panel were then distressed using the Tim Holtz Faded Jeans distress ink, and matted onto brown cardstock.
The number '2' was stamped using the Faded Jeans ink and a foam stamp from the Papermania Large Sheet Numbers stamp set. The number was outlined using the fine end of a brown Whispers Brushstroke marker.
The word 'today' was also stamped onto cream card using the Faded Jeans ink and a Studio G mini alphabet stamp set. The two panels were then distressed around the edges using the Faded Jeans ink. Both were then matted onto brown cardstock and a length of pale blue fibre was tied between both of the panels to suggest movement.
The card blank was covered using the blue mesh paper from the Daisy and Dandelion Picnic Patch paper pad, first distressed with the Faded Jeans ink. A strip of the brown polka dot paper, also from the Picnic Patch paper pad, was distressed with the Frayed Burlap ink and then matted onto the brown cardstock, was attached across the blue paper and the image panels adhered on top using 3D foam pads.
Posted by
Kathleen
at
1:47 am
Sunday, 6 September 2009
Red, White and Black Wedding Card
This is a wedding card that I made for a couple of friends who recently tied the knot.
I wanted to do something different, so I decided to use a stamp I've had for a while. Having stamped it, I realized that the bird looked a bit lonely, so I decided to stamp out a second one, cut it out and decoupaged it onto the branch.
I went with a red, white and black colour scheme as I thought it looked quite classic. Amazingly, the bride decided to wear a red wedding dress, so I made a wise choice!!
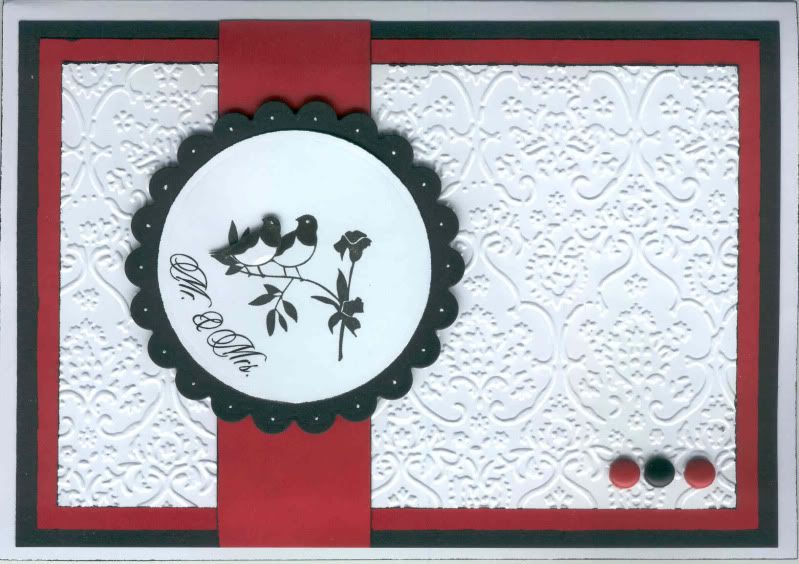 STAMPSBird on a Branch stamp - Kate Knight for Dovecraft
INKS ETCVersafine Onyx Black archival pigment ink
Brilliance Graphite Black pigment ink
Whispers Brushstroke markers
White gel pen
DIE CUTS/PUNCHESStandard Circle and Scalloped Circle Nestabilities
EMBELLISHMENTSLarge red and black brads - Papermania
OTHERSwiss Dots Embossing Folder - Cuttlebug
'Mr & Mrs' rub-on - Making Memories Wedding Wordage rub-ons
I wanted to do something different, so I decided to use a stamp I've had for a while. Having stamped it, I realized that the bird looked a bit lonely, so I decided to stamp out a second one, cut it out and decoupaged it onto the branch.
I went with a red, white and black colour scheme as I thought it looked quite classic. Amazingly, the bride decided to wear a red wedding dress, so I made a wise choice!!
 STAMPSBird on a Branch stamp - Kate Knight for Dovecraft
INKS ETCVersafine Onyx Black archival pigment ink
Brilliance Graphite Black pigment ink
Whispers Brushstroke markers
White gel pen
DIE CUTS/PUNCHESStandard Circle and Scalloped Circle Nestabilities
EMBELLISHMENTSLarge red and black brads - Papermania
OTHERSwiss Dots Embossing Folder - Cuttlebug
'Mr & Mrs' rub-on - Making Memories Wedding Wordage rub-ons
Posted by
Kathleen
at
12:20 pm
Thursday, 3 September 2009
Lilac Multicoloured Daisies Smirk Hugs
This is my second entry to the Mojo Monday Blog Challenge #102.
It is also the 400th card design that I have produced since I started making cards (not including Christmas cards!!) I keep a book with a record of what I have used when making all my cards so that if I want to reproduce a card, or locate a patterned paper from somewhere, I know what it is.
Anyway, here is the second card I made to this week's Mojo Monday sketch:
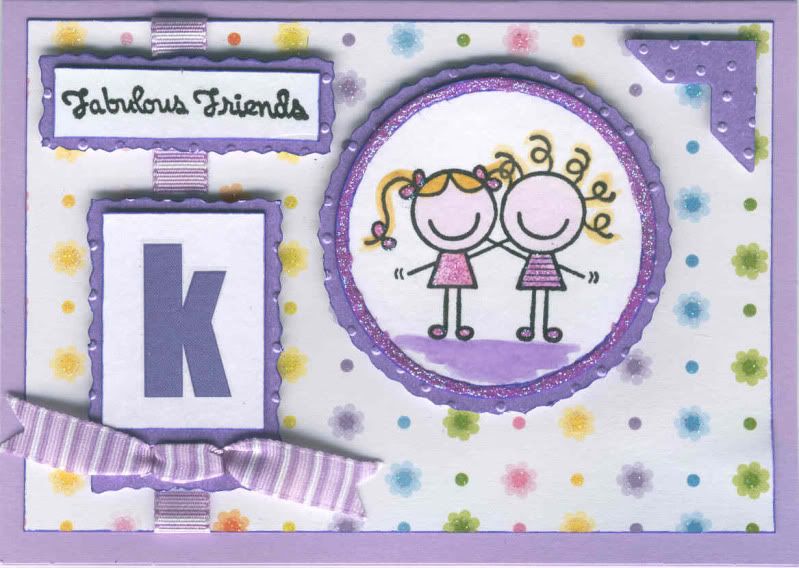 The only differences that this card has to the previous one is the background paper, although it is also from the DCWV Glitter Mat stack.
On this card, I decided to thread some of the lilac stripe ribbon through the lilac pearl mat to create a knot effect.
The other difference with this card is that whilst making this one the glitter glue bottle decided to split all the way down it and glitter glue decided to splurge (yes, that is a word!!) all over my card. Thankfully I managed to wipe it all away with a baby wipe, not leaving any trace or damaging the patterned paper that it splurged all over!!!
STAMPS
Hugs - Smirk Love and Friendship stamp set
Fabulous Friends - Smirk Love and Friendship stamp set
PATTERNED PAPERS/CARD
DCWV Glitter Mat Stack
Lilac pearl die-cut mats - Lakeland
INKS ETC
Versafine Onyx Black Archival Pigment ink
Whispers Brushstroke markers
Craft Planet Lavender glitter glue
EMBELLISHMENTS
Lilac Stripe grosgrain ribbon - Anita's
DIE-CUTS/PUNCHES
Standard Circle die - Nestabilities
Photo Corner - Ellison Photo Corner die
OTHER
Swiss Dots embossing folder - Cuttlebug
'K ' rub-on - Me & My Big Ideas Primary Monograms
It is also the 400th card design that I have produced since I started making cards (not including Christmas cards!!) I keep a book with a record of what I have used when making all my cards so that if I want to reproduce a card, or locate a patterned paper from somewhere, I know what it is.
Anyway, here is the second card I made to this week's Mojo Monday sketch:
 The only differences that this card has to the previous one is the background paper, although it is also from the DCWV Glitter Mat stack.
On this card, I decided to thread some of the lilac stripe ribbon through the lilac pearl mat to create a knot effect.
The other difference with this card is that whilst making this one the glitter glue bottle decided to split all the way down it and glitter glue decided to splurge (yes, that is a word!!) all over my card. Thankfully I managed to wipe it all away with a baby wipe, not leaving any trace or damaging the patterned paper that it splurged all over!!!
STAMPS
Hugs - Smirk Love and Friendship stamp set
Fabulous Friends - Smirk Love and Friendship stamp set
PATTERNED PAPERS/CARD
DCWV Glitter Mat Stack
Lilac pearl die-cut mats - Lakeland
INKS ETC
Versafine Onyx Black Archival Pigment ink
Whispers Brushstroke markers
Craft Planet Lavender glitter glue
EMBELLISHMENTS
Lilac Stripe grosgrain ribbon - Anita's
DIE-CUTS/PUNCHES
Standard Circle die - Nestabilities
Photo Corner - Ellison Photo Corner die
OTHER
Swiss Dots embossing folder - Cuttlebug
'K ' rub-on - Me & My Big Ideas Primary Monograms
Lilac Smirk Hugs
This is my entry to this week's Mojo Monday blog challenge, #102. This is the first time I've entered this blog challenge, and I enjoyed following the sketch.
I decided to use my Smirk Love and Friendship stamp set for this card.
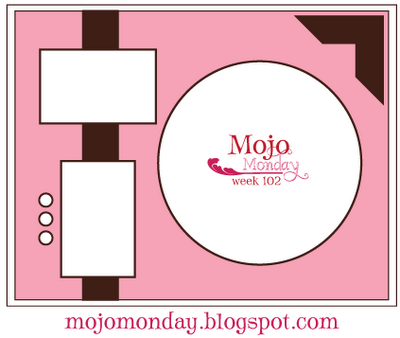
Here is the sketch:
....and here is the card I made.
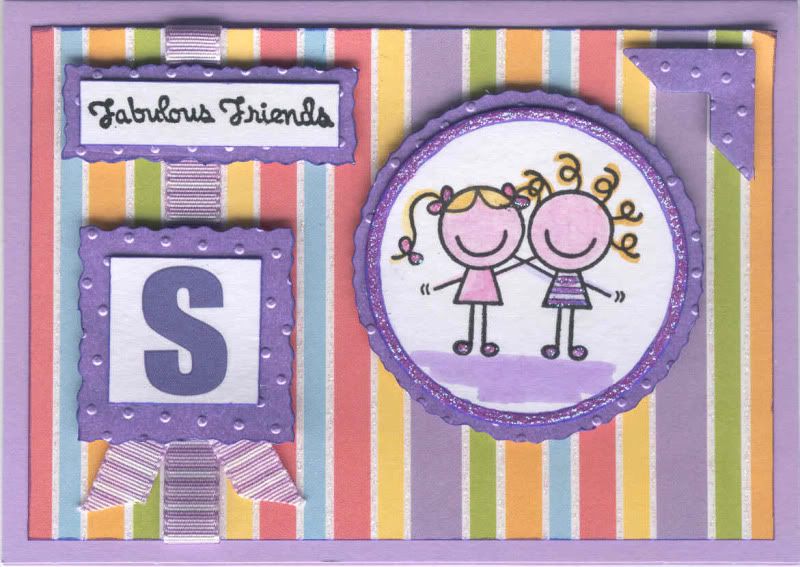 The Hugs image from the Smirk Love and Friendship stamp set was stamped using Versafine Onyx Black archival pigment ink and watercoloured using Whispers Brushstroke markers, and highlighted using Craft Planet Lavender glitter glue.
The image was cut out using a standard circle Nestabilities die, and matted onto a lilac pearl die-cut circle from a set from Lakeland that had first been embossed with the Swiss Dots Cuttlebug embossing folder. The photo corner was cut out from the excess card on the die-cut sheet using the Ellison Photo Corners thin cut die and also embossed.
A length of Anita's lilac stripe grosgrain ribbon was adhered across a panel of multi-coloured stripe paper from the DCWV Glitter Mat Stack. The sentiment, also from the Smirk Love and Friendship stamp set, was matted onto a die-cut panel, as was the monogram rub-on, from the Me and My Big Ideas Primary Monograms set. Both panels were embossed first with the Swiss Dots folder.
Two short lengths of the ribbon were attached to the reverse of the monogram panel.
I then decided to make a second similar card to the same sketch which will follow in the next post.
Blog Candy from Helen - CLOSED
The lovely Helen has reached her one year blogerversary and is offering some great blog candy to celebrate.
To enter the blog candy, pop over to her blog here and leave your name on Mr Linky!!
You can see a picture of what Helen is offering here. The blog candy contains:
Basic Grey 'June Bug' 6x6 paper pad
My Mind's Eye 'Wild Asparagus' 6x6 paper pad
Sugar Nellie 'Blossom' unmounted stamp
Stampavie 'Lily - Taking Care' clear stamp
'Skin Accents' Promarker pen set
Poppicrafts 'Random Blooms' (contains 80 paper flowers!)
Polka dot grosgrain ribbon (in a selection of widths and colours)
Craftwork Cards 'Card Candy Pick'n'mix' (an assortment from 10 packs)
There will also be a surprise beaded item as well.
If you want to enter then just:
1. Add a link to the blog candy on your blog (if you have one)
2. Add a link to your blog on Mr Linky at the end of the blog candy post here once you've done that.
The blog candy is available to everyone worldwide.
The Mr Linky will close at 9pm (UK time) on Sunday 13th September 2009, and the winner will be announced the next day.
Wednesday, 2 September 2009
Purple and Blue Dragonfly Tilda
This is my entry to this weeks 'The Pink Elephant' blog challenge (#30).
This week's challenge consists of a recipe:
1 ribbon
2 squares
something that sparkles
Here is the card I produced:
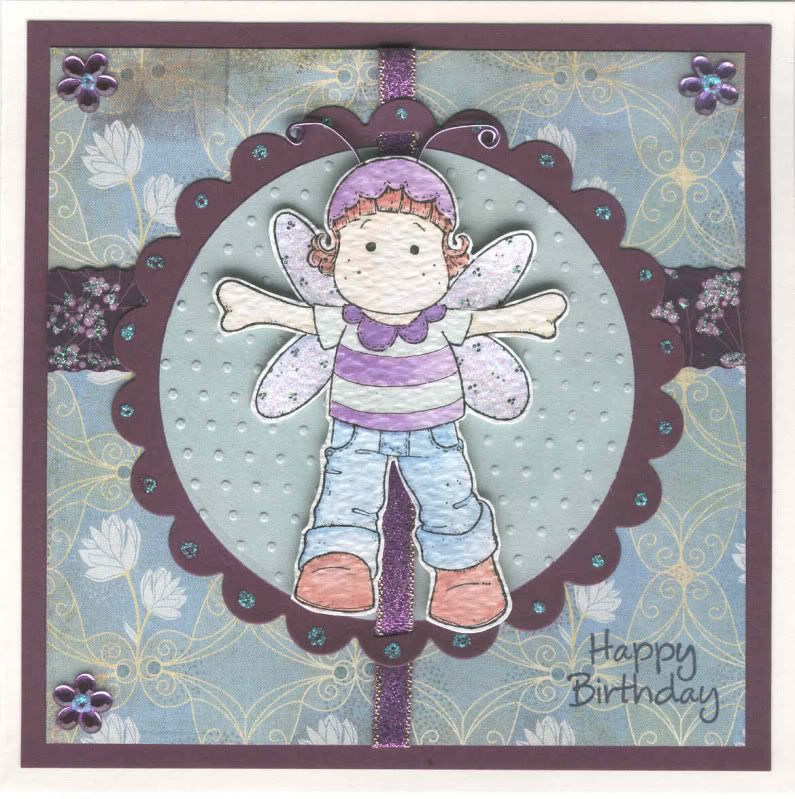 The Dragonfly Tilda image, from Magnolia, is one that I stamped whilst at Julie's thanks to the lovely Alex.
It was stamped using Versafine Onyx Black archival pigment ink and watercoloured using Whispers Brushstroke markers. The wings were highlighted with Craft Planet Iridescent Sparkle glitter glue. Antennae were added using purple wire from ACE Studio Cards.
A circle of blue paper, cut using a Nestabilities die, was then embossed using the Cuttlebug Swiss Dots folder. This was matted onto a Nestabilities scalloped circle of purple card and highlighted with dots of Craft Planet Ice Blue glitter glue.
A strip of the Jardin paper from the Basic Grey Wisteria paper pad was matted across a square of the White Dynasty paper.
Using the Making Memories Notch and Die tool, two ribbon holes were punched from the scalloped circle and a length of purple metallic ribbon from Dovecraft was threaded through them and attached on the reverse of the White Dynasty paper. This was then matted onto a square of the purple card.
The Tilda image was cut out and layered onto the circles using 3D foam pads.
Purple flower gems, from Papermania, were attached in three of the corners and they were highlighted with the Ice Blue glitter glue, and the floral pattern on the Jardin paper with the Iridescent Sparkle.
The 'Happy Birthday' greeting, from the Hero Arts Birthday Messages stamp set, was stamped in the bottom right-hand corner using Versafine Imperial Purple archival pigment ink.
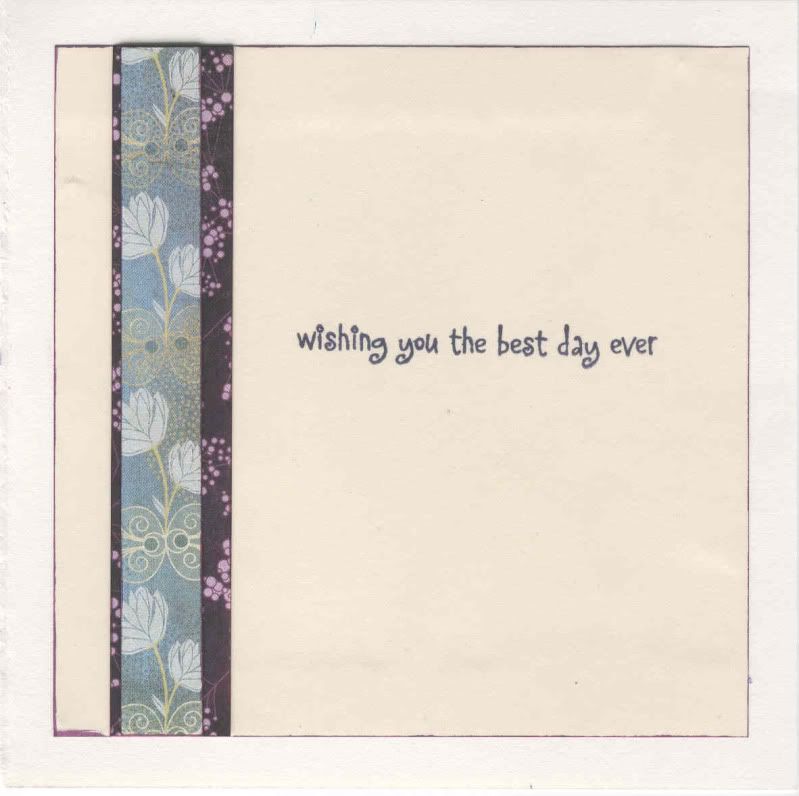
The inside of the card was also decorated, using the same papers as were used on the front of the card.The sentiment, also from the Hero Arts Birthday Messages stamp set, was stamped using the Imperial Purple ink.
This week's challenge consists of a recipe:
1 ribbon
2 squares
something that sparkles
Here is the card I produced:
 The Dragonfly Tilda image, from Magnolia, is one that I stamped whilst at Julie's thanks to the lovely Alex.
It was stamped using Versafine Onyx Black archival pigment ink and watercoloured using Whispers Brushstroke markers. The wings were highlighted with Craft Planet Iridescent Sparkle glitter glue. Antennae were added using purple wire from ACE Studio Cards.
A circle of blue paper, cut using a Nestabilities die, was then embossed using the Cuttlebug Swiss Dots folder. This was matted onto a Nestabilities scalloped circle of purple card and highlighted with dots of Craft Planet Ice Blue glitter glue.
A strip of the Jardin paper from the Basic Grey Wisteria paper pad was matted across a square of the White Dynasty paper.
Using the Making Memories Notch and Die tool, two ribbon holes were punched from the scalloped circle and a length of purple metallic ribbon from Dovecraft was threaded through them and attached on the reverse of the White Dynasty paper. This was then matted onto a square of the purple card.
The Tilda image was cut out and layered onto the circles using 3D foam pads.
Purple flower gems, from Papermania, were attached in three of the corners and they were highlighted with the Ice Blue glitter glue, and the floral pattern on the Jardin paper with the Iridescent Sparkle.
The 'Happy Birthday' greeting, from the Hero Arts Birthday Messages stamp set, was stamped in the bottom right-hand corner using Versafine Imperial Purple archival pigment ink.
The inside of the card was also decorated, using the same papers as were used on the front of the card.The sentiment, also from the Hero Arts Birthday Messages stamp set, was stamped using the Imperial Purple ink.

Blue, Green and Yellow Sailor Edwin
This is my entry to this week's Sketch and Stash blog challenge (#18). This is another of the NEW blog challenges that I discovered the other day and I love the idea behind this one.
The idea is to use something new and something that's been neglected from your stash. Well, I'm sure we've all got LOADS of neglected items, especially those ones we had to have but once Mr Postie brought them we had no idea how to use them!!!
Well, the sketch looked like this: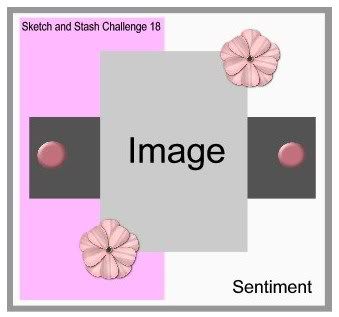

My new item is actually the papers, which are from the Making Memories Fresh Anthology Sydney paper pad. I bought these the other week, and was inspired to buy these (amongst others) by my visit to Julie's. The one I was looking for was the Ruby pad, but saw these and had to get them as well.
My neglected items are the buttons (that I bought about 4 years ago).
The Edwin stamp and the ticket stamps are also slightly neglected as this is the first time I've used the Edwin stamp that I bought months ago, and the ticket stamps that I haven't used as much as I should have!!
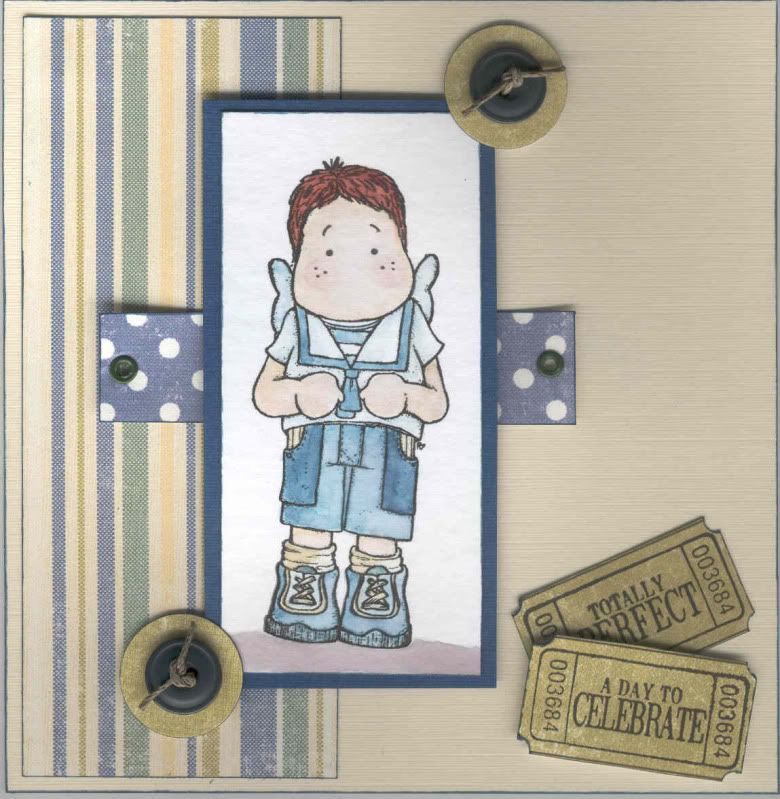
Anyway, the Sailor Edwin image from Magnolia was stamped using Versafine Onyx Black archival pigment ink and watercoloured using Whispers Brushstrokes markers and was then matted onto blue cardstock.
A panel of the blue stripe paper from the Sydney paper pad was attached to the left of the card blank. Two small green eyelets were set in a strip of the blue polka dot paper and attached across the centre of the card. The Edwin image was then layered over the patterned paper.
Green hemp cord (that I bought in Hobbycraft if you're interested) was threaded through two green buttons and layered onto the green brocade paper from the Sydney paper pad and added at the corners of the Edwin image.
Two of the stamps from the Autumn Leaves Ticketed stamp set were stamped using the Onyx Black ink on the green brocade paper. Holes were punched at the corners of each of the tickets using the Big Bite and then cut up. To see the tutorial on doing this from Aud Designs, click here. It's very clever.
I also decorated the inside of the card using strips of the patterned papers used on the front of the card and the Happy Birthday sentiment was taken from the Papermania Clare Curd Sentiments stamp set using the Onyx Black ink. Faux stitch doodling was added around the panel of paper to emphasize the edges.
Posted by
Kathleen
at
9:00 am
Subscribe to:
Comments (Atom)


