Pages

WELCOME

This blog was created to act as a record of the cards and other projects that I have made. It is for both my own reference and to help inspire anyone who wants to take a look.

I'd love it if you'd leave me a comment so that I know what you think of my projects and that you've been to visit!

Anyone can comment, even those who don't have a blog. (Just look for the word 'Comments' under the three little pictures at the end of each post). Readers without a blog can add an anonymous comment, but please leave your name (and docrafts username if applicable) so I know who you are!

Slideshows of all the cards I've uploaded to my blog can be found at the bottom of the page.


PEOPLE WHO FOLLOW MY BLOG

Thursday, 30 October 2008

Ribbon Storage Solution

I don't know about anyone else, but my ribbon storage leaves a lot to be desired.

My ribbons are stored in a number of ways.

The loose ribbons, the ones I've bought from haberdashers, Hobbycraft etc, are currently wrapped around the inner tubes of toilet rolls, but no matter which tape I use (Sellotape, masking tape, magic Scotch tape), invariably they come unstuck and start to unravel. I also have some ribbon on their reels, but most of them are the Dovecraft ones, and I'm sure you're all aware just how rubbish the reels are as they fall apart at the drop of a hat. I also have some that are stored around strips of card - and they get creases in them. I've also got a box of Brenda Pinnick ribbons that are stored not only on strips of card but are also still in the cardboard box they came in.

Other than the Brenda Pinnick ribbons, all my ribbons are stored by colour in Ziploc bags, but they are now so bulky due to the toilet roll inners, that they no longer fit into the large plastic box that they've always been stored in.

So, following numerous threads over on the docrafts cardmaking forum regarding storage solutions for ribbon, I did a Google search and came across a link to an e-book which gives instructions for a ribbon hanger and at the moment there is a bonus e-book with instructions for a re-order ring, where a sample of all your ribbons are stored with the details of the ribbon such as brand (if applicable), where you bought it and how much it cost. There is also the possibility of adding how much of it you have bought and making a note of how much you use so you can see when you are running low on anything.

So, the author of this book is an English lady called Sunday and she has a blog. I think she is mainly a scrapbooker, but if her ribbon storage solutions are anything to go by, I'm sure there will be lots of other interesting posts on there.

So, onto the e-book!

I had a couple of problems getting the download but Sunday was very helpful and got back to me as soon as she got my email and sorted everything out. (I think I was maybe a bit impatient and clicked on the wrong button).

The link for the e-book is here. I paid for mine through Paypal and it came to about £4.70 I think (it will depend on the exchange rate as for some reason it is priced in US$ at $7.50). I weighed everything up and figured if I went out and bought anything it would cost more than that.

The e-book is copyrighted so unfortunately I can't just post the instructions on here for you, but I think the price tag is well worth it (assuming I can get it to work!)
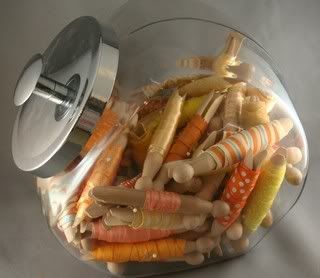
The solution I had been considering is the one over on Nicole Heady's blog with the dolly pegs and glass jars - but the dolly pegs would have been about £11 for 300 if I'd got them in Wilkinson's, that's before I got the glass jars to put them in. And they take up lots of shelf space which I don't have in my room.
I also considered buying the plastic tags that hold two or three lengths of ribbon from Ribbon Oasis, but at £36 for 200, this would also start to get a bit pricey!!

So, the idea of hanging my ribbons up appealed to me. That way I'll get a better idea of what I've got, and with the re-order ring, where I got it from and how much it cost per metre for when I need to get some more. I could add a couple of hooks to the side of my shelf unit and hang them there. I might have to come up with a solution to them getting dusty - maybe a clear plastic bag over the top like dry-cleaning!

Now, I've read the instructions and they are very clear. BUT I haven't as yet made any, so this endorsement comes with a caveat - I will post again once I've made one and let you know how I get on.

Tuesday, 28 October 2008

Wedding and Hen Party Cards - SOLD!

I just wanted to update you all on the order I got from my friend for two cards, namely a hen party card and a wedding card. She came round today to collect them and she gave me the money before she'd even seen them 'in the flesh', so to speak.


I'd emailed her pictures of them but I told her she should at least look at them before giving me any money!!


Anyway, she said she loved them and, as an added bonus, her sister had told her that the card I'd made for her wedding (also for my friend) was her favourite wedding card (I can feel my head growing!!!)

So, now I'm down to making just one more card before I start on my Christmas cards - I really can't believe that it's nearly November and I haven't made a start on them yet! The card in question is an anniversary card for my DH - it's our tenth anniversary in December so it's got to be a special one. I've got a design in mind and I'm going to use some HOTP papers. I'll post it on here when I've finished it (hopefully tomorrow).

Saturday, 25 October 2008

Blog Candy From FunkyFairyInspirations - CLOSED

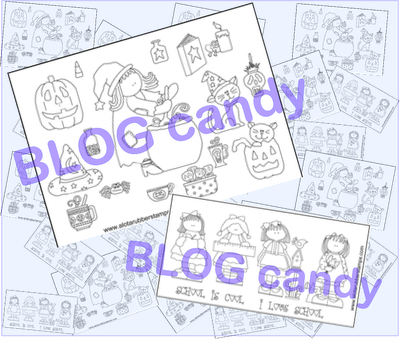
Funky Fairy Inspirations have got some Blog Candy up for grabs for three lucky winners. Just head over to their blog and answer the question they've set and add a comment to their post.

You can have a look here for a picture of what's up for grabs between the three winners.

This "Blog Candy" giveaway will run up to 7th November 2008 with the winners being announced on Saturday 8th November 2008.

Juliet's Blog Candy - CLOSED

Juliet is almost at 10,000 hits over on her blog and has some lovely blog candy up for grabs to celebrate the milestone.

It will be open until next Saturday when a winner will be chosen.

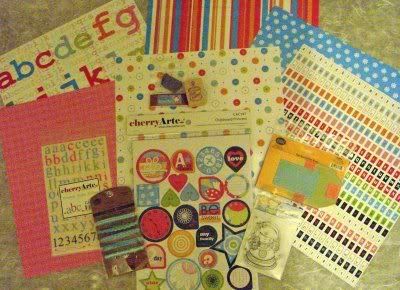
You can see what's up for grabs here.

Not only that, she also has some beautiful creations on her blog so pop over and have a look.

Friday, 24 October 2008

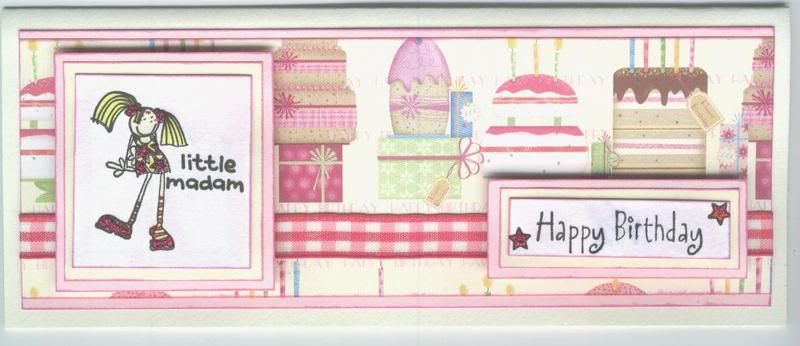
Pink Little Madam Birthday Card


This card is for my cousin's little girl who is 5 this year. She's a lovely little girl but very independent, and at times a cute 'little madam'.
It is also my entry into this week's Cute Card Thursday Blog Challenge, the theme of which is 'Stars', which are apparent on the Little Madam's dress and on the sentiment panel.

The image, from the Bang On The Door Fairy Girls and Her Friends set, was stamped and coloured using Whispers Brushstroke markers and highlighted with Craft Planet Fuchsia glitter glue. The image was then matted onto cream paper and pink card.
The sentiment and stars, from the See D's Celebration Messages set, were stamped and the stars coloured and highlighted with CP Fuchsia glitter glue.
The patterned paper, from the Dovecraft Birthday designer paper pack, was matted onto pink card and cerise gingham ribbon attached across the panel.

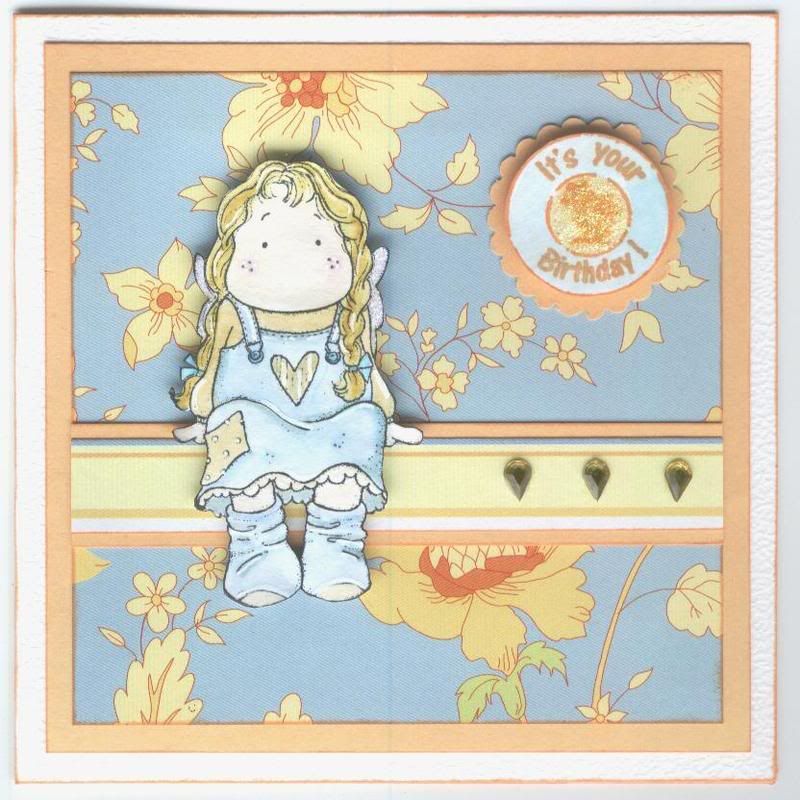
Blue and Yellow Tilda Card

The Tilda image was watercoloured using the Whispers Brushstroke markers and highlighted with white gel pen and Craft Planet Irridescent Sparkle glitter glue.

The patterned papers are from the DCWV Floral Prints paper stack, matted onto pale orange card.

The Tilda image was cut out and the card assembled. Yellow Papermania teardrop gems were added along the strip of patterned paper.

The sentiment is from the circle greetings set from Aud Designs, stamped using ColorBox Tangerine Fluid Chalk ink, watercoloured using Brushstroke markers and highlighted with Craft Planet Irridescent Sparkle glitter glue.

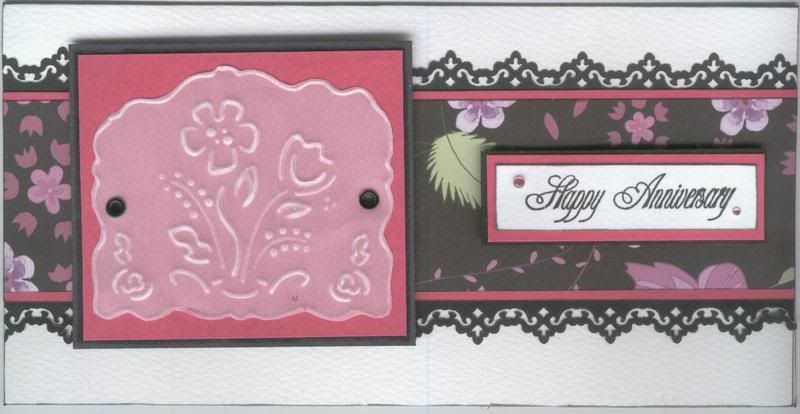
Pink and Black Floral Embossed Card

I was a bit busy yesterday and managed to make four cards (quite productive for me!!) - just goes to show you really can get going once you set your mind to it.

I shall be posting them as separate posts as they are all different styles of cards.

The first is my very first card made using a brass stencil!

I embossed the floral section of the Papermania Floral Friend stencil onto white vellum.

A panel of pink card was then stamped using the Whispers Floral Damask background stamp and ColorBox Orchid Pastel Fluid Chalk ink to give a tone-on-tone effect. This was matted onto a panel of black card.

The embossed image was cut out and attached to the pink and black panels using small eyelets.

A strip of the patterned paper from the Dovecraft Amethyst Floral prints designer paper pack was matted onto a strip of the pink card and strips of black paper cut using the Fiskars Lace Border punch were attached.

The sentiment, from CleverCut, was stamped using Versafine Onyx Black pigment ink and pink crystal gems were added to the panel.

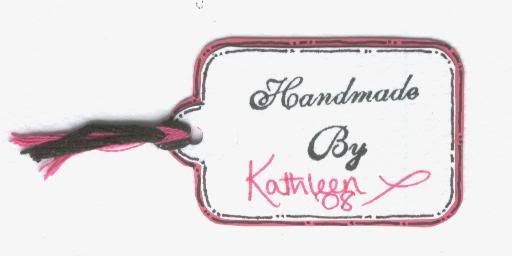
Inspired by Aud over at Aud Designs, I have now started adding 'Handmade' panels to the reverse of my cards. I've had to improvise until I get a stamp made, but hopefully they do the job.

Wednesday, 22 October 2008

New Watercolouring Tutorial


I've just found a new watercolouring tutorial over on Wendy Todd's blog.

She's an Australian Stampin' Up demonstrator, and has a great tutorial, especially showing how to add shading.

Monday, 20 October 2008

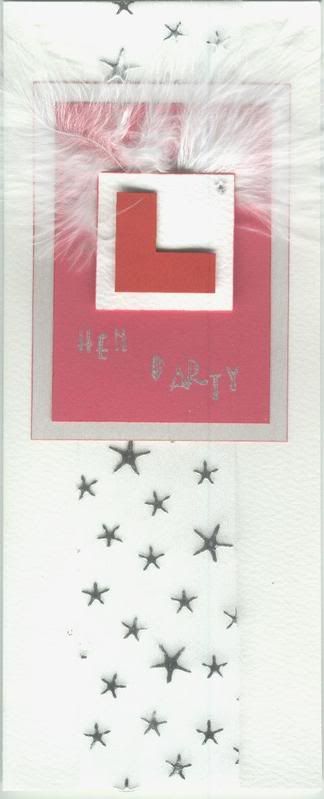
Cards Made For My Friend - Hen Party and Wedding Card

My friend asked me if I could make her a couple of cards and I jumped at the chance.

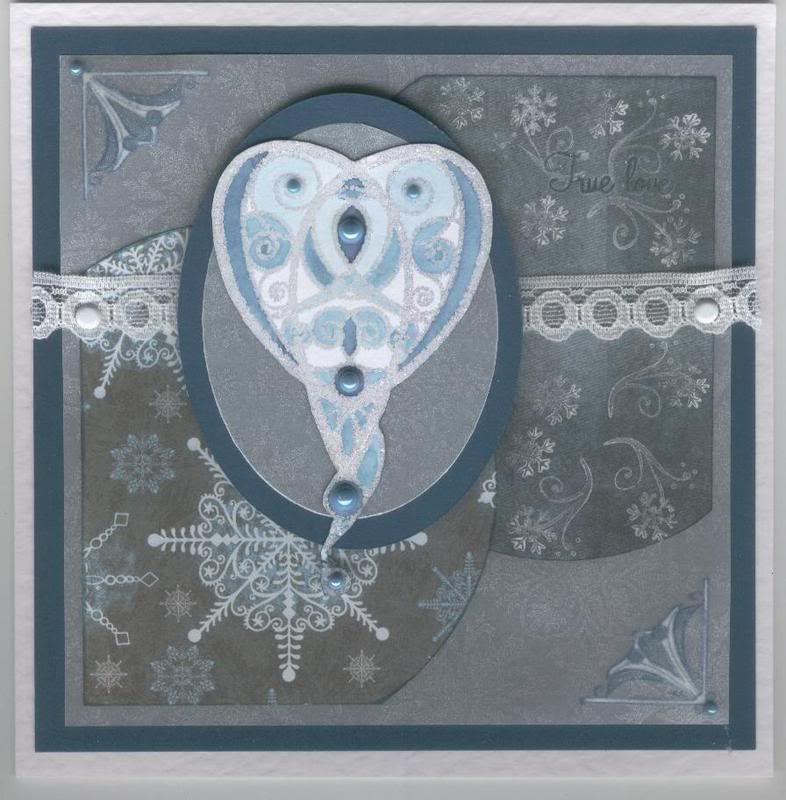
She wanted a 'Hen Party' card and a wedding card with a Winter Wonderland theme, with a colour scheme of white, silver and teal.

The Hen Party card was easy enough - a learner plate, some marabou feathers, some decorative ribbon and a crystal star gem.

I cut the letter 'L' from some read card and mounted it onto white card and added a Papermania crystal star gem to the corner.

A rectangle of cerise card was matted onto silver Constellation Shantung card, and a couple of white marabou feathers were attached below the letter panel.

The words 'Hen Party' were stamped below the letter panel using a set of the Studio G mini alphabet stamps and the Brilliance Starlight Silver ink.

A length of decorative ribbon was attached down the middle of a small tall card blank and the panel was attached over the top.

The wedding card was another story. I was trying to decide on a style and decided to adapt the design of the Summery Tilda card.

The Papermania Decorative Heart image was stamped in Metallic Silver Ink It Up! pigment ink and embossed using Personal Impressions Turquoise Sparkle embossing powder. This was cut out and watercoloured using Whispers Brushstroke markers. The image was then attached onto layered ovals cut out from teal card and Anita's Classic Silver Christmas vellum.

Two corners of a matching sheet of the vellum were stamped using one of the small Docrafts Ornate Corner stamps and ColorBox Prussian Blue Fluid Chalk ink, and embossed using clear powder. The corners were then coloured from the reverse using a metallic permanent pen and a white souffle pen.

A patterned paper from the HOTP Earth's Palette Creative paper pack was cut using the Fiskars Shapecutter and circle template. This was then stamped using the small flourish morsel stamp from the See D's Connectors Collection set, and a small snowflake stamp from the HOTP Snowflake set of stamps. These were stamped using Brilliance Moonlight White ink, and the 'True Love' sentiment was stamped using a stamp from the Making Memories 'Express It' stamp set and Marvy Matchables Turquoise dye ink, and overwritten with a clear Stardust pen.

A patterned paper from the Dovecraft Christmas Blues designer paper pack was also cut and both pieces were layered up with the stamped vellum and a piece of teal cardstock. A length of white lace was attached across this using small white Papermania brads, and the heart panel was attached over the lace.

Turquoise Papermania adhesive pearls were then added to the heart image, and to the stamped corners.

Sunday, 19 October 2008

Weekend At Flutterbys

Well, I went to the open weekend at Flutterbys and have to admit I was very restrained.

The demos on Saturday were on the BIA and the Dreamcutz and watercolouring with pencils. The D/Cutz looks like a handy tool - but a bit expensive and takes up quite a bit of room. And I really should get my pencils out again - I've only used them once or twice.

Today's demo was using crackle mediums to both crackle paints and to add a craquelure effect over a picture. Tracy was using napkins over the crackle effect and it looked great.
So, my purchases were some inkpads (Distress and Versafine), two different types of crackle medium, and some of the Dovecraft £1 stamps and stamp sets.

The new premises are so much better than the last - lots of room to move about, and demo areas. Lynn is also looking to get some new ranges of stamps (including Penny Blacks) and it also looks like they are opening an online store.

Well, I've got a few cards to make (not to mention my 70 0dd Christmas cards!!!) so I'd better go and get them done.

Saturday, 18 October 2008

Going To A Demo

I'm heading over to Flutterbys tomorrow (well, later today actually) near Thatcham for a demo day. Tracy Watkiss, Graham Hansford and Michelle Saxon should be there, and of course I am only going to watch the demos - I'm not going to buy anything!!!

They are having their grand opening at 10am as they have moved their shop into larger premises, so hopefully I'll be able to get up and ready in time!!!

Last time I went to see Tracy do a demo, she had some really good projects (although of course I haven't got round to making any of them!)

So, I shall update you tomorrow and let you know how I got on and what I didn't buy!!

Friday, 17 October 2008

Natalie's Blog Candy - CLOSED

Natalie has reached 1000 hits over on her blog and so is offering some lovely blog candy.
You can see a picture of what's up for grabs here.
You can put your name down to enter until 6pm (GMT) on the 24th October.

Wednesday, 15 October 2008

Paul's Blog Candy - CLOSED

Wow!!!
A male crafter - and a very good one!!

Paul has some blog candy up for grabs as he has reached over 15,000 hits. You can view what he has on offer here.

You have until the end of October to enter.

Summery Tilda for a Friend

Here is my entry for this weeks Stamp Something blog challenge. The theme for this week is 'Stamp Something For A Friend'. I needed to make a card for my friend Simone - the mum of the little boy I made the robot card for, so decided this was the perfect challenge for the project.

As I said, her birthday is the same day as mine (29th Dec), and I've been busy trying to get all my birthday and anniversary cards for December and January finished so I can make a start on my Christmas cards (think this is the latest I will have ever started them!!) and not have to worry about not having any cards to send when I get back from the in-laws after New Year.

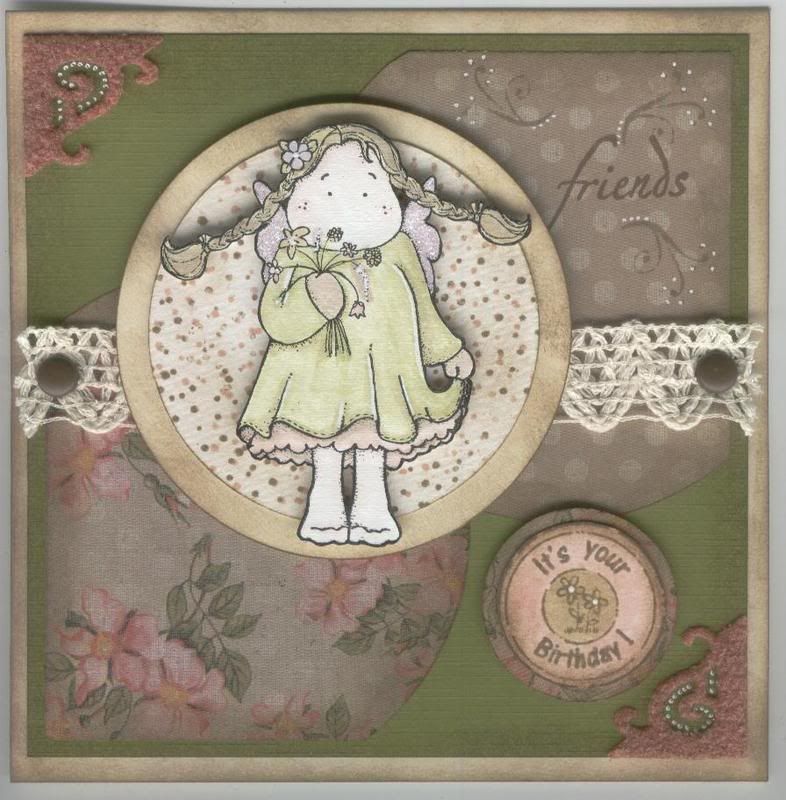
So, my method for this card began with picking the papers and then colouring the image in to match. I decided to try and colour with the Distress Inks (Frayed Burlap, Scattered Straw, Tattered Rose, Shabby Shutters and Milled Lavender) - not sure if the effect is as good as with the Whispers Brushstroke markers! Highlights were added using a white gel pen and Craft Planet Irridescent Sparkle glitter glue was added to the wings

Having coloured the image I then decided on the layout. This one just kind of evolved. I cut the shapes from the HOTP Pretty Cardmakers Creative pack papers using the Shapecutter and circle template. I distressed the edges using the Frayed Burlap distress ink and some Cut 'n' Dry foam. I attached these to a piece of equally distressed olive card from the Papermania textured cardstock pack.

I wanted to add some fancy corners, so cut some Vivelle using the Ellison Photo Corners die cut, and added some of the Frayed Burlap ink to tone down the brightness of the colour. Highlights were added using a white gel pen.

A length of cream crochet trim was attached across the card using large brown Papermania brads.

Small flourishes were stamped using a morsel stamp from the See D's Connectors Collection set and the Frayed Burlap distress ink and embellished using a white gel pen. The word friends was selectively inked from a stamp in the Clear Choice! Butterflies and Dragonflies set using ColorBox Chestnut Roan Fluid Chalk ink.

The greeting was stamped using one of the Aud Designs circle greetings stamps and the Frayed Burlap distress ink. It was then coloured using the Frayed Burlap, Tattered Rose and Shabby Shutters distress inks, and highlighted with a white gel pen. This wasa cut out and added to a circle of the floral patterned paper.

Two circle mats were cut out using the Shapecutter and circle template. These were both distressed and the white circle was stamped using one of the spotty background stamps from the See D's Mini Deco Backgrounds set using the Frayed Burlap and Tattered Rose distress inks.Tilda was cut out and matted onto the circles.

I must confess that I rather like this card and am pleased that it will be making its way to Australia in December.

Monday, 13 October 2008

Aston Villa Footballer Card

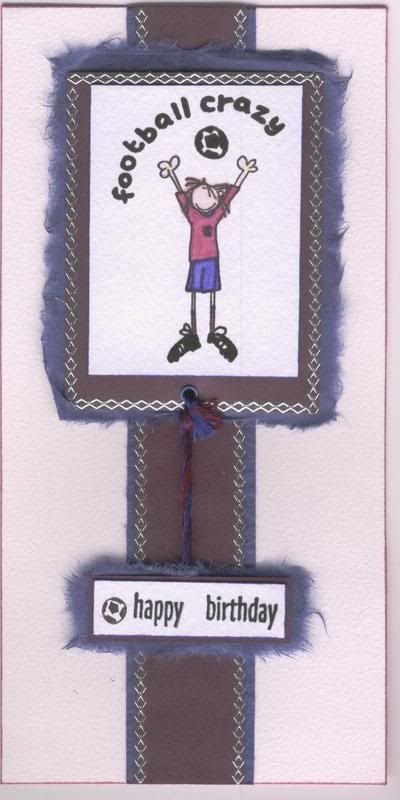
Here is my latest creation - it's a card for my poor deluded uncle who seems to be under the impression that Aston Villa are a decent team!!! It was hard work making this one - and now I feel unclean and must wash!!!

It's not really in my style but I was short on inspiration and backing papers in matching colours.
The stamped image is from the Bang On The Door Football Crazy stamp set, stamped with Versafine Onyx Black ink and watercoloured with Whispers Brushstroke markers.
The greeting was stamped using the HOTP Sentiment Set . Both panels were matted onto 'claret' paper and blue mulberry paper.
A small blue eyelet was set in the bottom of the image panel and matching embroidery threads were added, joining the two panels.
A strip of claret paper was adhered to a strip of blue handmade paper, and attached down the centre of the card. Silver diamond border peel-offs were added to the edges of the image panel and the long strip.

Saturday, 11 October 2008

Amazing Blog Candy - CLOSED

Found some amazing blog candy today over on Camilla's blog. She has 2 Whiff of Joy stamps up for grabs in two blog candy draws. You have until October 11th to enter. To enter, click here.
Camilla has a great blog so head over to her blog for some great inspiration.

Lisa is celebrating 1000 hits with some lovely stamps and papers up for grabs. Head over to her blog and leave a comment. Make sure your comment is made by no later than 12.00 noon (UK time) Tuesday 14th October.
And Susie has a mystery blog candy available here. Leave your comment before Sunday 12th October 2008 at 8pm to be in with a chance.

Thursday, 9 October 2008

Birthday Boy Robot Card

My latest project has been a birthday card for a little boy. He's the son of a friend over in Melbourne (I've never met him and I think I was about 3&1/2 last time I saw Simone his mum - we were born in the same hospital on the same day. My mum and her mum became firm friends and are still in touch today. Simone and I started writing to each other when I was about 10 (when I had about 10 other penfriends all over Europe), and she used to send me clippings of what was going to happen in Neighbours before it was on the screens over here!! And of course magazine clippings of Jason Donovan - what more could I have asked for???

Anyway, we are both happily married now and she is a mother to two children, a boy and a girl.

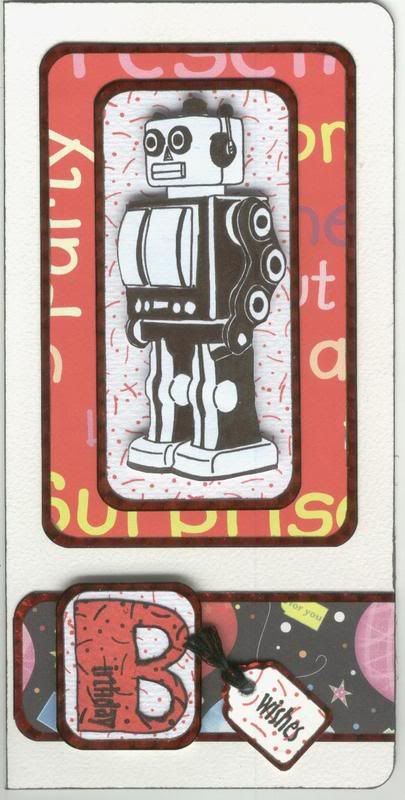
I decided to use one of the stamped images I got in the June docrafts image swap that I did with April83/Melanie. The image is the Papermania Robot and I have cut it out. A backing panel was cut and stamped using a stamp from the See D's Mini Deco Backgrounds set.
This and the backing papers from the Dovecraft Birthday Designer Paper pack were matted onto red holographic card.


The letter B from the Papermania Quirky Alphabet foam stamp set was inked using Whispers Cherry Red Permanent Dye ink, and outlined using a black Whispers Brushstroke marker. The 'birthday' text was stamped using a stamp from the HOTP Sentiments set and Brilliance Graphite Black pigment ink, as well as the Mini Deco Background stamp.


The ready-made tag was stamped in a similar way and both were matted onto red holographic card. The hole was repunched in the tag and black embroidery threads were attached.

Some New Colouring Tutorials

I received the Splitcoaststampers (SCS) newsletter, 'The Weely Inkling', this morning and, having read it, came across a great SCS blog that includes some great colouring tutorials including a couple of techniques I've never heard of but wouldn't mind trying.


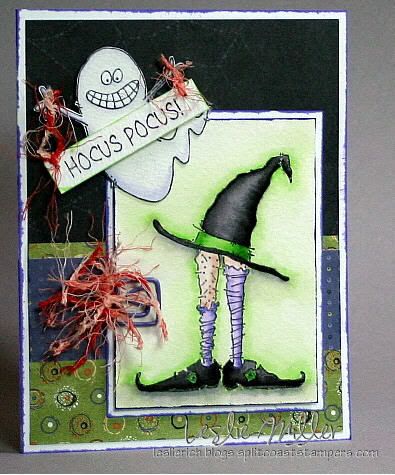
The SCS member in question is Leslierich, and her colouring tutorials can be found here. She has tutorials on watercolouring with markers, chalks, pencils over inks, sponged watercolour backgrounds and watercolouring with H2Os. I'm sure she'll teach you at least one new technique.


Here is an example of her work:

You can subscribe to 'The Weekly Inkling' here- there are some great projects, challenges, tips and techniques included each week.


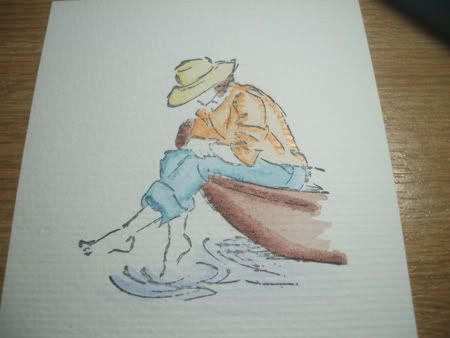
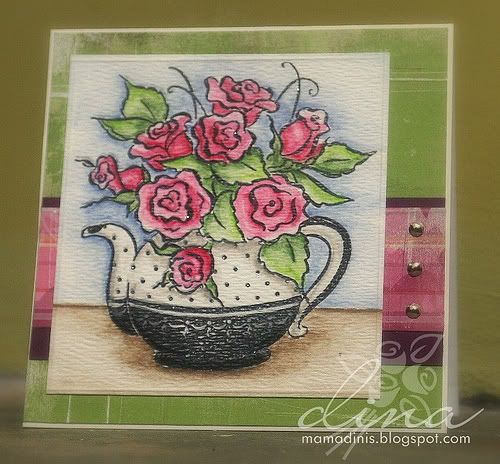
I have also found a tutorial on watercolouring with pencils here. The blog belongs to Dina, and here is an example of her work:

Wednesday, 8 October 2008

Found Some More Blog Candy - CLOSED

Found some more blog candy whilst 'blurfing'.

Gill is celebrating 10,000 hits and has some lovely blog candy up for grabs.

I can't seem to post the picture here, but you should be able to see it here.

You have until 6pm (BST) on October 9th, which just so happens to be Gill's birthday.

Tuesday, 7 October 2008

A Tree For All Seasons


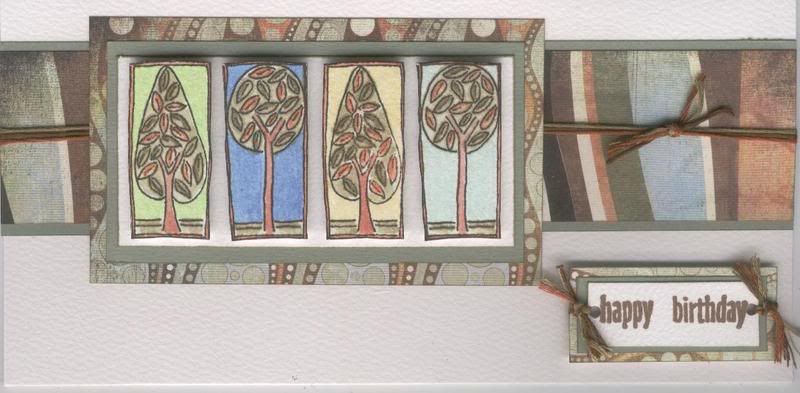
Been busy making some more men's cards. Thought this tree stamp would be a good starting point.

The 'Two Trees' stamp (a Personal Impressions stamp from Craft Stamper magazine) was stamped using Versafine Onyx Black ink and watercoloured using the Whispers Brushstroke markers.

The four trees were cut out and matted onto white and green card. Paper from the Basic Grey Archaic paper pad was matted onto green card and matching embroidery threads were attached over the top. The tree panel was matted onto matching Archaic paper and attached to the left of the card blank.

The HOTP 'Happy Birthday' sentiment was stamped using ColorBox Chestnut Roan Fluid Chalk ink. This was matted onto green card and matching Archaic paper, holes were punched either end of the panel and embroidery thread knotted through the holes.

Lovely Card From Alex

Just wanted to show the world this lovely card that I received from the great Alex. She has just set up her own blog (FINALLY!!!) and I know that I shall look forward to how it develops.

The card was part of an image swap. I am as yet to reciprocate but I'm working on the 'it'll be a surprise when she gets it' theory!!! Alex sent me some great images from the Heavenly and School Tilda and Edwin collections. I'm really looking forward to using them.
I love the paper-piecing that Alex has done, and love the embossing - I'm definitely putting the Big Shot and some embossing folders on my Christmas list.

Monday, 6 October 2008

Lots of Blog Candy - CLOSED

I've been doing a bit if blog surfing (or, as Tara calls it, blurfing) and come across a few blogs that are giving away some blog candy.

The first is on Susan's blog. She is celebrating the 200,000 hit on her blog and is offering some alota stamps. I'd also recommend that you head over and check out her blog if you are interested in mastering Inkscape and SCAL. Susan seems to be a bit of a whizz where that's concerned.
She will do the draw on the 16th October.

The second is over at Silly Monkey's blog. They are celebrating a number of things - new DT members, some birthdays, some lovely new stock and their 100th blog post.
This is open until 6pm (GMT) on the 15th October.

The third is over at Donalda's blog. She has one of the Whiff of Joy stamps as blog candy.
This will be drawn on the 18th October.

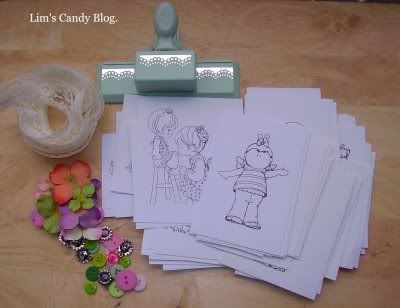
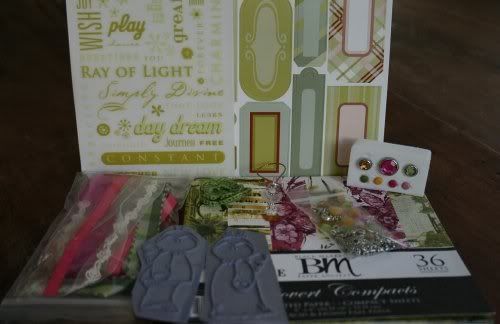
The fourth is over at Lim's blog. She has some amazing blog candy up for grabs. Lim is also after some tips on storing EZ Mounted stamps, but those are not necessary to win!
This is open until October 11th.

Just head over to their blogs and leave a comment.

Sunday, 5 October 2008

Birthday Blog Candy From Mar1ene - CLOSED

Mar1ene is celebrating her birthday and is offering some lovely blog candy to celebrate.
Head over to her blog and leave her a birthday message.
She makes beautiful cards, but take a look a judge for yourself.

You have until October 8th to enter.
Blog Widget by LinkWithin