Pages

WELCOME

This blog was created to act as a record of the cards and other projects that I have made. It is for both my own reference and to help inspire anyone who wants to take a look.

I'd love it if you'd leave me a comment so that I know what you think of my projects and that you've been to visit!

Anyone can comment, even those who don't have a blog. (Just look for the word 'Comments' under the three little pictures at the end of each post). Readers without a blog can add an anonymous comment, but please leave your name (and docrafts username if applicable) so I know who you are!

Slideshows of all the cards I've uploaded to my blog can be found at the bottom of the page.


PEOPLE WHO FOLLOW MY BLOG

Thursday, 28 October 2010

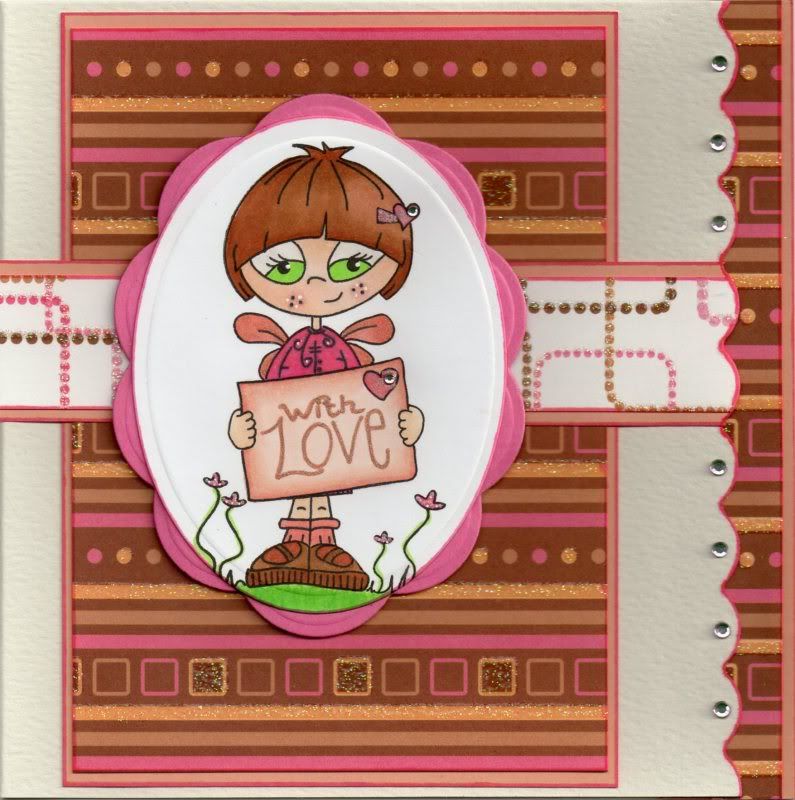
Pink, Brown and Orange Love Notes

I love this image and can't believe this is the first time I've used it!! Naughty me!! I've had it for a while now too!


The Love Notes image, from Pollycraft, was stamped using Versafine Onyx Black archival pigment ink and coloured with Copic sketch markers:
  • Hair: E13, E35, E39
  • Skin: E00, E21, E51, R20
  • Eyes: YG07, E40
  • Dress: YR02, RV06
  • Socks/Wings: YR02
  • Shoes: E35, E39, YR02
  • Flowers/Grass: YG07, G05, YR02, RV06
  • Sign: YR02, E11, E00
The sentiment was then added using the sentiment stamp from the same stamp set using Versafine Vintage Sepia archival pigment ink.

The image was die cut using an oval Nestabilities die and matted onto a big scalloped oval die cut from pink card. A panel of the pink, brown and orange multi-stripe paper, from the DCWV Glitter Mat Stack, was matted onto orange card and onto the card blank.

A strip of the pink, brown and orange retro squares paper, from the same paper pad, was also matted onto the orange card and adhered across the larger mat.

Pink and orange Sakura Stardust pens were then used to highlight the wings, hearts, flowers and sentiment. The Papermania Snow White gel pen was used to highlight her eyes, cheeks and detail on her dress.

The edge of the card blank was punched using the XCut scalloped border punch and coloured with the Copic markers. Pink faux gems were added in each of the scallops and in each of the hearts.

The inside of the card was also decorated with a strip of the multi-stripe paper adhered to a strip of the orange card. The edge of the orange card was punched with the scallop border punch and added on the inside of the card behind the scallop border.

Here are the challenges that I am entering this card into:

Tuesday, 26 October 2010

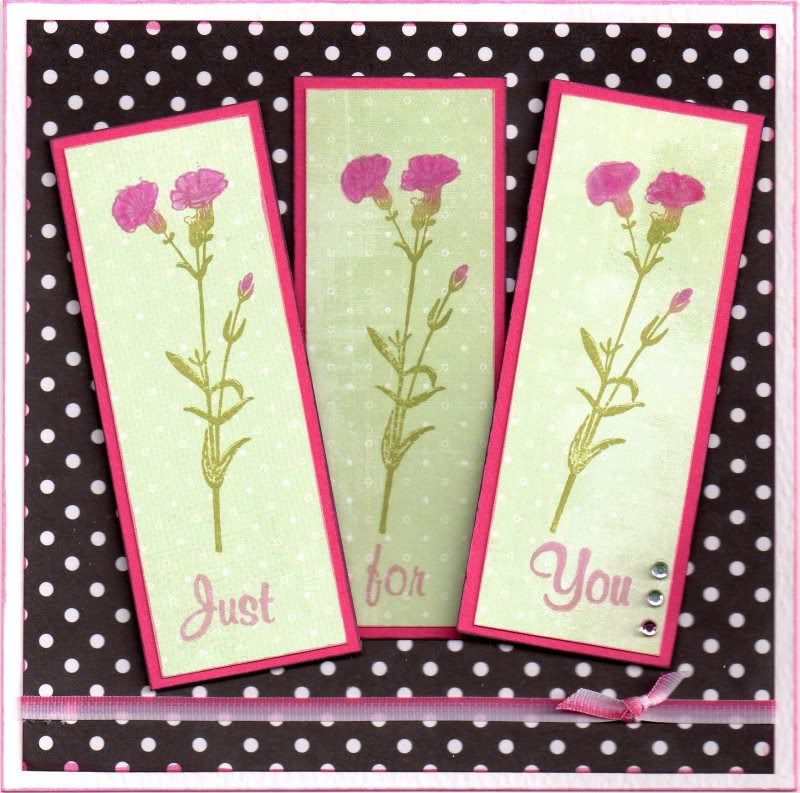
Pink, Black and White Wildflowers

This card was inspired by one that I saw in an issue of Creativity magazine. Just discovered it was Issue 19!
I decided to use one of the stamps from the Crafty Individuals Wildflowers stamp set.

The Wildflower stamp was inked up using the Versafine Spanish Moss archival pigment ink and Whispers Port Wine permanent dye ink and stamped onto the Greenhouse paper from the Basic Grey Wisteria paper pad. The flowers were then coloured using the Carmine Impress reinker.

The individual words from the 'Just For You' stamp from the Clear Choice! Birthday Parcels and Greetings stamp set were inked up with the Port Wine ink and stamped onto the separate panels.

A length of the Anita's pink two-tone self-adhesive ribbon was adhered to a panel of the black and white polka dot paper from the Papermania Clare Curd 'The Big One' paper pad, and a knot attached to the right.

The image panels were attached overlapping each other and at angles and clear faux gems were added to the third panel.

Here are the challenges that I will be entering this card into:

Sunday, 24 October 2010

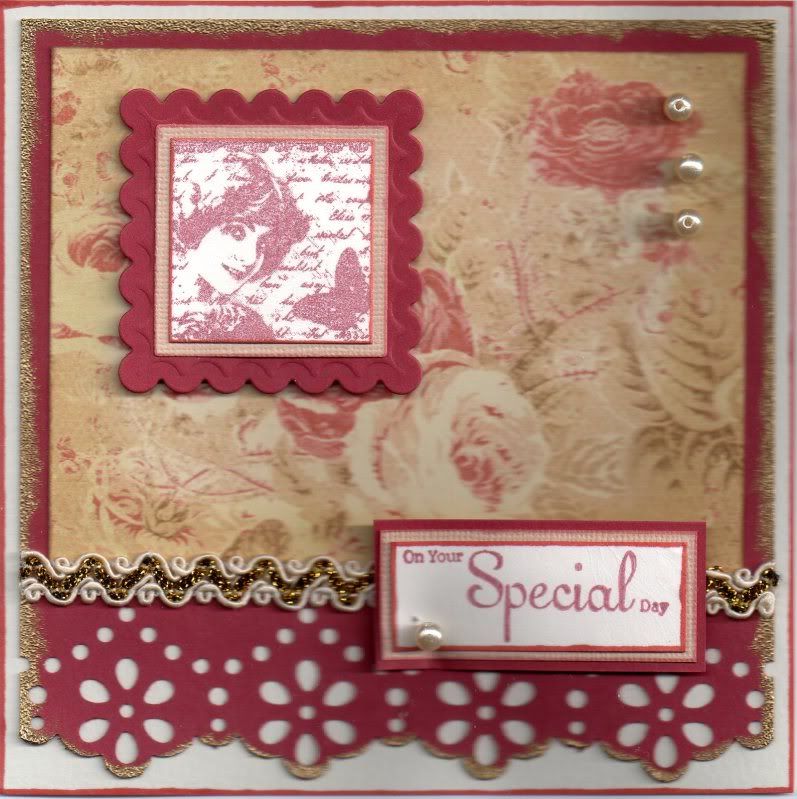
Red and Cream Vintage Lady

Not the greatest of pictures for this one I'm afraid - it's a bit too unevenly 3D'd for the scanner!!!


The Vintage Lady image, from the Vintage Postage Ladies stamp by Crafty Individuals, was stamped onto cream card using Versafine Crimson Red archival pigment ink was cut out using the Cuttlebug Square stamp die. This was then matted onto a beige square cut from Core'dinations card and a scalloped red square, both cut using the Nestabilities dies.

A panel of the red card was cut and the bottom edge punched using the Martha Stewart Flower Bed deep edge punch. The edges of the panel were heat embossed using Ink It Up! gold pigment ink and Heat It Up! gold embossing powder.

A panel of the beige and red rose paper from the K&Co Classic K Bailey paper pad was matted onto the red panel and a length of the cream and gold self-adhesive Anita's ribbon was added along the bottom of the patterned paper. The stamped image was added in the top left corner and three cream pearl beads were attached to the top right corner.

The sentiment, from the Papermania Chatsworth Frames and Messages stamp set, was stamped onto the cream card using the Crimson Red ink and matted onto the beige and red cardstock. A pearl bead was stitched in the corner of the sentiment panel and adhered to the card over the ribbon.

Here are  the challenges that I'll be entering this card into:

Thursday, 21 October 2010

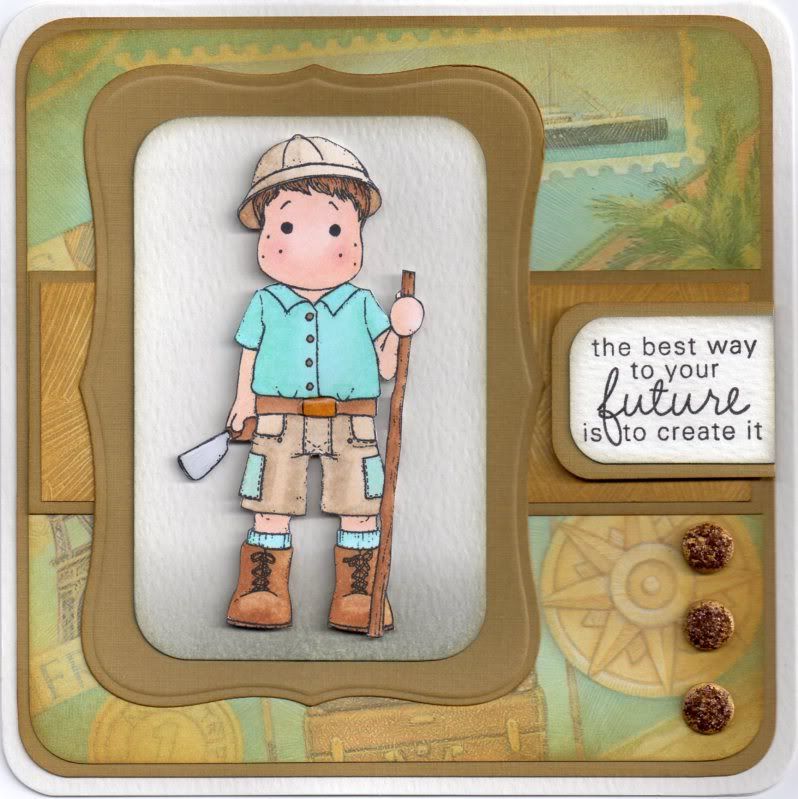
Blue and Brown Jungle Edwin

Another card using the great Jungle Edwin image, once again coloured using Copic Sketch markers.


The Jungle Edwin image, from Magnolia, was stamped using Memento Tuxedo Black dye ink and coloured using Copic Sketch markers:
  • Hat: E35, E41, E43
  • Hair/Stick: E35, E57
  • Skin: E00, E21, E51, R20
  • Shirt/Socks: BG11, BG32, B00
  • Belt: E35, E43, Y17
  • Boots: E35, E41, Y17
  • Shorts: E41, E43, BG11, B00
  • Knife: E35, E57, C0, C2
The image was then cut out and matted onto a panel of white card coloured with Tim Holtz Weathered Wood distress ink, and a panel die cut using a Labels 8 Nestabilities die from Papermania Gold textured cardstock.

A strip of Brown Brushstroke 'Our Vacation' paper from the K&Co Tim Coffey Vacation paper pad was matted onto a strip of the gold card and adhered across a panel of the Vacation Images paper from the same paper pad.

The image panel was added over the strip and three gold card candy from Craftwork Cards, coloured with the Tim Holtz Frayed Burlap, Scattered Straw and Brushed Corduroy distress inks and highlighted with Tim Holtz Vintage Photo Distress Stickles.

The sentiment, from the Fiskars Make A Wish stamp set, was stamped onto white card using Versafine Onyx Black archival pigment ink. The corners were rounded using the small Avec corner rounder punch and matted onto the gold card.


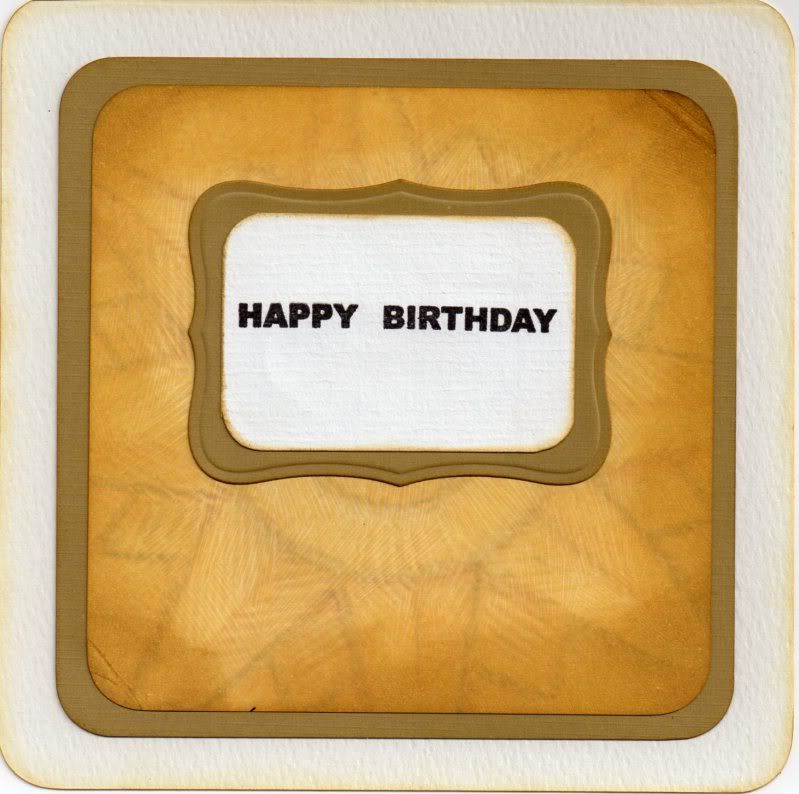
The inside of the card was also decorated. A panel of the brown compass points paper, also from the Vacation paper pad, was matted onto the gold card. A panel was cut from white writing paper and the sentiment stamped in the centre using stamps from the Elzybells Swirly Sentiments stamp set with the Onyx Black ink. The edges were distressed using the Brushed Corduroy ink and matted onto a panel die cut from the gold card using a Labels 8 Nestabilities die.

Here are the challenges I am entering this card into:

Tuesday, 19 October 2010

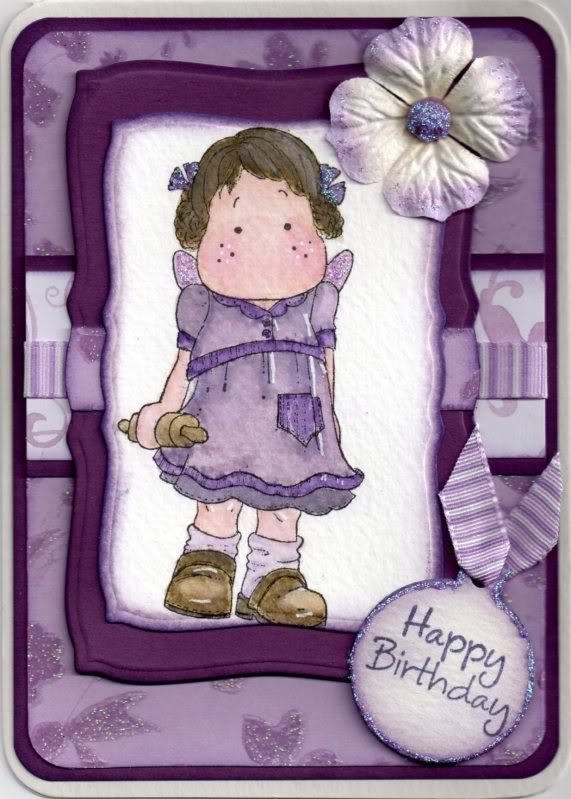
Lilac and Purple Tilda with Rolling Pin

Here is a card that I actually watercoloured - a novelty for me of late because I love using my Copics!!


The Tilda with Rolling Pin image, kindly donated by Alex K, was watercoloured using the Tim Holtz Distress inks.
  • Dress: Milled Lavender, Dusty Concord, Black Soot
  • Socks: Milled Lavender
  • Hair Ribbons: Dusty Concord
  • Hair/Shoes/Rolling Pin: Antique Linen, Frayed Burlap, Black Soot
  • Skin: Tattered Rose, Worn Lipstick
Highlights were added to the image using the Papermania Snow White gel pen.

The image was cut out using the Mega Curved Rectangles die from Nestabilities and colour tinted around the edges with the Milled Lavender and Dusty Concord inks. A larger panel was cut from the mauve card and a strip of the lilac blossom glitter paper from the Papermania Henbury Lane paper pack was adhered across it.

The Tilda image was then adhered to the shaped panel and a Prima paper flower was attached using a mauve Papermania brad to the top corner.

The corners of the card blank were punched with the XCut large corner rounder punch and the edges lightly colour tinted with the Dusty Concord ink.

Another panel of the lilac blossom glitter paper was cut and the corners rounded and matted onto a panel of the mauve card. A strip of the lilac and white flourish paper, also from the Henbury Lane paper pack, was matted onto a strip of the mauve card and a strip of the Anita's stripy lilac grosgrain ribbon was wrapped around the panel and the panel attached across the centre of the larger panel.

The sentiment tag was created by die cutting a Cuttlebug circle tag and the sentiment, from the Hero Arts Birthday Messages stamp set, was stamped in the centre of it with Versafine Imperial Purple archival pigment ink. The edges were then coloured tinted with the Milled Lavender and Dusty Concord inks and a short length of the lilac ribbon was threaded through the hole at the top.

The tag was then attached over the bottom corner of the Tilda image panel.

Highlights were then added to the image, flower, brad and sentiment tag using Craft Planet Lavender glitter glue.

Here are the blog challenges that I am entering this card into:

Monday, 18 October 2010

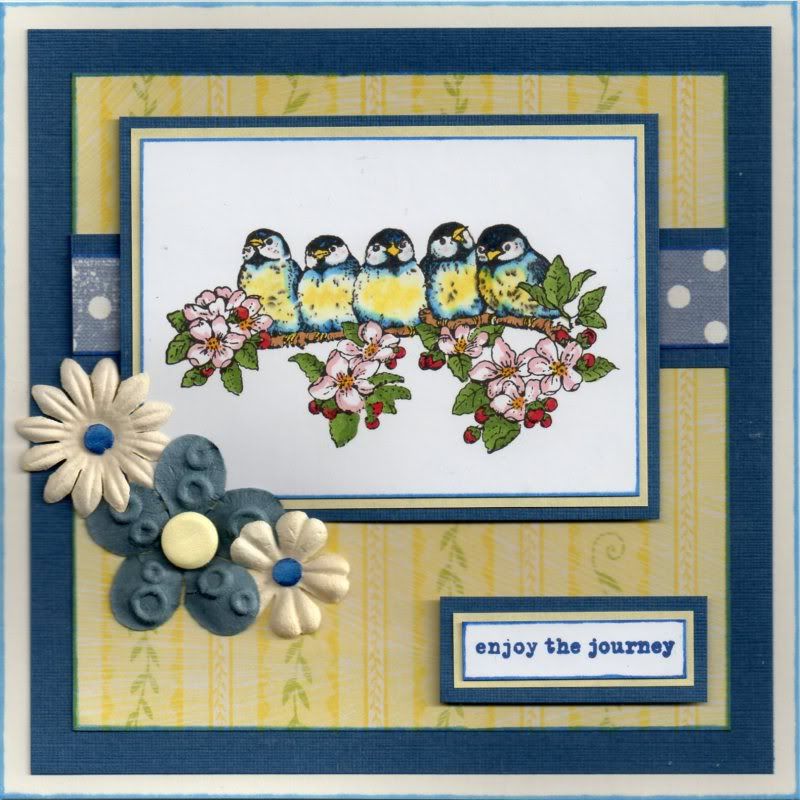
Blue and Yellow Enjoy The Journey Bluebirds

Here is my 500th card design!!! I can't believe I've made 500 different designs of cards. No idea how many actual cards I've made as sometimes I've made multiples of the same design (I've made two of this one!).

It's a little bit different to my normal style of cards but this is a lovely stamp and thought it was appropriate for the recipient!!


The Bluebirds image, from the Penny Black Enjoy Life stamp set, was stamped using Versafine Onyx Black archival pigment ink and coloured using the Copic Sketch markers:
  • Birds: B12, B18, B24, Y00, Y08, YR02
  • Branch: E35
  • Leaves: YG17, YG67
  • Berries: E07, R29
  • Flowers: R20, YR02, Y08
  • Edges: B18, B24
The image was then matted onto yellow paper and blue card.

A strip of the blue polka dot paper from the Making Memories Fresh Anthology Sydney paper pad was matted onto the blue card and across a panel of the yellow and green vine stripe paper from the K&Co Tim Coffey Daffodil paper pad, also matted onto the blue card. I haven't used these papers for ages, so decided it was time to pull them out again. I'm sure they were feeling just a little bit neglected!!!

The image panel was added over the polka dot stripe panel and Prima paper flowers, from the Prima Botanical Mix, were added over the corner of the image panel and a soft white card candy, from Craftwork Cards, added in the centre of the blue flower and smaller circles were punched from blue card candy for the centres of the smaller cream flowers.

The sentiment, from the Making Memories Express It stamp set, was stamped using Versafine Majestic Blue archival pigment ink and matted onto the yellow paper and blue card and added in the bottom right corner.

Here are the challenges I shall be entering this card into:

Saturday, 16 October 2010

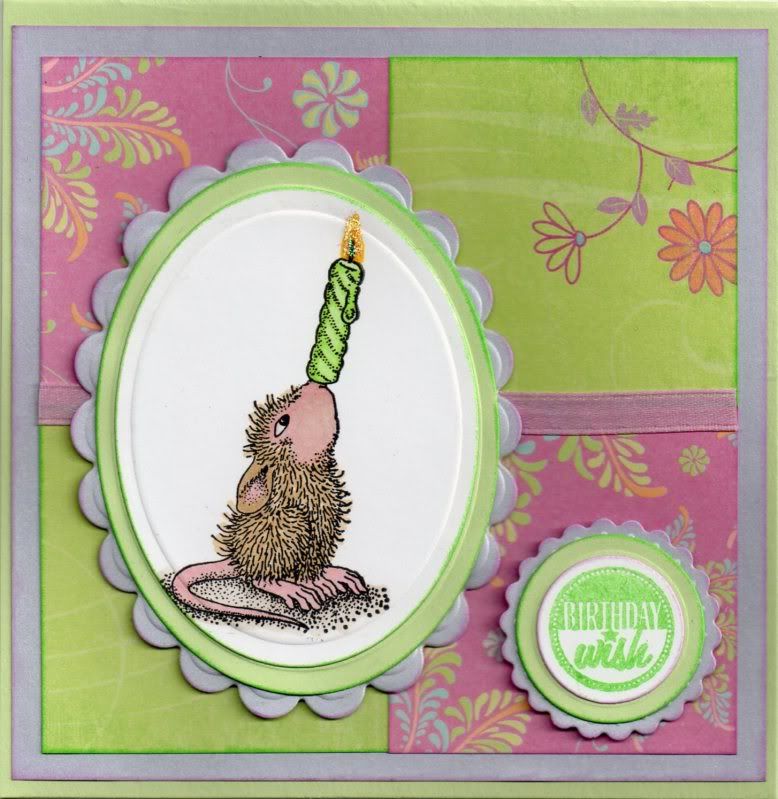
Pink, Green and Lilac House Mouse Balancing Candle Quarters

Here is my first House Mouse card! I've always loved these images but haven't been able to justify the cost. Thankfully, the lovely Joanna Sheen has now released some of these images as unmounted stamps, making them a lot more affordable. Hopefully a few more of these lovely images will be made available in this format.


The House Mouse image, from the Birthdays Balloon stamp set from Joanna Sheen, was stamped using Memento Tuxedo Black dye ink and coloured using Copic sketch markers:
  • Mouse Fur: E31, E43
  • Mouse Face/Ear/Tail: R20, E40
  • Eye: C0
  • Candle: YG07, YG11
  • Flame: YR02, Y08
The image was die cut using an oval Nestabilities die and matted onto a green oval and lilac big scalloped oval die cut from pearlescent paper.

Squares of papers from the K&Co Sparkly Sweet paper pad were matted onto Anita's lilac pearlescent paper and a length of Anita's pink self-adhesive satin ribbon adhered over the join.

The sentiment, from the HOTP Sentiments stamp set, was stamped using ColorBox Fresh Green pigment ink and die cut using a circle Nestabilities die, then matted onto a larger green circle and scalloped lilac circle.

The image panel was matted to the left of the panels and the sentiment in the bottom right corner.

Here are the challenges that I am entering this card into:
Friday, 15 October 2010

I Made Top 3 At The Sisterhood of Crafters

Well, everyone who took part in the last challenge made Top 3 as they found it too hard to choose.

So, my Duck Egg Blue and Cream Fly Free Sugar Nellie card made Top 3 at The Sisterhood of Crafters blog challenge.


It was chosen as Top 3 in their colur challenge of Blue, Brown and Ivory.


You can see my original post for this card here.

Thursday, 14 October 2010

An Historical Moment

I didn't think I could let this moment pass without saying something. Over the past 25 hours I've watched almost all of the coverage of the miraculous rescue of the 33 trapped miners from the San Jose mine in Chile; the rescue of 33 miners who have spent 69 days underground, and the recovery of 6 rescue workers.

It has been truly amazing to watch, from the tense first run of the rescue cage with the first rescue worker to the rescue of the 33rd miner and the recovery of the last rescuer.

Just felt it was too important an event to not mention it. Hopefully they can all return to 'normal' life swiftly and safely.

Tuesday, 12 October 2010

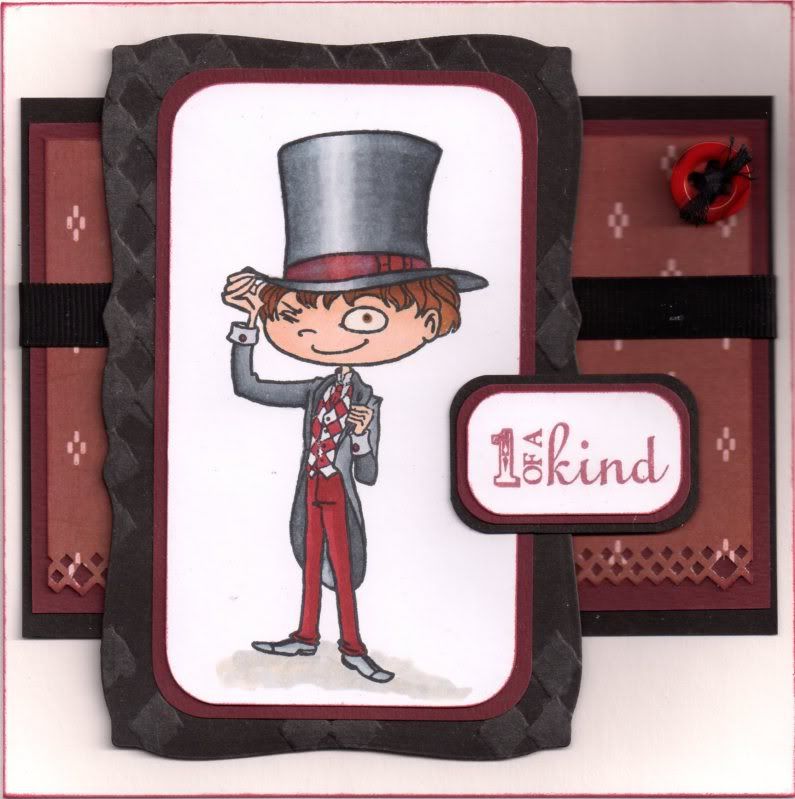
Burgundy and Black Chester

Here is the card that I made for my hubby's uncle. I love this image and I can't believe it's taken me this long to use it. I'm also rather pleased with the colouring, especially his hat!!!


The Chester image, from Kraftin' Kimmie, was stamped using Memento Tuxedo Black dye ink and coloured using Copic sketch markers:
  • Skin: E00, E21, E51
  • Eye: E39, E40
  • Hair: E35, E39, E57
  • Hat/Jacket/Shoes: C0, C2, C4, C6, C8
  • Hat Band: R20, R59, E07, C2
  • Shirt: C2
  • Waistcoat: R59, C0
  • Tie/Cufflinks/Trousers: R59
  • Shadow: C2, E40
The corners of the image were rounded using the large XCut corner rounder punch, and then matted onto a panel of burgundy card.

A panel of black card was die cut using the Mega Curved Rectangles Nestabilities die and embossed using the Cuttlebug Diamonds in the Rough embossing folder. The raised areas of the panel were coloured with a Versamark pen and silver shimmer chalks dabbed over the top from the Papermania Earth Tones set of shimmer chalks.

A panel of the burgundy geometric paper from the Papermania Red Hot Capsule Collection paper pad was punched using the XCut Diamonds border punch, then matted onto the burgundy and black card. A length of black grosgrain ribbon was then attached across the panel.

Black embroidery thread was knotted through a red button and added in the top right corner of the patterned paper panel.

The sentiment, from the Hero Arts Anytime Messages stamp set, was stamped using Versafine Crimson red archival pigment ink and the corners rounded using the small Avec corner rounder punch. This was matted onto the burgundy and black card and attached over the edge of the image panel.

Here are the challenges that I will be entering this card into:

I Won The Scrap-Creations Blog Challenge

My Pink and Brown Apron Dress card has (randomly) won the Scrap-Creations blog challenge!!


It won the Think Pink Challenge sponsored by Tiddly Winks and the prize is a $10 Gift Certificate!! Better go and see what I'm goig to spend it on.


You can see the original post for this card here.

Monday, 11 October 2010

New Watercolouring Tutorial

I just discovered this watercolouring tutorial and thought I should share it with you all!!

It is using watercolouring cakes but I'm sre the same techniques can be used with distress inks or marker pens if applied to a non-porous surface as a palette.


The tutorial is done by Lisa Hindsley, the Art Director at Stampendous and here is the card that she produces.

Here is the link to the tutorial.

Sunday, 10 October 2010

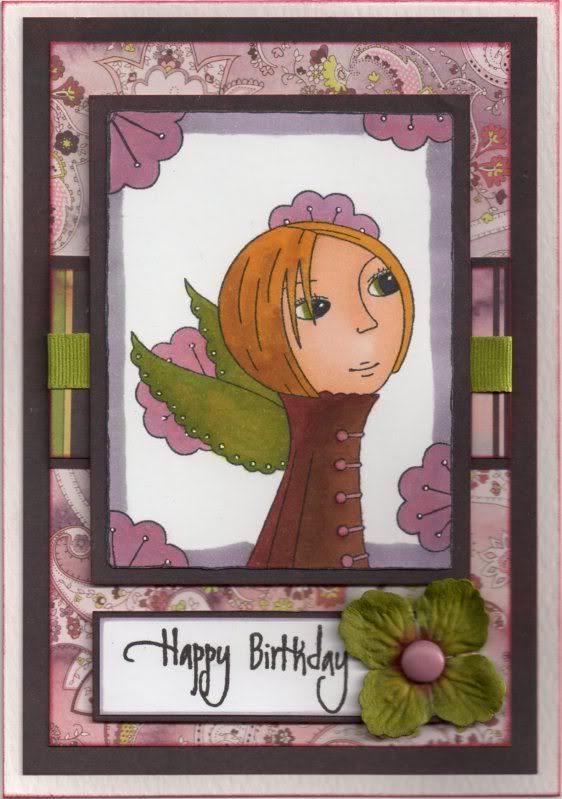
Burgundy and Olive Leanne Ellis Dreamer

This is the card that I made for the lovely and very talented Teresa for her birthday. I know that she has received this now so am free to upload it.


The beautiful Dreamer image, by Leanne Ellis for Sugar Nellie, was kindly donated to me last year by Alex K as a birthday gift. I love these images and they are on my ever-growing wish list.
The image was coloured using Copic Sketch markers:
  • Hair: E13, E35, Y08
  • Skin: E00, E21, E51
  • Jacket: E57, E39, RV21
  • Eyes/Wings: YG17, Y08, N3
  • Flowers: V12, RV21, R20, BV31
  • Outline: V12, BV31, N3
 and matted onto the Dauphin paper from the Basic Grey Eva paper pad.

A strip of the Aristocrat paper was matted onto the Dauphin paper and a length of Anita's olive green grosgrain ribbon was added around it. This was then matted across a panel of the Versailles paper from the same paper pad.

The sentiment panel was created by stamping onto white card using the 'Happy' and 'Birthday' stamps from the Elzybells Swirly Sentiments stamp set using Versafine Onyx Black archival pigment ink and matted onto the Dauphin paper. A green Prima paper flower was coloured using Copic markers:
  • Prima flower: YG17, Y08, E57, R39, N3
 and a large dusky pink Papermania brad was added to the centre and attached to the panel.
 
Highlights were added to the image using the Papermania Snow White gel pen.

Here are the challenges that I shall be entering this card into:
Friday, 8 October 2010

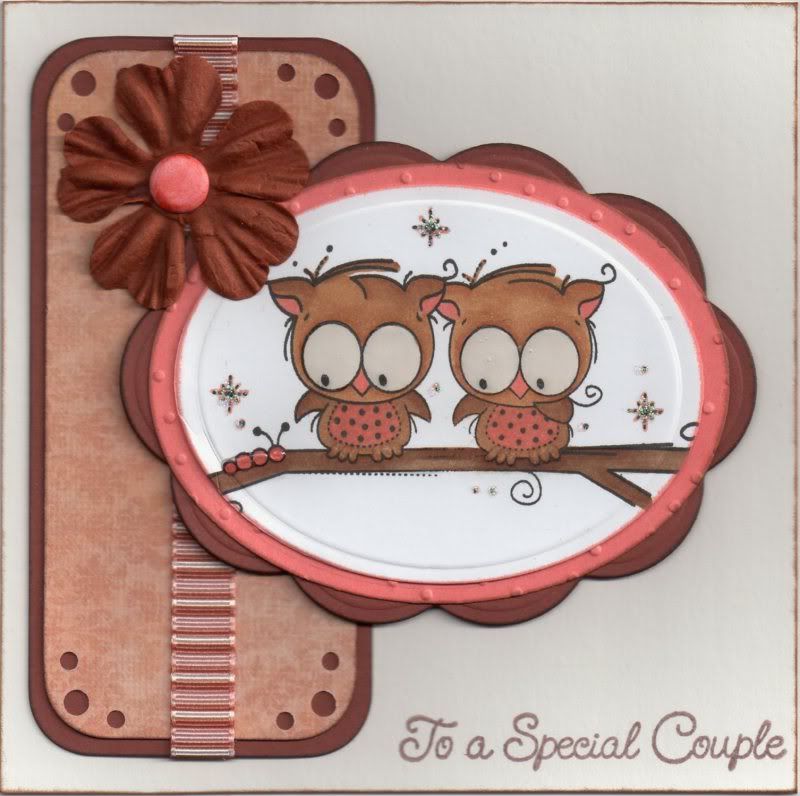
Salmon and Brown Hoo Hoo There Owls

This card I made using a recent purchase from the lovely ClarkyJ when she had a bit of a clearout. I've always loved these cute owls so I'm chuffed to actually own them now!! Think they are great for anniversary cards, which is precisely what I have made here.


The image, Hoo Hoo There by Rachelle Anne Miller/Stampavie, was stamped using Versafine Onyx Black archival pigment ink and coloured using Copic sketch markers:
  • Owls: YR02, E35, E39, E40, E57
  • Branch: E39, E40, E57, C4
  • Sparkles/Dots/Caterpillar: YR02
 The image was die cut using an oval Nestabilities die and matted onto a salmon pink card embossed with the Cuttlebug Swiss Dots embossing folder. This was then matted onto a big scalloped oval cut from brown card.

The corners of the panel of the salmon pink flourish paper, from the DCWV The Old World Mat Stack, were punched using the Martha Stewart Scallop Dot border punch and the large XCut corner rounder punch. This was then matted onto the brown card and a length of Anita's brown striped grosgrain ribbon added across it.

The image panel was added overlapping the patterned paper panel.

A pink card candy, from Craftwork Cards, was coloured using a Copic marker (YR02) to make it co-ordinate with the colour scheme of the card and added in the centre of a brown Prima ELine paper flower in the top left corner.

The sentiment, from Elzybells, was stamped in the bottom right hand corner using Memento Rich Cocoa dye ink. Anita's 3D Gloss was then added to the owls' eyes and the caterpillar.

Here are the challenges that I will be entering this card into:

Wednesday, 6 October 2010

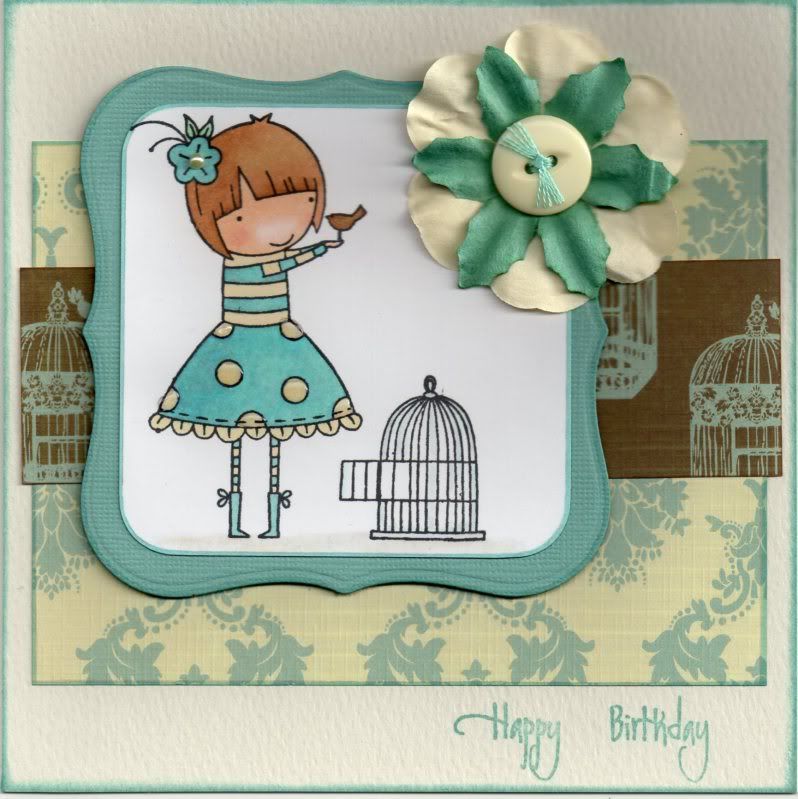
Duck-Egg Blue and Cream Sugar Nellie Fly Free

Here is the card that I made for Natalie for her birthday. I know that she has received it now so I can post it without spoiling the surprise!!


I love this cute Leanne Ellis image, available form Funky Kits. It's called Fly Free image, and it was stamped using Memento Tuxedo Black dye ink and coloured using Copic Sketch markers:
  • Hair: E13, E31, E35
  • Skin: E00, E21, E51, R20
  • Flower: BG02, BG11, N3,
  • Leaf: BG32, YG41
  • Top/Skirt/Socks: E41, Y00, BG02, BG11, N3
  • Boots: BG02, BG11, N3
  • Bird: E35, E39, N3
  • Cage: C2, BG11
  • Shadow: E41, N1, 0
The image was matted onto a panel die cut using the Labels 1 Nestabilities die from duck-egg blue Core'dinations card from the Elements card pack.

A panel of the cream and blue flourish paper from the Papermania Chatsworth paper pad was added to the centre of the card blank with a strip of the brown and blue bird cage paper from the same paper pad over the top.

Embroidery thread was tied through a cream button and assembled with a cream Papermania paper flower and a blue Prima paper flower and added to the top right corner of the image panel.

The spots on the image were then highlighted using Anita's 3D Gloss, and a cream self-adhesive pearl from The Hobby House was added to the centre of the flower in her hair.

The sentiment, from the Elzybells Swirly Sentiments stamp set, was then stamped in the bottom right corner of the card blank using ColorBox Celadon pigment ink.

Here are the challenges that I will be entering this card into:

Tuesday, 5 October 2010

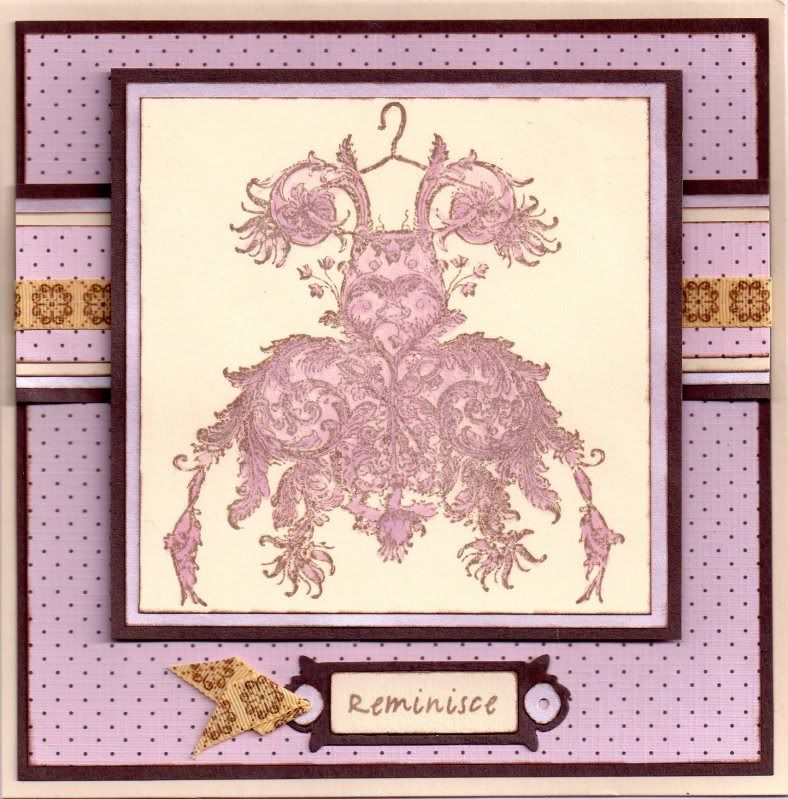
Pink and Brown Apron Dress

Another delayed upload again - but I seem to be catching up a bit on my older cards. Here is the card I made for my cardmaking matey Julie for her birthday in May. I decided to make something a bit different for me and used one of my new Stampington & Co stamps.


Firstly, the Apron image, from Stampington & Co, was stamped onto cream card using Versafine Vintage Sepia archival pigment ink and watercoloured using the Whispers Whisper Pink and Whisper Lilac permanent dye inks.

The image was matted onto a panel of Anita's pink pearlescent paper and brown card.

A panel of the pink and brown polka dot paper from the Papermania Chatsworth paper pack was matted onto the brown card. A smaller strip of the polka dot paper was matted onto the pink pearlescent paper and the brown card and a length of cream and brown medallion ribbon from the Chatterbox Chocolate ribbon pack was wrapped around the panel and attached over the larger panel towards the top.

The stamped image was then attached over the top of the ribbon panel.

The sentiment panel was created by die cutting the bookplate from the Sizzix Sizzlit Bookplate #2 die using cream and brown card and the pearlescent pink paper. The word, from the Making Memories Express It stamp set, was stamped onto the cream panel using the Vintage Sepia ink and the bookplate was assembled. A short length of the cream and brown ribbon was attached to one side of the bookplate.

Here are the challenges that I will be entering this card into:
ETA:
This card was picked by the randon number generator as the winner of the Scrap Creations Think Pink blog challenge.

Monday, 4 October 2010

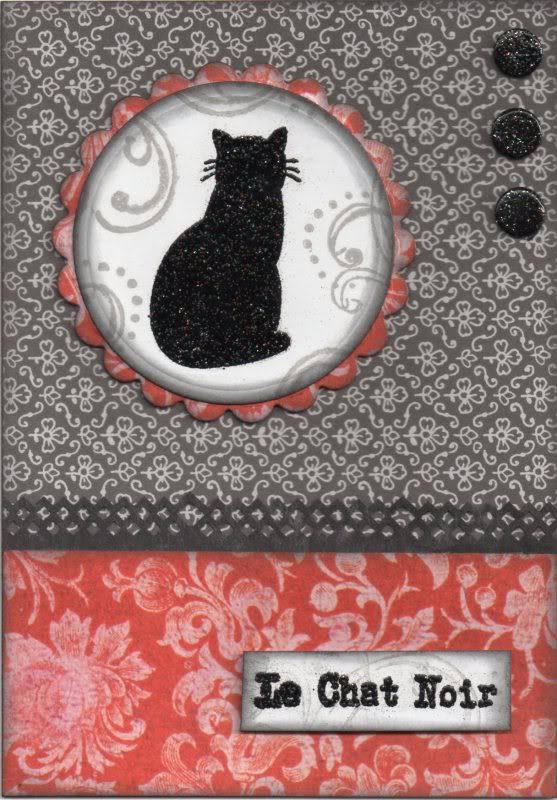
Red and Black Silhouette Cat

This card has been shamelessly copied from one made by Katy Fox in the June 2010 issue of Craft Stamper magazine. I've used different papers and swirl stamps but the card looks very similar to the one that Katy made.


The cat image, the free stamp from Craft Stamper magazine designed by the team at Katzelkraft, was stamped onto white card using Versacolor Black ink and heat embossed using Heat It Up! Black Sparkle embossing powder.

The image was then die cut using a standard circle Nestabilities die, and a swirl image, from the Autumn Leaves Rhona Farrer Flourishes v1 stamp set, was stamped around the edge of the circle using Versafine Smokey Gray archival pigment ink. The edges of the panel were then distressed using Tim Holtz Black Soot distress ink.

This was then matted onto a scalloped circle die cut from the Red Cabbage Rose Flourish paper from the Papermania Red Hot Capsule Collection pack, also distressed with the Black Soot ink.

The card blank was partly covered with a panel of the Black Clover Leaf paper, from the Papermania Monochrome Capsule Collection pack. A strip of black paper was punched using the XCut Diamond border punch and adhered to the reverse of a panel of the same red paper used for the scalloped circle and adhered below the black patterned paper.

The sentiment, the accompanying stamp to the cat image, was stamped using the Versacolor Black ink and heat embossed with the black sparkle powder. This was also overstamped with the swirl stamp and the Smokey Gray ink and distressed with the Black Soot ink.

Three black card candy, from Craftwork Cards, were heat embossed with the black sparkle powder and placed in the top right corner.

TIP:
To heat emboss the card candy, I found the easiest way to do it is to add a small piece of double sided tape to the end of a pencil (preferably not painted) and press the card candy onto it. Tap the card candy into the inkpad you wish to use until the candy is covered in the ink than dip the candy into the embossing powder.


Tap off the excess embossing powder and heat, turning the pencil as the embossing powder starts to melt. Once the embossing powder has all melted, leave to cool for a few seconds then remove from the pencil - the heat will have softened the tape a little, making it easy to peel away. You can then re-use the tape if you need to do multiple card candy pieces.

Saturday, 2 October 2010

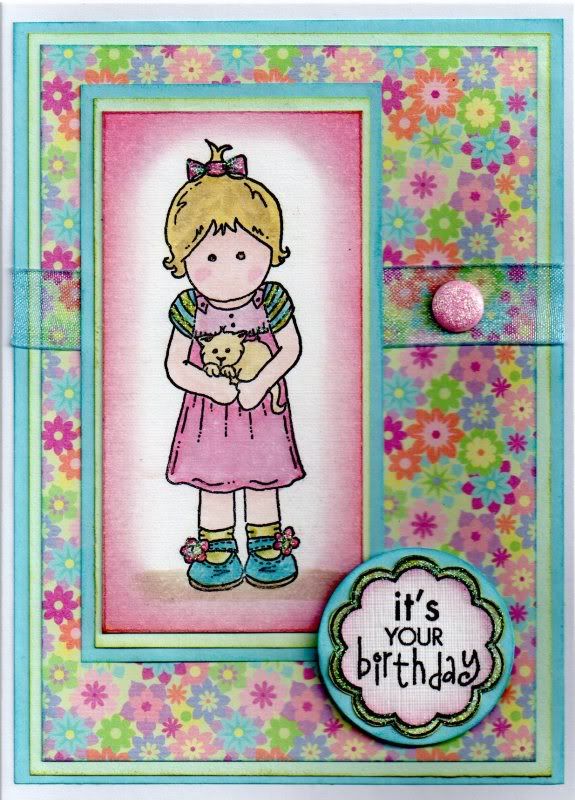
Pink, Green and Blue Floral Milly with Kitten

This card was made with a Pink Gem image kindly donated by Judith B in a docrafts image swap back in September 2008.

I watercoloured the Milly with Kitten image using the following Tim Holtz Distress Inks:
  • Worn Lipstick
  • Milled Lavender
  • Broken China
  • Peeled Paint
  • Antique Linen
  • Frayed Burlap
  • Mustard Seed
  • Tattered Rose
The image was then highlighted with Craft Planet Iridescent Sparkle glitter glue.

I then distressed the edges of the image panel with the Worn Lipstick and Milled Lavender distress inks. The image panel was then matted onto green and blue paper.

A panel of the multi-floral paper from the K&Co Sparkly Sweet paper pad was also matted onto the green and blue paper and a length of light blue organza ribbon was wrapped around it with the image panel matted over the top. A pink card candy from Craftwork Cards was added over the ribbon and covered with the Iridescent Sparkle glitter glue.

The 'It's Your Birthday' circle sentiment from the Hero Arts Birthday Messages stamp set was stamped onto white linen card and green paper using Versafine Onyx Black archival pigment ink. The inner section of the sentiment was cut out from the white linen card and edged with the Worn Lipstick and Milled Lavender inks. The whole sentiment panel was cut from the green paper and all matted onto a circle die cut using a small classic Nestabilities die cut from the blue paper. The sentiment panel was then adhered over the bottom corner of the image panel.

The challenges that I will be entering this card into are:
Blog Widget by LinkWithin