Pages

WELCOME

This blog was created to act as a record of the cards and other projects that I have made. It is for both my own reference and to help inspire anyone who wants to take a look.

I'd love it if you'd leave me a comment so that I know what you think of my projects and that you've been to visit!

Anyone can comment, even those who don't have a blog. (Just look for the word 'Comments' under the three little pictures at the end of each post). Readers without a blog can add an anonymous comment, but please leave your name (and docrafts username if applicable) so I know who you are!

Slideshows of all the cards I've uploaded to my blog can be found at the bottom of the page.


PEOPLE WHO FOLLOW MY BLOG

Showing posts with label Aud Designs. Show all posts

Wednesday, 24 August 2011

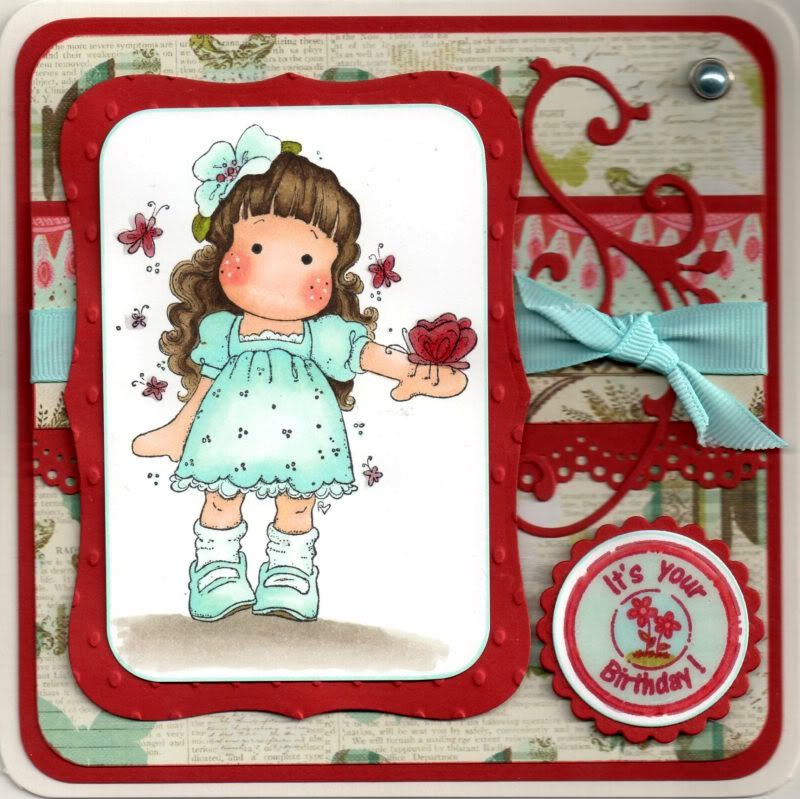
Red and Aqua Tilda With Hawaiian Flower

The Tilda with Hawaiian Flower image from Magnolia was very kindly donated to me by the lovely, talented Teresa/Craftingallday.

The image was stamped with Memento Tuxedo Black dye ink and coloured with Copic sketch markers:
  • Hair: E43, E44, E49
  • Skin: E00, E21, E51, R02, R20
  • Dress; B00, BG10, BG11
  • Flower: B00, BG10, BG11, R32, R37
  • Leaves; YG13, YG95, E44
  • Butterflies: R32, R37, R39
  • Socks: BG10
  • Lace Frills: BG10
  • Shoes: B00, BG10, BG11, E44
Tilda's cheeks were then highlighted with the Papermania Snow White gel pen.

Once again, large parts of this image were coloured using the Transfer Technique as discovered in the Copic Colouring Guide, using both the lighter shades and the blender pen.

The image panel was then trimmed and the corners rounded with the large XCut corner rounder punch. This was then matted onto a panel of red card die cut using a Labels 8 Nestabilities die and embossed with the Indentz Ellipse embossing folder.

A strip of the blue floral border paper from the Prima Madeline paper pad was matted onto a strip of the red card that was punched with the Martha Stewart Doilly Lace punch. A length of aqua grosgrain ribbon was wrapped around the strip and a shorter piece was knotted to the right.

This strip was then attached across a panel of the butterflies paper from the same paper pad and a Marianne Creatables leaf flourish die cut, also cut from the red card, was tucked under the ribbon.
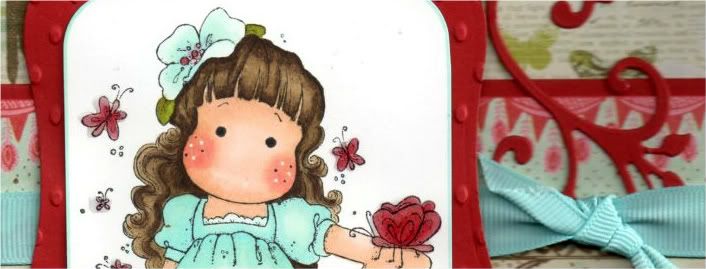
The image panel was then added over the ribbon.

A large pale blue pearl brad from Papermania was added in the top right corner.

The circle sentiment, from Aud Designs, was stamped using Memento Rhubarb Stalk dye ink and coloured with Copic markers:
  • R32, R37, BG10, BG11, B00, YG13, YG95

This was then die cut using a classic circle Nestabilities die and matted onto a red classic scalloped circle.
Once the card was fully assembled, the circle sentiment and the butterflies in the image were then highlighted using Ranger Glossy Accents.

I also decorated the inside of the card using a strip of the border paper matted onto a strip punched with the Doilly Lace punch. The sentiment stamp, from the Papermania Clare Curd Sentiments stamp set, was stamped using the Rhubarb Stalk ink.

Here are the blog challenges I am entering this card into:

Sunday, 20 February 2011

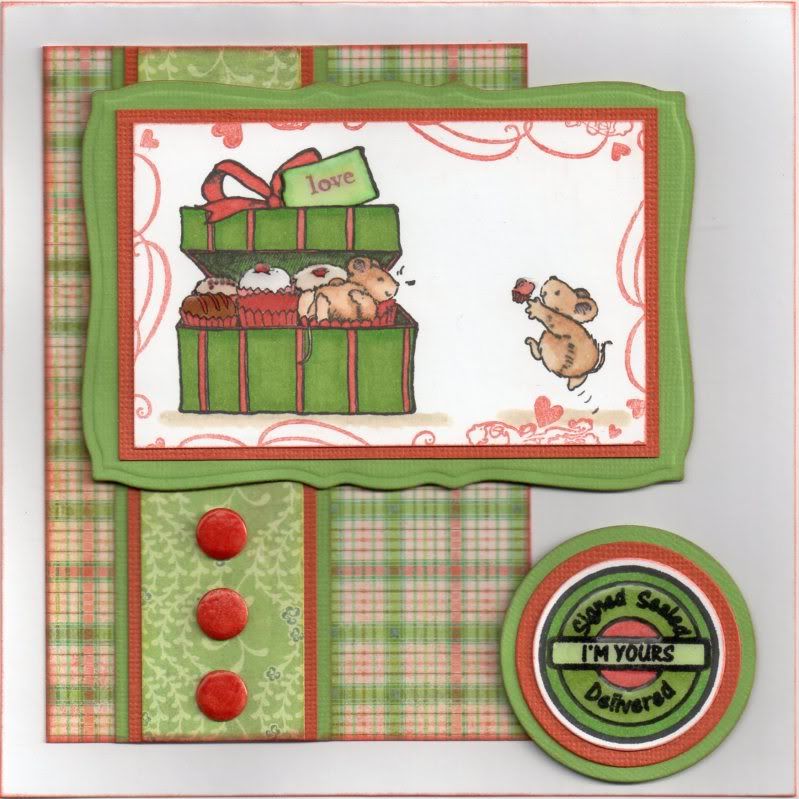
Green and Terracotta Penny Black Cupcake Mice Anniversary

Here is the card I made for my hubby for our anniversary. Unfortunately, due to us moving house the day after, it didn't really get any mantlepiece time!! So, I packed it with the 'going to Ireland' stuff and put it up at the in-laws!!
This was an unusual colour combination for me but I really liked the plaid paper so coloured everything to match it.

The Cupcake Box Mouse image, from the Penny Black Piece Of My Heart stamp set, was stamped using Versafine Onyx Black archival pigment ink to the left of the panel and the single mouse from the Mice Chasing Cat stamp from the same set was stamped to the right, masking off the extra detail from the image.

The images were coloured using Copic Sketch markers:
  • Mice: E13, E51, E35, R20
  • Box: G05, YG17, E07, YR02, C4
  • Cupcake Cases/Ribbon: E07, YR02
  • Cupcakes: E57, E07, YR02, E41
  • Label: YG11, YG17, G05
  • Shadow: N3, E41
The cupcakes were then highlighted with Anita's 3D Gloss.

The sentiment from the same stamp set was then stamped into the tag on the image using ColorBox Terracotta pigment ink.

The edges of the panel were then stamped using the heart border stamp from the Autumn Leaves 'On The Edge' stamp set and the Terracotta ink.

The image panel was matted onto terracotta card from the Core'dinations Elements card pack, and onto a panel die cut from green card from the same pack using a Mega Curved Rectangle die from Nestabilities.

A strip of the Pistachio Almond paper from the Basic Grey Two Scoops paper pad was matted onto the terracotta and green cardstocks and then across a panel of the Waffle Cone paper from the same paper pad.

The image panel was matted to the top of the card and three orange card candy, from Craftwork Cards, were coloured with Copic markers (E07), and added below the image along the strip.

The circle sentiment, from Aud Designs, was stamped using Memento Tuxedo Black dye ink and coloured using the Copic markers:
  • Sentiment panel: YG11, YG17, G05, E07, YR02
This was die cut using the standard circle Nestabilities die and matted onto circles of the terracotta and green cardstocks. This was then adhered in the bottom right corner of the card and highlighted with Anita's 3D Gloss.

Here are the challenges that I am entering this card into:

Thursday, 30 September 2010

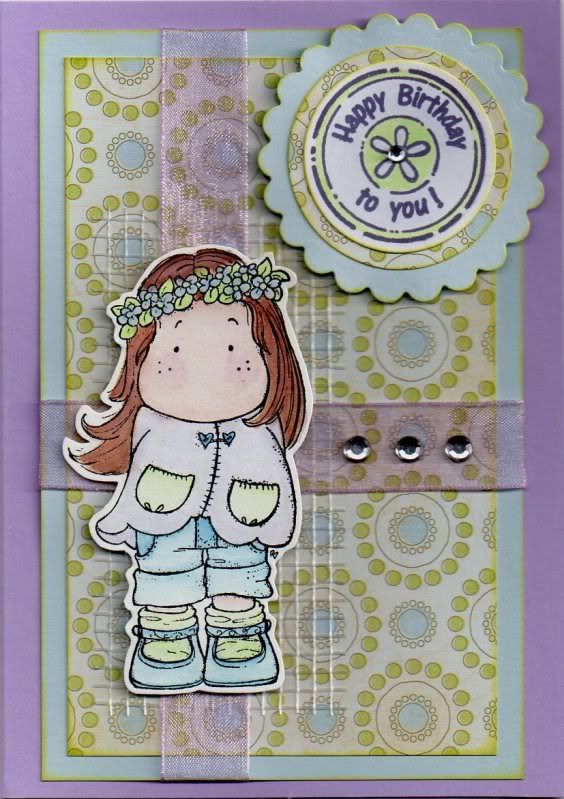
Lilac, Blue and Green Flower Power Tilda

This lovely little lady was very kindly donated to me by Tara back in 2008 in a swap we did. She really is a cutie, isn't she!!


I decided to watercolour the Flower Power Tilda image using the Whispers Brushstroke markers and cut the image out.

A panel of the circle paper from the Basic Grey Lily Kate paper pad was matted onto blue paper, and a panel of adhesive plasterer's scrim was attached to the front of the patterned paper. I found this particular one in Wickes and it seems to be sticky enough to stay stuck to the paper.

Two lengths of lilac organza ribbon were attached across the panel and three large clear faux gems were attached onto the ribbon.

The circle sentiment panel, from Aud Designs, was stamped using Versafine Onyx Black archival pigment ink and watercoloured using the Whispers markers. This was matted onto a circle of the patterned paper and a scalloped circle of the blue paper, all cut out using Nestabilities dies.

A small clear gem was added to the centre of the flower on the sentiment panel.

Here are the challenges that I'll be entering this card into:

Tuesday, 20 July 2010

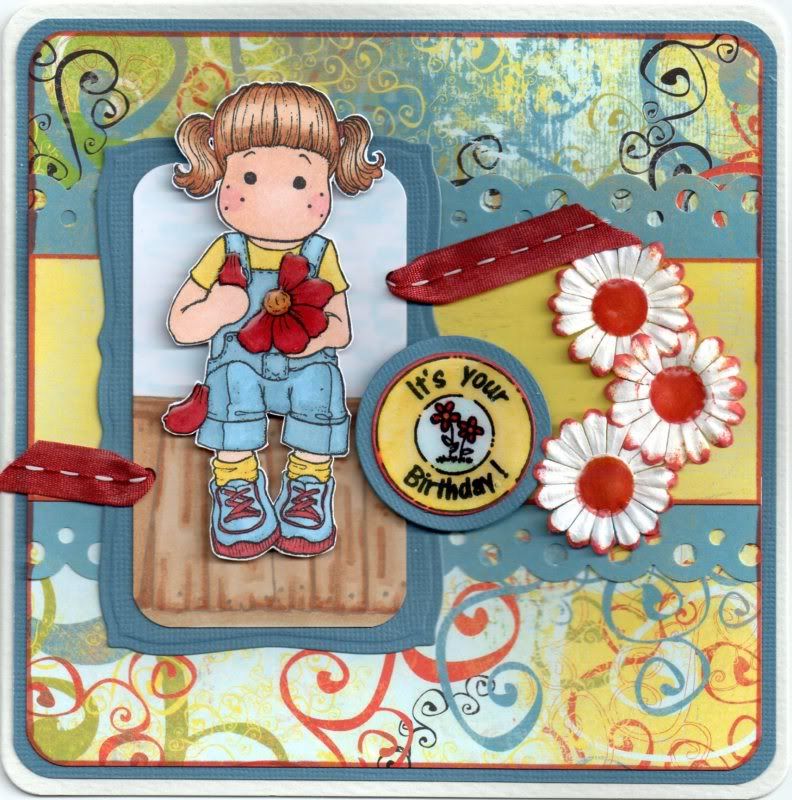
Red, Yellow and Blue Loves Me Tilda

Here is my entry to this week's Just Magnolia blog challenge, which this week is a sketch challenge by Bev.


The Loves Me Tilda image was stamped using Versafine Onyx Black archival pigment ink, coloured using Copic markers and cut out.
  • Hair: E21, E35, E39
  • Skin: E00, E21, E51, R20
  • Top/Socks: Y00, Y08, E41
  • Shoes: B41, B93, E04, E07, R24, YR02
  • Dungarees: B41, B45, B93
  • Flowers: E04, E07, E41, R24, YR02, Y08
A panel was cut from white card and the Magnolia Old Wooden Stand image was stamped using Versafine Vintage Sepia archival pigment ink and coloured using Copic markers.
  • Fence: E21, E35, E39, E43
A sky was coloured also using a blue Copic marker and the blender pen. This was matted onto a panel cut from blue Core'dinations card using a Mega Curved Rectangle Nestabilities die.

The card was then constructed to match the sketch supplied by Bev for the challenge:


A strip of the Surprise paper from the Basic Grey Cupcake paper pad was matted onto a strip of the Kazoo Blue paper from the same paper pad punched using the Scallop Dot border punch from Martha Stewart. This was matted onto a panel of the Streamers paper which was in turn matted onto the blue card.

The Tilda image was matted onto the background panel and two holes were punched and red stitched organza ribbon from the Chatterbox Scarlet Ribbon pack was threaded through them.

The circle greeting sentiment from Aud Designs was stamped using the Tuxedo Black ink and coloured with the Copic markers, cut out with Nestabilities and matted onto blue card.

Three white Papermania Imaginisce paper flowers were stamped in the centres using the circle stamp from the Aud Designs circle sentiments set using ColorBox Warm Red and Burnt Sienna fluid chalk inks. The same inks were used to colour the petal tips.

The sentiment panel was added to the card front to overlap the image and the flowers to the right. Anita's 3D Gloss was added over the flower and petals in the Tilda image, over the sentiment and in the flower centres.

Wednesday, 2 June 2010

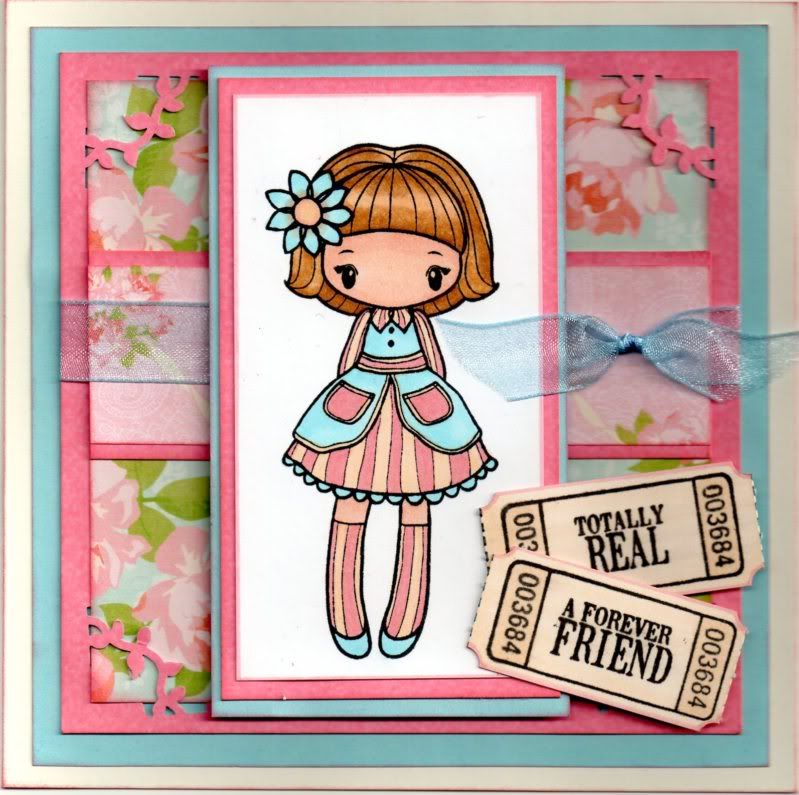
Blue, Pink and Cream Flowery Dressy Miss Anya

Here is my entry to this week's Pink Elephant blog challenge, which has Bright Colours as its theme.


I recently bought two sets of the Miss Anya stamps (Dressy and Love) from someone having a bit of a crafty clear-out so I decided I'd use one of them for this card. I've been after these stamps since they were released but couldn't really justify the cost, so thank you to Sam for having a clear-out and allowing me to get them!!!


The Flowery Dressy Miss Anya image was stamped using Memento Tuxedo Black dye ink and coloured using Copic sketch markers:


  • Hair: E51, E35, E57

  • Skin: E00, E02, E21

  • Dress/Pinafore: B00, E51, R20, RV21

  • Socks: E51, R20, RV21

  • Shoes: B00

  • Flower: B00, R20, E51
The image was then matted onto pink and blue card.

A strip of the pink mini roses and ribbons paper from the Papermania Blueberry Hill paper pack was matted onto the pink card and across the centre of a panel of the blue and pink bold roses paper from the same paper pack.

The corners of a square of the pink card were punched using the XCut Vine Silhouette corner punch and the square panel of patterned paper was slotted behind the punched corners.

A length of blue organza ribbon was tied around the panel and the Miss Anya panel was attached in the centre.

Two ticket images from the Autumn Leaves Ticketed stamp set were stamped out onto the white card using Versafine Onyx Black archival pigment ink and turned into tickets using the Aud Designs Ticket tutorial. The tickets were coloured using the Copic sketch markers:
  • Tickets: E51, R20, RV21
and cut apart using a perforating cutter, ripped apart and attached at the corner of the image panel.

Monday, 24 May 2010

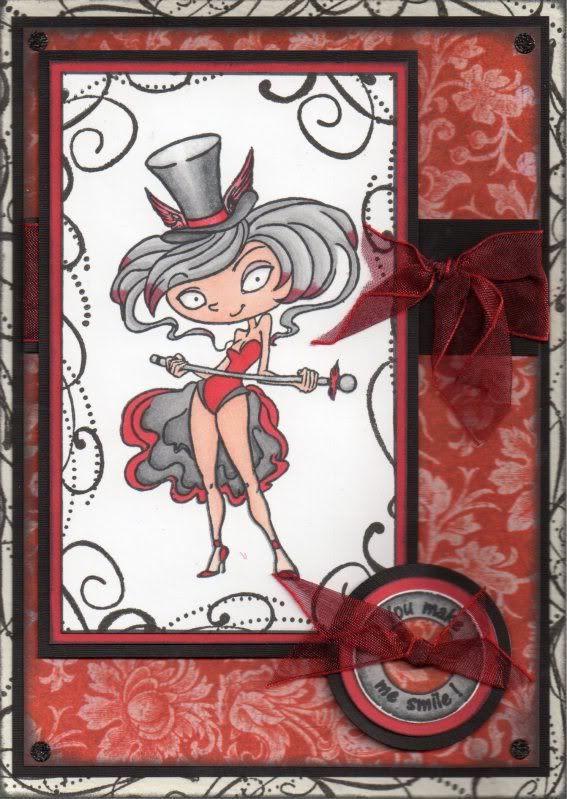
Red and Black Flourish Monique

Here is my entry for this week's Cupcake Craft Challenge, which specifies a colour challenge of black, grey and one other colour. I have gone for red as the extra colour.

The card I made is for Natalie to accompany a swap we did. I decided to use the Monique stamp from Kraftin' Kimmie - one of my recent purchases.


I started by stamping the edges of the card blank using one of the flourish stamps from the Autumn Leaves Flourish v1 by Rhonna Farrer stamp set with Versafine Onyx Black archival pigment ink. The edges of the card were than distressed using ColorBox Charcoal Fluid Chalk ink.

A panel of the red cabbage rose paper from the Papermania Red Hot Capsule paper pad was also distressed around the edges using the Charcoal ink and matted onto black linen paper.

A length of dark red organza ribbon was then tied in a knot and wrapped around a strip of the black linen paper and matted onto the red patterned paper.

The Monique image was stamped onto white card using Memento Tuxedo Black dye ink and coloured using the Copic sketch markers.
  • Hat: R20, R24, R29, N1, N3, N5, N7
  • Hair: N1, N3, R29
  • Skin: E00, E02, E21
  • Eyes: N1
  • Dress: R24, R29, N1, N3, N5
  • Shoes: R24, R29
  • Cane: N1, N3, N5, R24, R29
I was really pleased with the way I got the colour shading on the hat, but not so much with the red tips of the hair - it was harder to get the gradation of colour there.

The flourish stamp used on the card blank was then used to stamp a pattern around the image panel using the Onyx Black ink. This panel was then matted onto red card and the black linen paper.

The circle sentiment, from Aud Designs, was stamped using the Tuxedo Black ink, cut out using the circle Nestabilities die and coloured using the Copic markers.

  • Sentiment: N1, N3, N5

This was matted onto circles of red card and black paper also cut out using the Nestabilities. A small circle of the red patterned paper was cut using the Nestabilities was added to the centre of the sentiment and a length of the red ribbon was tied through the centre and adhered over the bottom corner of the image panel.

As an added embellishment, and to add a touch of sparkle, black Glitterations circles from Anita's were added in the corners of the red patterned paper panel.

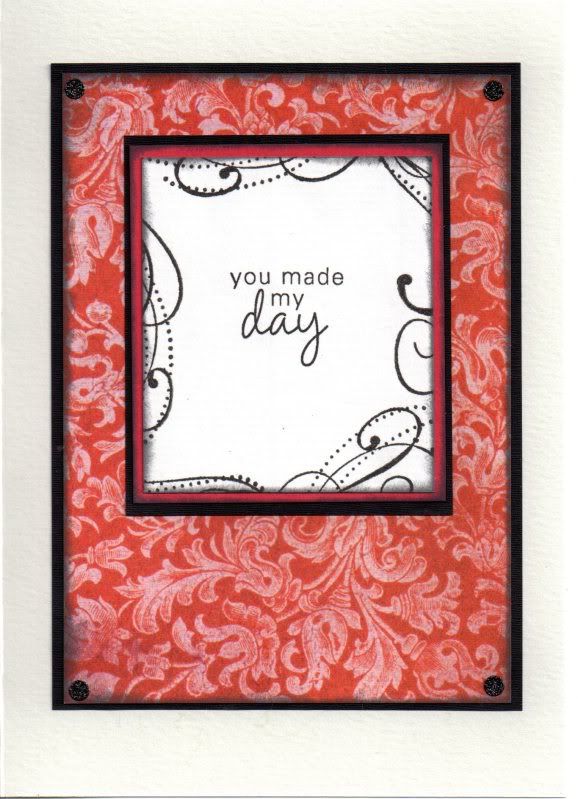
I also decorated the inside of the card, using the red patterned paper and a sentiment panel again stamped with the flourish stamp and a sentiment stamp from the Hero Arts Anytime Messages stamp set, both stamped using the Onyx Black ink. The black Glitterations stickers were again added in the corners of the red patterned paper.

Wednesday, 20 January 2010

Hot Pink and Aqua Rainy Miss Anya

I have finally managed to enter a blog challenge! Hooray!!

I decided to have a go at the current A Spoon Full of Sugar challenge, which is 'Lots of Layering' and decided to use the Rainy Miss Anya image,which is quite apt for the current conditions!


The image was stamped using Versafine Onyx Black archival pigment ink and coloured using a combination of Impress reinkers (Carmine and Pale Aqua), Tim Holtz Distress inks (Tattered Rose, Worn Lipstick and Frayed Burlap) and Marvy Matchables dye ink (Black). The image was then matted onto two shades of blue card.
A strip of the pink stripe paper from the Papermania Claire Curd Big One paper pad was matted over a panel of the aqua plaid paper, and a length of Anita's teal polka dot ribbon was attached across it. Three mini brads were attached at the top of the panel.
The card blank was covered with a panel of the pink stripe paper and the aqua panel was attached to the right.
The greeting panel was created using one of the circle sentiment stamps by Aud Designs and coloured using the Impress reinkers in Carmine and Pale Aqua. This was cut out using a circle Nestabilities die and matted onto a teal scalloped circle.

Monday, 7 December 2009

Pink and Brown Tilda with Watering Can - A Card For Alex

This is the card that I made for Alex's birthday. I find making a card for expert cardmakers quite daunting sometimes but I also enjoy it because I know that they will appreciate the effort you put into them!!

I know that she's opened it now so I can post it on here for you all.


I decided to make a card for her using my new Basic Grey Bittersweet paper pad - these really are beautiful papers!!
The image was very kindly donated by Tara W in an image swap we did last year. The image was watercoloured using Whispers Brushstroke markers and distressed around the edges using the Tim Holtz Frayed Burlap Distress ink. This was then matted onto brown and red card.

A panel of the Cherry Cordial paper from the Basic Grey Bittersweet paper pad was matted onto brown card. A smaller panel of the Truffle paper was matted onto red card and attached onto the Cherry Cordial panel at an angle.

A length of cream lace was coloured with the Frayed Burlap ink to give it a more aged look to fit in with the rest of the card and attached across the two panels.

The sentiment circle, from Aud Designs, was stamped using the Onyx Black ink, coloured using the Whispers Brushstroke markers and distressed around the edges using the Frayed Burlap ink. This was then matted onto brown and red circles cut out using the standard and scalloped circle Nestabilities dies.


The inside of the card was also decorated using a strip of both the Cherry Cordial and Truffle papers. The sentiment, from the Papermania Clare Curd Sentiments stamp set, was stamped using the Versafine Onyx Black archival pigment ink.

I really enjoyed making this card, and thankfully Alex seems to like it! Phew!

Wednesday, 2 September 2009

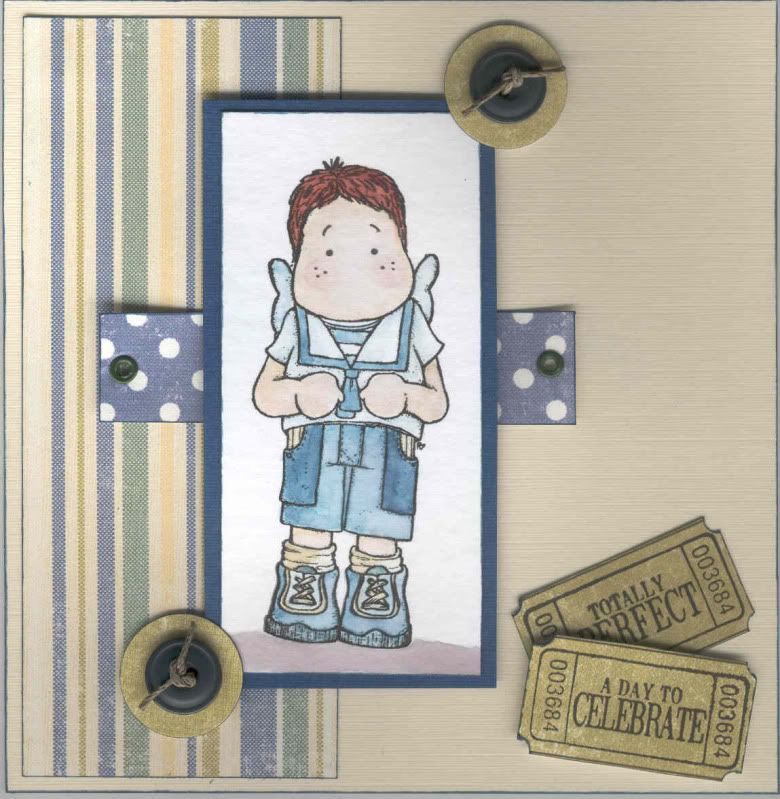
Blue, Green and Yellow Sailor Edwin

This is my entry to this week's Sketch and Stash blog challenge (#18). This is another of the NEW blog challenges that I discovered the other day and I love the idea behind this one.


The idea is to use something new and something that's been neglected from your stash. Well, I'm sure we've all got LOADS of neglected items, especially those ones we had to have but once Mr Postie brought them we had no idea how to use them!!!

Well, the sketch looked like this:

My new item is actually the papers, which are from the Making Memories Fresh Anthology Sydney paper pad. I bought these the other week, and was inspired to buy these (amongst others) by my visit to Julie's. The one I was looking for was the Ruby pad, but saw these and had to get them as well.

My neglected items are the buttons (that I bought about 4 years ago).

The Edwin stamp and the ticket stamps are also slightly neglected as this is the first time I've used the Edwin stamp that I bought months ago, and the ticket stamps that I haven't used as much as I should have!!

Anyway, the Sailor Edwin image from Magnolia was stamped using Versafine Onyx Black archival pigment ink and watercoloured using Whispers Brushstrokes markers and was then matted onto blue cardstock.

A panel of the blue stripe paper from the Sydney paper pad was attached to the left of the card blank. Two small green eyelets were set in a strip of the blue polka dot paper and attached across the centre of the card. The Edwin image was then layered over the patterned paper.

Green hemp cord (that I bought in Hobbycraft if you're interested) was threaded through two green buttons and layered onto the green brocade paper from the Sydney paper pad and added at the corners of the Edwin image.

Two of the stamps from the Autumn Leaves Ticketed stamp set were stamped using the Onyx Black ink on the green brocade paper. Holes were punched at the corners of each of the tickets using the Big Bite and then cut up. To see the tutorial on doing this from Aud Designs, click here. It's very clever.

I also decorated the inside of the card using strips of the patterned papers used on the front of the card and the Happy Birthday sentiment was taken from the Papermania Clare Curd Sentiments stamp set using the Onyx Black ink. Faux stitch doodling was added around the panel of paper to emphasize the edges.

This card was made for a friend with not a hint of irony. As you can see, there is a ticket that says 'Totally Perfect'. Well, he's not, but he thinks he is. He also thinks he's always right, but I didn't have a ticket that said that!!!

Monday, 31 August 2009

Coral Pink Tingla New Baby Girl

Whilst 'blurfing' over on Tara's blog Happily Ever Crafting, I saw some links to some new challenge blogs (well, new to me, anyway). I've added links to them on my sidebar if you're interested.

One of the blogs, Stampin' For The Weekend, has a challenge to make an 'Anything Baby' card. It was then that I realized that I had never uploaded the New Baby Girl card I made for my cousin and his wifewhen their baby Evie Grace was born. I figured it was perfect for the challenge.

So, here's the card I made:

The image is one that I stamped during my trip down to West Sussex last November down at Alex's.

Baby Tingla was watercoloured using Whispers Brushstroke markers, cut out and highlighted with Sakura clear gel pen and Craft Planet Green glitter glue.

The 'It's A Girl' circle sentiment from Aud Designs was stamped and watercoloured using the Whispers Brushstroke markers and highlighted using Sakura clear glaze pen.

The patterned papers are from the DCWV Nana's Nursery It's A Girl paper stack and were matted onto coral card.

Ovals were cut from matching paper and white card using the Fiskars Shapecutter, and the scalloped circle was cut using PI scallop decorative scissors.

Paper Prima flowers were attached in the bottom right hand corner and self-adhesive pearls were added in their centres. I changed the colour of one of the flowers by colouring the petal tips and the centre with Whispers Brushstroke markers and then flooding each petal with water to make the pigments run. Once dry, the petals were re-shaped using an embossing tool and one of the mini purple stamping mats from See D.

Saturday, 29 August 2009

Yellow, Orange and Green Miss Anyas

I made a couple of cards using my new Miss Anya stamps. I decided to use the beautiful My Mind's Eye Bloom and Grow papers and watercoloured the images using a selection of Tim Holtz distress inks. Once coloured, Anita's 3D gloss was added to the headband, handbag and boots.

The greetings panels were created by stamping the sentiments on a selection of card and patterned papers, cut out and layered up.

Yellow and Orange Fashion Miss Anya
STAMPS
Miss Anya stamp - The Greetings Farm
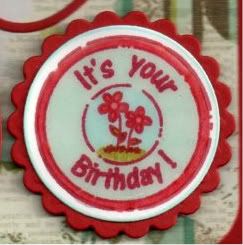
'It's Your Birthday' Circle Greeting stamp - Aud Designs

PATTERNED PAPERS/CARD
Bloom and Grow paper pad - My Mind's Eye
Yellow and Green card - Core'dinations Card

INKS ETC
Versafine Onyx Black archival pigment ink
Tim Holtz Distress Inks - Spiced Marmalade, Shabby Shutters, Frayed Burlap, Scattered Straw & Tattered Rose
Whispers Brushstroke markers
Anita's 3D Gloss

EMBELLISHMENTS

Orange Skeleton Leaves - Papermania
Patti's Pretties Domes
Yellow grosgrain ribbon - Anita's

Green and Yellow Fashion Miss Anya


STAMPSMiss Anya stamp - The Greetings Farm
'It's Your Birthday' Circle Greeting stamp - Hero Arts Birthday Messages stamp set

PATTERNED PAPERS/CARDMy Mind's Eye Bloom and Grow paper pad
Yellow and Green card - Core'dinations Card

INKS ETCVersafine Onyx Black archival pigment ink
Tim Holtz Distress Inks - Spiced Marmalade, Shabby Shutters, Frayed Burlap, Scattered Straw & Tattered Rose
Anita's 3D Gloss

EMBELLISHMENTSGreen Skeleton Leaf - Papermania
Patti's Pretties Domes
Yellow grosgrain ribbon - Anita's

Friday, 20 March 2009

Basic Grey Challenge #26 - Cupcake Chick

This card was inspired by the very talented Docrafts designer Becky James. She very kindly allowed me to make a copy of her bird template at the last Docrafts demo I went to over at The Range in Swindon. You can see her version of the bird here.

I decided to take part in this week's Basic Grey blog challenge, which is "rounded corners, not an angle in sight!"

I began by cutting out the pieces for the bird from two co-ordinating papers from the Basic Grey Cupcake paper pad, namely the orange brushstroke paper and the multicoloured flowery dots paper. Each piece of the bird was edged with ColorBox Prussian Blue Fluid Chalk ink. The pieces were assembled and a little googly eye was added.
The bird was then matted onto a piece of white card, which was also coloured with the Prussian Blue ink, and then matted onto the orange paper.
A hand-cut scalloped frame was cut from a piece of the multicoloured stripe paper, also from the Basic Grey Cupcake paper pad, and then edged with the Prussian Blue ink. The bird panel was then attached on top of the frame.
The daisy birthday sentiment circle from Aud Designs was then selectively inked using a blue Whispers Brushstroke marker pen and stamped onto white card. The word 'chick' was stamped using a set of the Studio G mini alphabet stamps.
The text and image of the sentiment circle was then traced over using a blue Sakura Stardust pen and the colour drawn out with a damp paintbrush to create a wash over the whole image. The sentiment circle was then cut out and attached to the card over a loop of orange organza ribbon.

This is something a little bit out of the ordinary for me, as I normally like everything to be straight and symmetrical, but having seen the beautiful card that Becky made at the demo, I felt compelled to make this one.
Hopefully the recipient of this card will like it as much as I do!!!

Thursday, 13 November 2008

Autumn Leaves Ticket Stamps Tutorial


I recently purchased this set of stamps and I know they are increasingly popular.

I have discovered a great tutorial over on Aud's blog explaining a great way of making them look more like tickets.

Head over here to see how she achieves it.

Friday, 24 October 2008

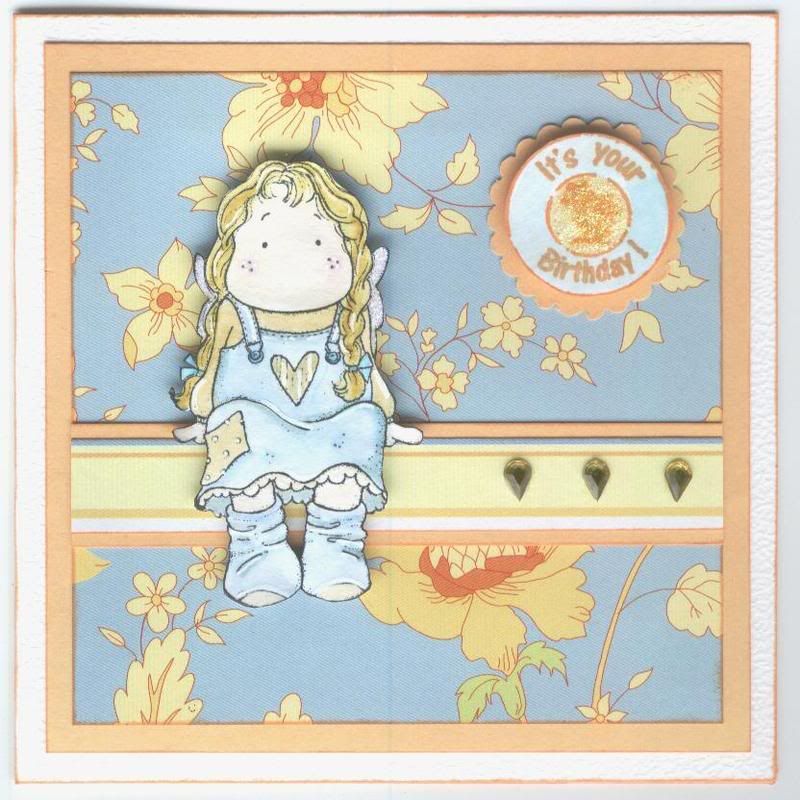
Blue and Yellow Tilda Card

The Tilda image was watercoloured using the Whispers Brushstroke markers and highlighted with white gel pen and Craft Planet Irridescent Sparkle glitter glue.

The patterned papers are from the DCWV Floral Prints paper stack, matted onto pale orange card.

The Tilda image was cut out and the card assembled. Yellow Papermania teardrop gems were added along the strip of patterned paper.

The sentiment is from the circle greetings set from Aud Designs, stamped using ColorBox Tangerine Fluid Chalk ink, watercoloured using Brushstroke markers and highlighted with Craft Planet Irridescent Sparkle glitter glue.

Pink and Black Floral Embossed Card

I was a bit busy yesterday and managed to make four cards (quite productive for me!!) - just goes to show you really can get going once you set your mind to it.

I shall be posting them as separate posts as they are all different styles of cards.

The first is my very first card made using a brass stencil!
I embossed the floral section of the Papermania Floral Friend stencil onto white vellum.

A panel of pink card was then stamped using the Whispers Floral Damask background stamp and ColorBox Orchid Pastel Fluid Chalk ink to give a tone-on-tone effect. This was matted onto a panel of black card.

The embossed image was cut out and attached to the pink and black panels using small eyelets.

A strip of the patterned paper from the Dovecraft Amethyst Floral prints designer paper pack was matted onto a strip of the pink card and strips of black paper cut using the Fiskars Lace Border punch were attached.

The sentiment, from CleverCut, was stamped using Versafine Onyx Black pigment ink and pink crystal gems were added to the panel.

Inspired by Aud over at Aud Designs, I have now started adding 'Handmade' panels to the reverse of my cards. I've had to improvise until I get a stamp made, but hopefully they do the job.

Wednesday, 15 October 2008

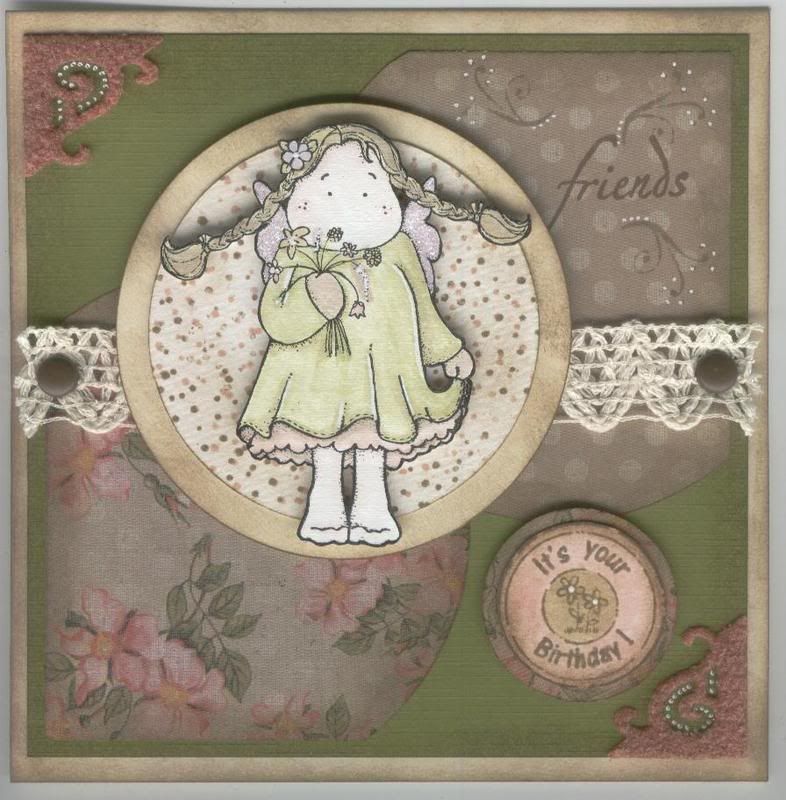
Summery Tilda for a Friend

Here is my entry for this weeks Stamp Something blog challenge. The theme for this week is 'Stamp Something For A Friend'. I needed to make a card for my friend Simone - the mum of the little boy I made the robot card for, so decided this was the perfect challenge for the project.

As I said, her birthday is the same day as mine (29th Dec), and I've been busy trying to get all my birthday and anniversary cards for December and January finished so I can make a start on my Christmas cards (think this is the latest I will have ever started them!!) and not have to worry about not having any cards to send when I get back from the in-laws after New Year.

So, my method for this card began with picking the papers and then colouring the image in to match. I decided to try and colour with the Distress Inks (Frayed Burlap, Scattered Straw, Tattered Rose, Shabby Shutters and Milled Lavender) - not sure if the effect is as good as with the Whispers Brushstroke markers! Highlights were added using a white gel pen and Craft Planet Irridescent Sparkle glitter glue was added to the wings

Having coloured the image I then decided on the layout. This one just kind of evolved. I cut the shapes from the HOTP Pretty Cardmakers Creative pack papers using the Shapecutter and circle template. I distressed the edges using the Frayed Burlap distress ink and some Cut 'n' Dry foam. I attached these to a piece of equally distressed olive card from the Papermania textured cardstock pack.

I wanted to add some fancy corners, so cut some Vivelle using the Ellison Photo Corners die cut, and added some of the Frayed Burlap ink to tone down the brightness of the colour. Highlights were added using a white gel pen.

A length of cream crochet trim was attached across the card using large brown Papermania brads.

Small flourishes were stamped using a morsel stamp from the See D's Connectors Collection set and the Frayed Burlap distress ink and embellished using a white gel pen. The word friends was selectively inked from a stamp in the Clear Choice! Butterflies and Dragonflies set using ColorBox Chestnut Roan Fluid Chalk ink.

The greeting was stamped using one of the Aud Designs circle greetings stamps and the Frayed Burlap distress ink. It was then coloured using the Frayed Burlap, Tattered Rose and Shabby Shutters distress inks, and highlighted with a white gel pen. This wasa cut out and added to a circle of the floral patterned paper.

Two circle mats were cut out using the Shapecutter and circle template. These were both distressed and the white circle was stamped using one of the spotty background stamps from the See D's Mini Deco Backgrounds set using the Frayed Burlap and Tattered Rose distress inks.Tilda was cut out and matted onto the circles.

I must confess that I rather like this card and am pleased that it will be making its way to Australia in December.

Thursday, 18 September 2008

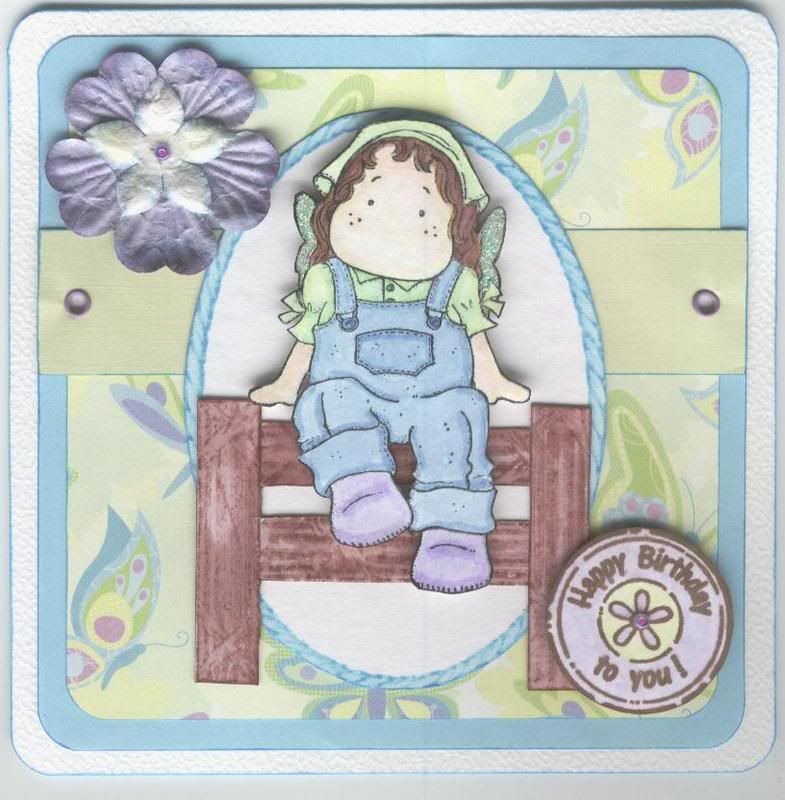
Butterfly Farmer Tilda


I made this card with a Tilda image kindly donated by Cleo/Sylvia P over on the docrafts cardmaking forum.

I watercoloured the `Farmer Tilda` image using Whispers Brushstrokes markers and highlighted with Craft Planet Green glitter glue, and cut out.

I created the wooden fence by stamping out the 'Wooden Beam' stamp from the Non Sequitur Memories of Italy stamp set.

Butterfly paper from the K&Co Sparkly Sweet paper pad was layered onto blue paper, and a strip of green paper layered across that, and lilac eyelets added. It was then added to a square card blank.

An oval frame was stamped by selectively inking one from the Whispers Multiple Oval Frames stamp, watercoloured and cut out.

The sentiment is from an Aud Designs set, stamped using ColorBox Chestnut Roan Fluid Chalk ink, and watercoloured, and a violet seed bead added to the centre of the daisy.

The flowers are Prima, layered up and a violet seed bead added in the centre.

How To Improve The Reverse Of Your Cards

On my travels today, I came across the blog of the stamp designer Aud, from whom I bought my lovely circle greeting stamp set.

She has some beautiful cards on her blog, and she has also highlighted how she decorates the reverse of her cards.

I normally just use one of my 'Handmade by' or 'Handstamped by' stamps directly on the back of the card and then sign and add the year, but her method looks so much more professional.
I really need to get my Craft Robo set up so I can do proper scallops, but until then I'll have to improvise or try something different.
**EDIT** Just discovered that you can buy a stamp like this one (or other designs) from an online store called Scrapmagasinet that has a very unusual range of stamps. I am very tempted, although I suppose I could also design my own.

Wednesday, 17 September 2008

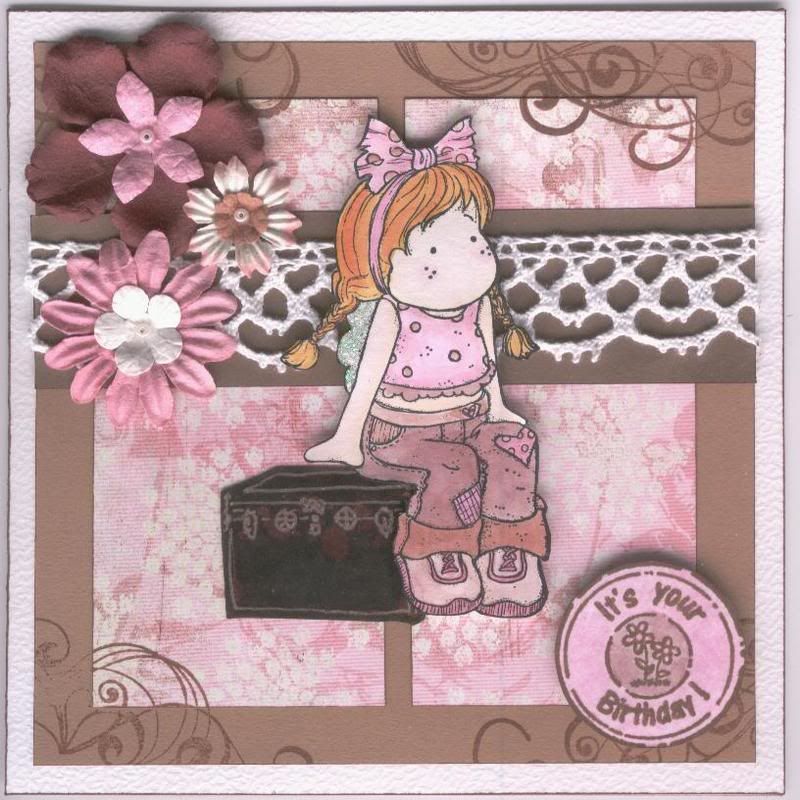
Chocolate Delight Tilda

Here is my entry for the latest Tilda and Co Challenge.

The theme for this week is 'Chocolate Delight' with a colour theme of chocolate brown, pink and white.

The Tilda is the 'Sitting Summer Tilda' that I received from Tara in an image swap.

As she is sitting, I had to find something for her to sit on and found this travelling trunk stamp amongst my stash in the Clear Choice! Travel set.

The patterned paper is from the Basic Grey Sugared paper pad, and the sentiment is from a set from Aud Designs. The flourishes were stamped over the corners using a stamp from the HOTP Flourishes stamp set and the dark brown ink from the Brilliance Tiramisu(3) ink.

The flowers are from both Prima and Papermania, and layered up with a white seed bead adhered in the centre.

It's not my usual style but I'm warming to these 'layered' styles of card, especially the more I see on the various blogs I hop around.
I have also used some of the woven trim that I bought a few months back but forgot about!
The card is also loosely based on last week's A Spoon Full Of Sugar Blog Challenge sketch by Nikki.

Friday, 12 September 2008

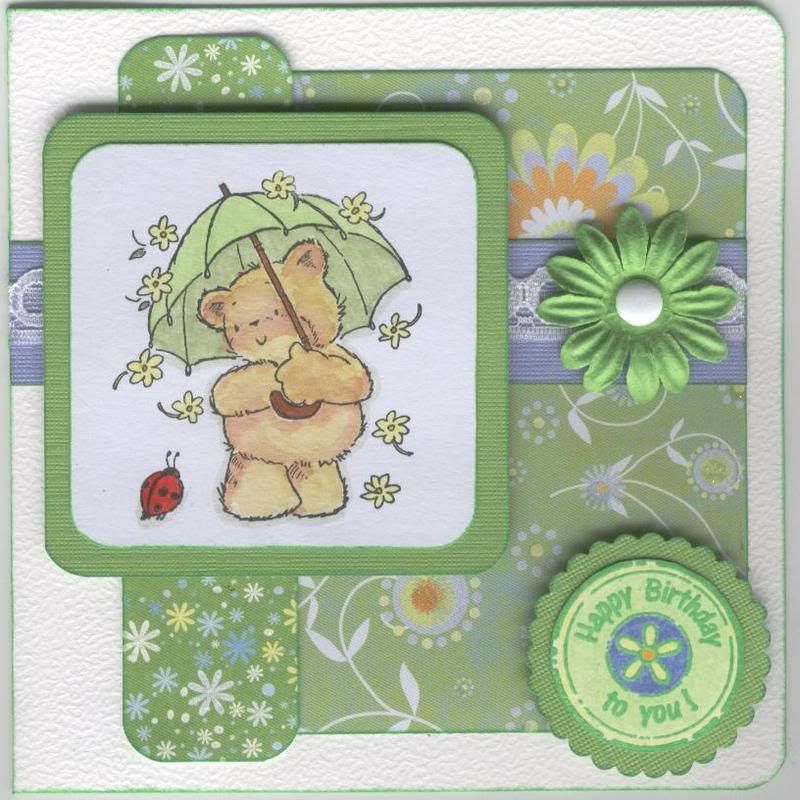
Green Rainin' Daisies

Continuing with my endeavours to enter the blog challenges, here is my entry for this weeks Penny Black Saturday Challenge. The theme for this week is 'One For The Girls'.

The image is obviously from Penny Black, namely Rainin' Daisies, which I got from Jackie/mp3mills over at docrafts in the July 08 Image Swap.

The image was coloured/watercoloured using Whispers Brushstroke markers and matted onto lime green card from the DCWV Brights stack.

The patterned card is from the DCWV Glitter Stack and the Pocket Full of Posies Stack. A strip of DCWV powder blue card was added across the card and narrow white lace was adhered across that.
A large white brad from Papermania was added through a lime green Prima flower and attached over the lace.
The 'Happy Birthday' circular greeting from Aud Designs was stamped in ColorBox Fresh Green pigment ink and clear embossed, and then coloured using Whispers Brushstrokes markers. It was cut out and added to a lime green circle cut out using scallop decorative scissors.
This was one of those cards that just kind of evolves. I started out with the image, as it's for a lady with a bit of a teddy bear thing going!! I also knew I wanted to use the green daisy backing paper from the DCWV Glitter Stack. Then I chose a matching pattern and then the flower.
Then I decided it needed an accent colour as everything seemed to be blending into everything else, so I opted for the strip of blue. Thought this looked a bit plain but didn't want to add ribbon and then remembered all the lace and other trimmings I bought a few months back but still not used and went for a narrow lace.
All that was left then was to decide on a greeting. I really like the circular greetings from Aud Designs and went for the birthday one. It looked a bit stark on the white card so I opted to colour it in in colours that matched the backing papers.
Blog Widget by LinkWithin