Pages

WELCOME

This blog was created to act as a record of the cards and other projects that I have made. It is for both my own reference and to help inspire anyone who wants to take a look.

I'd love it if you'd leave me a comment so that I know what you think of my projects and that you've been to visit!

Anyone can comment, even those who don't have a blog. (Just look for the word 'Comments' under the three little pictures at the end of each post). Readers without a blog can add an anonymous comment, but please leave your name (and docrafts username if applicable) so I know who you are!

Slideshows of all the cards I've uploaded to my blog can be found at the bottom of the page.


PEOPLE WHO FOLLOW MY BLOG

Showing posts with label Sugar Nellie. Show all posts

Tuesday, 5 July 2016

30-Day Colouring Challenge - Day #1

I know as I type this that I won't be able to participate in the 30-Day Colouring Challenge set by Kathy Racoosin over on her blog every day as I have my in-laws arriving on the 15th for 2 weeks, but I will try my hardest to participate when I can.

This image, Dreamer from Leanne Ellis/Sugar Nellie, began life as part of my indexing system, but it didn't stamp very well, but the girl part of the image was salvageable. Unfortunately, that meant that she was stamped with Versafine, which isn't very Copic friendly, and on Ryman's cardstock which I find is more inclined to bleed with too much pen ink. Ho-hum!
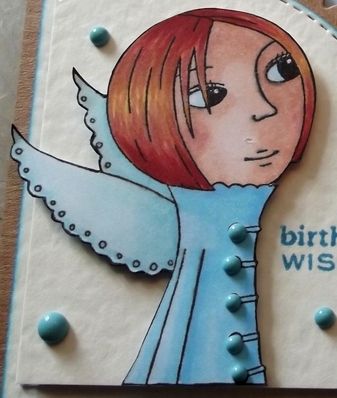

I coloured her to match the starburst background that I made last week at the craft group that I go to.

Copics:
Skin: E000 E00 E11 E13 (Cheeks: E04 R20)
Eyes: B00
Hair: Y15 E07 E09 E15
Coat: B00 B01 B02
Wings: BG02 BG10 BG11
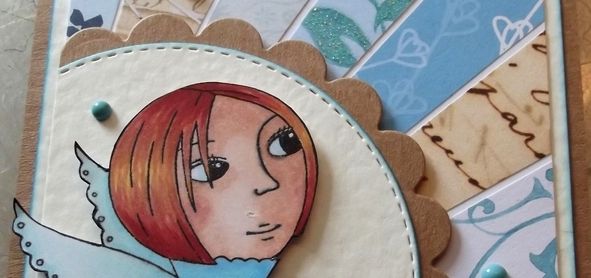

I fussy-cut her out and matted her onto a double-stitched circle die from Crealies XXL #33 die set cut from ivory hammer card. This was then matted onto a Nestabilities scalloped circle. The circle was cropped to fit into the corner of the card.

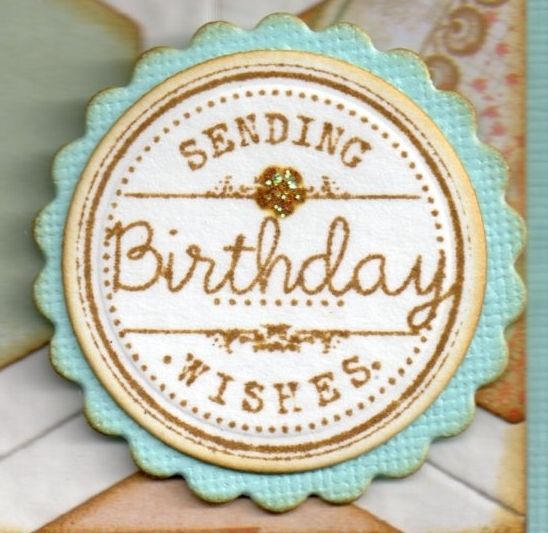
The 'Birthday Wishes' sentiment, from the Personal Impressions Paula Pascual Mixed Sentiments stamp set, was stamped using Tim Holtz Mermaid Lagoon ink, to match the sponging around each of the cream panels.
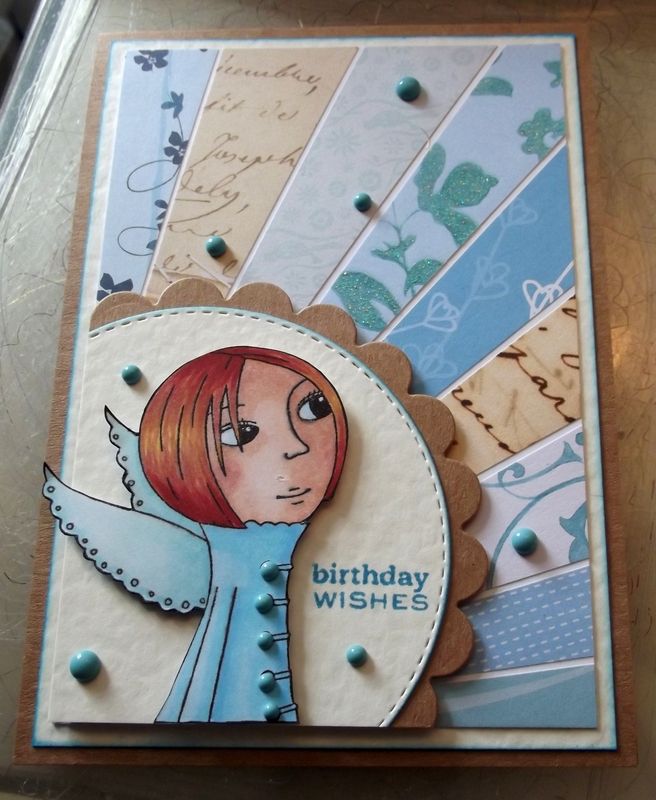

The starburst background was created using a bunch of papers from my stash - some of which haven't been used in a very long time!!!

The paper pads used were:
Papermania Venetian Skies Creative Tones
Papermania Birdsong
Papermania Henbury Lane
K&Co Life's Journey Script
K&Co Life's Journey Map
Daisy & Dandelion Picnic Patch


To finish the card, I added some dots of the Cosmic Shimmer Teal PVA.


Sunday, 25 October 2015

Brown, Cream and Blue Patchwork Background Bumble Bee Gorjuss Girl

Well, as promised, here is an older card that I made that is waiting to be blogged. This is a card that I made for my mum's birthday using the Bumble Bee Gorjuss Girl by Sugar Nellie.

I also decided to use my Sizzix Hexagon Framelits dies and create a patchwork background.


So, the image was stamped using Memento Tuxedo Black dye ink and coloured using Copic markers:

Hair: E31, E33,E35
Skin: E000, E00, E04, E21, R20
Sash/Hearts/Socks: YR04, W1
Wings/Dress: G00, G21,W1

The image was then fussy cut.


A Classic Oval Nestie was used to die cut white card and was embossed using the Sizzix Basic Grey Snow Cap embossing folder. This was then matted onto a scalloped oval of sky blue cardstock from the DCWV Brights Matstack.

A number of hexagons were die cut from ivory hammer cardstock as well as papers from the Prima Songbird paper pad. These were matted and layered together and pieced together on a square of the sky blue cardstock to create the background.


A length of the Dovecraft blue and brown striped ribbon was knotted and then adhered across the patchwork panel before the panel was adhered to the cardblank.
The Gorjuss Girl image was then matted onto the ovals and then they were added to the centre of the patchwork background.

The sentiment, from the Wild Rose Studio Birthday Circles stamp set, was stamped using Tim Holtz Frayed Burlap distress ink and die cut with a Nestie circle die and matted onto a scalloped circle Nestie diecut.

As a finishing touch, Ranger Crystal Stickles glitter glue were added to the wings on the image and details on the sentiment.

Sunday, 5 April 2015

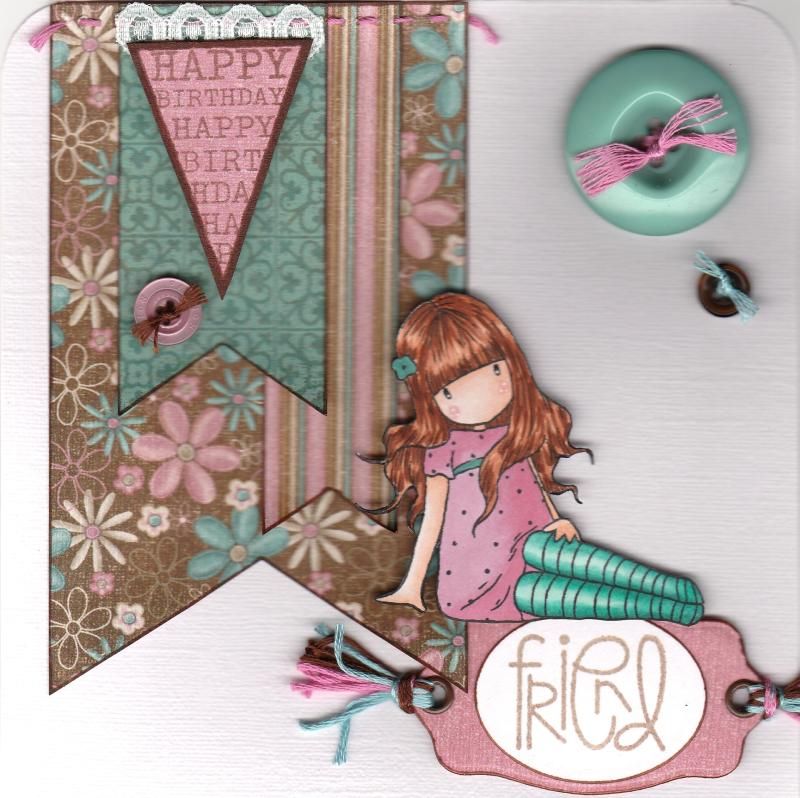
Teal Pink and Brown Sitting Gorjuss Girl with Banners

OK, so I thought I'd have another go at blogging a card as it's been so long since I last did it!
I've decided I'm going to try and blog a current card and then an older card that's still waiting to be blogged after I was offline for so long.

So, it's time to blog a current card. This is one that has been received so I know I can blog it.
 
 
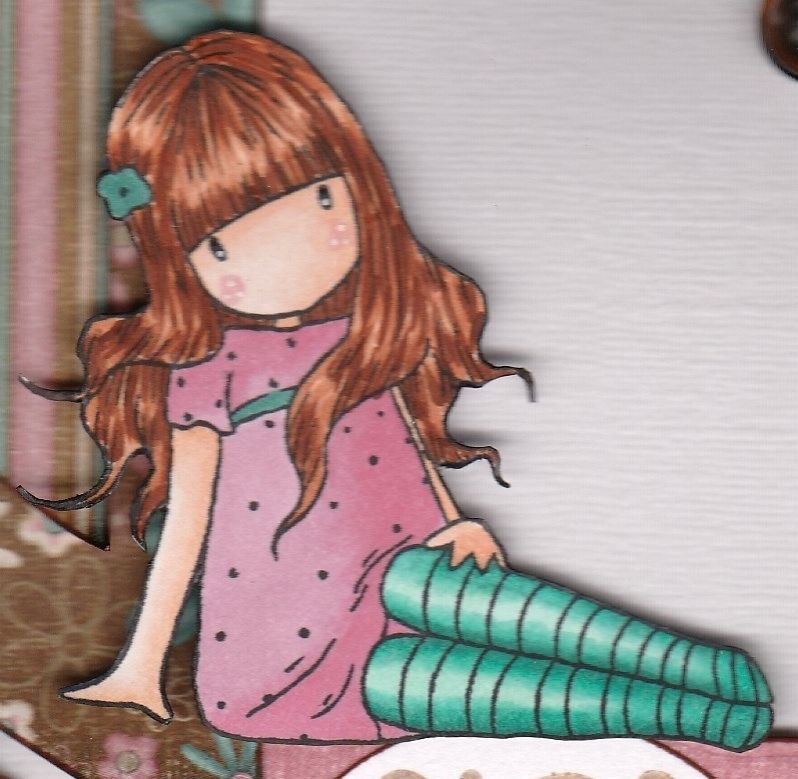
This was a card I was rather pleased with, I have to say. It used one of my older Sugar Nellie Gorjuss Girl stamps, called 'Sitting'.

The papers used on this card are from the Hot Off The Press Floral Ultimate Creative Cardmaker's Pack. There are some lovely colour combo in this paper pad.
 
 The image was stamped using Memento Tuxedo Black dye ink and coloured using Copic markers and then fussy cut.


Copics used:
Hair: E11, E13, E15, E29
Skin: E000, E00, E11, R20
Dress: RV11, RV34
Socks: BG10, BG13, BG15, BG18
Belt/Flower: BG18
 
Fishtail banners were then handcut from a few other patterned papers from the same paper pad and handstitching was added to the top of the largest one. These were then added in the top left corner of the card blank.
 
The Happy Birthday banner from the Hero Arts Friendly Flags stamp set was stamped using Versafine Vintage Sepia archival pigment ink and fussy cut. A small length of white lace was added to the reverse of the image and layered over the handcut banners.
 
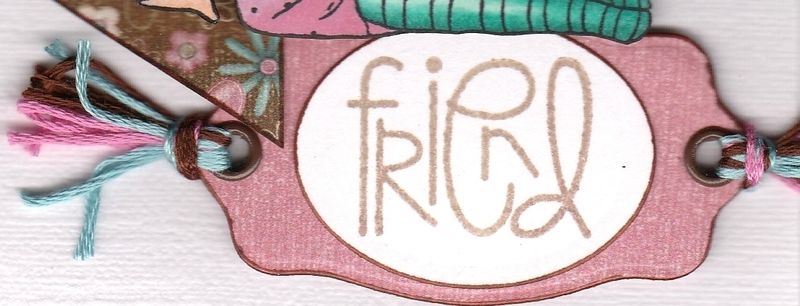
The 'Friend' sentiment from the Paper Smooches Sentiment Sampler stamp set was also stamped with the Vintage Sepia ink and was die cut using a Classic Oval Nestabilities die. This was then matted onto a bookplate diecut from a paper from the same paper pad using a die from the XCut Tags and Bookplates set of dies.
 
Brown eyelets were added through the holes of the diecut and co-ordinating embroidery threads were added.
 
 
The sentiment panel was then added in the bottom right corner of the card blank and the Gorjuss Girl image placed sitting on top of it.
A few co-ordinating buttons were threaded with the embroidery threads and added to the card blank.

Saturday, 22 March 2014

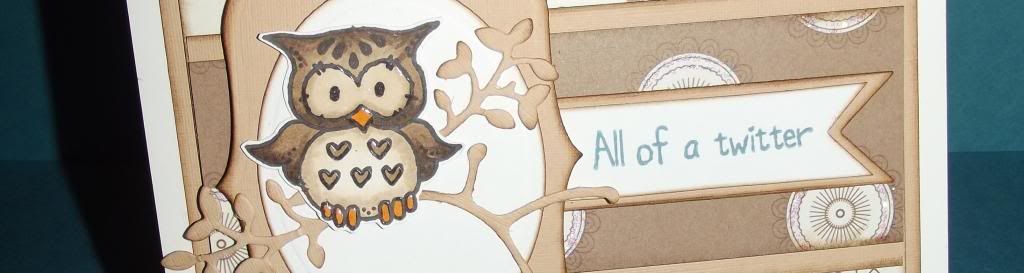
Owl Lots of Pops 30th Birthday

This is a card that I made at my local cardmaking group. It's a cute pop-up card using a die to create the mechanism. It was pretty simple to make, although you do have to ensure that whatever you put on the pop-up will remain within the card when closed.


I needed a 30th birthday card for my 'little' brother (how did that happen?) and thought this would make a good "special card".

The die used to create this card is the new Lots of Pops die by Karen Burniston for Elizabeth Crafts.


Firstly, the card blank and inner panel were created, with the inner panel being slightly smaller than the card blank. In this instance, the inner panel was created using a panel of paper from the First Edition Sweet Owl paper pad. To create the pop-up, place the die along the centre fold of the inner panel. Work the folds of the pop-up and then adhere to the card blank.


I decided that I would use the free owl stamp by Sugar Nellie that came with the July 2009 issue of Craft Stamper Magazine. The image was stamped using Memento Tuxedo Black dye ink and coloured using Copic markers. Highlights were added using Ranger Glossy Accents. The image was then fussy cut.

The Copic markers used are:
E41, E43, E44, E49, YR14

In the set of dies there is also a post die and a couple of different banner dies. Two of each of these were die cut, the banners being cut from patterned papers from the Sweet Owl paper pad.

The two fishtail banners were stamped on he reverse of the patterned paper using the Whimsy Letters and Numbers stamp set by See D's using Memento Teal Zeal dye ink. The banners were then attached to a length of brown embroidery thread which was then tied and adhered to the two post die cuts and these were then in turn attached to the pop-up mechanism.


The longer fishtail ended banner was then stamped using the PSX Buttons Pixie alphabet stamps and the Teal Zeal ink. This was placed on the front pop-up, and the owl placed sitting on branches and leaves, die cut using the Sizzix Sizzlet Flowers and Branches die and the Joy! Crafts Branches die.


A strip of the brown circle paper from the Sweet Owl paper pad was matted onto the beige card and added across the inner panel. Ranger Crystal Stickles were added to the circle pattern on the patterned paper. The 'Have A Hoot...' sentiment, from the Woodware Owl stamp set, was then stamped using the Teal Zeal ink and die cut using the Nestabilities Classic Ovals die and matted onto a Labels Thirty-One shape.


Once the inside of the card was completed, the front of the card was created using the same owl stamped image and the branch and leaves die cuts. The owl image was adhered to panels of oval and Labels Thirty-One shapes.


The fishtail banner from the Sizzix Framelits Banners #2 set was die cut from the beige card. The matching stamp was stamped onto white card using a pale ink and fussy cut. The 'All of a Twitter' sentiment, also from the Woodware Owl stamp set, was stamped onto the reverse of the shape and matted onto the diecut shape.

All panels and diecuts were distressed using Tim Holtz Walnut Stain distress ink.


For an area to write the greeting, a large classic oval diecut was matted onto a Labels Thirty-One diecut with a few of the leaf diecuts and adhered to the reverse of the card. The 'Happy Birthday' sentiment, from the Kanban Farmyard Animal Wobblers stamp set, was created in the same way as the 'All of a Twitter' sentiment on the front of the card.

I'm rather pleased with this card, even if I do say so myself. I love the combination of the die cut elements and the stamped elements.

Here are the blog challenges I'd like to enter this card into:

A Creative Romance - Seeing Double
Brown Sugar - #86 - Anything Goes
Craftitude - #61 - Anything Goes
Crafts4Eternity - #168 - Anything Goes
Cut It Up - #41 - Anything Goes
Fairytale - #87 - An Old Stamp
Pattie's Creations - #88 - Anything Goes
QKR Stampede - #80 - A Little Birdie Told Me
Simply Create Too - #57 - Animals
Sister Act - #49 - Anything Goes
Stampin' For The Weekend - Anything Goes
Crafty Girls - #14 - Anything Goes
Aud Sentiments - #102 - Anything Goes
Copic Marker Europe - Birthday
Red Rubber Inspirationals - #112 - Colour In The Lines
Crafter's Café - #55 - Make A Square Card
Inklings and Yarns - #48 - Anything Goes
Stampotique Designers - #139 - Masculine
Fan-Tastic Tuesday - #27 - Anything Goes
Oldie But A Goodie - Bunting (Owl Stamp)
Through The Craftroom Door - Anything Goes 18/3-24/3
Aurora Wings - #1 - Anything Goes
Crafty Bloggers Network - Nature
Crafty Boots - Feathers
Fitztown - #27 - Anything Goes
Lexi's Creations - #112 - Punches and Dies
Shabby Tea Room - #210 - Anything Goes
Paper Nest Dolls - #6 - Anything Goes
613 Avenue Create - #63 - Anything Goes
Challenges 4 Everybody - #39 - Anything Goes
Eclectic Ellapu - Wings (Pink Team)
Penny Black and More - So Sweet
Pile It On - #11 - For A Guy
Sentimental Sundays - #198 - Cute and Cuddly
Cards Galore Encore - #3 - Use Stamp or Digi
Crafts & Me - #146 - Anything Goes
Flat Friends - #18 - Cards For Men
Just B Creative Crazy - Anything Goes

Monday, 13 June 2011

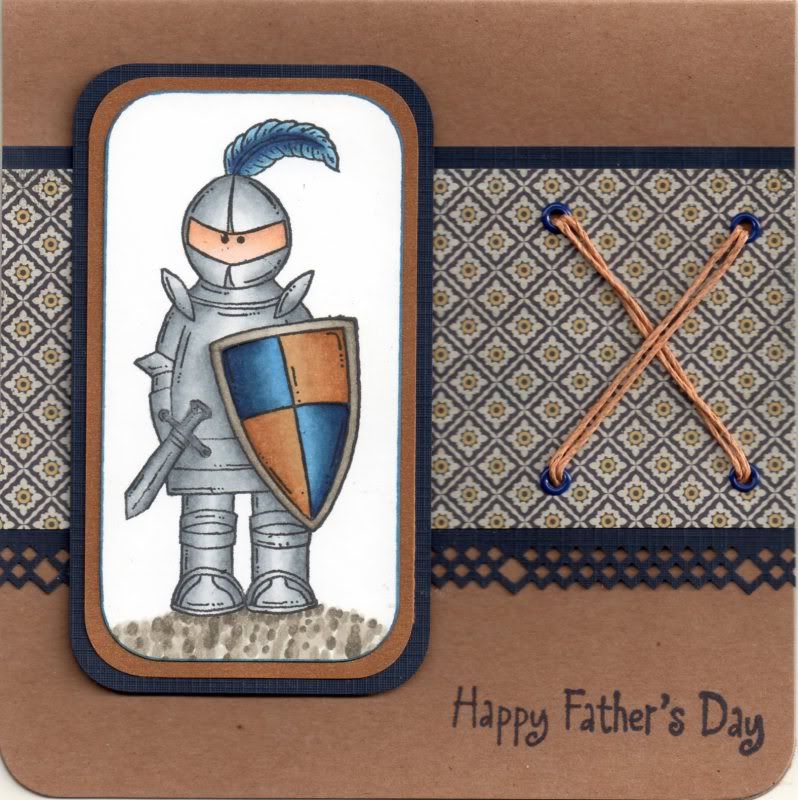
Blue and Brown Father's Day Sugar Nellie Knight

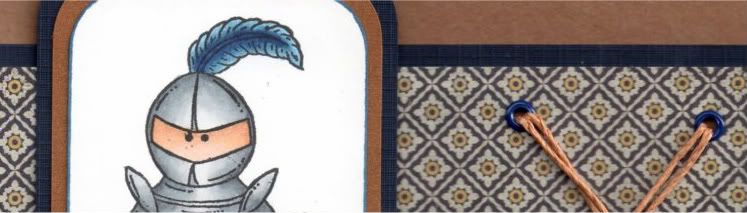
Here is the design of this year's Father's Day cards that I've made for my dad and hubby's dad. I decided to go with the Sugar Nellie Knight image.


The image was stamped using Memento Tuxedo Black dye ink and coloured using Copic sketch markers:
  • Armour: C0, C1, C3, C4, C6
  • Sword: C2, C4, C6
  • Skin: E00, E13, E21, E51
  • Shield: W1, W3, W5, W7, B32, B34, B37, B39, E31, E33, E35
  • Feather: B32, B34, B37, B39
  • Shadow: W1, W3, W5
Somehow I actually managed to get the armour and shield to look quite metallic and shiny!!

The corners were rounded using the large XCut corner rounder punch and matted onto bronze shimmer paper and navy card.


A panel of the Jute paper from the Basic Grey Granola paper pad was matted onto the navy card, punched with the XCut Diamonds border punch.

I wanted to add an element of texture but also keep it masculine, so four holes were punched using the Cropodile Big Bite and the Stampin' Up Mat Pack template and small dark blue Papermania eyelets were added. The holes were then threaded with a double strand of tan hemp cord from Hobbycraft.

The card was assembled and the 'Happy Father's Day' sentiment, from Elzybells, was stamped in the corner using Versafine Majestic Blue archival pigment ink.

Here are the challenges I am entering this card into:

Thursday, 24 February 2011

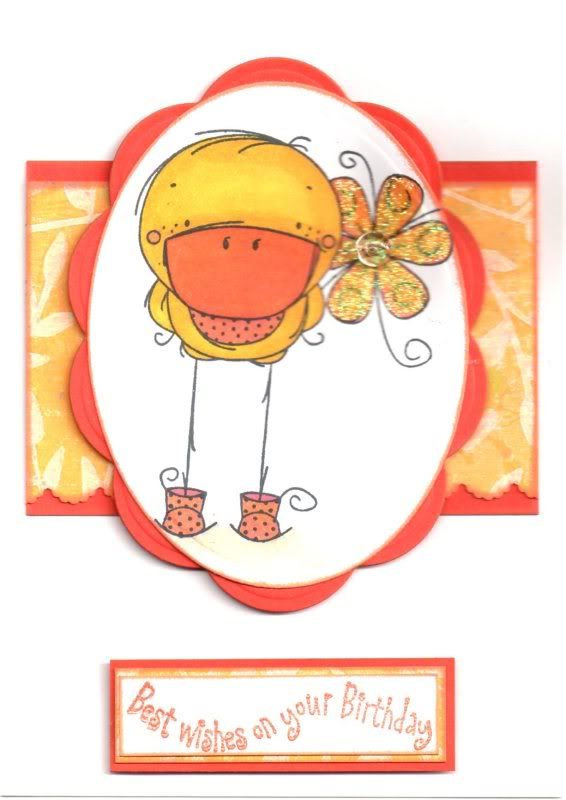
Yellow and Orange Duck In Boots

Here is the card I made for my docrafts matey Kay/Incy for her birthday.


The Duck in Boots image, from Sugar Nellie/Rachelle Anne Miller was stamped using Memento Tuxedo Black dye ink and coloured using Copic Sketch markers:
  • Duck: Y08, Y17, YR02, RV06
  • Flower: Y17, RV06
  • Boots: RV06, Y17, N3
  • Shadow: N1, N3, E41
The image was die cut using a classic oval Nestabilities die and matted onto a big scalloped oval die cut from orange card.

A strip of the golden yellow leaves paper from the DCWV Pocket Full of Posies stack was punched along the bottom edge using the scalloped scallop punch from EK Success. This was then matted onto a strip of the orange card.

The sentiment, from Elzybells, was stamped using Ink It Up! Pumpkin pigment ink and heat embossed using the Heat It Up! Enchanted Gold embossing powder. This was matted onto the golden yellow leaves paper and the orange card.

The image was then highlighted with Craft Planet Yellow glitter glue and a clear dew drop from Patti's Pretties was added to the centre of the flower image.

Here are the blog challenges that I am entering with this card:

Sunday, 10 October 2010

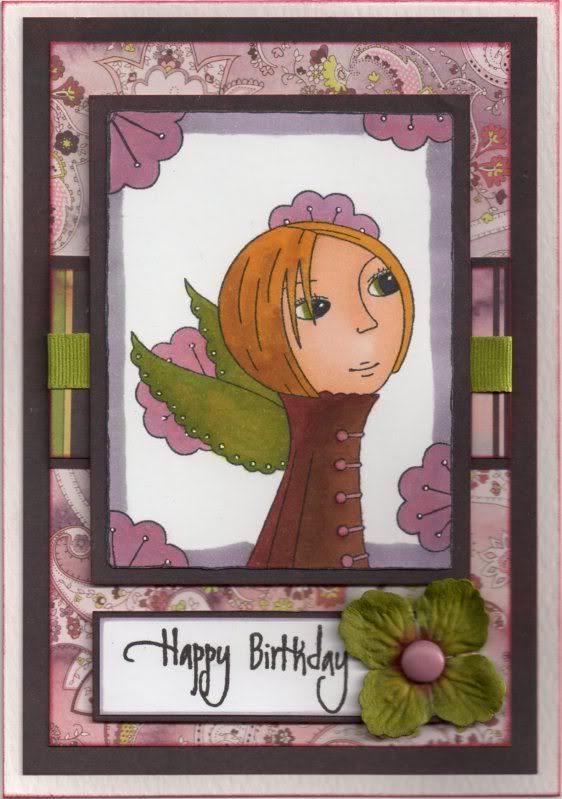
Burgundy and Olive Leanne Ellis Dreamer

This is the card that I made for the lovely and very talented Teresa for her birthday. I know that she has received this now so am free to upload it.


The beautiful Dreamer image, by Leanne Ellis for Sugar Nellie, was kindly donated to me last year by Alex K as a birthday gift. I love these images and they are on my ever-growing wish list.
The image was coloured using Copic Sketch markers:
  • Hair: E13, E35, Y08
  • Skin: E00, E21, E51
  • Jacket: E57, E39, RV21
  • Eyes/Wings: YG17, Y08, N3
  • Flowers: V12, RV21, R20, BV31
  • Outline: V12, BV31, N3
 and matted onto the Dauphin paper from the Basic Grey Eva paper pad.

A strip of the Aristocrat paper was matted onto the Dauphin paper and a length of Anita's olive green grosgrain ribbon was added around it. This was then matted across a panel of the Versailles paper from the same paper pad.

The sentiment panel was created by stamping onto white card using the 'Happy' and 'Birthday' stamps from the Elzybells Swirly Sentiments stamp set using Versafine Onyx Black archival pigment ink and matted onto the Dauphin paper. A green Prima paper flower was coloured using Copic markers:
  • Prima flower: YG17, Y08, E57, R39, N3
 and a large dusky pink Papermania brad was added to the centre and attached to the panel.
 
Highlights were added to the image using the Papermania Snow White gel pen.

Here are the challenges that I shall be entering this card into:

Wednesday, 6 October 2010

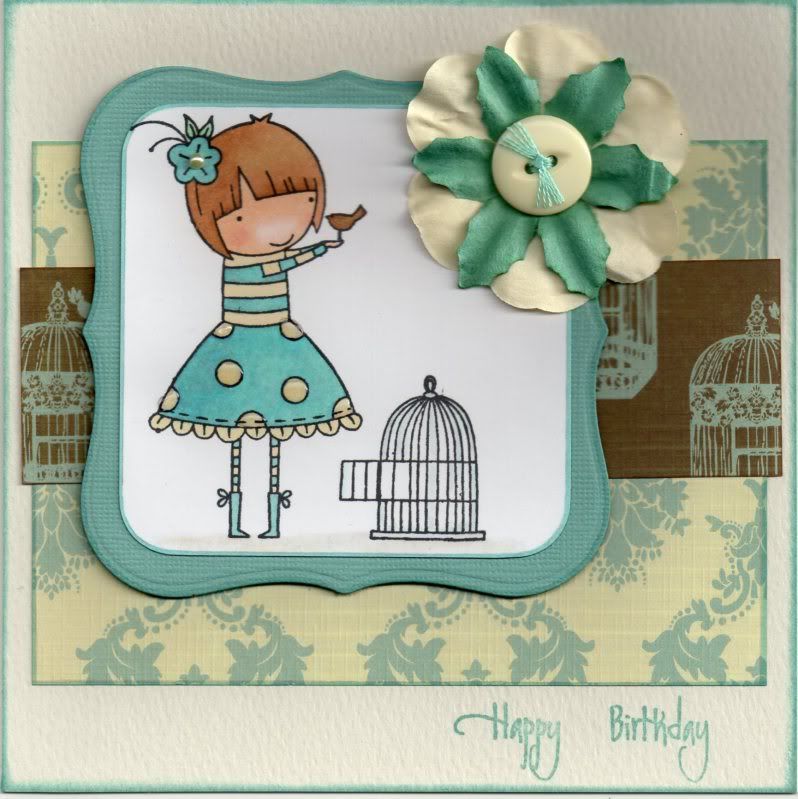
Duck-Egg Blue and Cream Sugar Nellie Fly Free

Here is the card that I made for Natalie for her birthday. I know that she has received it now so I can post it without spoiling the surprise!!


I love this cute Leanne Ellis image, available form Funky Kits. It's called Fly Free image, and it was stamped using Memento Tuxedo Black dye ink and coloured using Copic Sketch markers:
  • Hair: E13, E31, E35
  • Skin: E00, E21, E51, R20
  • Flower: BG02, BG11, N3,
  • Leaf: BG32, YG41
  • Top/Skirt/Socks: E41, Y00, BG02, BG11, N3
  • Boots: BG02, BG11, N3
  • Bird: E35, E39, N3
  • Cage: C2, BG11
  • Shadow: E41, N1, 0
The image was matted onto a panel die cut using the Labels 1 Nestabilities die from duck-egg blue Core'dinations card from the Elements card pack.

A panel of the cream and blue flourish paper from the Papermania Chatsworth paper pad was added to the centre of the card blank with a strip of the brown and blue bird cage paper from the same paper pad over the top.

Embroidery thread was tied through a cream button and assembled with a cream Papermania paper flower and a blue Prima paper flower and added to the top right corner of the image panel.

The spots on the image were then highlighted using Anita's 3D Gloss, and a cream self-adhesive pearl from The Hobby House was added to the centre of the flower in her hair.

The sentiment, from the Elzybells Swirly Sentiments stamp set, was then stamped in the bottom right corner of the card blank using ColorBox Celadon pigment ink.

Here are the challenges that I will be entering this card into:

Saturday, 25 September 2010

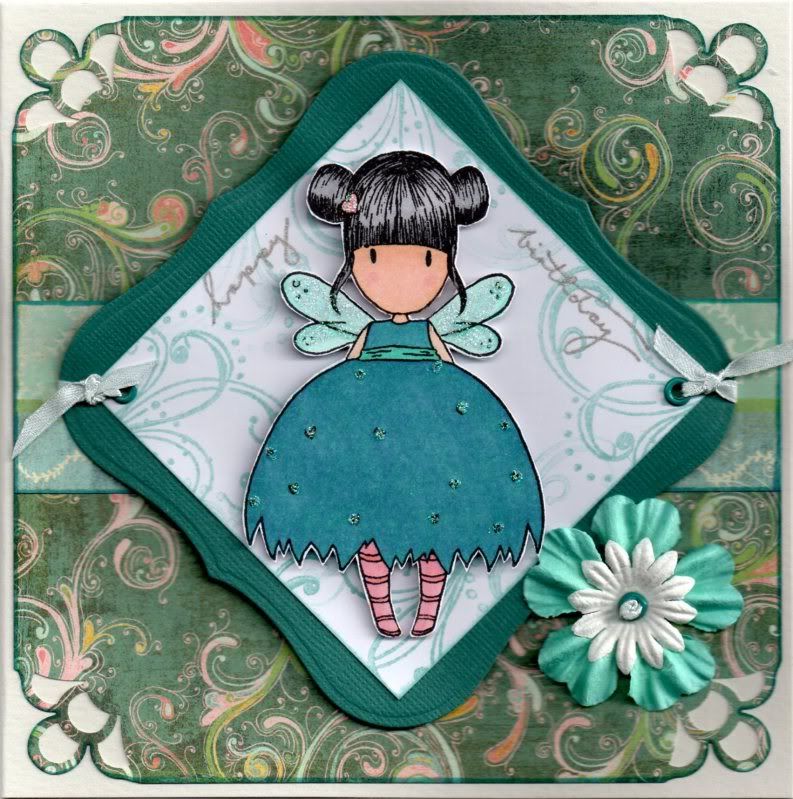
Teal, Pink and Turquoise Bumble Bee Gorjuss Girl

This is one of my favourite Gorjuss Girl images. This image was stamped at Julie's house last August using one of Julie's stamps! I really can't believe how long ago that was now - over 13 months!!!


The Bumble Bee Gorjuss Girl image was stamped using Versafine Onyx Black archival pigment ink, coloured using Copic sketch markers:
  • Hair: N1, N3, N5
  • Skin: E00, E21, E51, R20
  • Socks/Hearts: R20, YR02
  • Dress: BG13, B45
  • Wings: BG11, BG13

and cut out.

A panel of white card was cut out and stamped using one of the flourish stamps from the Autumn Leaves  v1 Flourish Rhonna Farrer stamp set and ColorBox Celadon pigment ink. This was then matted onto a panel of blue Core'dinations card die cut using a Labels 1 Nestabilities die.

A panel of the Spumoni paper from the much underused Basic Grey Two Scoops paper pad was cut and the corners punched using the Martha Stewart Double Loops corner punch.

A strip of the Ice-Cream Parlour paper, from the same paper pad, was adhered across the centre of the punched panel and matted on to the card blank.

The Gorjuss Girl image was placed over the white stamped panel and the 'Happy Birthday' words, from the Woodware Jane's Script sentiments stamp set were stamped either side of the image using the Versafine Smokey Gray archival pigment ink and traced over using the Sakura clear Stardust pen.

Holes were punched in two corners of the Label shape using the Big Bite and small teal Papermania eyelets were set in the holes and light blue satin ribbon was knotted through them.

The Gorjuss Girls image was then added to the centre of the panel using 3D foam pads and Craft Planet Iridescent Sparkle glitter glue was added over the wings, small heart and dress hearts of the image.

A white Papermania Imaginisce paper flower was layered over an aqua Prima flower and a small teal Papermania eyelet was added to the centre. A length of the light blue ribbon was knotted and threaded through the centre as a finishing touch.

Thursday, 9 September 2010

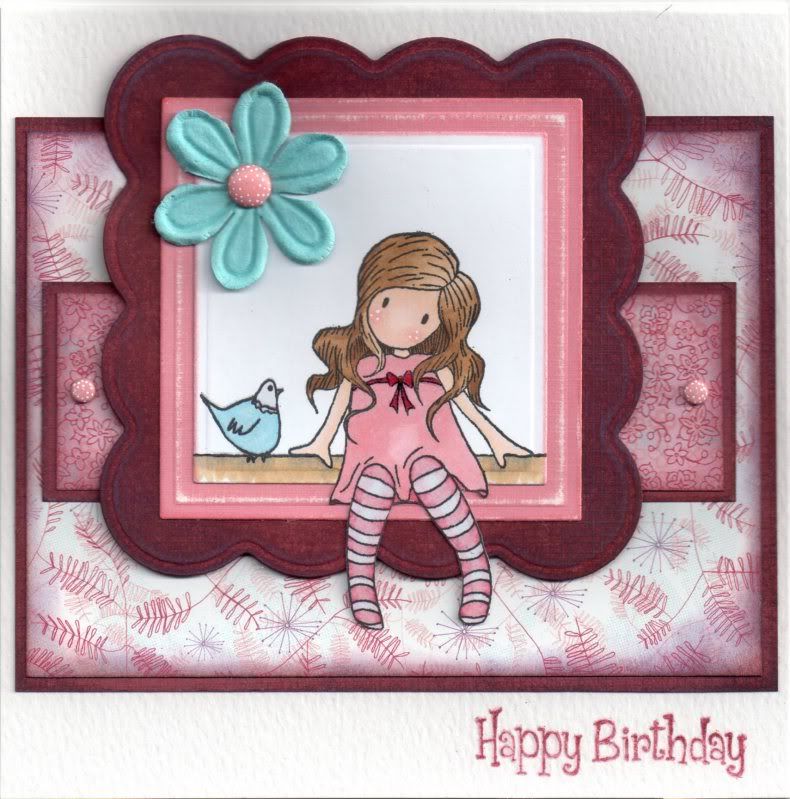
Pink, Burgundy and Blue Little Birdie Gorjuss Girl

Here is a card I made for my great-aunt in Canada - hopefully she'll like this image!


The 'A Little Birdie Told Me' Gorjuss Girl image, from Sugar Nellie, was stamped using Memento Tuxedo Black dye ink and coloured using Copic markers:
  • Hair: E21, E31, E35, E57
  • Skin: E00, E21, E51, R20
  • Dress/Socks: R20, R39, C0
  • Bird: B02, C0
  • Shadow: N3, E31
The image was then die cut using the 'out of the box' technique and a standard square Nestabilities die.

A larger square was cut from candy pink textured card from Papermania and the edges were scuffed using the Basic Grey precision file set. A big scalloped square was then die cut from the dusky red textured card from Papermania, scuffed with the precision file set and coloured with the Tim Holtz Dusty Concord and Fired Brick distress inks.

A panel of the Felicity paper from the Basic Grey Euphoria paper pad was matted onto a similarly distressed mat of the dusky red textured card, as were two small panels of the Utopia paper from the same paper pad.

A Prima paper flower from the Botanical Mix tub was added to the image panel using a large pink Papermania brad, and two small pink Papermania brads were added to the two small panels of Utopia paper. The brads were then highlighted with small dots using the Papermania Snow White gel pen.


The sentiment, from the Papermania Clare Curd Sentiments stamp set, was stamped in the bottom corner of the card blank using Versafine Crimson Red archival pigment ink and traced over the top with a Sakura Clear Glaze pen, as was the red bow on the dress.

I will be entering this card into a few blog challenges:

Wednesday, 4 August 2010

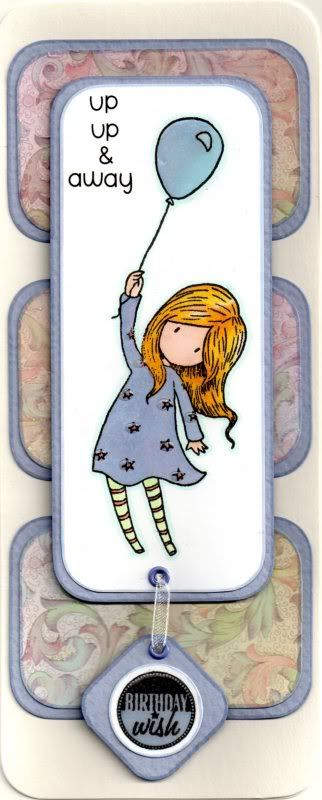
Lilac Up, Up and Away Gorjuss Girl

This is my entry to this week's Simon Says blog challenge, which has a theme of 'Sing It Baby'.

Now, apparently, Nancy Sinatra sang 'Up, Up & Away' so this seems perfect!!


The Up, Up and Away Gorjuss Girl image, from Sugar Nellie, was stamped (at Julie's) using Versafine Onyx Black archival pigment ink and coloured using Copic Sketch markers:
  • Hair: Y08, Y17, YR02, E41
  • Skin: E00, E21, E51, R20
  • Balloon: B41, BV00
  • Dress: B41, BV00, R20, YR02
  • Socks: YG11, R20, YR02
  • Outline: BG11
The image was cut out and the corners rounded using the large XCut corner rounder punch. The image was matted onto lilac card and the sentiment was added using the Doodlebug Beetle Black Simply Sweet alphabet rub-ons.

Three panels were cut form the lilac, pink and green botanical flourish paper from the DCWV Once Upon A Time mat stack and matted onto the lilac card.

The 'Birthday Wish' circle sentiment was stamped onto white card using the Onyx Black ink and coloured using the Copic markers
  • Circle Sentiment: BV00, B41
A square was cut from the lilac card and the corners rounded with the XCut punch. Holes were punched in the bottom of the image panel and in the top of the square. Small lilac Papermania eyelets were set in the holes and white organza ribbon was threaded through creating a dangling sentiment panel.

The image panel was matted over the three panels and Anita's 3D Gloss was added over the balloon, dress stars and circle sentiment.

Thursday, 25 March 2010

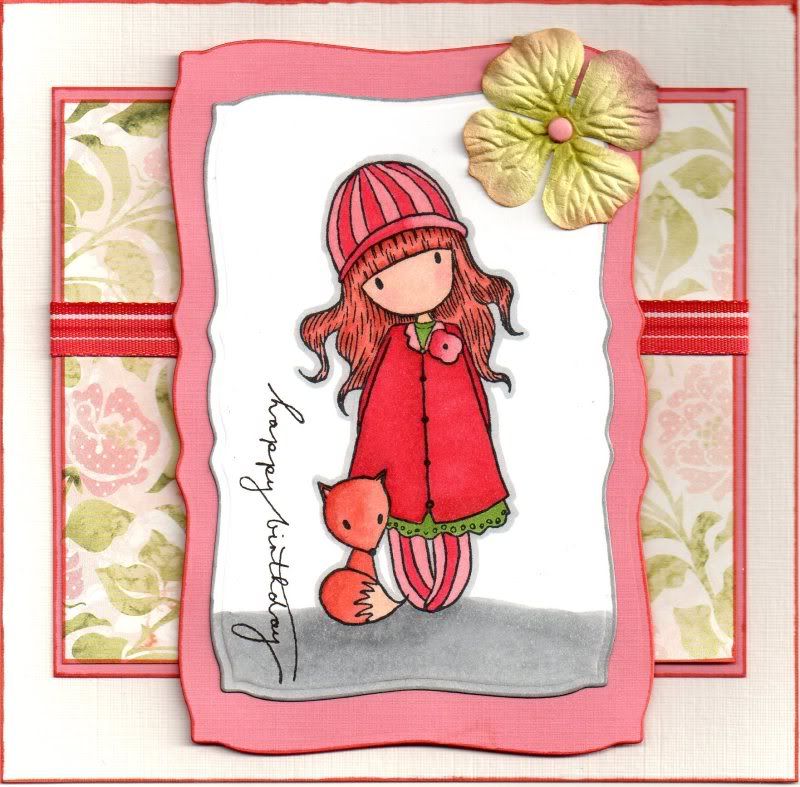
Pink, Red and Green Gorjuss Girl with Fox

Here is my latest Copic project using the lovely Gorjuss Girl with Fox from Sugar Nellie.

It is also my entry to the current Quirky Crafts blog challenge, which is Flowers this fortnight.


I started by stamping the Gorjuss Girl image with Memento Tuxedo Black dye ink and coloured using my Copic Sketch markers.
  • Hair: E02, E07, YR02
  • Face: E00, E02, E11, R20
  • Coat: R24, R29, E07
  • Hat/Socks/Flower: R20, R24
  • Dress: YG17, G85
  • Fox: YR02, E07, E51
  • Shadows: N3, N5
  • Highlights: N3
The image was then cut out using a mega rectangle Nestabilities die and matted onto a larger pink panel. The sentiment was then stamped up the side of the image using the 'Happy Birthday' stamp from the Woodware Jane's Script Sentiment stamp set with Versafine Onyx Black archival pigment ink.
A green Prima hydrangea paper flower was attached to the top corner using a small pink brad.
A panel of the Rochelle paper from the Basic Grey Porcelain paper pad was matted onto the pink card and a length of the red striped grosgrain ribbon from the Chatterbox Scarlet ribbon pack was adhered across the centre.

Wednesday, 24 March 2010

Teal, Green and Pink Sitting Gorjuss Girl and By The Cute and Girly Challenge

Here is another of my Copic coloured cards - I'm very proud of this one and it uses one of my favourite colour combinations (at least for this week!)

I am also entering it into the By The Cute and Girly blog challenge (a new one for me) and their current monthly challenge is 'Spring Is In The Air'.

I started by stamping the Sitting Gorjuss Girl image from Sugar Nellie using Memento Tuxedo Black dye ink and coloured using my Copic sketch markers.
  • Hair: E02, E07, YR02
  • Face: E00, E02, E11, R20
  • Dress: BG11, BG13, BG49
  • Socks: YG11, YG17
  • Highlights: N1 (not as noticeable in the picture as in real life)
  • Shadows: N3, N5
The image was then cut out using the Nestabilities Label 3 die and matted onto a teal blue panel.
A panel was created using two co-ordinating papers from the Making Memories Funky Vintage Ruby Collection paper pad and a strip of green paper, and a length of white twill ribbon was attached across this, having been knotted first.
Three Papermania paper flowers were colour tinted with the Copic markers* and attached to the bottom corner of the card. Small self-adhesive pearls were then attached to their centres.
The sentiment tag, from Stamps Away, was stamped using Versafine Onyx Black archival pigment ink and coloured using the Copics.
  • Tag: BG11, BG13, BG49
A hole was created in the top of the tag and white embroidery thread was threaded through and attached between the flowers.
* I don't recommend this as the paper tends to fluff up and get stuck to the nib of the pen!!!

Monday, 31 August 2009

Stephanie's Blogerversary Blog Candy - CLOSED

Stephanie is celebrating her one month blogerversary by offering some amazing blog candy.

She is offering a selection of papers from the My Mind's Eye Wild Asparagus 6x6 papers, matching buttons and four Manga Sugar Nellie stamps and a Tuxedo Black Memento Dew Drop inkpad.

Pop over here to see a pic of all the goodies!!

For a chance to win, Stephanie asks that you leave a comment on the blog candy post here & link the candy on your Blog.

This candy is open to everyone worldwide and a winner will be drawn randomly on Tuesday 8th September 2009.

Wednesday, 29 July 2009

Some Cards For Young Girls

As promised, here are the cards I made for a couple of young girls.

One uses a stamped image and the other a Craft Planet sticker. I did get a bit snobby about using stickers, but I think for children they are very useful as the colour intensity is usually very good, a result I cannot achieve with watercolouring. If I ever justify the cost of Copics then I might return to my snobby frame of mind, but until then.........

Green and Orange Maggie with Teddy Bear

StampsMaggie with Teddy Bear - Sugar Nellie
Scallop Frame - Papermania (Sweet Nothings set)
Happy Birthday - Papermania (Sweet Nothings set)

Patterned PapersPapermania Citrus Colossal paper pack

Inks etc
Versafine Onyx Black archival pigment ink
ColorBox Pigment inks:
Fresh Green
Pink
Old Rose
Topaz
Terra Cotta

Plum and Heather Fairy Princess
Patterned PapersDCWV Pocket Full of Posies stack

CardstockDCWV Brights Matstack

Inks etcWhispers Brushstroke markers

StickersFairy - Craft Planet Fairytale Sticker sheet
Special Birthday Wishes - Papermania Birthday Sentiments sheet

EmbellishmentsPink Satin Ribbon - Anita's Self-Adhesive Ribbon Pinks and Reds

Tuesday, 28 July 2009

Some Cards For The Boys


Well, I have finally managed to get all my cards sorted over in my photobucket album, so now I can actually start uploading some pictures and info here.

I've actually been rather productive (for me!) since I got out of hospital. Bearing in mind my craft room was packed up for two weeks of those five weeks whilst the in-laws were visiting, I've made TWENTY cards (all different) since the 23rd June. That's almost a card a day!!

Anyway, the first card post is to show the cards I made for my cousins and family friends, aging from 9 to 15. All of the images were watercoloured using the Whispers Brushstroke markers.

Blue, Green and Brown Balloon Boy Luca

Stamps
Balloon Boy Luca - Sugar Nellie (image from Alex K)
It's Your Birthday Scallop Frame - Hero Arts (Birthday Messages set)

Patterned Papers
DCWV Retro Prints stack

Inks etc
Whispers Brushstroke markers
Versafine Onyx Black achival pigment ink

Die-Cuts/Punches etc
Circle Nestabilities


Red and Brown Pirate Luca

Stamps
Pirate Luca - Sugar Nellie (image from Vicky/Mrs VH)
Happy Birthday - Hero Arts (Birthday Messages)

Patterned Papers
DCWV Retro Prints stack

Inks etc
Whispers Brushstroke markers
Versafine Onyx Black archival pigment ink


Blue and Yellow Cuddly Buddly Rugby Player

I took a little artistic licence with this one as you really can't tell if he is a footbally player or otherwise, so I decided to make a rugby themed card for a real rugby enthusiast in the Leinster colours.

Stamps
Footballer - Cuddly Buddly
It's Your Birthday Scallop Frame - Hero Arts (Birthday Messages set)

Patterned Papers
Papermania Citrus Colossal paper pack

Inks etc
Whispers Brushstroke markers
Versafine Onyx Black archival pigment ink

Die-Cuts/Punches
Circle Nestabilities


The cards are based around a similar design. They would have looked a lot more similar if I'd remembered to cut down the pirate image before matting it up!!!

The next cards I'll upload are the ones I made for some young girls.

Monday, 8 June 2009

Black, White and Blue Gorjuss Girl Sitting With Bird

Here's another of those cards I've been holding on to until I know the recipient (Loretta) has received it.

I wanted to make a card for her birthday using another of my newest stamps, the Gorjuss Girl Sitting with Bird, from Sugar Nellie and available from Funky Kits.

I decided to go with a monochrome colour combo with a hint of blue.

I started by stamping the Gorjuss Girl Sitting with Bird using Versafine Onyx Black pigment ink then watercoloured it using the Whispers Brushstrokes markers. The sentiment, from the Making Memories Express It! stamp set. was then added to the image panel using the Onyx Black ink. This panel was matted onto black card.

A panel of patterned paper from the Papermania Ivory and Black Creative Tones paper pad was cut to size and the large daisy was watercoloured blue using one of the Whispers Brushstroke markers. The Making Memories Notch and Die tool was used to create slots either side of the daisy to allow the light blue organza ribbon to be threaded through and attached on the reverse of the panel. This was then matted onto a panel of the solid blue paper from the Papermania Citrus Colossal paper pack.

A scalloped circle was cut from the blue striped paper from the Papermania Citrus Colossal paper pack using one of the Nestabilities scalloped circle dies. A clear faux gem was attached within alternate scallops. This was then cut in half and attached behind the ribbon.

The image panel was attached over the semi-circles and mini clear faux gems were attached in the centre of the daisy.

For the inside of hte card, I used the outside of the scalloped circle cut for the front of card, matted over a piece of white paper and a square of black card. The sentiment was stamped using the 'Happy Birthday' stamp from the Hero Arts Birthday Messages stamp set and the Onyx Black ink. This was matted over patterned paper to match that used on the front of the card.
The 'Handmade By' medallion was attached to the reverse of the card. It was made using a 'Handmade By' stamp from Oyster Stamps and the blue stripe paper used on the front of the card.

Sunday, 7 June 2009

Pink Leanne Ellis Girl with Bird Cage Gatefold

Finally I can upload this card! I've been wanting to upload this for a couple of weeks now, but restrained myself as I didn't want the recipient (Jules B) to get a glimpse of it before her birthday. But, I know she's received it now, so I can put it on my blog!


The card was made using one of my newest acquisitions - one of the lovely Leanne Ellis stamps called 'Fly Free' fron the Sugar Nellie family, available from Funky Kits.

I started by creating an off-centre gatefold 6" square card made from plum card. The flaps were covered with a combination of pink multi spots paper and purple mesh paper, both from the HOTP Citrus Cardmaker's Creative Pack. A strip of sky blue card from the DCWV Brights Card Stack was added across the right-hand flap.

A length of Anita's self-adhesive satin ribbon was added to hide the join of the two papers on the left-hand flap, and a length of narrow white lace was added down the edge of the left-hand flap.

The 'Fly Free' image was stamped using the Versafine Onyx Black archival pigment ink and watercoloured using the Whispers Brushstroke markers. The background colour, Whispers Rich Plum permanent dye ink, was added by sponging around the image.

A clear faux gem was added to the centre of the flower in her hair.

The sentiment 'Fabulous Friends', from the Smirk Love and Friendship stamp set, was stamped onto the image panel using the Onyx Black ink, and the panel was matted onto dark plum paper.

A tag was cut from the HOTP Citrus Cardmaker's Creative pack and a large silver eyelet set at the top. A piece of the lace was threaded through the eyelet, and a strip of the pink self-adhesive ribbon was attached across the tag, with a Prima paper flower attached to the edge of the tag with a small silver brad. The sentiment 'A Day To Celebrate', from the Hero Arts Birthday Messages stamp set, was stamped across the top of the tag using the Onyx Black ink.

The tag was backed with the dark plum paper so that it looked better when the card was opened. The image panel was attached at an angle to the left-hand flap, and the tag to the right-hand flap. Clear faux gems were adhered in rows of three to the top right and the bottom left corners.

A 'handmade by' panel was created for the reverse of the card using paper and card used on the front of the card, the Sizzlit Elegant Embellishments die, standard and scalloped circle Nesties and a strip of the narrow white lace used on the front.

Tuesday, 19 May 2009

Pink, Lemon and Mint Gorjuss Girl Sitting with Bird

Hopefully I've managed to get this uploaded in time!! I had finished this on Thursday but have only just managed to get it scanned into my computer!!

This is the first Sugar Bowl Challenge I've entered (mainly because I've only recently bought some Sugar Nellie stamps!), and at first I thought I'd chosen the wrong combination of papers to make it, but I actually really like it now!

The challenge this week (#10) is based on a sketch by the lovely Marlene.


I decided to use one of my new stamps, namely the Gorjuss Girl Sitting with Bird, and the Basic Grey Two Scoops paper pad. The added extra for this challenge was to use buttons, so I decided to make some from one of the papers in the paper pad to ensure that they colour matched.


The Gorjuss Girl image was stamped using Versafine Onyx Black archival pigment ink and watercoloured using the Tim Holtz Distress inks (Scattered Straw, Tattered Rose, Frayed Burlap and Milled Lavender). The bird was also watercoloured and cut out, nand the Gorjuss Girl image was cut into a rectangle.
Papers from the Basic Grey Two Scoops paper pad were colour tinted around the edges using the distress inks (Tattered Rose, Shabby Shutters and Scattered Straw) and the edges of the yellow/pink panel were also coloured using Whispers Green Green permanent dye ink. The green strips were then overstamped using the RicRac ribbon stamp from the HOTP Stitches stamp set.
A 6" square lemon yellow card blank was made from the Papermania Textured cardstock pack, and the edges were coloured using the Scattered Straw ink. The papers were then adhered to the card blank following the sketch as seen above.
Faux buttons were made from the yellow patterned paper by stamping the large button from the See D's Vintage Morsels Collection stamp set, and green embroidery thread was threaded through the holes that were made using a piercing tool.
Using the medium Flowers and Branch Sizzlit die, a branch and flowers were cut from the BG Two Scoops papers and colour tinted using the distress inks.
The 'Celebrate' word, from the Making Memories Express It! stamp set, was stamped using the Versafine Onyx Black ink and cut out into a tag shape. This was then matted onto the yellow patterned paper, and the bird image adhered to the tag.
Pictures of the inside and reverse to be added later.......

Monday, 20 April 2009

Blue, Green and Yellow Nellie with Spring Flower

Here is my entry for this week's Stamp Something blog challenge. The theme for this challenge is a colour one - blue, green and yellow.

The Nellie with Spring Flower image by Sugar Nellie was kindly donated by Alex K.

The image was watercoloured using the Whispers Brushstroke markers and the blender pen. This was matted onto green paper and blue card. The blue flower and stripe paper from the Papermania Venetian Skies Creative Tones paper pad was matted onto the card blank and a strip of the outline flower paper from the same paper pad was watercoloured and matted onto it.
The journalling panel from the Papermania Sweet Nothings stamp set was stamped using Versafine Onyx Black Archival pigment ink, and watercoloured. The hearts were then highlighted with Glitz It Pear Green glitter glue and the sentiment was stamped onto the journalling panel using Versafine Spanish Moss Archival pigment ink. This was also matted onto the green paper and blue card.

The Pear Green glitter glue was added to the coloured flowers on the paper strip as well as the flower on the image panel.

Paper flowers (green from The Crafty Cow and Faded Jeans Blue from Papermania Imaginisce), were adhered to the top corner and Patti's Pretties (glass pebbles) were added to their centres.

I also decorated the inside of the cards, using a strip of the blue flower and stripe paper and the watercoloured outline flower paper as used on the front of the card.

The sentiment was stamped using the 'Happy Birthday' stamp from the Hero Arts Birthday Messages stamp set and ColorBox Prussian Blue Fluid Chalk ink.

Blog Widget by LinkWithin