Pages

WELCOME

This blog was created to act as a record of the cards and other projects that I have made. It is for both my own reference and to help inspire anyone who wants to take a look.

I'd love it if you'd leave me a comment so that I know what you think of my projects and that you've been to visit!

Anyone can comment, even those who don't have a blog. (Just look for the word 'Comments' under the three little pictures at the end of each post). Readers without a blog can add an anonymous comment, but please leave your name (and docrafts username if applicable) so I know who you are!

Slideshows of all the cards I've uploaded to my blog can be found at the bottom of the page.


PEOPLE WHO FOLLOW MY BLOG

Showing posts with label Smirk. Show all posts

Thursday, 29 July 2010

Yellow and Orange Honey Smirk

Here is one of my recent makes for a good friend's little girl. I love this cute image and I'm surprised  this is the only time I've used it.

I am also entering it into a few blog challenges:
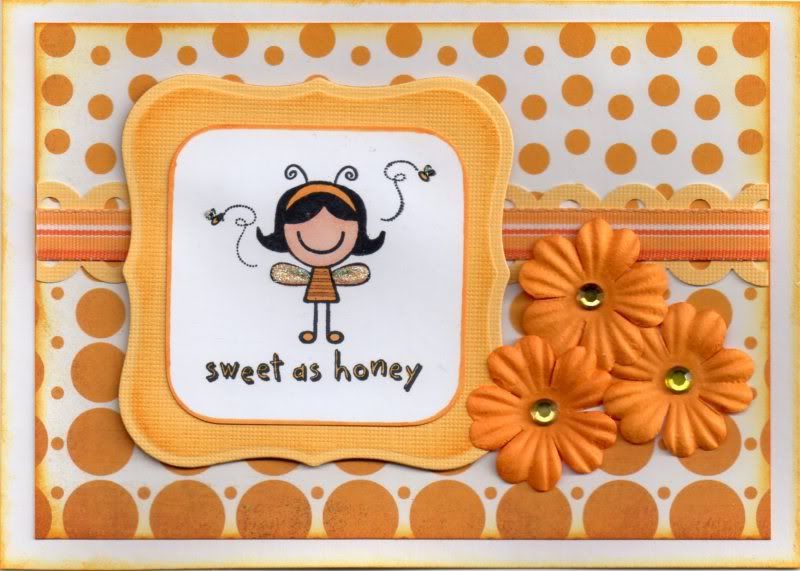
The 'Sweet As Honey' image from Smirk was stamped using Memento Tuxedo Black dye ink and coloured using Copic markers:
  • Hair: C8
  • Dress: Y17, E57
  • Wings: E21, E51
  • Skin: E00, E02, E21
  • Shoes/Bees/Headband: Y17
A mat was created for the image panel using the Nestabilities Labels 1 die. I prefer to do this as you can create a smaller increment rather than matting two of the Labels shapes together.

The panel was coloured using the Tim Holtz Wild Honey distress ink whilst keeping the die in place, creating a non-coloured edge.

A strip of the butter yellow card from the DCWV Brights card mat stack was punched along both edges using the Scallop Dot border punch by Martha Stewart to create a border strip. A length of the yellow and orange striped grosgrain ribbon from the Chatterbox Tangerine ribbon pack was then attached across it.

This was then matted across a panel of the Informal paper from the Basic Grey Offbeat paper pad, and distressed around the edges with the Wild Honey ink.

The image panel was attached over the ribbon and highlighted with Craft Planet Yellow glitter glue.

Three paper flowers from The Crafty Cow were added to the right hand side of the panel and faux yellow gem stones were added to their centres.

Thursday, 19 November 2009

Blue Smirk Bath Couple Anniversary

This is the anniversary card I made for some good friends, using the cute little Smirk stamp.


The Smirk Bath Couple image was stamped using Versafine Onyx Black and watercoloured using Whispers Brushstroke markers. This was then cut out using the standard circle Nestabilities die and matted onto a blue scalloped circle also cut out using a Nestabilities die and embossed using the Cuttlebug Swiss Dots embossing folder.
A panel of the blue spotty paper from the Hot Off The Press Ultimate Creative Pack was matted onto blue card and a strip of blue organza ribbon was attached across the top of the panel.
Two lengths of the blue ribbon were also attached to the reverse of the circle panels and attached at the top of the card.
The sentiment, from the See D's Blooming Friendships stamp set, was stamped using the Onyx Black ink and matted onto the blue card, also embossed with the Swiss Dots embossing folder.
The mini concentric circles stamp, also from the Blooming Friendships stamp set, was stamped in the top corners of the card and on the sentiment panel using the Tim Holtz Faded Jeans Distress ink. Faux gems were then adhered at the centre of the circles at the top of the card and along the ribbon. As a finishing touch, Anita's 3D Gloss was added over the bath image to give it a realistic enamelled finish.

Thursday, 3 September 2009

Lilac Multicoloured Daisies Smirk Hugs

This is my second entry to the Mojo Monday Blog Challenge #102.

It is also the 400th card design that I have produced since I started making cards (not including Christmas cards!!) I keep a book with a record of what I have used when making all my cards so that if I want to reproduce a card, or locate a patterned paper from somewhere, I know what it is.

Anyway, here is the second card I made to this week's Mojo Monday sketch:

The only differences that this card has to the previous one is the background paper, although it is also from the DCWV Glitter Mat stack.
On this card, I decided to thread some of the lilac stripe ribbon through the lilac pearl mat to create a knot effect.
The other difference with this card is that whilst making this one the glitter glue bottle decided to split all the way down it and glitter glue decided to splurge (yes, that is a word!!) all over my card. Thankfully I managed to wipe it all away with a baby wipe, not leaving any trace or damaging the patterned paper that it splurged all over!!!
STAMPS
Hugs - Smirk Love and Friendship stamp set
Fabulous Friends - Smirk Love and Friendship stamp set
PATTERNED PAPERS/CARD
DCWV Glitter Mat Stack
Lilac pearl die-cut mats - Lakeland
INKS ETC
Versafine Onyx Black Archival Pigment ink
Whispers Brushstroke markers
Craft Planet Lavender glitter glue
EMBELLISHMENTS
Lilac Stripe grosgrain ribbon - Anita's
DIE-CUTS/PUNCHES
Standard Circle die - Nestabilities
Photo Corner - Ellison Photo Corner die
OTHER
Swiss Dots embossing folder - Cuttlebug
'K ' rub-on - Me & My Big Ideas Primary Monograms

Lilac Smirk Hugs

This is my entry to this week's Mojo Monday blog challenge, #102. This is the first time I've entered this blog challenge, and I enjoyed following the sketch.

I decided to use my Smirk Love and Friendship stamp set for this card.

Here is the sketch:

....and here is the card I made.

The Hugs image from the Smirk Love and Friendship stamp set was stamped using Versafine Onyx Black archival pigment ink and watercoloured using Whispers Brushstroke markers, and highlighted using Craft Planet Lavender glitter glue.

The image was cut out using a standard circle Nestabilities die, and matted onto a lilac pearl die-cut circle from a set from Lakeland that had first been embossed with the Swiss Dots Cuttlebug embossing folder. The photo corner was cut out from the excess card on the die-cut sheet using the Ellison Photo Corners thin cut die and also embossed.

A length of Anita's lilac stripe grosgrain ribbon was adhered across a panel of multi-coloured stripe paper from the DCWV Glitter Mat Stack. The sentiment, also from the Smirk Love and Friendship stamp set, was matted onto a die-cut panel, as was the monogram rub-on, from the Me and My Big Ideas Primary Monograms set. Both panels were embossed first with the Swiss Dots folder.

Two short lengths of the ribbon were attached to the reverse of the monogram panel.

I then decided to make a second similar card to the same sketch which will follow in the next post.

Sunday, 7 June 2009

Pink Leanne Ellis Girl with Bird Cage Gatefold

Finally I can upload this card! I've been wanting to upload this for a couple of weeks now, but restrained myself as I didn't want the recipient (Jules B) to get a glimpse of it before her birthday. But, I know she's received it now, so I can put it on my blog!


The card was made using one of my newest acquisitions - one of the lovely Leanne Ellis stamps called 'Fly Free' fron the Sugar Nellie family, available from Funky Kits.

I started by creating an off-centre gatefold 6" square card made from plum card. The flaps were covered with a combination of pink multi spots paper and purple mesh paper, both from the HOTP Citrus Cardmaker's Creative Pack. A strip of sky blue card from the DCWV Brights Card Stack was added across the right-hand flap.

A length of Anita's self-adhesive satin ribbon was added to hide the join of the two papers on the left-hand flap, and a length of narrow white lace was added down the edge of the left-hand flap.

The 'Fly Free' image was stamped using the Versafine Onyx Black archival pigment ink and watercoloured using the Whispers Brushstroke markers. The background colour, Whispers Rich Plum permanent dye ink, was added by sponging around the image.

A clear faux gem was added to the centre of the flower in her hair.

The sentiment 'Fabulous Friends', from the Smirk Love and Friendship stamp set, was stamped onto the image panel using the Onyx Black ink, and the panel was matted onto dark plum paper.

A tag was cut from the HOTP Citrus Cardmaker's Creative pack and a large silver eyelet set at the top. A piece of the lace was threaded through the eyelet, and a strip of the pink self-adhesive ribbon was attached across the tag, with a Prima paper flower attached to the edge of the tag with a small silver brad. The sentiment 'A Day To Celebrate', from the Hero Arts Birthday Messages stamp set, was stamped across the top of the tag using the Onyx Black ink.

The tag was backed with the dark plum paper so that it looked better when the card was opened. The image panel was attached at an angle to the left-hand flap, and the tag to the right-hand flap. Clear faux gems were adhered in rows of three to the top right and the bottom left corners.

A 'handmade by' panel was created for the reverse of the card using paper and card used on the front of the card, the Sizzlit Elegant Embellishments die, standard and scalloped circle Nesties and a strip of the narrow white lace used on the front.

Friday, 24 April 2009

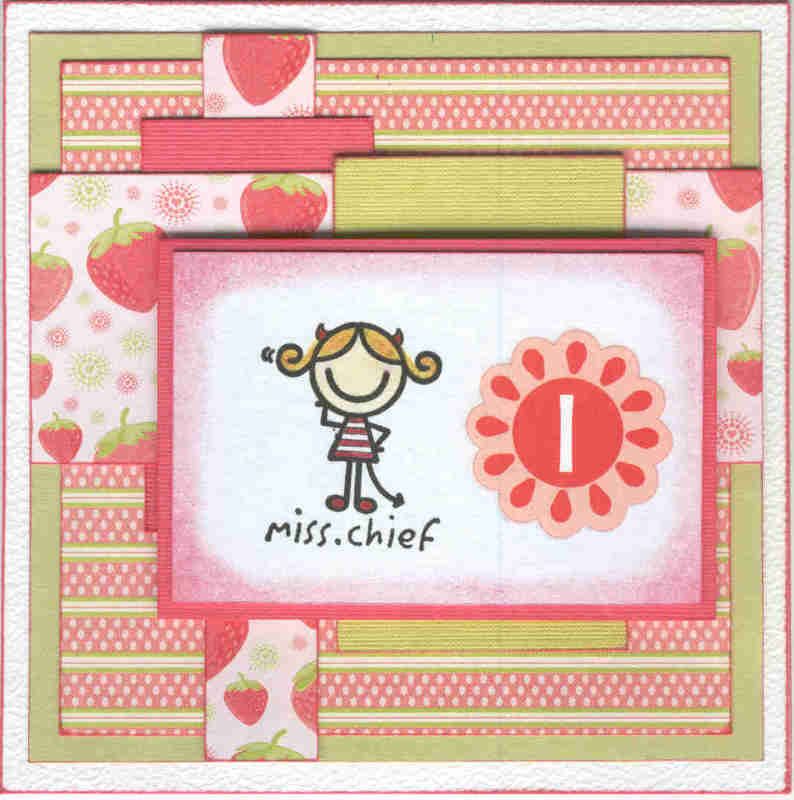
Pink and Green Strawberry Miss-Chief


Here is my entry to the current Truly Scrumptious blog challenge. This is challenge #5, and follows a sketch.

I decided to make a card for my cousin's little girl (actually I made two, one for my friend's little girl as well!)

I began by stamping the 'Miss-Chief' image from the Studio G Smirk range onto the reverse of a piece of white hammer card using Versafine Onyx Black archival pigment ink. It was then coloured using Sakura Stardust pens and Whispers Brushstroke markers. The edges of the panel were sponged using Whispers Grand Cranberry permanent dye ink.

Now I have a confession to make. About 3 and a half years ago, I saw a product spotlighted in a cardmaking magazine and thought 'Ooh, those look good!'. An internet search ensued and I found the products on ebay as part of a bumper kit. They were in the US, but I worked out how much they would cost if I bought the whole lot in the UK, and put in my maximum bid. Needless to say, I won the auction and a bumper ppack of monogram and alphabet rub-ons were winging their way across the Atlantic. Now, three and a half years later, I have actually used one of them (or two if you remember I made two cards to this design!!)

So, using one of my now quite old rub-ons from the Me And My Big Ideas Chester pack, I added an initial to the right hand side of the 'Miss-Chief' panel.

This panel was matted onto a piece of pink card from the DCWV Brights card mat stack. A selection of patterned papers from the DCWV Nana's Nursery Baby Girl mat stack and the card mat stack were then layered up according to the sketch from the blog challenge. These were in turn matted onto a piece of green paper and then onto a Craft Tonic square white card.
Blog Widget by LinkWithin