Pages

WELCOME

This blog was created to act as a record of the cards and other projects that I have made. It is for both my own reference and to help inspire anyone who wants to take a look.

I'd love it if you'd leave me a comment so that I know what you think of my projects and that you've been to visit!

Anyone can comment, even those who don't have a blog. (Just look for the word 'Comments' under the three little pictures at the end of each post). Readers without a blog can add an anonymous comment, but please leave your name (and docrafts username if applicable) so I know who you are!

Slideshows of all the cards I've uploaded to my blog can be found at the bottom of the page.


PEOPLE WHO FOLLOW MY BLOG

Showing posts with label Docrafts. Show all posts

Friday, 27 November 2015

Cream and Blue Tatty Teddy Panels

Another look back into the past here with a couple of old cards from 2011!!!

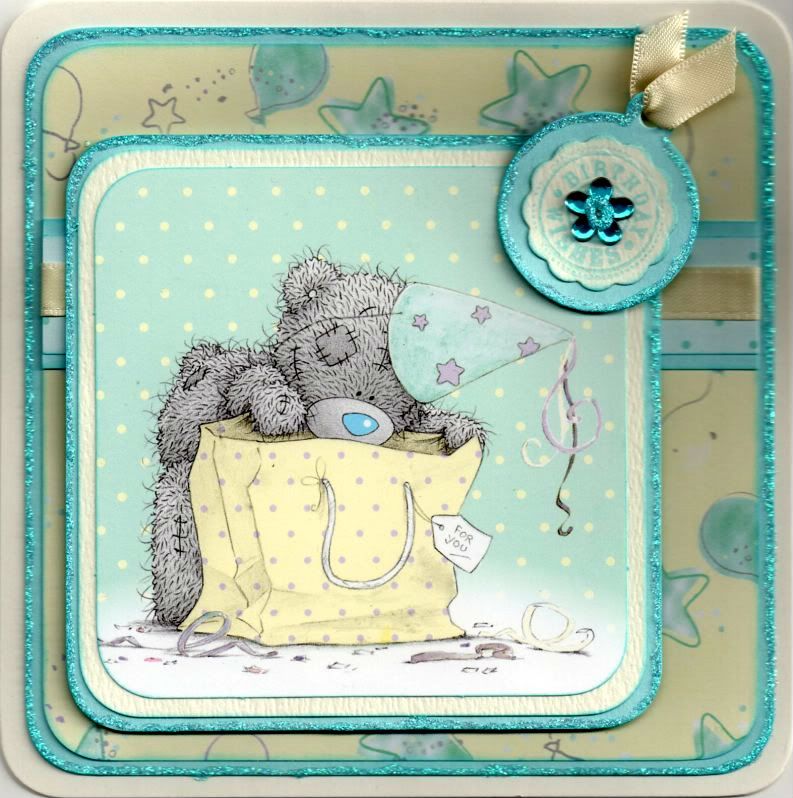
These are a couple of quick cards I made for a couple of 8-year old girls using the printed panels in the Me To You Especially For You paper pack.


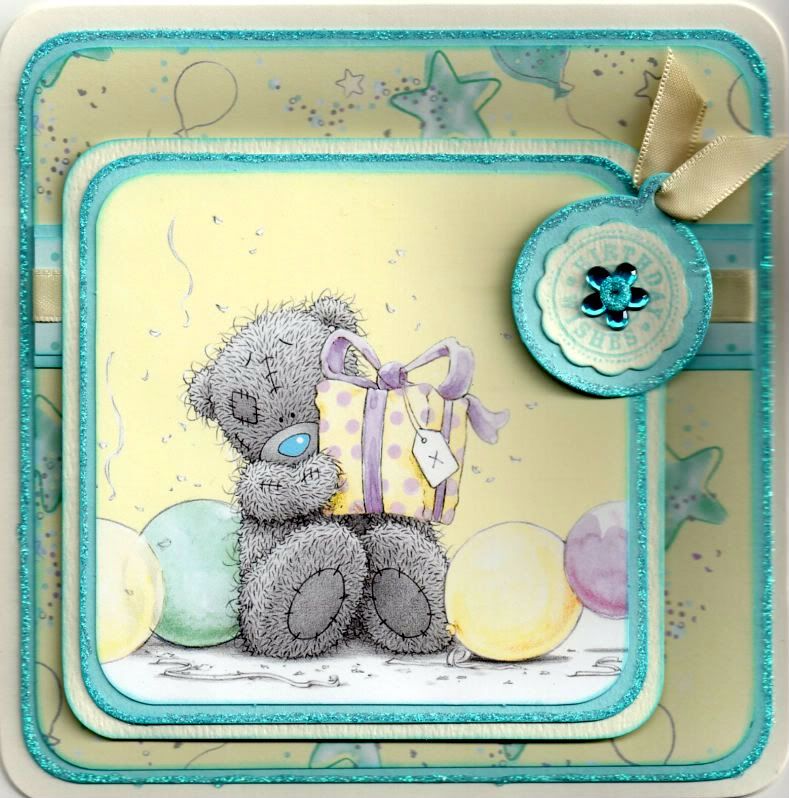
The corners of the printed image were rounded using the large XCut corner rounder punch and matted onto light blue and cream card.

A strip of the blue polka dot paper from the same paper pack was matted onto the light blue card and a length of cream satin ribbon was wrapped around and matted onto a panel of the yellow stars and balloons paper. This was then matted onto the light blue card.

A tag was die cut from the light blue card using the Cuttlebug round tag die. A big scalloped circle was die cut from cream card using a Nestabilities die and stamped with the 'Birthday Wishes' circle sentiment from the Hero Arts Birthday Messages stamps set using ColorBox Aqua pigment ink. The scalloped circle was matted onto the tag and a blue Papermania flower gem was added in the centre. A short length of the cream satin ribbon was threaded through the tag and added in the top right corner of the image panel.

All the edges of the blue layers and the centre of the flower gem were highlighted with Craft Planet Ice Blue glitter glue.

A similar card was made with a different image panel from the same paper pack.

Sunday, 18 January 2015

Frantaged Collage and Charms Masculine Birthday

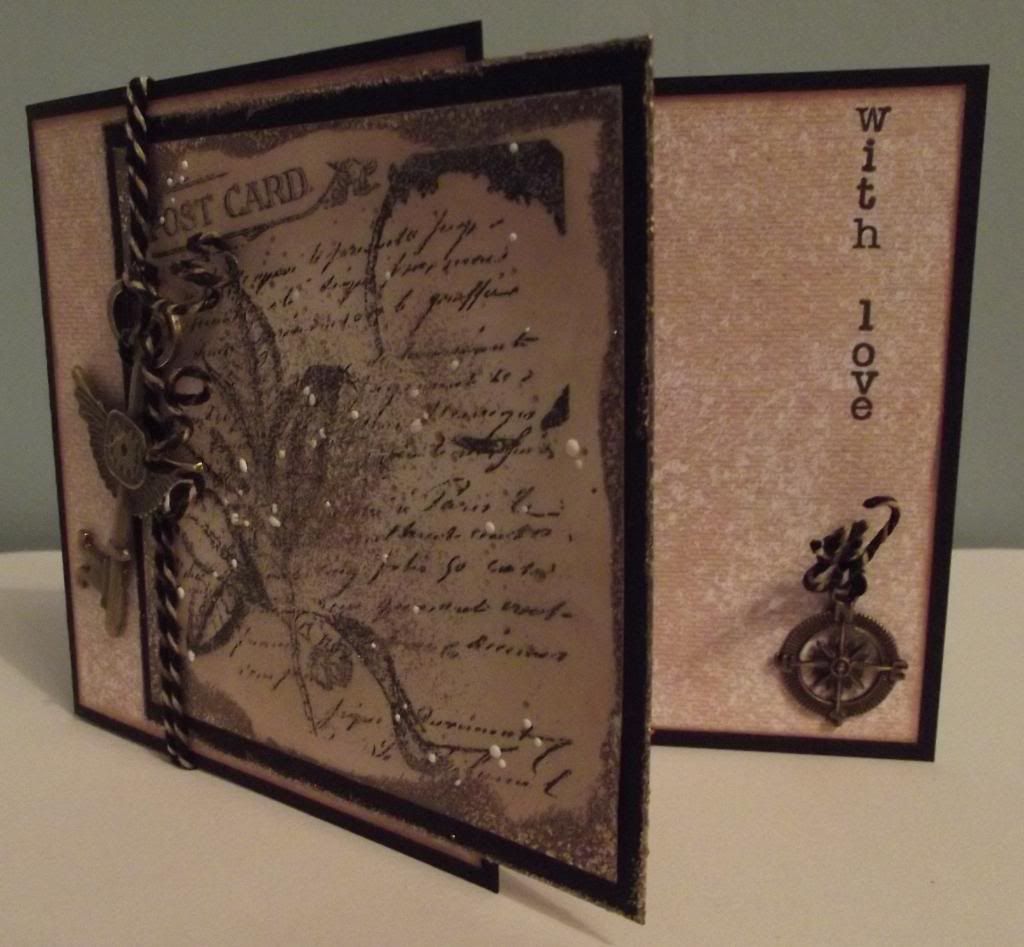
This is the card that I made for my hubby's birthday this year. It involved using the Frantage embossing powders which were new to me before making this card, although I have of course watched the demos on Create & Craft.


To begin with, I stamped the collage image of Folium from Papermania using Versafine Onyx Black archival pigment ink. The panel was then distressed using Tim Holtz Antique Linen and Walnut Stain inks. Once the distress ink was dry, Versamark was added around the edge of the panel and Aged Taupe Frantage powder was added. Once that was heat set, extra Aged Taupe and White powders were sprinkled over the centre of the panel to give a speckled appearance.

To create the card blank, a sheet of A4 card was trimmed to 5" wide and then scored at 7". Panels of beige mottled paper by Craftwork Cards were cut to fit both the front and inside of the card, the edges first being distressed with the Walnut Stain ink.

The stamped and Frantaged panel was matted onto the black card as used for the card blank and adhered overlapping the edge of the front panel.


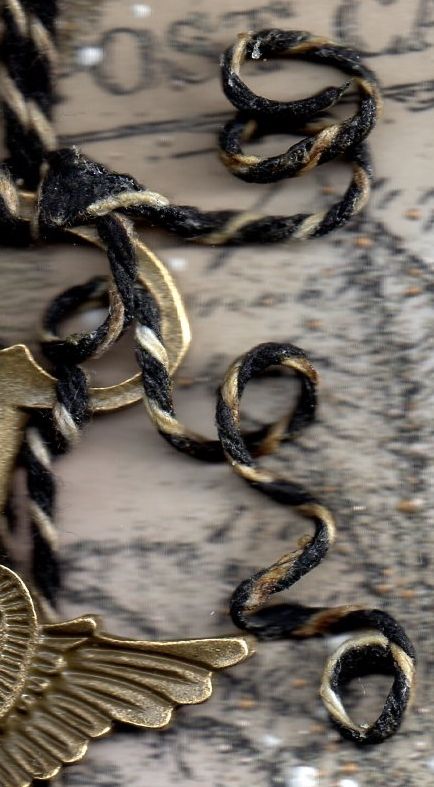
The next stage was to add the charms. These were very kindly donated by Donna at the cardmaking group that I attend. The large key charm was looped onto a length of black and white Gorjuss twine that was coloured with the Antique Linen and Walnut Stain inks, to tie it in with the rest of the card. The twine was wrapped around the front of the card and tied to the top of the charm.


The ends of the twine were then wiped with Aleene's Tacky Glue and wound around a paintbrush until the glue was dry, allowing the twists in the twine to remain. The same was done to the twine threaded through the compass charm.


The next stage was to work on the inside of the card.


The first step was to add some sentiments.


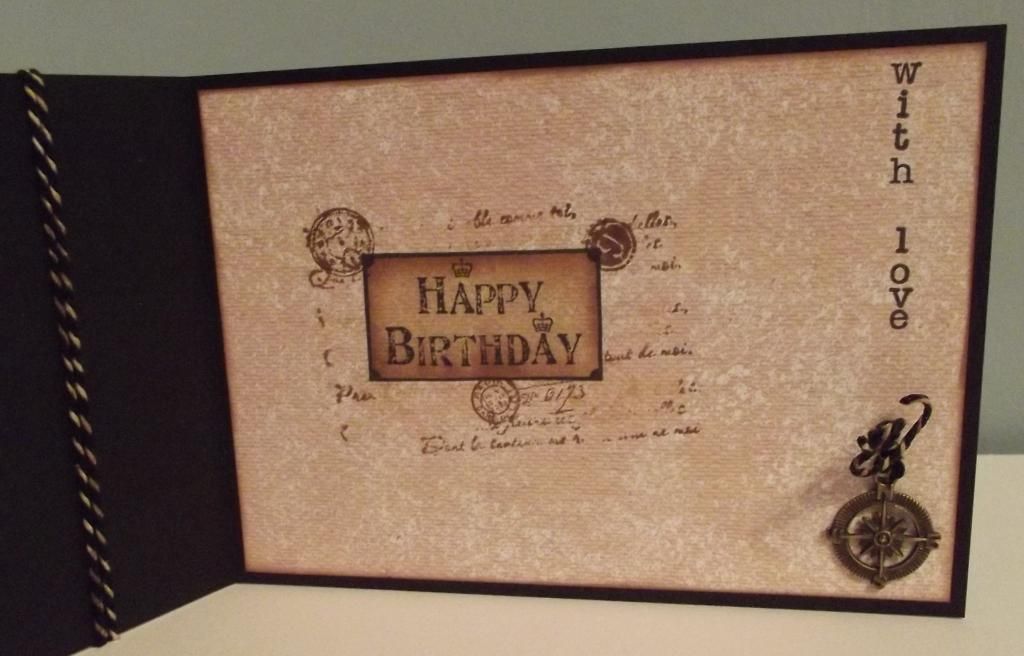
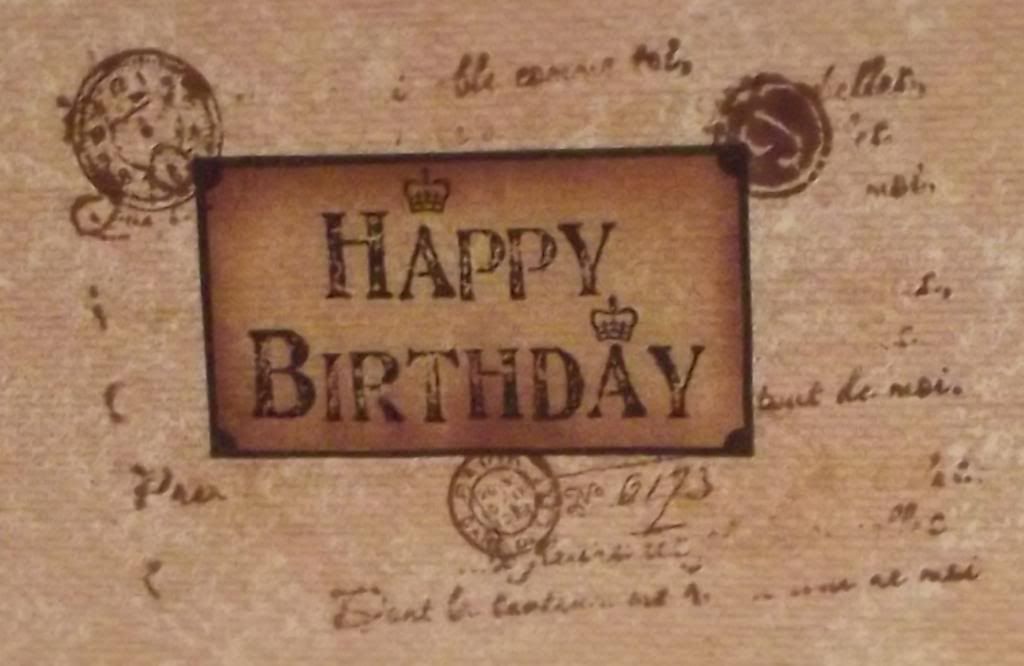
Firstly, the 'Happy Birthday' panel stamp, from the Papermania Portabello range, was stamped on the inside of the card using the Onyx Black ink. The panel was reverse masked and coloured using the Antique Linen and Walnut Stain inks. Using the positive mask, the panel was covered and overstamped using the postmark and clock stamps from the Tim Holtz Stampers Anonymous Visual Artistry stamp set, and the script stamp and number stamp from the Bo Bunny It's In The Words stamp set, all stamped using the two brown distress inks.


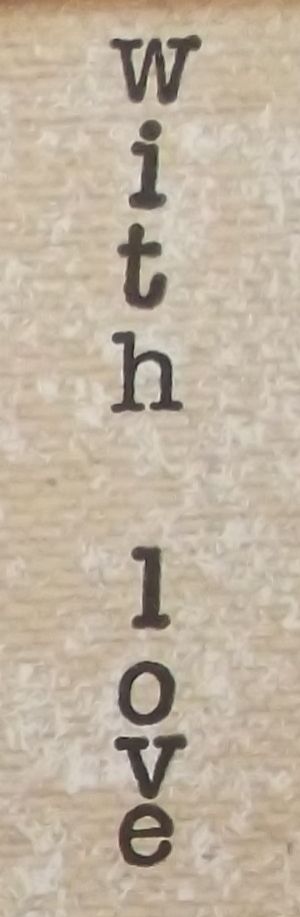
The final stage was to add a sentiment that could be read both when the card was open and closed. A line was drawn down the side of the card using a T-square ruler and a pencil, and, using individual alphabet stamps from a Studio G/Hampton Art alphabet stamp set and a Stamp-a-ma-jig, the sentiment 'with love' was stamped down the side of the card using Memento Tuxedo Black dye ink.


Versafine Onyx Black ink would have been better, but the Memento was out on my desk from when I had stamped the alphabet stamps onto the plastic sheet of the Stamp-a-ma-jig, and was used by mistake!

Here are the challenges that I am entering this card into:

A Girl Who Crafts - Anything Goes
Crafts Galore Encore - Anything Goes
Crafty Hazelnuts Patterned Paper - Anything Goes (Not Square)
Creative Craft Cottage - #31 - Anything Goes
Mema's Crafts - Anything Goes
Seema Crafts - Anything Goes
The Sisters Of Crafts - Anything Goes
Bastel - Traum - Anything Goes
Vandicrafts Artistry - Anything Goes
Sweet Stampin' - Masculine
Art By Miran - Anything Goes
Jo's Scrap Shack - #71 - Anything Goes
Sister Act - #89 - Anything Goes
Wags 'n' Whiskers - #145 - Anything Goes
Aud Sentiments - #123 - Anything Goes
Dream It Up! - Birthdays
Little Miss Muffet - #102 - Anything Goes
Scrap & Craft - #1 - Anything Goes
Baffies Kreativladen - #40 - Anything Goes
The House That Stamps Built - #114 - Black, Brown and White
Penny's Paper-Crafty - #210 - Anything Goes
Simon Says Stamp - It's A Guy Thing
Whimsy Stamps - #78 - Anything Goes
Cardz 4 Guyz - Happy Birthday
Inky Chicks - #45 - Anything Goes
Party Time Tuesdays - #194 - Anything Goes
Through The Craft Room Door - Anything Goes
Crafting From the Heart - #42 - Anything Goes
Sparkle N Sprinkle - Anything Goes (Glitter, Embossing Powders, Flock)
Squigglefly - #2 - Anything Goes
The Paper Nest Dolls - #1 - Anything Goes
Whoopsi Daisy - Anything Goes
Robyn's Fetish - #247 - Vintage Look

Thursday, 21 July 2011

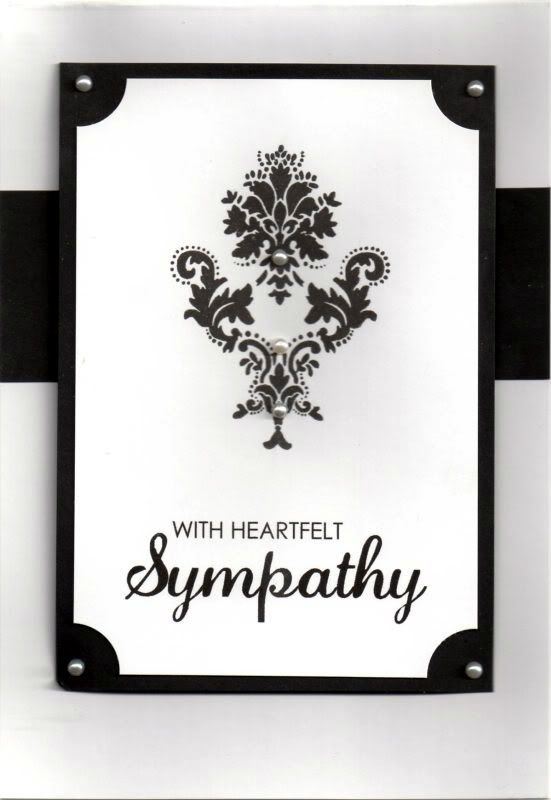
Black and White Ornament Sympathy Card For Liz G's Family

This was a difficult card to make. Just last week I discovered that a lady who is very active on the docrafts forum, Liz G, sadly passed away suddenly. Her lovely daughter, Pixie-Lou, also a forum member, kindly took the time  to let us know despite her obvious grief.


So, having reclaimed my craft room after the in-laws had visited, I got my stash out and had a think. I went with a clean and simple idea.

I didn't have a suitable sentiment stamp so created something in Word using Century Gothic and Lauren Script fonts and cut it into a panel.


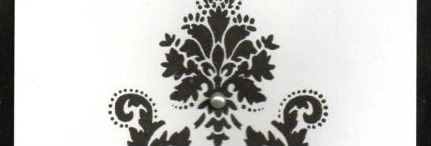
The ornament image, from the Papermania Chatsworth Furnishings stamp set, was stamped centrally using Versafine Onyx Black archival pigment ink. The corners of the panel were punched with the Woodware Inverted Corner Rounder punch and matted onto black card.


Ivory pearls, from the Hobby House Wedding Day set of self-adhesive pearls were added in the corners and on the ornament image.

A strip of the black card was added across a tent fold card and the image panel added over it.


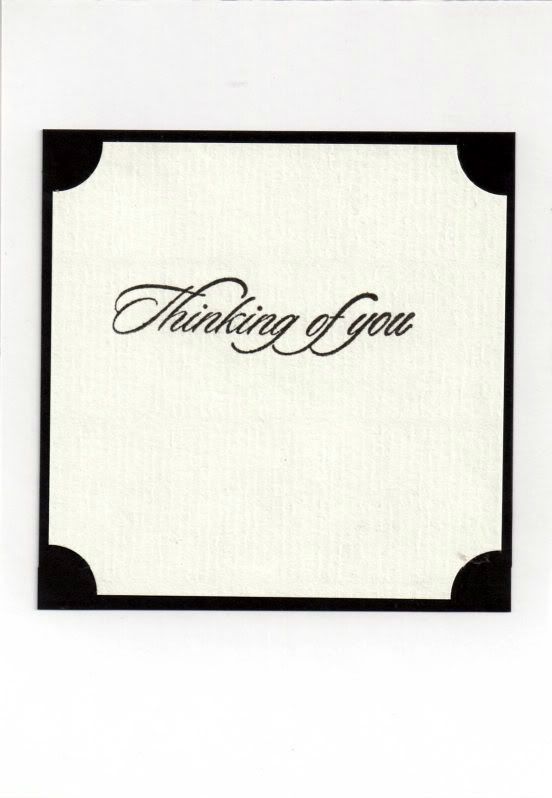
I also decorated the inside of the card using the Thinking Of You stamp from the Hot Off The Press Sentiments stamp set and the Onyx Black ink.

Sunday, 29 May 2011

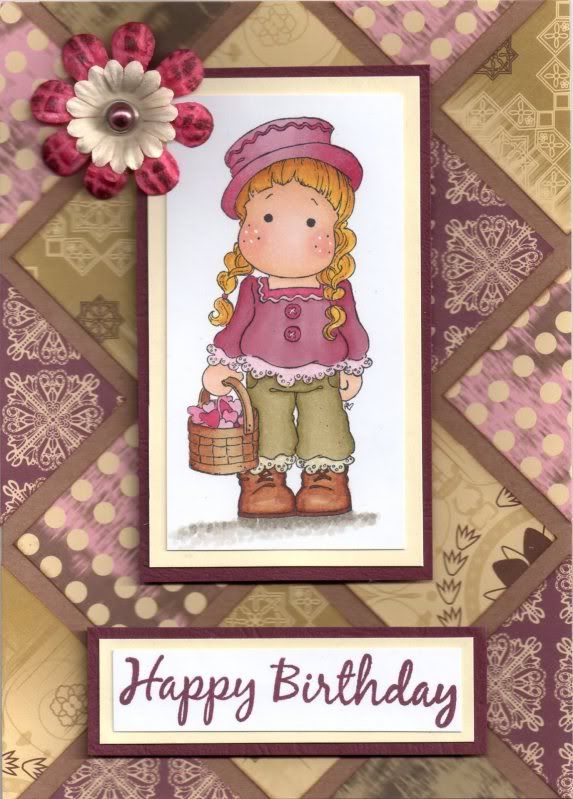
Olive and Plum Gingerbread Tilda with Quilted Background

This card was based on a card I saw at a docrafts demo by Clare Bennett. A similar card of hers was also in the Creativity magazine, using the Liquorice and Sherbet papers.


This is one of my new Tilda images from Magnolia, the Gingerbread Tilda  - I really love her. I think she is supposed to be a Christmas image, but I think she works all year round. The image was stamped with Memento Tuxedo Black dye ink and coloured with Copic markers:
  • Hat/Hearts: RV11, RV19, RV34
  • Hair: YR23, YR24, Y13, Y15
  • Skin: E00, E21, E51, R20
  • Top: RV11, RV19, RV34, R20
  • Trousers: YG91, YG95
  • Shoes/Basket: E31, E33, E29
Highlights were added to Tilda's cheeks with a Papermania Snow White gel pen and the image was then matted onto cream and burgundy card.

Squares were cut from a variety of papers from the Papermania Simply Elegant paper pad, distressed along the edges with ColorBox Chestnut Roan Fluid Chalk ink and arranged in a quilt pattern on a Kraft card blank. The image panel was then added to the centre of the card blank.


The 'Happy Birthday' sentiment, from the Papermania Clare Curd Sentiments stamp set was stamped using Adirondack Currant dye ink and matted onto the cream and burgundy cardstock, and adhered to the card below the image panel.

A cream paper flower, from Papermania Imaginisce, was coloured with a Copic marker (RV19) and the currant ink and layered up with a smaller cream flower and a Papermania plum pearl brad.

Here are the challenges that I am entering this card into:

Thursday, 26 May 2011

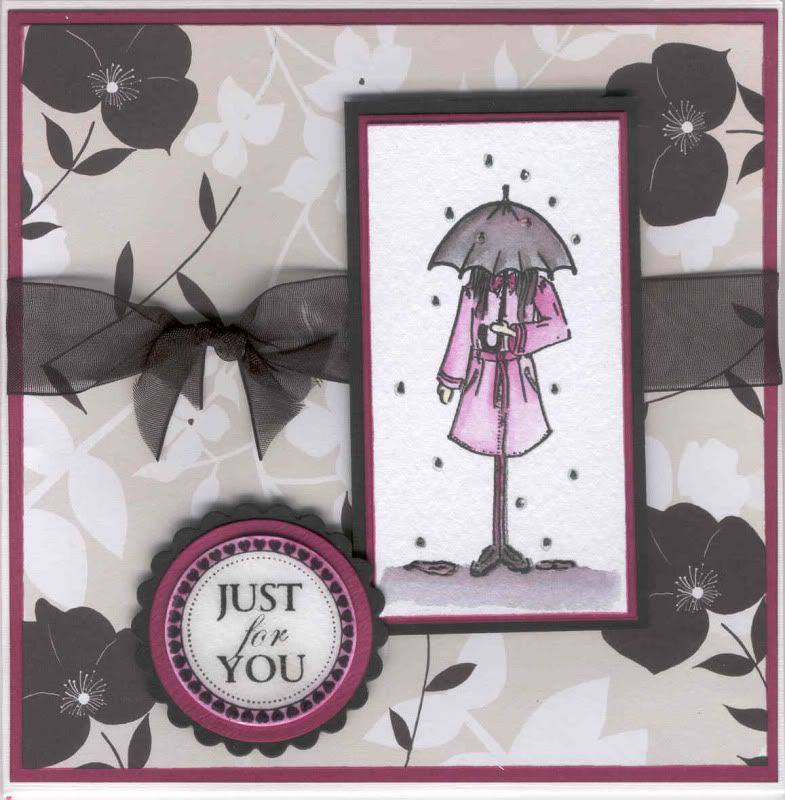
Pink, Black and Beige Kerry Jo Umbrella Girl Wallet Card


Here is a wallet card I made for a good friend over on the docrafts forum - Teresa has just got a DT post on the Here Come The Boys blog challenge so I sent her some male images for her to use. I look forward to seeing what she does with the images.


The Kerry Jo image, available from Debbi Moore, was stamped using Versafine Onyx Black and watercoloured using the Whispers Brushstroke markers and highlighted with Anita's 3D Gloss. This was matted onto pink and black card.

A panel of the beige and black floral paper from the Dovecraft Designer Amethyst Floral paper pack was matted onto pink card and a length of black organza ribbon was tied around this panel. The image panel was then attached over the ribbon.

The sentiment circle, from the Papermania Just For You stamp set, was stamped using the Onyx Black ink and matted with pink and black circles cut using standard and scalloped circle Nestabilities dies.

Anita's 3D Gloss was then added over the top of the sentiment to make a glossy tile.

Here are the challenges I am entering this card into:

Saturday, 21 May 2011

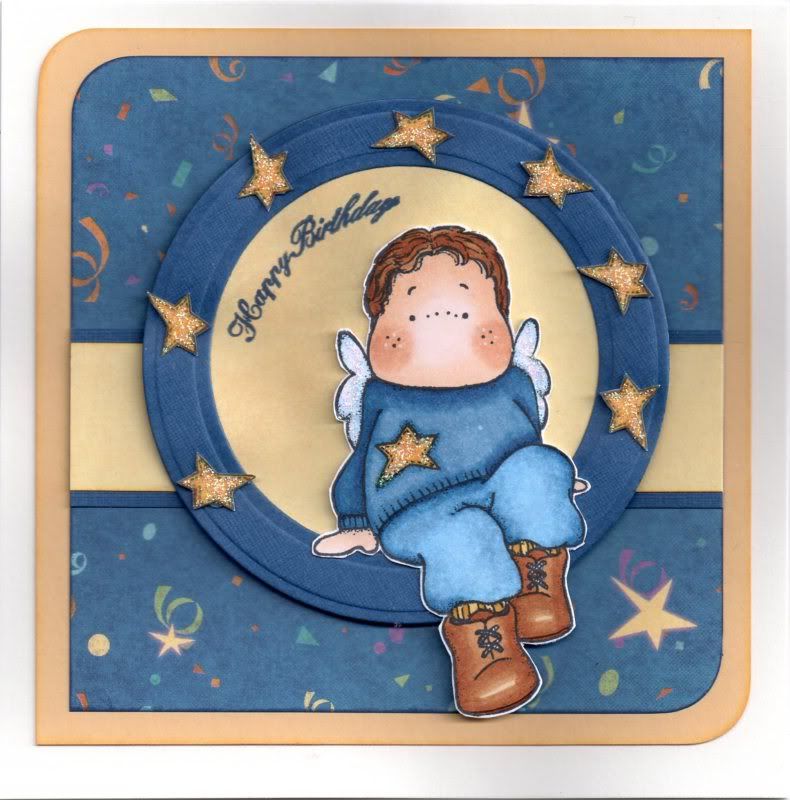
Blue and Yellow Sitting Edwin with Stars

Here is another of my masculine cards. I enjoyed making this one, and finally used the magnetic paper that
the lovely Carol S on the docrafts forum sent to me to create a frame using my Nestabilities dies and Bigshot machine.


The Edwin image, from Magnolia, was stamped with Memento Tuxedo Black dye ink and coloured with Copic markers:
  • Hair: E35, E37, E39
  • Skin: E00, E13, E21, E51
  • Jumper: B34, B37, B39
  • Trousers: B32, B34, B37
  • Stars/Socks: Y21, Y26
  • Wings: B32
  • Shoes: E31, E35, E37, E39
Edwin's cheeks were then highlighted with a Papermania Snow White gel pen and the image was cut out.

Using magnetic paper, two circle dies were positioned and a circle frame was cut from dark blue card and a circle of yellow paper from the HOTP Ultimate Cardmaker's Creative Pack was matted behind.

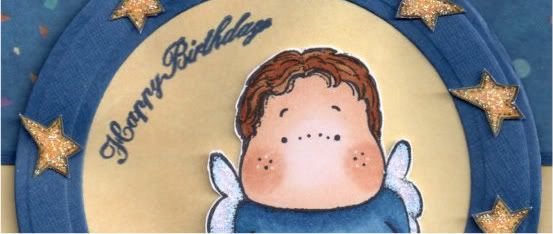
The Edwin image was matted over the circle panel and the 'Happy Birthday' sentiment, from the Papermania Mix and Match Scrolls and Sentiments stamp set, was stamped on the yellow panel using Versafine Majestic Blue archival pigment ink.


A strip of the yellow paper was matted onto the blue card and across a panel of the dark blue stars paper from the same paper pad and then onto a panel of yellow card.

Seven stars (the jumper detail from the image) were stamped out and coloured with Copic markers:
  • Stars: Y21, Y26
The stars were cut out and attached around the circle frame using 3D foam. These were then highlighted with Craft Planet Yellow glitter glue, as was the star on the jumper. Craft Planet Iridescent Sparkle glitter glue was added to highlight the wings on the image.

This card uses some of my old stash (HOTP papers) with some of my new stash (Edwin stamp, new Copic colours, Papermania Mix & Match stamps and of course my magnetic paper).

Here are the blog challenges that I am entering this card into:

Sunday, 6 March 2011

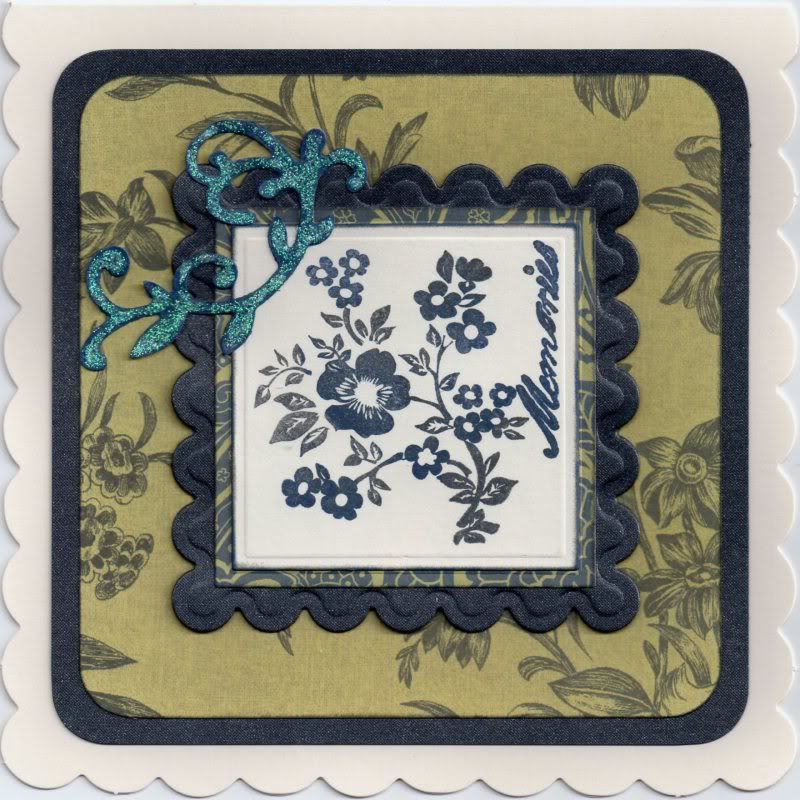
Dark Blue and Green Scalloped Florals

Here is an anniversary card that I made for a couple of pals over on the docrafts forum, both of whom celebrated their anniversaries on Valentine's Day. This is something a little different for me and was inspired by the very talented Ikki. The inspiration for this card is here.


I have just noticed that I managed to choose exactly the same papers as Ikki, which wasn't my intention, it's just that those two seemed to go together best when I looked through all the papers. Just goes to show we both have a great eye for co-ordination!

A square was die cut using a Nestabilities die and the image, from the Papermania Jesse Edwards Memories stamp set, was stamped in the centre and the sentiment, from the same stamp set, along the edge using a combination of Charcoal and Blue Iris ColorBox Fluid Chalk inks.


This was then matted onto a die cut panel of dark blue and green paisley paper from the Laura Ashley Traditional paper pack and a panel of dark blue shimmer card, die cut with a scalloped square Nestabilities die.

A panel of the green and dark blue etched botanicals paper, from the same paper pack, was matted onto a panel of the shimmer card and onto the card blank, from Craftwork Cards. I bought these last year at the Make It show at Farnborough, and this is the first time I've used them!

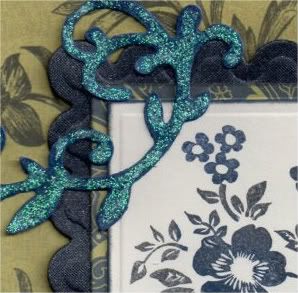
The flourish, cut using the Vine #2 Sizzix Sizzlits die from cream card, was coloured using the blue and grey chalk inks and adhered over the corner of the image panel. It was then highlighted with Craft Planet Iridescent Sparkle glitter glue.

Here are the challenges that I am entering this card into:

Thursday, 3 March 2011

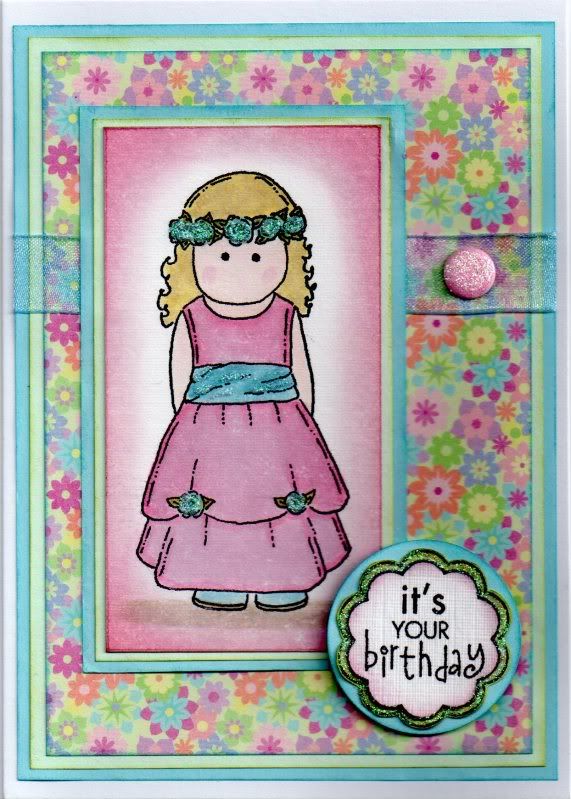
Pink, Blue and Green Posh Milly

Here is another of the cards I made last year and didn't get around to blogging so thought I'd blog it now!


The Posh Milly image from Pink Gem, kindly donated by Judith B in the September 2008 docrafts image  swap, was watercoloured using the Tim Holtz Distress Inks and highlighted using Craft Planet Iridescent Sparkle glitter glue. The edges of the image panel were coloured using the Worn Lipstick and Milled Lavender distress inks. This was then matted onto green and blue paper.

A panel of the multi-floral paper from the K&Co Sparkly Sweet paper pad was also matted onto the green and blue paper and a length of light blue organza ribbon was wrapped around it and the image matted over the top.

A pink card candy from Craftwork Cards was added over the ribbon and covered with the Iridescent Sparkle glitter glue.

The 'It's Your Birthday' circle sentiment from the Hero Arts Birthday Messages stamp set was stamped onto white linen card and green paper. The inner section of the sentiment was cut out from the white linen card and edged with the Worn Lipstick and Milled Lavender inks. The whole sentiment panel was cut from the green paper and all matted onto a circle cut from the blue paper. The sentiment panel was then adhered over the bottom corner of the image panel.

Here are the blog challenges I am entering this card into:

Sunday, 30 January 2011

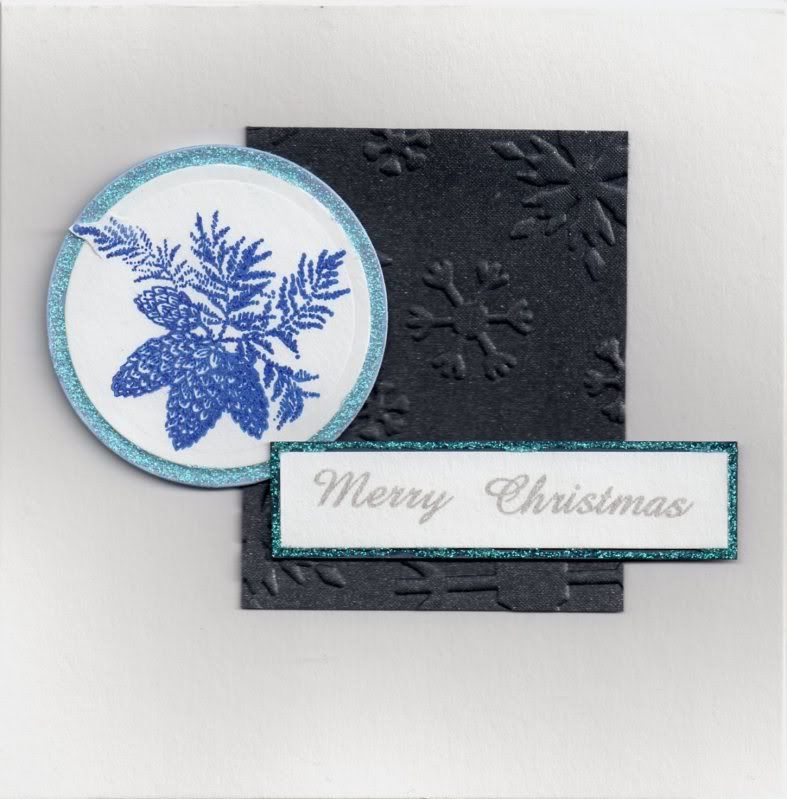
Blue Pine Cone and Branches

OK, so I wasn't sure whether or not to blog the Christmas cards I made what with it being nearly February, but, since this is supposed to be a record for me of what I've made, as well as a forum for me to show off (my cards), then I decided 'what the heck!'

So, here goes! I'll try and blog one a day (there are only 10 or 11 different designs I think, so they'll be over soon enough!!)

Here is the first one!


This card was shamelessly based on a card that the lovely Alex K/Eisbaerin made for the docrafts Creativity Magazine. Her version was dusky pinks from memory, but I decided to go with blues.

The Pine Cone and Branches image, from the Papermania Silent Night Icons stamp set, was stamped using Versafine Majestic Blue archival pigment ink. The image was then die cut using a circle Nestabilities die and the out-of-the-box technique. This was matted onto a panel of light blue card.

The sentiment, from the Papermania Gifts and Robin free stamp set, was stamped using Memento London Fog dye ink and matted onto dark blue card.

Craft Planet Ice Blue glitter glue was then added around the edges of the image and sentiment panels.

A panel of blue shimmer card was embossed using the Papermania Snowflakes embossing folder and all the elements layered onto the card blank.

Saturday, 2 October 2010

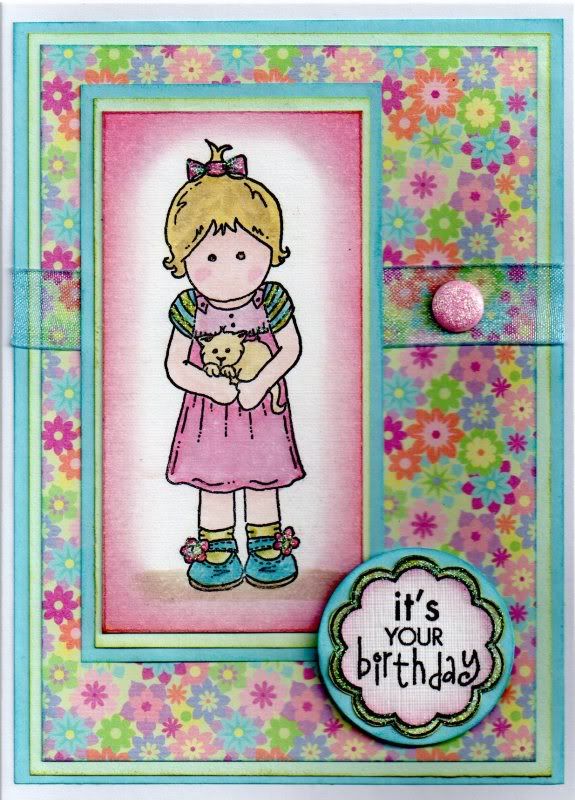
Pink, Green and Blue Floral Milly with Kitten

This card was made with a Pink Gem image kindly donated by Judith B in a docrafts image swap back in September 2008.

I watercoloured the Milly with Kitten image using the following Tim Holtz Distress Inks:
  • Worn Lipstick
  • Milled Lavender
  • Broken China
  • Peeled Paint
  • Antique Linen
  • Frayed Burlap
  • Mustard Seed
  • Tattered Rose
The image was then highlighted with Craft Planet Iridescent Sparkle glitter glue.

I then distressed the edges of the image panel with the Worn Lipstick and Milled Lavender distress inks. The image panel was then matted onto green and blue paper.

A panel of the multi-floral paper from the K&Co Sparkly Sweet paper pad was also matted onto the green and blue paper and a length of light blue organza ribbon was wrapped around it with the image panel matted over the top. A pink card candy from Craftwork Cards was added over the ribbon and covered with the Iridescent Sparkle glitter glue.

The 'It's Your Birthday' circle sentiment from the Hero Arts Birthday Messages stamp set was stamped onto white linen card and green paper using Versafine Onyx Black archival pigment ink. The inner section of the sentiment was cut out from the white linen card and edged with the Worn Lipstick and Milled Lavender inks. The whole sentiment panel was cut from the green paper and all matted onto a circle die cut using a small classic Nestabilities die cut from the blue paper. The sentiment panel was then adhered over the bottom corner of the image panel.

The challenges that I will be entering this card into are:

Friday, 16 July 2010

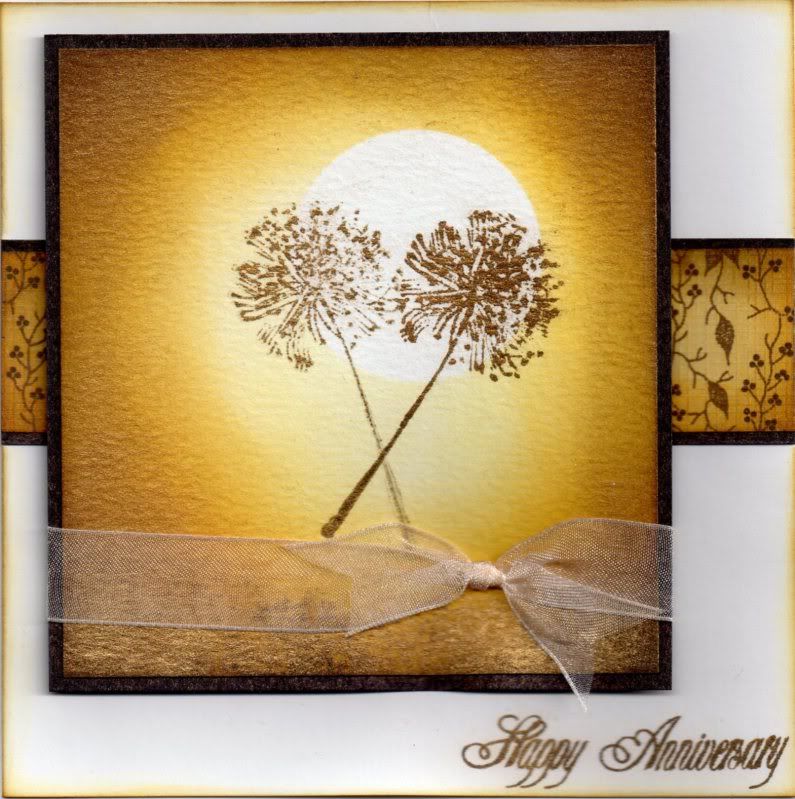
Brown and Gold Mica Agapanthus Golden Wedding Anniversary

This is the card I made for my hubby's aunt and uncle who recently celebrated their Golden Wedding Anniversary.  I had already made a card for my in-laws to send and decided to use my new set of Penny Black stamps to make this card.

I was actually inspired by someone demonstrating the Penny Black stamps at the Lincoln Craft Show (Sincerely Yours) at the end of May so thank you to whoever that was.

I am also entering this card into the following blog challenges:


I began by die-cutting a circle mask from a Post-It note and placing it off-centre on a square of white card. Using Cut 'n' Dry foam, the edges of the panel and up to the mask were colour distressed using the Mustard Seed, Wild Honey and Walnut Stain Tim Holtz Distress inks.

The Post-It note mask was then removed and the flower images were then stamped over the white area using the Agapanthus stamp from the Penny Black Allegro stamp set and the Walnut Stain ink. Gold Lustre mica powder from Stamps Away was then dusted over the whole image highlighting the flower images and the the distressing around the edges. Unfortunately, the shimmer that the mica powders give to the image wasn't captured by the scanned image.

The image panel was then matted onto a panel of brown glimmer card and a length of white organza ribbon was knotted and wrapped around the panel.

A strip of the beige and brown vines paper from the Docrafts V&A Quilts paper pad was distressed using the Wild Honey and Walnut Stain inks and matted onto the brown glimmer card. The image panel was attached over the V&A paper strip and the sentiment was stamped in the bottom right corner of the card blank using the Stamps Away 'Happy Anniversary' stamp and the Walnut Stain ink.

Friday, 12 February 2010

Pink and Brown Penny Black Hedgehog Stroll

This is the card that I made for my mate and docrafts demonstrator Becky James. I wanted to make something special for her as I won't be able to go to her demos anymore having moved 'up north'. I have loved going to her demos over the past few years, as I always learn new techniques and get great inspiration, and I have certainly put on some miles to see her, travelling to Southampton, Salisbury and Swindon. It was all worth it (although I'm not sure my chauffeur would agree!!)

It is also my entry to this week's Stamp Something blog challenge, which is Stamp Something Cute this week, and I think this card fits the bill perfectly!

I decided to make her a card using a Penny Black Hedgie image that I received from Judith B in the docrafts September '08 image swap.


The Penny Black 'Hedgehog Stroll' image was watercoloured using Whispers Brushstroke markers and highlighted with Craft Planet Iridescent Sparkle glitter glue. The corners of the image were rounded using the large XCut corner rounder punch and matted onto pink card.


A strip of the Delectable paper from the Basic Grey Sugared paper pad was punched using the Honor Multishaper punch, adhered to a strip of the pink card and highlighted with a pink Whispers Brushstroke marker and the Iridescent Sparkle glitter glue. A length of pink organza ribbon was tied around the pink panel and attached across a panel of the Luscious paper from the Sugared paper pad.


A large white Papermania Imaginisce paper flower was colour tinted with the pastel pink Whispers Brushstroke marker and highlighted with the Iridescent Sparkle glitter glue. The 'Birthday Wishes' circle sentiment, from the Hero Arts Birthday Messages stamp set, was stamped onto white card using Versafine Vintage Sepia archival pigment ink, cut out using a circle Nestabilities die and matted onto a larger circle of the pink card. A large Papermania bronze brad was used in the centre of the message and flower and attached in the top right corner of the card.


The Hedgie image was then attached over the pink panel to the left of the card, and the Luscious patterned paper panel matted onto pink card.


I also decorated the inside of the card, using squares of the Luscious paper with the corners rounded and matted over a strip of the Delectable paper. The sentiment, stamped using the Vintage Sepia ink, was one of the many free stamps I received with my order from Crafty Individuals.

Friday, 14 August 2009

Weekend Get-Together

OK - so I haven't uploaded the men's cards, but I've been far to busy. You see, I'm meeting up with a couple of friends from the docrafts forum on Saturday and I wanted to make them each a little gift, so I've been busy beavering away making them. I'll try and either scan them in or take some photos and upload the pictures next week (assuming I can find the cable to connect the camera to the laptop!!)

I'm really excited to see Jules and Alex again, and a friend of Jules is also coming along so I look forward to meeting her too.

This will also be my first post-diabetes solo trip so a bit nervous about that aspect of things, but I shall have my insulin and a snack with me to make sure I'm OK.

Well, got to go and put the finishing touches to my little gifts, then off to bed. Need to decide what stash to take with me and see if I can find my little cutting mat. I think it's in a box somewhere!!!

Monday, 6 April 2009

Couple of Easter Cards

Here are a couple of Easter cards that I made last week. I decided I wanted to make two different styles of cards, one a more traditional design.

For the first card, I stamped the Celtic Cross image from the See D's Easter Kit stamp set onto a circle of smooth white card using ColorBox Fresh Green pigment ink and then gold embossed it.

This was then watercoloured using the Whispers Brushstroke markers and then matted onto a scalloped circle of Papermania lime green textured card. A panel of patterned paper from the Papermania Spring Burst paper pad was also matted onto the lime green card.

The sentiment, from the See D's Easter Kit stamp set, was stamped using ColorBox Fresh Green pigment ink and gold embossed. The panel was then cut out using the HOTP Labels template and matted onto the lime green card.I made a 'Handmade By' label for the reverse of the card by printing off a WordArt circle message and matted it onto a scalloped circle cut from a matching paper from the Papermania Spring Burst paper pad.

I wanted the second card to have a less traditional feel and so went with an Easter Chick theme. I also wanted to use the Basic Grey Ambrosia papers, but since I don't have them (yet!) I tried to find papers in my stash of similar colours to imitate them. I think I've almost pulled it off!

I stamped the Easter Chick image from the See D's Easter kit stamp set onto a circle of smooth white card using Versafine Onyx Black pigment ink and watercoloured it using the Whispers Brushstroke markers. This was matted onto a scalloped circle of paper from the Papermania 'The Big One' Temptations paper pack.
The edge of the card front was cut away, and strips of yellow and chestnut brown papers from the Temptations paper pack was attached to the inside of the card. Matching yellow papers were matted onto grey card and layered onto the card front. A file tab was cut from grey card using the Sizzix Sizzlet File Tab #4, and the sentiment was added using a Docrafts stamp and Brilliance Crimson Copper pigment ink onto the yellow patterned paper.
Two flowers were cut out using the Flower Parts Sizzlet dies. They were cut to the centre to create petals and embossed from the reverse to create dimension. A yellow faux gem was attached to the centre of the flowers. If I remember who it was who posted about this technique, I'll add it here later as it's a very good technique and I'd like to acknowledge who it was.

Tuesday, 9 December 2008

A birthday card for Alex (Eisbaerin)

Here is the birthday card that I made for Alex (Eisbaerin) for her birthday on Sunday. It sounds like she had a lovely day!!

I made the card to double as a wallet card as I wanted to reciprocate all the lovely images she has sent me over the past few months. I haven't made up for everything but I hope it goes someway to say thank you!!!

The image is a cute little Docrafts stamp, which I coloured with Whispers Brushstroke markers and a green Impress re-inker.

The little tag was 3D'd to add dimension, and the mouse image was matted onto lime green card from the DCWV Brights cardstack.

The patterned papers are from the K&Co Amy Butler Belle paper pad, and a length of green organza ribbon was attached across the pieces of paper and a knot was added.

The sentiment was stamped using one of the circles from the HOTP Sentiments set and also matted onto lime green DCWV card, cut using the Fiskars Shapecutter and circles template. A small piece of ribbon was attached to it to make it look like it is hanging.

A lime green Papermania brad was attached through a pink paper flower from Crafty Cow and attached over the corner of the image.

Tuesday, 25 November 2008

Kerry Jo Balloon Girl Wallet Card

I just wanted to show you all the wallet card that I made for Annette (Sandra) over on the docrafts cardmaking forum for the die cut swap that was organized on there. I know that she has received it now so it's safe to upload the images to my blog.


The Kerry Jo Balloon Girl (available from the Debbi Moore website) was watercoloured using the Whispers Brushstroke markers, and mounted onto green card.

The patterned papers are from the DCWV Floral Prints paper stack. These were matted onto lilac paper.

The sentiment tag is taken from the Stamps Away Everyday Tag-Its set (available from Clevercut) and was stamped with ColorBox Wisteria Fluid Chalk ink.

Narrow lilac satin ribbon and lime green organza ribbon were threaded through the tag.

Lilac Papermania paper flowers (from an old Goody Bag) were coloured using Whispers Brushstroke markers. This was done by adding different colours of markers to different parts of the flower (pastel blue/green in the centre, with a few dots of purple, and purple on the petal tips) and then flooded with water to make the colours run, making the colouring of the flowers more realistic than the single shade they come in.

Once they were dry, they were shaped using an embossing tool and the mini purple See D's stamping mat.

Clear faux gems were attached to the centres of the flowers.

Craft Planet Iridescent Sparkle glitter glue was added to the flowers in the image.

The pocket section on the inside was created by punching three holes down each side and lacing lilac satin ribbon through the holes and tying in a knot at the back.

The reverse of the card was finished by stamping one of the bookplate stamps from the Stamps Away Bookplates, Anchors and Corners stamp set (available from Clevercut) using ColorBox Wisteria Fluid Chalk ink and my 'Handmade by' stamp from the Aspects of Design Botanical stamp sheet (available from The Stampman).

Thursday, 6 November 2008

Lots and Lots of Blog Candy from Clare - CLOSED

The lovely Clare Curd of docrafts (you might have seen her on QVC recently) is offering LOADS of blog candy over on her blog.
She is offering a different BC every other day for two weeks. It started on Tuesday and you have a week to add you comments to be in with a chance.
Unfortunately there don't appear to be Permalinks on the docrafts blogs so I can't pinpoint the actual posts so you'll just have to scroll through the whole thing to find all the different BC posts. That won't be too great a hardship though as Clare is a great designer and you're sure to get some great inspiration from her cards on there.

Thursday, 30 October 2008

Ribbon Storage Solution

I don't know about anyone else, but my ribbon storage leaves a lot to be desired.

My ribbons are stored in a number of ways.

The loose ribbons, the ones I've bought from haberdashers, Hobbycraft etc, are currently wrapped around the inner tubes of toilet rolls, but no matter which tape I use (Sellotape, masking tape, magic Scotch tape), invariably they come unstuck and start to unravel. I also have some ribbon on their reels, but most of them are the Dovecraft ones, and I'm sure you're all aware just how rubbish the reels are as they fall apart at the drop of a hat. I also have some that are stored around strips of card - and they get creases in them. I've also got a box of Brenda Pinnick ribbons that are stored not only on strips of card but are also still in the cardboard box they came in.

Other than the Brenda Pinnick ribbons, all my ribbons are stored by colour in Ziploc bags, but they are now so bulky due to the toilet roll inners, that they no longer fit into the large plastic box that they've always been stored in.

So, following numerous threads over on the docrafts cardmaking forum regarding storage solutions for ribbon, I did a Google search and came across a link to an e-book which gives instructions for a ribbon hanger and at the moment there is a bonus e-book with instructions for a re-order ring, where a sample of all your ribbons are stored with the details of the ribbon such as brand (if applicable), where you bought it and how much it cost. There is also the possibility of adding how much of it you have bought and making a note of how much you use so you can see when you are running low on anything.

So, the author of this book is an English lady called Sunday and she has a blog. I think she is mainly a scrapbooker, but if her ribbon storage solutions are anything to go by, I'm sure there will be lots of other interesting posts on there.

So, onto the e-book!

I had a couple of problems getting the download but Sunday was very helpful and got back to me as soon as she got my email and sorted everything out. (I think I was maybe a bit impatient and clicked on the wrong button).

The link for the e-book is here. I paid for mine through Paypal and it came to about £4.70 I think (it will depend on the exchange rate as for some reason it is priced in US$ at $7.50). I weighed everything up and figured if I went out and bought anything it would cost more than that.

The e-book is copyrighted so unfortunately I can't just post the instructions on here for you, but I think the price tag is well worth it (assuming I can get it to work!)

The solution I had been considering is the one over on Nicole Heady's blog with the dolly pegs and glass jars - but the dolly pegs would have been about £11 for 300 if I'd got them in Wilkinson's, that's before I got the glass jars to put them in. And they take up lots of shelf space which I don't have in my room.
I also considered buying the plastic tags that hold two or three lengths of ribbon from Ribbon Oasis, but at £36 for 200, this would also start to get a bit pricey!!

So, the idea of hanging my ribbons up appealed to me. That way I'll get a better idea of what I've got, and with the re-order ring, where I got it from and how much it cost per metre for when I need to get some more. I could add a couple of hooks to the side of my shelf unit and hang them there. I might have to come up with a solution to them getting dusty - maybe a clear plastic bag over the top like dry-cleaning!

Now, I've read the instructions and they are very clear. BUT I haven't as yet made any, so this endorsement comes with a caveat - I will post again once I've made one and let you know how I get on.

Thursday, 9 October 2008

Birthday Boy Robot Card

My latest project has been a birthday card for a little boy. He's the son of a friend over in Melbourne (I've never met him and I think I was about 3&1/2 last time I saw Simone his mum - we were born in the same hospital on the same day. My mum and her mum became firm friends and are still in touch today. Simone and I started writing to each other when I was about 10 (when I had about 10 other penfriends all over Europe), and she used to send me clippings of what was going to happen in Neighbours before it was on the screens over here!! And of course magazine clippings of Jason Donovan - what more could I have asked for???

Anyway, we are both happily married now and she is a mother to two children, a boy and a girl.

I decided to use one of the stamped images I got in the June docrafts image swap that I did with April83/Melanie. The image is the Papermania Robot and I have cut it out. A backing panel was cut and stamped using a stamp from the See D's Mini Deco Backgrounds set.

This and the backing papers from the Dovecraft Birthday Designer Paper pack were matted onto red holographic card.


The letter B from the Papermania Quirky Alphabet foam stamp set was inked using Whispers Cherry Red Permanent Dye ink, and outlined using a black Whispers Brushstroke marker. The 'birthday' text was stamped using a stamp from the HOTP Sentiments set and Brilliance Graphite Black pigment ink, as well as the Mini Deco Background stamp.


The ready-made tag was stamped in a similar way and both were matted onto red holographic card. The hole was repunched in the tag and black embroidery threads were attached.

Saturday, 27 September 2008

Cards Received From Very Talented Cardmakers

Over the past few months I have been involved in a few image swaps with fellow Docrafters and thought it was about time I shared the wonderful cards that they have sent to me with the rest of you. They have all been of different styles and using different techniques.
The first I received from the very talented Tara - I'm honoured to have one of her masterpieces!!!

The second I received from the equally talented Alex - an unusual style wallet card and a beautiful image.

The third was from Melanie and used some of the (then) new masculine stamps and papers from Anita's.

The fourth was from Jackie, with a beautiful Penny Black stamped image and lovely papers.
The fifth was from Loretta - a wallet card that she reckons isn't very good but I beg to differ. And I'm sure you do too!!
The sixth was from Mina - a lovely design and papers.

And the seventh and last card I've received to date was from Judith - a lovely wallet card with a beautifully coloured Tilda and really nice and pretty papers.I'm sure you'll agree that they are all lovely cards. I've added links to either their blogs or docrafts galleries so you can see some more of their work.

Blog Widget by LinkWithin