Pages

WELCOME

This blog was created to act as a record of the cards and other projects that I have made. It is for both my own reference and to help inspire anyone who wants to take a look.

I'd love it if you'd leave me a comment so that I know what you think of my projects and that you've been to visit!

Anyone can comment, even those who don't have a blog. (Just look for the word 'Comments' under the three little pictures at the end of each post). Readers without a blog can add an anonymous comment, but please leave your name (and docrafts username if applicable) so I know who you are!

Slideshows of all the cards I've uploaded to my blog can be found at the bottom of the page.


PEOPLE WHO FOLLOW MY BLOG

Showing posts with label Easter card. Show all posts

Wednesday, 20 April 2011

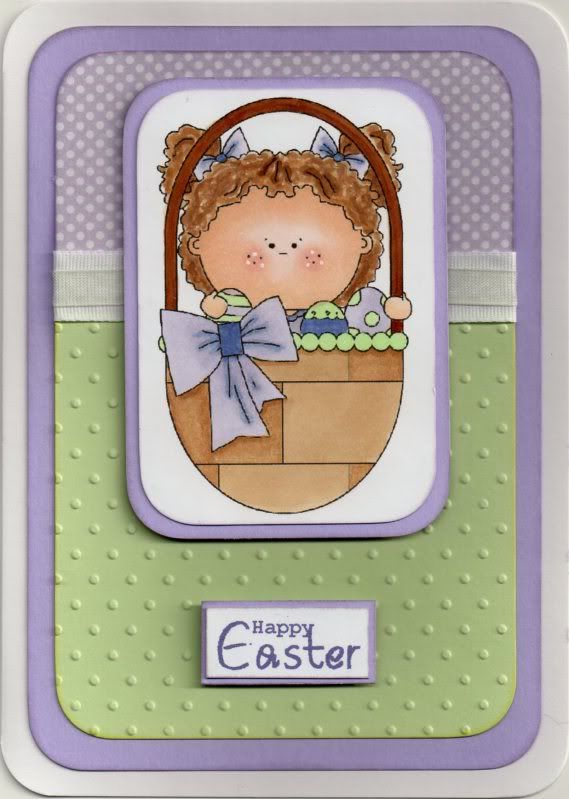
Lilac and Apple Green Easter Basket Kid

Here are my Easter cards for this year. I decided to go cute this year and used one of my recent Clipart Fairy purchases.


The image, Easter Basket Kid from The Clipart Fairy, was printed onto Xerox Colotech Gold card (my choice for Copic colouring) and coloured using Copic markers:
  • Basket: YG11, E31, E35, E39, E57
  • Eggs: YG11, BV00, BV04, BV31
  • T-Shirt: BV00, BV04, V91
  • Bows: BV00, BV04, BV31
  • Skin: E00, E21, E51, R20
Highlights were then added using the Papermania Snow White gel pen.


The corners of the image panel were then rounded using the large XCut corner rounder punch, and matted onto lilac card.

A panel of light green card was embossed using the Swiss Dots Cuttlebug embossing folder and was joined to a panel of the lilac mini polka dot paper from the DCWV Nana's Nursery Baby Boy Mat Stack with a length of white woven ribbon and light green organza ribbon.

This was then matted onto a panel of the lilac card.

The sentiment was computer-generated and matted onto lilac card.

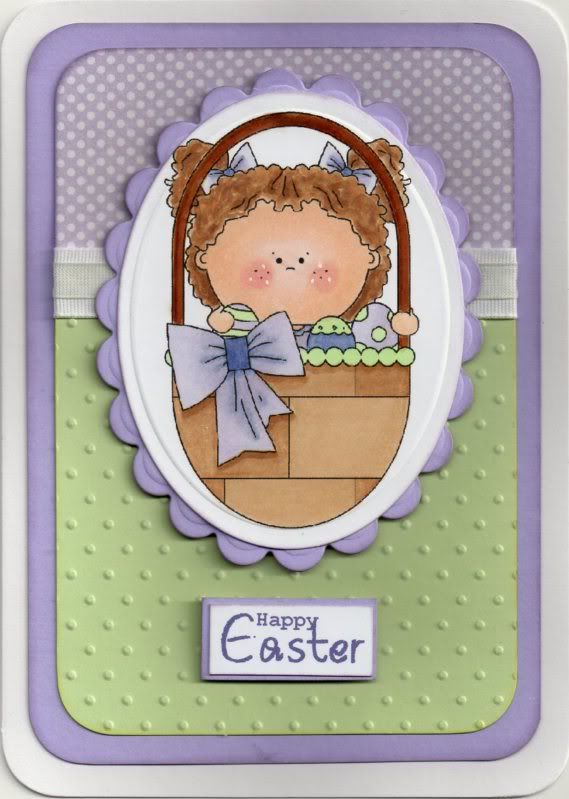
I also made a version using Nestabilities classic oval and classic scalloped oval dies but the card looked a bit unbalanced to me.


Here are the challenges that I am entering these cards into:

Tuesday, 30 March 2010

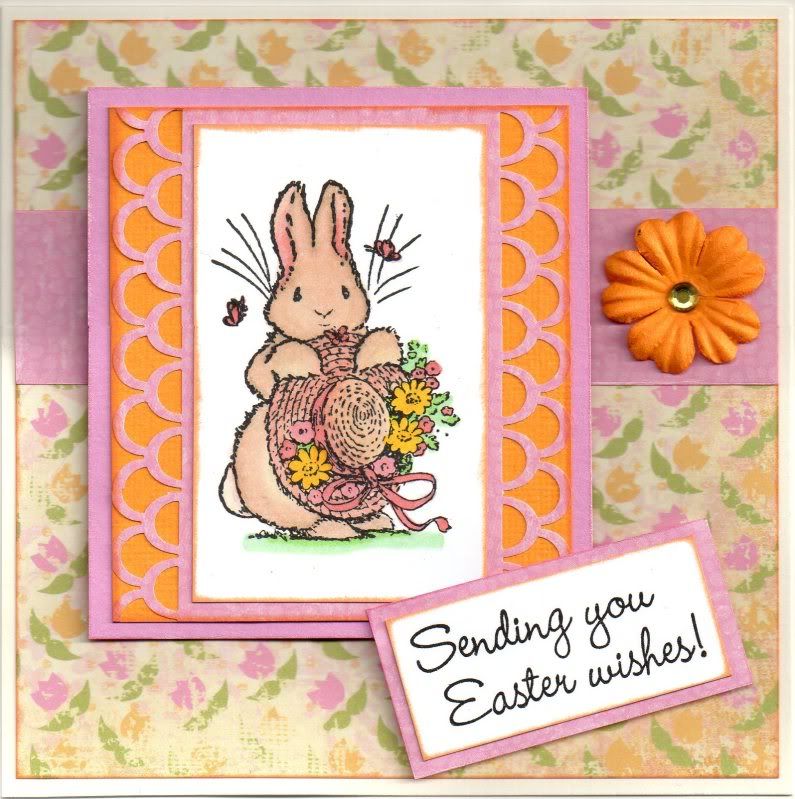
Pink and Yellow Easter Bonnet Bunny

This is the second design of my Easter cards for this year. I decided to use the same patterned papers as for the first but a different focal image.

I am also entering it into the following challenges:

The Easter Bonnet Bunny image, from the Penny Black Garden Friends stamp set, was stamped using Versafine Onyx Black archival pigment ink and coloured with the Copic Sketch markers.
  • Bunny: E00, E41, E43, R20, YR02
  • Hat: Y00, E00, YR02
  • Ribbon/Butterflies: R20, YR02
  • Flowers/Foliage: R20, YR02, Y08, YG41, G14
  • Grass: YG41, G14
A strip of the pink distressed bubble paper from the K&Co The Best of K&Co Too paper pad was punched using the Martha Stewart Double Loop border punch and was then layered onto yellow and pink card with the Bunny image on top.
A strip of the pink paper was matted across a panel of the distressed pink and yellow tulip paper, also from the K&Co paper pad and matted onto the card blank.
The sentiment, from the See D's Easter Kit stamp set, was stamped using the Onyx Black ink and matted onto the pink paper and positioned over the corner of the Bunny image.
A yellow paper flower from The Crafty Cow was adhered onto the pink border strip and a yellow faux gem was added in the centre.

Sunday, 28 March 2010

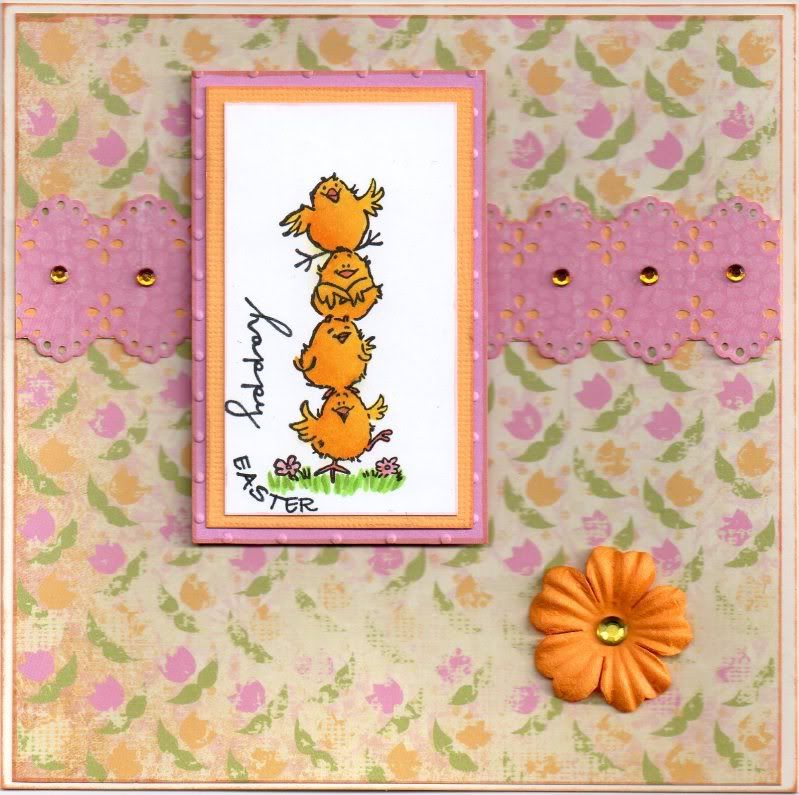
Pink and Yellow Easter Chicks

Here is the first of the two designs of my Easter cards this year. I have also entered it into a number of challenges.


The image, from the Penny Black Garden Friends stamp set, was stamped using Versafine Onyx Black archival pigment ink and coloured using the Copic Sketch markers.
  • Chicks: Y00, Y08, Y17
  • Beaks/Feet: YR02, E13
  • Flowers: R20, YR02
  • Grass: YG07, YG17
The sentiment was added using a combination of two stamps. The 'Happy' was taken from the 'Happy Birthday' stamp from the Woodware Jane's Script Sentiment stamp set and the 'Easter' from the Easter Egg stamp from the See D's Easter Kit.
The image was matted onto yellow Core'dinations card and pink card embossed using the Swiss Dots Cuttlebug folder.
A strip of the pink distressed bubble paper, from the K&Co The Best of K&Co Too paper pad, was punched along both edges with the Martha Stewart Eyelet Lace border punch. This was then layered onto a strip of the yellow Core'dinations card and the yellow tulip paper, also from the K&Co pad.
The image was added over the border strip and a yellow paper flower from The Crafty Cow was added in the bottom-right corner. Yellow faux gems were added along the border strip and in the centre of the flower.

Monday, 6 April 2009

Couple of Easter Cards

Here are a couple of Easter cards that I made last week. I decided I wanted to make two different styles of cards, one a more traditional design.

For the first card, I stamped the Celtic Cross image from the See D's Easter Kit stamp set onto a circle of smooth white card using ColorBox Fresh Green pigment ink and then gold embossed it.

This was then watercoloured using the Whispers Brushstroke markers and then matted onto a scalloped circle of Papermania lime green textured card. A panel of patterned paper from the Papermania Spring Burst paper pad was also matted onto the lime green card.

The sentiment, from the See D's Easter Kit stamp set, was stamped using ColorBox Fresh Green pigment ink and gold embossed. The panel was then cut out using the HOTP Labels template and matted onto the lime green card.I made a 'Handmade By' label for the reverse of the card by printing off a WordArt circle message and matted it onto a scalloped circle cut from a matching paper from the Papermania Spring Burst paper pad.

I wanted the second card to have a less traditional feel and so went with an Easter Chick theme. I also wanted to use the Basic Grey Ambrosia papers, but since I don't have them (yet!) I tried to find papers in my stash of similar colours to imitate them. I think I've almost pulled it off!

I stamped the Easter Chick image from the See D's Easter kit stamp set onto a circle of smooth white card using Versafine Onyx Black pigment ink and watercoloured it using the Whispers Brushstroke markers. This was matted onto a scalloped circle of paper from the Papermania 'The Big One' Temptations paper pack.
The edge of the card front was cut away, and strips of yellow and chestnut brown papers from the Temptations paper pack was attached to the inside of the card. Matching yellow papers were matted onto grey card and layered onto the card front. A file tab was cut from grey card using the Sizzix Sizzlet File Tab #4, and the sentiment was added using a Docrafts stamp and Brilliance Crimson Copper pigment ink onto the yellow patterned paper.
Two flowers were cut out using the Flower Parts Sizzlet dies. They were cut to the centre to create petals and embossed from the reverse to create dimension. A yellow faux gem was attached to the centre of the flowers. If I remember who it was who posted about this technique, I'll add it here later as it's a very good technique and I'd like to acknowledge who it was.
Blog Widget by LinkWithin