Pages

WELCOME

This blog was created to act as a record of the cards and other projects that I have made. It is for both my own reference and to help inspire anyone who wants to take a look.

I'd love it if you'd leave me a comment so that I know what you think of my projects and that you've been to visit!

Anyone can comment, even those who don't have a blog. (Just look for the word 'Comments' under the three little pictures at the end of each post). Readers without a blog can add an anonymous comment, but please leave your name (and docrafts username if applicable) so I know who you are!

Slideshows of all the cards I've uploaded to my blog can be found at the bottom of the page.


PEOPLE WHO FOLLOW MY BLOG

Showing posts with label Magnolia. Show all posts

Wednesday, 11 November 2015

Orange and Green Gingerbread Tilda

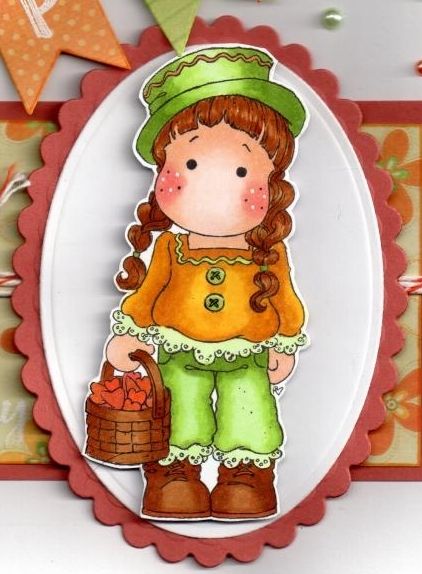
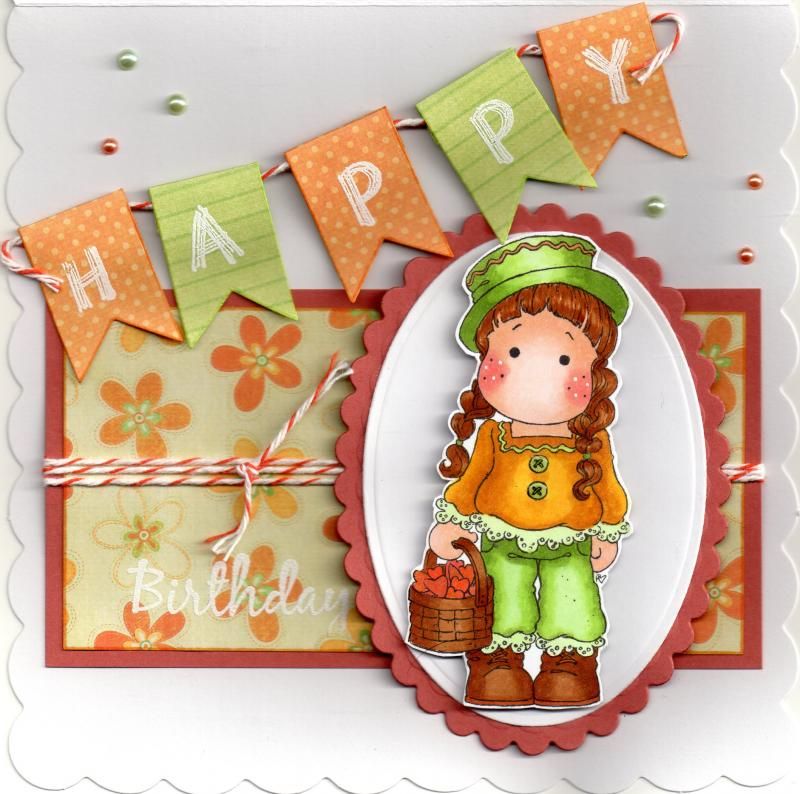
These are a couple of cards that I made using the Gingerbread Tilda stamp from Magnolia. I really like this stamp and I really ought to use it more. I made two versions of this card using different hair colours.

Here is the first with a more blond colouring:
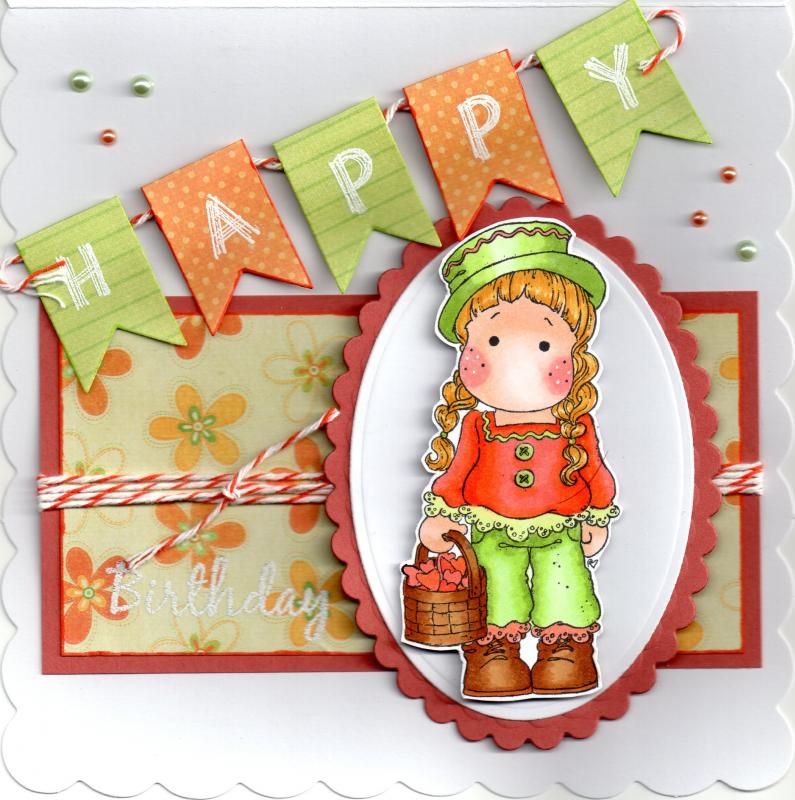
 
To begin with, the Tilda image was stamped using Memento Tuxedo Black dye ink and coloured with Copics:
 
Hair: Y21, Y26, YR23
Skin: E000, E00, E11, E21, R02
Hat: YG11,YG13, YG17, YR04
Trousers: YG11, YG13, YG17, Y11, YR02
Top: YR02, YR04, YR07, YG11, YG13, Y11
Shoes/Basket: E31, E35, E37, E39
Hearts: YR02, YR23, YR24
Hairbobbles: YR13
 
Highlights were added to here cheeks with a Papermania Snow White gel pen, and to the buttons and hearts with Ranger Glossy Accents.
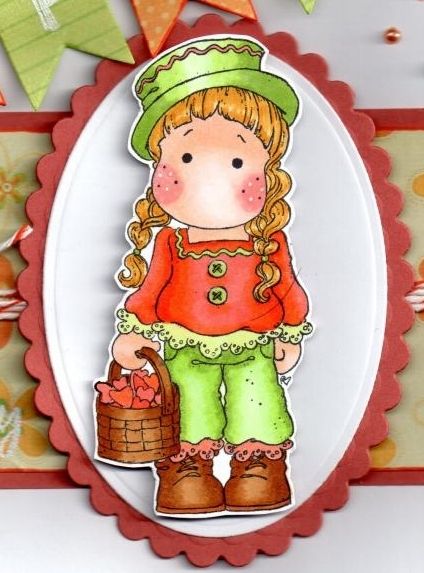
 
 
The image was then fussy cut and layered onto an oval and scalloped oval die cut using the Spellbinders Petite Ovals and Petite Scalloped Ovals Nestabilities.
 
A floral paper from the My Mind's Eye Bloom and Grow paper pack was matted onto the orange cardstock and the Birthday sentiment, from the Papermania Clare Curd Sentiments stamp set, was white heat embossed in the corner using Versamark and the Stampendous Detail Opaque White embossing powder. A length of the orange baker's twine from Divine Twine was wrapped around the panel and tied and this was then adhered to the card front with the image panel positioned to the right.
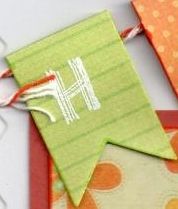
 
 
Using the small fishtail banner die from the Sizzix Framelits Banners #2 die set, five banners were diecut from patterned papers from the Bloom and Grow paper pack and stamped with the letters of the word Happy using the Hero Arts Fine Lines Alphabet stamp set and then heat embossed with the white detail powder.
 
These were then adhered across a length of the orange baker's twine across the corner of the card.
 
Small green and orange pearls from Papermania and Kort and Godt were then randomly placed around the card front.
 
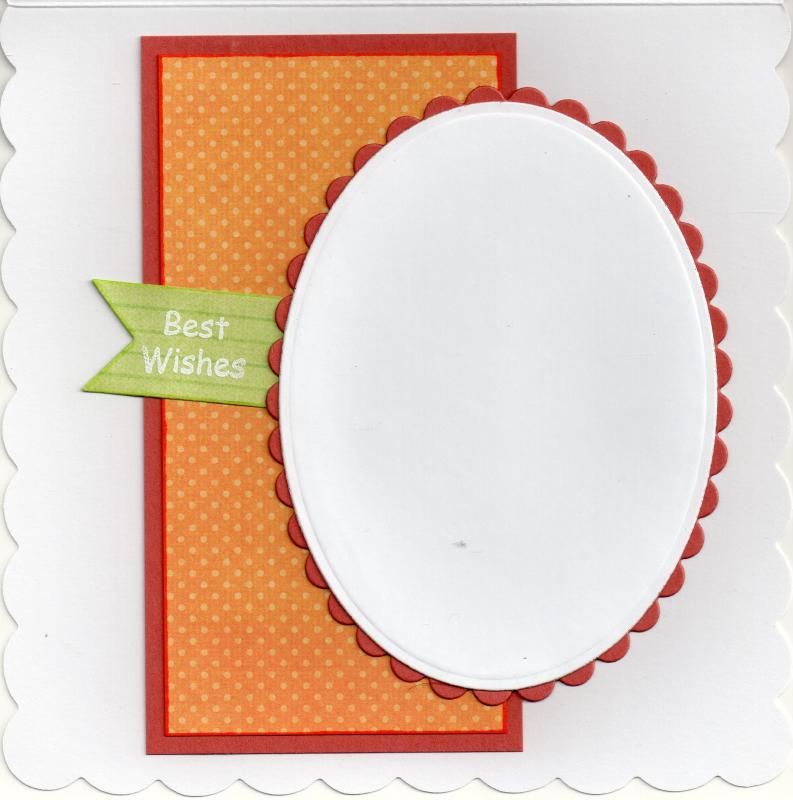
The inside of the card was also decorated, adding a panel of the orange spotty paper from the Bloom and Grow paper pack onto orange card stock. A white oval was matted onto an orange scalloped oval and the sentiment, from the Papermania Clare Curd Sentiments stamp set white embossed onto the green stripe paper and tucked behind the oval panel.


The card was also produced with a Tilda with a more brown shade of hair and a more yellow top.
 
 
Copics
Hair/Basket/Shoes: E31, E35, E37, E39
Skin: E000, E00, E11, E21, R02
Hat: YG11, YG13, YG17, YR23
Trousers: YG11, YG13, YG17
Top: Y08, YR23, YR24, YG11, YG13
Hearts: YR02, YR23, YR24
Hairbobbles: yr13
 

Tuesday, 27 October 2015

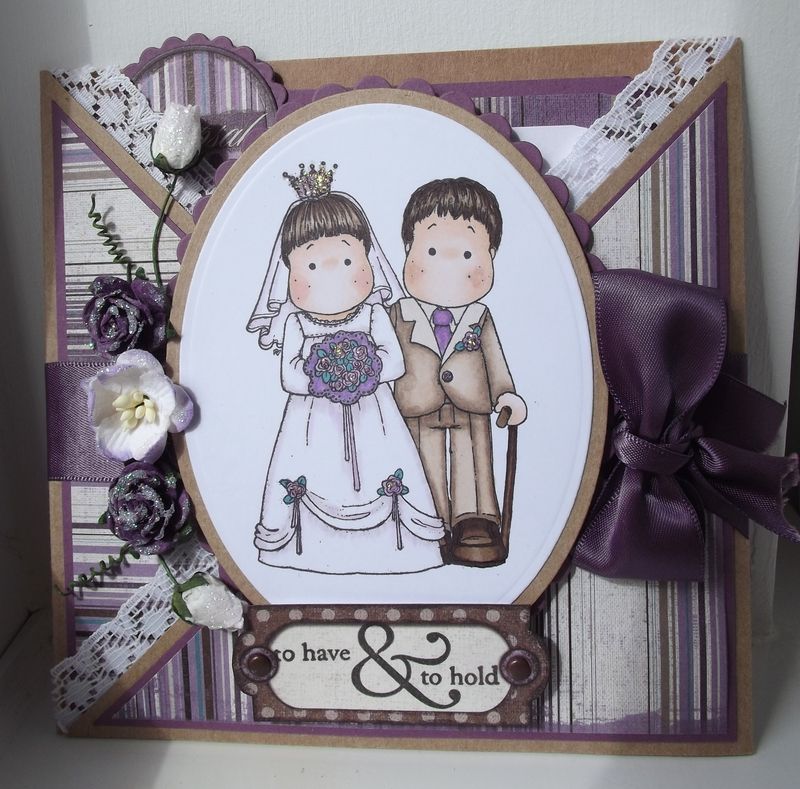
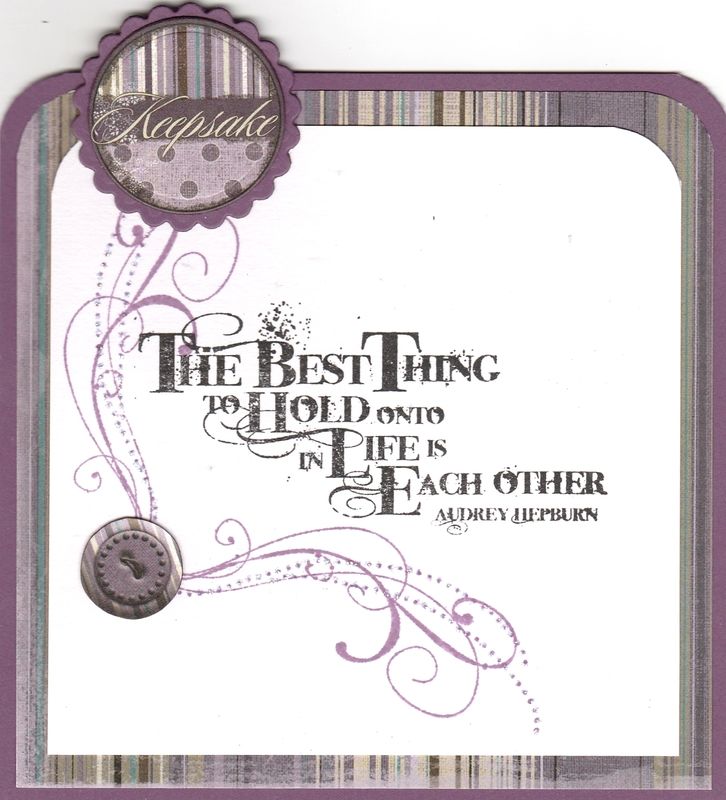
Mauve and Brown Tilda and Edwin Wedding Criss-Cross Card

This is the first of two wedding cards that I made for hubby's cousin and her new husband.
 
They had an amazing reception on board HMS Warrior. It really was remarkable (if a little dark) eating your meal at the tables in the same conditions as the seamen. The kids thought it was great as well, as they had the run of the ship for the whole evening.
 
The inspiration for this card came from this card by Christine, that you can see on her blog here.
 
 
This is a style of card that I've been wanting to make for a number of years now, especially having seen the wonderful cards that Teresa makes!!!

The card in question is a criss-cross card, that actually requires a stand in order to actually stand up, or needs to be leant up against the wall.

Two pieces of craft card were cut to 5.75" x 11.5" and scored in half to create two 5.75" square card blanks. The upper triangle was then cut away from each piece, one on the left flap, the other the right. The two pieces were then adhered together in the centre to create the basis of the criss-cross card.

Each of the front panels were then decorated with mauve card and striped patterned paper from the HOTP Vintage paper pad. A length of ivory lace was then attached to the inside of both of the flaps.

The next step was to stick down the two flaps, but ensuring that they created a pocket to enable a tag to be slotted into the card at a later date. This was done by adding red-liner tape to the lower edge of the left flap and adhering down to the centre panel. The right hand panel had red-liner tape added to the lower edge and a little way up the diagonal side.
 

The image, Classic Bridal Couple by Magnolia, was then stamped using Memento Tuxedo Black ink and coloured using Copic markers:
 
Tilda
Hair: E41, E43, E44, E49
Skin:  E000, E00, E21, R20
Crown: W1, V12, V15
Veil/Dress: V12, W1
Flowers: V04, V12, V15
Leaves: BG09
Lace Frill (Bouquet): V17
Ribbons: V15
 
Edwin
Skin: E000, E00, E21, E13
Hair: E41, E43, E44, E49
Suit: E40, E41, E43, E44, E49
Shoes/Cane: E43, E44, E49
Shirt: E40
Tie: V12, V15
Button: V15
 
The image was diecut using a Classic Oval Nestabilities die and matted onto a Kraft oval and mauve Scalloped Nestabilities Oval.
 
A length of mauve satin ribbon was wrapped around the whole card and the image panel adhered on the front of the card. A bow was tied in a length of the ribbon and added to the side of the image panel.
 
 
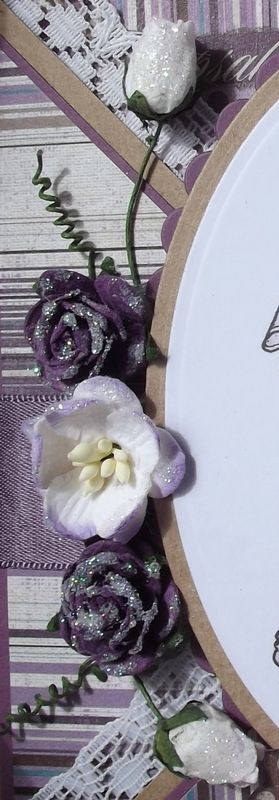
A bouquet of paper flowers from Wild Orchid Crafts were then added to the left of the image panel, which were dusted in DecoArt Crystal Glamour Dust. 
 

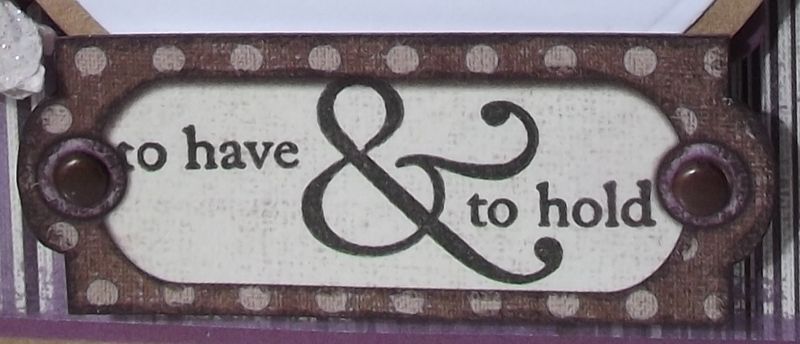
The last step for the front of the card was to add the sentiment. The panel was taken from the Vintage paper pad, and stamped using the 'To Have & To Hold' stamp from the American Crafts Wedding stamp set. A couple of brads were added to the sentiment panel and this was then added below the image panel.
  
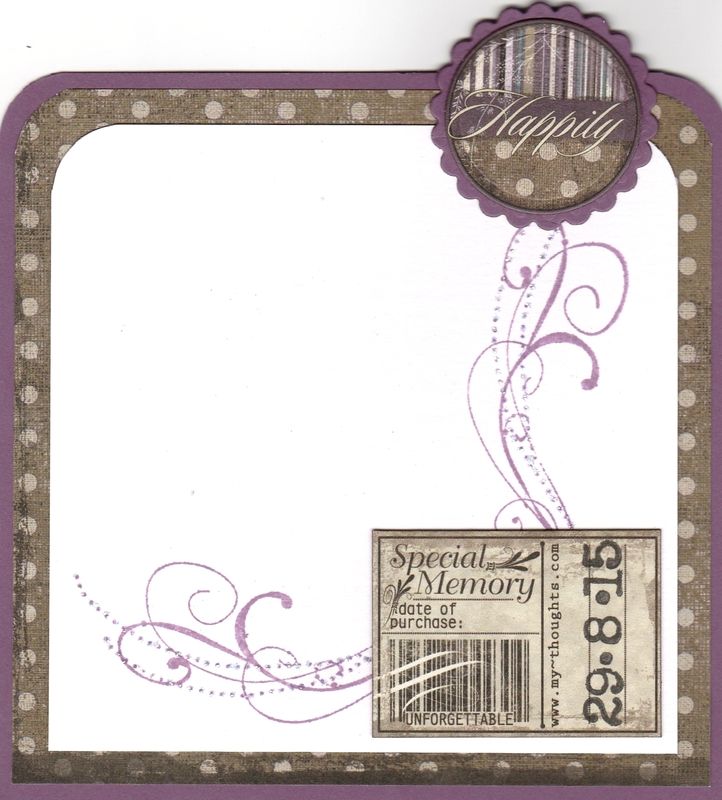
To finish the card, a tag was created using papers and tags from the Vintage paper pad. The front of the tag was stamped using a Lili of the Valley sentiment stamp and Versafine Onyx Black archival pigment ink and a flourish stamp from the Autumn Leaves Rhona Farrer Flourishes v2 stamp set, stamped with Memento Sweet Plum ink.
 

The reverse was also stamped using the flourish stamp and a tag from the Vintage paper pad was added in the corner. The date of the wedding was stamped onto the tag using number stamps from the Labelled With Love  stamp set that was free with the Simply Homemade magazine.
 
 
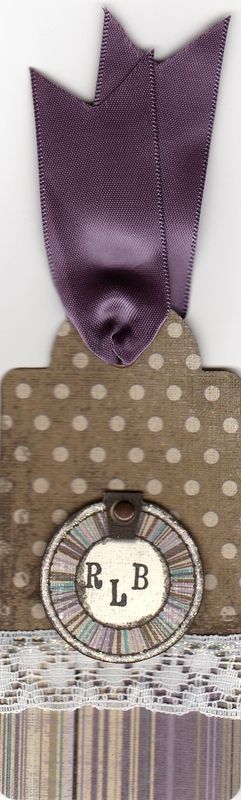
To accompany the card, a tag was created to go on to the wedding present. This was made using papers from the Vintage paper pad, a short length of lace and the mauve satin ribbon.
 
The bride and groom's initials were added to a tag from the paper pad using a Dovecraft mini alphabet stamp set. A brad to match the front of the card was added to the initialled tag before it was attached to the front of the tag.
 

Wednesday, 24 August 2011

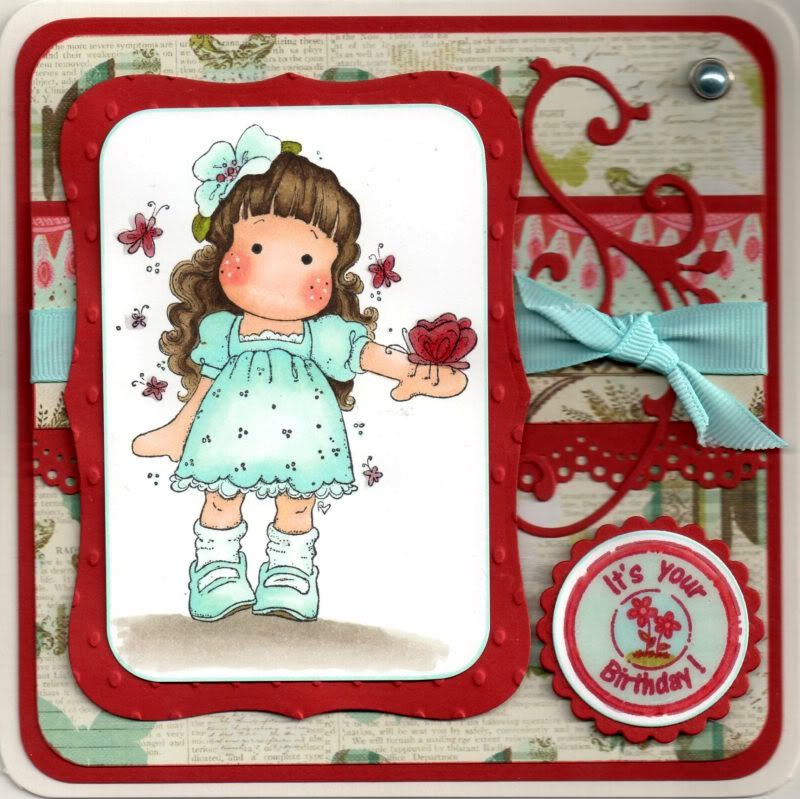
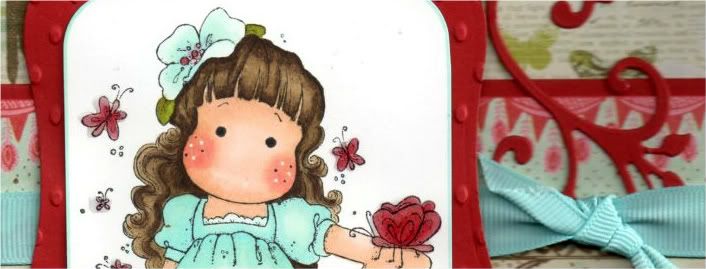
Red and Aqua Tilda With Hawaiian Flower

The Tilda with Hawaiian Flower image from Magnolia was very kindly donated to me by the lovely, talented Teresa/Craftingallday.

The image was stamped with Memento Tuxedo Black dye ink and coloured with Copic sketch markers:
  • Hair: E43, E44, E49
  • Skin: E00, E21, E51, R02, R20
  • Dress; B00, BG10, BG11
  • Flower: B00, BG10, BG11, R32, R37
  • Leaves; YG13, YG95, E44
  • Butterflies: R32, R37, R39
  • Socks: BG10
  • Lace Frills: BG10
  • Shoes: B00, BG10, BG11, E44
Tilda's cheeks were then highlighted with the Papermania Snow White gel pen.

Once again, large parts of this image were coloured using the Transfer Technique as discovered in the Copic Colouring Guide, using both the lighter shades and the blender pen.

The image panel was then trimmed and the corners rounded with the large XCut corner rounder punch. This was then matted onto a panel of red card die cut using a Labels 8 Nestabilities die and embossed with the Indentz Ellipse embossing folder.

A strip of the blue floral border paper from the Prima Madeline paper pad was matted onto a strip of the red card that was punched with the Martha Stewart Doilly Lace punch. A length of aqua grosgrain ribbon was wrapped around the strip and a shorter piece was knotted to the right.

This strip was then attached across a panel of the butterflies paper from the same paper pad and a Marianne Creatables leaf flourish die cut, also cut from the red card, was tucked under the ribbon.

The image panel was then added over the ribbon.

A large pale blue pearl brad from Papermania was added in the top right corner.

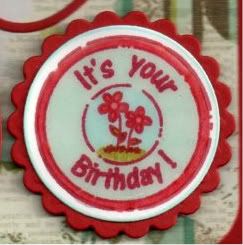
The circle sentiment, from Aud Designs, was stamped using Memento Rhubarb Stalk dye ink and coloured with Copic markers:
  • R32, R37, BG10, BG11, B00, YG13, YG95

This was then die cut using a classic circle Nestabilities die and matted onto a red classic scalloped circle.
Once the card was fully assembled, the circle sentiment and the butterflies in the image were then highlighted using Ranger Glossy Accents.

I also decorated the inside of the card using a strip of the border paper matted onto a strip punched with the Doilly Lace punch. The sentiment stamp, from the Papermania Clare Curd Sentiments stamp set, was stamped using the Rhubarb Stalk ink.

Here are the blog challenges I am entering this card into:

Thursday, 30 June 2011

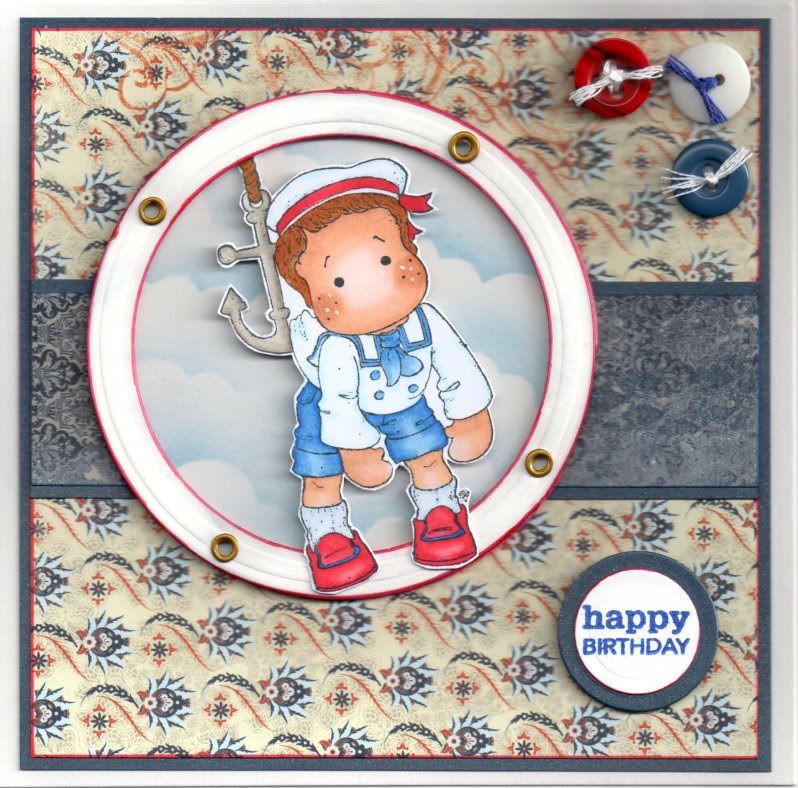
Red, White and Blue Dangling Sea Edwin with Shaving Brush Clouds

Well, I have finally had a go at the shaving brush clouds with the Distress Inks and I have to say I love the technique. A couple of tips I will give however are add a little ink at a time and dab your brush on some scrap paper before applying to your project to check you don't have too much ink on the brush..


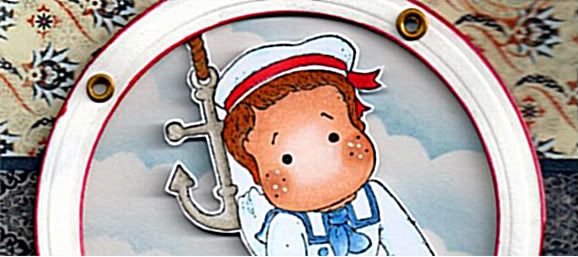
Firstly, the Dangling Sea Edwin image, from Magnolia, was stamped using Memento Tuxedo Black dye ink and coloured with Copic markers:
  • Hair: YR00, YR14, YR24, E35
  • Skin: E00, E13, E21, E51
  • Hat: R20, R24, R27, R29, B00, 0
  • Matelot Jacket: B23, B24, B00, 0
  • Shorts/Tie: B21, B23, B24, B26
  • Buttons: B24
  • Socks: B00, C0
  • Shoes: R20, R24, R27, R29. B26
The anchor in the image was highlighted with a clear Sakura Stardust pen, and highlights were added to Edwin's cheeks with a Papermania Snow White gel pen. Tthe image was then cut out.

A circle was cut from white card using a circle Nestabilities die and clouds were created using Tim Holtz Faded Jeans Distress Ink, a hand-cut mask cut from a Post-It note and a shaving brush. Basically, the brush with very little ink, was swirled over the edge of the mask, pinching the bristles of the brush together, focusing them on a smaller area.

A frame was also die cut from white card using two circle Nestabilities dies positioned on a piece of magnetic paper. The shape was then embossed and lightly coloured with Tim Holtz Weathered Wood Distress Ink. The edges of the circle were then coloured with a Copic marker (R29) to make them stand out more and small gold Papermania eyelets were set around the circle to create a porthole.

The cloud background, Edwin image and porthole were then all layered up.


A strip of the Wide Tie paper from the Basic Grey Boxer paper pad was matted onto a strip of navy
shimmer card and matted across a panel of the Oxford paper from the same paper pad. This was then also matted onto the navy shimmer card.

A red and blue button (items I've had in my stash for a very long time now!) were threaded with white embroidery thread and a white button with blue thread and positioned in the top right hand corner.

The 'Happy Birthday' sentiment, from the Personal Impressions Paula Pascual Mixed Sentiments stamp set, was stamped onto a die cut circle of the white card using Versafine Majestic Blue archival pigment ink and matted onto a circle of the navy shimmer card.

Here are the challenges I am entering this card into:

Friday, 24 June 2011

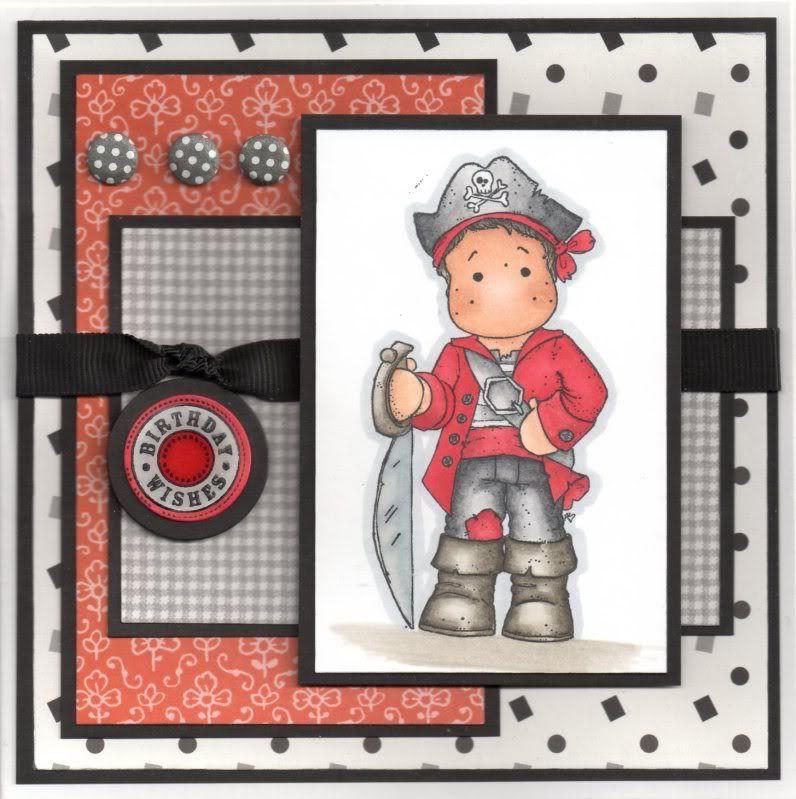
Red, Black and Grey Captain Edwin

This card was based on a layout in Issue 68 of Papercraft Essentials magazine.


The Captain Edwin image, from Magnolia, was stamped using Memento Tuxedo Black dye ink and coloured with Copics:
  • Hat/Trousers/T-Shirt/Belt: N1, N3, N5, N7
  • Jacket/Bandana: R20, R24, R27, R29, R32, R37, R39
  • Sash/Patch: R32, R37, R39
  • Boots/Sword Hilt: W1, W3, W5, W7
  • Sword Blade/Buckle: C0, C2, C4
  • Buttons: N5
  • Hair: W3, W5, W7
  • Skin: E00, E13, E21, E51
  • Shadow: W1, W3
  • Outline: C2
The image was then matted onto black card.

Patterned papers from the Dovecraft Charcoal Designer paper pack (Dots and Squares), Papermania Monochrome Capsule Collection paper pad (gingham) and Papermania Red Hot Capsule Collection paper pad (red Clover Leaf) were cut to size and matted on the black card and layered up.


A length of black grosgrain ribbon was knotted and added across the layers and the image panel added over the top.

The Birthday Wishes circle sentiment, from the Hero Arts Birthday Messages stamp set, was stamped using Brilliance Graphite Black pigment ink and coloured using Copics:
  • Sentiment Circle: R24, R27, R29, C2
This was then added beneath the knot of the ribbon.

Three dark grey polka dot Card Candi, from Craftwork Cards, were then added in the top left corner.

The sword blade in the image and the circle sentiment were then both highlighted with Anita's 3D gloss.

Here are the blog challenges that I am entering this card into:

Thursday, 16 June 2011

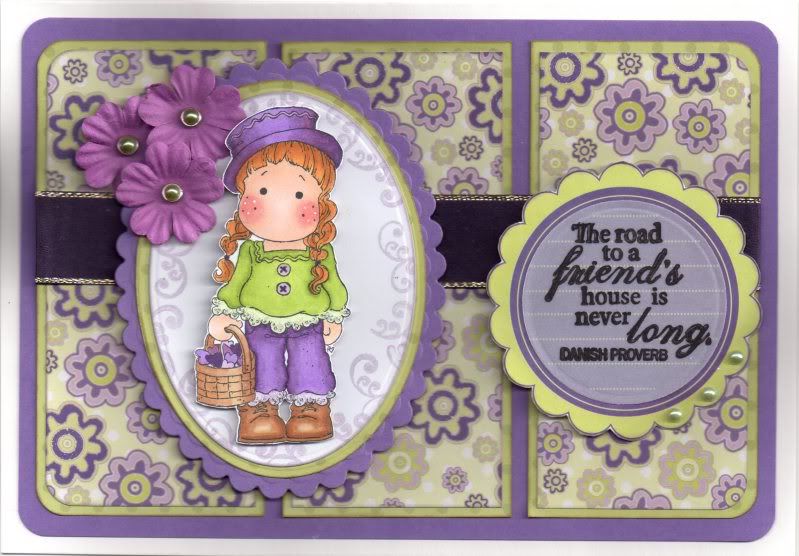
Purple and Green Gingerbread Tilda Panels

Here is the card I made for my matey Julie B for her birthday.


The Gingerbread Tilda image was stamped using Memento Tuxedo Black dye ink and coloured with Copic markers:
  • Hair: YR23, YR24, Y17
  • Skin: E00, E21, E51, R02, R20
  • Blouse: YG03, YG11, YG13, YG17, Y00, Y02
  • Buttons: V12
  • Hearts/Trousers/Hat: V04, V06, V09, V12
  • Shoes/Basket: E31, E33, E35
On 'girly' characters, I usually just use R20 on the cheeks, but I decided to experiment with R02 and R20 (especially as I now have a few more colours to use) and went for a rosier cheek and I think it rather suits her! Tell me what you think.

The image was then cut out and highlighted with Craft Planet Iridescent Sparkle glitter glue.

A petite oval Nestabilities die was used to die cut a panel of white card which was then stamped around the edge with a small flourish stamp from the Fiskars Friends Forever Quotes stamp set using ColorBox Wisteria fluid chalk ink. This was then matted onto an oval of the green polka dot paper from the Papermania Spring Burst paper pad and a scalloped oval die cut from purple card.


Three panels of the green and purple daisy paper, also from the Spring Burst paper pad, were matted onto the green polka dot paper and a length of wide purple satin ribbon was adhered across all three panels. These were then matted onto a panel of purple card.

The sentiment, also from the Friends Forever stamp set, was stamped onto white vellum using Brilliance Graphite Black pigment ink and die cut using a circle Nestabilities die. This was then matted onto a Spring Burst journalling page.


The image panel and the sentiment panel were matted onto the panel and three purple paper flowers from The Crafty Cow were added to the panel and image panel with green Papermania pearl brads before the panel was added to the card blank.

Three green Kort & Godt pearls were added to the scallops of the sentiment panel.

Here are the blog challenges I am entering this card into:

Sunday, 29 May 2011

Olive and Plum Gingerbread Tilda with Quilted Background

This card was based on a card I saw at a docrafts demo by Clare Bennett. A similar card of hers was also in the Creativity magazine, using the Liquorice and Sherbet papers.


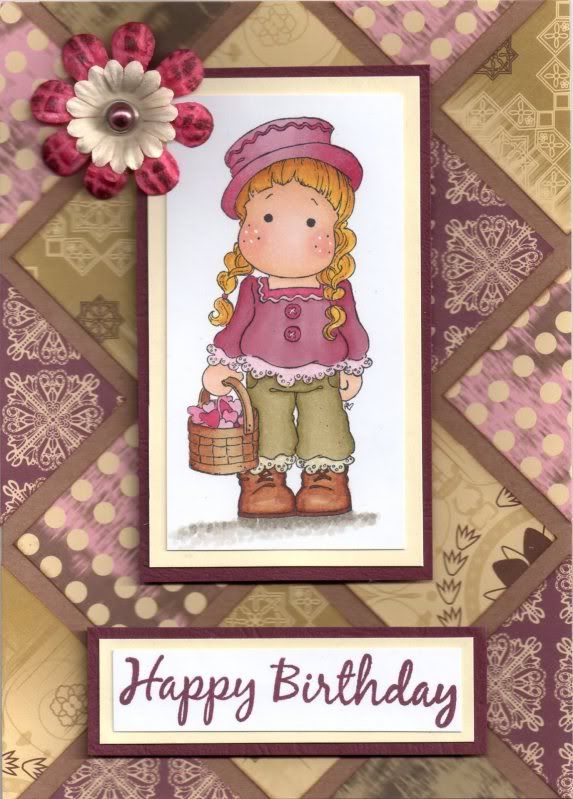
This is one of my new Tilda images from Magnolia, the Gingerbread Tilda  - I really love her. I think she is supposed to be a Christmas image, but I think she works all year round. The image was stamped with Memento Tuxedo Black dye ink and coloured with Copic markers:
  • Hat/Hearts: RV11, RV19, RV34
  • Hair: YR23, YR24, Y13, Y15
  • Skin: E00, E21, E51, R20
  • Top: RV11, RV19, RV34, R20
  • Trousers: YG91, YG95
  • Shoes/Basket: E31, E33, E29
Highlights were added to Tilda's cheeks with a Papermania Snow White gel pen and the image was then matted onto cream and burgundy card.

Squares were cut from a variety of papers from the Papermania Simply Elegant paper pad, distressed along the edges with ColorBox Chestnut Roan Fluid Chalk ink and arranged in a quilt pattern on a Kraft card blank. The image panel was then added to the centre of the card blank.


The 'Happy Birthday' sentiment, from the Papermania Clare Curd Sentiments stamp set was stamped using Adirondack Currant dye ink and matted onto the cream and burgundy cardstock, and adhered to the card below the image panel.

A cream paper flower, from Papermania Imaginisce, was coloured with a Copic marker (RV19) and the currant ink and layered up with a smaller cream flower and a Papermania plum pearl brad.

Here are the challenges that I am entering this card into:

Saturday, 21 May 2011

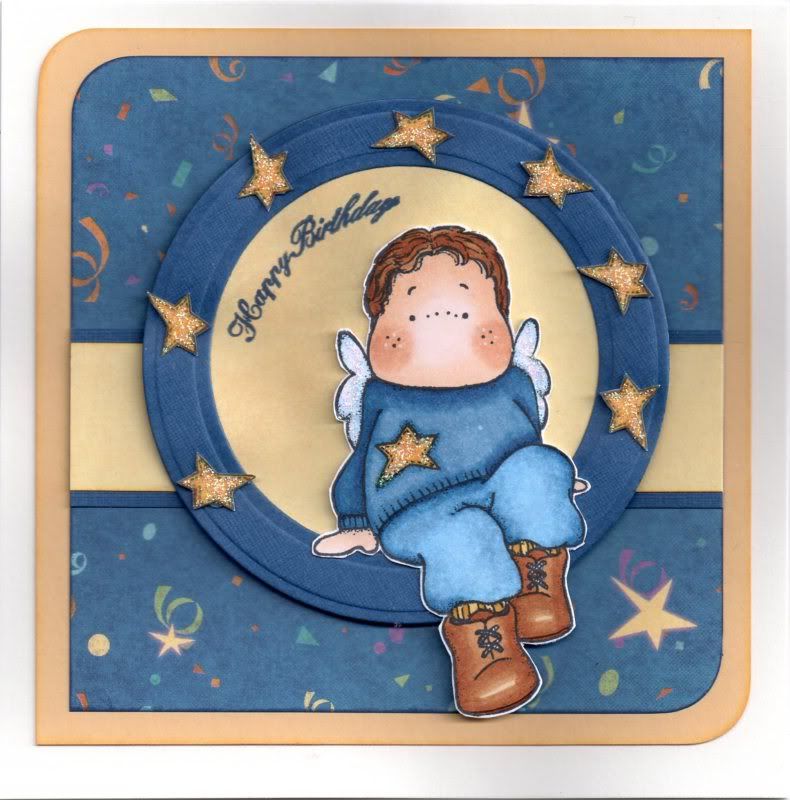
Blue and Yellow Sitting Edwin with Stars

Here is another of my masculine cards. I enjoyed making this one, and finally used the magnetic paper that
the lovely Carol S on the docrafts forum sent to me to create a frame using my Nestabilities dies and Bigshot machine.


The Edwin image, from Magnolia, was stamped with Memento Tuxedo Black dye ink and coloured with Copic markers:
  • Hair: E35, E37, E39
  • Skin: E00, E13, E21, E51
  • Jumper: B34, B37, B39
  • Trousers: B32, B34, B37
  • Stars/Socks: Y21, Y26
  • Wings: B32
  • Shoes: E31, E35, E37, E39
Edwin's cheeks were then highlighted with a Papermania Snow White gel pen and the image was cut out.

Using magnetic paper, two circle dies were positioned and a circle frame was cut from dark blue card and a circle of yellow paper from the HOTP Ultimate Cardmaker's Creative Pack was matted behind.

The Edwin image was matted over the circle panel and the 'Happy Birthday' sentiment, from the Papermania Mix and Match Scrolls and Sentiments stamp set, was stamped on the yellow panel using Versafine Majestic Blue archival pigment ink.


A strip of the yellow paper was matted onto the blue card and across a panel of the dark blue stars paper from the same paper pad and then onto a panel of yellow card.

Seven stars (the jumper detail from the image) were stamped out and coloured with Copic markers:
  • Stars: Y21, Y26
The stars were cut out and attached around the circle frame using 3D foam. These were then highlighted with Craft Planet Yellow glitter glue, as was the star on the jumper. Craft Planet Iridescent Sparkle glitter glue was added to highlight the wings on the image.

This card uses some of my old stash (HOTP papers) with some of my new stash (Edwin stamp, new Copic colours, Papermania Mix & Match stamps and of course my magnetic paper).

Here are the blog challenges that I am entering this card into:

Saturday, 19 March 2011

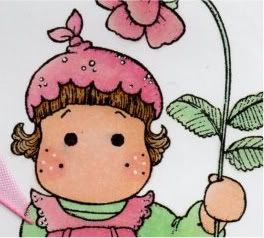
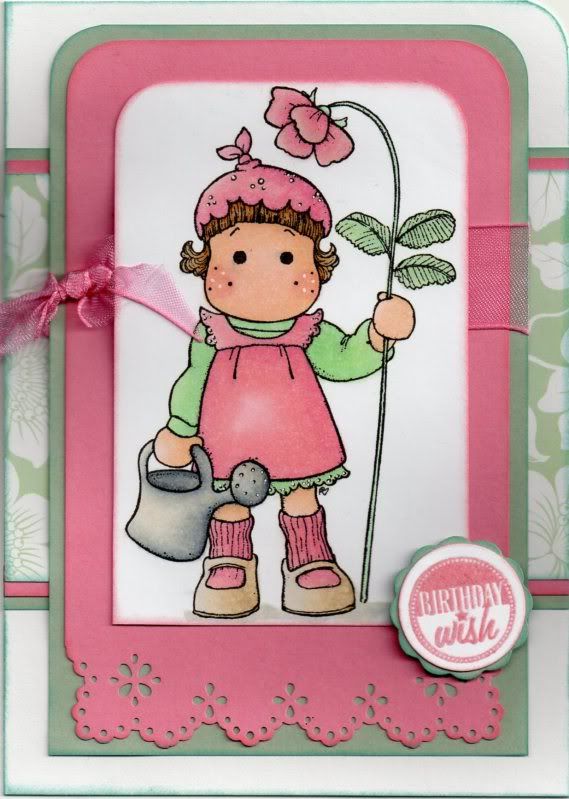
Pink and Tea Green Strawberry Tilda

The Tilda image was stamped during a craft playday at Julie's. Alex very kindly let me stamp a few of her. I really love this image, and in an ideal world, I'd own her!


The Strawberry Tilda image from Magnolia was stamped using Versafine Onyx Black archival pigment ink and coloured using Copic sketch markers:
  • Hair: E13, E35, E43, E57
  • Skin: E00, E21, E51, R20
  • Flower/Hat/Dress/Socks: RV21, RV34, R20, E40
  • Shoes: E40, E41, E43
  • Watering Can: C0, C2, C4, C6, E40
  • Jumper/Leaves/Stem: G00, G12, YG11, YG41, E40
  • Shadow: C2, E40
The top corners of the image panel were then rounded using the large XCut corner rounder punch. A panel of pink card, punched using the Martha Stewart Eyelet Lace corner and border punches was matted onto a panel of green paper and pink organza ribbon was knotted around it. The image panel was then matted on top.


A panel of the tea green floral paper from the Dovecraft Eastern Promise paper pack was matted onto the pink card and green paper and adhered across the card blank and the image panel was matted over the top.

The sentiment, from the HOTP Sentiments stamp set, was stamped using ColorBox Old Rose pigment ink and clear embossed. This was then die cut using a circle Nestabilities die and then matted on a big scalloped circle cut from the green paper.

Here are the blog challenges I am entering this card into:

Tuesday, 1 March 2011

Lilac and Apple Lazy Summer Tilda Ovals

Firstly, before I blog this card, I want to say a big thank you to Elaine at Quixotic Cards for drawing my attention to the great tutorial on colouring blonde hair with Copics that Mary J did on her blog and the Quixotic Paperie blog.

I found that, with my three yellow markers, my blonde  hair didn't look right. But with some help from Elaine and Mary J, I've worked out which E markers to use and I think it looks really good - even if I say so myself!!!


The Lazy Summer Tilda image from Magnolia, (which I managed to borrow from Alex during a playday at Julie's) was stamped using Versafine Onyx Black archival pigment ink and coloured using Copic sketch markers:
  • Skin: E00, E21, E51, R20
  • Hair: E40, E41, E43, E51, E57
  • Wings: BV00, BV23, B41
  • Jumper: G12, G14, YG11
  • Pinafore: BV00, BV04, BV31
The image was die cut using a classic oval Nestabilities die and matted onto a green oval and lilac scalloped oval, also die cut using Nestabilities.


A strip of the lilac cherry blossom paper from the Dovecraft Aquamarine Kate Knight paper pack was matted onto green and lilac card. A panel of the green and lilac leaves paper, from the same paper pack, was punched using the Doilly Lace border punch by Martha Stewart, and then matted onto a punched panel of the green card and the lilac card.

The sentiment, from the Papermania Clare Curd Sentiments stamp set was stamped onto a Cuttlebug Oval Stamp die using the Onyx Black ink and matted onto a lilac die cut. I think if I were to make this again, I'd use either a grey or lilac ink for the sentiment - the black looks a little bit too harsh. 

The Tilda image was then highlighted with Craft Planet Iridescent Sparkle glitter glue and a Papermania Snow White gel pen.

Here are the blog challenges that I am entering this card into:
Blog Widget by LinkWithin