Pages

WELCOME

This blog was created to act as a record of the cards and other projects that I have made. It is for both my own reference and to help inspire anyone who wants to take a look.

I'd love it if you'd leave me a comment so that I know what you think of my projects and that you've been to visit!

Anyone can comment, even those who don't have a blog. (Just look for the word 'Comments' under the three little pictures at the end of each post). Readers without a blog can add an anonymous comment, but please leave your name (and docrafts username if applicable) so I know who you are!

Slideshows of all the cards I've uploaded to my blog can be found at the bottom of the page.


PEOPLE WHO FOLLOW MY BLOG

Showing posts with label See Ds. Show all posts

Saturday, 31 October 2015

Yellow and Kraft Bee and Honeycomb Masculine

Time for a masculine card I think.

This was the card that I made for my father-in-law this year. It actually came together rather well and I was pretty pleased with it. Especially the colouring!
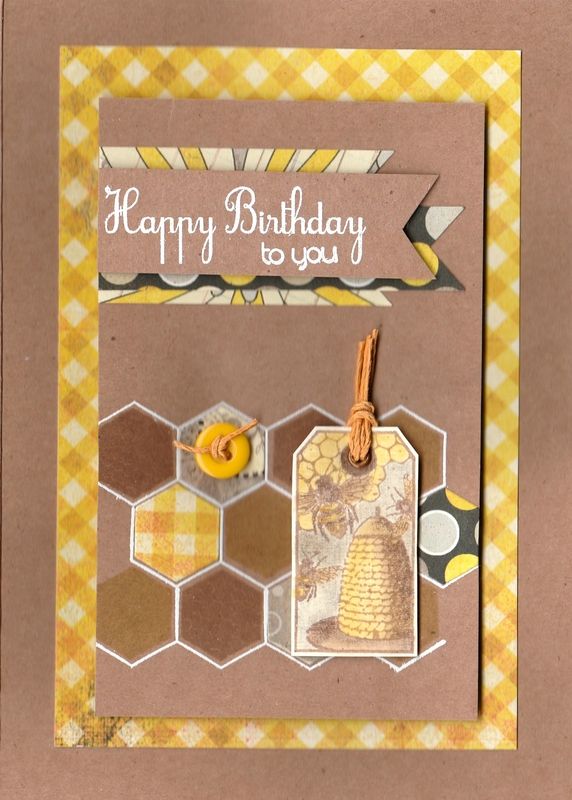
 
 
This card uses my much-coveted yet much under-used honeycomb stamp and die set.
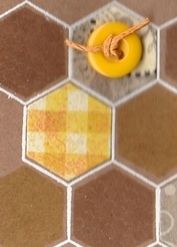
 
 
So, to begin this card, the honeycomb image from the Clearly Besotted Honeycomb stamp set was stamped onto Kraft card using Versamark ink and heat embossed using Stampendous Opaque White detail embossing powder. Using Versafine Toffee and Vintage Sepia archival pigment inks, the honeycomb hexagon and the solid hexagon from the same stamps set were stamped into the honeycomb framework. To complete the honeycomb image, honeycomb pieces were die cut from the gingham paper, spotty paper and the floral paper from the Authentique Blissful paper pad using the Clearly Besotted Honeycomb die.
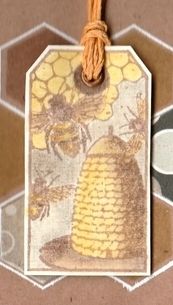
 
 
The next stage was to create the tag. The bee skep tag stamp from the Invoke Arts Nature Tags stamp set was stamped using the Vintage Sepia ink and coloured using pencils from the WHSmith tin of pencils, including the white to add highlights. This was then cut out and a metallic Papermania eyelet added and threaded with a length of yellow hemp cord. This, along with a yellow button also tied with the same hemp cord were added to the honeycomb.
 
 
The sentiment, also from the Honeycomb stamp set was stamped in Versamark and white heat embossed onto Kraft card. This was hand cut into a fishtail banner and adhered to the panel over fishtail banner pieces cut from papers also from the Blissful paper pad.
 
The panel was then adhered to a panel of the yellow gingham paper and then to the card front.
 
The inside of the card was also decorated using just a strip of matching patterned paper and a tag.
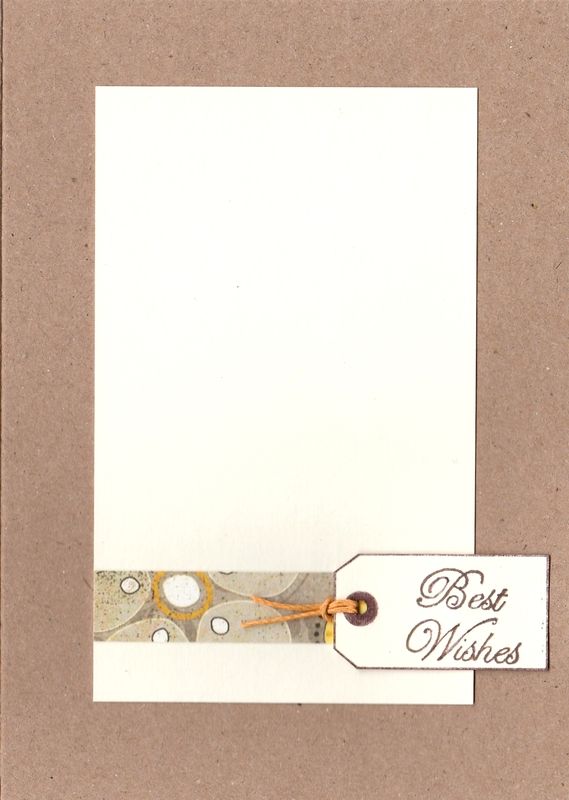
 
 
The tag was created by only inking up the edge of the tag and the eyelet feature with a brown pen and stamping out. The sentiment, from the See D's Celebration Messages stamp set, was stamped using the Vintage Sepia ink within the tag shape and fussy cut out. The tag was threaded with the yellow hemp cord and added to the inside of the card over the patterned paper.
 

Wednesday, 2 April 2014

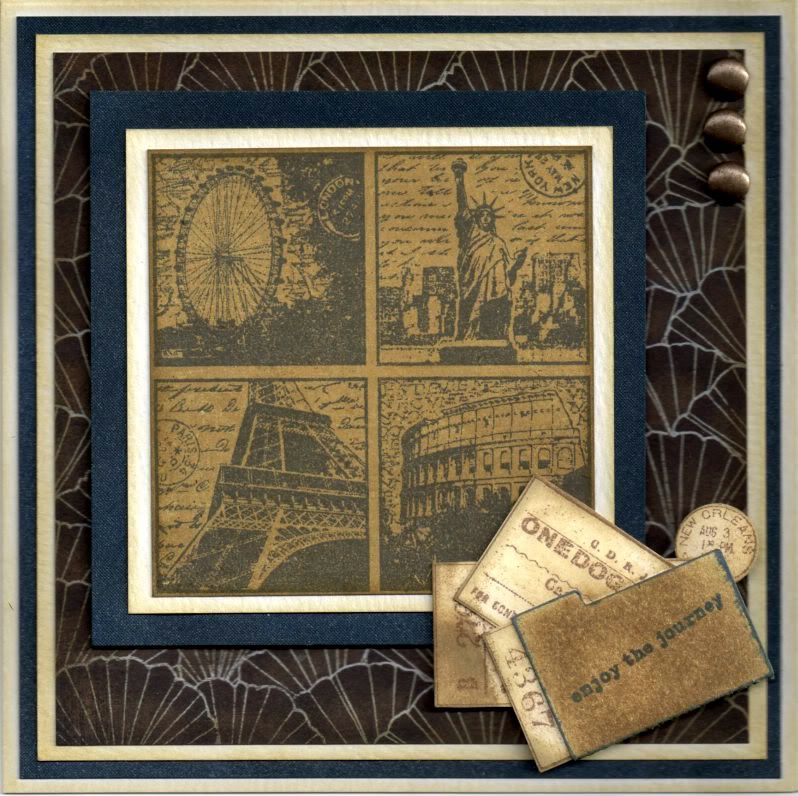
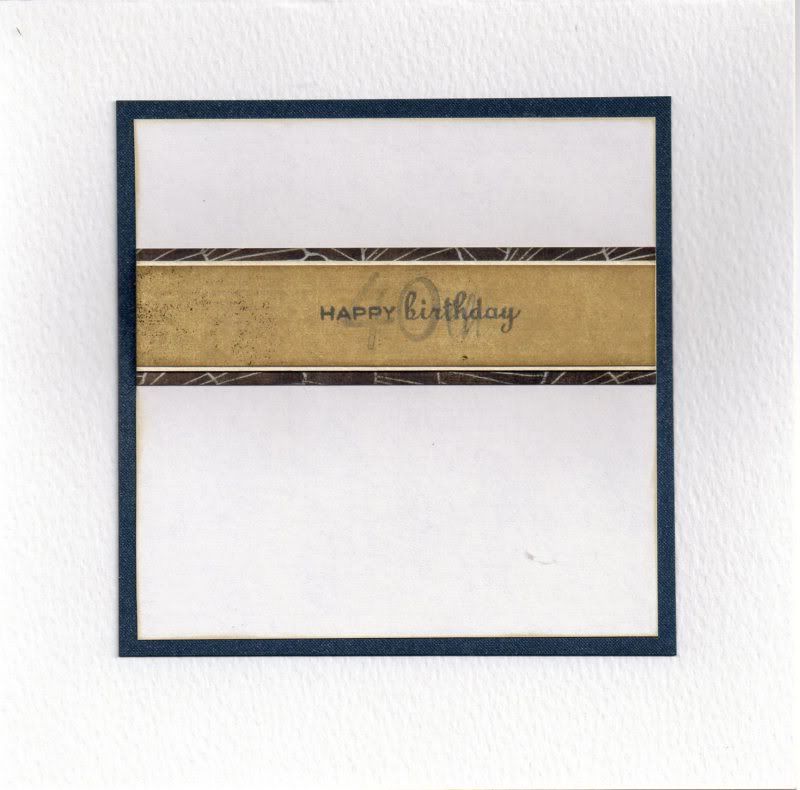
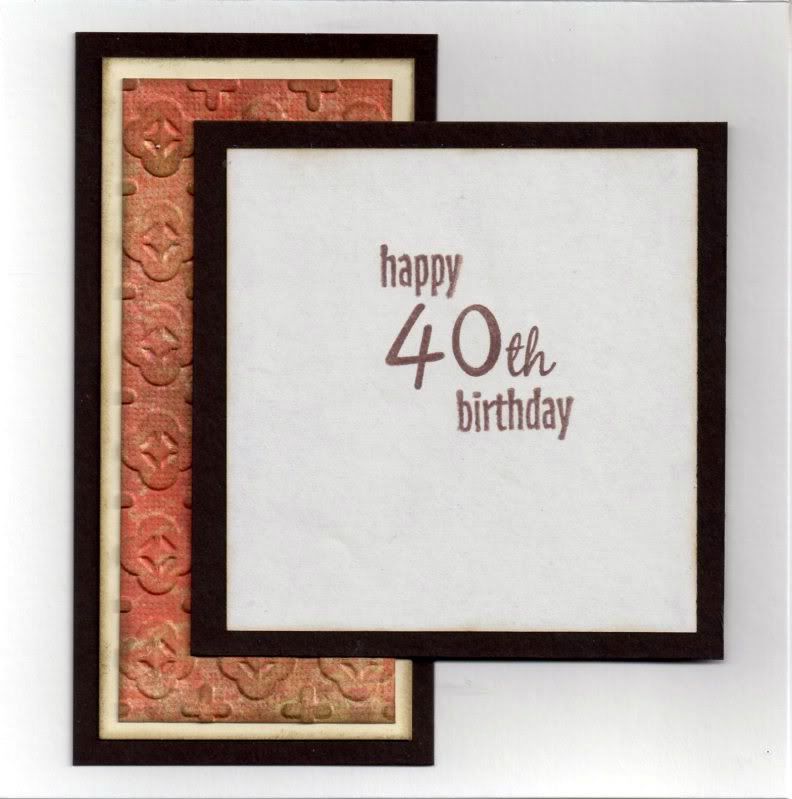
Dark Blue and Brown Landmarks and Tickets 40th

So, my latest upload is a card I made for a friend who was turning 40. He has always called me 'aunty Kathleen' ever since I used to feed him curry when we were based in Germany. Even though he is actually older than me!!


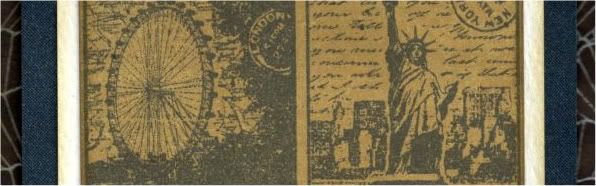
I pulled out the trusty Landmarks image, from Crafty Individuals, and stamped it onto the Honey paper from the Basic Grey Granola paper pad using Memento Paris Dusk dye ink and trimmed it up into a square. The image was then matted onto cream and navy shimmer cardstocks.

A panel of the Wild Oats paper from the same paper pad was also matted onto the cream and navy cardstocks.

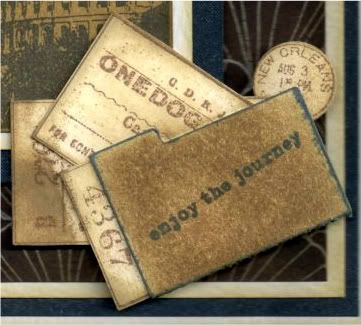
A file folder was die cut from cream card using the Sizzix Sizzlits die and coloured using Tim Holtz Frayed Burlap distress ink and stamped with a sentiment from the Making Memories Express It! stamp set using the Paris Dusk ink.


The Travel Tickets stamp, also from Crafty Individuals, was then stamped onto cream card using the Versafine Vintage Sepia archival pigment ink and the individual tickets were cut out. Tim Holtz Old Paper and Frayed Burlap distress inks were then added to distress them. The tickets were arranged inside the file folder and added at the bottom right corner of the image panel.


Three large old gold brads from Papermania were then added in the top right of the panel and the panel was then added to the card blank.


The inside of the card was also decorated using strips of the papers used on the front of the card. The sentiment was stamped across the Honey paper using the Paris Dusk ink, the Happy Birthday stamp from the Personal Impressions Paula Pascual Mix and Match Sentiments stamp set and the '4', '0' and 'th' stamps from the See D's Lower Case Script Alphabet stamp set. The '40th' text was stamped using the second generation of ink, giving it a more faded look.


Here are the blog challenges I am entering this card into:

Saturday, 22 March 2014

Owl Lots of Pops 30th Birthday

This is a card that I made at my local cardmaking group. It's a cute pop-up card using a die to create the mechanism. It was pretty simple to make, although you do have to ensure that whatever you put on the pop-up will remain within the card when closed.


I needed a 30th birthday card for my 'little' brother (how did that happen?) and thought this would make a good "special card".

The die used to create this card is the new Lots of Pops die by Karen Burniston for Elizabeth Crafts.


Firstly, the card blank and inner panel were created, with the inner panel being slightly smaller than the card blank. In this instance, the inner panel was created using a panel of paper from the First Edition Sweet Owl paper pad. To create the pop-up, place the die along the centre fold of the inner panel. Work the folds of the pop-up and then adhere to the card blank.


I decided that I would use the free owl stamp by Sugar Nellie that came with the July 2009 issue of Craft Stamper Magazine. The image was stamped using Memento Tuxedo Black dye ink and coloured using Copic markers. Highlights were added using Ranger Glossy Accents. The image was then fussy cut.

The Copic markers used are:
E41, E43, E44, E49, YR14

In the set of dies there is also a post die and a couple of different banner dies. Two of each of these were die cut, the banners being cut from patterned papers from the Sweet Owl paper pad.

The two fishtail banners were stamped on he reverse of the patterned paper using the Whimsy Letters and Numbers stamp set by See D's using Memento Teal Zeal dye ink. The banners were then attached to a length of brown embroidery thread which was then tied and adhered to the two post die cuts and these were then in turn attached to the pop-up mechanism.


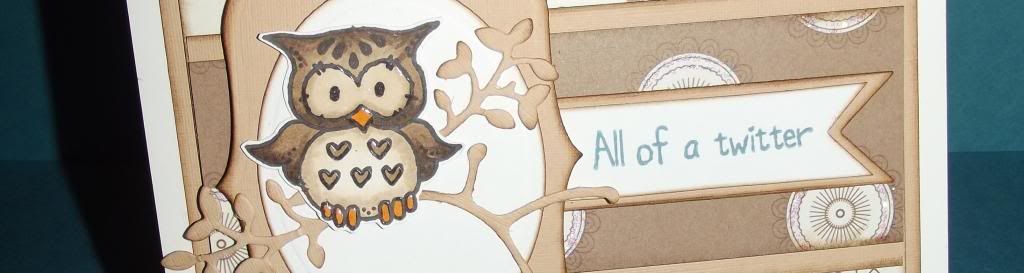
The longer fishtail ended banner was then stamped using the PSX Buttons Pixie alphabet stamps and the Teal Zeal ink. This was placed on the front pop-up, and the owl placed sitting on branches and leaves, die cut using the Sizzix Sizzlet Flowers and Branches die and the Joy! Crafts Branches die.


A strip of the brown circle paper from the Sweet Owl paper pad was matted onto the beige card and added across the inner panel. Ranger Crystal Stickles were added to the circle pattern on the patterned paper. The 'Have A Hoot...' sentiment, from the Woodware Owl stamp set, was then stamped using the Teal Zeal ink and die cut using the Nestabilities Classic Ovals die and matted onto a Labels Thirty-One shape.

Once the inside of the card was completed, the front of the card was created using the same owl stamped image and the branch and leaves die cuts. The owl image was adhered to panels of oval and Labels Thirty-One shapes.


The fishtail banner from the Sizzix Framelits Banners #2 set was die cut from the beige card. The matching stamp was stamped onto white card using a pale ink and fussy cut. The 'All of a Twitter' sentiment, also from the Woodware Owl stamp set, was stamped onto the reverse of the shape and matted onto the diecut shape.

All panels and diecuts were distressed using Tim Holtz Walnut Stain distress ink.


For an area to write the greeting, a large classic oval diecut was matted onto a Labels Thirty-One diecut with a few of the leaf diecuts and adhered to the reverse of the card. The 'Happy Birthday' sentiment, from the Kanban Farmyard Animal Wobblers stamp set, was created in the same way as the 'All of a Twitter' sentiment on the front of the card.

I'm rather pleased with this card, even if I do say so myself. I love the combination of the die cut elements and the stamped elements.

Here are the blog challenges I'd like to enter this card into:

A Creative Romance - Seeing Double
Brown Sugar - #86 - Anything Goes
Craftitude - #61 - Anything Goes
Crafts4Eternity - #168 - Anything Goes
Cut It Up - #41 - Anything Goes
Fairytale - #87 - An Old Stamp
Pattie's Creations - #88 - Anything Goes
QKR Stampede - #80 - A Little Birdie Told Me
Simply Create Too - #57 - Animals
Sister Act - #49 - Anything Goes
Stampin' For The Weekend - Anything Goes
Crafty Girls - #14 - Anything Goes
Aud Sentiments - #102 - Anything Goes
Copic Marker Europe - Birthday
Red Rubber Inspirationals - #112 - Colour In The Lines
Crafter's Café - #55 - Make A Square Card
Inklings and Yarns - #48 - Anything Goes
Stampotique Designers - #139 - Masculine
Fan-Tastic Tuesday - #27 - Anything Goes
Oldie But A Goodie - Bunting (Owl Stamp)
Through The Craftroom Door - Anything Goes 18/3-24/3
Aurora Wings - #1 - Anything Goes
Crafty Bloggers Network - Nature
Crafty Boots - Feathers
Fitztown - #27 - Anything Goes
Lexi's Creations - #112 - Punches and Dies
Shabby Tea Room - #210 - Anything Goes
Paper Nest Dolls - #6 - Anything Goes
613 Avenue Create - #63 - Anything Goes
Challenges 4 Everybody - #39 - Anything Goes
Eclectic Ellapu - Wings (Pink Team)
Penny Black and More - So Sweet
Pile It On - #11 - For A Guy
Sentimental Sundays - #198 - Cute and Cuddly
Cards Galore Encore - #3 - Use Stamp or Digi
Crafts & Me - #146 - Anything Goes
Flat Friends - #18 - Cards For Men
Just B Creative Crazy - Anything Goes

Monday, 5 September 2011

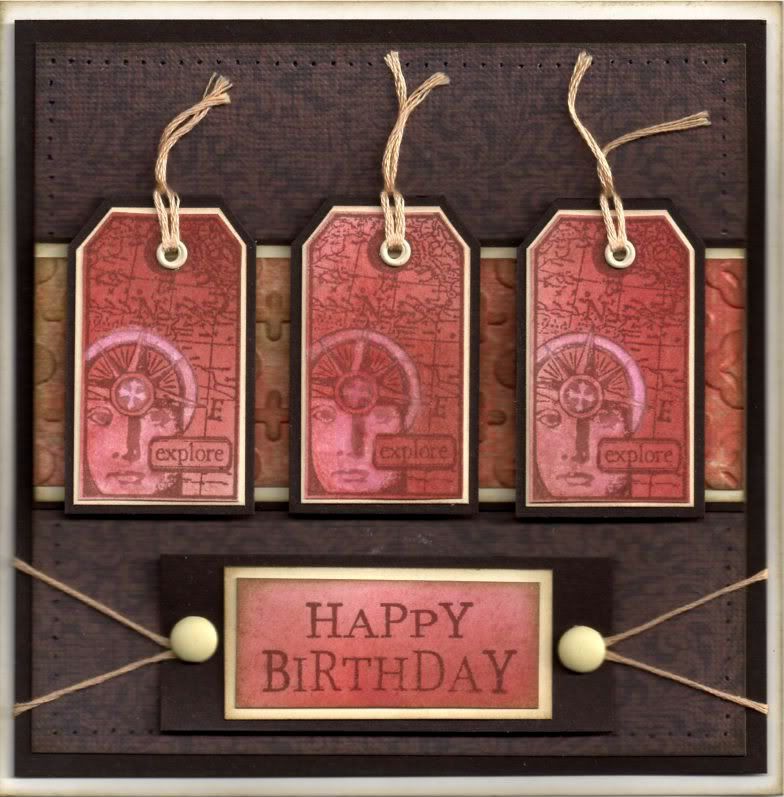
Red and Brown Explore Invoke Arts Tags

Well, here is the first of the masculine 40th birthday cards that I need to make. Got to get my thinking cap on for the second one now!


A piece of white card was coloured using Tim Holtz Fired Brick, Aged Mahogany and Frayed Burlap distress inks using the shaving brushes.

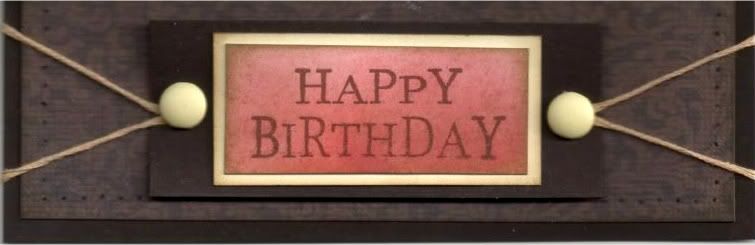
This was then overstamped with the Explore tag from the Invoke Arts Travel Tags stamp set and the 'Happy Birthday' sentiment stamp from the See D's Celebration Messages stamp set. All were stamped using Memento Rich Cocoa Dye ink.

Using a damp paint brush and a piece of tissue (OK, toilet roll, but I couldn't be bothered going downstairs to get a tissue!!), some of the colour was removed from the face image on the tag. Areas of the compass were then lightly coloured using the Angel Green Mica Pigment from Stamps Away. Unfortunately that doesn't show up on the scan.

The tags were then cut out by hand and matted onto cream card and dark brown card. Holes were punched in the top of each tag using the Big Bite and small cream eyelets from Papermania were set in the holes. Each hole was then threaded with cream embroidery thread.


The sentiment was also matted onto cream and dark brown cardstock and large cream brads from Papermania were added either side of the sentiment, with a length of cream embroidery thread threaded through the legs of the brads.


A strip of the red/brown paper from the DCWV Old World mat stack was embossed using the Moroccan Screen embossing folder from Cuttlebug and Frayed Burlap ink was added to highlight the embossing using Cut 'n' Dry foam.

This was then matted onto cream and dark brown card and then matted across a panel of the dark brown flourish paper from the same paper pad.

Once matted onto the dark brown cardstock, the panel was then paper pierced all the way around using the Stampin' Up Mat Stack piercing template.


The tags were adhered onto the card in the centre over the embossed strip and the sentiment was added beneath, wrapping the lengths of embroidery thread behind the panel before adhering to the card front.

The inside of the card was also decorated, using another strip of the embossed cardstock. The sentiment was stamped using the Rich Cocoa ink and stamps from the See D's Lower Case Script stamp set ('4', '0' and 'th') and the HOTP Sentiments stamp set (Happy and Birthday).


Here are the blog challenges I am entering this card into:

Saturday, 18 September 2010

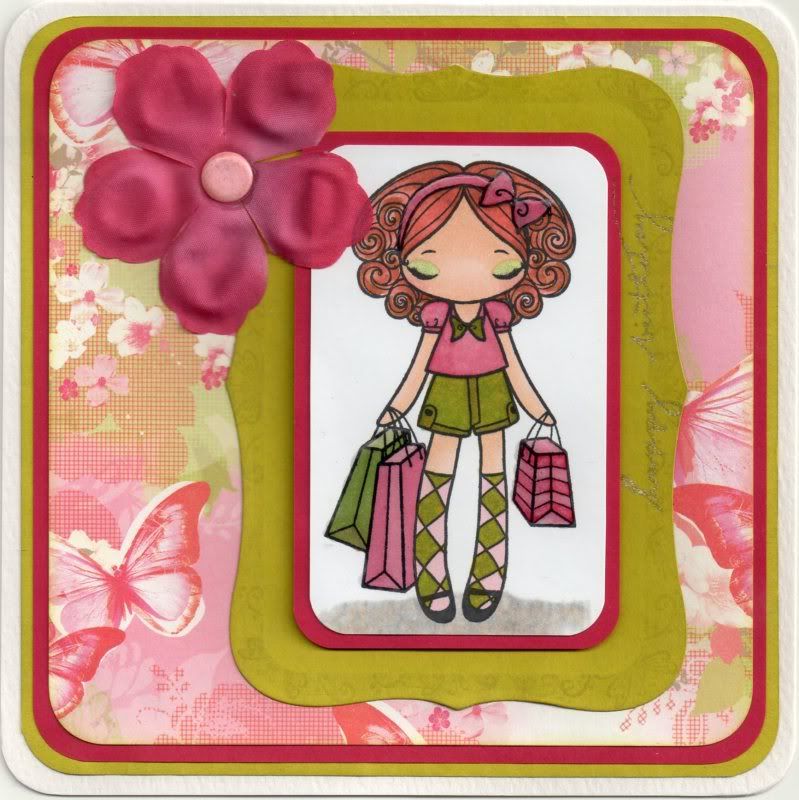
Hot Pink and Lime Shopping Miss Anya

Here is a birthday card I made for a young lady who is about to embark on her university studies in Dublin.


The Shopping Miss Anya image, from The Greeting Farm, was stamped using Memento Tuxedo Black dye ink and coloured using Copic Sketch markers:
  • Hair: YR02, E35, E39
  • Skin: E00, E21, E51, R20, YG11, Y00
  • Bow: R29, RV21, RV34
  • Top: RV21, RV34, R29, G14, E43, Y08
  • Shorts: G14, E43, YG11, Y08
  • Socks: RV21, G14, E43, YG11, Y08
  • Bags: 1) RV21, RV34, C0; 2) G14, E43; 3) RV21, RV34
  • Shadow: N1, N3, E11, 0
 and matted onto pink paper.

The hair on the image was coloured following the excellent tutorial on the Colour Me Copic blog showing how to colour curly hair using Copic markers, so many thanks to them for that.

A panel was die cut using the Labels 8 Nestabilities die and the centre masked. Small images from the See D's Vintage, Romantic and Whimsical Garden Morsels stamp sets (which really haven't been used as much as I thought they would be when I bought them) were stamped around the edge using ColorBox Olive Pastel Fluid Chalk ink.

This was then overstamped with the 'Happy Birthday' stamp from the Woodware Jane's Script Sentiments stamp set using Versafine Spanish Moss archival pigment ink and traced over the top with a clear Sakura Stardust pen.

A panel of the pink butterfly paper from the Papermania Summer Bloom paper pad was matted onto the pink and green paper with the image added off-centre.

Anita's 3D Gloss was then added over the hair bow and the shopping bags, and a wash of clear Sakura gel pen was added to the eyes.

A pink silk flower from Papermania was added in the top left corner with a clear embossed pink card candy, from Craftwork Cards, added in the centre.

To heat emboss the card candy, I found the easiest way to do it is to add a small piece of double sided tape to the end of a pencil (preferably not painted) and press the card candy onto it. Tap the card candy into the inkpad you wish to use until the candy is covered in the ink than dip the candy into the embossing powder.

Tap off the excess embossing powder and heat, turning the pencil as the embossing powder starts to melt. Once the embossing powder has all melted, leave to cool for a few seconds then remove from the pencil - the heat will have softened the tape a little, making it easy to peel away. You can then re-use the tape if you need to do multiple card candy.

There are a few challenges that I'd like to enter this card into:

Sunday, 1 August 2010

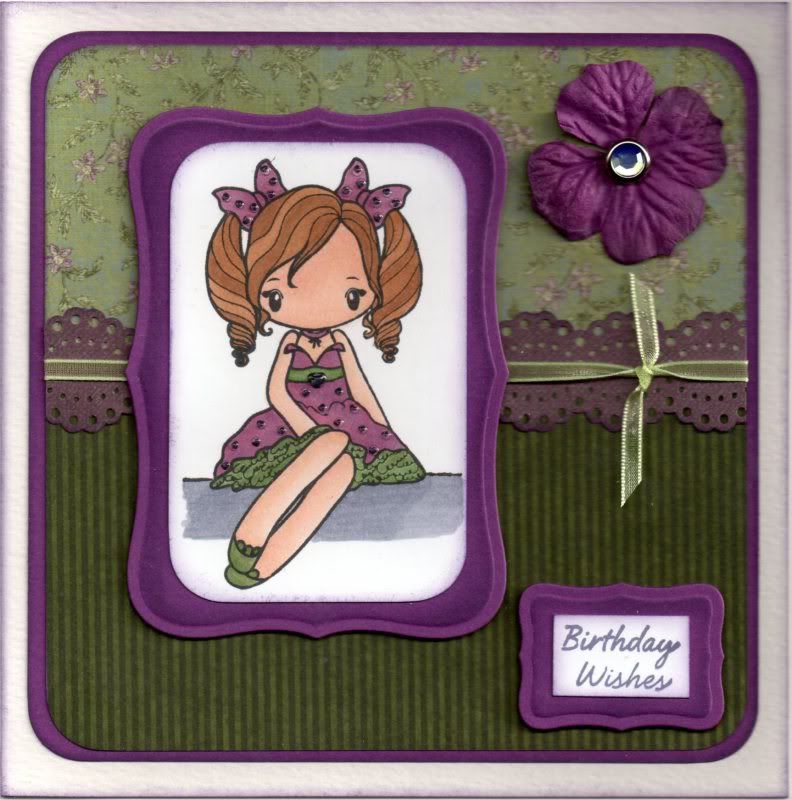
Green and Purple Sitting Love Miss Anya

Here is the card I made for my mum earlier last month. I really love this set of Miss Anya stamps, and this particular one is lovely to colour.

I am also entering this card into a couple of blog challenges:

The Sitting Love Miss Anya image from The Greeting Farm was stamped using Memento Tuxedo Black dye ink and coloured using Copic sketch markers:
  • Hair: E21, E35, E57
  • Skin: E00, E02, E21
  • Bows: RV21, RV34, V12, V15
  • Dress: G85, YG67, RV21, RV34, V12, V15
  • Shoes: G85, YG67
  • Shadow: BV00, BV23
The image was cut into a rectangle and the corners were rounded using the large XCut corner rounder punch. A purple mat was cut for the image panel using the Labels 8 die from Nestabilities, and, keeping the die in place, the panel was coloured using the Tim Holtz Dusty Concord distress ink.

The green patterned papers from the HOTP Earth's Palette Creative Cardmaker's Pack were pieced together to make a rectangular panel. A strip of the purple paper from the same paper pack was punched along both edges with the Martha Stewart Doily Lace punch.  A length of narrow green organza ribbon was knotted and attached across the punched purple strip which was then attached across the join of the two green papers.

This was then matted onto a panel of the purple card.

The rectangular sentiment panel was stamped using the 'Birthday Wishes' stamp from the See D's Celebration Messages stamp set and the Versafine Imperial Purple archival pigment ink. The smallest Labels 8 shape was die cut from purple card, coloured with the Dusty Concord ink and the sentiment panel matted in the centre.

A purple Prima flower was added to the panel using a pale green Papermania gem brad before it was added to the card blank.

Anita's 3D Gloss was then added over the hearts on the dress and hair bows of the Miss Anya image.

Saturday, 24 July 2010

Blue and Orange Puppies

Here are a couple of cards I made for a couple of my younger male cousins using a lovely stamp from Little Claire. This particular design I call the Woof Puppy because it comes with an extra stamp that says 'Woof'.

These are also my entries to the current Cupcake Craft blog challenge, which has a theme of Cats and Dogs this week. (Unfortunately, this week's challenge doesn't have a title so I can't add a direct link to the post).


The Woof puppy image was stamped using Versafine Onyx Black archival pigment ink and coloured using Copic markers.
  • Puppy: N1, N3, N5, R20
  • Ball: B00, BG02, Y17, YR02
The ball and the puppy's nose were then covered with the Anita's 3D Gloss to give them a realistic shine.

A panel was cut from white card using the Labels 1 Nestabilities die and embossed with the Swiss Dots Cuttlebug folder. The dots were then coloured with the Copic markers.
  • Dots: N3, N5
This was then matted onto an orange square and a blue big scalloped square both cut using Nestabilities dies.

A strip of the blue retro squares paper from the DCWV Retro Prints paper pad was matted onto the orange and blue card. This was then matted onto a larger panel of orange mini dots paper from the same paper pad.

The sentiment, from the See D's Celebration Messages stamp set, was stamped onto a rectangle of white card using the Onyx Black ink and matted onto the orange and blue card.

I also made a version with a brown puppy:


Again, the puppy and dots were coloured with the Copic Sketch markers:

  • Puppy: E02, E11, E13, R20

  • Ball: B00, BG02, Y17, YR02

  • Dots: E11, E13
This card was actually made for a colour combo challenge (hence the unusual colours used) but of course I missed the deadline so I decided to enter it into this challenge instead.

ETA: This card is now in the Little Claire's Gallery here and here. For some reason they've put the image into the wrong individual image gallery.

Saturday, 12 June 2010

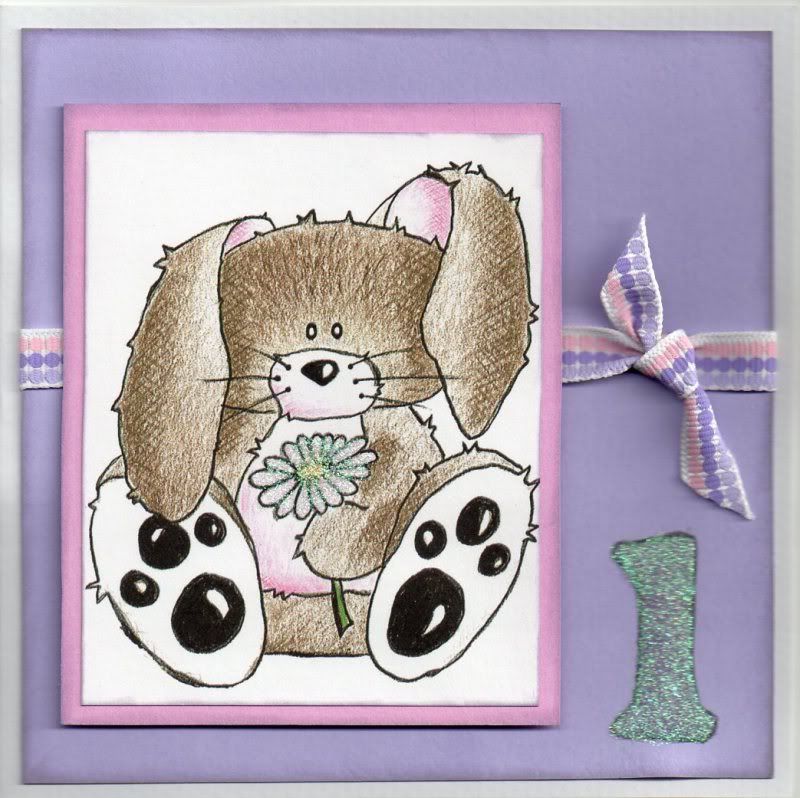
Pink and Lilac Candyfloss First Birthday

This is the card I made for my cousin's little baby girl for her first birthday.

It is also my entry to this week's following blog challenges:

I figured a one-year old still counts as a baby, so here's my card:


To begin with, the Candyfloss image was cut into a rectangular panel from the paper from the Daisy and Dandelion Picnic Patch paper pad and matted onto pink card.

A length of pink and lilac spotty ribbon from Hobbycraft was tied around a panel of lilac card and matted onto the card blank.

The '1' stamp from the Papermania Large Sheet Numbers foam stamp set was stamped onto the lilac card using ColorBox Wisteria Fluid Chalk ink, traced around with a purple colouring pencil and then coloured over the top with Craft Planet Iridescent Sparkle glitter glue.


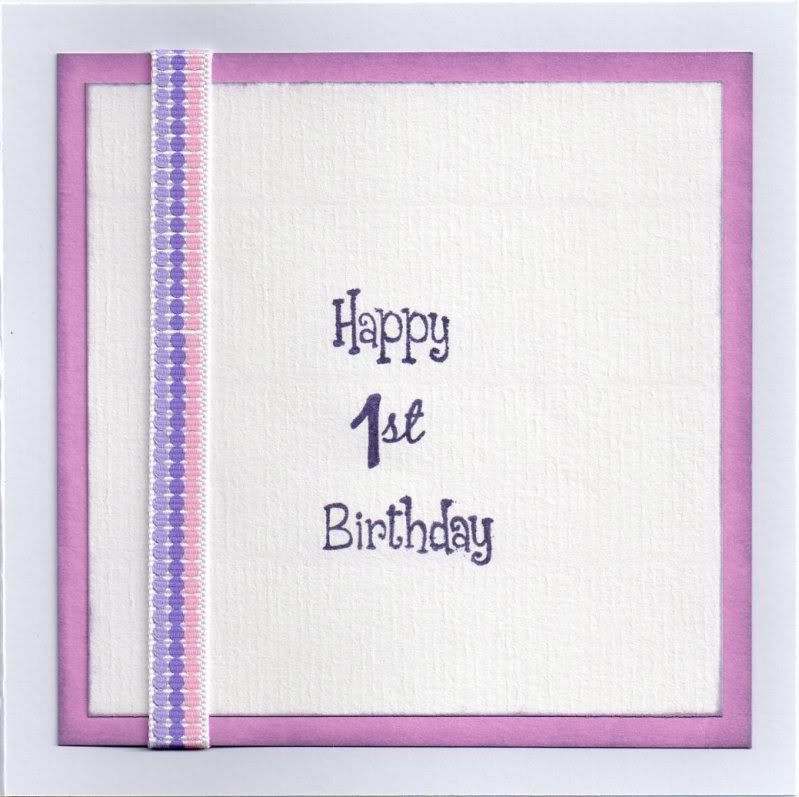
The inside of the card was simply decorated with a length of the spotty ribbon and a mixture of stamps from the Papermania Claire Curd Sentiments stamp set and the See D's Script Lower Case Letters and Numbers stamp set using the Wisteria ink

Saturday, 24 April 2010

Red and Blue Vintage Lady Easel

Thought it was about time I uploaded a card project, so here is the card I made for my mother-in-law's 70th birthday. She really didn't want to be reminded it was her 70th, so no numbers on this one! Just made it special, so this is an easel card.

I have entered this card into a number of blog challenges:
I started by decorating the panel that makes up the front of the easel card.

The edges of the card blank were stamped using a flourish stamp from the Autumn Leaves Rhona Farrer v1 Flourishes stamp set and Versafine Crimson Red archival pigment ink. The Vintage Lady image, from the Vintage Ladies stamp from Crafty Individuals, was stamped on cream card using the Crimson Red ink. The image was cut out using the Cuttlebug square stamp die, and matted onto a standard and scalloped square cut using Nestabilities dies.


A strip of blue Moroccan Tile paper from the K&Co The Best of K&Co Too paper pad was punched using the XCut scallop border punch and the edges coloured using Copic marker E07. This was then matted onto a panel of the floral paper, also from the K&Co paper pad. A length of cream lace was wrapped around the panel vertically. The image panel was attached over the lace.

A red silk flower (kindly donated by Alex) was attached in the bottom right hand corner of the panel using a pale blue Papermania pearl brad, and a smaller brad was attached to the blue border strip.
Using the See D's Alphabet stamp set, the word MUM was stamped along the border strip using the Crimson Red ink. The panel was then matted onto a panel of red card punched using the XCut scallop border punch. The letters, flowers and around the image were highlighted using Rock Candy Distress Stickles. This panel was then added to the front of the easel card.
I then started work on the inside of the card. I began by adding the flourish stamp around the edge of the card
I then started on the sentiment panel which acts as the anchor for the easel card.
Firstly, the striped frame from the Hero Arts Frames and Messages stamp set was stamped onto cream card using the Crimson Red ink and cut out using a standard square Nestabilities die. The 'Happy Birthday' sentiment, from the Hero Arts Birthday Messages stamp set, was stamped in the centre of the frame. This was then matted onto beige Core'dinations card and a scalloped square, both cut using Nestabilities dies.
A strip of the floral paper from the K&Co paper pad was punched using the XCut scallop border punch and the edges coloured using the E07 Copic marker. This was matted onto a panel of the blue Moroccan Tile paper. This was then matted onto a panel of red card punched using the XCut scallop border punch. Rock Crystal Distress Stickles were added to the sentiment panel.
Below you can see the front and side views of the card when standing.

Tuesday, 30 March 2010

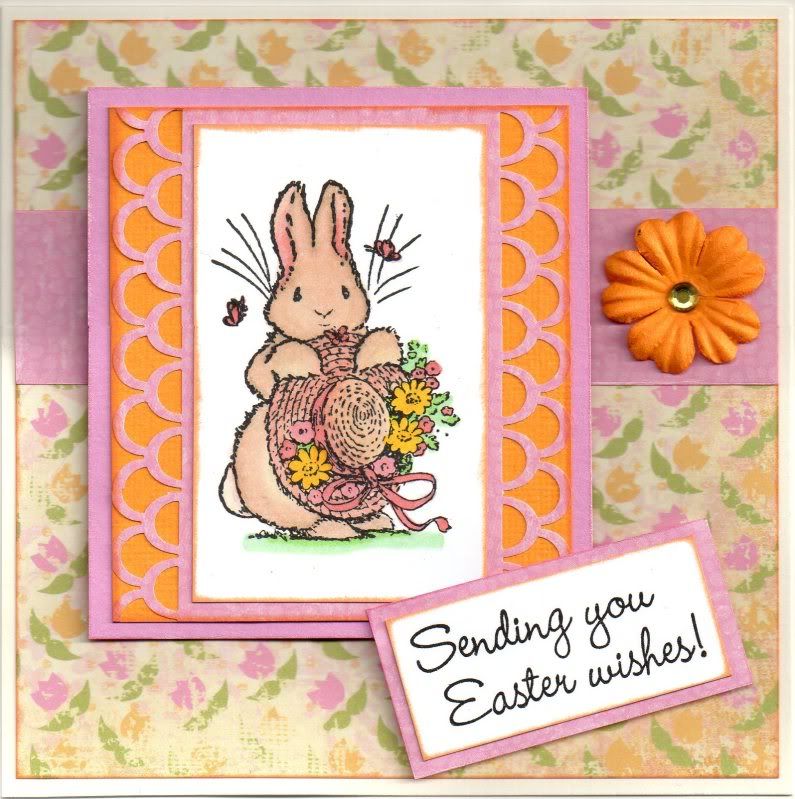
Pink and Yellow Easter Bonnet Bunny

This is the second design of my Easter cards for this year. I decided to use the same patterned papers as for the first but a different focal image.

I am also entering it into the following challenges:

The Easter Bonnet Bunny image, from the Penny Black Garden Friends stamp set, was stamped using Versafine Onyx Black archival pigment ink and coloured with the Copic Sketch markers.
  • Bunny: E00, E41, E43, R20, YR02
  • Hat: Y00, E00, YR02
  • Ribbon/Butterflies: R20, YR02
  • Flowers/Foliage: R20, YR02, Y08, YG41, G14
  • Grass: YG41, G14
A strip of the pink distressed bubble paper from the K&Co The Best of K&Co Too paper pad was punched using the Martha Stewart Double Loop border punch and was then layered onto yellow and pink card with the Bunny image on top.
A strip of the pink paper was matted across a panel of the distressed pink and yellow tulip paper, also from the K&Co paper pad and matted onto the card blank.
The sentiment, from the See D's Easter Kit stamp set, was stamped using the Onyx Black ink and matted onto the pink paper and positioned over the corner of the Bunny image.
A yellow paper flower from The Crafty Cow was adhered onto the pink border strip and a yellow faux gem was added in the centre.

Sunday, 28 March 2010

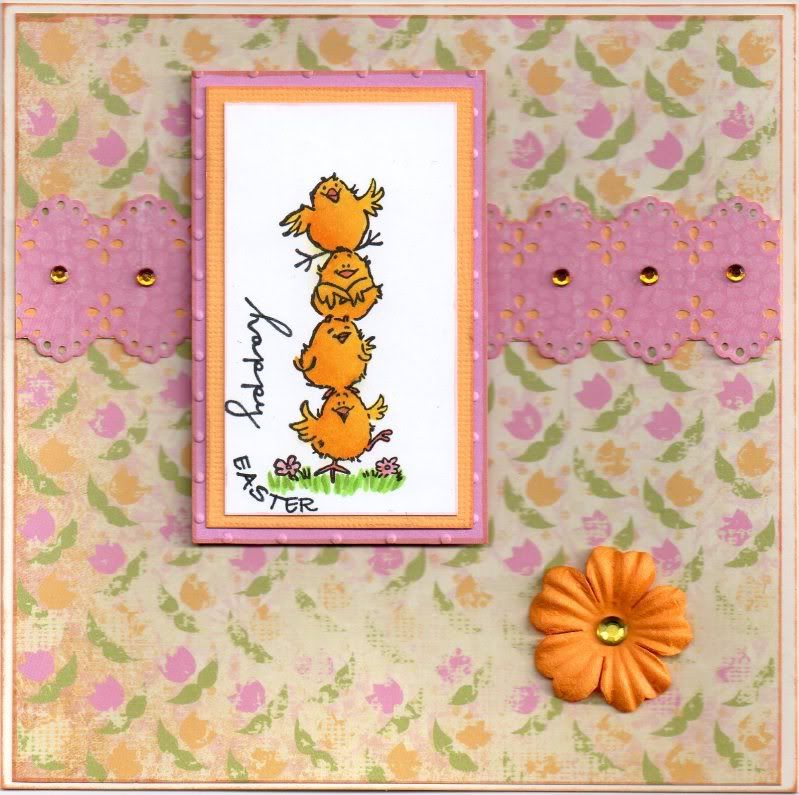
Pink and Yellow Easter Chicks

Here is the first of the two designs of my Easter cards this year. I have also entered it into a number of challenges.


The image, from the Penny Black Garden Friends stamp set, was stamped using Versafine Onyx Black archival pigment ink and coloured using the Copic Sketch markers.
  • Chicks: Y00, Y08, Y17
  • Beaks/Feet: YR02, E13
  • Flowers: R20, YR02
  • Grass: YG07, YG17
The sentiment was added using a combination of two stamps. The 'Happy' was taken from the 'Happy Birthday' stamp from the Woodware Jane's Script Sentiment stamp set and the 'Easter' from the Easter Egg stamp from the See D's Easter Kit.
The image was matted onto yellow Core'dinations card and pink card embossed using the Swiss Dots Cuttlebug folder.
A strip of the pink distressed bubble paper, from the K&Co The Best of K&Co Too paper pad, was punched along both edges with the Martha Stewart Eyelet Lace border punch. This was then layered onto a strip of the yellow Core'dinations card and the yellow tulip paper, also from the K&Co pad.
The image was added over the border strip and a yellow paper flower from The Crafty Cow was added in the bottom-right corner. Yellow faux gems were added along the border strip and in the centre of the flower.

Thursday, 26 November 2009

Pink and Burgundy Christmas Pudding Version Two

I liked this week's Mojo Monday sketch so much that I decided to make a second design.

The Christmas Pudding image from the See D's Fun Christmas stamp set was coloured the same way as the first card, but this time I decided to go with a top fold tent card. The card was covered using the brown Christmas Phrase paper from the Papermania Naughty and Nice Christmas paper pad. The scallops, cut using a Nestabilities circle die, were attached to the reverse of a strip of burgundy card and a length of pink satin ribbon adhered along the strip.


The Christmas Pudding image panel was attached at the bottom left hand corner of the card, as shown in the sketch below.

Pink and Burgundy Christmas Pudding

Well, I've finally made a start on my Christmas cards. I've actually made the grand total of 18 cards. Only about 65 to go!!!

I saw the sketch for this week's Mojo Monday blog challenge and thought it looked really stylish, so I decided to have a go.

I decided to use one of the cute little stamps from the See D's Fun Christmas stamp set, namely the Christmas Pudding image. The image was stamped using Versafine Vintage Sepia archival pigment ink, and watercoloured using the Whispers Brushstroke markers. The berries were then coloured with a red Sakura glaze pen, the icing with Anita's Metallic White 3D Dimensional paint and the pudding and leaves coloured with Winsor and Newton Iridescent Medium. The image was then matted onto pink and burgundy card.


A white A6 side-opening card was covered with brown star paper from the Papermania Naughty and Nice Christmas paper pad. Three burgundy circles and three pink circles, cut using a standard Nestabilities circle die were attached to a strip of burgundy card to create scallops. A length of pink satin ribbon was attached over the join, and a second length of ribbon tied to it. The image panel was then placed in the bottom right hand corner as shown in the sketch.

Thursday, 19 November 2009

Blue Smirk Bath Couple Anniversary

This is the anniversary card I made for some good friends, using the cute little Smirk stamp.


The Smirk Bath Couple image was stamped using Versafine Onyx Black and watercoloured using Whispers Brushstroke markers. This was then cut out using the standard circle Nestabilities die and matted onto a blue scalloped circle also cut out using a Nestabilities die and embossed using the Cuttlebug Swiss Dots embossing folder.
A panel of the blue spotty paper from the Hot Off The Press Ultimate Creative Pack was matted onto blue card and a strip of blue organza ribbon was attached across the top of the panel.
Two lengths of the blue ribbon were also attached to the reverse of the circle panels and attached at the top of the card.
The sentiment, from the See D's Blooming Friendships stamp set, was stamped using the Onyx Black ink and matted onto the blue card, also embossed with the Swiss Dots embossing folder.
The mini concentric circles stamp, also from the Blooming Friendships stamp set, was stamped in the top corners of the card and on the sentiment panel using the Tim Holtz Faded Jeans Distress ink. Faux gems were then adhered at the centre of the circles at the top of the card and along the ribbon. As a finishing touch, Anita's 3D Gloss was added over the bath image to give it a realistic enamelled finish.

Tuesday, 19 May 2009

Pink, Lemon and Mint Gorjuss Girl Sitting with Bird

Hopefully I've managed to get this uploaded in time!! I had finished this on Thursday but have only just managed to get it scanned into my computer!!

This is the first Sugar Bowl Challenge I've entered (mainly because I've only recently bought some Sugar Nellie stamps!), and at first I thought I'd chosen the wrong combination of papers to make it, but I actually really like it now!

The challenge this week (#10) is based on a sketch by the lovely Marlene.


I decided to use one of my new stamps, namely the Gorjuss Girl Sitting with Bird, and the Basic Grey Two Scoops paper pad. The added extra for this challenge was to use buttons, so I decided to make some from one of the papers in the paper pad to ensure that they colour matched.
The Gorjuss Girl image was stamped using Versafine Onyx Black archival pigment ink and watercoloured using the Tim Holtz Distress inks (Scattered Straw, Tattered Rose, Frayed Burlap and Milled Lavender). The bird was also watercoloured and cut out, nand the Gorjuss Girl image was cut into a rectangle.
Papers from the Basic Grey Two Scoops paper pad were colour tinted around the edges using the distress inks (Tattered Rose, Shabby Shutters and Scattered Straw) and the edges of the yellow/pink panel were also coloured using Whispers Green Green permanent dye ink. The green strips were then overstamped using the RicRac ribbon stamp from the HOTP Stitches stamp set.
A 6" square lemon yellow card blank was made from the Papermania Textured cardstock pack, and the edges were coloured using the Scattered Straw ink. The papers were then adhered to the card blank following the sketch as seen above.
Faux buttons were made from the yellow patterned paper by stamping the large button from the See D's Vintage Morsels Collection stamp set, and green embroidery thread was threaded through the holes that were made using a piercing tool.
Using the medium Flowers and Branch Sizzlit die, a branch and flowers were cut from the BG Two Scoops papers and colour tinted using the distress inks.
The 'Celebrate' word, from the Making Memories Express It! stamp set, was stamped using the Versafine Onyx Black ink and cut out into a tag shape. This was then matted onto the yellow patterned paper, and the bird image adhered to the tag.
Pictures of the inside and reverse to be added later.......

Wednesday, 6 May 2009

Pink and Green Cherry Tilda

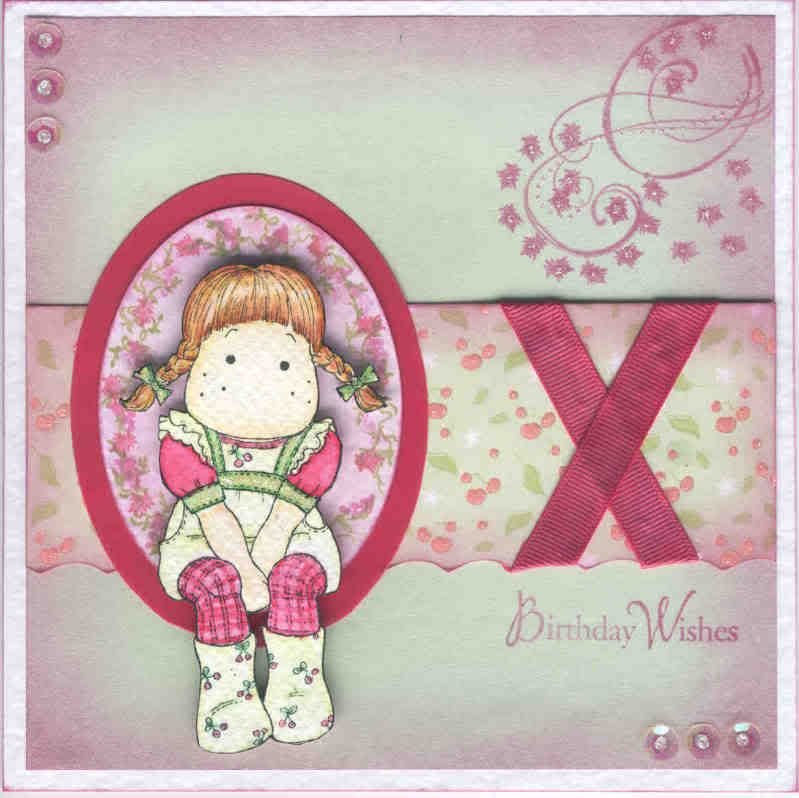
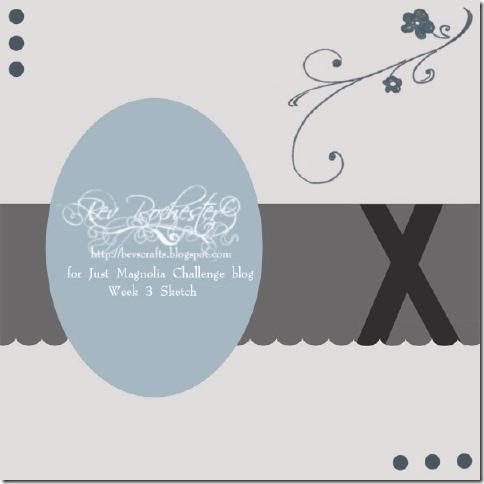
I have decided this week to enter the Just Magnolia blog challenge. The challenge this week, #3, is in the form of a sketch.


This is the first Just Magnolia challenge that I have participated in, much to my shame, but this is mostly down to the fact that it is about two and a half months since I used a Magnolia stamp, and five months since I used a Tilda stamp!! (I know, how terrible of me, I should be flogged!!)

So, here is the sketch that I followed to create the card shown above:


So, I decided to use the lovely Cherry Tilda stamp that the equally lovely Alex sent to me back in September last year. Please head over to her blog to see her beautiful creations. She really is a very talented lady.

The Cherry Tilda image was watercoloured using the Whispers Brushstroke markers and highlighted with Craft Planet Iridescent Sparkle glitter glue.

An oval of white hammer card was cut out using the Fiskars Shapecutter and colour-tinted with Whispers Port Wine permanent dye ink. This was then stamped around the edge to create a frame using flower and foliage morsel stamps from the See D's Tropical and Romance Collections stamp sets using Whispers Green Green, Port Wine and Grand Cranberry permanent dye inks. This was in turn matted onto an oval of Anita's dark pink vellum. The Tilda image was cut out and matted onto the ovals.

A piece of light green paper was stamped with a small flourish stamp from the Autumn Leaves Rhona Farrer Flourishes v.2 stamp set and a morsel flower stamp from the See D's Tropical Morsel Collection stamp set using the Port Wine ink, and embellished using the Iridescent glitter glue. The paper was then colour-tinted around the edges using the same ink.

A strip of the cherry paper from the DCWV Nana's Nursery Baby Girl stack was edged using the edge of the Fiskars circle template and the Fiskars Shapecutter, and similarly colour-tinted around the edges.

Strips of Dovecraft Pouty Pink grosgrain ribbon were colour-tinted with the Port Wine ink and adhered across the strip of cherry paper.

Iridescent sequins (from a bead kit from my sister) were added in the corners of the green panel, as indicated in the sketch, and highlighted with the glitter glue.

To finish the card, a sentiment was added by stamping 'Birthday Wishes' from the Hero Arts Birthday Messages stamp set below the patterned strip using the Port Wine ink.

The inside of the card was also decorated with strips of the colour-tinted green paper and the DCWV cherry paper. The flourish image was 'second-impression' stamped using the Port Wine ink, and the sentiment was stamped over the top using the same ink.


The 'Handmade By' medallion on the reverse of the card was made by stamping my new 'Handmade By' stamp from Oyster Stamps onto a circle of white card cut out using Nestabilities, which was later colour-tinted with the Port Wine ink, and matted onto a scalloped circle of the colour-tinted green paper.

Judging by the way it is stamped a bit off-centre, it looks like I might have to invest in a stamp positioner. If anyone can tell me the best-value one to get in the UK, I'd be very grateful (and please don't tell me to make one from Lego - I don't have any!!!)
Blog Widget by LinkWithin