Pages

WELCOME

This blog was created to act as a record of the cards and other projects that I have made. It is for both my own reference and to help inspire anyone who wants to take a look.

I'd love it if you'd leave me a comment so that I know what you think of my projects and that you've been to visit!

Anyone can comment, even those who don't have a blog. (Just look for the word 'Comments' under the three little pictures at the end of each post). Readers without a blog can add an anonymous comment, but please leave your name (and docrafts username if applicable) so I know who you are!

Slideshows of all the cards I've uploaded to my blog can be found at the bottom of the page.


PEOPLE WHO FOLLOW MY BLOG

Showing posts with label The Stampman. Show all posts

Monday, 21 March 2011

Coral, Red and Brown Visage Eyes

I really liked the effect of the first card I made using this stamp so I decided to have a go at a new one, this time using more muted colours.

The Visage Eyes image, from The Stamp Man/Craft Stamper magazine was stamped using Versafine Vintage Sepia archival pigment ink and distressed with ColorBox Alabaster Fluid Chalk ink. This was matted onto red and brown paper.
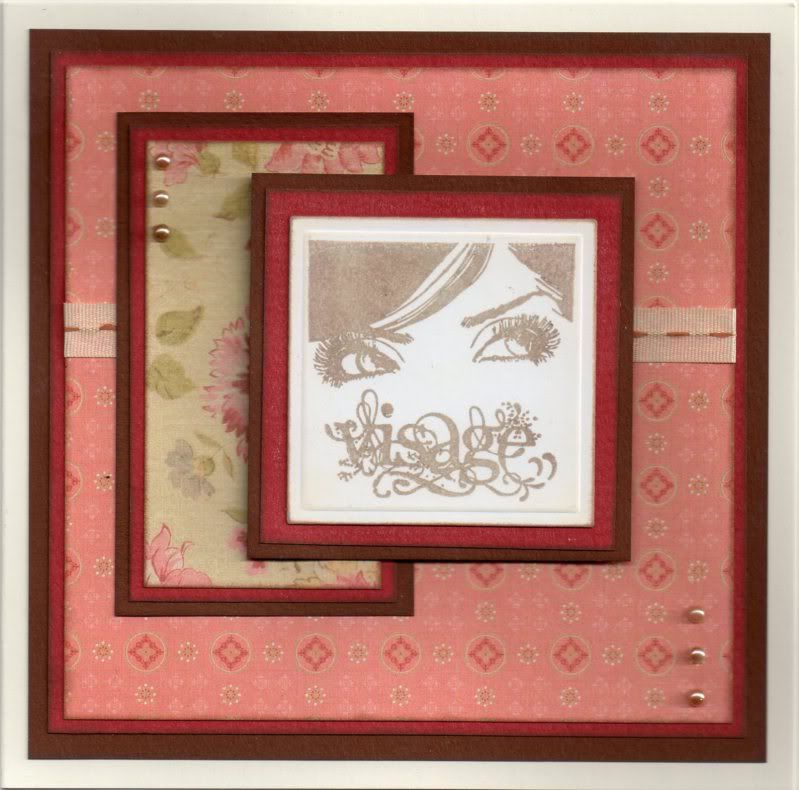

A length of the cream stitched satin ribbon, from the Chatterbox Chocolate ribbon pack was wrapped around a panel of the coral circles paper, from the K&Co McKenna paper pad and then matted onto the red and brown paper.

A small panel of the cream floral paper, from the same paper pad, was also matted up and layered up with the image panel.

Cream self-adhesive pearls, from the Hobby House Chocolate Heaven pack, were added in the bottom right corner of the coral paper and in the top left corner of the cream patterned paper.

Here are the blog challenges I am entering this card into:

Monday, 14 February 2011

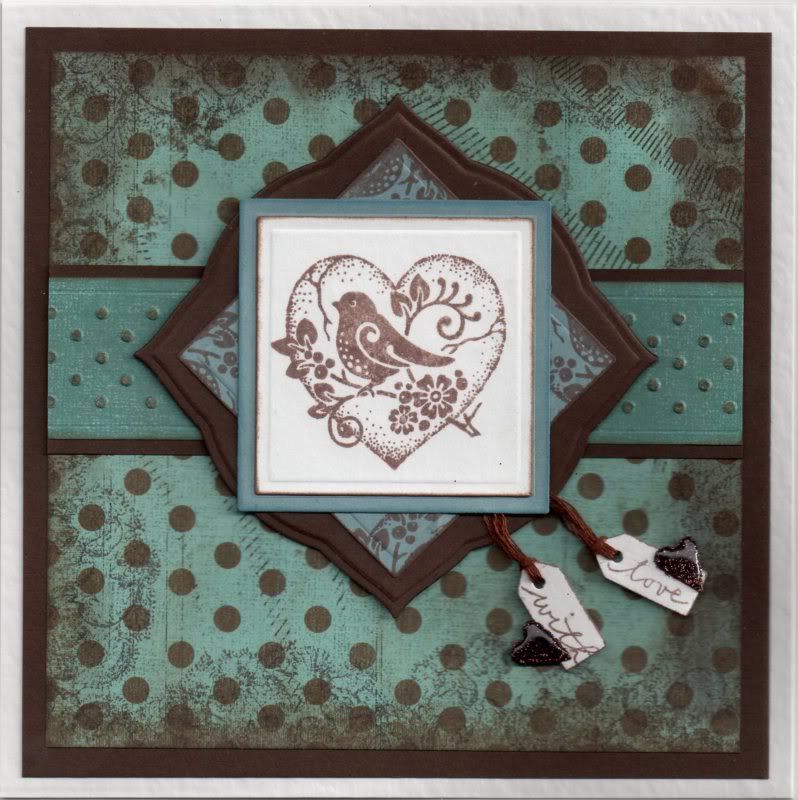
Duck Egg Blue and Brown Bird in Heart Valentine

Well, after a VERY late night, I finally got hubby's Valentine's card made. I decided to go with an unconventional colour scheme of duck-egg blue and brown.


The image, a freebie from Craft Stamper Magazine designed by Graphicus, was stamped using Memento Rich Cocoa dye ink and then die cut using a square Nestabilities die. This was then matted onto blue paper.

A second square of the blue paper was stamped using part of the bird stamp using the Rich Cocoa ink and matted in the centre of a Labels 1 die cut.

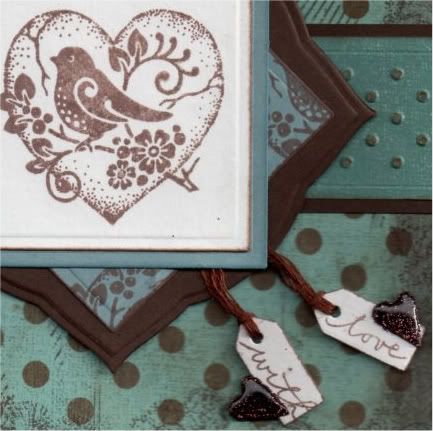
Two mini tags were die cut using the Sizzix Sizzlits Hearts, Stars and Tags die and stamped using the 'With Love' stamp from the Woodware Jane's Script Sentiments stamp set with the Rich Cocoa ink. Two small hearts were die cut from the brown card and covered with brown glitter from the Lakeland glitter kit and covered with Anita's 3D Gloss. These were attached using brown embroidery thread between the two blue square layers.


A strip of the duck egg blue mottled paper, from the HOTP Vintage paper pad, was embossed using the dots border embossing folder from the Just My Type set of border folders from Cuttlebug. This was then matted onto a strip of the brown card.

A panel of the duck egg blue and brown polka dot paper, from the same paper pad, was stamped around the edge using the floral and scroll background stamp from the Aspects of Design Memories of Italy stamp plate from The Stampman using the Rich Cocoa ink. This was also colour tinted around the edges using the Rich Cocoa ink and the ColorBox Chestnut Roan fluid chalk ink.

The embossed strip was then matted across the square panel and onto the brown card.


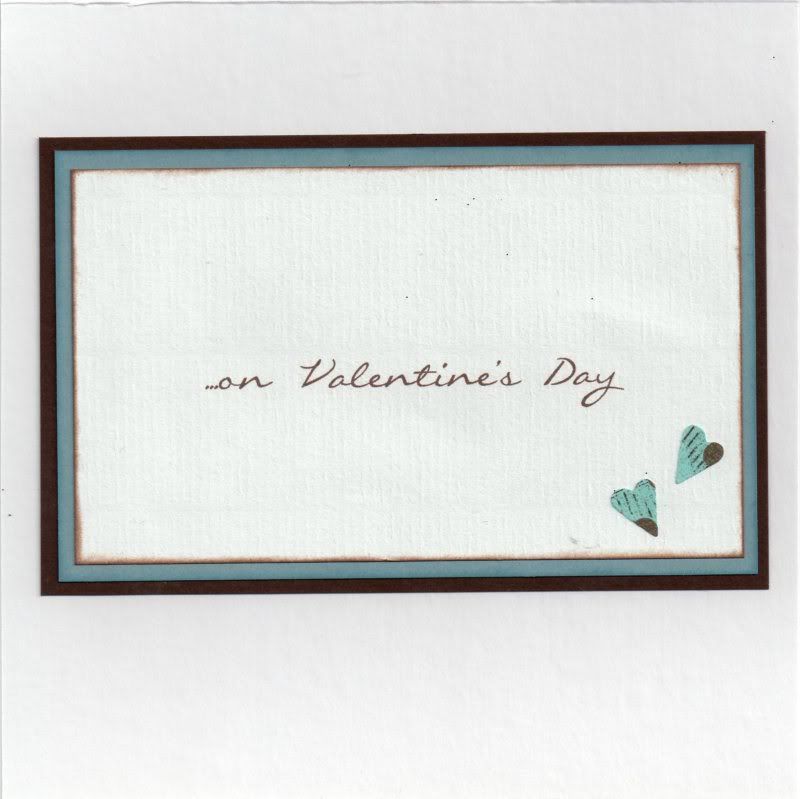
The inside of the card was also decorated using hearts punched from the polka dot paper. The sentiment was computer generated, using the Callie Hand font, which was the nearest one I could find to the Jane's Script font of the sentiment stamps.

Here are the challenges that I am entering this card into:

Thursday, 3 February 2011

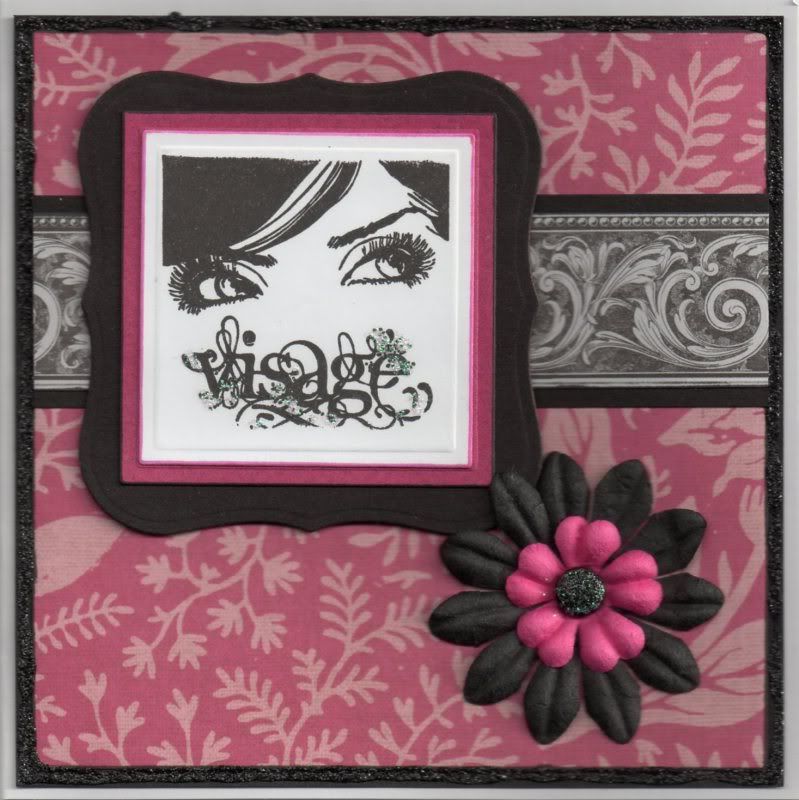
Pink and Black Visage Eyes

Well, here is my first card of 2011!

I needed to make a couple of cards in double-quick time and decided to use this beautiful stamp that came free with the September 2010 Craft Stamper magazine.


The image, from The Stampman, was stamped using Versafine Onyx Black archival pigment ink and die cut using a square Nestabilities die. This was matted onto cerise and black card panels, also die cut using Nestabilities.

A strip of the black Scroll Border paper from the Papermania Mono Capsule Collection pad was matted onto the black card and across a panel of the cerise Dahlia and Fern paper from the Papermania Red Hot Capsule Collection pad.

Pink and black paper flowers, from the Prima Botanicals Mix, were added to the panel using a large black Papermania brad.

The stamped image was highlighted with Craft Planet Iridescent Sparkle glitter glue, and Glitz It Black glitter glue was added to the centre of the brad and around the large black panel.

Here are the challenges that I am entering this card into:

Tuesday, 9 June 2009

Pink and Blue Butterflies Tri-Shutter Anniversary

Why is it when you need to make a card quickly you decide to try a new card design that ends up taking forever????
I saw this Tri-Shutter card over on the Splitcoaststampers gallery and thought it looked very effective. I shall definitely be making it again, but I have learnt my lesson and won't be making it when I need a card made in double-quick time!

I started by creating the card blank from cream linen cardstock. This consisted of folding a piece of card measuring 30cm x 15cm at the 5cm, 10cm, 20cm and 25cm points. Then the card was cut lengthwise between the 5cm and 25cm folds 4cm from the top and bottom of the card. I used a craft knife and metal edge ruler for this. The edges and cut edges were then coloured using the ColorBox Old Rose pigment ink pad.

The panels of the card (excluding the large central one) were then covered using two different blue/pink rose papers from the Papermania Blueberry Hill paper pad. Each was edged with the Old Rose pigment ink before attaching them to the panels.

Flourishes were cut from the cream card using the Sizzlit Flower and Flourish #2 die and edged with the Old Rose ink and attached to the larger central panels top and bottom.

A bow was tied (using a bow-maker!) in a narrow cream satin ribbon and attached across the central panel and then attached to the card base. The 'Happy Anniversary' sentiment, by Stamps Away available at Clevercut, was stamped onto a panel of the cream card and matted onto a piece of the rose paper over the cream ribbon.

Using the Butterfly stamp from the Stampman Aspects of Design Botannical stamp set, two butterflies were stamped and clear embossed, one using the ColorBox Old Rose pigment ink and the other ColorBox Aqua pigment ink. ColorBox Pink pigment ink was sponged over the pink butterfly image after it was embossed to make it more pink as the Old Rose pink colour didn't show up much pn the cream linen card.

They were cut out and wire antennae added. The pink butterfly was attached on the right-hand panel and the blue butterfly was attached onto layered circles using the standard and scalloped Nesties using cream card and one of the rose papers.
This is the view of the card when laid out flat and the picture below shows the card when closed up ready to post. It will fit into a C6 envelope (but will need a 'Large' stamp if you embellish it - it might need it even if you don't!!!)

This is what the reverse of the card looked like after I had added the 'Handmade By' medallion and the greeting panel.


And here are some close ups of the greeting panel and 'Handmade By' medallion, both matted onto the rose papers from the Blueberry Hill paper pad to match the rest of the card.

Monday, 6 April 2009

Pink Butterfly Wings - Basic Grey Challenge #29

Here is my entry for this week's Basic Grey blog challenge. The theme for this week's challenge is Spring/Easter.

I actually made this card to last week's sketch but I finished it too late to enter it. I turned the sketch 90 degrees and adapted it to a DL card.


I started by stamping the butterfly image from the Stampman Botanical Aspects of Design stamp set onto smooth white card using ColorBox Magenta pigment ink and embosssed it using Heat It Up! Cranberry embossing powder. The edges of the card panel were coloured with the magenta ink and clear embossed.

The panel was then coloured with Tim Holtz Tattered Rose Distress ink. A diamond panel was cut from Papermania dusky red textured card, and also edged and clear embossed. Baby pink pearls were adhered to the corners of the panels.

Panels were cut from Basic Grey Euphoria papers and edged with ColorBox Warm Violet fluid chalk ink. A scalloped edge was cut along one panel using the edge of the Fiskars oval template.

The sentiment was stamped onto matching paper using the Papermania Standard Font stamp set and the warm violet chalk ink.

Tuesday, 25 November 2008

Kerry Jo Balloon Girl Wallet Card

I just wanted to show you all the wallet card that I made for Annette (Sandra) over on the docrafts cardmaking forum for the die cut swap that was organized on there. I know that she has received it now so it's safe to upload the images to my blog.


The Kerry Jo Balloon Girl (available from the Debbi Moore website) was watercoloured using the Whispers Brushstroke markers, and mounted onto green card.

The patterned papers are from the DCWV Floral Prints paper stack. These were matted onto lilac paper.

The sentiment tag is taken from the Stamps Away Everyday Tag-Its set (available from Clevercut) and was stamped with ColorBox Wisteria Fluid Chalk ink.

Narrow lilac satin ribbon and lime green organza ribbon were threaded through the tag.

Lilac Papermania paper flowers (from an old Goody Bag) were coloured using Whispers Brushstroke markers. This was done by adding different colours of markers to different parts of the flower (pastel blue/green in the centre, with a few dots of purple, and purple on the petal tips) and then flooded with water to make the colours run, making the colouring of the flowers more realistic than the single shade they come in.

Once they were dry, they were shaped using an embossing tool and the mini purple See D's stamping mat.

Clear faux gems were attached to the centres of the flowers.

Craft Planet Iridescent Sparkle glitter glue was added to the flowers in the image.

The pocket section on the inside was created by punching three holes down each side and lacing lilac satin ribbon through the holes and tying in a knot at the back.

The reverse of the card was finished by stamping one of the bookplate stamps from the Stamps Away Bookplates, Anchors and Corners stamp set (available from Clevercut) using ColorBox Wisteria Fluid Chalk ink and my 'Handmade by' stamp from the Aspects of Design Botanical stamp sheet (available from The Stampman).
Tuesday, 9 September 2008

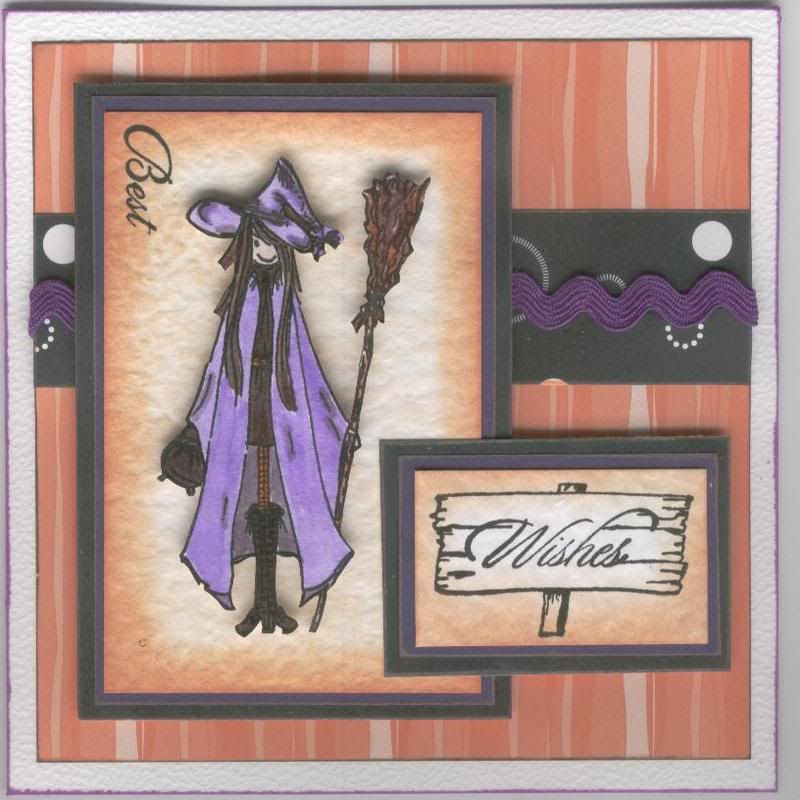
The Witching Hour

Here is my entry for the Stamp Something blog challenge, whose theme for this week is 'Stamp Something For The Fall'. I figured Hallowe'en is in the autumn/fall so this would fit the bill.

The stamp is from the Kerry Jo collection available from Debbi Moore in a set of twelve stamps.

The witch girl image was stamped and watercoloured using Whispers Brushstroke markers, cut out and matted onto a piece of white hammer card coloured with Whispers Butterscotch ink.

The wooden sign from Clevercut was stamped onto coloured white hammer card and the sentiment 'Wishes' from the HOTP Sentiments set was stamped within it. The 'Best', from The Stampman Botannical set was added to the witch panel.

Both images were matted onto purple and black paper.

A strip of patterned paper from the Dovecraft Charcoal Designer paper pack was added across a square of orange stripe paper from the Papermania Citrus Colossal paper pack, and a length of Papermania purple ricrac ribbon was added across the panel, and all matted onto a white square Craft Tonic card.

You have until midnight 11th September BST to upload your entries, and the winner will be announced sometime after that.
Blog Widget by LinkWithin