Pages

WELCOME

This blog was created to act as a record of the cards and other projects that I have made. It is for both my own reference and to help inspire anyone who wants to take a look.

I'd love it if you'd leave me a comment so that I know what you think of my projects and that you've been to visit!

Anyone can comment, even those who don't have a blog. (Just look for the word 'Comments' under the three little pictures at the end of each post). Readers without a blog can add an anonymous comment, but please leave your name (and docrafts username if applicable) so I know who you are!

Slideshows of all the cards I've uploaded to my blog can be found at the bottom of the page.


PEOPLE WHO FOLLOW MY BLOG

Showing posts with label beads. Show all posts

Sunday, 24 October 2010

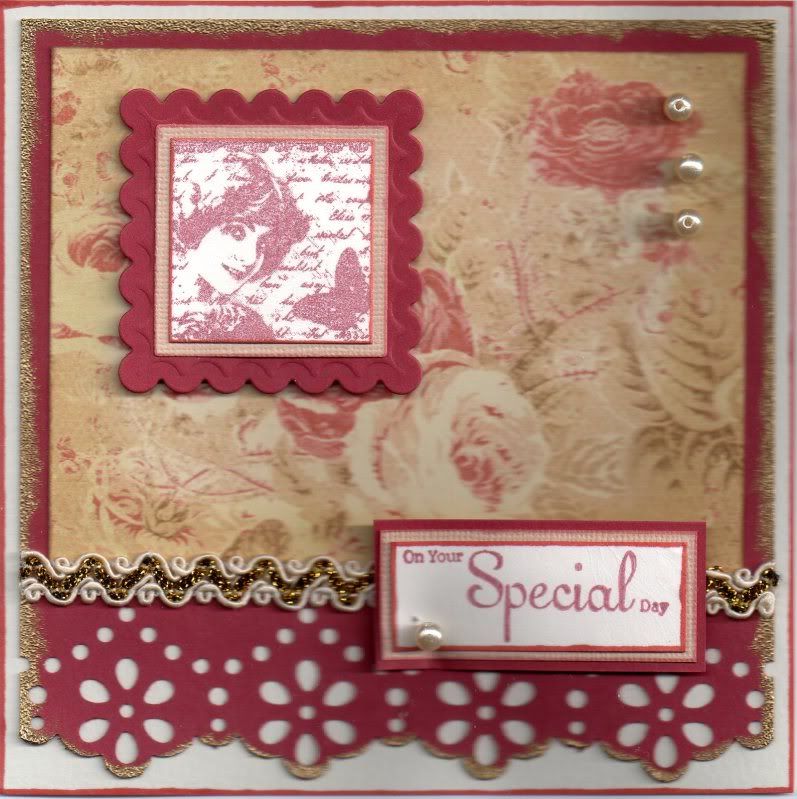
Red and Cream Vintage Lady

Not the greatest of pictures for this one I'm afraid - it's a bit too unevenly 3D'd for the scanner!!!


The Vintage Lady image, from the Vintage Postage Ladies stamp by Crafty Individuals, was stamped onto cream card using Versafine Crimson Red archival pigment ink was cut out using the Cuttlebug Square stamp die. This was then matted onto a beige square cut from Core'dinations card and a scalloped red square, both cut using the Nestabilities dies.

A panel of the red card was cut and the bottom edge punched using the Martha Stewart Flower Bed deep edge punch. The edges of the panel were heat embossed using Ink It Up! gold pigment ink and Heat It Up! gold embossing powder.

A panel of the beige and red rose paper from the K&Co Classic K Bailey paper pad was matted onto the red panel and a length of the cream and gold self-adhesive Anita's ribbon was added along the bottom of the patterned paper. The stamped image was added in the top left corner and three cream pearl beads were attached to the top right corner.

The sentiment, from the Papermania Chatsworth Frames and Messages stamp set, was stamped onto the cream card using the Crimson Red ink and matted onto the beige and red cardstock. A pearl bead was stitched in the corner of the sentiment panel and adhered to the card over the ribbon.

Here are  the challenges that I'll be entering this card into:

Wednesday, 25 March 2009

Pink and Brown Garden Gossip Hedgie

Here's the card I made for the lovely Tara's birthday. Now I know that she has received it, I can put it on my blog!!


The brown/pink flourish border paper from the Papermania Simply Elegant paper pack was matted onto a piece of light brown paper. A length of Chatterbox pink picot-edged organza ribbon was matted onto the pink/cream spot paper from the same paper pad and was then matted onto the larger piece.
The Penny Black Garden Gossip image, from the Bubbly stamp set, was watercoloured using the Whispers Brushstroke markers and matted onto dark brown card, light brown paper and pink vellum punched with the Fiskars Lace border punch. This was matted over the ribbon strip.
Two co-ordinating paper flowers from The Crafty Cow were sewn together using cream embroidery thread and a pearl bead in the centre. These were attached to the other end of the ribbon strip.
The sentiment, from the See D's Garden Of Friendship stamp set, was stamped in Onyx Black Versafine ink and matted onto the dark brown card, light brown paper and pink vellum.

Thursday, 19 March 2009

Pink and Brown Floral Mother's Day Tagbook

Well, I finally got the second Mother's Day tagbook finished. I was starting to think I was going to have to swap them round as the first one I made was intended for my MIL and doesn't need to be posted as she will be with us on Sunday, whereas my mum's did have to be posted!! However, after yet another late night, I managed to get it finished in time for today's post!


Three tags were cut from dark brown cardstock, and a spine was scored down the left hand side. Three holes were punched through the three tags using the Big Bite. As preparattion for the tagbook, a piece of the pink 'Happy Mother's Day' text paper from the Papermania Flowery Colossal paper pad had computer-generated 'Happy Mother's Day' text printed on it in brown.


The first tag was covered with the multi-coloured floral paper from the Papermania Flowery Colossal paper pad.

A flower was cut from the yellow outline flower paper from the same pad and coloured using the Whispers Brushstroke markers, and highlighted with white gel pen. Pink faux gems were added to the flower, and then attached to a panel of the pink 'Happy Mother's Day' text paper, which in turn was matted onto the dark brown card.

A strip was cut from the printed section of the pink 'Happy Mother's Day' text paper and matted onto a strip of the brown card. This was then adhered along the edge of the tag.


I then made a start on the inside pages.


For page two, the tag was covered with the multi-coloured stripe paper from the Flowery Colossal paper pad. A strip was cut from the computer-generated text paper and matted onto the brown card.

A flower was cut from the yellow outline flower paper from the pad and coloured using the Whispers Brushstroke markers, and again highlighted with white gel pen. Pink faux gems were added to the centre of the flower.


For page three, the tag was covered with the brown floral paper and a strip of the multi-coloured stripe paper from the pad was matted onto a strip of the salmon pink card.

The letters were cut from the salmon pink and brown card using the Sizzix Sizzlets Bounce Alphabet die set.

A white/pink Prima paper flower was coloured on the edges using a salmon pink Whispers Brushstroke marker and a white bead was attached in the centre.


For page four, I chose a definition from the HOTP Definitions and Words Ephemera book.


This was matted onto a panel of the multi-coloured stripe paper. The tag was covered with the pink 'Happy Mother's Day' text paper, and the definition panel matted on top.

A flower was cut from the yellow outline flower paper and coloured using the Whispers Brushstroke markers and highlighted with white gel pen. Pink faux gems were added to the centre of the flower.


For page five, the tag was again covered with the brown floral paper, and a strip from the computer-generated text was matted onto the salmon pink card.

Another white/pink Prima paper flower was coloured with the salmon pink pen and pink faux gems were added to its centre and the lower corner of the tag.


For the back page, the tag was covered with the multi-coloured floral paper A smaller tag was made from the salmon pink card and brown satin ribbon was threaded through the holes. A computer-generated sentiment was adhered on the top.

The corners of the tags were rounded using the XCut Large corner rounder punch and then tied together using Anita's Copper Brown striped grosgrain ribbon and cream fibre.

Hopefully my mum will like the tagbook. I certainly enjoyed making it, despite the time pressures. I really wish I could be more organized when it comes to getting cards made in advance. Hopefully once I get my craft room back to normal (I have to pack it all up again on Friday for the in-laws' visit) I'll spend more time in there and get more cards made. I've got two to make before I pack up, and hopefully I'll get them done tomorrow!!

Monday, 16 March 2009

Blue Butterfly Mother's Day Tag Book

Here is the first of the two tag books I've decided to make for Mother's Day this year. I wanted to make something special this year as I didn't manage to make any Mother's Day cards last year due to the house move and all my stash still being boxed up.

I started by making the three tags from blue card. The tags were scored to create a spine to make opening the tag book easier. Each side of the tags was covered with patterned paper from the Papermania Flowery Colossal paper pad.

The front page was covered with the butterfly paper and was decorated using a butterfly cut from the remainder of the sheet and silver wire antennae were added. This was matted onto a piece of the blue/green spots paper from the same paper pad. The sentiment was cut from the 'Happy Mother's Day' text paper and matted onto the blue cardstock.


Page two was covered with the blue/green spots paper and a strip of the 'Happy Mother's Day' text paper. This was also decorated with a butterfly with wire antennae.


Page three was covered with the 'Happy Mother's Day' text paper (a section without the text) with a strip of the blue/green spots paper over the top. The 'MUM' letters were cut using the Ellison Curlie Girlie thin cuts alphabet set and embossed using the Ellison Spots embossing folder. The letters were coloured using the ColorBox Prussian Blue Fluid Chalk ink.


The tag was finished with a blue Prima flower embellished with a pearl bead.


Page four was covered with the blue/green abstract paper from the Papermania Flowery colossal paper pad, with a smaller panel of the blue/green spots paper over the top. A butterfly was cut from the butterfly paper and wire antennae were added. A definition from the HOTP Definitions and Words Ephemera was added and embellished with a light blue faux gem.


Page five was also covered with the blue/green abstract paper and a strip of the 'Happy Mother's Day' text paper was attached over the top. A blue Prima flower, embellished with a light blue faux gem was adhered to the bottom of the tag along with a row of larger light blue faux gems.


The back page was covered with the butterfly paper and a tag made from green card was added with pale blue organza ribbon threaded through the holes.


Holes were punched through all the tags along the spine section and were tied together with narrow light blue satin ribbon and blue/green fibre. The corners of each page were punched with a corner rounder and the edges of each of the tags inked with the ColorBox Prussian Blue Fluid Chalk ink.

I shall be entering this into Clare Curd's Card Challenge this week which is to create a card for Mother's Day. Follow the link for more details on how to enter.

Thursday, 18 September 2008

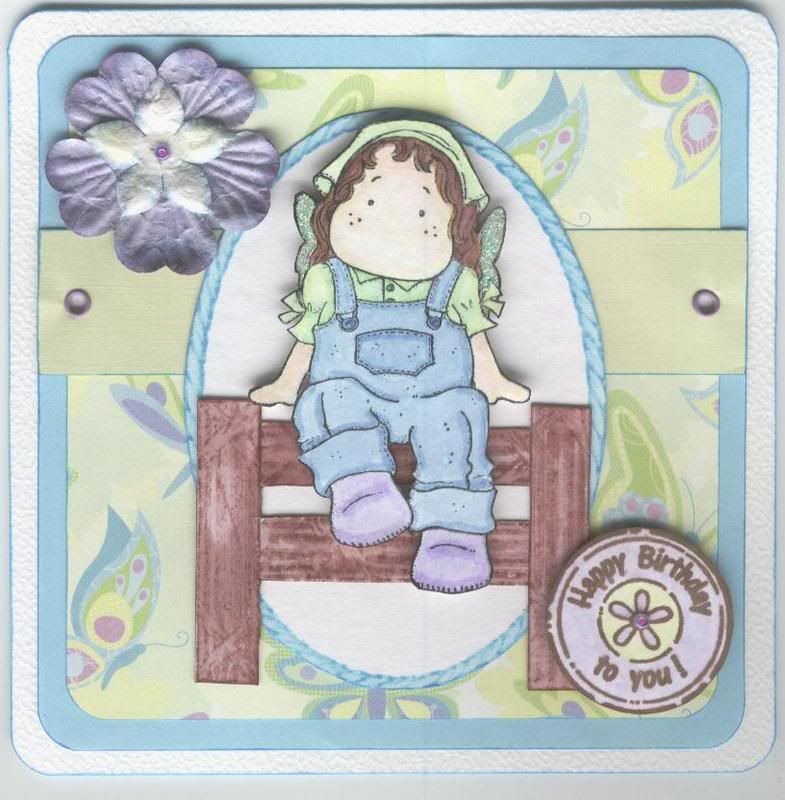
Butterfly Farmer Tilda


I made this card with a Tilda image kindly donated by Cleo/Sylvia P over on the docrafts cardmaking forum.

I watercoloured the `Farmer Tilda` image using Whispers Brushstrokes markers and highlighted with Craft Planet Green glitter glue, and cut out.

I created the wooden fence by stamping out the 'Wooden Beam' stamp from the Non Sequitur Memories of Italy stamp set.

Butterfly paper from the K&Co Sparkly Sweet paper pad was layered onto blue paper, and a strip of green paper layered across that, and lilac eyelets added. It was then added to a square card blank.

An oval frame was stamped by selectively inking one from the Whispers Multiple Oval Frames stamp, watercoloured and cut out.

The sentiment is from an Aud Designs set, stamped using ColorBox Chestnut Roan Fluid Chalk ink, and watercoloured, and a violet seed bead added to the centre of the daisy.

The flowers are Prima, layered up and a violet seed bead added in the centre.

Wednesday, 17 September 2008

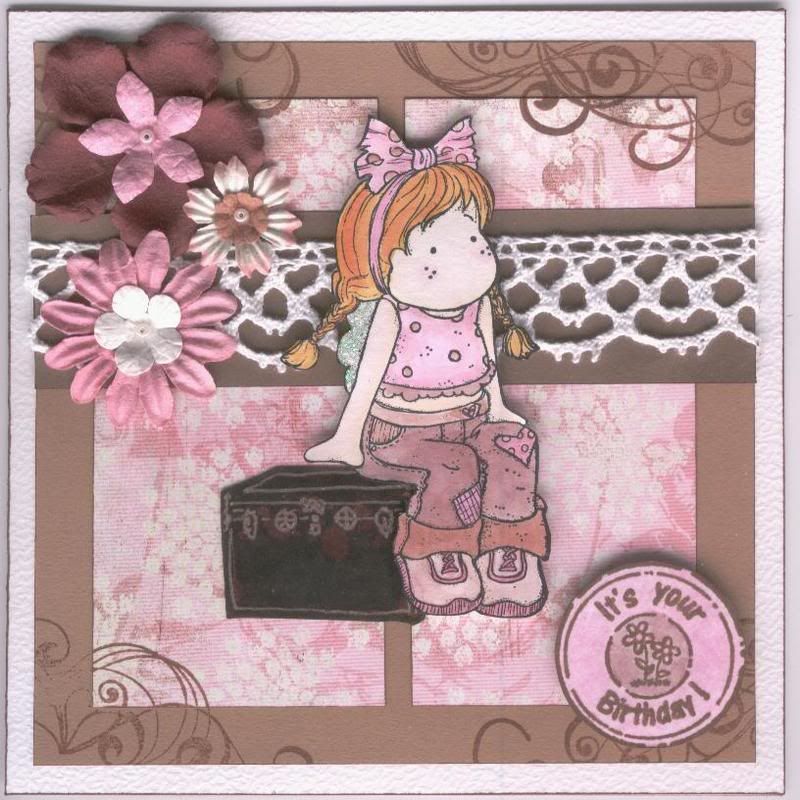
Chocolate Delight Tilda

Here is my entry for the latest Tilda and Co Challenge.

The theme for this week is 'Chocolate Delight' with a colour theme of chocolate brown, pink and white.

The Tilda is the 'Sitting Summer Tilda' that I received from Tara in an image swap.

As she is sitting, I had to find something for her to sit on and found this travelling trunk stamp amongst my stash in the Clear Choice! Travel set.

The patterned paper is from the Basic Grey Sugared paper pad, and the sentiment is from a set from Aud Designs. The flourishes were stamped over the corners using a stamp from the HOTP Flourishes stamp set and the dark brown ink from the Brilliance Tiramisu(3) ink.

The flowers are from both Prima and Papermania, and layered up with a white seed bead adhered in the centre.

It's not my usual style but I'm warming to these 'layered' styles of card, especially the more I see on the various blogs I hop around.
I have also used some of the woven trim that I bought a few months back but forgot about!
The card is also loosely based on last week's A Spoon Full Of Sugar Blog Challenge sketch by Nikki.

Wednesday, 25 June 2008

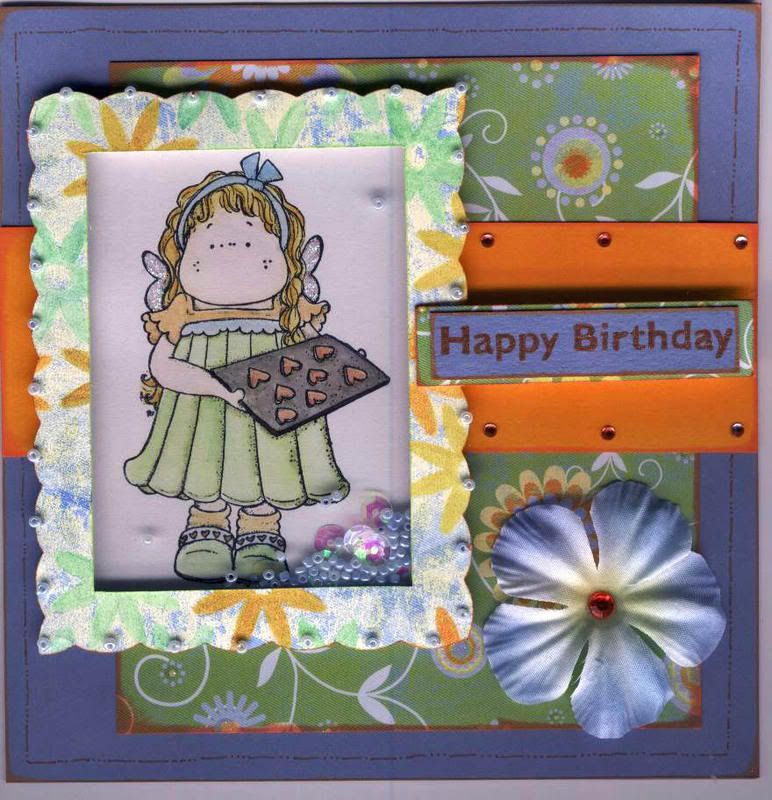
Very First Blog Entry

Well - I've finally done it. Hopefully I'll be able to maintain this blog without too many hair-pulling moments.

Thought I'd share a card with you that I made the other day.

This was made for the docrafts Mini Magnolia/Tilda Challenge. The premise was to make a shaker card. The only other stipulation was that any of the Magnolia range of stamps had to be used.

Blog Widget by LinkWithin