Pages

WELCOME

This blog was created to act as a record of the cards and other projects that I have made. It is for both my own reference and to help inspire anyone who wants to take a look.

I'd love it if you'd leave me a comment so that I know what you think of my projects and that you've been to visit!

Anyone can comment, even those who don't have a blog. (Just look for the word 'Comments' under the three little pictures at the end of each post). Readers without a blog can add an anonymous comment, but please leave your name (and docrafts username if applicable) so I know who you are!

Slideshows of all the cards I've uploaded to my blog can be found at the bottom of the page.


PEOPLE WHO FOLLOW MY BLOG

Showing posts with label CraftyIndividuals. Show all posts

Wednesday, 2 April 2014

Dark Blue and Brown Landmarks and Tickets 40th

So, my latest upload is a card I made for a friend who was turning 40. He has always called me 'aunty Kathleen' ever since I used to feed him curry when we were based in Germany. Even though he is actually older than me!!


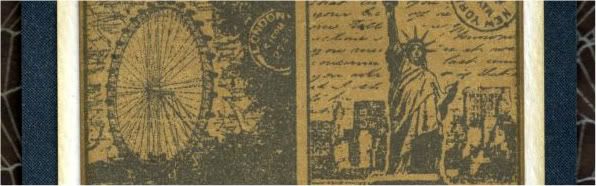
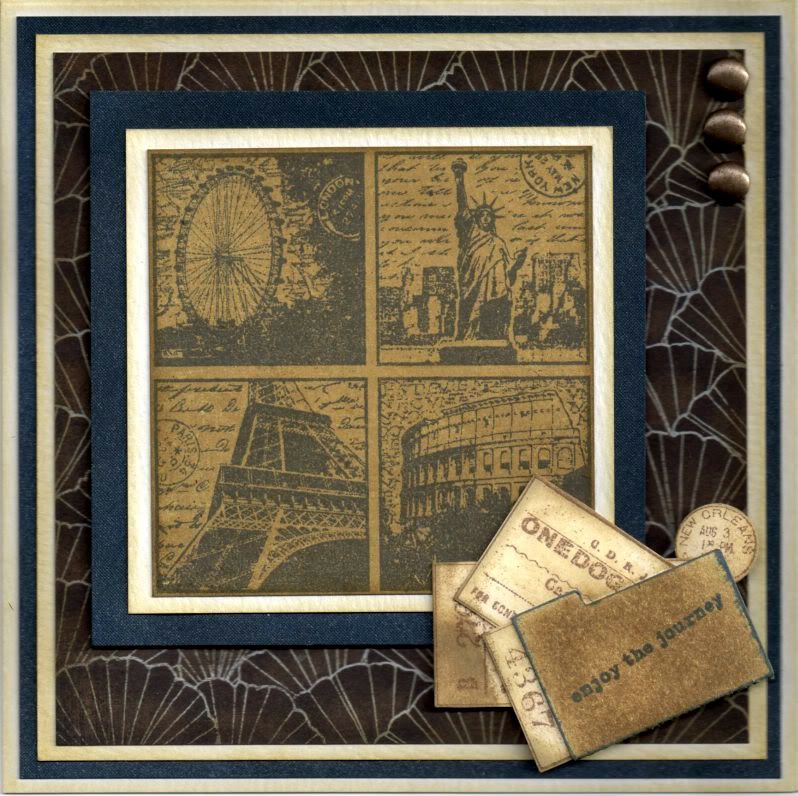
I pulled out the trusty Landmarks image, from Crafty Individuals, and stamped it onto the Honey paper from the Basic Grey Granola paper pad using Memento Paris Dusk dye ink and trimmed it up into a square. The image was then matted onto cream and navy shimmer cardstocks.

A panel of the Wild Oats paper from the same paper pad was also matted onto the cream and navy cardstocks.

A file folder was die cut from cream card using the Sizzix Sizzlits die and coloured using Tim Holtz Frayed Burlap distress ink and stamped with a sentiment from the Making Memories Express It! stamp set using the Paris Dusk ink.
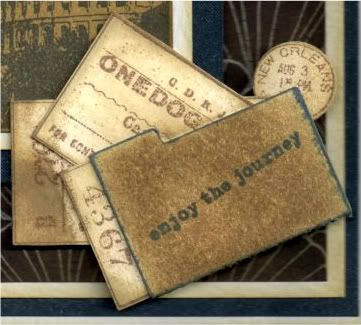


The Travel Tickets stamp, also from Crafty Individuals, was then stamped onto cream card using the Versafine Vintage Sepia archival pigment ink and the individual tickets were cut out. Tim Holtz Old Paper and Frayed Burlap distress inks were then added to distress them. The tickets were arranged inside the file folder and added at the bottom right corner of the image panel.

Three large old gold brads from Papermania were then added in the top right of the panel and the panel was then added to the card blank.

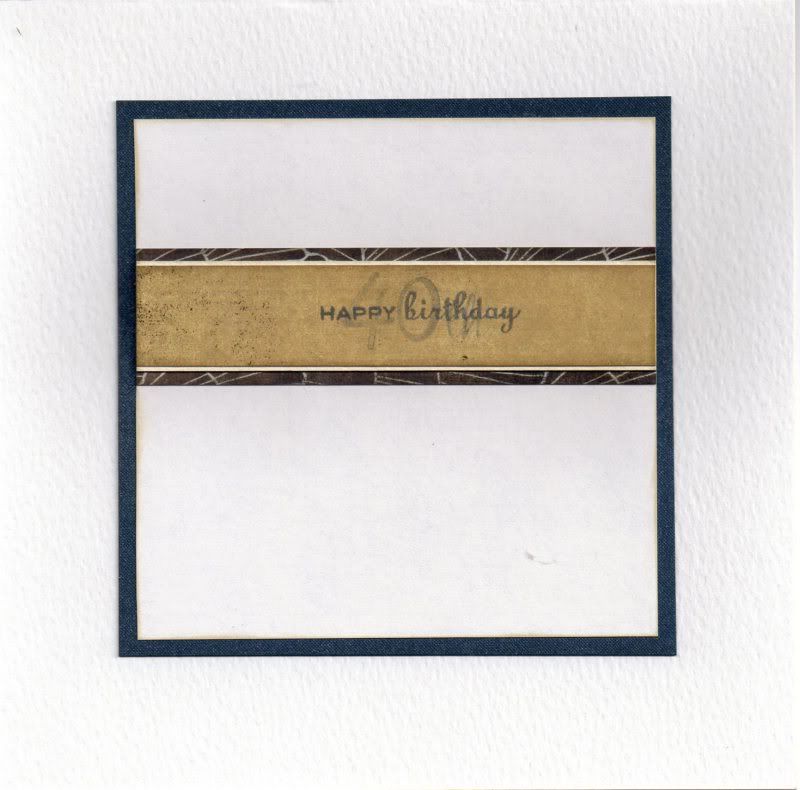
The inside of the card was also decorated using strips of the papers used on the front of the card. The sentiment was stamped across the Honey paper using the Paris Dusk ink, the Happy Birthday stamp from the Personal Impressions Paula Pascual Mix and Match Sentiments stamp set and the '4', '0' and 'th' stamps from the See D's Lower Case Script Alphabet stamp set. The '40th' text was stamped using the second generation of ink, giving it a more faded look.

Here are the blog challenges I am entering this card into:

Wednesday, 9 March 2011

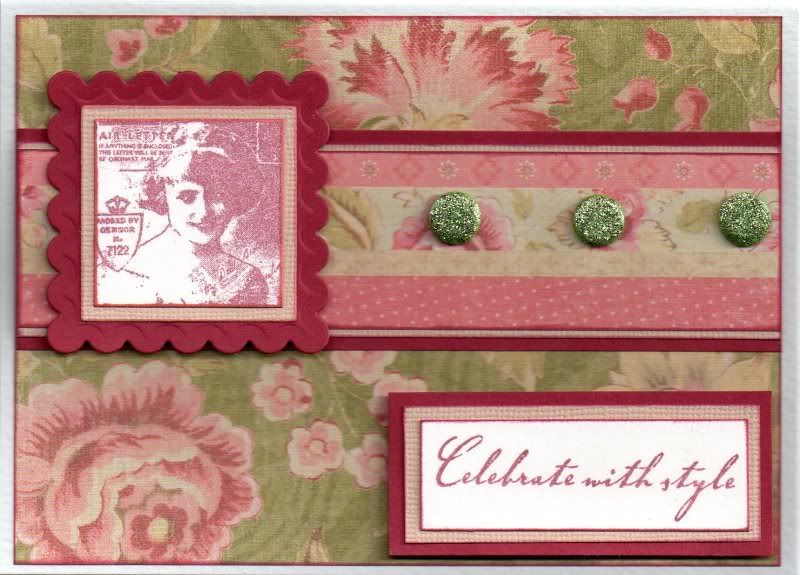
Red and Green Vintage Lady

Here's another of my older cards from last year that I didn't get around to uploading.

I am loving this colour combo and will have to get these papers out again!


The Vintage Lady image, from the Vintage Postage Ladies stamp set from Crafty Individuals, was stamped onto cream card using Versafine Crimson Red archival pigment ink and cut out using the Square Stamp die from Cuttlebug. This was then matted onto a square of beige Core'dinations card and a scalloped red square, both cut using Nestabilities.

A strip of the multi ribbon strips paper from K&Co Classic K McKenna paper pad was matted onto the beige and red card, and then onto a panel of the green large floral paper also from the McKenna paper pad.

The stamped image was attached over the ribbon strip paper and three olive green card candy from Craftwork Cards were attached along the ribbon paper panel. The card candy were covered with Glitz It Pear Green glitter glue to make them nice and sparkly.

The sentiment panel was created by stamping the sentiment from the Hero Arts Birthday Messages stamp set using the Crimson Red ink onto the cream card which was then matted onto the beige and red card.

Here are the blog challenges I am entering this card into:

Tuesday, 26 October 2010

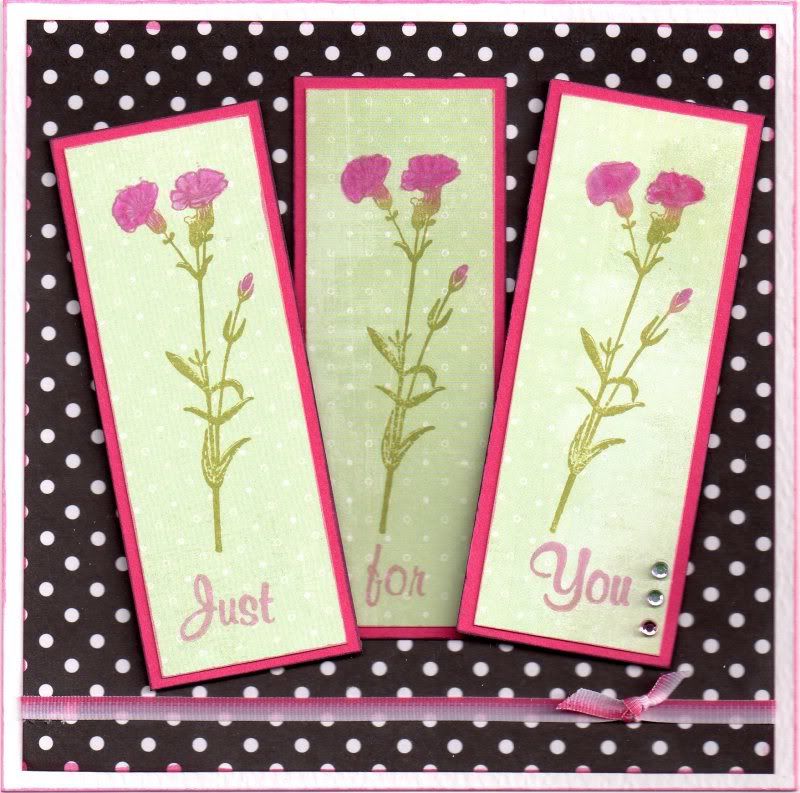
Pink, Black and White Wildflowers

This card was inspired by one that I saw in an issue of Creativity magazine. Just discovered it was Issue 19!
I decided to use one of the stamps from the Crafty Individuals Wildflowers stamp set.

The Wildflower stamp was inked up using the Versafine Spanish Moss archival pigment ink and Whispers Port Wine permanent dye ink and stamped onto the Greenhouse paper from the Basic Grey Wisteria paper pad. The flowers were then coloured using the Carmine Impress reinker.

The individual words from the 'Just For You' stamp from the Clear Choice! Birthday Parcels and Greetings stamp set were inked up with the Port Wine ink and stamped onto the separate panels.

A length of the Anita's pink two-tone self-adhesive ribbon was adhered to a panel of the black and white polka dot paper from the Papermania Clare Curd 'The Big One' paper pad, and a knot attached to the right.

The image panels were attached overlapping each other and at angles and clear faux gems were added to the third panel.

Here are the challenges that I will be entering this card into:

Sunday, 24 October 2010

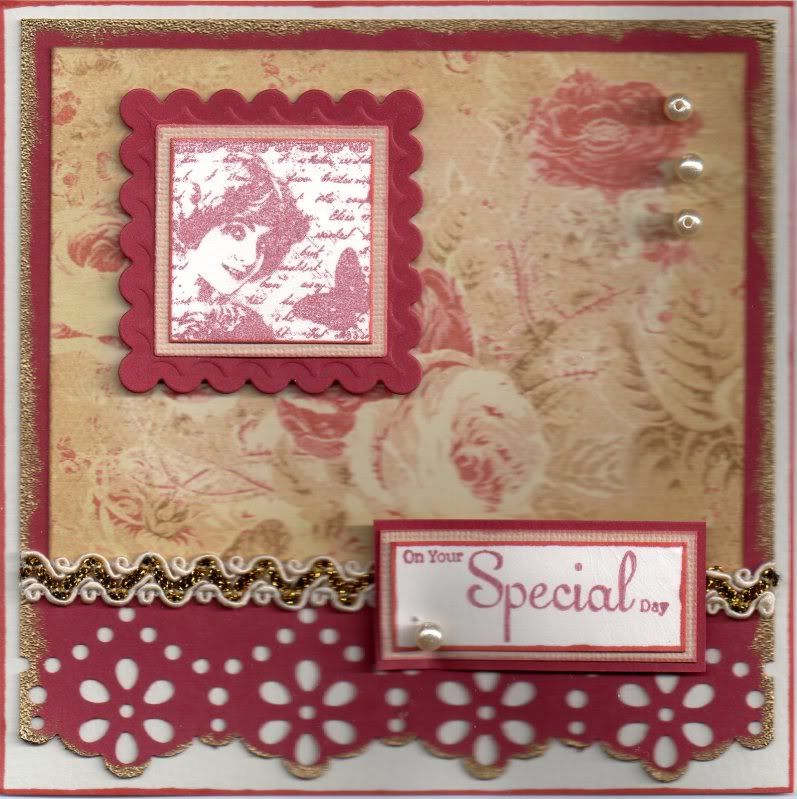
Red and Cream Vintage Lady

Not the greatest of pictures for this one I'm afraid - it's a bit too unevenly 3D'd for the scanner!!!


The Vintage Lady image, from the Vintage Postage Ladies stamp by Crafty Individuals, was stamped onto cream card using Versafine Crimson Red archival pigment ink was cut out using the Cuttlebug Square stamp die. This was then matted onto a beige square cut from Core'dinations card and a scalloped red square, both cut using the Nestabilities dies.

A panel of the red card was cut and the bottom edge punched using the Martha Stewart Flower Bed deep edge punch. The edges of the panel were heat embossed using Ink It Up! gold pigment ink and Heat It Up! gold embossing powder.

A panel of the beige and red rose paper from the K&Co Classic K Bailey paper pad was matted onto the red panel and a length of the cream and gold self-adhesive Anita's ribbon was added along the bottom of the patterned paper. The stamped image was added in the top left corner and three cream pearl beads were attached to the top right corner.

The sentiment, from the Papermania Chatsworth Frames and Messages stamp set, was stamped onto the cream card using the Crimson Red ink and matted onto the beige and red cardstock. A pearl bead was stitched in the corner of the sentiment panel and adhered to the card over the ribbon.

Here are  the challenges that I'll be entering this card into:

Tuesday, 7 September 2010

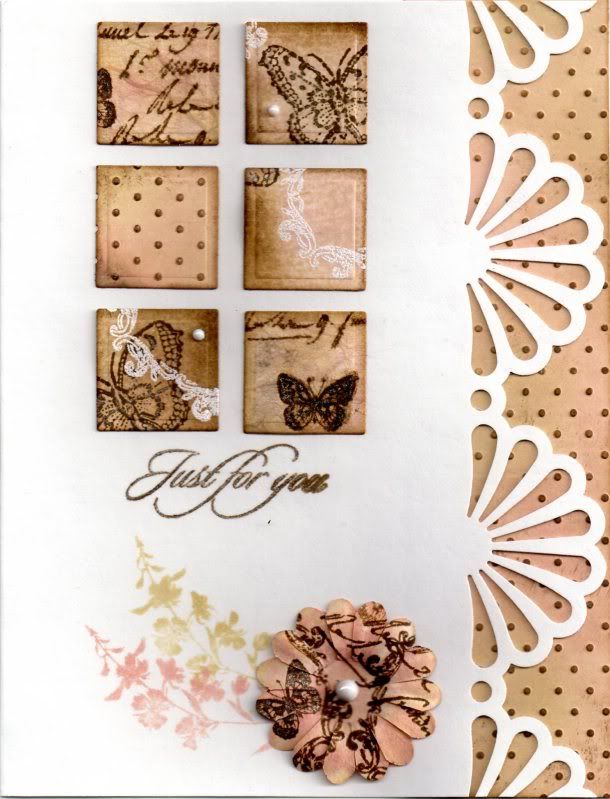
Pink and Brown Daisy Fan Tiles

This card was based on a project in the June 2010 issue of the Craft Stamper magazine.

It is created by making what is called a Serigraph. This consists of a colourful background made with a brayer and three or four co-ordinating colours.

This was something a little out of my comfort zone but I loved the look of the card in the magazine and wanted to give it a try!! I think it makes a nice anniversary card for the in-laws!


To create the serigraph background, a piece of cream card was coloured using the Tim Holtz Tattered Rose and Antique Linen distress inks. This was overstamped with the circle flourish frame image from the Papermania Chatsworth Frames stamp set using Emboss Clear ink and heat embossed with Stampendous Detail White Opaque embossing powder. The Tim Holtz Walnut Stain distress ink was then used to fill in areas of the card that weren't already coloured with the other two colours. The embossing was then wiped with a tissue to remove any excess ink.

Using the Walnut Stain ink, the two butterfly stamps from the Penny Black Enjoy Life stamp set and the Crafty Individuals Wildflowers stamp set were randomly stamped over the sheet. The butterflies were then highlighted with the Sakura clear Stardust pen.

A second sheet was created by colouring a piece of white mulberry paper with the Tattered Rose and Antique Linen inks, and then over stamped with the Hero Arts Old Writing stamp and the Crafty Individuals Butterfly stamps with the Walnut Stain ink.

A third sheet was created by colouring the cream card with the Tattered Rose and Antique Linen inks and then embossed with the Cuttlebug Swiss Dots embossing folder. The raised dots were then coloured with the Walnut Stain ink.

The mulberry paper was backed with cream card and small squares were cut from all three sheets using a standard square Nestabilities die.

The edge of a 5"x7" card blank was punched using the Martha Stewart Daisy Fan deep-edge punch and a panel of the embossed card was adhered to the inside of the card so it can be seen through the punched edge.

Six of the small tiles were adhered to the front of the card and a small white Papermania adhesive pearl was added to a couple of the tiles.

The 'Just For You' sentiment, from the HOTP Sentiments stamp set, was stamped below the tiles using the Walnut Stain ink and traced over with the Sakura clear Stardust pen.
 
Using the Tattered Rose and Antique Linen inks, the larkspur image from the Crafty Individuals Wildflower stamp set was stamped at the bottom of the card blank.
 
A cream Papermania Imaginisce paper flower was coloured with the same inks and overstamped with the small butterfly, flourish frame and Old Writing stamps using the Walnut Stain ink. A large white adhesive pearl was added in the centre of the paper flower and adhered to the card over the edge of the larkspur stamped images.

I would like to enter this card into a few challenges:

Saturday, 24 April 2010

Red and Blue Vintage Lady Easel

Thought it was about time I uploaded a card project, so here is the card I made for my mother-in-law's 70th birthday. She really didn't want to be reminded it was her 70th, so no numbers on this one! Just made it special, so this is an easel card.

I have entered this card into a number of blog challenges:
I started by decorating the panel that makes up the front of the easel card.

The edges of the card blank were stamped using a flourish stamp from the Autumn Leaves Rhona Farrer v1 Flourishes stamp set and Versafine Crimson Red archival pigment ink. The Vintage Lady image, from the Vintage Ladies stamp from Crafty Individuals, was stamped on cream card using the Crimson Red ink. The image was cut out using the Cuttlebug square stamp die, and matted onto a standard and scalloped square cut using Nestabilities dies.


A strip of blue Moroccan Tile paper from the K&Co The Best of K&Co Too paper pad was punched using the XCut scallop border punch and the edges coloured using Copic marker E07. This was then matted onto a panel of the floral paper, also from the K&Co paper pad. A length of cream lace was wrapped around the panel vertically. The image panel was attached over the lace.

A red silk flower (kindly donated by Alex) was attached in the bottom right hand corner of the panel using a pale blue Papermania pearl brad, and a smaller brad was attached to the blue border strip.
Using the See D's Alphabet stamp set, the word MUM was stamped along the border strip using the Crimson Red ink. The panel was then matted onto a panel of red card punched using the XCut scallop border punch. The letters, flowers and around the image were highlighted using Rock Candy Distress Stickles. This panel was then added to the front of the easel card.
I then started work on the inside of the card. I began by adding the flourish stamp around the edge of the card
I then started on the sentiment panel which acts as the anchor for the easel card.
Firstly, the striped frame from the Hero Arts Frames and Messages stamp set was stamped onto cream card using the Crimson Red ink and cut out using a standard square Nestabilities die. The 'Happy Birthday' sentiment, from the Hero Arts Birthday Messages stamp set, was stamped in the centre of the frame. This was then matted onto beige Core'dinations card and a scalloped square, both cut using Nestabilities dies.
A strip of the floral paper from the K&Co paper pad was punched using the XCut scallop border punch and the edges coloured using the E07 Copic marker. This was matted onto a panel of the blue Moroccan Tile paper. This was then matted onto a panel of red card punched using the XCut scallop border punch. Rock Crystal Distress Stickles were added to the sentiment panel.
Below you can see the front and side views of the card when standing.

Sunday, 7 March 2010

Masculine Italian Architecture

I really like the Travels in Italy stamp set from Crafty Individuals, so have made a couple more cards using it in a couple of different colourways.


The first card I made in a green and brown colourway. The image was stamped onto the green paintstroke paper from the K&Co Basic Grey Sublime paper pad and cut into squares. Three of the squares were then matted onto cream and brown card.


The sentiment was stamped onto a square of cream card using the 'Warm Wishes' stamp from the HOTP Sentiments stamp set and Versafine Vintage Sepia archival pigment ink. The panel was then colour distressed using ColorBox Chestnut Roan fluid chalk ink.


A panel of the brown map paper from the K&Co Life's Journey Map paper pad was matted onto a square of the brown card and lengths of brown ladder ribbon were wrapped around it.


The square image and sentiment panels were then adhered centrally to the card.


The second version was made in exactly the same way but using blue and mustard yellow.


The images were stamped using Versafine Onyx Black archival pigment ink on the brown paintstroke paper from the K&Co Basic Grey Motifica paper pad. The sentiment was also stamped using the Onyx Black ink.


A panel of the blue flourish paper, also from the Motifica paper pad, was matted onto mustard yellow card.


The inside of the card was decorated using a strip of the blue flourish paper and the 'Happy Birthday' stamp from the Papermania 'Just For You' stamp set, stamped using Versafine Majestic Blue archival pigment ink.


Friday, 12 February 2010

Pink and Brown Penny Black Hedgehog Stroll

This is the card that I made for my mate and docrafts demonstrator Becky James. I wanted to make something special for her as I won't be able to go to her demos anymore having moved 'up north'. I have loved going to her demos over the past few years, as I always learn new techniques and get great inspiration, and I have certainly put on some miles to see her, travelling to Southampton, Salisbury and Swindon. It was all worth it (although I'm not sure my chauffeur would agree!!)

It is also my entry to this week's Stamp Something blog challenge, which is Stamp Something Cute this week, and I think this card fits the bill perfectly!

I decided to make her a card using a Penny Black Hedgie image that I received from Judith B in the docrafts September '08 image swap.


The Penny Black 'Hedgehog Stroll' image was watercoloured using Whispers Brushstroke markers and highlighted with Craft Planet Iridescent Sparkle glitter glue. The corners of the image were rounded using the large XCut corner rounder punch and matted onto pink card.


A strip of the Delectable paper from the Basic Grey Sugared paper pad was punched using the Honor Multishaper punch, adhered to a strip of the pink card and highlighted with a pink Whispers Brushstroke marker and the Iridescent Sparkle glitter glue. A length of pink organza ribbon was tied around the pink panel and attached across a panel of the Luscious paper from the Sugared paper pad.


A large white Papermania Imaginisce paper flower was colour tinted with the pastel pink Whispers Brushstroke marker and highlighted with the Iridescent Sparkle glitter glue. The 'Birthday Wishes' circle sentiment, from the Hero Arts Birthday Messages stamp set, was stamped onto white card using Versafine Vintage Sepia archival pigment ink, cut out using a circle Nestabilities die and matted onto a larger circle of the pink card. A large Papermania bronze brad was used in the centre of the message and flower and attached in the top right corner of the card.


The Hedgie image was then attached over the pink panel to the left of the card, and the Luscious patterned paper panel matted onto pink card.


I also decorated the inside of the card, using squares of the Luscious paper with the corners rounded and matted over a strip of the Delectable paper. The sentiment, stamped using the Vintage Sepia ink, was one of the many free stamps I received with my order from Crafty Individuals.

Wednesday, 13 January 2010

Blue and Brown Landmarks and Tickets

I really like the "London, New York, Paris, Rome" Landmarks stamp from Crafty Individuals, so here's another card made using it. This time I used the Basic Grey Granola paper pad.

Firstly, the edges of the Crunchy paper from the Basic Grey Granola paper pad were distressed using ColorBox Chestnut Roan fluid chalk ink and matted onto dark brown cardstock.
Then the Landmarks image was stamped onto the Flax paper from the same paper pad using Versafine Vintage Sepia archival pigment ink and matted onto beige and dark brown cardstock. A length of brown ladder ribbon was then wrapped around the Crunchy paper panel.
The Travel Tickets image, also from Crafty Individuals, was then stamped onto cream card using the Sepia ink, and three of the ticket images were cut out and colour distressed using Tim Holtz Faded Jeans and Scattered Straw distress inks and Ink It Up! Chocolate Brown dye ink.
Using the Sizzix Sizzlet file folder die, a beige file folder was die-cut and the edges ink distressed. The word 'Tickets' was hand-written on the tab using a black fineliner pen, and the word 'Celebrate' was stamped on the front using the 'Celebrate with Style' stamp from the Hero Arts Birthday Messages stamp set and the Sepia ink. The ticket images were adhered to the inside of the file folder.
This Landmarks stamp is a great stamp for masculine cards, and I foresee it being used quite a lot in 2010.

Monday, 16 November 2009

A6 Green and Copper Landmarks

Here is another card I made using the London, New York, Paris, Rome stamp from Crafty Individuals. I actually made them at the same time but forgot to upload this version.

The image was stamped onto the orange brushstroke paper from the K&Co Basic Grey Sublime paper pad using Versafine Vintage Sepia archival pigment ink. This was cut down to two images and matted onto green paper and copper mirror card and also matted onto the copper mirror card.

A panel of green paper was embossed using the Cuttlebug hinge border embossing folder and colour tinted using the ColorBox Chestnut Roan fluid chalk ink.

A border was stamped around the edge of a panel of the green paper using a stamp from the Autumn Leaves On The Edge stamp set and the Vintage Sepia ink. I was forced to buy these having seen what Alex did with them at our little get-together in August.

The 'Happy Birthday' sentiment, from the Papermania Just For You stamp set, was stamped below the image using the Vintage Sepia ink.

The inside of the card was also decorated using the border stamp from Autumn Leaves stamp set and the 'Happy Birthday' sentiment stamp.

Thursday, 17 September 2009

Blue and Brown Italian Architecture

These cards are made with a couple of my new Crafty Individuals stamps.


I decided to stamp the image using Versafine Onyx Black archival pigment ink onto the blue patterned paper from the K&Co Basic Grey Motifica paper pad. The images were highlighted with white pencil.

Four of the six images were cut out as a square and matted onto golden brown card and blue Core'dinations cardstock. The paper and cardstock were distressed with ColorBox Amber Clay, Tangerine and Chestnut Roan fluid chalk inks. The 'Imagine' text (one of 5 freebie stamps from Crafty Individuals - how cool is that!!) was also stamped onto the blue paper from the Motifica paper pad and matted on the brown and blue cardstocks.

A panel of the beige vine patterned paper from the Motifica paper pad was matted onto the golden brown cardstock and embellished with brown metallic square brads from Dovecraft.

The edges of the card blank were distressed with the brown inks and ColorBox Celadon pigment ink.

The inside of the card was also decorated.


Another of the images was stamped out and matted onto the golden brown cardstock and layered over strips of the papers from the Motifica paper pad. The 'Celebrate with Style' sentiment, from the Hero Arts Birthday Messages stamp set, was stamped on the inside using the Coffee Bean ink from the Brilliance Tiramisu triple inkpad.

The remaining two images were then used to make a second card. The same golden brown and blue cardstocks were used to mat the images and text panels. A scroll paper from the Motifica paper pad was used as the main background paper with the Dovecraft brads in the corners.

The patterned papers were also used to decorate the inside of the card.

I really like these stamps and think they are great for the dreaded men's cards. Crafty Individuals has a great range of stamps to choose from!!

Wednesday, 9 September 2009

Green and Copper Landmarks

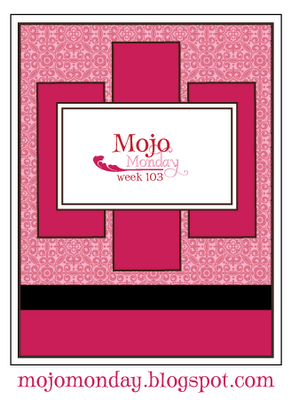
This is my entry to this week's Mojo Monday Blog Challenge, which follows a sketch from Mojo Monday as shown below.
 
And here is the sketch that I followed:


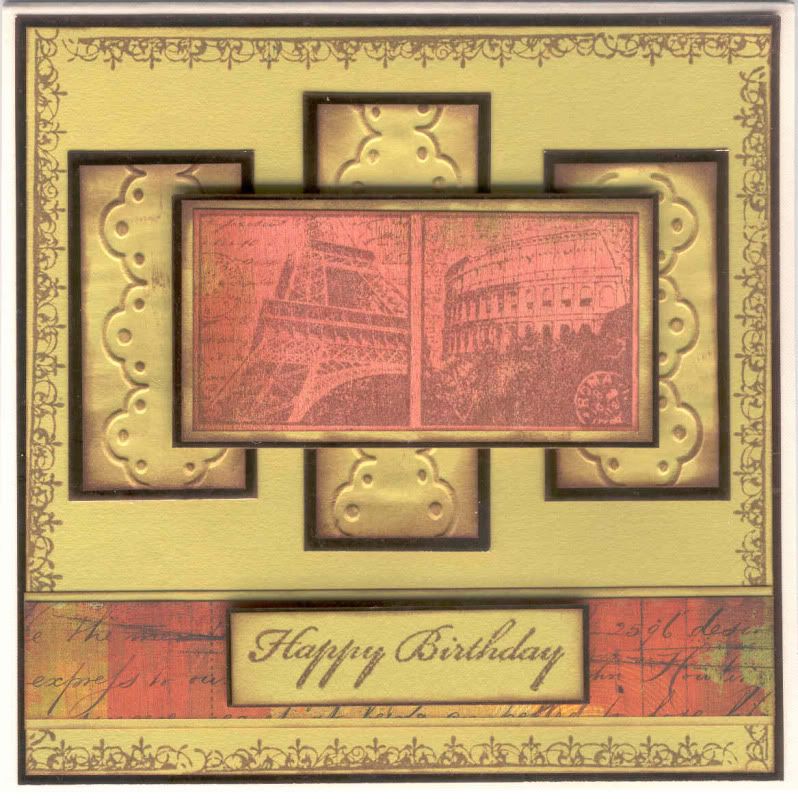
The Landmarks image, from Crafty Individuals, was stamped using Versafine Vintage Sepia archival pigment ink onto the orange brushstroke paper from the K&Co Basic Grey Sublime paper pad and matted onto green paper and copper mirror card (which hasn't scanned on very well).
Panels of the green paper were embossed using the Cuttlebug hinge border embossing folder, and the ColorBox Chestnut Roan Fluid Chalk inkpad was swiped over the top to pick out the embossed details. These were then matted onto the copper mirror card.

A panel of the green paper was stamped around the edge using the Fleur de Lys border stamp from the Autumn Leaves On The Edge stamp set and the Vintage Sepia ink. A panel of the collage script paper from the Sublime paper pad was matted onto the green paper and then across the bottom of the large green panel.

The 'Happy Birthday' sentiment, from the Papermania 'Just For You' stamp set, was stamped using the Vintage Sepia ink onto a piece of the green paper and matted onto the copper mirror card.

I also decorated the inside of the card using the Fleur de Lys border stamp with the Vintage Sepia ink and a strip of the orange brushstroke paper.

Blog Widget by LinkWithin