Pages

WELCOME

This blog was created to act as a record of the cards and other projects that I have made. It is for both my own reference and to help inspire anyone who wants to take a look.

I'd love it if you'd leave me a comment so that I know what you think of my projects and that you've been to visit!

Anyone can comment, even those who don't have a blog. (Just look for the word 'Comments' under the three little pictures at the end of each post). Readers without a blog can add an anonymous comment, but please leave your name (and docrafts username if applicable) so I know who you are!

Slideshows of all the cards I've uploaded to my blog can be found at the bottom of the page.


PEOPLE WHO FOLLOW MY BLOG

Showing posts with label Stampin Up. Show all posts

Saturday, 31 January 2015

Beige White and Cork Flower and Flourish

This is a card that I made last year that was inspired by a card I saw over on Amy Rysavy's blog.
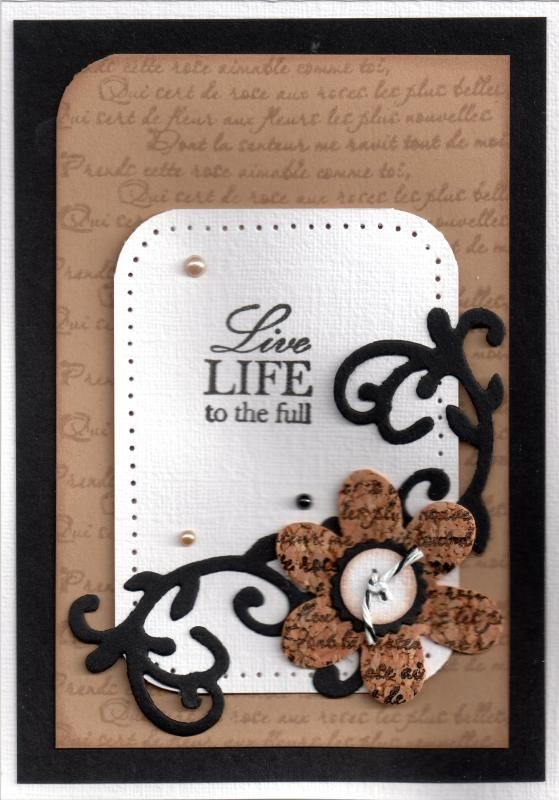
 
 
For my card, I started by creating the background. For that, I took a piece of beige card and stamped it with the French Script stamp from the Bo Bunny It Is Written stamp set using Memento Toffee Crunch dye ink for a tone-on-tone effect. I then punched the top left corner using the WRMK 1/2" Corner Chomper.
 
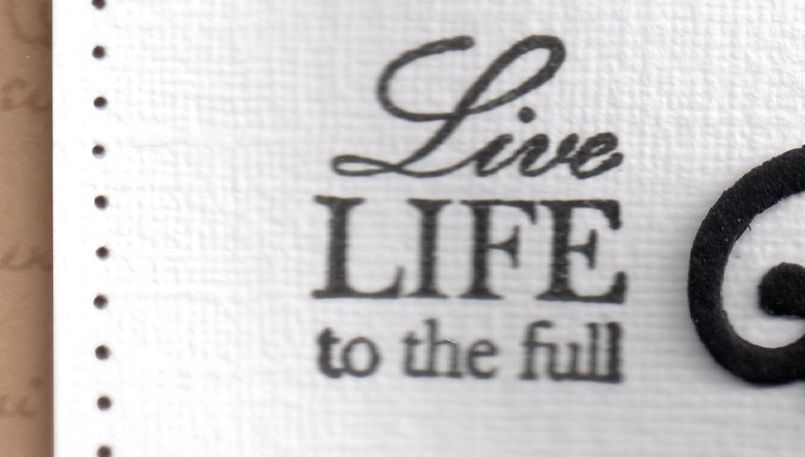
I then created a panel from white hessian effect card and added pricking detail using the Stampin' Up piercing template and a pricking tool. The sentiment, from the Kaisercraft Life Sentiments stamp set was stamped onto this panel using Versafine Onyx Black archival pigment ink.
 
 
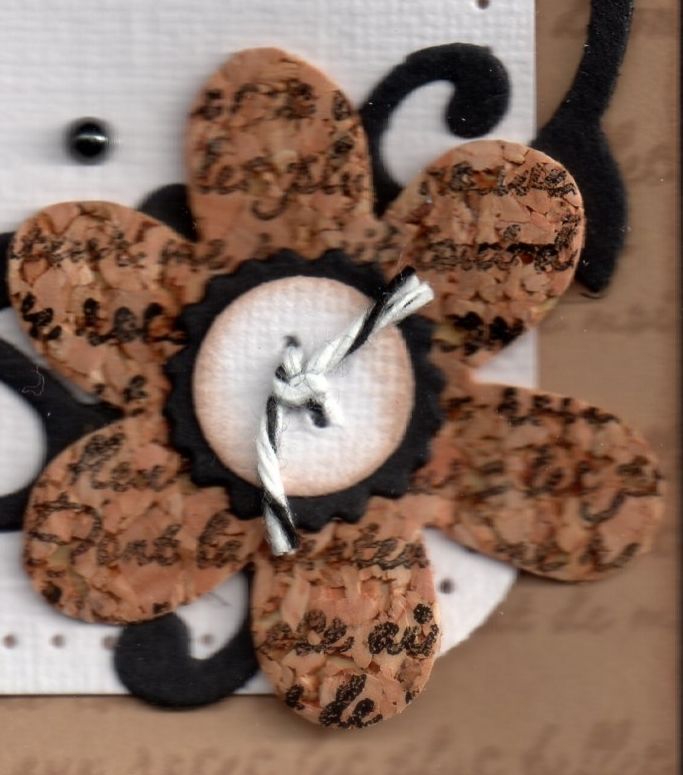
Next I created the flower detail. To do this, I die cut some Fablon self-adhesive cork sheet using the Sizzix Sizzlits Flower, Centre and Leaf die. This was overstamped using the script stamp and the Onyx Black ink. The Flower Centre, from the same die, was cut from the white hessian card and distressed with the Toffee Crunch ink, and the scalloped circle from the Sizzix Sizzlits Flower and Flourish die using black cardstock. Black and white Baker's Twine was then threaded through the centre holes.
 
 
To complete the corner detail, two flourishes were also die cut from the black card using the Sizzix Sizzlits Vine #2 die.

The card was then assembled as shown in the main picture., mounting the beige card onto black card and positioning the flourishes and flower in the bottom right hand corner.

To finish the card, flat-back pearls from the Kort & Godt Autumn Shades selection were randomly added.

Here are the challenges that I shall be entering this card into:

Art By Mi Ran - #24 - Anything Goes
Brown Sugar - #131 - 3 Embellishments
Crafts 4 Eternity - #211 - No Patterned Paper
Sister Act - #91 - Anything Goes
Stamplorations - Stamps & Inks
The Stamping Boutique - Make Your Own Background
4 Crafty Chicks - #231 - Anything Goes
Red Rubber Inspiration - #204 - CAS
Scrap & Craft - #1 - Anything Goes
Baffies Kreativladen - #40 - Anything Goes
The Crafter's Café - #101 - Make Own Background
Inspiration Destination - #18 - Anything Goes
Penny's Paper Crafty - #212 - Anything Goes
Simon Says Stamp - Anything Goes
Wonderful Wednesday - Anything Goes
Creative Moments - #60 - Anything Goes/Optional Sketch
Inky Chicks - #45 - Anything Goes
Party Time Tuesdays - #194 - Anything Goes
Through The Craft Room Door - Anything Goes
Crafting From The Heart - #44 - Anything Goes
Craft Your Passion - #246 - Anything Goes
Love To Scrap - #46 - Anything Goes
Melonheadz Friends - CAS
My Craft Creations - Anything Goes
Not Just Cards - Anything Goes
Scrapbook Stamp Society - #58 - Anything Goes/Happy Birthday
The Paper Girls - #72 - Cork
The Paper Nest Dolls - #1 - Anything Goes
The Pink Elephant - #283 - Anything Goes
Whoopsi Daisy - #1 - Anything Goes
613 Avenue Create - #108 - Anything Goes
Amusing - Anything Goes
Fairytale Stampers - #50 - Flowers
Glitter and Sparkle - #121 - Pearls and Swirls
Pile It On - #53 - Hearts and/or Flowers
Paper Creator's Crafts - #34 - Anything Goes

Tuesday, 25 March 2014

Kristina Werner Inspired #3

Well, here we are again. This time I decided to try something different. I went through all of Kristina's blog, from start to finish, and made a note of the cards that I wouldn't mind having a go at at some stage. I wrote the dates of the posts onto a slip of paper and popped them all into a tub. This is the card idea that I pulled out of the tub to be the inspiration for this card. I am hoping that Ali will play along with me on this one. When she posts her version, I'll add a link to her card somewhere in this post. If you want to play along too, add a link to your creation in the comments below. I'd love to see what you come up with.


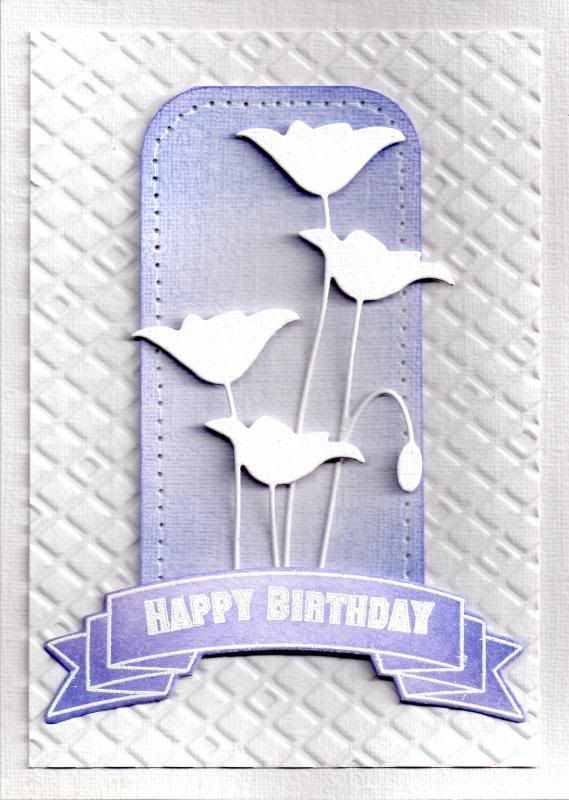
So, the first change I made to my version of this card was to create an embossed panel rather than embossing the card blank. I wasn't sure if the cardstock I was using would hold up to the embossing. I think I was right to be cautious, as the embossing folder I used (Sizzix Diamonds) did push through the card in a couple of spots which I think would have been more obvious on a card blank.


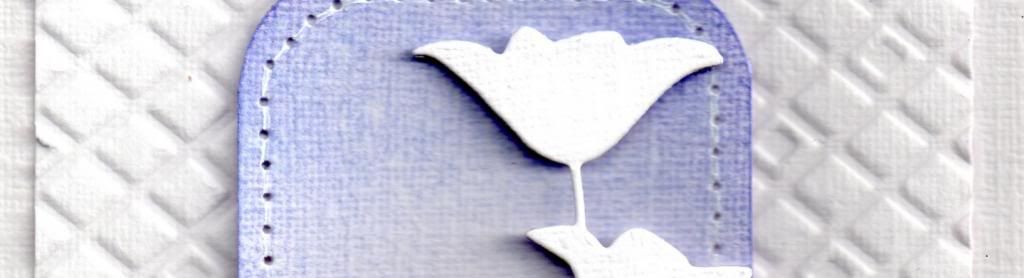
The next step was to create the coloured panel. This consisted of a rectangle of the same white hessian cardstock, with the corners rounded using the WRMK Corner Chomper. I wanted to create a Spring coloured card, so the panel was then coloured using Tim Holtz Shaded Lilac distress ink (I'm ashamed to say I think this is the first time I've used this colour!) I decided I wanted to add a bit more detail to this panel, so I pulled out my Stampin' Up! Mat Stack and pierced a border around the panel.


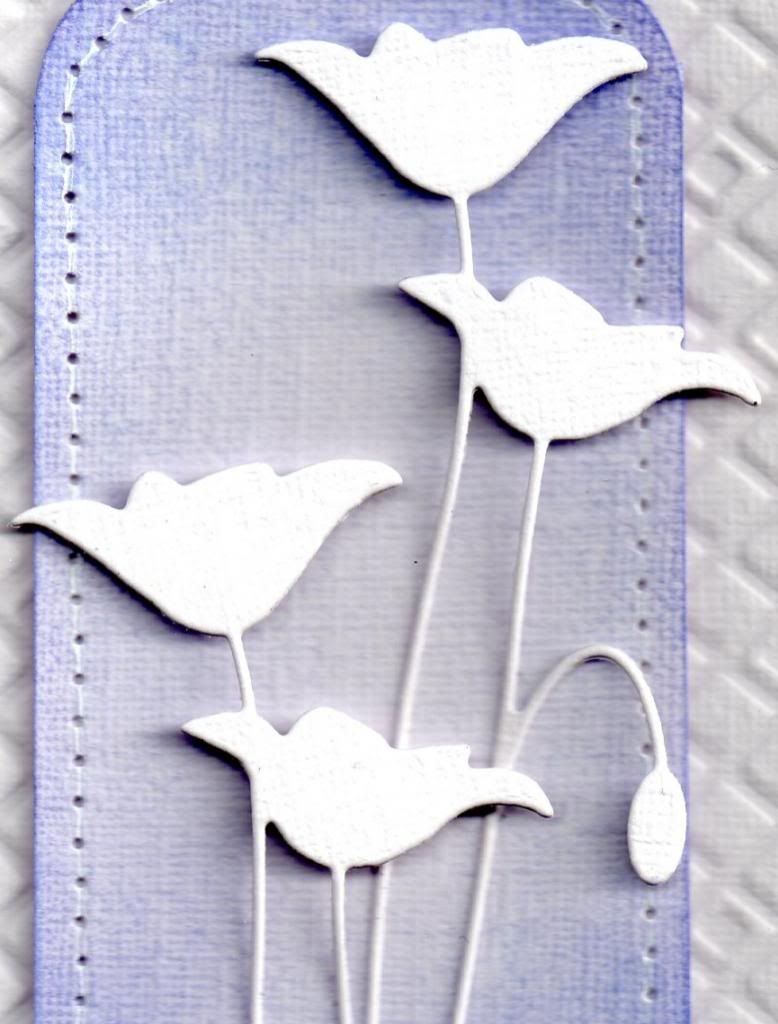
Then I created the die cut flowers using the Memory Box Prim Poppy die. The flowerbud was snipped off the second diecut and the diecuts arranged on the panel. To create dimension, the flowerheads were adhered using 3d foam and the stems using Zig glue.


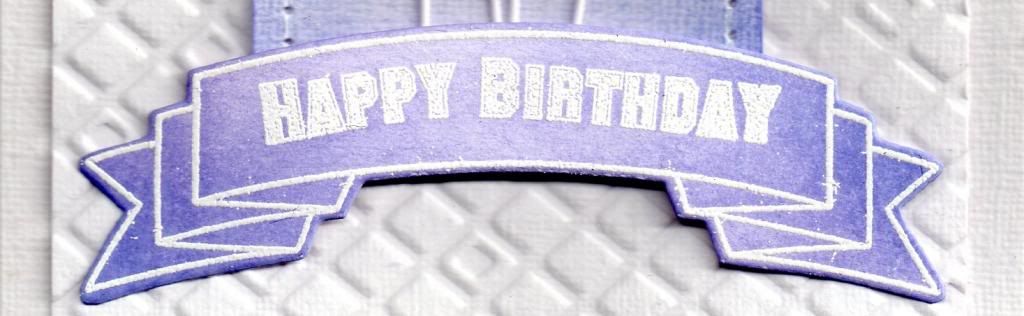
To create the greeting panel, the multi-folded banner from Clearly Besotted Basic Banners was die cut and then stamped on top using the matching stamp from the co-ordinating stamp set using Versamark ink. The banner was then heat embossed using Stampendous Detail White embossing powder. The sentiment, from the same stamp set, was then stamped and embossed within the banner shape. Once the embossing powder had cooled, the Shaded Lilac ink was applied to the diecut to help the detail stand out.
Here is a picture of the finished card in all of its glory.


Friday, 17 January 2014

Kristina Werner Inspired Card #1

So, I am trying to blog more, and so here goes!

This project is one that was inspired by a lady whose youtube videos I watch religiously. Namely, Kristina Werner. You can find her blog here and her youtube channel here.

 I am not the only person who appreciates her work and the very talented Ali and I decided we'd challenge ourselves to select one of her projects and do our own takes on it.

So, Ali chose the first project that we'd attempt and here is the video of the project that she chose, and here is the blog post.

I decided to make birthday cards based on her design and to make a masculine and feminine version of it.

The first design was the feminine version, using the First Edition Spring Feast paper pad. These papers are perfect for girlie cards!


Having chosen the papers I wanted to use, I die cut a number of banners from them using a die from the Sizzix Banners #2 Framelits die set. Using an old XCut daisy punch, I punched a daisy from some of the banners, leaving a couple of the banners plain.


Each of the banner shapes were edged using ColorBox Chestnut Roan Fluid Chalk ink.

Two more panels of patterned papers were chosen and matted onto each other. The sentiment, from the Paper Smooches Sentiment Sampler stamp set, was stamped onto the smaller panel using the Chestnut Roan ink. A design was also pierced in two of the cornes using the Stampin' Up! Mat pack.

A thin line of Aleene's Tacky glue was run across the two panels and a length of green embroidery thread was run along it. Once dried, the ends were trimmed and the panel attached to the card blank. The banners, each trimmed to fit the panel so as not to obscure the sentiment, were then 3d mounted along the thread, and a brown Kort & Godt faux pearl was added in three corners of the smaller panel.


For the inside of the card, a panel of writing paper was matted onto a panel of matching patterned paper and adhered to the left hand side of the card. Using another of the banner dies from the Banners #2 die set and the Sentiment Sampler stamp set, the sentiment panel was stamped using the Chestnut Roan ink and placed to the right of the panel. A selection of the daisy punchouts from the banners on the front of the card were then placed around the sentiment panel.

The masculine card was made in a similar fashion, using the DCWV Retro Prints paper pad.


The smaller panel on the front of the card was this time created from white card and run through the Cuttlebug Basket Weave embossing folder. A large blue brad from Papermania was added in the top right corner. Stars were punched from the banners using a small punch I got in Tescos many years ago!

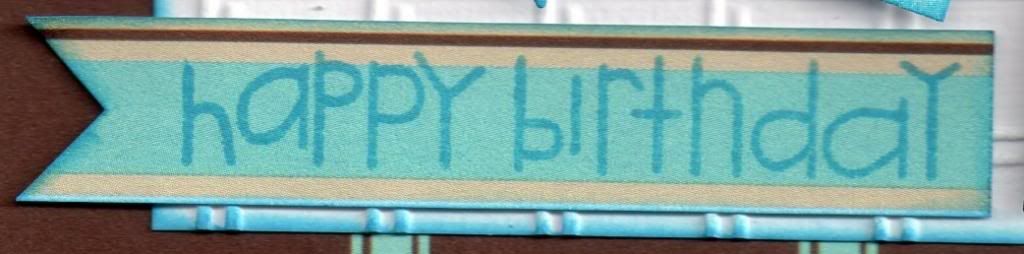
The sentiment was stamped onto a strip of the striped paper using Memento Bahama Blue dye ink and a fishtail banner was handcut at the end.


The inside of the card was created in much the same way as the feminine card, using the star punch outs around the sentiment. The sentiment was stamped onto the patterned paper using Versamark ink and heat embossed using Stampendous Detail Opaque White embossing powder.


I'm liking this idea of choosing a card and making your own version of it.

You can see Ali's versions of the card here.

It's my turn to choose the next card to be inspired by, so I'm off now to choose one.


Thursday, 8 September 2011

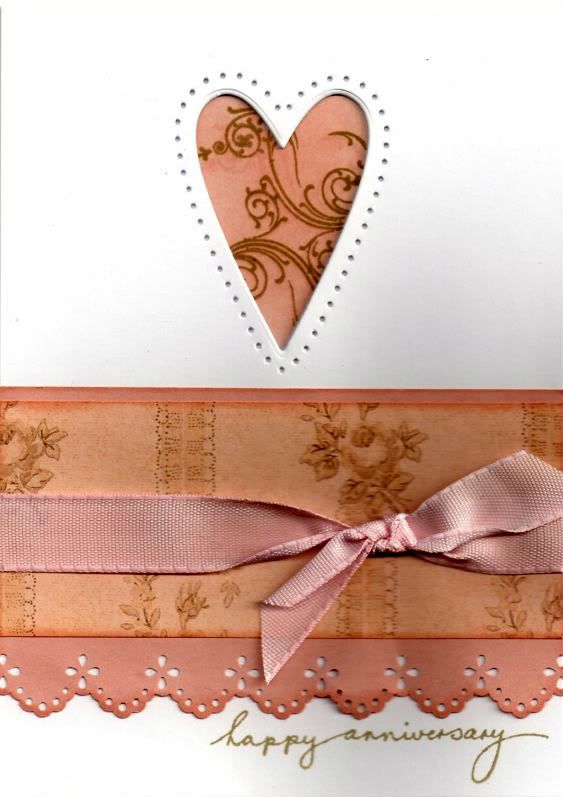
Pink and Brown Reverse Masked Heart Aperture Anniversary

Well, I don't know about you but I've had enough of masculine cards so here's a more feminine anniversary card for you!

This card was inspired by a card I saw over on the Splitcoaststampers gallery by MarieMc and you can see the card that she made here and here on her blog.

I needed to make a couple of anniversary cards and thought this idea would work really well. I'm thinking I might try it with my butterfly die too.


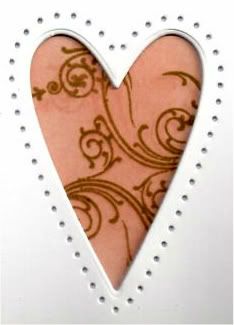
The heart, from the Marianne Creatables set of three heart dies (LR0159), was cut from the card front. A mask was also cut and affixed to the inside of the card behind the aperture so that it lined up.

Colour was added through the mask using Tim Holtz Tattered Rose distress ink and then overstamped using the Tattered Rose and Frayed Burlap distress inks using the flourish stamp from the Personal Impressions Paula Pascual Mix and Match Sentiments stamp set.


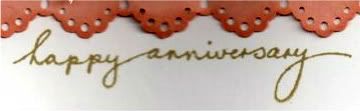
The sentiment, from the Woodware Jane's Script sentiment stamp set was then stamped on the inside using the Frayed Burlap ink.

Using the Stampin' Up Mat Pack piercing template, holes were then pierced around the heart aperture.


A panel of pink paper was punched using the Eyelet Lace border punch from Martha Stewart, and a strip of the pink floral stripe paper from the Papermania Regency paper pad was matted onto it. A length of pink woven ribbon was then knotted around it and the panel added to the card blank.

The sentiment, also from the Jane's Script Sentiment stamp set was then stamped at the bottom of the card blank using the Frayed Burlap ink.

 
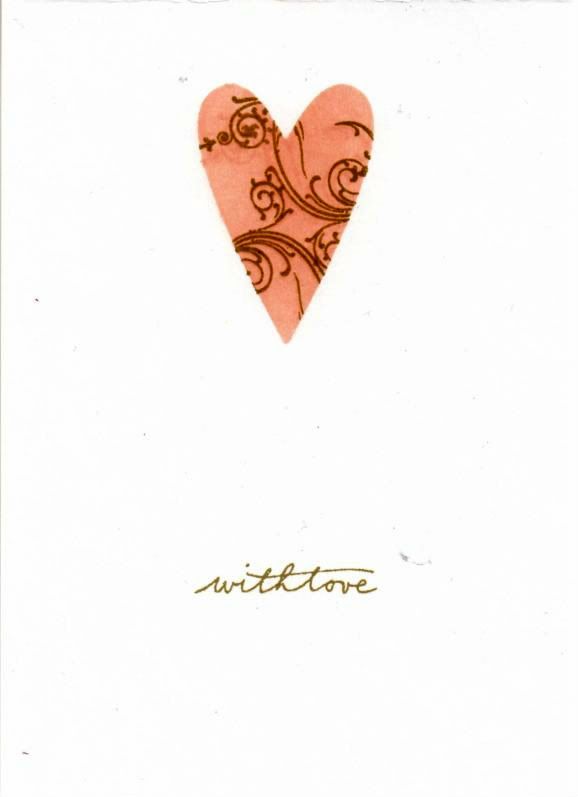
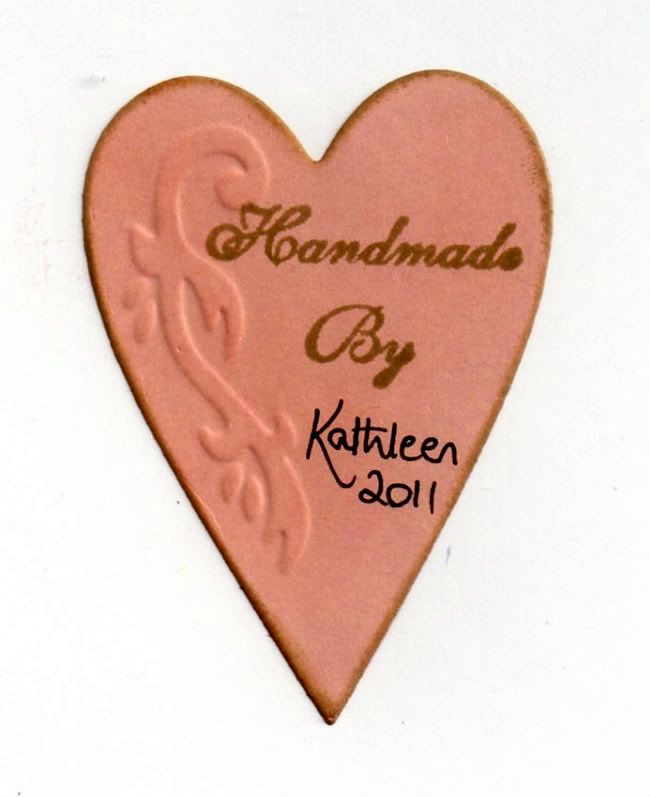
As my personalized 'Handmade By' stamp is a circle and I felt sure you would be able to see it through the card blank if I stamped it on the reverse of the card, I decided to die cut a heart from the pink paper using another of the heart dies in the Marianne Creatables die set. The embossed design was highlighted with the Frayed Burlap ink, and 'Handmade By' was stamped on it using a stamp from the Aspects Of Design Botanical stamp set from The Stampman. It was then added on the reverse of the card behind the inked heart on the inside of the card.


Here are the blog challenges I am entering this card into:

Monday, 5 September 2011

Red and Brown Explore Invoke Arts Tags

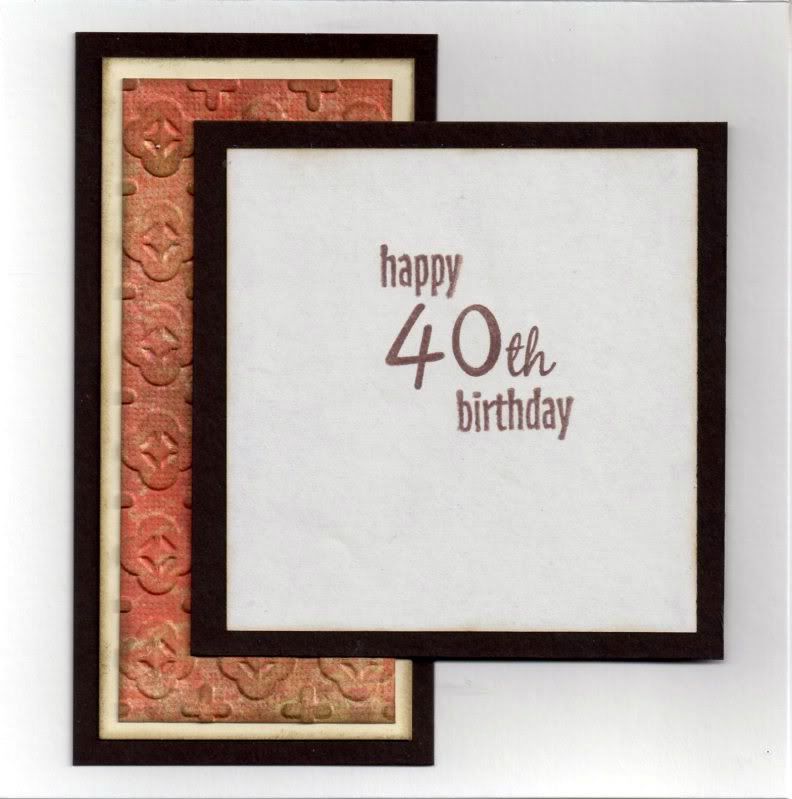
Well, here is the first of the masculine 40th birthday cards that I need to make. Got to get my thinking cap on for the second one now!


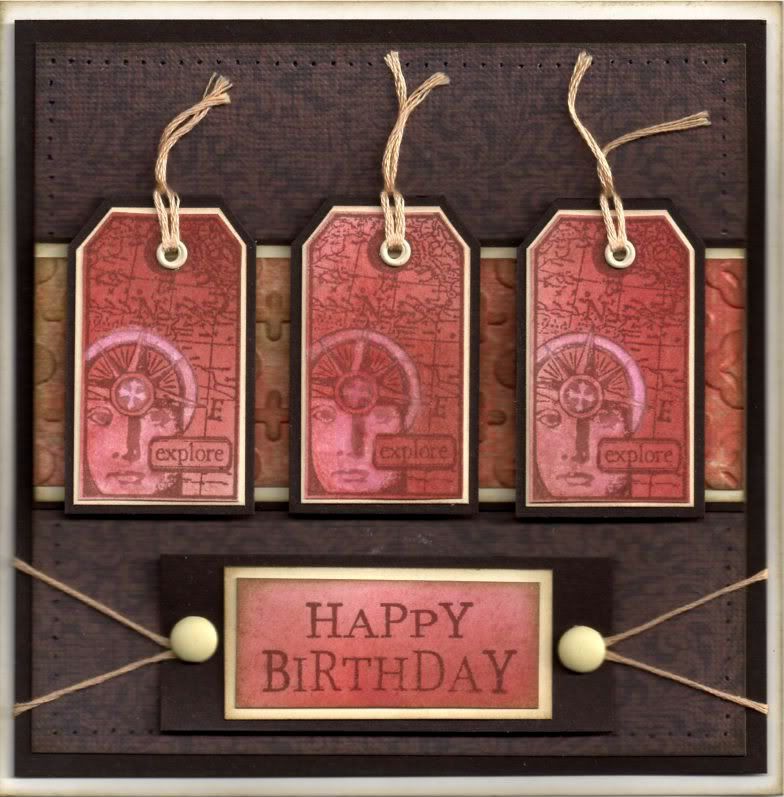
A piece of white card was coloured using Tim Holtz Fired Brick, Aged Mahogany and Frayed Burlap distress inks using the shaving brushes.

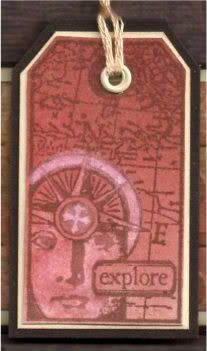
This was then overstamped with the Explore tag from the Invoke Arts Travel Tags stamp set and the 'Happy Birthday' sentiment stamp from the See D's Celebration Messages stamp set. All were stamped using Memento Rich Cocoa Dye ink.

Using a damp paint brush and a piece of tissue (OK, toilet roll, but I couldn't be bothered going downstairs to get a tissue!!), some of the colour was removed from the face image on the tag. Areas of the compass were then lightly coloured using the Angel Green Mica Pigment from Stamps Away. Unfortunately that doesn't show up on the scan.

The tags were then cut out by hand and matted onto cream card and dark brown card. Holes were punched in the top of each tag using the Big Bite and small cream eyelets from Papermania were set in the holes. Each hole was then threaded with cream embroidery thread.


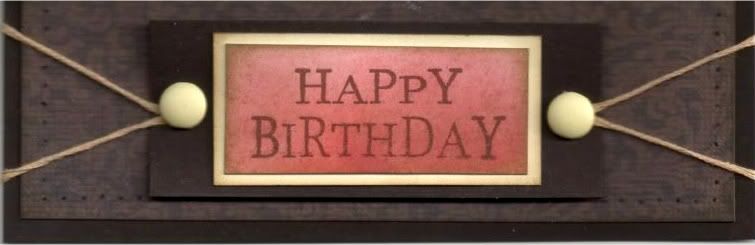
The sentiment was also matted onto cream and dark brown cardstock and large cream brads from Papermania were added either side of the sentiment, with a length of cream embroidery thread threaded through the legs of the brads.


A strip of the red/brown paper from the DCWV Old World mat stack was embossed using the Moroccan Screen embossing folder from Cuttlebug and Frayed Burlap ink was added to highlight the embossing using Cut 'n' Dry foam.

This was then matted onto cream and dark brown card and then matted across a panel of the dark brown flourish paper from the same paper pad.

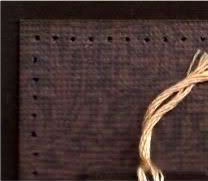
Once matted onto the dark brown cardstock, the panel was then paper pierced all the way around using the Stampin' Up Mat Stack piercing template.


The tags were adhered onto the card in the centre over the embossed strip and the sentiment was added beneath, wrapping the lengths of embroidery thread behind the panel before adhering to the card front.

The inside of the card was also decorated, using another strip of the embossed cardstock. The sentiment was stamped using the Rich Cocoa ink and stamps from the See D's Lower Case Script stamp set ('4', '0' and 'th') and the HOTP Sentiments stamp set (Happy and Birthday).


Here are the blog challenges I am entering this card into:

Monday, 13 June 2011

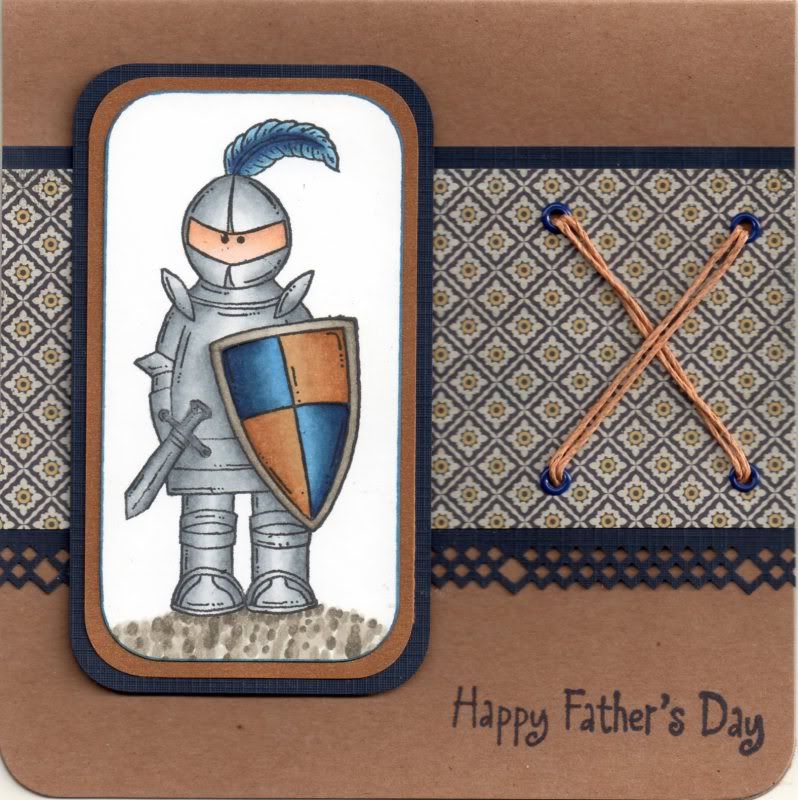
Blue and Brown Father's Day Sugar Nellie Knight

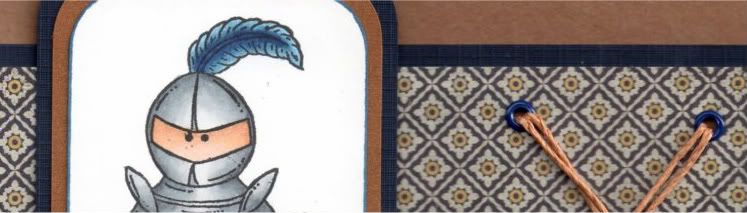
Here is the design of this year's Father's Day cards that I've made for my dad and hubby's dad. I decided to go with the Sugar Nellie Knight image.


The image was stamped using Memento Tuxedo Black dye ink and coloured using Copic sketch markers:
  • Armour: C0, C1, C3, C4, C6
  • Sword: C2, C4, C6
  • Skin: E00, E13, E21, E51
  • Shield: W1, W3, W5, W7, B32, B34, B37, B39, E31, E33, E35
  • Feather: B32, B34, B37, B39
  • Shadow: W1, W3, W5
Somehow I actually managed to get the armour and shield to look quite metallic and shiny!!

The corners were rounded using the large XCut corner rounder punch and matted onto bronze shimmer paper and navy card.


A panel of the Jute paper from the Basic Grey Granola paper pad was matted onto the navy card, punched with the XCut Diamonds border punch.

I wanted to add an element of texture but also keep it masculine, so four holes were punched using the Cropodile Big Bite and the Stampin' Up Mat Pack template and small dark blue Papermania eyelets were added. The holes were then threaded with a double strand of tan hemp cord from Hobbycraft.

The card was assembled and the 'Happy Father's Day' sentiment, from Elzybells, was stamped in the corner using Versafine Majestic Blue archival pigment ink.

Here are the challenges I am entering this card into:

Monday, 6 June 2011

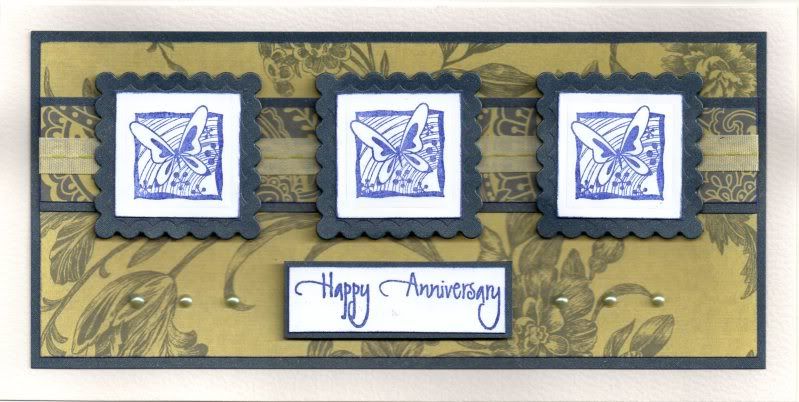
Dark Blue and Green Inkadinkado Anniversary Butterflies

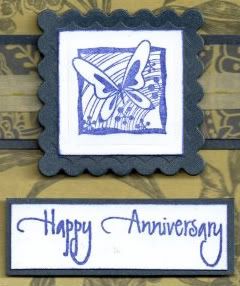
The Butterfly Rainbow image from the Inkadinkado Butterflies and Birds stamp set was stamped using ColorBox Midnight Pigment ink and die cut using square Nestabilities dies. These were then matted onto scalloped squares, also die cut with Nestabilities, from navy blue shimmer card.

Here is a close-up view of the image and sentiment:


A strip of the dark blue and green paisley paper from the Laura Ashley Traditional paper pack was matted onto the navy shimmer card and a length of olive green stitched woven ribbon from the Chatterbox Olive ribbon pack was wrapped around the panel.

This was matted onto a panel of the green and dark blue etched botanical paper from the same paper pad and matted onto a panel of the navy blue shimmer card.


The sentiment, from the Elzybells Swirl Sentiments stamp set was stamped using the Midnight ink and matted onto the shimmer card. The image panels were matted over the ribbon and the sentiment placed beneath it.

Green pearls, from the Kort and Godt Pastels set, were added to either side of the sentiment panel, lined up using the Stampin' Up Mat Pack template.

I have to say I'm rather pleased with it!!!

Here are the challenges I am entering this card into:

Thursday, 28 April 2011

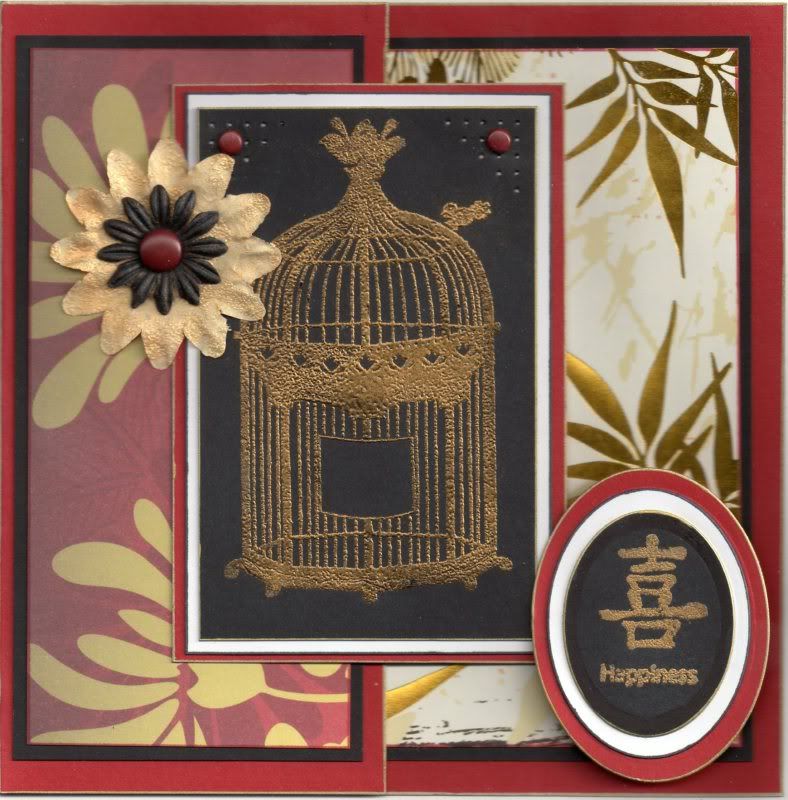
Red, Black and Gold Oriental Birdcage

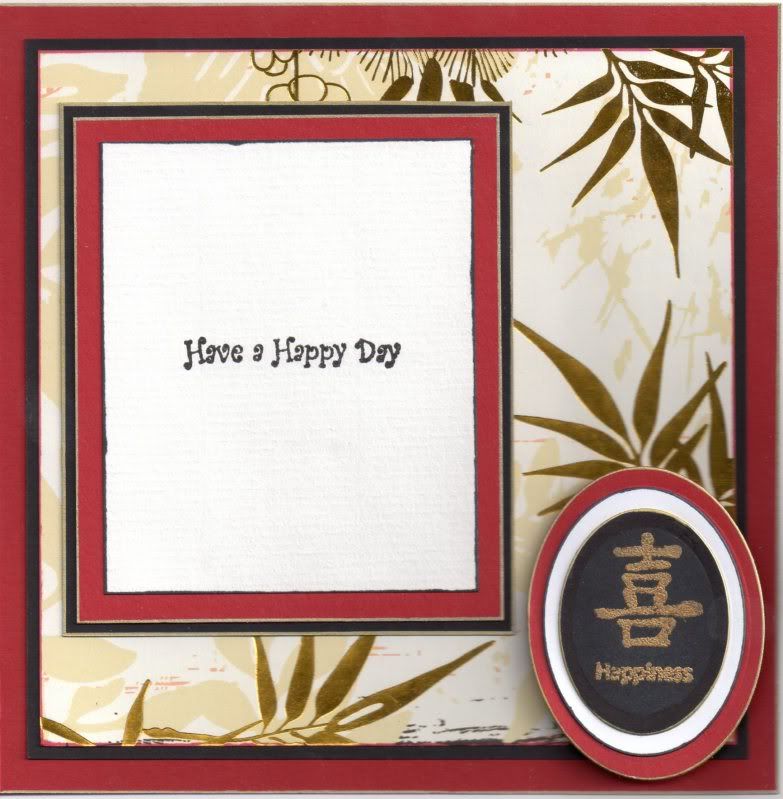
Here's the card I made for my mother-in-law for her birthday. I wanted to use my oriental papers and after using the mica powder on hubby's birthday card, I wanted to try the Stamp 'n' Bond powder with it to see how it works.


The Birdcage image, from the Papermania Tweet stamp set and the Little Bird image from the Papermania Chatsworth Furnishings stamp set were stamped using Versacolor Black pigment ink onto black card and Stampendous Stamp 'n' Bond embossing powder was added and heated. The Gold Lustre Iridescent Mica Pigment Powder from Stamps Away was then dusted over the sticky powder and left to set. (It tends to stay a bit sticky for a while but does set hard eventually).


Holes were pricked in the top corners of the image panel, using the Stampin' Up piercing template (Mat Pack) and small red brads from Papermania were added in the corners. This was then matted onto white and red card.

A half-front card blank was created from red card. The white and gold foiled bamboo paper from the Papermania Oriental Treasures paper pad was matted onto the black card and adhered to the inside of the card.


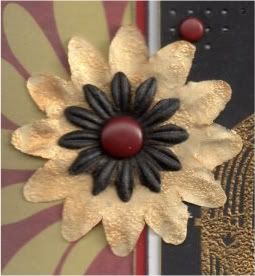
A white paper flower from Papermania Imaginisce was covered in Emboss Clear Pigment ink and then the Stamp 'n' Bond powder was added and heated to melt. The Gold Lustre mica powder was then dusted over the top. A smaller white paper flower from the Prima Botanicals Mix was coloured using a dark grey Copic marker (N9) and the Gold Lustre mica powder was lightly dusted over the top. The flowers were then layered up and a large red Papermania brad was added in the centre and attached to a panel of the red and gold chrysanthemum paper matted onto the black card. This was then adhered to the card front.


The sentiment panel was created by stamping the Happiness symbol and word from the Papermania Oriental Treasures Lanterns stamp set using the Versacolor Black ink onto a black oval die cut using a classic oval Nestabilities die. The Stamp 'n' Bond was added and heated and the gold mica powder dusted over. The sentiment panel was then matted onto larger red and white ovals, also die cut using the Nestabilities dies. The sentiment was added in the bottom right hand corner of the inside of the card, overlapping the image panel.


Here are the blog challenges I am entering this card into:

Wednesday, 6 April 2011

Red Black and Gold Bonsai Tree

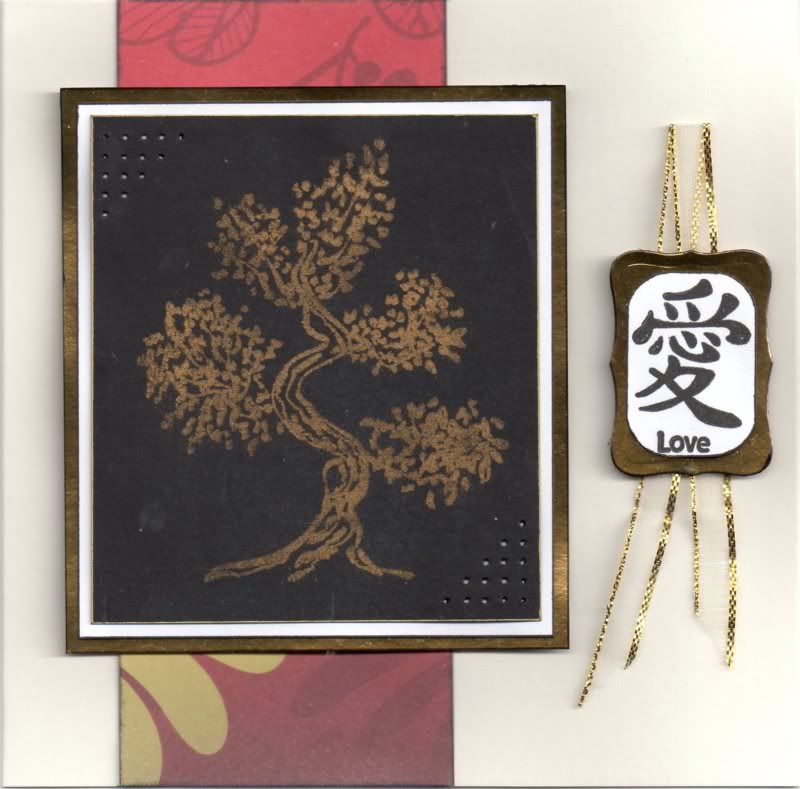
Here is the card that I made for my hubby's birthday today. I wanted to make something a little bit different as he's had Edwins the past couple of years.


I decided to go with an oriental theme and used my reasonably new Papermania Oriental Treasures stamps and papers.

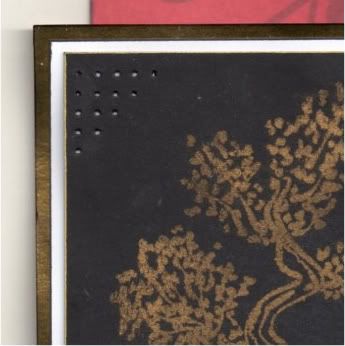
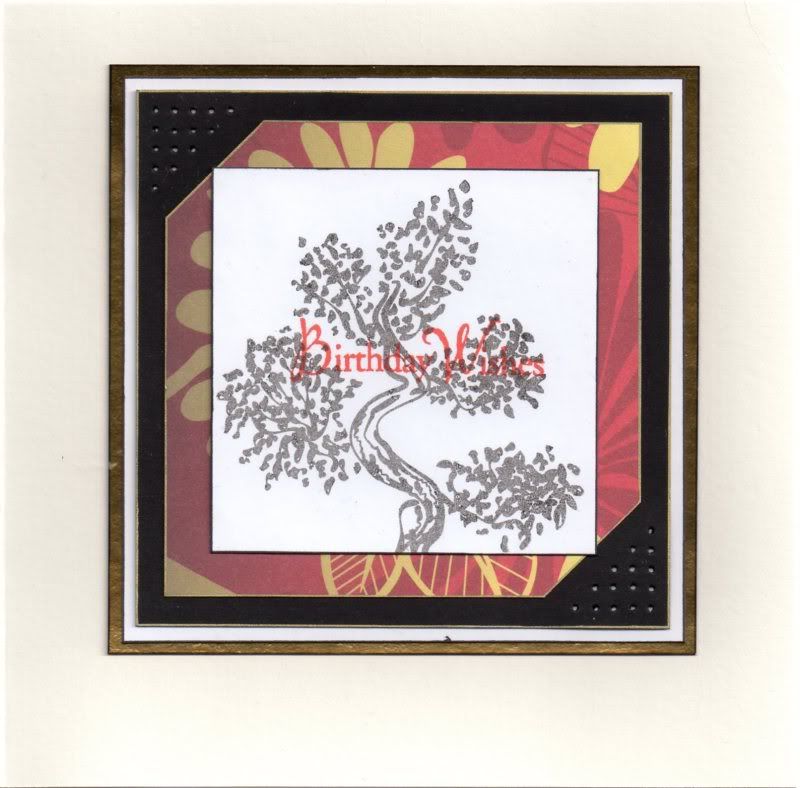
The Bonsai Tree image was stamped onto black card using Emboss Clear pigment ink and dusted over with Stamps Away Gold Lustre Iridescent Mica Pigment powder. Unfortunately you can't really see the shimmerr that these powders give the image in this scan. The corners of the panel were then pierced using the Stampin' Up piercing template (Mat Pack) and then matted onto white and Craft Planet Gold Mirror card.

A strip of the red and gold ginkgo leaf paper from the Papermania Oriental Treasures paper pad was matted onto the card blank and the image panel was matted over the top.


The Love character from the same stamp set was stamped using Versafine Onyx Black archival pigment ink and the Love word was stamped below it. The corners were then rounded using the small corner rounder punch by Avec and matted onto a gold mirror panel die cut using a Labels 8 Nestabilities die. A length of cream and gold organza ribbon from the Papermania Sparkly trim pack was then adhered behind the panel.

I also decorated the inside of the card and decided to produce a faded image of the tree on the inside.

A second generation stamping of the Bonsai Tree image was stamped onto a panel of white card and overstamped with the Birthday Wishes sentiments stamp from the Hero Arts Birthday Messages stamp set using Adirondack Red Pepper dye ink.


This was then matted onto a panel of the red and gold ginkgo paper and then onto panels of the black, white and gold mirror cardstocks.

Here are the challenges I am entering this card into:

Monday, 31 August 2009

More Blog Candy from Stephanie - CLOSED

Stephanie has some more blog candy here as a big thank you following her return to the blogging world.

Up for grabs are theMiss Anya Dressy Stamp Set from The Greeting Far, Prima Daisy Doodles Flowers, a 6"x4" DCWV Luxury Paper Stack and 3 reels of Stampin' Up Ribbon (30yards total).

You can see what she has on offer here.

For a chance to win, leave a comment on the blog candy post here, and add a link to the candy on your blog.

This Candy is open to everyone worldwide and a winner will be drawn randomly on Tuesday 1st September 2009.

Tuesday, 18 August 2009

A Day At Julie's

Just wanted to let you all know how my day at Julie's went. Early morning (6am!!) and an early train journey into London (or the outskirts at least). I bumped into Alex at the train station as we'd managed somehow to synchronize our arrivals.

After a bit of a chat, and the handing out of goodies, we got underway. Thankfully, they all liked their post-it note holders that I'd made for them (and they didn't fall to pieces in my bag, which I was rather worried about!!). But, I did forget to take a photograph of them, so girls, if you get a chance, please email me a couple of pictures so I can put them on here!

Alex had very kindly given us all one of her little boxes that was filled with chocolate. My dear hubby has been looking at it longingly but I'm blowed if I'm going to let him have them. I might just suck them a little every night so I can taste them but not actually eat them. They should last a while that way too!!! Darn this diabetes!!!

Alex had also assembled a card kit for us all in another beautifully constructed and decorated box. The card was a nice clean and simple design, using the gorgeous Papertrey Ink Damask stamp set (if only they would find a UK distributor/retailer, I'd snap them up in a moment, but with such exorbitant P&P charges, I could never justify the expense).

Anyway, having made my version of the card, I then proceeded to get inky finger prints (Versafine Vintage Sepia) all over it, which I had to disguise when I got home by sponging on the lightest brown colour from the Brilliance Tiramisu ink pad. I also failed to match up the border stamp in the centre of the gatefold!! I really should have a think before I commit anything to paper or card!!

Here is what I managed to create. I don't think it turned out that badly. The card blank was made from brown Kraft card, also available from Papertrey Ink, and brown gems were added to embellish the ornament image.


The second project I attempted was given to us by Julie's friend Lesley. She had prepared a pram template for us all to use, and this time we all managed to make completely different cards. Cutting the template out was the hardest part for some of us (wasn't it "stompy-feet Julie"), but we all produced lovely cards.

Here is my attempt!! I'm not sure what make of papers these are, but I thought they were perfect for a 'just in case' baby card, to keep for when you do need one!!

The Cuttlebug Swiss Dots embossing folder was used on the hood and the Fiskars Apron Lace border punch was used to create the lace trim. Craft Planet yellow glitter glue was added to the dots on the hood and along the top of the paper lace trim. A large Stampin' Up flower punch and a second smaller flower punch were used to create the layered flower in the top corner. The brad was originally pink, so was coloured using a green Copic marker and a blob of the yellow glitter glue.

Buttons from my stash were added to the wheels and the hood (when I got home), after threading them with green embroidery thread.

Alex very kindly did a demonstration of how to use the Copics to their best, so when/if I get around to buying any, I'll have more of an idea of how to get those great effects that so many of you all produce!!!

Also we all had a go at the monochrome look using the Tim Holtz Distress inks on a stamp and dragging the colour out, just as Alex had done on a Sarah Kay card she made last week. I decided to use the technique on one of the lovely house stamps from Papertrey Ink and the Weathered Wood ink. I haven't made the images into cards as yet, but will upload them when I have.

The rest of the day (and somehow there wasn't much more!) was spent stamping up each others various images that we had brought with us. Before we knew it, it was almost 7pm and we had to start tidying everything away.

Amazingly, that didn't take as long as we had anticipated, so we made our way back to the train station. We said our goodbyes (reluctantly) and headed off home. It was 10.45pm when I got home and was pretty bushed, but it was all worth it for an amazing day spent with friends - 'cos that's what you are girls!!! I never thought that two very special friends could be made through a forum, but they can and you are the proof!! Hopefully my move up north won't spell the end of our get-togethers. We'll have to figure a way around that! Not sure how big my new house is going to be, but maybe a weekend in Lincolnshire is on the cards.

Well, enough of all this soppy-ness! Hopefully I'll get around to uploading a few more cards tomorrow. Not sure which ones though. I'm still a bit behind on my uploads, so I might add a few of the anniversary cards I've been making.

Monday, 30 June 2008

More Blog Candy - Stampin' Up - CLOSED

I think I need to make some cards 'cos this is all I seem to be posting just lately. Maybe I should make a note of all the blog candy I come across in a day and post it as one post!!!
Hopefully I'll have some cards for you all tomorrow as my craft room has to be packed up for when the inlaws arrive on Thurs evening, and they have to be made before they arrive.

Well, as advertized in the post title, there is some blog candy up for grabs from Debbie, a US Stampin' Up demonstrator, as she has reached 10,000 hits on her blog.

To enter, head over to Debbie's blog HERE.

OPEN UNTIL JUNE 30TH 9AM EST (THINK THAT'S 5 HOURS BEHIND UK TIME, SO 2PM BST)
Blog Widget by LinkWithin