Pages

WELCOME

This blog was created to act as a record of the cards and other projects that I have made. It is for both my own reference and to help inspire anyone who wants to take a look.

I'd love it if you'd leave me a comment so that I know what you think of my projects and that you've been to visit!

Anyone can comment, even those who don't have a blog. (Just look for the word 'Comments' under the three little pictures at the end of each post). Readers without a blog can add an anonymous comment, but please leave your name (and docrafts username if applicable) so I know who you are!

Slideshows of all the cards I've uploaded to my blog can be found at the bottom of the page.


PEOPLE WHO FOLLOW MY BLOG

Showing posts with label Sakura. Show all posts

Wednesday, 14 September 2011

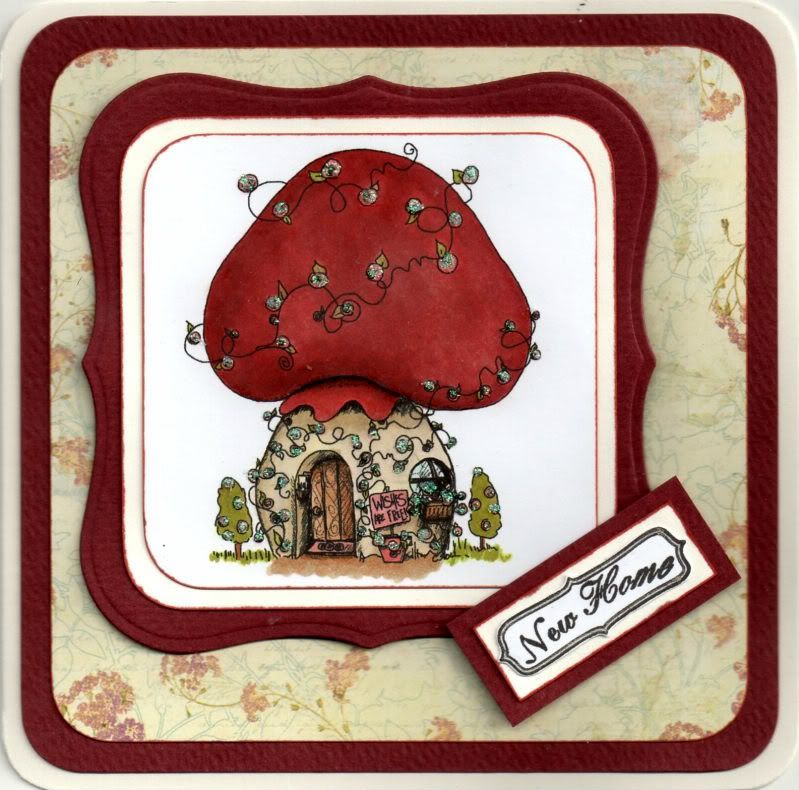
Red and Cream Tiddly Inks Mushroom New Home

I needed to make a New Home card for my friend who has just moved back to Germany. Of course, having made the card, I learnt that there were issues with the new house and so they weren't actually moving into it. But, thankfully all the issues have now been resolved and they can now move out of the hotel and into their new home.


I decided that I would make the New Home card using this cute digi image.

The Mushroom House digi image, from Tiddly Inks, was coloured with Copic Sketch markers:
  • Mushroom Roof: E04, E07, E09, R02, R37, R39
  • Mushroom Base: Y00, Y02, Y11, E40, E41, E43
  • Door: E33, E35, E37
  • Window Frame: E35
  • Window: BG10
  • Grass/Leaves/Trees: YG13, YG95
  • Flowers/Sign/Door Mat: R02
  • Pot: E07
  • Shadow: E35, E43
  • Letters: E40

The corners of the image panel were then punched with the large XCut corner rounder. This was then matted onto a panel of cream card and a panel of deep red card die cut using a Nestabilities Labels 1 die.

A panel of the Cream Floral Script paper from the Prima Botanical paper pad was matted onto the red card, both punched with the corner punch.

The sentiment panel was created by stamping the curly frame image from the Papermania Tweet stamp set using Versafine Onyx Black archival pigment ink and the sentiment from the Papermania Mix and Match Scrolls and Sentiments stamp was stamped in the centre using the same ink. The frame was cut out and matted onto the cream and red cardstocks.
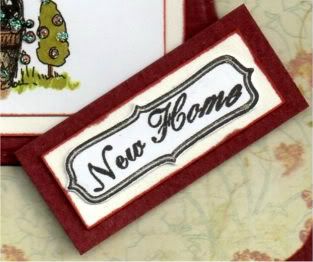

The flowers on the main image were then highlighted with Craft Planet Iridescent Sparkle glitter glue.

The frame of the sentiment panel was traced around using the clear Sakura Stardust pen.
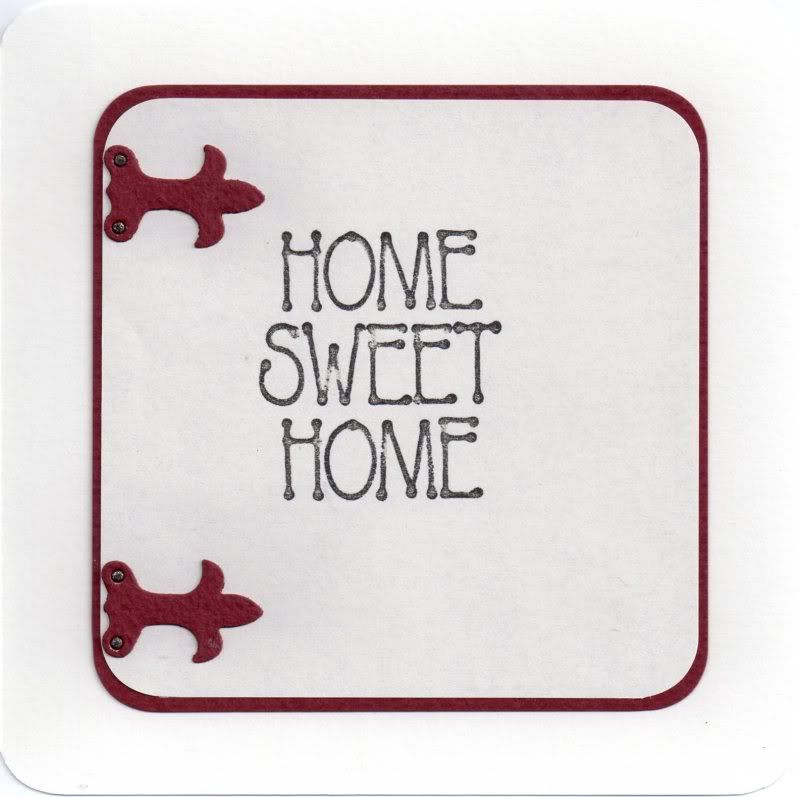

The inside of the card was also decorated, using my much-neglected Sizzix Sizzlits Latches die. The rivets of the latches were coloured using the 110 Copic sketch marker and traced over with the clear Sakura Stardust pen.

Here are the blog challenges I am entering this card into:

Tuesday, 2 August 2011

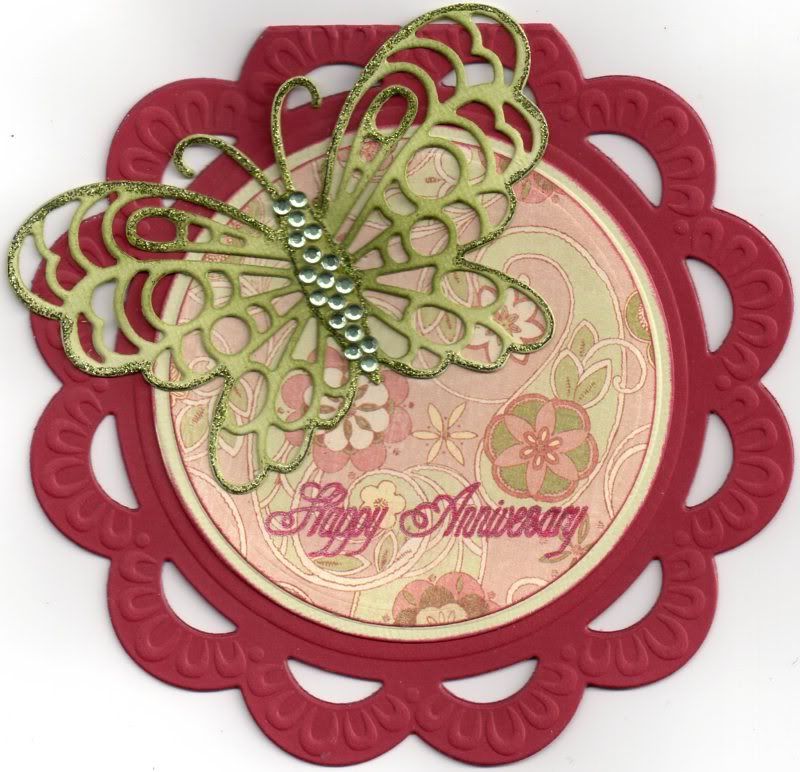
Red and Green Butterfly Scalloped Circle

Here is the anniversary card that I made for the in-laws. It's their 48th wedding anniversary this year.


The card blank was created by die cutting it with the Marianne Creatables Frame Circle die and it was then embossed.

Layers were die cut using circle Nestabilities dies, cut from pale green linen card and the floral paisley paper from the K&Co Classic McKenna paper pad. These were matted together in the centre of the card.

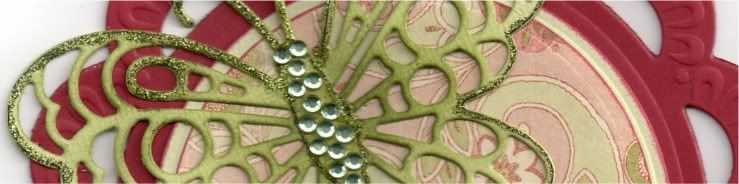
A butterfly was die cut using the Marianne Creatables Butterfly 2 die from the light green card and coloured with the Marvy Matchables Jungle Green dye ink with a shaving brush and then outlined with Glitz It Pear Green glitter glue.

Small light green gems from the Anita's Gem Wheel were then added along the body of the butterfly.


The sentiment, from Stamps Away, was stamped onto the patterned paper using Versafine Crimson Red archival pigment ink but as it didn't show up too well, I traced over the top with a red Sakura Stardust pen.

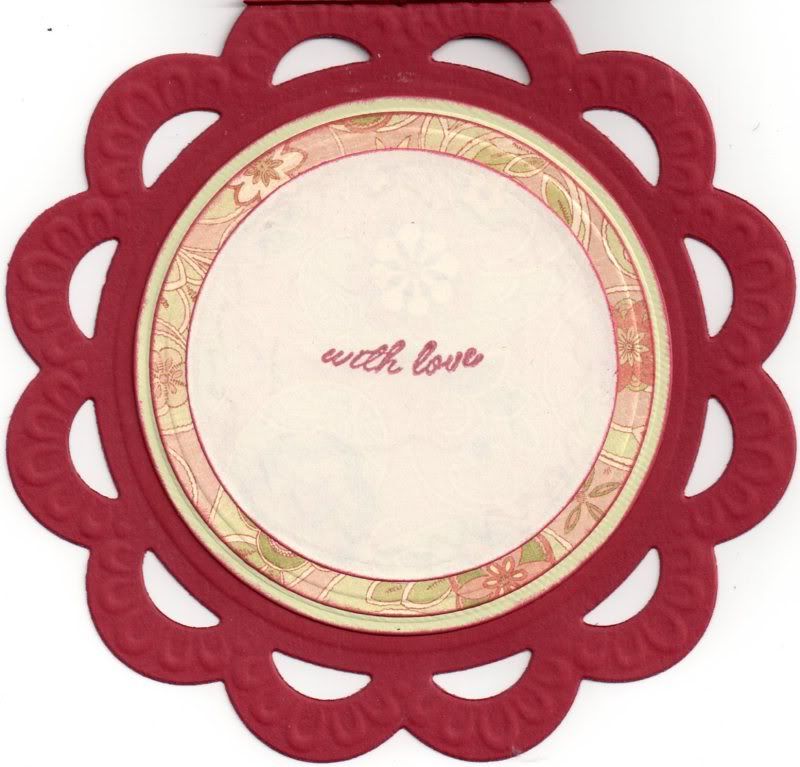
I also decorated the inside of the card using circles of the green card and patterned paper, and the sentiment, from the Papermania Mix and Match Scrolls and Sentiments stamp set, was also stamped using the Crimson Red ink.


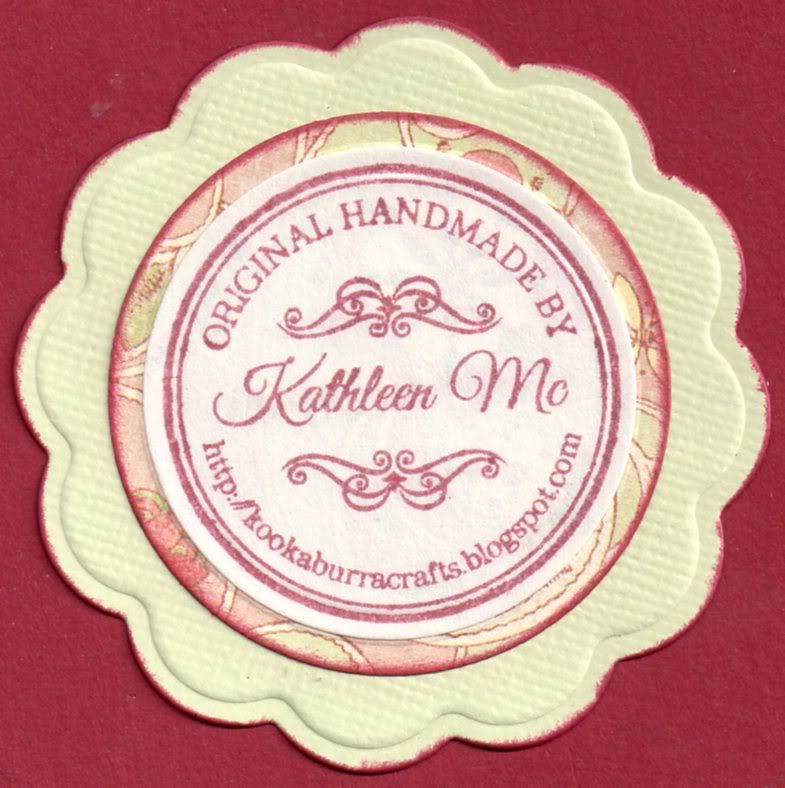
And I finally got to use my new personalized stamp that I bought from this ebay seller. I stamped it up with the Crimson Red ink and matted it onto the patterned paper and green card die cut with Nestabilities Circle and Big Circle dies.


Here are the blog challenges I am entering this card into:

Tuesday, 21 June 2011

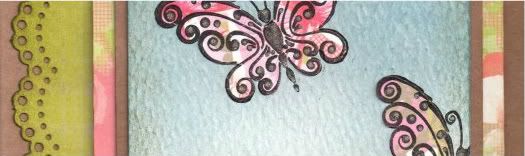
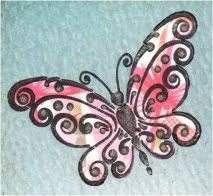
Pink Green and Blue Paper Pieced Butterflies

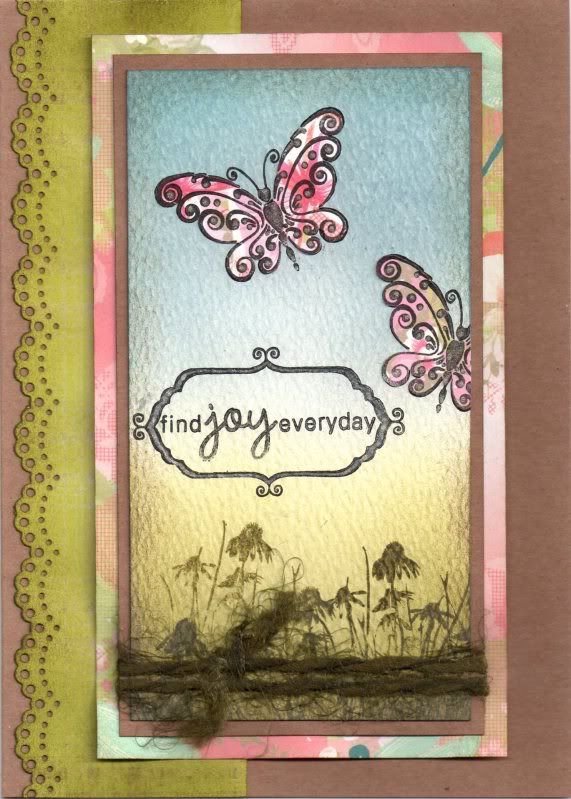
Well, as promised here is my attempt at colouring with Distress Inks and the shaving brushes from Wilkinsons in place of the much more expensive Inkdusters or similar. The card I made, an anniversary card, was actually based on a beautiful tag created by the very talented ClarkyJ and you can see her stunning masterpiece here.

Having looked back at Janet's tag, I realized hers looks more balanced as she has followed the 'rule of thirds' whereas mine is more half and half. I shall try and remember that for the future!!


I started by stamping the Butterfly image, from Chocolate Baroque/Craft Stamper, onto pieces of the pink butterfly paper from the Papermania Summer Bloom paper pad using Brilliance Graphite Black pigment ink and cutting them out.

A piece of white textured card was coloured using the shaving brushes and a selection of Tim Holtz Distress inks. The green area was created using Shabby Shutters and Forest Moss and the blue area using Weathered Wood and Faded Jeans. The edges were then distressed with the Walnut Stain ink. In retrospect, I think maybe Antique Linen may have been a better idea - never mind!

The green area was then overstamped using the Forest Moss ink and the Cone Flower and Grass stamp from the Inkadinkado Meadow stamp set.


The butterfly image was stamped a couple of times onto the blue area and then paper pieced using the pieces already cut out. The excess was cut away from the edge of the panel.


The sentiment, from the Hero Arts Anytime Messages stamp set, was then stamped onto the panel using the Graphite Black ink and then a frame from the Papermania Mix and Match Frames stamp set was stamped to go around it. The frame section was coloured in using a black Whispers Brushstroke marker.

A clear Sakura Stardust pen was then used to trace over the frame and the word 'JOY' and on the swirly sections of the butterflies. You can just make it out on the above pictures.

A length of green fibres from the HOTP Emerald Sarabooks Fibre Pack was then tied around the panel and this was then matted onto a panel of the pink dragonfly paper from the Summer Bloom paper pad.


A strip of the lime green plaid paper from the same paper pad was punched using the Martha Stewart Doilly Lace border punch and distressed with the Forest Moss ink. This was matted directly onto the card blank and the image panel matted over the top to the right of the card blank.

Here are the challenges I am entering this card into:

Thursday, 3 February 2011

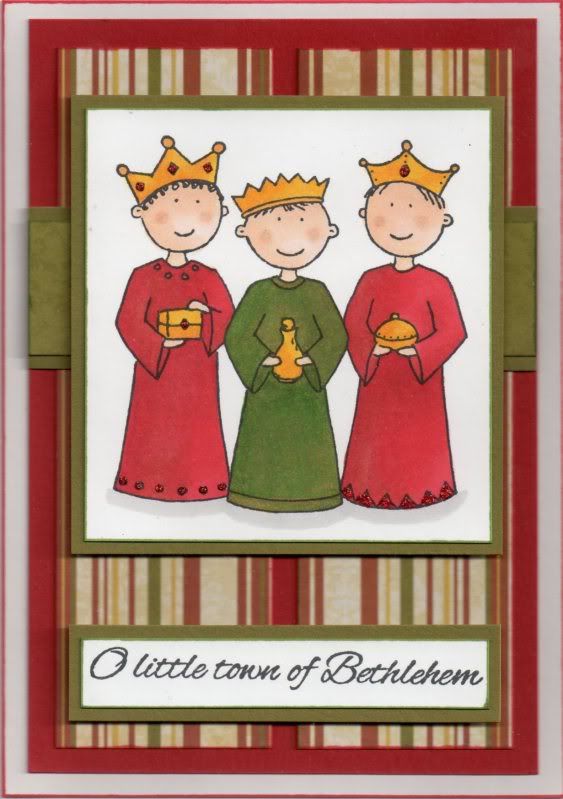
Green and Red Three Kings

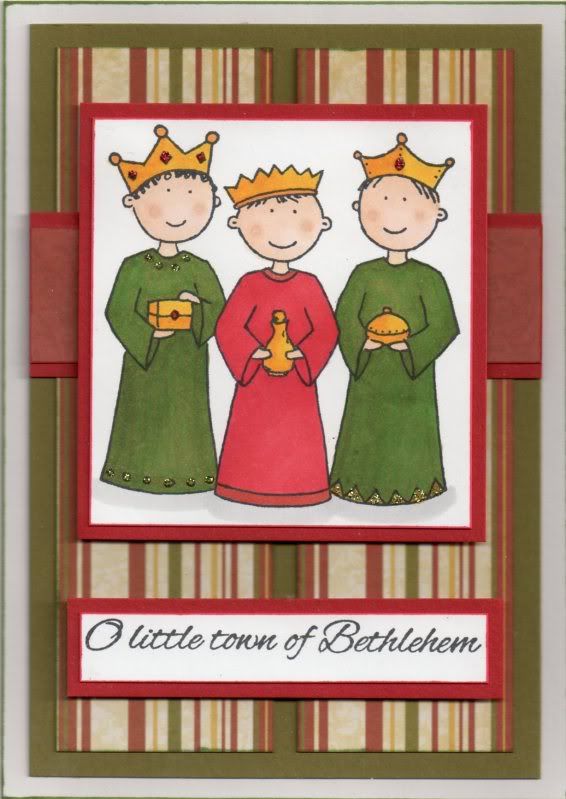
And so onto the next in the series of Christmas cards. This was the only card design I made using my Copics and is the design I sent to the parents.


The Three Kings image, from Elzybells, was stamped using Memento Tuxedo Black dye ink and coloured using Copic sketch markers:
  • Crowns/Gifts: Y08, Y17, R29, E07
  • Green Robes: YG67, G05, Y17
  • Red Robes: R24, R29
  • Skin: E00, E21, E51, E13
  • Shadow: N1
Highlights were added to the crowns and gifts using the yellow and orange Sakura Stardust pens, and the robes were highlighted with Craft Planet Red glitter glue and Glitz It Pear Green glitter glue.

The image was then matted onto red card.

A strip of the red flourish paper from the Dovecraft Noel paper pad was matted onto the red card. Two panels of the multi stripe paper were matted onto olive green card and the red panel matted across it.

The sentiment, also from Elzybells, was stamped using the Tuxedo Black ink and matted onto the red card. The image panel was matted over the red panel, and the sentiment below it.

I also made this in the reverse colourway:

Sunday, 12 December 2010

Light Blue and Violet Foxglove Friends

I can now blog this card as I know the recipient (Alex K/Eisbaerin) has now opened her card!

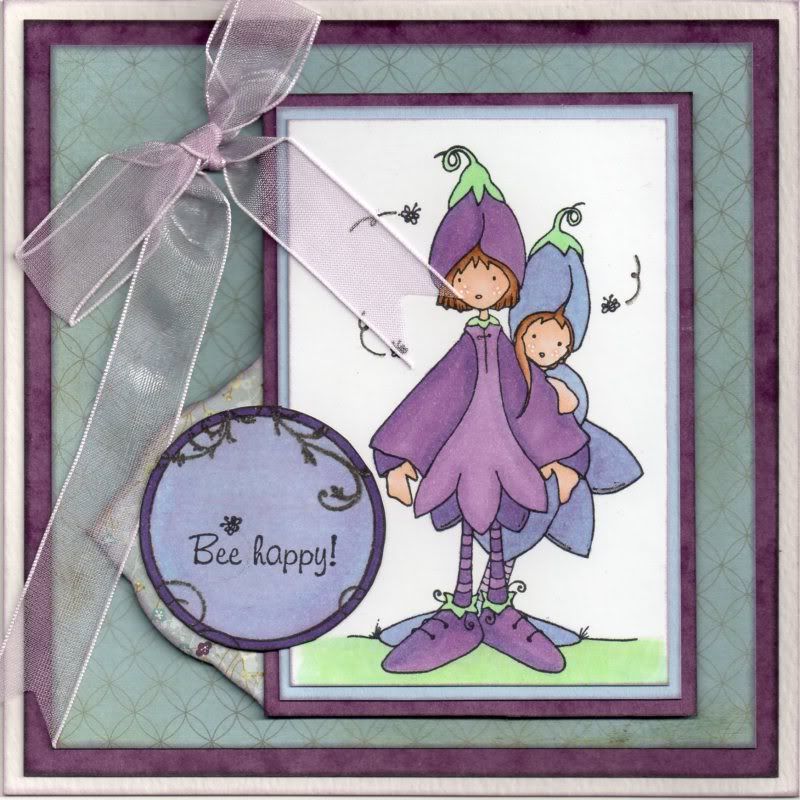
I fell in love with this image the first time I saw it and managed to get hold of it a few months ago. I decided to use the lovely Basic Grey Wisteria papers and coloured my image to match.


The Mr and Mrs Foxglove image, from Whiff of Joy, was stamped using Memento Tuxedo Black dye ink and coloured using Copic Sketch markers:
  • Foxglove 1: V12, V15, V17, B21, G00, BG11, YG11
  • Foxglove 2: V12, B21, G00, BG11, YG11
  • Hair: E13, E35, E57
  • Skin: E00, E21, E51, R20
  • Bees: V12, N1
  • Grass: BG11, YG11
I decided to interpret the image as two females as it's not obvious that it's a 'Mr & Mrs' image, at least I don't think so. The image was then matted onto light blue and purple card.

A panel of the Pond paper from the Basic Grey Wisteria paper pad was matted onto the purple card and then onto the card blank.

Using the Violet paper from the same paper pad, a panel was die cut using a Labels 3 Nestabilities die and attached behind the image panel.

The circle flourish stamp from the Fiskars Harlequin Charm stamp set was stamped using Versafine Onyx Black archival pigment ink and cut out along the outer edge of the circle. The sentiment from the Foxglove stamp was stamped in the centre of the circle using the Tuxedo Black ink and the circle was then coloured using the Copic markers:
  • Sentiment panel: V17, B21, V12
This was then attached over the Labels 3 panel and the edge of the image panel.

A bow was created from lilac organza ribbon using a bowmaker and attached in the top left corner of the card.

Highlights were then added to the image using a Papermania Snow White gel pen and to both the image and sentiment panels using a clear Sakura Stardust pen.

Here are the challenges that I am entering this card into:

Thursday, 28 October 2010

Pink, Brown and Orange Love Notes

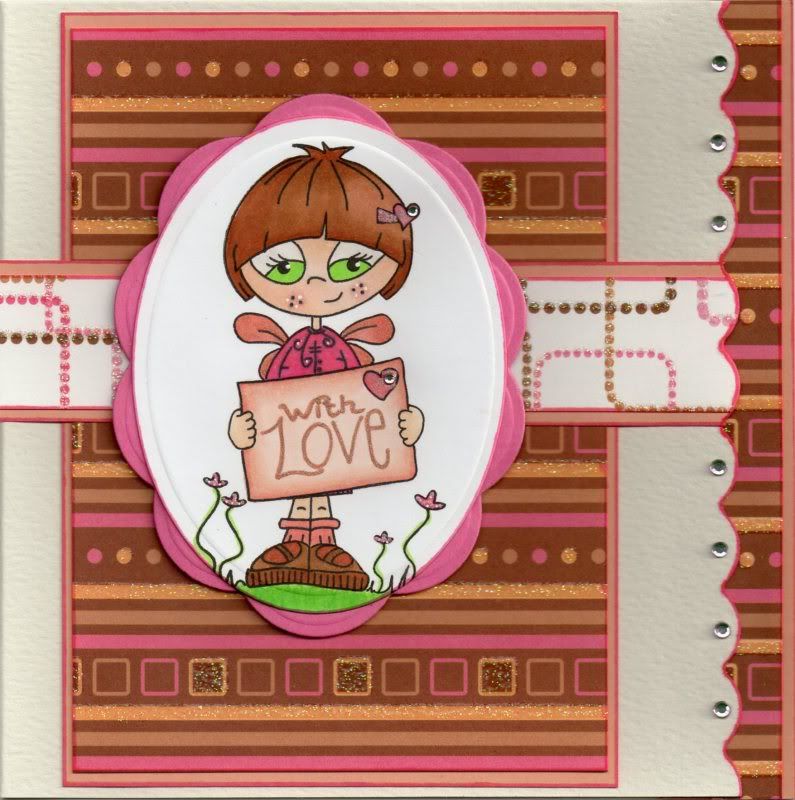
I love this image and can't believe this is the first time I've used it!! Naughty me!! I've had it for a while now too!


The Love Notes image, from Pollycraft, was stamped using Versafine Onyx Black archival pigment ink and coloured with Copic sketch markers:
  • Hair: E13, E35, E39
  • Skin: E00, E21, E51, R20
  • Eyes: YG07, E40
  • Dress: YR02, RV06
  • Socks/Wings: YR02
  • Shoes: E35, E39, YR02
  • Flowers/Grass: YG07, G05, YR02, RV06
  • Sign: YR02, E11, E00
The sentiment was then added using the sentiment stamp from the same stamp set using Versafine Vintage Sepia archival pigment ink.

The image was die cut using an oval Nestabilities die and matted onto a big scalloped oval die cut from pink card. A panel of the pink, brown and orange multi-stripe paper, from the DCWV Glitter Mat Stack, was matted onto orange card and onto the card blank.

A strip of the pink, brown and orange retro squares paper, from the same paper pad, was also matted onto the orange card and adhered across the larger mat.

Pink and orange Sakura Stardust pens were then used to highlight the wings, hearts, flowers and sentiment. The Papermania Snow White gel pen was used to highlight her eyes, cheeks and detail on her dress.

The edge of the card blank was punched using the XCut scalloped border punch and coloured with the Copic markers. Pink faux gems were added in each of the scallops and in each of the hearts.

The inside of the card was also decorated with a strip of the multi-stripe paper adhered to a strip of the orange card. The edge of the orange card was punched with the scallop border punch and added on the inside of the card behind the scallop border.

Here are the challenges that I am entering this card into:

Saturday, 25 September 2010

Teal, Pink and Turquoise Bumble Bee Gorjuss Girl

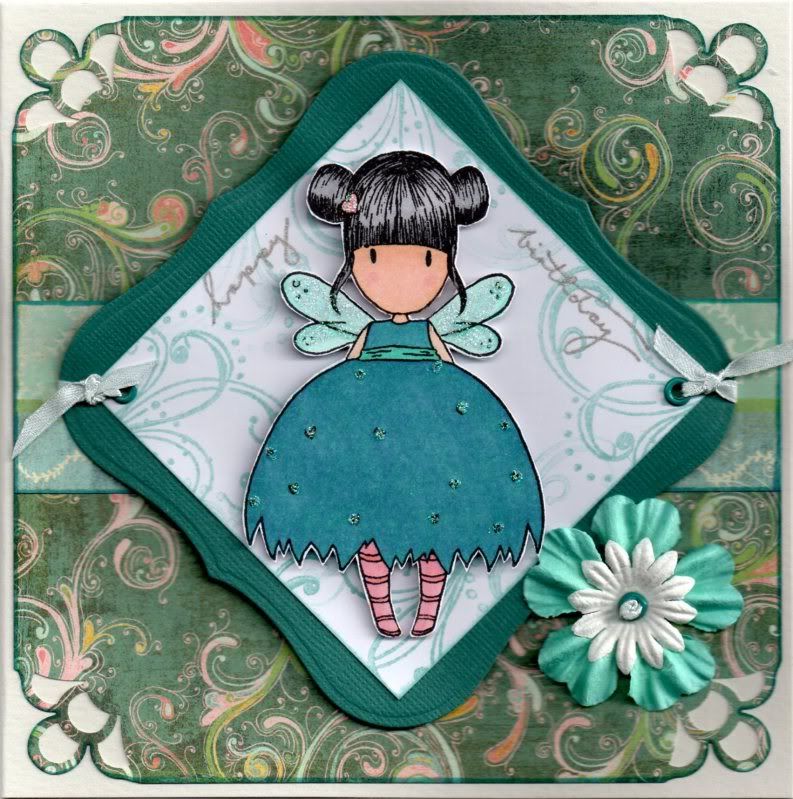
This is one of my favourite Gorjuss Girl images. This image was stamped at Julie's house last August using one of Julie's stamps! I really can't believe how long ago that was now - over 13 months!!!


The Bumble Bee Gorjuss Girl image was stamped using Versafine Onyx Black archival pigment ink, coloured using Copic sketch markers:
  • Hair: N1, N3, N5
  • Skin: E00, E21, E51, R20
  • Socks/Hearts: R20, YR02
  • Dress: BG13, B45
  • Wings: BG11, BG13

and cut out.

A panel of white card was cut out and stamped using one of the flourish stamps from the Autumn Leaves  v1 Flourish Rhonna Farrer stamp set and ColorBox Celadon pigment ink. This was then matted onto a panel of blue Core'dinations card die cut using a Labels 1 Nestabilities die.

A panel of the Spumoni paper from the much underused Basic Grey Two Scoops paper pad was cut and the corners punched using the Martha Stewart Double Loops corner punch.

A strip of the Ice-Cream Parlour paper, from the same paper pad, was adhered across the centre of the punched panel and matted on to the card blank.

The Gorjuss Girl image was placed over the white stamped panel and the 'Happy Birthday' words, from the Woodware Jane's Script sentiments stamp set were stamped either side of the image using the Versafine Smokey Gray archival pigment ink and traced over using the Sakura clear Stardust pen.

Holes were punched in two corners of the Label shape using the Big Bite and small teal Papermania eyelets were set in the holes and light blue satin ribbon was knotted through them.

The Gorjuss Girls image was then added to the centre of the panel using 3D foam pads and Craft Planet Iridescent Sparkle glitter glue was added over the wings, small heart and dress hearts of the image.

A white Papermania Imaginisce paper flower was layered over an aqua Prima flower and a small teal Papermania eyelet was added to the centre. A length of the light blue ribbon was knotted and threaded through the centre as a finishing touch.

Saturday, 18 September 2010

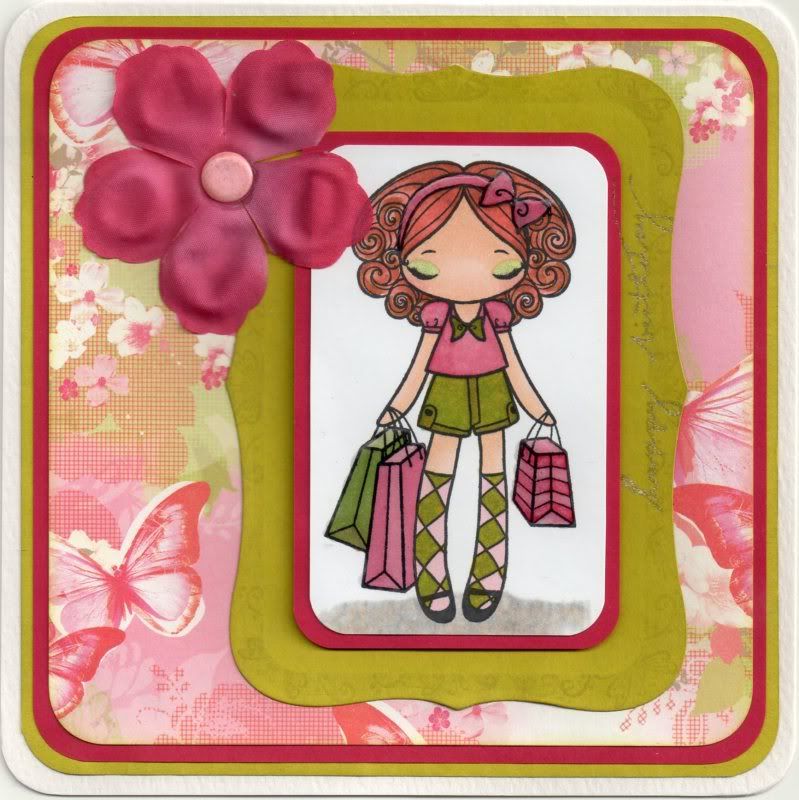
Hot Pink and Lime Shopping Miss Anya

Here is a birthday card I made for a young lady who is about to embark on her university studies in Dublin.


The Shopping Miss Anya image, from The Greeting Farm, was stamped using Memento Tuxedo Black dye ink and coloured using Copic Sketch markers:
  • Hair: YR02, E35, E39
  • Skin: E00, E21, E51, R20, YG11, Y00
  • Bow: R29, RV21, RV34
  • Top: RV21, RV34, R29, G14, E43, Y08
  • Shorts: G14, E43, YG11, Y08
  • Socks: RV21, G14, E43, YG11, Y08
  • Bags: 1) RV21, RV34, C0; 2) G14, E43; 3) RV21, RV34
  • Shadow: N1, N3, E11, 0
 and matted onto pink paper.

The hair on the image was coloured following the excellent tutorial on the Colour Me Copic blog showing how to colour curly hair using Copic markers, so many thanks to them for that.

A panel was die cut using the Labels 8 Nestabilities die and the centre masked. Small images from the See D's Vintage, Romantic and Whimsical Garden Morsels stamp sets (which really haven't been used as much as I thought they would be when I bought them) were stamped around the edge using ColorBox Olive Pastel Fluid Chalk ink.

This was then overstamped with the 'Happy Birthday' stamp from the Woodware Jane's Script Sentiments stamp set using Versafine Spanish Moss archival pigment ink and traced over the top with a clear Sakura Stardust pen.

A panel of the pink butterfly paper from the Papermania Summer Bloom paper pad was matted onto the pink and green paper with the image added off-centre.

Anita's 3D Gloss was then added over the hair bow and the shopping bags, and a wash of clear Sakura gel pen was added to the eyes.

A pink silk flower from Papermania was added in the top left corner with a clear embossed pink card candy, from Craftwork Cards, added in the centre.

To heat emboss the card candy, I found the easiest way to do it is to add a small piece of double sided tape to the end of a pencil (preferably not painted) and press the card candy onto it. Tap the card candy into the inkpad you wish to use until the candy is covered in the ink than dip the candy into the embossing powder.

Tap off the excess embossing powder and heat, turning the pencil as the embossing powder starts to melt. Once the embossing powder has all melted, leave to cool for a few seconds then remove from the pencil - the heat will have softened the tape a little, making it easy to peel away. You can then re-use the tape if you need to do multiple card candy.

There are a few challenges that I'd like to enter this card into:

Thursday, 9 September 2010

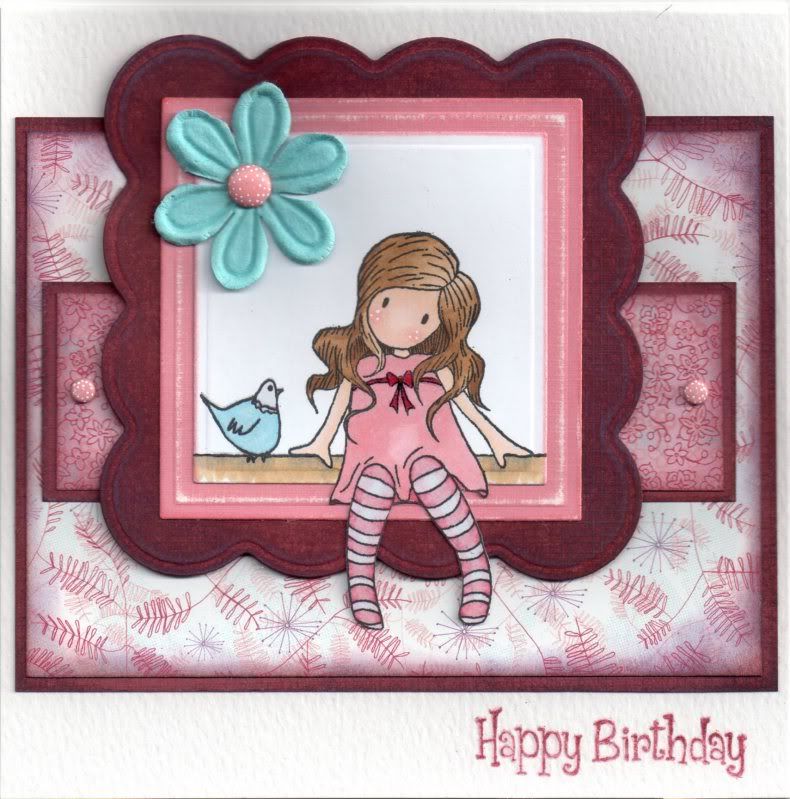
Pink, Burgundy and Blue Little Birdie Gorjuss Girl

Here is a card I made for my great-aunt in Canada - hopefully she'll like this image!


The 'A Little Birdie Told Me' Gorjuss Girl image, from Sugar Nellie, was stamped using Memento Tuxedo Black dye ink and coloured using Copic markers:
  • Hair: E21, E31, E35, E57
  • Skin: E00, E21, E51, R20
  • Dress/Socks: R20, R39, C0
  • Bird: B02, C0
  • Shadow: N3, E31
The image was then die cut using the 'out of the box' technique and a standard square Nestabilities die.

A larger square was cut from candy pink textured card from Papermania and the edges were scuffed using the Basic Grey precision file set. A big scalloped square was then die cut from the dusky red textured card from Papermania, scuffed with the precision file set and coloured with the Tim Holtz Dusty Concord and Fired Brick distress inks.

A panel of the Felicity paper from the Basic Grey Euphoria paper pad was matted onto a similarly distressed mat of the dusky red textured card, as were two small panels of the Utopia paper from the same paper pad.

A Prima paper flower from the Botanical Mix tub was added to the image panel using a large pink Papermania brad, and two small pink Papermania brads were added to the two small panels of Utopia paper. The brads were then highlighted with small dots using the Papermania Snow White gel pen.


The sentiment, from the Papermania Clare Curd Sentiments stamp set, was stamped in the bottom corner of the card blank using Versafine Crimson Red archival pigment ink and traced over the top with a Sakura Clear Glaze pen, as was the red bow on the dress.

I will be entering this card into a few blog challenges:

Tuesday, 7 September 2010

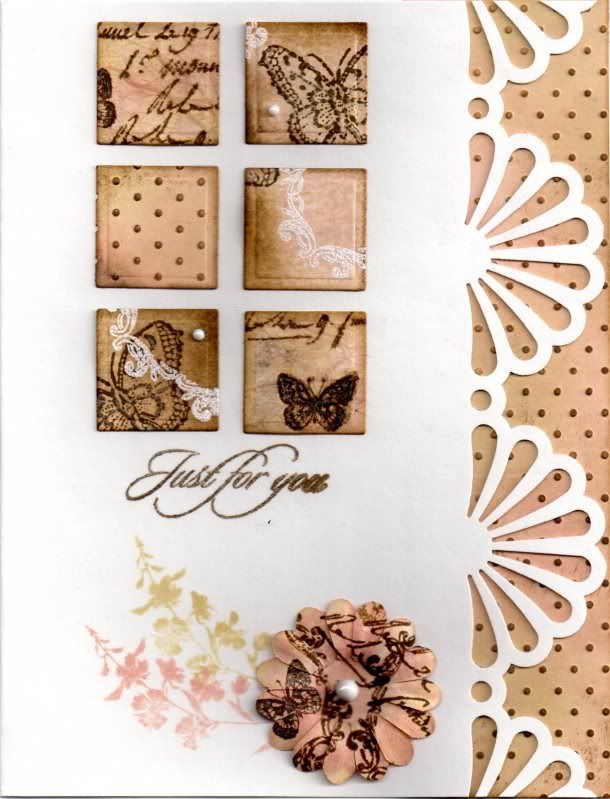
Pink and Brown Daisy Fan Tiles

This card was based on a project in the June 2010 issue of the Craft Stamper magazine.

It is created by making what is called a Serigraph. This consists of a colourful background made with a brayer and three or four co-ordinating colours.

This was something a little out of my comfort zone but I loved the look of the card in the magazine and wanted to give it a try!! I think it makes a nice anniversary card for the in-laws!


To create the serigraph background, a piece of cream card was coloured using the Tim Holtz Tattered Rose and Antique Linen distress inks. This was overstamped with the circle flourish frame image from the Papermania Chatsworth Frames stamp set using Emboss Clear ink and heat embossed with Stampendous Detail White Opaque embossing powder. The Tim Holtz Walnut Stain distress ink was then used to fill in areas of the card that weren't already coloured with the other two colours. The embossing was then wiped with a tissue to remove any excess ink.

Using the Walnut Stain ink, the two butterfly stamps from the Penny Black Enjoy Life stamp set and the Crafty Individuals Wildflowers stamp set were randomly stamped over the sheet. The butterflies were then highlighted with the Sakura clear Stardust pen.

A second sheet was created by colouring a piece of white mulberry paper with the Tattered Rose and Antique Linen inks, and then over stamped with the Hero Arts Old Writing stamp and the Crafty Individuals Butterfly stamps with the Walnut Stain ink.

A third sheet was created by colouring the cream card with the Tattered Rose and Antique Linen inks and then embossed with the Cuttlebug Swiss Dots embossing folder. The raised dots were then coloured with the Walnut Stain ink.

The mulberry paper was backed with cream card and small squares were cut from all three sheets using a standard square Nestabilities die.

The edge of a 5"x7" card blank was punched using the Martha Stewart Daisy Fan deep-edge punch and a panel of the embossed card was adhered to the inside of the card so it can be seen through the punched edge.

Six of the small tiles were adhered to the front of the card and a small white Papermania adhesive pearl was added to a couple of the tiles.

The 'Just For You' sentiment, from the HOTP Sentiments stamp set, was stamped below the tiles using the Walnut Stain ink and traced over with the Sakura clear Stardust pen.
 
Using the Tattered Rose and Antique Linen inks, the larkspur image from the Crafty Individuals Wildflower stamp set was stamped at the bottom of the card blank.
 
A cream Papermania Imaginisce paper flower was coloured with the same inks and overstamped with the small butterfly, flourish frame and Old Writing stamps using the Walnut Stain ink. A large white adhesive pearl was added in the centre of the paper flower and adhered to the card over the edge of the larkspur stamped images.

I would like to enter this card into a few challenges:

Thursday, 19 August 2010

Pink, Red and Green Tilda with Marguerites

Here is my latest offering for you all. She's a real cutie pie isn't she!!


The Tilda with Marguerites image, from Magnolia, was stamped using Memento Tuxedo Black dye ink and coloured using the Copic Sketch markers:
  • Hair: E35, E43, E57
  • Skin: E00, E02, E21, R20
  • Shirt: R20, E43
  • Bow: R20, R24
  • Shorts: G85, YG17, YG67
  • Socks: R20, E43
  • Shoes: YG11, YG17, YG67, E41, E43
  • Flowers: G85, YG17, YG67, R20, R24, E43
  • Wings: YG11
  • Shadow: N3, N5
  • Outline: N3
Highlights were added to her cheeks with a Papermania Snow White gel pen, and highlights were added to the flowers and the wings using a Sakura clear Stardust pen.

The image was cut out using a Mega Curved Rectangles Nestabilities die and matted onto a larger pink panel. A red and white Prima flower was attached to the corner of the panel with a small green brad.

A panel of the Chintz paper from the Basic Grey Porcelain paper pad was matted onto the pink card and a length of the striped red grosgrain ribbon from the Chatterbox Scarlet ribbon pack was adhered across the centre. The sentiment, from the Woodware Jane's Script sentiments stamp set was stamped in the bottom right hand corner using Versafine Crimson Red archival pigment ink

Saturday, 10 April 2010

Blue, Green and Brown Jungle Edwin

So, I thought it was about time I uploaded another card.

This time it is my dear hubby's birthday card and I decided I wanted to use my new Edwin stamp.

I have decided to enter this card into a couple of blog challenges this week.

The first is the Creative Inspirations blog challenge, which this week, Challenge #55, has a colour theme of blue, green and brown. Hopefully you think this fits into the theme!!

The second is the A Spoonfull of Sugar blog challenge, which this week, Challenge #98, asks for a card For The Boys.

I started by stamping the Jungle Edwin image onto smooth white card using Memento Tuxedo Black dye ink and coloured it in using the Copic Sketch markers.
  • Hat/Socks: YG07, YG17, N3
  • Shorts/Boots/Stick: E31, E35, E57
  • Shirt: BG11, B41, B45
  • Knife: C0, N3, BG11, E57
  • Hair: E35, E57
  • Skin: E00, E02, E21
I then added highlights to the image using a white Sakura Souffle gel pen (although these didn't look right on the hat so I coloured over them with the green Copic marker).


The image was then cut out and mounted onto blue Core'dinations card and beige card panels that had been die cut using the Mega Curved Rectangle Nestabilities.


A strip of the Light-Hearted paper from the Basic Grey Offbeat paper pad was matted onto a panel of the beige card and a length of beige hemp cord was tied around it. This was then layered onto a square panel of the Impromptu paper, also from the Offbeat paper pad and the beige card.


The sentiment, from the Daisy and Dandelion 'Marshmallow Does DIY' stamp set, was stamped onto the smooth white card using Versafine Vintage Sepia archival pigment ink and matted onto the beige card. A couple of small blue eyelets were set either side of the sentiment and short lengths of the beige hemp cord were threaded through them and attached to the underside of the panel.

Sunday, 7 February 2010

Valentine's Hearts and Polka Dots

Well, I have finally got around to entering a couple of blog challenges.

The first is the Stamp Something blog challenge and the theme for this week is Love Something. The second is the Stampin' For The Weekend blog challenge and their theme is Love and Valentine's. So, I decided to enter the Valentine's card that I made for my hubby into both.

I decided to go for a fairly simple design for this card and decided to use some of my new goodies, in particular my new border punch that I won on ebay recently.

I started by punching the edges of a strip of red card using my new punch, an EK Success Scalloped Scallop punch. A strip of the black and white polka dot paper from the Papermania Claire Curd The Big One paper pad was then matted on top.

The 'From The Heart' stamp from Dovecraft Studio G was then stamped onto white and red card using Versafine Onyx Black archival pigment ink. Just the sentiment centre part was cut from the white card and the whole frame was cut from the red card. The little heart was stamped again onto red card, cut out and attached to the white panel. The white panel was matted onto the red panel and then onto a panel of black card with the corners rounded.

Using the heart stamps from the Dovecraft Studio G Love and Be Mine mini stamp set, the images were stamped onto red card using the Onyx Black ink. The images were highlighted using a white gel pen and a red Sakura glitter gel pen. The circle sentiments were cut out using a circle Nestie die and matted onto black circles. The sentiment panel and the hearts were positioned across the polka dot border.


The inside of the card was also decorated, using the frame part of the 'From The Heart' stamp and the 'Be Mine' stamp from the mini stamp set. This was also layered onto the polka dot paper and punched red card.

Thursday, 26 November 2009

Pink and Burgundy Christmas Pudding Version Two

I liked this week's Mojo Monday sketch so much that I decided to make a second design.

The Christmas Pudding image from the See D's Fun Christmas stamp set was coloured the same way as the first card, but this time I decided to go with a top fold tent card. The card was covered using the brown Christmas Phrase paper from the Papermania Naughty and Nice Christmas paper pad. The scallops, cut using a Nestabilities circle die, were attached to the reverse of a strip of burgundy card and a length of pink satin ribbon adhered along the strip.


The Christmas Pudding image panel was attached at the bottom left hand corner of the card, as shown in the sketch below.

Pink and Burgundy Christmas Pudding

Well, I've finally made a start on my Christmas cards. I've actually made the grand total of 18 cards. Only about 65 to go!!!

I saw the sketch for this week's Mojo Monday blog challenge and thought it looked really stylish, so I decided to have a go.

I decided to use one of the cute little stamps from the See D's Fun Christmas stamp set, namely the Christmas Pudding image. The image was stamped using Versafine Vintage Sepia archival pigment ink, and watercoloured using the Whispers Brushstroke markers. The berries were then coloured with a red Sakura glaze pen, the icing with Anita's Metallic White 3D Dimensional paint and the pudding and leaves coloured with Winsor and Newton Iridescent Medium. The image was then matted onto pink and burgundy card.


A white A6 side-opening card was covered with brown star paper from the Papermania Naughty and Nice Christmas paper pad. Three burgundy circles and three pink circles, cut using a standard Nestabilities circle die were attached to a strip of burgundy card to create scallops. A length of pink satin ribbon was attached over the join, and a second length of ribbon tied to it. The image panel was then placed in the bottom right hand corner as shown in the sketch.

Wednesday, 5 August 2009

Some Cards For The Ladies

Here are a few cards I've made recently for the ladies in my life. The first was for my mum's 60th birthday. I have also made a lady's card with a difference, namely that it is a motorbike card, but purple!!

GREEN AND ORANGE PENNY BLACK UPLIFTING OCCASION


The image used on this card was very kindly donated by Judith B in the Sep '08 Docrafts Image Swap, and was watercoloured using Whispers Brushstroke markers.

STAMPS
Uplifting Occasion - Penny Black
Birthday Wishes - Hero Arts (Birthday Messages set)

PATTERNED PAPERS
Hot Off The Press Ultimate Cardmakers Creative Pack

INKS ETC
Versafine Spanish Moss archival pigment ink
Whispers Brushstroke markers

EMBELLISHMENTS
White paper flower - Papermania Imaginisce
Cream paper flower - Papermania Imaginisce
Mini orange brad

PURPLE POLKA DOT MOTORCYCLE


PATTERNED PAPERS
Papermania Spring Burst paper pad

INKS ETC
Sakura glaze gel pen
Whispers Brushstroke markers
ColorBox Wisteria fluid chalk ink

EMBELLISHMENTS
Motorcycle peel-off - Anita's
Happy Birthday peel-off - Anita's
Lilac organza ribbon

PINK AND PURPLE DAISY DECORATIVE PANEL

I used one of my recent purchases to make this card - an Impress panel die. However, it wasn't large enough to fill the panel, so I cut it into two pieces and hid the join behind the circular panel.
The Daisy image was 3D'd by concertina folding a piece of card and attaching it behind the image that was stuck onto a piece of white card and cut out.
PATTERNED PAPERSPapermania Spring Burst paper pad

INKS ETCWhispers Brushstroke markers
ColorBox Wisteria fluid chalk ink

EMBELLISHMENTSDaisy stickers - Daisy and Dandelion
Have A Great Day sticker - Papermania Birthday Sentiments sheet
DIE CUTS/PUNCHESXCut Impress Panel die
The next installment will be some of the hardest cards of all to make - cards for the men!!!

Friday, 29 May 2009

DIY Marshmallow Fathers Day - Alex K's Blog Candy Challenge - CLOSED

Why is it when you really want to get down to some cardmaking there's always something getting in your way!

I wanted to get my entry for Alex's blog candy challenge out of the way about a fortnight ago, but what with one thing and another it didn't happen. Then, on Monday I said to myself I'd get it made on Tuesday, so of course I spent all day in bed with a migraine. I haven't had one for a long time, and this was a particularly nasty one. Not only that, but my eyesight seems to be getting worse just lately, so I'm going to have to dig my glasses out more often.


The blog candy up for grabs is amazing!!!!

Here is what the lucky recipient will receive from the very generous Alex:

- A set of Nestabilities - large plain Octagons
- A packet of designer Gromlets from We Are Memory Keepers
- 5 pink glittery cards with envelopes
- A pack of flower shapes
- A 2"x12" Papermania Oriental Spice Border pack
- 24 A4 sheets from the new Papermania Signature ranges Blueberry Hill and Regency (12 each)
- 20 6"x6" sheets of Core'dinations Whitewash cardstock
- 1 Autumn Leaves Butterfly stamp
- 4 reels of American Crafts Ribbon
- Bottle of Silver Metallic 3D paint
- A wallet with Hanglar images

Anyway, I finally managed to get the card made yesterday. The sketch that Alex produced for the challenge looked particularly 'girlie' with the flowers on it, but I decided to adapt it to a masculine card, mainly because I had to make my Father's Day cards earlier than normal as my father-in-law is going on holiday at the start of June so I've got to get it to him before he leaves.


Anyway, I hope you don't think I've taken too many liberties with the sketch!!!

I started by stamping the Marshmallow DIY image from the Marshmallow Does DIY stamp set from Daisy and Dandelion using the Versafine Onyx Black archival pigment ink and watercoloured it using the ColorBox Amber Clay and Chestnut Roan fluid chalk inks.


The 'Warning' tag image was also stamped using the Onyx Black ink and watercoloured with the Amber Clay ink and a small length of Anita's tan leather sticky ribbon was threaded through the tag. The toolbox image was also stamped and coloured as for the other images.


The edges of the Marshmallow image panel, as well as all the other panels, were coloured using the Amber Clay and Chestnut Roan fluid chalk inks, and matted onto beige textured cardstock.


Two matching papers from the Daisy and Dandelion Picnic Patch paper pad were matted onto another piece of the beige card and a length of the tan leather sticky ribbon was adhered onto a strip of the beige card and then attached across the join of the patterned papers.


The Circle Journalling image from the Studio G Mini Journalling Blocks stamp set was stamped onto white card using the Onyx Black ink and the 'Best Wishes' sentiment from the Papermania Clare Curd Sentiments set was stamped within it. This was then watercoloured using the Amber Clay ink. Silver embroidery thread was tied through a hole made through the top of the circle and threaded under the leather ribbon and through to the back of the panel. A mini silver brad was pushed through the hole in the panel to make it look like the brad was holding the sentiment in place.


The 'Warning' tag and toolbox images were then adhered over the edges of the Marshmallow image panel.

I decorated the inside of the card with a strip of the striped paper as used on the front of the card and stamped the sentiment using a 'Happy Father's Day' stamp from Inca.


I also made a 'Handmade By' medallion for the reverse of the card.

Watercolouring with the fluid chalk inks is a bit of trial and error. You need to add quite a lot of water so you don't get too thick a colour as they can obliterate the stamped lines, as you can see below on the second Father's Day card I made.


This was made almost the same as the challenge card, but on this one I added the 'Warning' tag to the Marshmallow image panel and added the word 'DAD' down the right-hand side.

This was done by stamping the letters from the Papermania Fun Letters stamp set onto both the striped paper and the beige texture cardstock.

The patterned letters were stamped using the Onyx Black ink and cut out close to the outline and the cardstock letters were stamped using both the Amber Clay and Chestnut Roan chalk inks and layered up.

The screwhead image from the Marshmallow Does DIY stamp set was then stamped onto the letters and traced over with an orange Sakura metallic gel pen.
Blog Widget by LinkWithin