Pages

WELCOME

This blog was created to act as a record of the cards and other projects that I have made. It is for both my own reference and to help inspire anyone who wants to take a look.

I'd love it if you'd leave me a comment so that I know what you think of my projects and that you've been to visit!

Anyone can comment, even those who don't have a blog. (Just look for the word 'Comments' under the three little pictures at the end of each post). Readers without a blog can add an anonymous comment, but please leave your name (and docrafts username if applicable) so I know who you are!

Slideshows of all the cards I've uploaded to my blog can be found at the bottom of the page.


PEOPLE WHO FOLLOW MY BLOG

Showing posts with label Fiskars. Show all posts

Wednesday, 9 December 2015

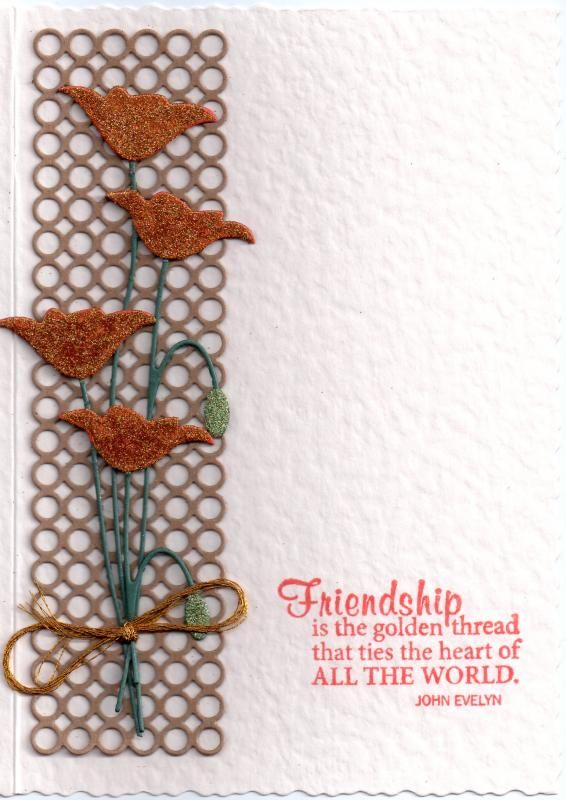
Orange Glittered Prim Poppies

This was one of those CAS cards that was by no means 'simple' in its execution. It was based on  card I saw on Pinterest here.
 
The first step was to die-cut the Contempo Circle Border die by Memory Box from Kraft card. Getting adhesive on the back was then the first hurdle. I should have added wide double-sided tape to the back of the Kraft card first, but only thought of that afterwards, so I used tacky glue and that was fun!!!
 
 
The next step was to diecut a couple of the Memory Box Prim Poppy shapes using dark-green card stock, as well as the flower heads in orange card stock which were then adhered in place.
Then came hurdle number two - adding the glitter. I used the LP Creative Crafts Corn Yellow and Apple Green glitters with the Zig glue pen. Of course, there was glitter everywhere and then I realized I'd added the glitter too early. I should have added it after I had stuck everything down!
 
Once the glue had dried and the glitter in place, the two poppy die cuts were tied together (not as easy as it sounds) using gold metallic embroidery thread.
 
The poppy diecuts were then adhered in place over the Contempo Circle Border diecut.
 
The sentiment, from the Fiskars Friends Forever Quotes stamp set, was stamped directly onto the card front using Memento Morocco dye ink.

Monday, 27 June 2011

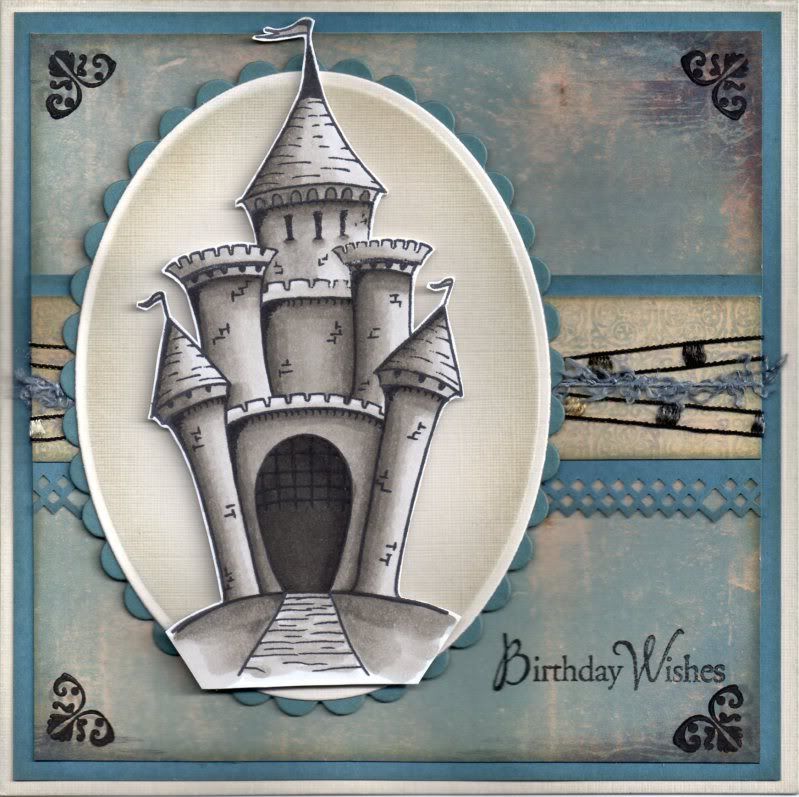
Blue and Grey Paper Artsy Castle

So, as promised, here is the card I made using the Castle stamp from the Paper Artsy Crowns and Castles 4 stamp set.


The Castle image was stamped using Memento Tuxedo Black dye ink and coloured with Copic markers:
  • Castle: W1, W3,W5,W7,W9
The image was then cut out.

Using Nestabilities dies, a petite cream oval and petite scalloped blue oval were die cut. Keeping the cream die cut within the die, the edges were distressed using Tim Holtz Weathered Wood and Antique Linen distress inks with shaving brushes. I much prefer the effect using the brushes to the Cut & Dry foam as I always get heavy smudges when I use the foam, whereas this gives a much softer look.

The Castle image was then mounted in the centre of the ovals.

A panel of the cream and blue medallion paper from the DCWV Once Upon A Time mat stack was then matted onto a strip of the blue card punched with the XCut Diamonds border punch and lengths of brown ladder ribbon and blue fibre from the HOTP Sapphire Sarabooks fibres were wrapped around it.


This was then matted across the blue distressed birds paper from the same mat stack. The edges of all of these pieces were distressed with the two distress inks and then matted onto blue card.

The corners of the blue distressed paper were then stamped using a small corner flourish stamp from the Fiskars Friends Forever Quotes stamp set and Versafine Smokey Gray archival pigment ink and then overstamped with Brilliance Graphite Black pigment ink.

The Birthday Wishes sentiment, from the Hero Arts Birthday Messages stamp set, was stamped in the bottom right corner also using the Graphite Black ink.

Here are the challenges I am entering this card into:

Thursday, 16 June 2011

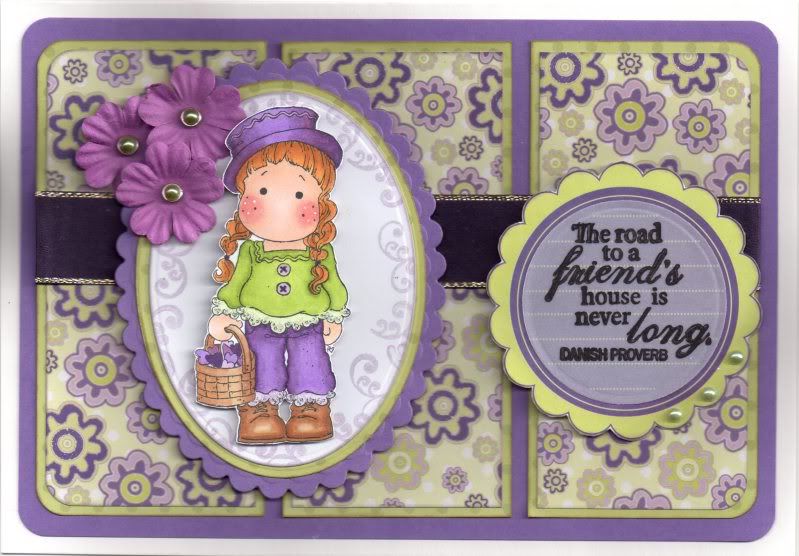
Purple and Green Gingerbread Tilda Panels

Here is the card I made for my matey Julie B for her birthday.


The Gingerbread Tilda image was stamped using Memento Tuxedo Black dye ink and coloured with Copic markers:
  • Hair: YR23, YR24, Y17
  • Skin: E00, E21, E51, R02, R20
  • Blouse: YG03, YG11, YG13, YG17, Y00, Y02
  • Buttons: V12
  • Hearts/Trousers/Hat: V04, V06, V09, V12
  • Shoes/Basket: E31, E33, E35
On 'girly' characters, I usually just use R20 on the cheeks, but I decided to experiment with R02 and R20 (especially as I now have a few more colours to use) and went for a rosier cheek and I think it rather suits her! Tell me what you think.

The image was then cut out and highlighted with Craft Planet Iridescent Sparkle glitter glue.

A petite oval Nestabilities die was used to die cut a panel of white card which was then stamped around the edge with a small flourish stamp from the Fiskars Friends Forever Quotes stamp set using ColorBox Wisteria fluid chalk ink. This was then matted onto an oval of the green polka dot paper from the Papermania Spring Burst paper pad and a scalloped oval die cut from purple card.


Three panels of the green and purple daisy paper, also from the Spring Burst paper pad, were matted onto the green polka dot paper and a length of wide purple satin ribbon was adhered across all three panels. These were then matted onto a panel of purple card.

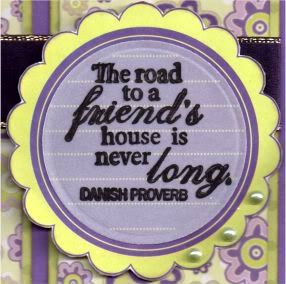
The sentiment, also from the Friends Forever stamp set, was stamped onto white vellum using Brilliance Graphite Black pigment ink and die cut using a circle Nestabilities die. This was then matted onto a Spring Burst journalling page.


The image panel and the sentiment panel were matted onto the panel and three purple paper flowers from The Crafty Cow were added to the panel and image panel with green Papermania pearl brads before the panel was added to the card blank.

Three green Kort & Godt pearls were added to the scallops of the sentiment panel.

Here are the blog challenges I am entering this card into:

Thursday, 2 June 2011

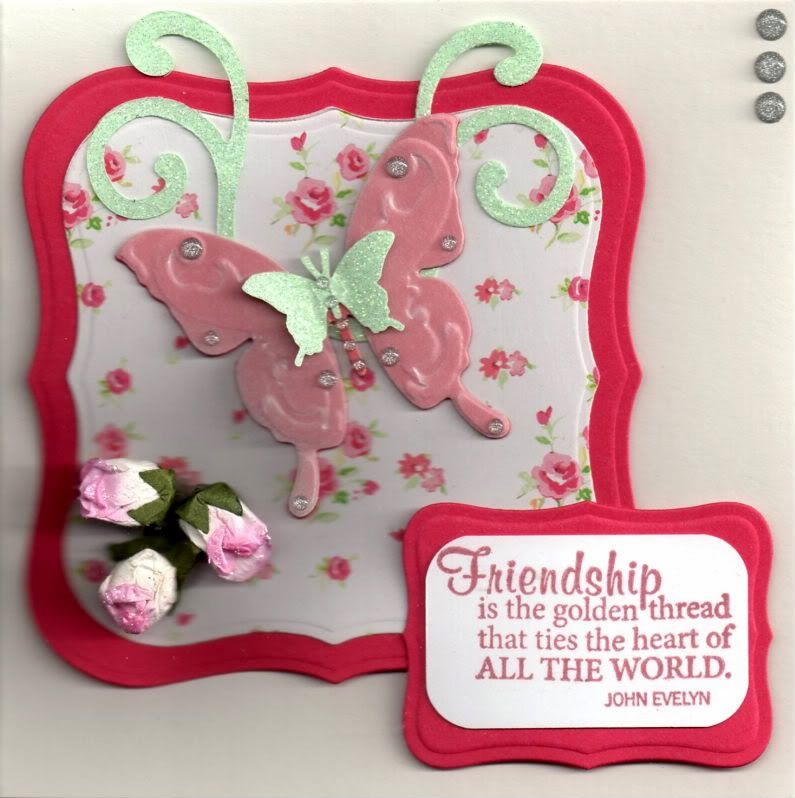
Pink and Green Flourish Butterfly

This card was based on a beautiful card that was sent to me by the very talented Angie. You can see her card here (it's the top one!)

This is the card that I made for my matey Loretta for her birthday. I know she has received it so I can post it now.

I decided to make my card a more simple version than the intricate one I received from Angie, and used my new Spellbinders Butterfly Shapeabilities die set.


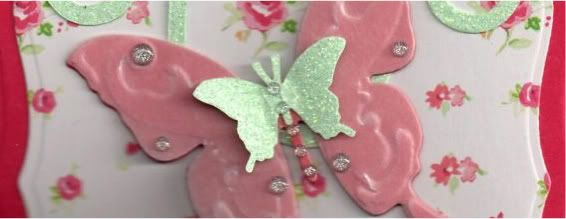
Using the largest of the butterfly dies, two butterflies were cut from cerise card and white vellum and embossed. A smaller butterfly was also punched from light green glitter card using the Martha Stewart Butterfly punch and the three butterflies were layered up along the centre, with the wings loose and fluttering, although you can't see that in the scanned picture. The butterfly was then adorned with Papermania silver shimmer dots.

A panel was die cut from the cerise card using the Labels 1 Nestabilities die and matted with a smaller die cut from the pink rosebud paper from the Papermania Henbury Lane paper pad.

Flourishes were then die cut from the light green glitter card using the Sizzix Sizzlets Flower and Flourish #2 die and attached to the patterned panel beneath the butterfly.

Using silicon glue, three pink paper rosebuds were attached to the patterned paper panel in the bottom left corner.


The sentiment, from the Fiskars Friends Forever Quotes stamp set, was stamped using Versafine Crimson Red archival pigment ink and the corners of the panel were punched with the small corner rounder punch from Avec. This was then matted onto a panel die cut with a Label 8 Nestabilities die and matted over the bottom right corner of the butterfly panel.

Three silver shimmer dots were then added in the top right corner of the card blank.

Here are the challenges that I am entering this card into:

Friday, 11 March 2011

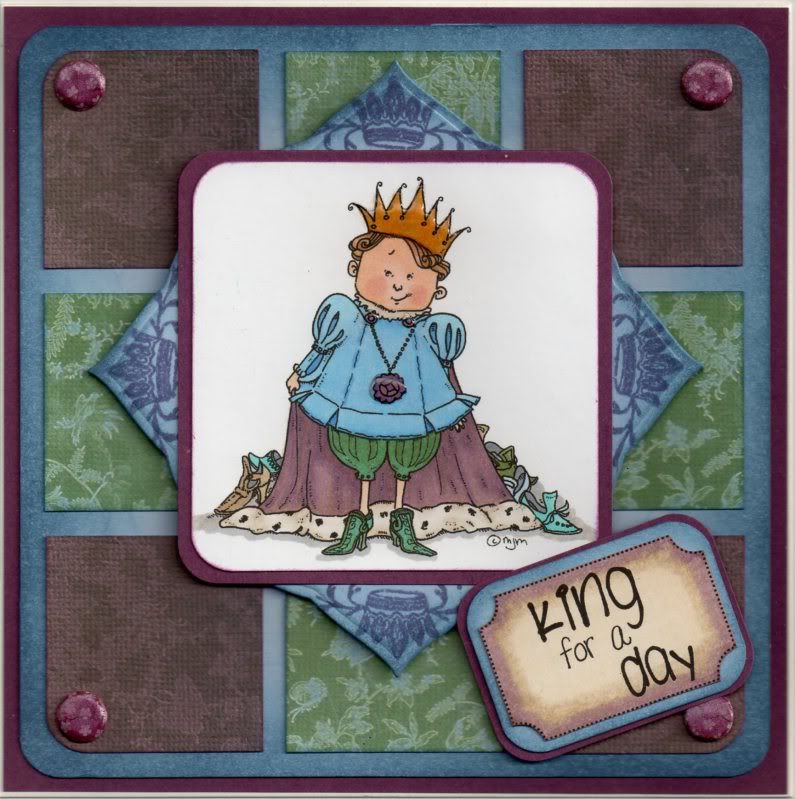
Plum and Blue Prince Charming Tiles

Here is the card I made for my not-so-little brother (he's 27 now!) He reckons that's not old, so that means I'm "not old + 10"!!

I chose the patterned papers and coloured the image to match, and it wasn't until I'd made it I realized it was in Villa colours, which is handy because that's the football team he supports (that's soccer for all you Americans reading this!)


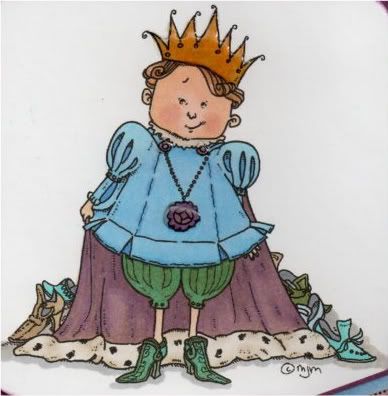
The Prince Charming image, from Mo's Digital Pencil, was coloured using Copic markers:
  • Crown: Y17, E41, E43
  • Blouson: B12, B21, B24
  • Breeches/Shoes: G85, BG45, E43
  • Robe/Medallion: V15, E43
  • Ermine/Collar: E40, E43
  • Skin: E00, E21, E51, E13
  • Hair: E13, E35, E57
  • Extra Shoes: BG45, G85, B21, E43, C6
  • Shadow: N3, E41
The image was then punched with the large XCut corner rounder punch and matted onto plum card. A Labels 3 shape was cut using a Nestabilities die from blue card and distressed using Tim Holtz Faded Jeans distress ink, then overstamped in the corners with the Crown Flourish stamp from the Fiskars Harlequin Charms stamp set with the Versafine Imperial Purple archival pigment ink. The image panel was then matted over the top.

Two papers from the DCWV The Old World mat stack were cut into 4cm tiles and the plum tiles were punched using the large XCut corner rounder punch. These were positioned onto the blue card also distressed with the Faded Jeans ink.


Four violet card candi from the Pot Pourri set by Craftwork Cards were coloured using Copic markers:
  • Candi: V15, E43
These were then added in the corners.

The sentiment was computer generated and coloured with Copic markers:
  • Sentiment: V15, E43, E40
It was then cut out and matted onto panels of the plum and blue card and punched with the large XCut corner rounder. The image was then highlighted with Anita's 3D Gloss.

Here are the blog challenges I am entering this card into:

Sunday, 12 December 2010

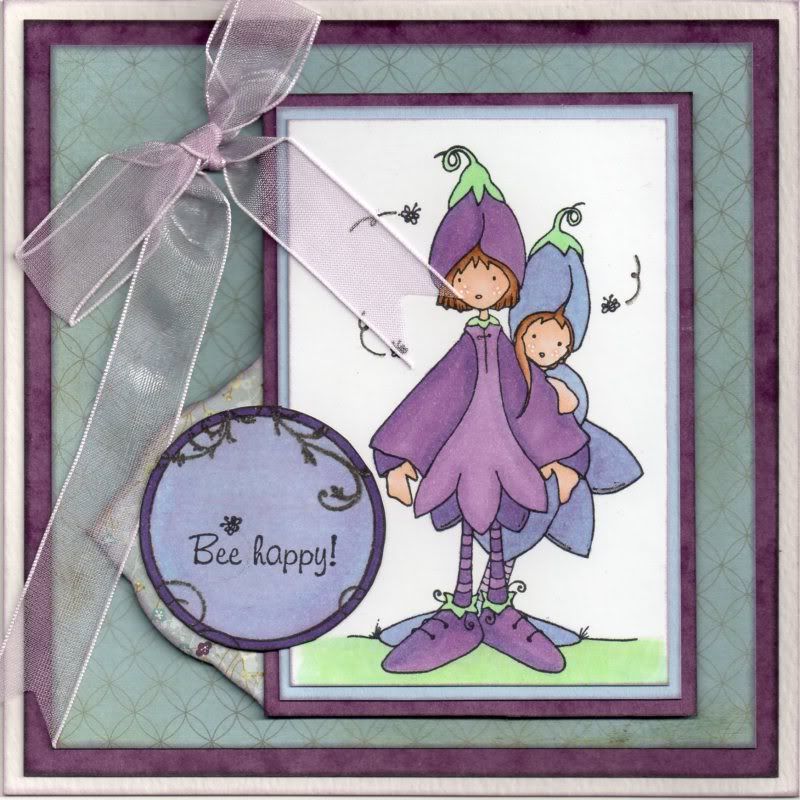
Light Blue and Violet Foxglove Friends

I can now blog this card as I know the recipient (Alex K/Eisbaerin) has now opened her card!

I fell in love with this image the first time I saw it and managed to get hold of it a few months ago. I decided to use the lovely Basic Grey Wisteria papers and coloured my image to match.


The Mr and Mrs Foxglove image, from Whiff of Joy, was stamped using Memento Tuxedo Black dye ink and coloured using Copic Sketch markers:
  • Foxglove 1: V12, V15, V17, B21, G00, BG11, YG11
  • Foxglove 2: V12, B21, G00, BG11, YG11
  • Hair: E13, E35, E57
  • Skin: E00, E21, E51, R20
  • Bees: V12, N1
  • Grass: BG11, YG11
I decided to interpret the image as two females as it's not obvious that it's a 'Mr & Mrs' image, at least I don't think so. The image was then matted onto light blue and purple card.

A panel of the Pond paper from the Basic Grey Wisteria paper pad was matted onto the purple card and then onto the card blank.

Using the Violet paper from the same paper pad, a panel was die cut using a Labels 3 Nestabilities die and attached behind the image panel.

The circle flourish stamp from the Fiskars Harlequin Charm stamp set was stamped using Versafine Onyx Black archival pigment ink and cut out along the outer edge of the circle. The sentiment from the Foxglove stamp was stamped in the centre of the circle using the Tuxedo Black ink and the circle was then coloured using the Copic markers:
  • Sentiment panel: V17, B21, V12
This was then attached over the Labels 3 panel and the edge of the image panel.

A bow was created from lilac organza ribbon using a bowmaker and attached in the top left corner of the card.

Highlights were then added to the image using a Papermania Snow White gel pen and to both the image and sentiment panels using a clear Sakura Stardust pen.

Here are the challenges that I am entering this card into:

Thursday, 21 October 2010

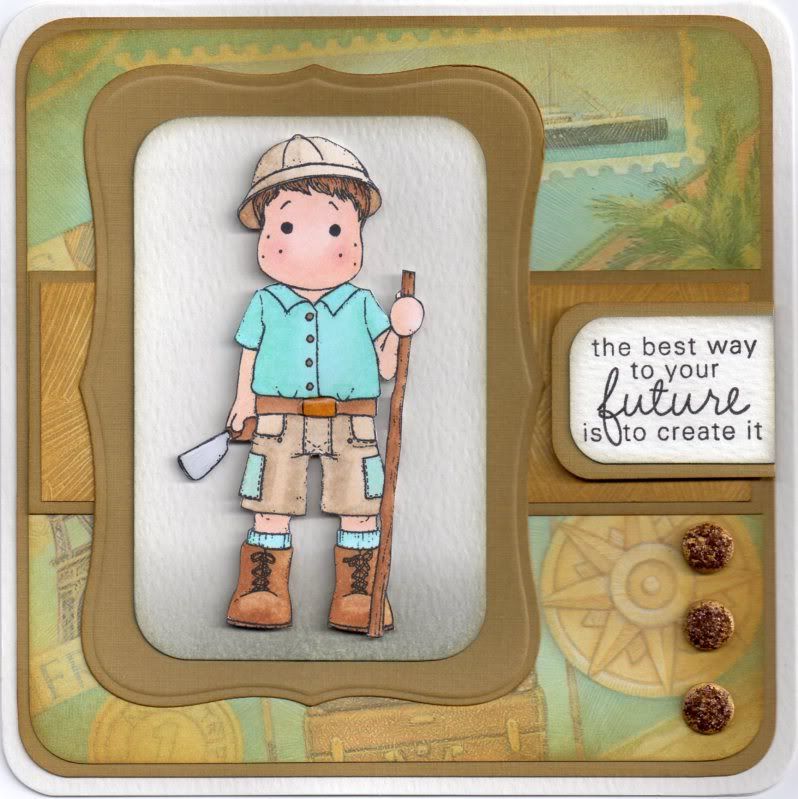
Blue and Brown Jungle Edwin

Another card using the great Jungle Edwin image, once again coloured using Copic Sketch markers.


The Jungle Edwin image, from Magnolia, was stamped using Memento Tuxedo Black dye ink and coloured using Copic Sketch markers:
  • Hat: E35, E41, E43
  • Hair/Stick: E35, E57
  • Skin: E00, E21, E51, R20
  • Shirt/Socks: BG11, BG32, B00
  • Belt: E35, E43, Y17
  • Boots: E35, E41, Y17
  • Shorts: E41, E43, BG11, B00
  • Knife: E35, E57, C0, C2
The image was then cut out and matted onto a panel of white card coloured with Tim Holtz Weathered Wood distress ink, and a panel die cut using a Labels 8 Nestabilities die from Papermania Gold textured cardstock.

A strip of Brown Brushstroke 'Our Vacation' paper from the K&Co Tim Coffey Vacation paper pad was matted onto a strip of the gold card and adhered across a panel of the Vacation Images paper from the same paper pad.

The image panel was added over the strip and three gold card candy from Craftwork Cards, coloured with the Tim Holtz Frayed Burlap, Scattered Straw and Brushed Corduroy distress inks and highlighted with Tim Holtz Vintage Photo Distress Stickles.

The sentiment, from the Fiskars Make A Wish stamp set, was stamped onto white card using Versafine Onyx Black archival pigment ink. The corners were rounded using the small Avec corner rounder punch and matted onto the gold card.


The inside of the card was also decorated. A panel of the brown compass points paper, also from the Vacation paper pad, was matted onto the gold card. A panel was cut from white writing paper and the sentiment stamped in the centre using stamps from the Elzybells Swirly Sentiments stamp set with the Onyx Black ink. The edges were distressed using the Brushed Corduroy ink and matted onto a panel die cut from the gold card using a Labels 8 Nestabilities die.

Here are the challenges I am entering this card into:

Sunday, 5 September 2010

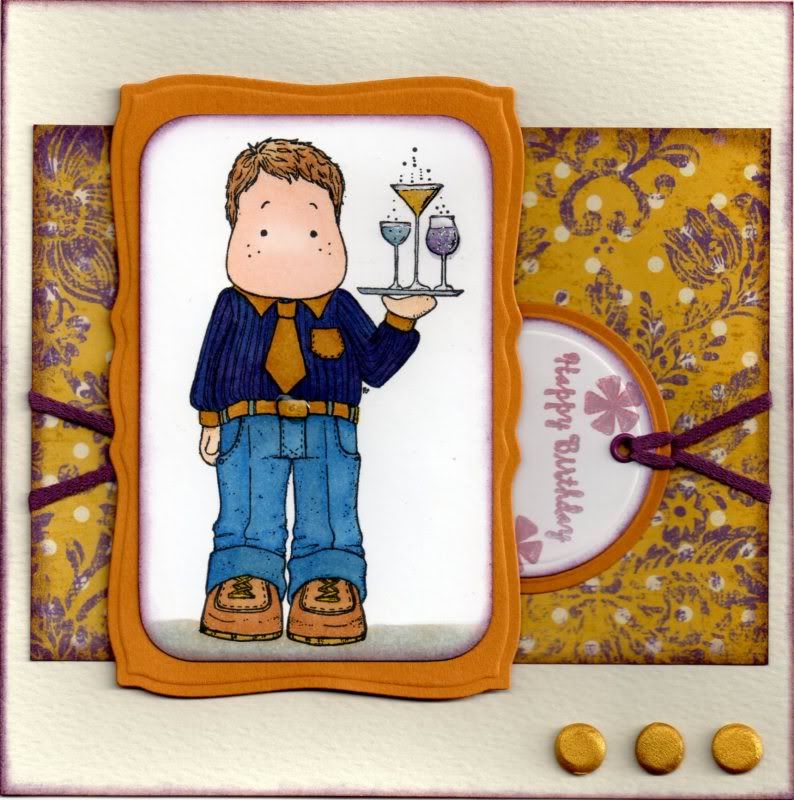
Mustard and Purple Bartender Edwin

Here's a card I made for my sister's fiancé - he's actually a Spanish waiter so thought this image was perfect for a card for him.


I picked the papers first, from the Papermania Persimmon paper pad, and coloured the image to match.

The Bartender Edwin image from Magnolia was stamped using Memento Tuxedo Black dye ink and coloured using Copic sketch markers:
  • Hair: E31, E35,E57
  • Skin: E00, E21, E51
  • Collar/ Tie/Cuffs/Belt/Shoes: Y08, E31, E35
  • Shirt: B18, B45, V17
  • Trousers: B18, B24, B45
  • Tray: C4, C6
  • Glasses: C0, C2
  • Cocktails: BV31 & B45; Y08 & E31; V17 & C2
  • Shadow: E31, C0, C2
The image was then cut out and the corners rounded using the large XCut corner rounder punch, and the edges of the image panel were distressed using Tim Holtz distress inks in Aged Mahogany and Dusty Concord. The image panel was then matted onto a panel of mustard coloured card die cut using the Mega Curved Rectangles die from Nestabilities.

Circles were die cut from white and mustard yellow card using standard circle Nestabilities dies and the sentiment, from the Papermania Clare Curd Sentiments stamp set, was stamped on the white circle using a combination of Wisteria and Warm Violet ColorBox Fluid Chalk inks. Asterisks, from the Fiskars Make A Wish Quotes stamp set, were also stamped using the same chalk inks.

The edge of the white circle was distressed using the Aged Mahogany and Dusty Concord inks and matted onto the mustard circle. A hole was punched in the circles and a small mauve Papermania eyelet set and a length of purple fibre was threaded through. This was then attached to the reverse of a panel of the mustard and purple flourish polka dot paper from the Papermania Persimmon paper pack. A second length was then attached to the left side of the panel to give the appearance of being wrapped all around the panel.

The patterned paper panel was then adhered to the centre of a square card blank and the image panel was adhered over the circles.

Three gold card candy from Craftwork Cards were coloured using the Tim Holtz Scattered Straw, Wild Honey and Walnut Stain distress inks and added in the bottom right hand corner.

Anita's 3D Gloss was then added to the glasses and the belt buckle, and DecoArt Crystal Glamour Dust was sprinkled into the gloss on the glasses.


I shall be entering this card into a few challenges this week:

Sunday, 25 July 2010

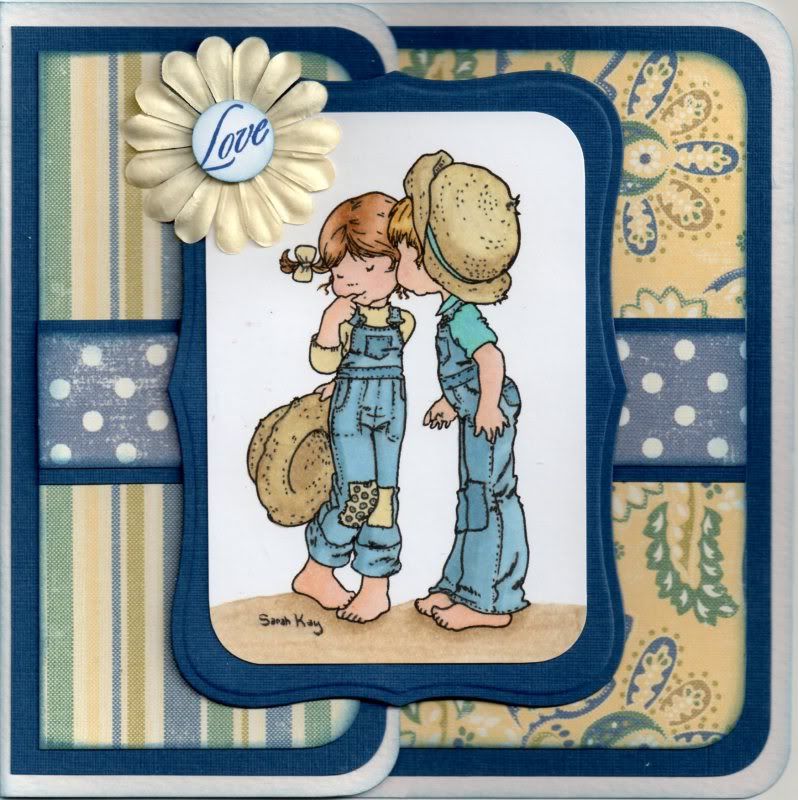
Blue, Green and Yellow Kiss For Chloe

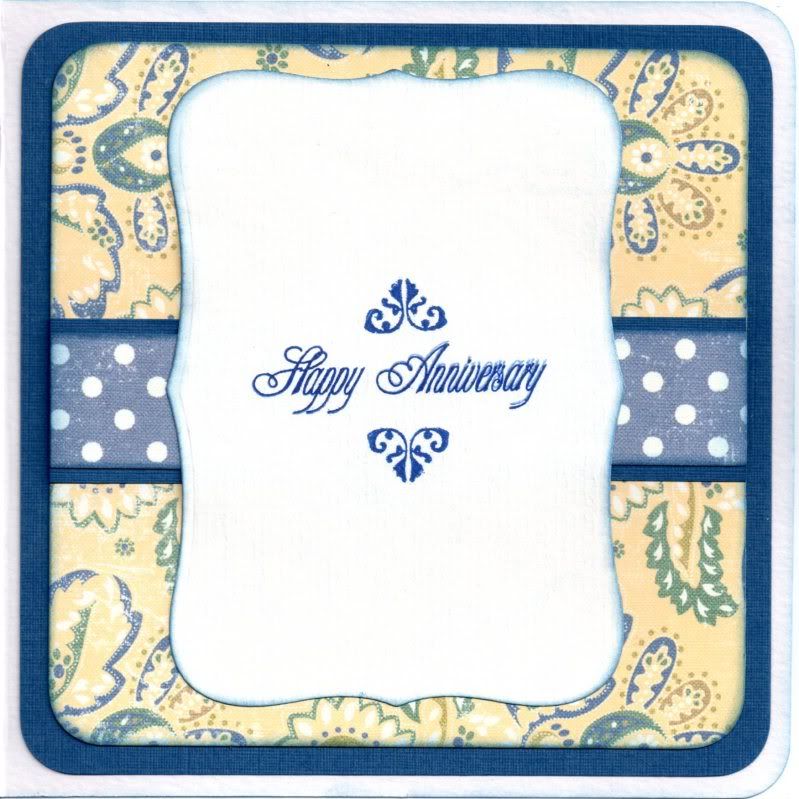
Here is the anniversary card I made for my cousin and her husband, for their second anniversary. I love this image and think it's great for a young couple.

I have also entered it into a few blog challenges:


The Kiss For Chloe image, from Stampavie, was stamped using Versafine Onyx Black archival pigment ink and coloured with Copic sketch markers.
  • Dungarees: B41, B45, B93
  • Hats: Y00, E21, E41, E43
  • Patches/Jumper: Y00, B41
  • Shirt: BG13, B41, G02
  • Girl's Hair: E21, E35, E57
  • Boy's Hair: Y00, Y17, E41
  • Skin: E00, E21, E51, R20
  • Shadow: E41, E43
The image was then cut out and the corners rounded with the large XCut corner rounder punch. This was then matted onto a panel of blue card cut out using the Labels 8 die from Nestabilities.


A square card blank was created from white card and half of the front panel was cut off. The corners were rounded with the XCut punch.

Panels of the blue card were cut to fit the front panel and the inside of the card. A strip of the blue polka dot paper from the Making Memories Fresh Anthology Sydney paper pad was matted onto the blue card and matted onto panels of the blue and green stripe paper and the yellow paisley paper from the same paper pad.

A 15mm circle of white card was punched out using a Craft Planet punch and stamped with the Love stamp from the HOTP Sentiments stamp set using the Versafine Majestic Blue ink. The edges of the circle were then distressed with Tim Holtz Faded Jeans distress ink. The circle was then adhered to the centre of a cream Papermania Imaginisce paper flower and attached to the corner of the image panel.
 
A sentiment panel was then added to the inside of the card using a panel of white paper cut out using the Nestabilities Labels 8 die and adhering it to the inside of the card directly behind the panel on the front of the card so it is not visible when the card is closed.

The sentiment was stamped using the Stamps Away Happy Anniversary stamp with the Majestic Blue ink. The mini flourish corner stamp, from the Fiskars Friends stamps set, was added above and below the sentiment using the same ink.

Saturday, 5 June 2010

Celtic Knot Father's Day

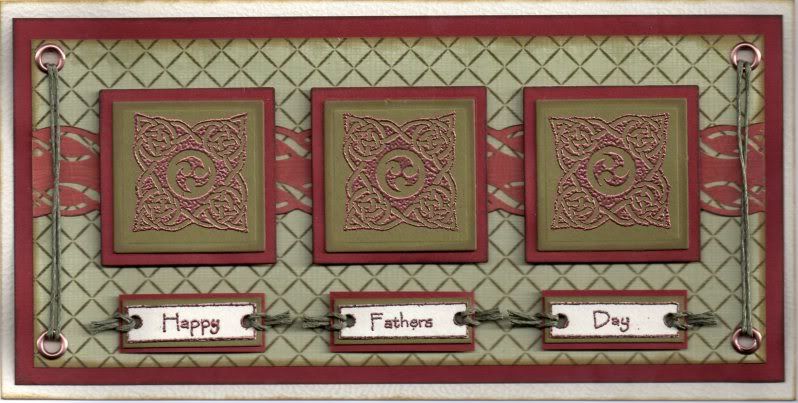
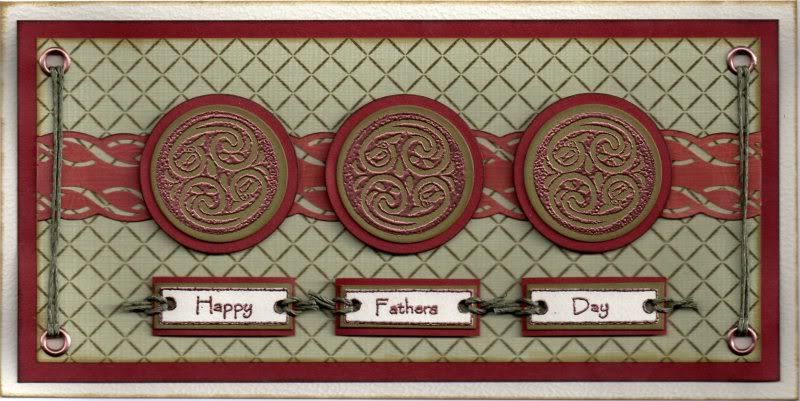
Here are the cards I made this year as the two Father's Day cards for my dad and my father-in-law.

As always, I made two similar but different cards. They both use the same papers but different Celtic knot stamps to distinguish themselves from one another.

I am entering these cards into the following challenges this week:


The square Celtic knot image, from a boxed set of Celtic stamps I bought a few years back at a gift shop in Avebury by the stone circles, was stamped onto olive green card using Versacolor Black pigment ink and heat embossed with Heat It Up! copper embossing powder. The images were then cut out using standard square Nesties and matted onto larger squares of russet coloured paper.

A panel of the green mesh paper from the Papermania Hampstead paper pack was matted onto the russet paper and large copper eyelets were set in the corners. A strip of the russet geometric paper, also from the Hampstead paper pack, was punched using the Fiskars Rope border punch along both edges and matted onto the green panel.

Double lengths of green hemp cord were threaded through the eyelets and the stamped images were adhered centrally to the panel.

The sentiment was stamped using the 'Happy Father's Day' stamp by Personal Impressions from the Craft Stamper magazine and the black pigment ink and copper heat embossed. The individual words were cut from the image and matted onto the green card and russet paper. Holes were punched either end of each word panel and the green hemp cord threaded through. Each word was adhered to the front of the card below the Celtic knot panels.


The second card was constructed in exactly the same way but a circular dragon Celtic knot stamp was used for the focal images.

Tuesday, 18 August 2009

A Day At Julie's

Just wanted to let you all know how my day at Julie's went. Early morning (6am!!) and an early train journey into London (or the outskirts at least). I bumped into Alex at the train station as we'd managed somehow to synchronize our arrivals.

After a bit of a chat, and the handing out of goodies, we got underway. Thankfully, they all liked their post-it note holders that I'd made for them (and they didn't fall to pieces in my bag, which I was rather worried about!!). But, I did forget to take a photograph of them, so girls, if you get a chance, please email me a couple of pictures so I can put them on here!

Alex had very kindly given us all one of her little boxes that was filled with chocolate. My dear hubby has been looking at it longingly but I'm blowed if I'm going to let him have them. I might just suck them a little every night so I can taste them but not actually eat them. They should last a while that way too!!! Darn this diabetes!!!

Alex had also assembled a card kit for us all in another beautifully constructed and decorated box. The card was a nice clean and simple design, using the gorgeous Papertrey Ink Damask stamp set (if only they would find a UK distributor/retailer, I'd snap them up in a moment, but with such exorbitant P&P charges, I could never justify the expense).

Anyway, having made my version of the card, I then proceeded to get inky finger prints (Versafine Vintage Sepia) all over it, which I had to disguise when I got home by sponging on the lightest brown colour from the Brilliance Tiramisu ink pad. I also failed to match up the border stamp in the centre of the gatefold!! I really should have a think before I commit anything to paper or card!!

Here is what I managed to create. I don't think it turned out that badly. The card blank was made from brown Kraft card, also available from Papertrey Ink, and brown gems were added to embellish the ornament image.


The second project I attempted was given to us by Julie's friend Lesley. She had prepared a pram template for us all to use, and this time we all managed to make completely different cards. Cutting the template out was the hardest part for some of us (wasn't it "stompy-feet Julie"), but we all produced lovely cards.

Here is my attempt!! I'm not sure what make of papers these are, but I thought they were perfect for a 'just in case' baby card, to keep for when you do need one!!

The Cuttlebug Swiss Dots embossing folder was used on the hood and the Fiskars Apron Lace border punch was used to create the lace trim. Craft Planet yellow glitter glue was added to the dots on the hood and along the top of the paper lace trim. A large Stampin' Up flower punch and a second smaller flower punch were used to create the layered flower in the top corner. The brad was originally pink, so was coloured using a green Copic marker and a blob of the yellow glitter glue.

Buttons from my stash were added to the wheels and the hood (when I got home), after threading them with green embroidery thread.

Alex very kindly did a demonstration of how to use the Copics to their best, so when/if I get around to buying any, I'll have more of an idea of how to get those great effects that so many of you all produce!!!

Also we all had a go at the monochrome look using the Tim Holtz Distress inks on a stamp and dragging the colour out, just as Alex had done on a Sarah Kay card she made last week. I decided to use the technique on one of the lovely house stamps from Papertrey Ink and the Weathered Wood ink. I haven't made the images into cards as yet, but will upload them when I have.

The rest of the day (and somehow there wasn't much more!) was spent stamping up each others various images that we had brought with us. Before we knew it, it was almost 7pm and we had to start tidying everything away.

Amazingly, that didn't take as long as we had anticipated, so we made our way back to the train station. We said our goodbyes (reluctantly) and headed off home. It was 10.45pm when I got home and was pretty bushed, but it was all worth it for an amazing day spent with friends - 'cos that's what you are girls!!! I never thought that two very special friends could be made through a forum, but they can and you are the proof!! Hopefully my move up north won't spell the end of our get-togethers. We'll have to figure a way around that! Not sure how big my new house is going to be, but maybe a weekend in Lincolnshire is on the cards.

Well, enough of all this soppy-ness! Hopefully I'll get around to uploading a few more cards tomorrow. Not sure which ones though. I'm still a bit behind on my uploads, so I might add a few of the anniversary cards I've been making.

Wednesday, 6 May 2009

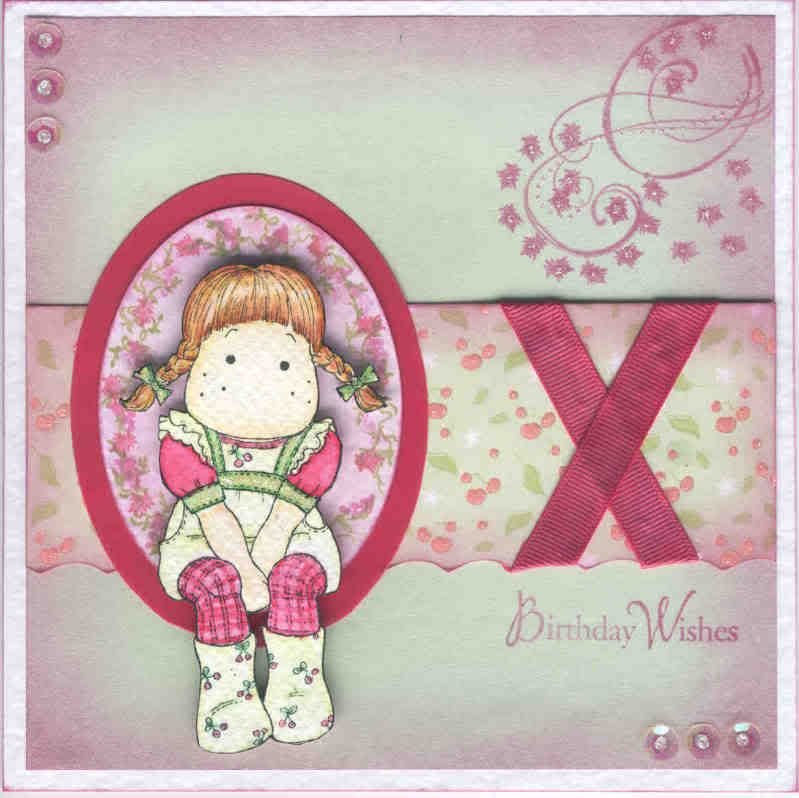
Pink and Green Cherry Tilda

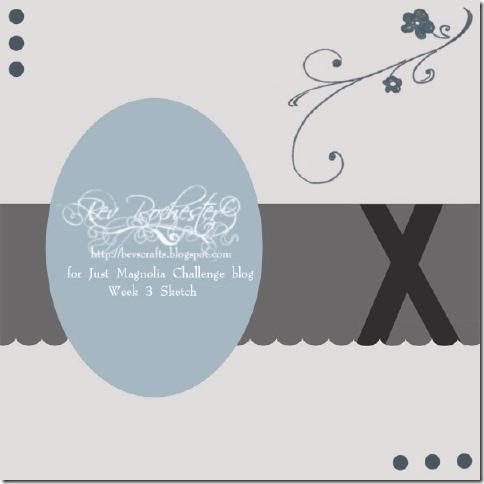
I have decided this week to enter the Just Magnolia blog challenge. The challenge this week, #3, is in the form of a sketch.


This is the first Just Magnolia challenge that I have participated in, much to my shame, but this is mostly down to the fact that it is about two and a half months since I used a Magnolia stamp, and five months since I used a Tilda stamp!! (I know, how terrible of me, I should be flogged!!)

So, here is the sketch that I followed to create the card shown above:


So, I decided to use the lovely Cherry Tilda stamp that the equally lovely Alex sent to me back in September last year. Please head over to her blog to see her beautiful creations. She really is a very talented lady.

The Cherry Tilda image was watercoloured using the Whispers Brushstroke markers and highlighted with Craft Planet Iridescent Sparkle glitter glue.

An oval of white hammer card was cut out using the Fiskars Shapecutter and colour-tinted with Whispers Port Wine permanent dye ink. This was then stamped around the edge to create a frame using flower and foliage morsel stamps from the See D's Tropical and Romance Collections stamp sets using Whispers Green Green, Port Wine and Grand Cranberry permanent dye inks. This was in turn matted onto an oval of Anita's dark pink vellum. The Tilda image was cut out and matted onto the ovals.

A piece of light green paper was stamped with a small flourish stamp from the Autumn Leaves Rhona Farrer Flourishes v.2 stamp set and a morsel flower stamp from the See D's Tropical Morsel Collection stamp set using the Port Wine ink, and embellished using the Iridescent glitter glue. The paper was then colour-tinted around the edges using the same ink.

A strip of the cherry paper from the DCWV Nana's Nursery Baby Girl stack was edged using the edge of the Fiskars circle template and the Fiskars Shapecutter, and similarly colour-tinted around the edges.

Strips of Dovecraft Pouty Pink grosgrain ribbon were colour-tinted with the Port Wine ink and adhered across the strip of cherry paper.

Iridescent sequins (from a bead kit from my sister) were added in the corners of the green panel, as indicated in the sketch, and highlighted with the glitter glue.

To finish the card, a sentiment was added by stamping 'Birthday Wishes' from the Hero Arts Birthday Messages stamp set below the patterned strip using the Port Wine ink.

The inside of the card was also decorated with strips of the colour-tinted green paper and the DCWV cherry paper. The flourish image was 'second-impression' stamped using the Port Wine ink, and the sentiment was stamped over the top using the same ink.


The 'Handmade By' medallion on the reverse of the card was made by stamping my new 'Handmade By' stamp from Oyster Stamps onto a circle of white card cut out using Nestabilities, which was later colour-tinted with the Port Wine ink, and matted onto a scalloped circle of the colour-tinted green paper.

Judging by the way it is stamped a bit off-centre, it looks like I might have to invest in a stamp positioner. If anyone can tell me the best-value one to get in the UK, I'd be very grateful (and please don't tell me to make one from Lego - I don't have any!!!)

Saturday, 18 April 2009

Chocolate Orange Medallion - Basic Grey Challenge #30

Well, I've done it again. Slaved over a card for a blog challenge only to miss the deadline. I wouldn't mind, but I had made it in time, just didn't get round to uploading it to my blog!!!
Anyway, I've got round to it now, so here it is - or should I say, they are. I made one, and wasn't 100% happy with it, so decided to make a second version. Let me know which one you prefer!

For a change, the card blank is a side opening A6 card.
The image, from the Lakeland set of small medallion stamps, was stamped onto smooth white card using Ink It Up! Light Chocolate pigment ink and then clear embossed. The panel was then colour tinted with Tim Holtz Spiced Marmalade Distress ink. The image panel was then matted onto brown card and paper, and a small orange brad was added to the centre.

Strips of three co-ordinating papers from the Basic Grey Sugared paper pad were colour tinted with the Tim Holtz Spiced Marmalade Distress ink, and the same ink was used to repeatedly stamp the medallion image on the brown strip. The paper strips were then matted onto brown paper. A further strip of paper was cut using the Fiskars Shapecutter and the small scalloped edge of the Fiskars Circles template. A sentiment from the Hero Arts Birthday Messages set was double stamped on this strip with the Whispers Barn Brown permanent dye ink and the Tim Holtz Spiced Marmalade Distress ink.

Little dots were added along the edges of each of the brown panels and to highlight the dots already on the medallion images.

The second version of the card isn't that dissimilar.

The main differences are that I added the scalloped strip to the vertical brown strip and stamped the medallions on it in the Whispers Barn Brown permanent dye ink.
I added the sentiment to a shorter panel of the scalloped strip, and traced over the lettering with the orange metallic Sakura gel pen.
I also decorated the inside of the cards,
and added my 'Handmade By' medallions to the reverse of the cards.

Friday, 17 April 2009

Sugar Nellie Knight In Shining Armour - UPDATE

I've been asked on the comment form for some information regarding my Sugar Nellie Knight card that I made for my husband. Unfortunately, as the comment was left anonymously, I can't reply to them privately, so I shall have to do it this way.

The knight stamp is available exclusively from Funky Kits.

I got the Cuttlebug folder from either Oyster Stamps or Cutting Edge Crafts.

The Craft Planet silver satin cardstock was from The Range.

I'm not sure of the best place to get the Hot Off The Press Creative Pack papers, See D stamp sets or the Fiskars Shapecutter at the moment. I got mine quite some time ago, and I'm almost certain that the online shop where I got the papers has long since gone out of business. It might be worth doing a Google search for them.

Monday, 6 April 2009

Pink Butterfly Wings - Basic Grey Challenge #29

Here is my entry for this week's Basic Grey blog challenge. The theme for this week's challenge is Spring/Easter.

I actually made this card to last week's sketch but I finished it too late to enter it. I turned the sketch 90 degrees and adapted it to a DL card.


I started by stamping the butterfly image from the Stampman Botanical Aspects of Design stamp set onto smooth white card using ColorBox Magenta pigment ink and embosssed it using Heat It Up! Cranberry embossing powder. The edges of the card panel were coloured with the magenta ink and clear embossed.

The panel was then coloured with Tim Holtz Tattered Rose Distress ink. A diamond panel was cut from Papermania dusky red textured card, and also edged and clear embossed. Baby pink pearls were adhered to the corners of the panels.

Panels were cut from Basic Grey Euphoria papers and edged with ColorBox Warm Violet fluid chalk ink. A scalloped edge was cut along one panel using the edge of the Fiskars oval template.

The sentiment was stamped onto matching paper using the Papermania Standard Font stamp set and the warm violet chalk ink.

Wednesday, 25 March 2009

Pink and Brown Garden Gossip Hedgie

Here's the card I made for the lovely Tara's birthday. Now I know that she has received it, I can put it on my blog!!


The brown/pink flourish border paper from the Papermania Simply Elegant paper pack was matted onto a piece of light brown paper. A length of Chatterbox pink picot-edged organza ribbon was matted onto the pink/cream spot paper from the same paper pad and was then matted onto the larger piece.
The Penny Black Garden Gossip image, from the Bubbly stamp set, was watercoloured using the Whispers Brushstroke markers and matted onto dark brown card, light brown paper and pink vellum punched with the Fiskars Lace border punch. This was matted over the ribbon strip.
Two co-ordinating paper flowers from The Crafty Cow were sewn together using cream embroidery thread and a pearl bead in the centre. These were attached to the other end of the ribbon strip.
The sentiment, from the See D's Garden Of Friendship stamp set, was stamped in Onyx Black Versafine ink and matted onto the dark brown card, light brown paper and pink vellum.

Thursday, 6 November 2008

DH's Anniversary Card For Our 10th Anniversary

I am taking a huge risk posting this on here. DH (Phil) hasn't had a look on here since I started this blog. He occasionally asks me what it is that I post on here, and stares at me with that look of incredulity (you all know the one) when I get excited that someone has left a comment, or I hit another 100 views on my blog counter.

So, with that in mind, I'm daring to post the anniversary card that I've made for our 10th Wedding Anniversary that we will be celebrating in December. I'm trying to get ahead with my 'normal' cards so that I can make a start on my Christmas cards and not have to worry that I haven't got my cards made for January after the holidays.

Anyway, apart from the imminent 'New Baby' card that is due to be made for the end of November, I am now up to date with my 'normal' cards, with them all made up to the end of January. Tomorrow, the big tidy up can commence in my craft room and I can get my Christmas stash out!!

So, this was the last card to be made, and hopefully it will go down well!

The card blank is deep red hammer card, and was folded to make a zigzag card. The patterned papers are from the Hot Off The Press (HOTP) Classic Creative Cardmakers Pack. The chosen papers were cut to shape and the edges inked with a black inkpad.

For the back page, I took the rectangle of patterned paper, and cut out a frame from the lower half. A piece of white paper was attached behind the frame, giving an area on which to stamp the greeting. The positioning of the frame ensures that it cannot be seen when the card is closed. A photo corner was cut from matching deep red hammer card using the Ellison Photo Corners Thin Cut die.


The other patterned paper panels were attached to the card blank, and punched border strips were then added along the cut edges. These are actually the waste from the lace borders that I added to the pink/black anniversary cards I made the other week using the Fiskars Lace Border punch, and thought these would come in handy for another project - and I was right. These are a lot less fussy and feminine than the lace part, and I think they work with the design.

The tag is artwork included in the HOTP Classic Creative Pack, which was simply cut out, and a black eyelet added (using my now very trusty Big Bite!) and some beige ribbon threaded through. A HOTP Word Fragment was 3D'd to the tag, and this was then adhered to the second panel of the card.

On the front panel, I used my HOTP Labels template to create the name plaque, using matching papers from the HOTP Classic Creative Pack. The letters are from the ColorBok Alphabet set. They are white paper letter die cuts that were coloured using the Brilliance Rocket Red pigment ink and over stamped using the Brilliance Graphite Black pigment ink and the Stone Texture stamp from the Judikins Artifacts cube.

Four lengths of brown ladder ribbon were attached to the front panel and the name plaque, complete with monograms (our initials) was added over the top of the ends of the ribbon.


I am entering this card into the Double Dutch Blog Challenge, the current challenge being to use only three techniques from the list on their blog.

The three techniques I have used are:
STAMPING
PUNCHING
EMBELLISHMENT MAKING

Head over there to see what the design team have come up with, and enter your creation.

Friday, 24 October 2008

Pink and Black Floral Embossed Card

I was a bit busy yesterday and managed to make four cards (quite productive for me!!) - just goes to show you really can get going once you set your mind to it.

I shall be posting them as separate posts as they are all different styles of cards.

The first is my very first card made using a brass stencil!

I embossed the floral section of the Papermania Floral Friend stencil onto white vellum.

A panel of pink card was then stamped using the Whispers Floral Damask background stamp and ColorBox Orchid Pastel Fluid Chalk ink to give a tone-on-tone effect. This was matted onto a panel of black card.

The embossed image was cut out and attached to the pink and black panels using small eyelets.

A strip of the patterned paper from the Dovecraft Amethyst Floral prints designer paper pack was matted onto a strip of the pink card and strips of black paper cut using the Fiskars Lace Border punch were attached.

The sentiment, from CleverCut, was stamped using Versafine Onyx Black pigment ink and pink crystal gems were added to the panel.

Inspired by Aud over at Aud Designs, I have now started adding 'Handmade' panels to the reverse of my cards. I've had to improvise until I get a stamp made, but hopefully they do the job.

Saturday, 27 September 2008

Budget Tilda with Dandelion Card

The challenge over on the Tilda and Co Blog Challenge this week is to make a card on a budget of less than £1.

I had a wallet card to make for my Docrafts Image Swap for September so decided to try and fulfil the criteria with this one.

The wallet card was made according to the instructions over on Katharina's blog, but slightly adjusted to give it a spine to accommodate the stamped images.
The 'Tilda with Dandelion' image was stamped using Versafine Onyx Black ink and watercoloured using Whispers Brushstroke markers. The wings and dandelion were highlighted with Craft Planet Iridescent Sparkle glitter glue. Whispers Azure Seas permanent ink was sponged around the Tilda image.

The dots from the 'A Little Something' stamp were selectively inked using the markers, cut out and matted onto a larger circle that was cut out using the Fiskars circles template and Shapecutter.

The sentiment was stamped using the 'Time Flies' stamp from the Making Memories 'Express It' set and the flourish was stamped over the sentiment using from Making Memories 'Ornaments' set.

Clear crystal gems were added around circle, at the corners of the Tilda panel and on Tilda's hairband.

To make up the wallet card, a strip of blue mini daisy paper from the Papermania Citrus paper pack was attached down the centre of the front, having been matted onto a piece of royal blue card.

Royal blue grosgrain ribbon was attached around the wallet card to enable it to be tied up.

Shopping List:

Card blank: box of card from Papermill Shop = £6.99/250 sheets - 1 sheet used = 2.8p
Other card (white and blue): as above - 1/2 sheet card total = 1.25p
Patterned paper: £7.99 for 100 sheets = 7.99p/sheet - 1/4 sheet paper total = 2p
Glitter glue: £1.99 for 120ml = 1.66p/ml =1p
Gems: £2.79 for 1500 = 0.19p each - 8 x0.19=1.5p
Ribbon: 20p/m - 0.5m used = 10p

Total cost: 18.55p

Tuesday, 23 September 2008

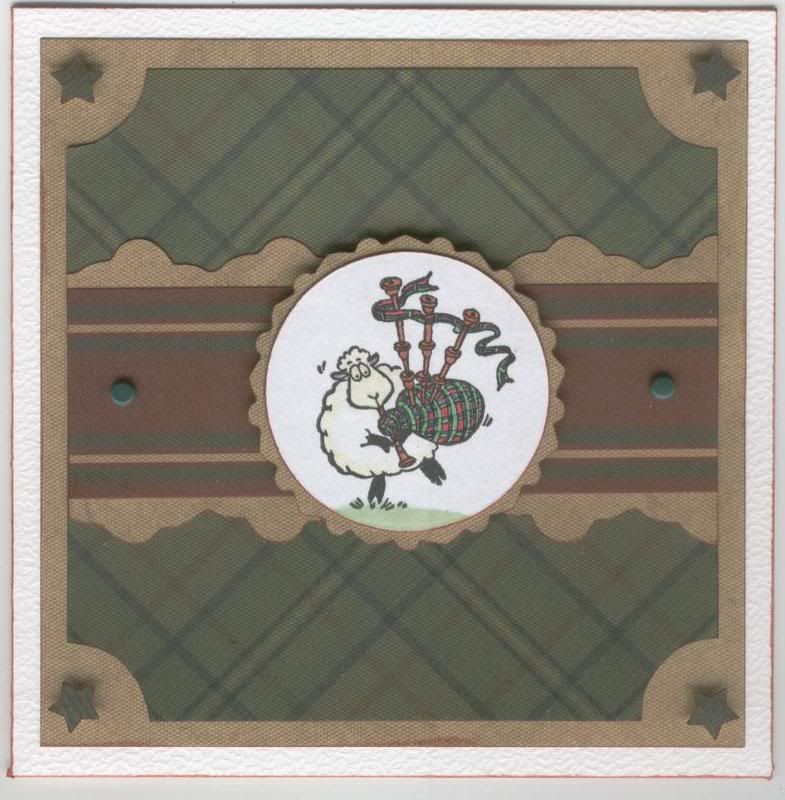
Tartan Sheep Birthday

This is my entry for this week's Sketch Saturday blog challenge.

I decided to use one of my new Penny Black Twelve Days Of Christmas stamps, but without the sentiment. I still haven't decided whether to add a birthday sentiment to it yet or leave it as it is.

The image was coloured using Whispers Brushstroke markers and cut into a circle with the Fiskars Shapecutter. The larger circle was cut from the beige texture paper from the K&Co Hampton paper pad using Personal Impressions decorative scissors.

The strip of papers were cut from matching papers, the beige texture paper cut using the edge of the Fiskars Frames template and the Fiskars Shapecutter. Punched stars were 3D'd in the corners and a couple of green brads were added to the paper strip.

Here is the original sketch:
Blog Widget by LinkWithin