Pages

WELCOME

This blog was created to act as a record of the cards and other projects that I have made. It is for both my own reference and to help inspire anyone who wants to take a look.

I'd love it if you'd leave me a comment so that I know what you think of my projects and that you've been to visit!

Anyone can comment, even those who don't have a blog. (Just look for the word 'Comments' under the three little pictures at the end of each post). Readers without a blog can add an anonymous comment, but please leave your name (and docrafts username if applicable) so I know who you are!

Slideshows of all the cards I've uploaded to my blog can be found at the bottom of the page.


PEOPLE WHO FOLLOW MY BLOG

Showing posts with label Clear Choice. Show all posts

Tuesday, 26 October 2010

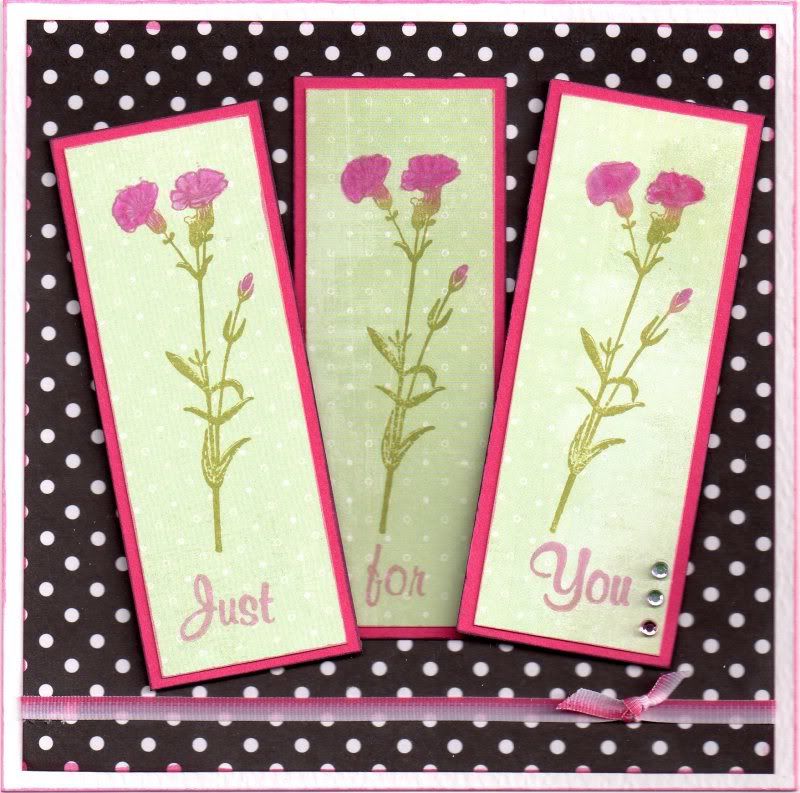
Pink, Black and White Wildflowers

This card was inspired by one that I saw in an issue of Creativity magazine. Just discovered it was Issue 19!
I decided to use one of the stamps from the Crafty Individuals Wildflowers stamp set.

The Wildflower stamp was inked up using the Versafine Spanish Moss archival pigment ink and Whispers Port Wine permanent dye ink and stamped onto the Greenhouse paper from the Basic Grey Wisteria paper pad. The flowers were then coloured using the Carmine Impress reinker.

The individual words from the 'Just For You' stamp from the Clear Choice! Birthday Parcels and Greetings stamp set were inked up with the Port Wine ink and stamped onto the separate panels.

A length of the Anita's pink two-tone self-adhesive ribbon was adhered to a panel of the black and white polka dot paper from the Papermania Clare Curd 'The Big One' paper pad, and a knot attached to the right.

The image panels were attached overlapping each other and at angles and clear faux gems were added to the third panel.

Here are the challenges that I will be entering this card into:

Saturday, 18 April 2009

Green Classical Face and Flourishes

This card was inspired by a card in Craft Stamper magazine, and also by Jules B's take on it.

The face image, from the Non Sequitur Memories of Italy stamp set, was stamped onto the card blank using Versfine Onyx Black pigment ink.
A circle of matching card was coloured using Tim Holtz Shabby Shutters Distress ink and edged with ColorBox Amber Clay Fluid Chalk ink. The image was then stamped onto it, and the circle was attached onto the card over the top of the first image.
A flourish from the Autumn Leaves Rhona Farrer Flourishes v.2 stamp set were stamped directly onto the card blank, as was the word, which was taken from the Clear Choice! Butterflies stamp set.

Thursday, 5 March 2009

Lilac and Green Quadrants

This is my entry to the current Truly Scrumptious Blog Challenge #2, which is a sketch. There is also the added requirement of adding handmade buttons, which can be made from any material.


Squares were cut from two matching papers from the Dovecraft Designer Aquamarine Floral Prints paper pack. These were matted onto green paper and then onto a square of lilac paper. A length of green picot-edge organza ribbon from the ChatterBox Olive Green ribbon selection was attached across the bottom of the panel. The sentiment was taken from the Clear Choice! Birthday stamp set and stamped using Versafine Imperial Purple ink onto the green paper and matted onto the lilac paper.

A circle was cut from white card and the flowers from the Papermania Party Petals Snag 'Em Stamp Duo set was selectively inked and the individual flowers stamped and watercoloured. This was matted onto a circle of flourish vellum from the Papermania Exquisite Vellum pack. The flowers were stamped again, coloured using ColorBox Fluid Chalk inks (Wisteria, Lime Pastel and Olive Pastel) and ColorBox Pigment inks (Celadon and Heliotrope). The flowers and leaves were cut out and decoupaged over the top of the stamped image. The circles were attached to the card. The decoupaged flowers and selected flowers on the patterned papers were highlighted with Craft Planet Irridescent glitter glue.

The three handmade buttons, which were part of the brief for the challenge, were created by stamping the images from the See D's Vintage Morsel stamp set, stamped using ColorBox Wisteria Fluid Chalk ink, cut out and threaded with green embroidery thread.

Here is the sketch that the card was based on:

Wednesday, 15 October 2008

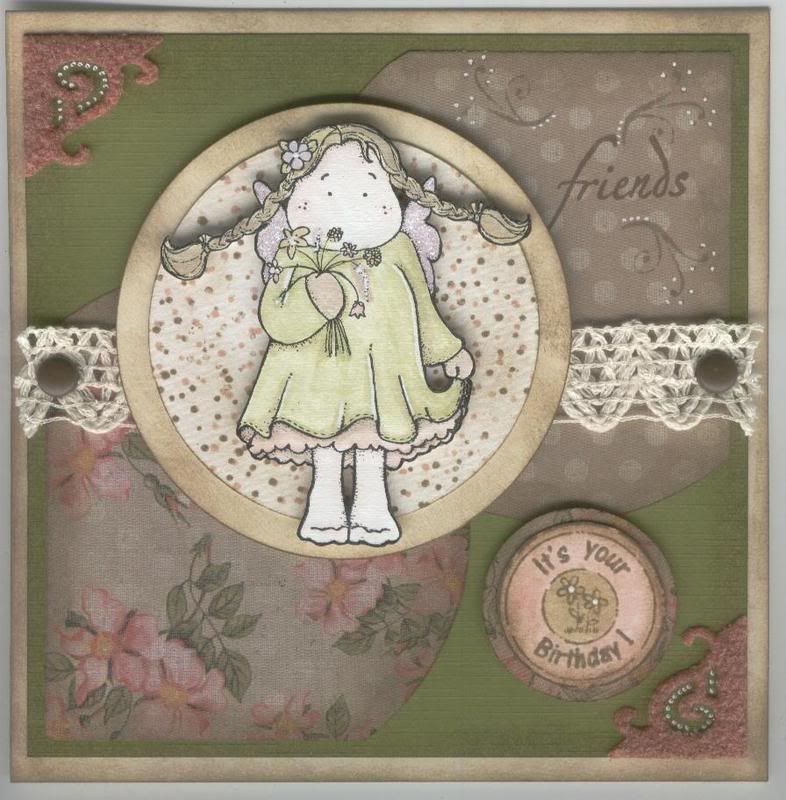
Summery Tilda for a Friend

Here is my entry for this weeks Stamp Something blog challenge. The theme for this week is 'Stamp Something For A Friend'. I needed to make a card for my friend Simone - the mum of the little boy I made the robot card for, so decided this was the perfect challenge for the project.

As I said, her birthday is the same day as mine (29th Dec), and I've been busy trying to get all my birthday and anniversary cards for December and January finished so I can make a start on my Christmas cards (think this is the latest I will have ever started them!!) and not have to worry about not having any cards to send when I get back from the in-laws after New Year.

So, my method for this card began with picking the papers and then colouring the image in to match. I decided to try and colour with the Distress Inks (Frayed Burlap, Scattered Straw, Tattered Rose, Shabby Shutters and Milled Lavender) - not sure if the effect is as good as with the Whispers Brushstroke markers! Highlights were added using a white gel pen and Craft Planet Irridescent Sparkle glitter glue was added to the wings

Having coloured the image I then decided on the layout. This one just kind of evolved. I cut the shapes from the HOTP Pretty Cardmakers Creative pack papers using the Shapecutter and circle template. I distressed the edges using the Frayed Burlap distress ink and some Cut 'n' Dry foam. I attached these to a piece of equally distressed olive card from the Papermania textured cardstock pack.

I wanted to add some fancy corners, so cut some Vivelle using the Ellison Photo Corners die cut, and added some of the Frayed Burlap ink to tone down the brightness of the colour. Highlights were added using a white gel pen.

A length of cream crochet trim was attached across the card using large brown Papermania brads.

Small flourishes were stamped using a morsel stamp from the See D's Connectors Collection set and the Frayed Burlap distress ink and embellished using a white gel pen. The word friends was selectively inked from a stamp in the Clear Choice! Butterflies and Dragonflies set using ColorBox Chestnut Roan Fluid Chalk ink.

The greeting was stamped using one of the Aud Designs circle greetings stamps and the Frayed Burlap distress ink. It was then coloured using the Frayed Burlap, Tattered Rose and Shabby Shutters distress inks, and highlighted with a white gel pen. This wasa cut out and added to a circle of the floral patterned paper.

Two circle mats were cut out using the Shapecutter and circle template. These were both distressed and the white circle was stamped using one of the spotty background stamps from the See D's Mini Deco Backgrounds set using the Frayed Burlap and Tattered Rose distress inks.Tilda was cut out and matted onto the circles.

I must confess that I rather like this card and am pleased that it will be making its way to Australia in December.

Wednesday, 17 September 2008

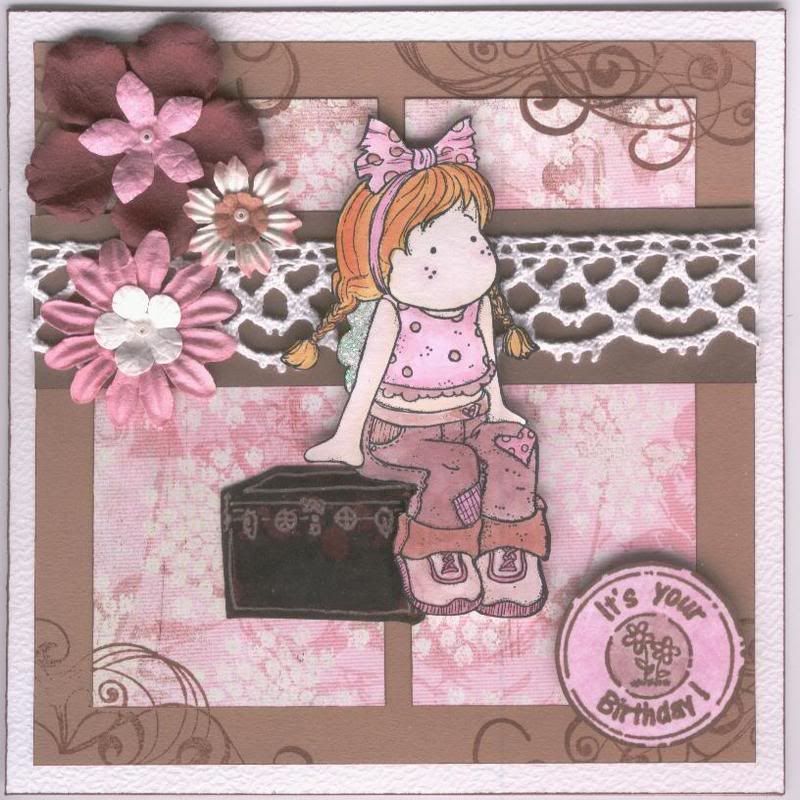
Chocolate Delight Tilda

Here is my entry for the latest Tilda and Co Challenge.

The theme for this week is 'Chocolate Delight' with a colour theme of chocolate brown, pink and white.

The Tilda is the 'Sitting Summer Tilda' that I received from Tara in an image swap.

As she is sitting, I had to find something for her to sit on and found this travelling trunk stamp amongst my stash in the Clear Choice! Travel set.

The patterned paper is from the Basic Grey Sugared paper pad, and the sentiment is from a set from Aud Designs. The flourishes were stamped over the corners using a stamp from the HOTP Flourishes stamp set and the dark brown ink from the Brilliance Tiramisu(3) ink.

The flowers are from both Prima and Papermania, and layered up with a white seed bead adhered in the centre.

It's not my usual style but I'm warming to these 'layered' styles of card, especially the more I see on the various blogs I hop around.
I have also used some of the woven trim that I bought a few months back but forgot about!
The card is also loosely based on last week's A Spoon Full Of Sugar Blog Challenge sketch by Nikki.
Blog Widget by LinkWithin