Pages

WELCOME

This blog was created to act as a record of the cards and other projects that I have made. It is for both my own reference and to help inspire anyone who wants to take a look.

I'd love it if you'd leave me a comment so that I know what you think of my projects and that you've been to visit!

Anyone can comment, even those who don't have a blog. (Just look for the word 'Comments' under the three little pictures at the end of each post). Readers without a blog can add an anonymous comment, but please leave your name (and docrafts username if applicable) so I know who you are!

Slideshows of all the cards I've uploaded to my blog can be found at the bottom of the page.


PEOPLE WHO FOLLOW MY BLOG

Showing posts with label StudioG. Show all posts

Sunday, 18 January 2015

Frantaged Collage and Charms Masculine Birthday

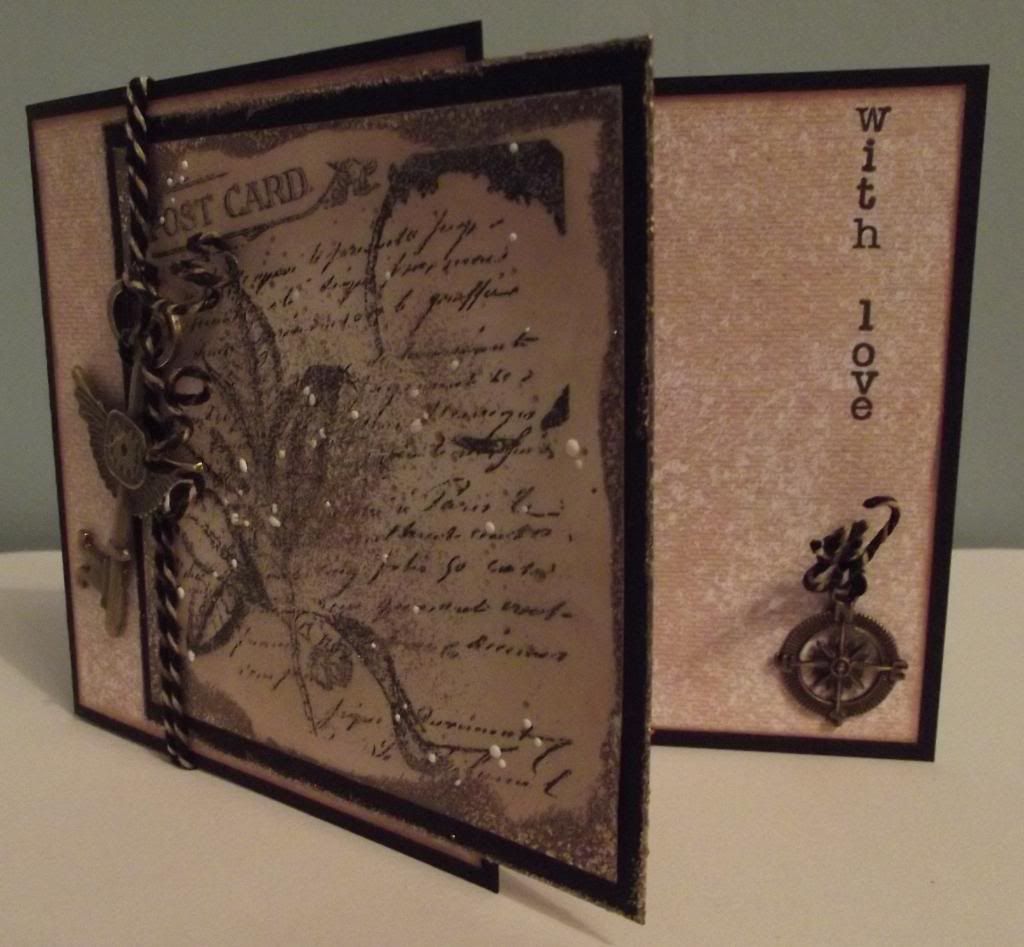
This is the card that I made for my hubby's birthday this year. It involved using the Frantage embossing powders which were new to me before making this card, although I have of course watched the demos on Create & Craft.


To begin with, I stamped the collage image of Folium from Papermania using Versafine Onyx Black archival pigment ink. The panel was then distressed using Tim Holtz Antique Linen and Walnut Stain inks. Once the distress ink was dry, Versamark was added around the edge of the panel and Aged Taupe Frantage powder was added. Once that was heat set, extra Aged Taupe and White powders were sprinkled over the centre of the panel to give a speckled appearance.

To create the card blank, a sheet of A4 card was trimmed to 5" wide and then scored at 7". Panels of beige mottled paper by Craftwork Cards were cut to fit both the front and inside of the card, the edges first being distressed with the Walnut Stain ink.

The stamped and Frantaged panel was matted onto the black card as used for the card blank and adhered overlapping the edge of the front panel.


The next stage was to add the charms. These were very kindly donated by Donna at the cardmaking group that I attend. The large key charm was looped onto a length of black and white Gorjuss twine that was coloured with the Antique Linen and Walnut Stain inks, to tie it in with the rest of the card. The twine was wrapped around the front of the card and tied to the top of the charm.
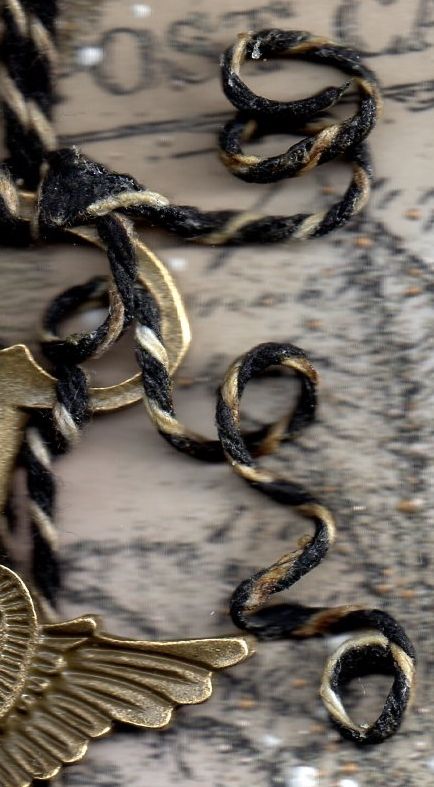

The ends of the twine were then wiped with Aleene's Tacky Glue and wound around a paintbrush until the glue was dry, allowing the twists in the twine to remain. The same was done to the twine threaded through the compass charm.


The next stage was to work on the inside of the card.
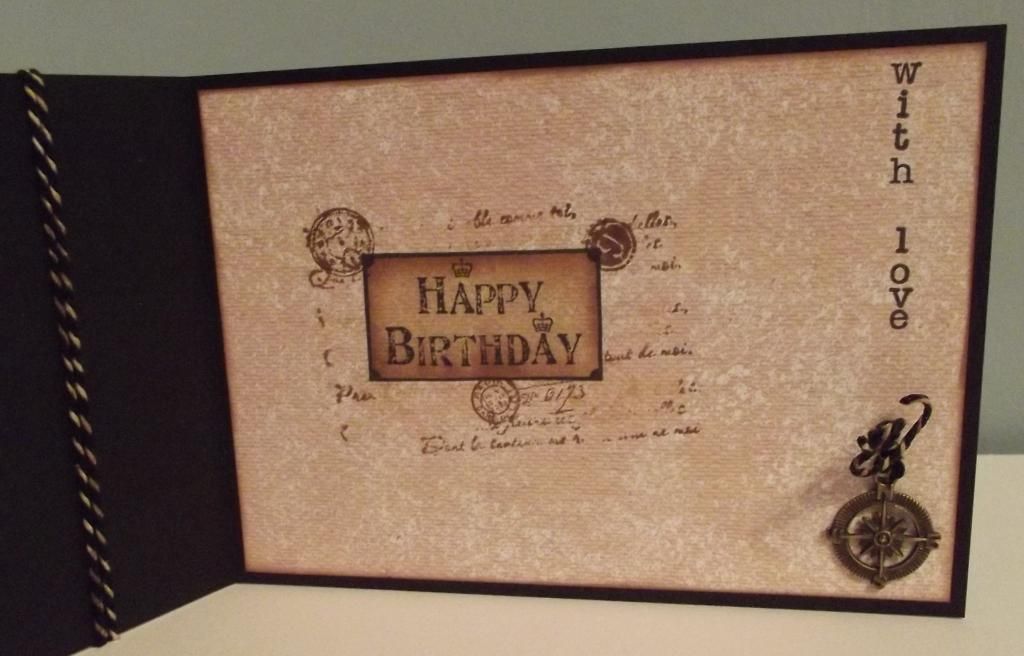

The first step was to add some sentiments.


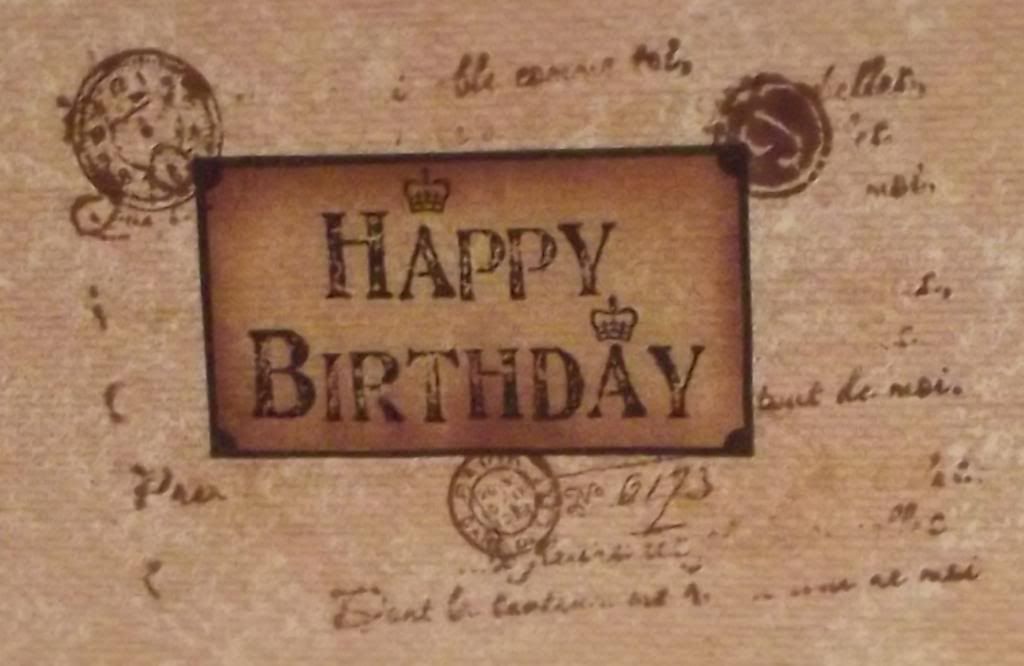
Firstly, the 'Happy Birthday' panel stamp, from the Papermania Portabello range, was stamped on the inside of the card using the Onyx Black ink. The panel was reverse masked and coloured using the Antique Linen and Walnut Stain inks. Using the positive mask, the panel was covered and overstamped using the postmark and clock stamps from the Tim Holtz Stampers Anonymous Visual Artistry stamp set, and the script stamp and number stamp from the Bo Bunny It's In The Words stamp set, all stamped using the two brown distress inks.

The final stage was to add a sentiment that could be read both when the card was open and closed. A line was drawn down the side of the card using a T-square ruler and a pencil, and, using individual alphabet stamps from a Studio G/Hampton Art alphabet stamp set and a Stamp-a-ma-jig, the sentiment 'with love' was stamped down the side of the card using Memento Tuxedo Black dye ink.
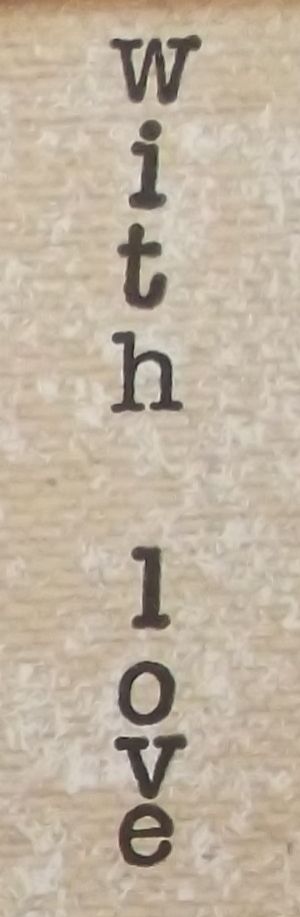

Versafine Onyx Black ink would have been better, but the Memento was out on my desk from when I had stamped the alphabet stamps onto the plastic sheet of the Stamp-a-ma-jig, and was used by mistake!

Here are the challenges that I am entering this card into:

A Girl Who Crafts - Anything Goes
Crafts Galore Encore - Anything Goes
Crafty Hazelnuts Patterned Paper - Anything Goes (Not Square)
Creative Craft Cottage - #31 - Anything Goes
Mema's Crafts - Anything Goes
Seema Crafts - Anything Goes
The Sisters Of Crafts - Anything Goes
Bastel - Traum - Anything Goes
Vandicrafts Artistry - Anything Goes
Sweet Stampin' - Masculine
Art By Miran - Anything Goes
Jo's Scrap Shack - #71 - Anything Goes
Sister Act - #89 - Anything Goes
Wags 'n' Whiskers - #145 - Anything Goes
Aud Sentiments - #123 - Anything Goes
Dream It Up! - Birthdays
Little Miss Muffet - #102 - Anything Goes
Scrap & Craft - #1 - Anything Goes
Baffies Kreativladen - #40 - Anything Goes
The House That Stamps Built - #114 - Black, Brown and White
Penny's Paper-Crafty - #210 - Anything Goes
Simon Says Stamp - It's A Guy Thing
Whimsy Stamps - #78 - Anything Goes
Cardz 4 Guyz - Happy Birthday
Inky Chicks - #45 - Anything Goes
Party Time Tuesdays - #194 - Anything Goes
Through The Craft Room Door - Anything Goes
Crafting From the Heart - #42 - Anything Goes
Sparkle N Sprinkle - Anything Goes (Glitter, Embossing Powders, Flock)
Squigglefly - #2 - Anything Goes
The Paper Nest Dolls - #1 - Anything Goes
Whoopsi Daisy - Anything Goes
Robyn's Fetish - #247 - Vintage Look

Wednesday, 21 September 2011

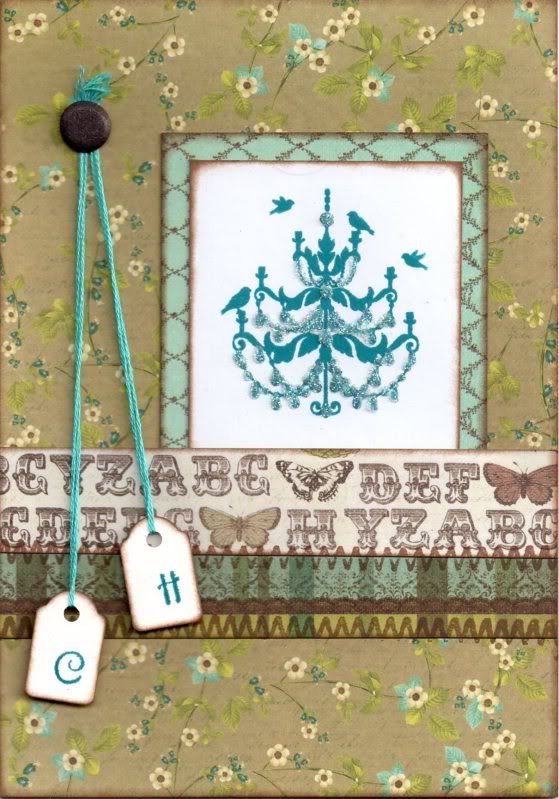
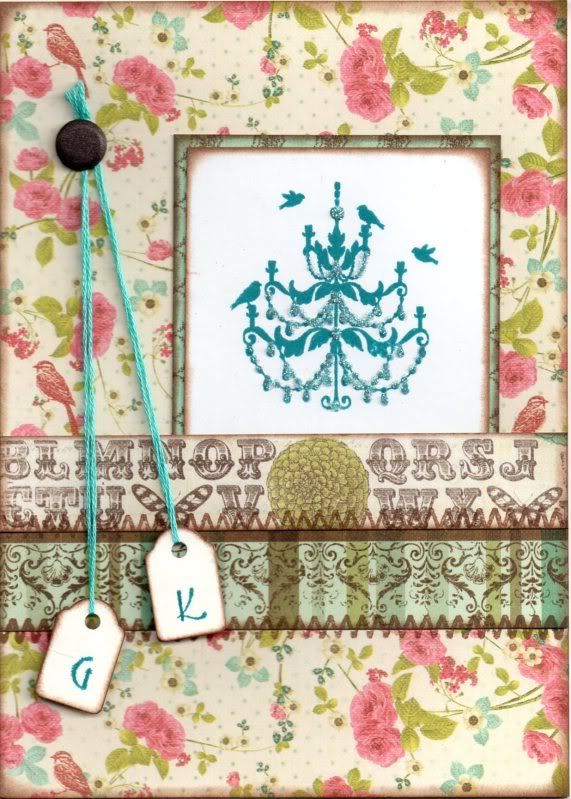
Brown and Blue Floral Chandelier Tags Anniversary

This is a second version of the anniversary card I made recently using the Chandelier stamp that came free with the July 2011 issue of Craft Stamper Magazine.


I went for more muted tones with this version, using one of my favourite colour combinations of blue and brown.

The Chandelier image was stamped using Adirondack Stream dye ink and matted onto the blue diamonds paper from the Prima Madeline paper pad.


The card blank was completely covered with the Brown Script Floral paper from the same paper pad and the image panel added to the right.

A strip of the Alphabet paper was added to a strip of the Multi Border paper and this was then added over the image panel. Faux stitching was then added over the joins of the paper pieces using the Zigzag Stitch stamp from the HOTP Stitches stamp set and ColorBox Chestnut Roan Fluid Chalk ink.

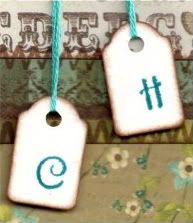
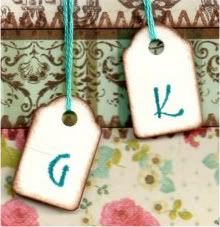
Two mini tags were coloured around the edges using the Chestnut Roan ink and letters were stamped using the Stream ink and a Studio G mini alphabet stamp set. The tags were attached to some teal embroidery thread and added to the card and a brown Card Candi from Craftwork Cards was added over the ends of the threads.


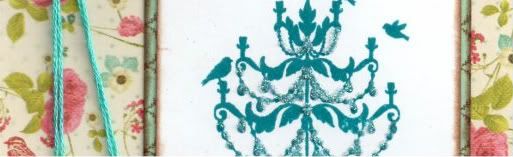
Highlights were added to the Chandelier image using Glossy Accents and DecoArt Crystal Glamour dust.
All papers were distressed with the Chestnut Roan ink.

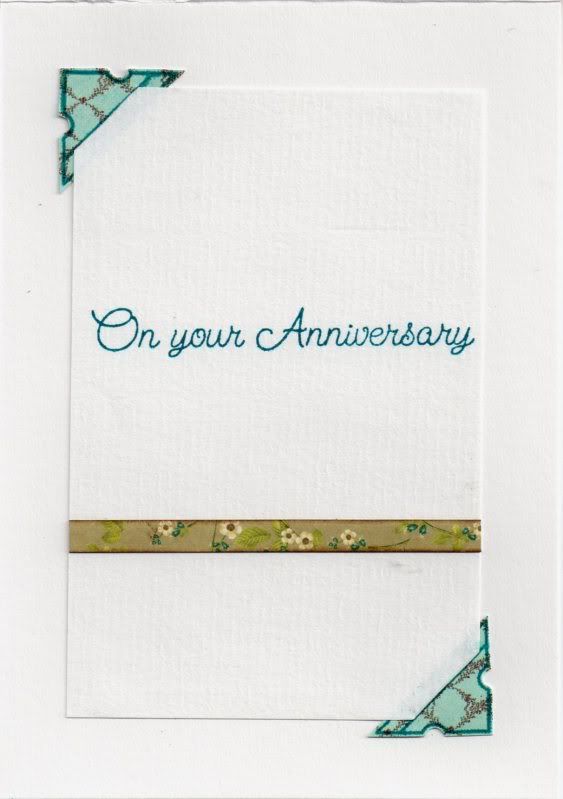
The inside of the card was also decorated using a photo corner stamp from the Stamps Away Bookplates, Corners and Anchors stamp set, stamped onto the blue diamonds paper used on the front of the card using the Stream ink and cut out


Slits were cut into the photo corners and the writing paper inserted into the corners, and a strip of the Brown Script Floral paper used on the front of the card was added across the paper and the sentiment, from Elzybells, was stamped using the Stream ink.

Here are the blog challenges I am entering this card into:

Wednesday, 10 August 2011

Pink and Blue Floral Chandelier Tags Anniversary

Here is an anniversary card that I made for a couple of friends. I really like the design (I actually adapted it from one of the projects in the July 2011 issue of Craft Stamper magazine using this particular stamp).


I absolutely love the Chandelier image tht came with the July 2011 issue of Craft Stamper magazine. The image was stamped using Adirondack Stream dye ink and matted onto the blue diamonds paper from the Prima Madeline paper pad.


The card blank was completely covered with the Floral Bird paper from the same paper pad and the image panel added to the right.

A strip of the Alphabet paper was added to a strip of the Multi Border paper (both from the Madeline paper pad), and this was then added over the image panel.

Faux stitching was then added over the joins of the paper pieces using the Zigzag Stitch stamp from the HOTP Stitches stamp set and ColorBox Chestnut Roan Fluid Chalk ink.

Two mini tags, that have been in my stash since the beginning of time, were coloured around the edges using the Chestnut Roan ink and letters were stamped using the Stream ink and a Studio G mini alphabet stamp set (also underused!!). The tags were attached to some teal embroidery thread and added to the card and a brown Card Candi from Craftwork Cards was added over the ends of the threads.


Highlights were added to the Chandelier image using Glossy Accents and DecoArt Crystal Glamour dust.

All papers were distressed with the Chestnut Roan ink.

The inside of the card was also decorated using a photo corner stamp from the Stamps Away Bookplates, Corners and Anchors stamp set, stamped onto the blue diamonds paper used on the front of the card using the Stream ink and cut out.


Slits were cut into the photo corners and  the writing paper inserted into the corners, and a strip of the Floral Bird paper used on the front of the card was added across the paper and the sentiment, from Elzybells, was stamped using the Stream ink.

Here are the blog challenges I am entering this card into:

Friday, 10 June 2011

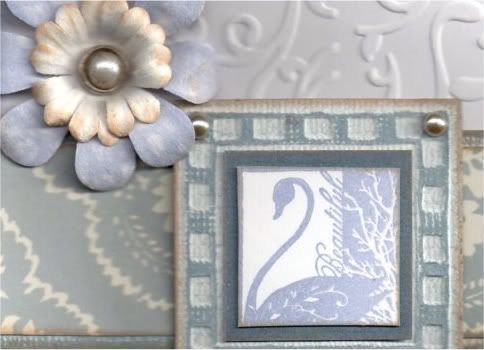
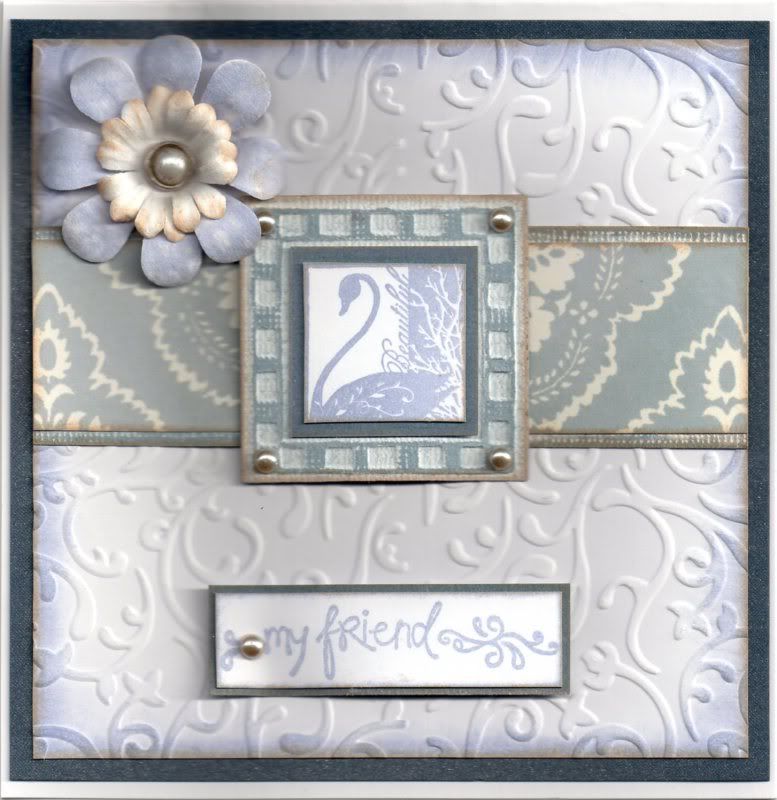
Light Blue Embossed Inkadinkado Swan

Here is a card I made for a good friend's birthday. We met at uni 17 years ago and are still in touch today.


The image, from the Inkadinkado Butterflies and Birds stamp set was stamped using ColorBox Smoke Blue pigment ink and cut out. It was then matted onto the reverse of blue Core'dinations Whitewash card.

A square was die cut with a Nestabilities die from the blue Whitewash card and embossed with a square embossing folder from the Cuttlebug Decorative Squares #3 set. The detail was then sanded and the image matted onto it.

A panel of white card was embossed using the Papermania Victorian Fleur embossing folder and coloured around the edges with the Smoke Blue pigment ink and ColorBox Creamy Brown fluid chalk ink.

A strip of the light blue medallion paper from the Papermania Persimmon paper pad was matted onto the blue whitewash card and matted across the embossed card and then matted onto navy blue shimmer card.


A large white Papermania Imaginisce paper flower was coloured with the Smoke Grey ink and the Creamy Brown fluid chalk ink. A small white flower was highlighted with the Creamy Brown ink and layered with a white pearl Papermania brad coloured with a W3 Copic marker.  The flower was added in the top corner of the panel.

The sentiment, from the Studio G 'Friends For Life' mini stamp set was stamped with the Smoke Blue ink and matted on the blue whitewash card.

Champagne coloured pearls from the Kort and Godt Autumn selection and added to the embossed square and sentiment panel.

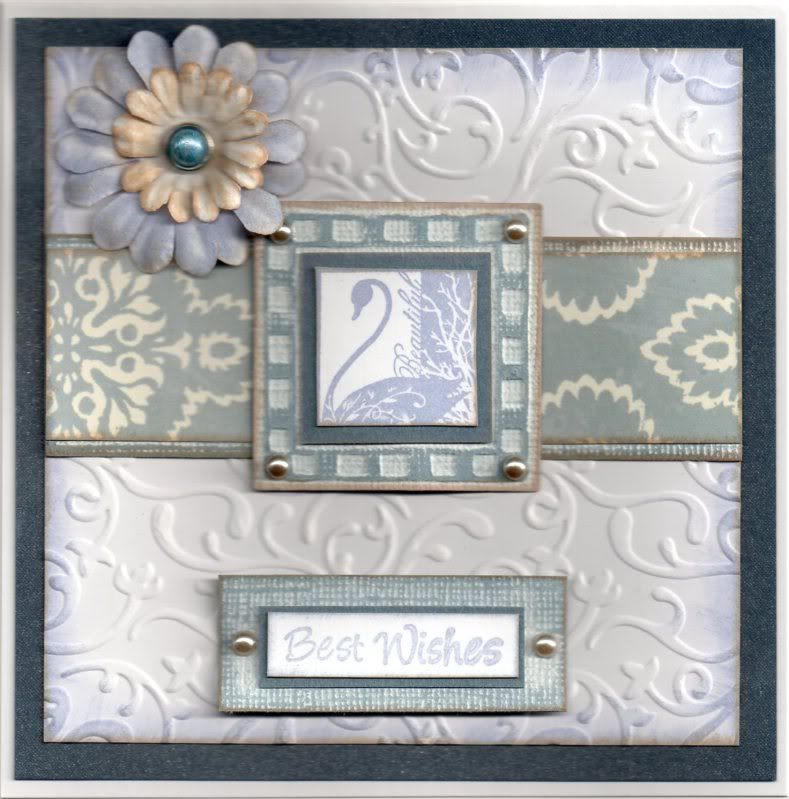
I also made a lightly different card using a 'Best Wishes' sentiment from the Papermania Just For You stamp set:


Here are the blog challenges I am entering this into:

Saturday, 5 February 2011

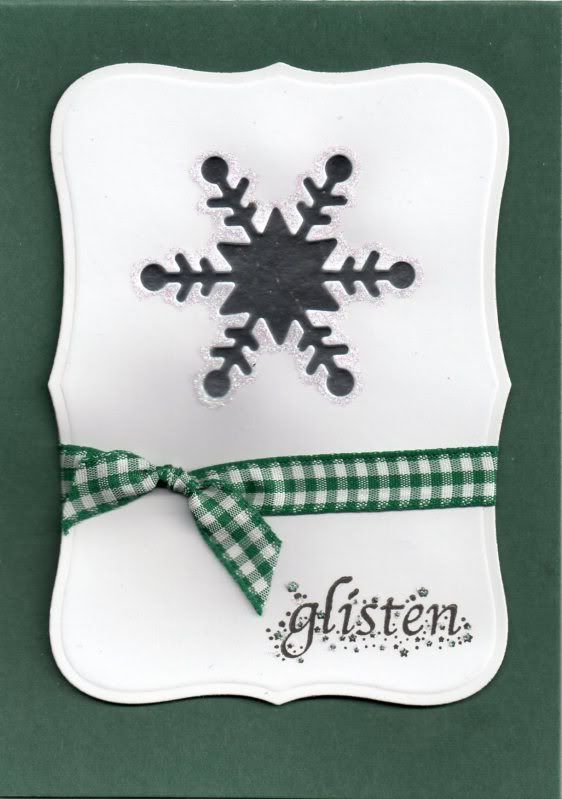
Glitter Snowflake Aperture

Here is the next in the line of Christmas cards from the 2010 collection!!!

I was rather pleased with these designs. I like the effect of the aperture in the shaped panel.


A panel was die cut from white card using the Labels 8 Nestabilities die and a snowflake, using a Marianne Creatables die, was die cut at the top of the panel.

The sentiment, from the Dovecraft Studio G Snow Words stamp set, was stamped at the bottom of the Label die cut using Versafine Onyx Black archival pigment ink.

A knot was then tied in a length of green gingham ribbon and wrapped around the die cut panel.

A small panel of silver mirror card was adhered to the card blank and the die cut panel matted over the top with the mirror card showing through the aperture.

The snowflake and the sentiment were then highlighted with Craft Planet Iridescent glitter glue.

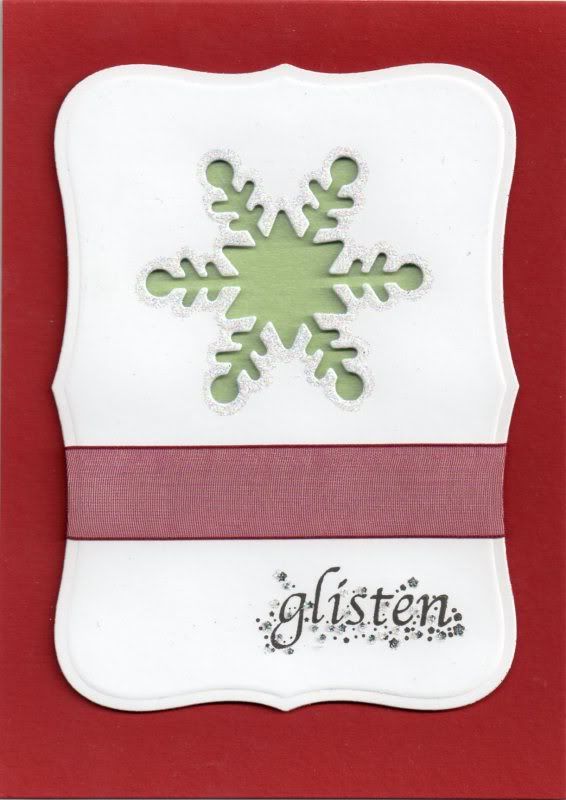
I also made this card in a red colourway, using deep red organza ribbon, Anita's Lime Green pearlescent paper behind the aperture, and DecoArt Crystal Glamour Dust to highlight the snowflake and the sentiment.

Tuesday, 1 February 2011

Blue and Cream and Green Snowflakes

So, here are the next Christmas cards!!!

I made the cards using the Marianne Creatables snowflake die and a selection of papers from the Dovecraft Let It Snow paper pad.

All the cards were made in the same way, using different papers and different sentiment stamps.

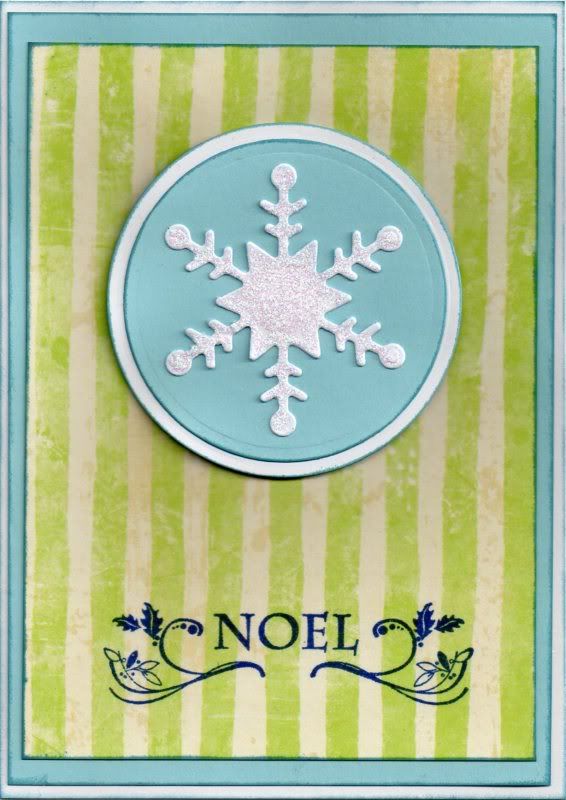
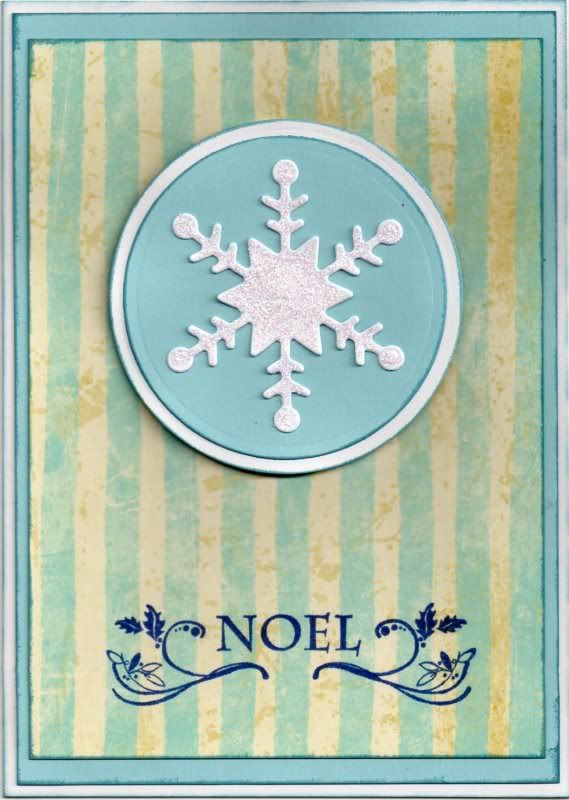
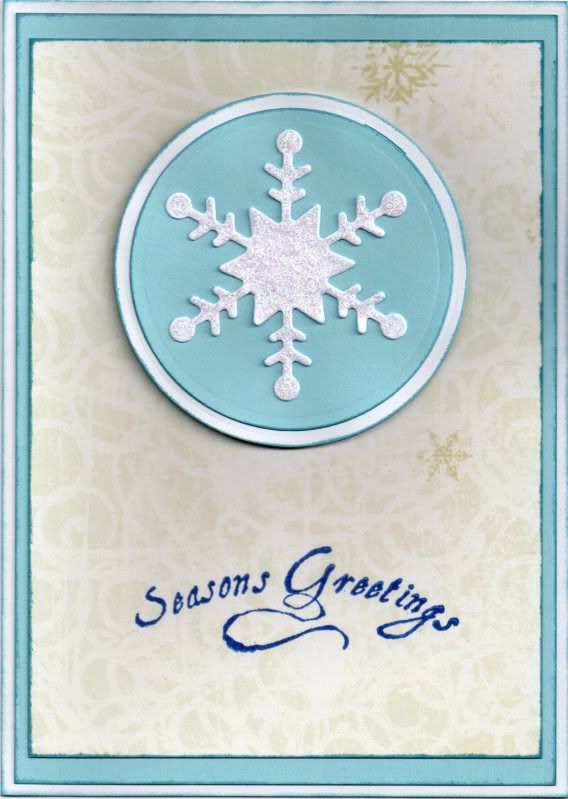
The first card was created by die-cutting a snowflake from white card using the Marianne Creatables die and covering it with Craft Planet Iridescent Sparkle glitter glue. This was then matted onto circles of light blue and white card, die cut using Nestabilities circle dies.


A panel of the lime green and cream stripe paper, from the Dovecraft Let It Snow paper pad, was matted onto the light blue card and the Noël sentiment, from Dovecraft Studio G, was stamped at the bottom of the panel using Versafine Majestic Blue archival pigment ink.

The second version of the card used the light blue and cream stripe paper from the same paper pad:


and the third version used the cream swirl and snowflakes paper and the Seasons Greetings stamp from the Papermania Home For Christmas by Jesse Edwards stamp set:

Saturday, 11 December 2010

Green and Glitter Wee with Christmas Tree

Here is the first of my Christmas cards that I've actually managed to scan in!!!

I love this image and decided, due to time constraints, to stamp and colour it in using just one inkpad.


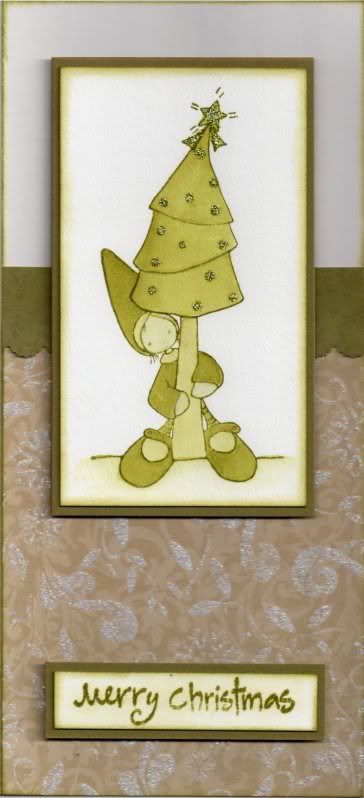
The Wee With Christmas Tree image, from Whiff of Joy, was stamped using Tim Holtz Peeled Paint distress ink and watercoloured by dragging the colour from the outline and adding extra colour where needed.

The tree image was then highlighted using Glitz It Pear Green glitter glue and matted onto olive green card.

A panel of the cream glitter flourish paper from the Dovecraft Noel paper pad was adhered to the card blank. A strip of the green flourish paper from the same paper pad was then punched using the scalloped scallop border punch from EK Success and matted over the join.

The sentiment, from the Dovecraft Studio G Stylized Tree stamp set was stamped using the Peeled Paint ink and matted onto the olive green card and positioned at the bottom of the card, and the image panel over the strip of punched paper.

Here are the challenges that I'll be entering this card into:

Friday, 19 November 2010

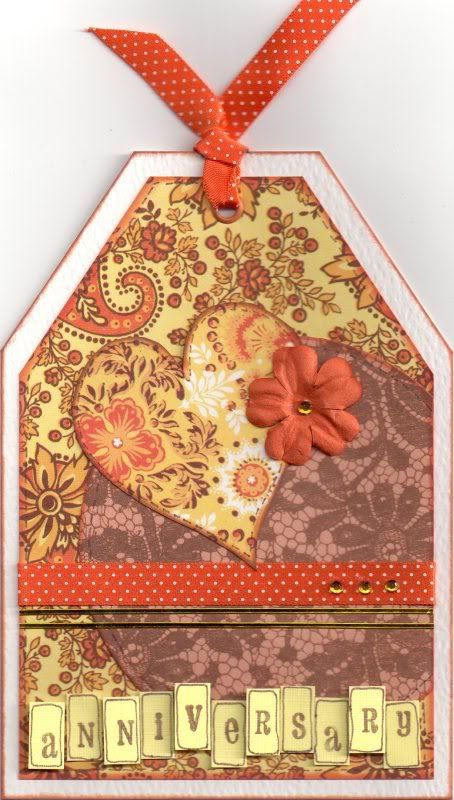
Yellow and Orange Anniversary Heart Tag

This card was based on a design in Creativity magazine (Issue 19) and uses the Papermania Sunshine Capsule Collection.

The card blank was cut into a tag shape. A circle of the orange lace paper from the Papermania Sunshine Capsule Collection paper pad was added over the edge of a tag shaped panel of the orange and yellow floral paisley paper and the excess trimmed away. A heart shape was cut from the yellow and orange medallion paper and attached over the two papers.

A length of the orange polka dot satin ribbon and some gold border peel-offs were added across the panel and three yellow faux gems were added to the ribbon.

A hole was punched at the top and an orange eyelet set and threaded with the orange ribbon. An orange paper flower was added over the edge of the heart and a yellow faux gem was added in the centre.

The letter panels were created by cutting rectangles from yellow linen card and stamped using the Studio G Hampton Art mini alphabet stamp set with the Versafine Vintage Sepia archival pigment ink and a line drawn around the edge with a fine liner. The letter panels were then added to the bottom of the tag, some flat and some 3D'd.

Tuesday, 17 August 2010

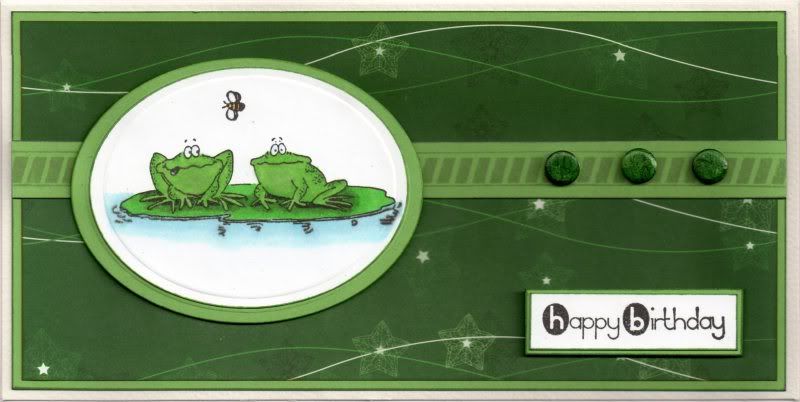
Green Lilypad Frogs

Here is the card I made for my cousin. I love this image and think I'll be getting good use out of this stamp set.

I am entering this card into a few challenges:

An oval was cut from white card using a Nestabilities classic oval die and the two frogs on lilypad image, from the Penny Black Toadily stamp set, was stamped centrally using Versafine Onyx Black archival pigment ink and coloured using Copic sketch markers, as was the mini bee image:
  • Frogs: G05, G14, E41, BV00, B00
  • Lilypad: G05, G29, YG17
  • Water: B00, B41, B12
  • Bee: B00, Y17
 The image panel was then matted onto a green oval.

A strip of green card was stamped using the stripy border stamp from the Papermania Hampstead Icons and Sentiments stamp set using Versafine Smokey Gray archival pigment ink and matted across a panel of the filigree stars paper from the Papermania 'The Big One' Temptations paper pad.

Three green card candy, from Craftwork Cards, were coloured with a Copic marker (G29), and adhered to the right of the stamped strip.

The sentiment, from the Dovecraft Studio G Make A Wish mini stamp set, was stamped onto a scrap of white card using the Onyx Black ink and matted onto the green card.

Sunday, 15 August 2010

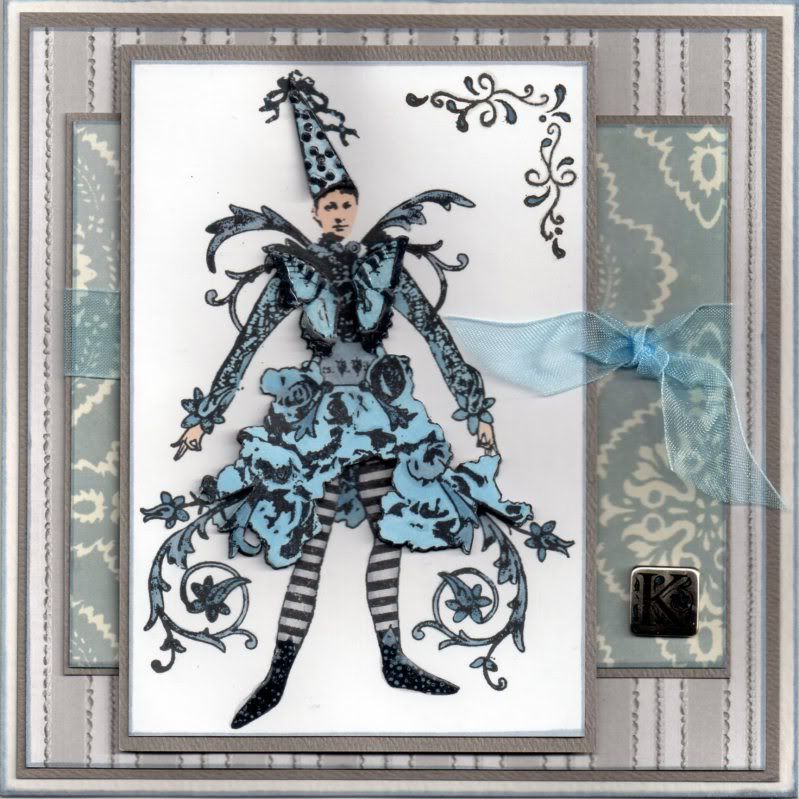
Blue and Grey Pantaloon

This is the card that I made for the very talented Katy (CraftyKaty) for her birthday. She seems to be going through it a bit at the moment and I hope this cheered her up a little. She is a tremendously talented cardmaker and I knew I had to make an extra-special card to be worthy of sending it to her!!! Please head over to her blog to see her amazing creations.

I hope no-one minds me entering it into quite so many challenges, but I'm rather proud of this one and want to show it off as much as possible!!!


The image, from Stampington & Co, is called Pantaloon, and was stamped onto white card using Memento Tuxedo Black dye ink and coloured using Copic sketch markers:
  • Skin: E00, E51
  • Hat/Dress: B41, B45, BV23, N1
  • Tights: N1, BV23
The image was stamped again and the butterfly, dress and hat were coloured and cut out and decoupaged over the base image.

The corner swirl image, from the Studio G Friends For Life mini stamp set, was stamped in the top right corner with Versafine Onyx Black archival pigment ink and coloured with the Copic markers:
  • Swirl: B41, B45, BV23, N1
I traced over the swirl section with the N1 marker, giving it a sort of shadow effect.


The image was layered up and Anita's 3D gloss was added to the spots on the hat, the shoes and the butterfly markings.


This panel was matted onto dark grey card.

A panel of the grey ribbon stripe paper from the Papermania Monochrome Capsule Collection paper pad was also matted onto the grey card, as was a panel of the light blue medallion paper from the Papermania Persimmon paper pad.

A length of light blue organza ribbon was tied around the light blue panel and a square 'K' brad, from the ColorBok Alpha Accents kit was added in the bottom right hand corner. The three layers were then matted up.

Colour was added to the brad using a Copic marker (B45) to tie it in with the rest of the card.

Monday, 17 May 2010

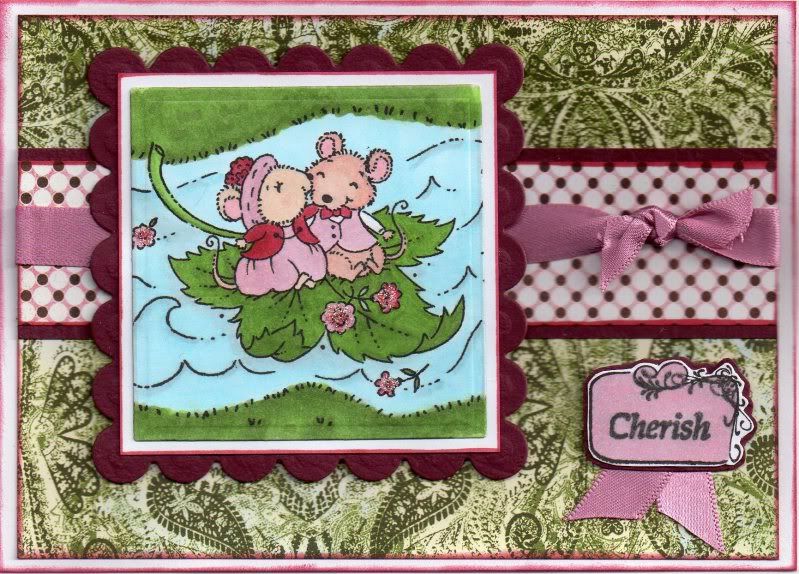
Burgundy, Pink and Green Mice Couple on Leaf Anniversary

Here is the card I made for my cousin's wedding anniversary. I decided to go with the colour scheme as dictated by the blog challenge over at A Gem Of A Challenge, which is burgundy, pink and green, and use one of my recent purchases, a Stampavie stamp by Tina Wenke.

I am also entering this card into the Stamp Something blog challenge, which has Celebrations as this week's theme, and the My Time To Craft challenge, which has Too Cute as its theme.


I started by stamping the "Mice Couple on Leaf" image, from Stampavie/Tina Wenke onto white card using Versafine Onyx Black archival pigment ink and coloured it using the Copic Sketch markers.

  • Grass/Leaf: G12, G85, YG07, YG67
  • Water: B00, BG02, N1
  • Mice: E00, E51, R20
  • Clothes: R39, R59, RV21, N1
  • Flowers: R39, RV21
The image was then cut out using a square Nestabilities die and matted onto another white square. This in turn was matted onto a panel of burgundy leather effect card cut out with a scalloped square Nestabilities die.

A panel of the Elite paper from the Basic Grey Sultry paper pad was matted onto a strip of the burgundy card and a length of Anita's pink satin ribbon was tied across it. This was then matted onto a panel of the Fedora paper from the Basic Grey Boxer paper pad.

The flourish frame from the Studio G Journalling Blocks mini stamp set was stamped onto white card using the Onyx Black ink, coloured using the Copic markers and cut out.
  • Sentiment: RV21

This was then matted onto the burgundy card, and a small piece of the pink ribbon was attached behind it.

The image panel was added to the left of the card and the sentiment to the bottom right.

Small touches of pink Craft Planet glitter glue were then added to the flowers in the image to highlight them, although this doesn't show up very well in the scanned image.

Monday, 12 April 2010

Blue and Black Sarah Kay Spring Blossoms Easel

This card was inspired by a card that Alex made during a friendly cardmaking get-together at Julie's last year. I've been wanting to have a go at this technique ever since and finally got around to doing it the other day. Hopefully you'll like the results.
You can see Alex's original card here.

I shall be entering these cards into the Cute Card Thursday blog challenge, #107, which has Mono Mania as it theme this week.

I started by stamping the Sarah Kay Spring Blossoms image from Stampavie onto 300gsm watercolour paper using Tim Holtz Faded Jeans Distress ink and the colour was then dragged out using a damp paintbrush. Extra colour was added to areas to add shadow.

The image was cut out using the Mega Rectangles Nestabilities die and the edges were coloured using the Faded Jeans ink and cut and dry foam, leaving the die in place to create a white border.

A larger mat was cut from dusky blue card and the edges colour tinted with ColorBox Charcoal Fluid Chalk ink and stamped with a flourish stamp from the Autumn Leaves Flourish V1 Rhona Farrer stamp set using the Versafine Smokey Grey archival pigment ink.


A panel of blue hessian effect paper from the Hot Off The Press Floral Ultimate Cardmaker's Creative Pack was matted onto a panel of the dusky blue card stamped with the Flourish stamp. A panel of the blue hessian effect flourish paper, from the same paper pad, was matted onto stamped blue card and a length of black sparkle weave ribbon was wrapped around this and matted onto the larger panel.

This was then attached to the easel card and the Sarah Kay image panel was attached onto this.

A circle tag was created from the blue card using the Cuttlebug circle tag and stamped with the Flourish stamp. A white circle to mat on top was cut from the watercolour paper using the Sizzix Sizzlets Circles #4 Frames die. The sentiment was stamped in the centre of the circle using the 'Make A Wish' stamp from the Dovecraft Studio G 'Make A Wish' mini stamp set using the Smokey Grey ink. This was then colour tinted using the Faded Jeans ink and a length of the black ribbon was threaded through the hole and the tag attached to the corner of the image panel.
A touch of sparkle was added to the ribbon and flowers in the image by adding Craft Planet Iridescent Sparkle glitter glue.
To create the stop part of the easel, the blue hessian effect flourish paper was matted onto a panel of the blue stamped card and a length of the black ribbon wrapped around. A sentiment panel was created using the Mega Curved Rectangles Nestabilities die, coloured using the Faded Jeans ink with the die still in place. the sentiment was stamped using the Happy Birthday stamp from the 'Make A Wish' mini stamp set and the Smokey Grey ink.

This was actually the second version of this card that I made. The original version, above, was created without the full front panel, but I decided it needed the panel to make the image stand out more.
Here is the card from the side, showing the construction of the card.

(Apologies for the quality of some of these pictures - they were taken on my camera phone - I really must find my proper camera and USB cable for it).

Monday, 22 March 2010

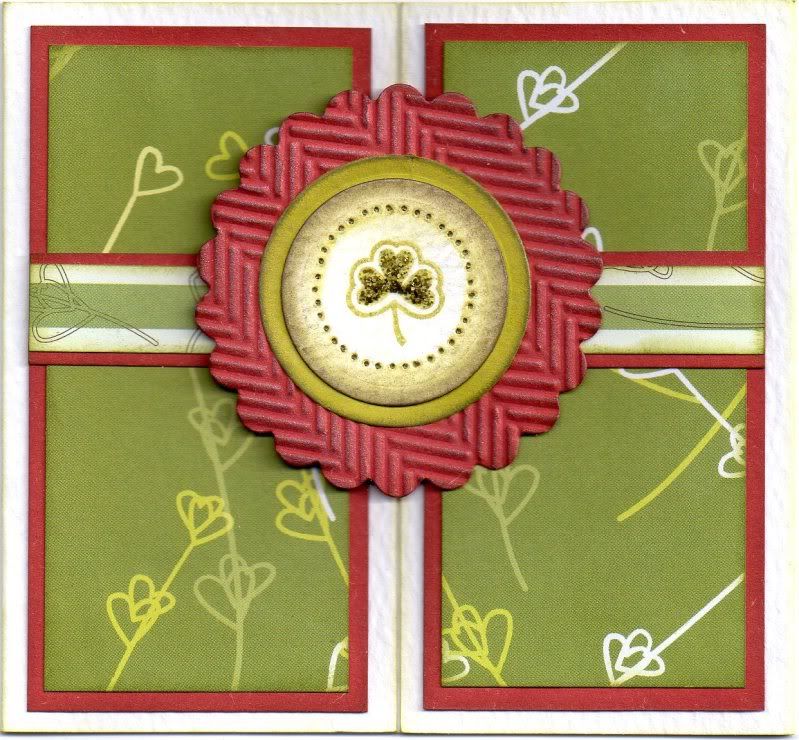
Green and Orange Shamrock Gatefold

Here is the card I made for St Patrick's Day this year. It is also my entry to this week's Stamp Something Challenge, which this week is Distressing.


I started by creating the small gatefold card from white textured card and the panels from orange card and the green heart stems paper from the Papermania Olivine Essences Creative Tones paper pad. A strip of the green heart stems floral border paper was matted onto a strip of the orange card and matted across the panels. All the papers were distressed using Tim Holtz Distress inks in Peeled Paint and Frayed Burlap and the orange card with the Frayed Burlap.
The Shamrock circle image from the Studio G Dovecraft mini Good Luck stamp set was stamped using Versafine Spanish Moss archival pigment ink in the centre of a Nestabilities die cut circle and the dots were pierced with a piercing tool.
The edges of the circle were coloured using Tim Holtz Peeled Paint, Shabby Shutters and Frayed Burlap Distress inks. This was then matted onto a circle of green paper. Rosewood and Golden White metallic rub-ons by Craf-T were then added to the edges of the Shamrock and green circles.
A scalloped circle was cut from orange card and embossed using the Cuttlebug Herringbone embossing folder. The two colours of metallic rub-ons were rubbed over the raised detail and the smaller circles were adhered to the centre.
The edges of the card were coloured with the Peeled Paint distress ink and the scalloped circle was attached to the left side of the gatefold card.

Sunday, 7 February 2010

Valentine's Hearts and Polka Dots

Well, I have finally got around to entering a couple of blog challenges.

The first is the Stamp Something blog challenge and the theme for this week is Love Something. The second is the Stampin' For The Weekend blog challenge and their theme is Love and Valentine's. So, I decided to enter the Valentine's card that I made for my hubby into both.

I decided to go for a fairly simple design for this card and decided to use some of my new goodies, in particular my new border punch that I won on ebay recently.

I started by punching the edges of a strip of red card using my new punch, an EK Success Scalloped Scallop punch. A strip of the black and white polka dot paper from the Papermania Claire Curd The Big One paper pad was then matted on top.

The 'From The Heart' stamp from Dovecraft Studio G was then stamped onto white and red card using Versafine Onyx Black archival pigment ink. Just the sentiment centre part was cut from the white card and the whole frame was cut from the red card. The little heart was stamped again onto red card, cut out and attached to the white panel. The white panel was matted onto the red panel and then onto a panel of black card with the corners rounded.

Using the heart stamps from the Dovecraft Studio G Love and Be Mine mini stamp set, the images were stamped onto red card using the Onyx Black ink. The images were highlighted using a white gel pen and a red Sakura glitter gel pen. The circle sentiments were cut out using a circle Nestie die and matted onto black circles. The sentiment panel and the hearts were positioned across the polka dot border.


The inside of the card was also decorated, using the frame part of the 'From The Heart' stamp and the 'Be Mine' stamp from the mini stamp set. This was also layered onto the polka dot paper and punched red card.

Saturday, 9 January 2010

Pink and Green Victorian Strolling Couple

I have returned. I have just spent three very cold wintry weeks in beautiful Dublin - at least I believe it's beautiful from my previous visits as I didn't actually see any of it this time round.

I've never known such cold weather - and if you thought the British councils were slow off the mark, get this. There were no gritters sent out on New Year's Eve before the first of the January snowfalls, and then they were knocked off for a few days' holiday. When we left on Thursday morning, the roads still hadn't been gritted and cars were skating like Todd Carty on a bad day! It took us over 90 minutes to do a 25 minute trip! When we got back to the UK, we didn't drive on a road with any snow or ice on it, until we reached the last half mile of our journey, the housing estate!

Anyway, I write this from my hibernation chamber where I will be spending the next couple of weeks by the looks of things. I'm definitely not a cold weather person! And, to top it all, the radiator doesn't seem to be working in our bedroom so we'll have to call someone out to have a look at it - and what's the betting they don't come out til the weather warms up - like August!

So, back to all things crafty! Here is a card I made a while back now, using a beautiful image that I got from Jackie/mp3mills in the July 2008 image swap over on docrafts. This was created for a very good friend that I made when I lived in Germany shortly after I got married. Hazel was very good to me and managed to get me an interview for a really good (if not well-paid) job where I was able to use my then recently acquired German degree. Eleven years on, we still keep in touch. I can't believe it's been that long!


Firstly, a gatefold card was created from white hammer card and covered using the pink blossom lace paper from the Papermania Regency Signature paper pad. These papers are really very elegant and suit the image very well.
A strip of green card was matted onto brown card, stamped using the Studio G border stamps and attached either side of the centre join.
The image, Strolling Couple from Inkadinkado, was watercoloured using the Whispers Brushstroke markers. This was matted onto green and brown cardstock and attached over the centre of the card.
The 'With Love' sentiment, from the All Night Media Brenda Walton Romanza Labels and Tags stamp set, was stamped using the Versafine Onyx Black ink and colour tinted using the Whispers Brushstroke markers. This panel was attached to the right-hand side of the card, and the image was tucked behind it to keep the card closed.

Tuesday, 8 September 2009

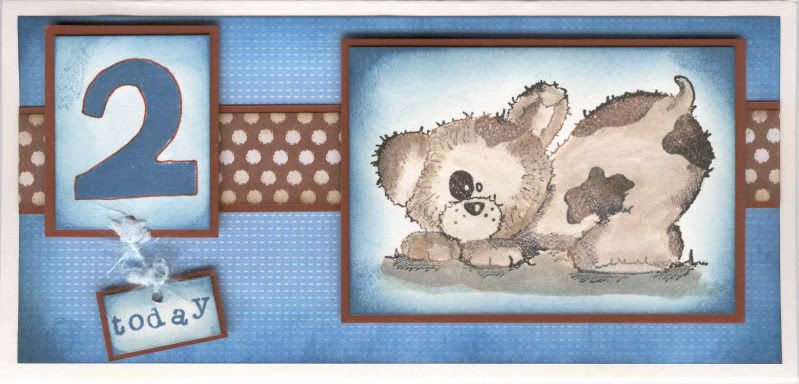
Brown and Blue Two Today Dandelion

I decided to enter the Pollycraft Blog Challenge #23 this week, and the theme this week is 'Furry Friends'. I decided to use one of the lovely Dandelion stamps from the Daisy and Dandelion stamp set.

The card is for a little two-year-old boy, the son of a friend of mine.

I started by stamping the Dandelion image onto cream cardstock using Versafine Onyx Black and Vintage Sepia archival pigment inks, giving the image a mottled effect. The image was then watercoloured using Tim Holtz Frayed Burlap distress ink.

The edges of the image panel were then distressed using the Tim Holtz Faded Jeans distress ink, and matted onto brown cardstock.

The number '2' was stamped using the Faded Jeans ink and a foam stamp from the Papermania Large Sheet Numbers stamp set. The number was outlined using the fine end of a brown Whispers Brushstroke marker.

The word 'today' was also stamped onto cream card using the Faded Jeans ink and a Studio G mini alphabet stamp set. The two panels were then distressed around the edges using the Faded Jeans ink. Both were then matted onto brown cardstock and a length of pale blue fibre was tied between both of the panels to suggest movement.

The card blank was covered using the blue mesh paper from the Daisy and Dandelion Picnic Patch paper pad, first distressed with the Faded Jeans ink. A strip of the brown polka dot paper, also from the Picnic Patch paper pad, was distressed with the Frayed Burlap ink and then matted onto the brown cardstock, was attached across the blue paper and the image panels adhered on top using 3D foam pads.

Friday, 29 May 2009

DIY Marshmallow Fathers Day - Alex K's Blog Candy Challenge - CLOSED

Why is it when you really want to get down to some cardmaking there's always something getting in your way!

I wanted to get my entry for Alex's blog candy challenge out of the way about a fortnight ago, but what with one thing and another it didn't happen. Then, on Monday I said to myself I'd get it made on Tuesday, so of course I spent all day in bed with a migraine. I haven't had one for a long time, and this was a particularly nasty one. Not only that, but my eyesight seems to be getting worse just lately, so I'm going to have to dig my glasses out more often.


The blog candy up for grabs is amazing!!!!

Here is what the lucky recipient will receive from the very generous Alex:

- A set of Nestabilities - large plain Octagons
- A packet of designer Gromlets from We Are Memory Keepers
- 5 pink glittery cards with envelopes
- A pack of flower shapes
- A 2"x12" Papermania Oriental Spice Border pack
- 24 A4 sheets from the new Papermania Signature ranges Blueberry Hill and Regency (12 each)
- 20 6"x6" sheets of Core'dinations Whitewash cardstock
- 1 Autumn Leaves Butterfly stamp
- 4 reels of American Crafts Ribbon
- Bottle of Silver Metallic 3D paint
- A wallet with Hanglar images

Anyway, I finally managed to get the card made yesterday. The sketch that Alex produced for the challenge looked particularly 'girlie' with the flowers on it, but I decided to adapt it to a masculine card, mainly because I had to make my Father's Day cards earlier than normal as my father-in-law is going on holiday at the start of June so I've got to get it to him before he leaves.


Anyway, I hope you don't think I've taken too many liberties with the sketch!!!

I started by stamping the Marshmallow DIY image from the Marshmallow Does DIY stamp set from Daisy and Dandelion using the Versafine Onyx Black archival pigment ink and watercoloured it using the ColorBox Amber Clay and Chestnut Roan fluid chalk inks.


The 'Warning' tag image was also stamped using the Onyx Black ink and watercoloured with the Amber Clay ink and a small length of Anita's tan leather sticky ribbon was threaded through the tag. The toolbox image was also stamped and coloured as for the other images.


The edges of the Marshmallow image panel, as well as all the other panels, were coloured using the Amber Clay and Chestnut Roan fluid chalk inks, and matted onto beige textured cardstock.


Two matching papers from the Daisy and Dandelion Picnic Patch paper pad were matted onto another piece of the beige card and a length of the tan leather sticky ribbon was adhered onto a strip of the beige card and then attached across the join of the patterned papers.


The Circle Journalling image from the Studio G Mini Journalling Blocks stamp set was stamped onto white card using the Onyx Black ink and the 'Best Wishes' sentiment from the Papermania Clare Curd Sentiments set was stamped within it. This was then watercoloured using the Amber Clay ink. Silver embroidery thread was tied through a hole made through the top of the circle and threaded under the leather ribbon and through to the back of the panel. A mini silver brad was pushed through the hole in the panel to make it look like the brad was holding the sentiment in place.


The 'Warning' tag and toolbox images were then adhered over the edges of the Marshmallow image panel.

I decorated the inside of the card with a strip of the striped paper as used on the front of the card and stamped the sentiment using a 'Happy Father's Day' stamp from Inca.


I also made a 'Handmade By' medallion for the reverse of the card.

Watercolouring with the fluid chalk inks is a bit of trial and error. You need to add quite a lot of water so you don't get too thick a colour as they can obliterate the stamped lines, as you can see below on the second Father's Day card I made.


This was made almost the same as the challenge card, but on this one I added the 'Warning' tag to the Marshmallow image panel and added the word 'DAD' down the right-hand side.

This was done by stamping the letters from the Papermania Fun Letters stamp set onto both the striped paper and the beige texture cardstock.

The patterned letters were stamped using the Onyx Black ink and cut out close to the outline and the cardstock letters were stamped using both the Amber Clay and Chestnut Roan chalk inks and layered up.

The screwhead image from the Marshmallow Does DIY stamp set was then stamped onto the letters and traced over with an orange Sakura metallic gel pen.
Blog Widget by LinkWithin