Pages

WELCOME

This blog was created to act as a record of the cards and other projects that I have made. It is for both my own reference and to help inspire anyone who wants to take a look.

I'd love it if you'd leave me a comment so that I know what you think of my projects and that you've been to visit!

Anyone can comment, even those who don't have a blog. (Just look for the word 'Comments' under the three little pictures at the end of each post). Readers without a blog can add an anonymous comment, but please leave your name (and docrafts username if applicable) so I know who you are!

Slideshows of all the cards I've uploaded to my blog can be found at the bottom of the page.


PEOPLE WHO FOLLOW MY BLOG

Showing posts with label Making Memories. Show all posts

Wednesday, 2 April 2014

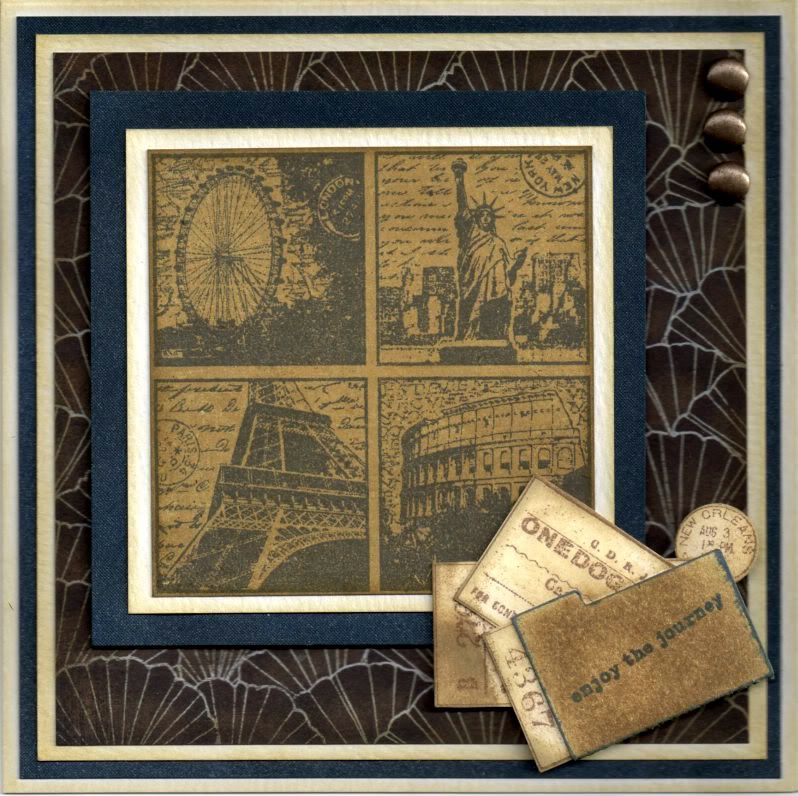
Dark Blue and Brown Landmarks and Tickets 40th

So, my latest upload is a card I made for a friend who was turning 40. He has always called me 'aunty Kathleen' ever since I used to feed him curry when we were based in Germany. Even though he is actually older than me!!


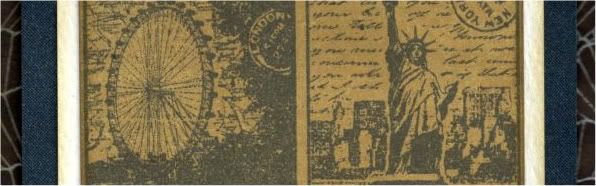
I pulled out the trusty Landmarks image, from Crafty Individuals, and stamped it onto the Honey paper from the Basic Grey Granola paper pad using Memento Paris Dusk dye ink and trimmed it up into a square. The image was then matted onto cream and navy shimmer cardstocks.

A panel of the Wild Oats paper from the same paper pad was also matted onto the cream and navy cardstocks.

A file folder was die cut from cream card using the Sizzix Sizzlits die and coloured using Tim Holtz Frayed Burlap distress ink and stamped with a sentiment from the Making Memories Express It! stamp set using the Paris Dusk ink.
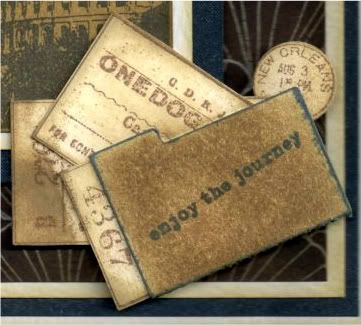


The Travel Tickets stamp, also from Crafty Individuals, was then stamped onto cream card using the Versafine Vintage Sepia archival pigment ink and the individual tickets were cut out. Tim Holtz Old Paper and Frayed Burlap distress inks were then added to distress them. The tickets were arranged inside the file folder and added at the bottom right corner of the image panel.

Three large old gold brads from Papermania were then added in the top right of the panel and the panel was then added to the card blank.

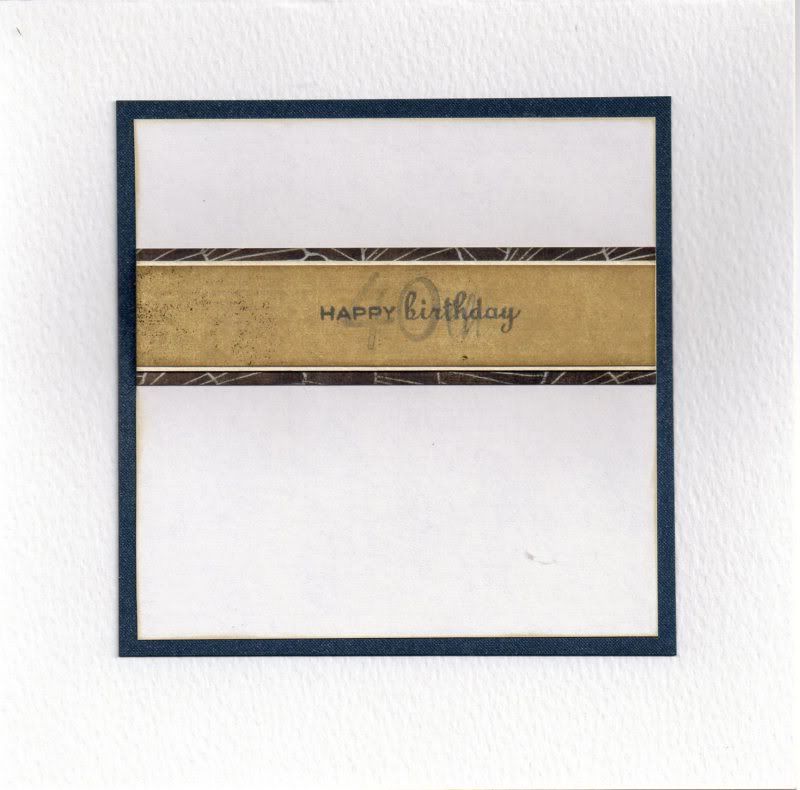
The inside of the card was also decorated using strips of the papers used on the front of the card. The sentiment was stamped across the Honey paper using the Paris Dusk ink, the Happy Birthday stamp from the Personal Impressions Paula Pascual Mix and Match Sentiments stamp set and the '4', '0' and 'th' stamps from the See D's Lower Case Script Alphabet stamp set. The '40th' text was stamped using the second generation of ink, giving it a more faded look.

Here are the blog challenges I am entering this card into:

Monday, 4 July 2011

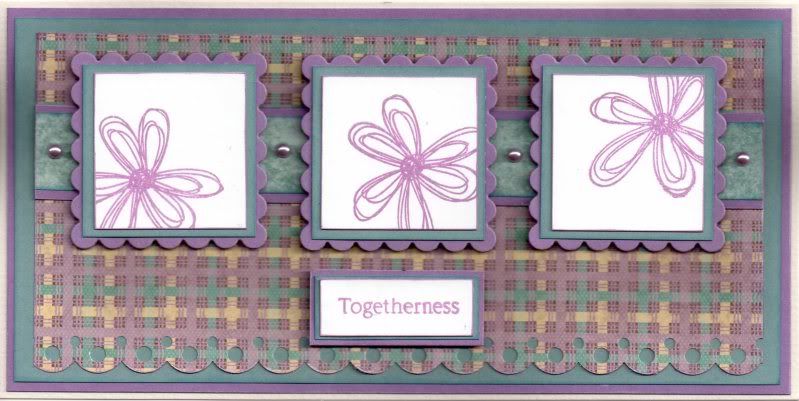
Lilac, Blue and Cream Scribble Daisies Anniversary

Here is the anniversary card that I made for my matey Teresa and her hubby Ken. I wanted to go with something a bit more summery so opted for the lilac colour tones.


Three panels were cut from white card and stamped with the Scribble Daisy stamp from the Papermania Hampstead Collection Sketch Flower stamp set using Brilliance Pearlescent Purple pigment ink. The panels were then matted onto blue paper and scalloped lilac squares die cut using a Nestabilities die.

A strip of the mottled blue paper from the HOTP Floral Ultimate Cardmaker's Creative Pack was matted onto the lilac card and across a panel of the lilac, blue and cream weave patterned paper from the same paper pad. This was then punched with the Martha Stewart Scallop Dot border punch and matted onto the blue paper and lilac card.

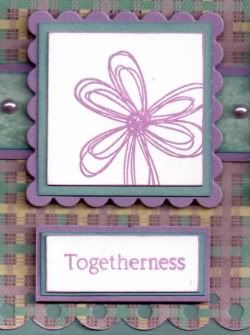
Detail of image and sentiment
The 'Togetherness' sentiment, from the Making Memories Express It stamp set, was stamped using the Pearlescent Purple ink and matted onto the blue and lilac. Once the card was assembled, the lilac pearls from the Kort and Godt pastels set were added between the image panels. It seemed only fair that I used the pearls on Teresa's card as she very kindly split a couple of the sets with me!!

Here are the blog challenges I am entering this card into:

Monday, 4 April 2011

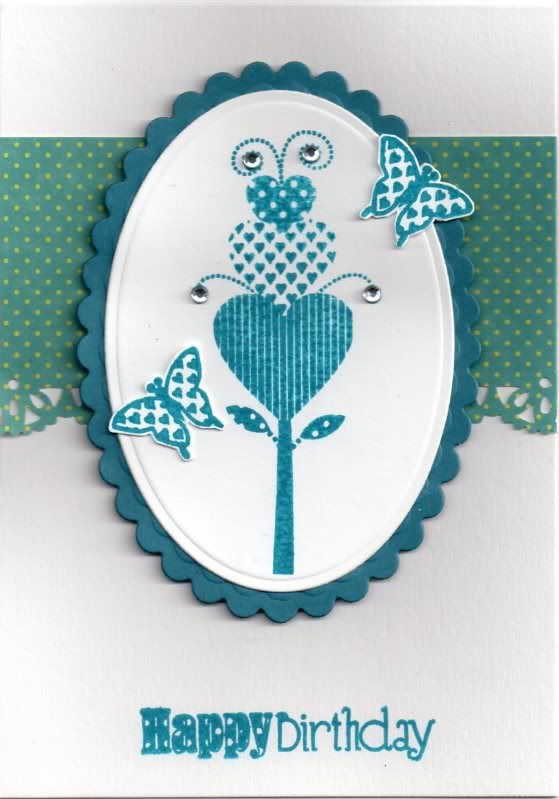
CAS Stream Funky Heart Flower

Here is the first of the CAS cards I made using the lovely Heart Flower image from the Pink Gem Funky Flowers stamp set.


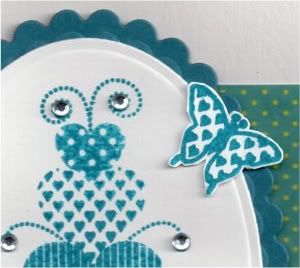
The Heart Funky Flower image was stamped using Stream Adirondack dye ink and die cut using a Petite Oval Nestabilities die. This was then matted onto a teal Petite Scalloped Oval mat.

A panel of the teal mini polka dot paper from the Making Memories Funky Vintage Ruby Collection paper pad was punched along the edge using the XCut Sparkler border punch and adhered across the tent fold card blank.


The image panel was matted over the top and the sentiment, also from the Funky Flowers stamp set, was stamped using the Stream ink at the bottom the card blank.

Blue faux gems were added to the flower image.

Here are the challenges I am entering this card into:

Monday, 18 October 2010

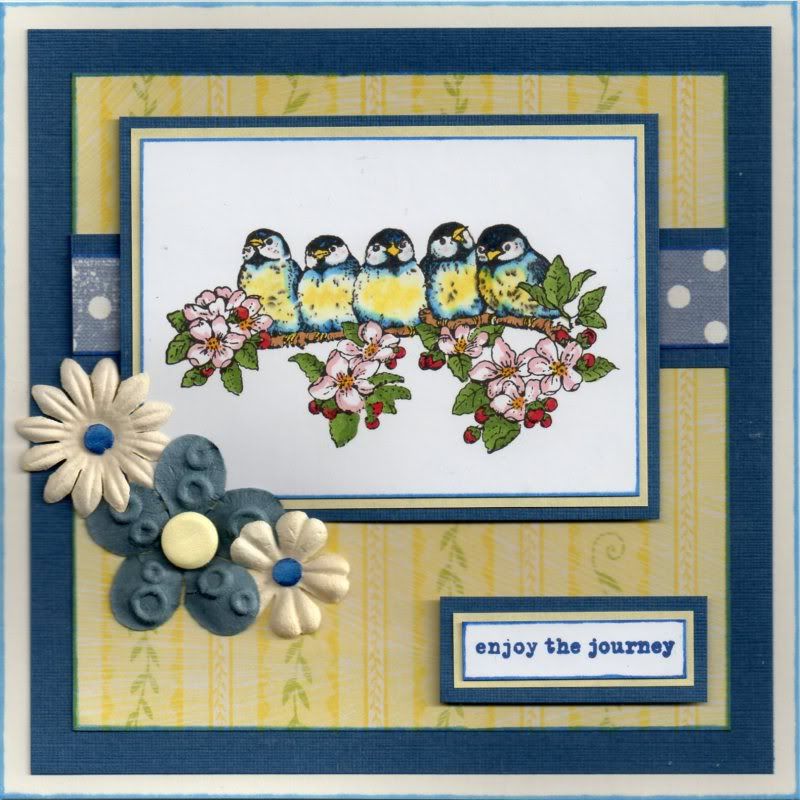
Blue and Yellow Enjoy The Journey Bluebirds

Here is my 500th card design!!! I can't believe I've made 500 different designs of cards. No idea how many actual cards I've made as sometimes I've made multiples of the same design (I've made two of this one!).

It's a little bit different to my normal style of cards but this is a lovely stamp and thought it was appropriate for the recipient!!


The Bluebirds image, from the Penny Black Enjoy Life stamp set, was stamped using Versafine Onyx Black archival pigment ink and coloured using the Copic Sketch markers:
  • Birds: B12, B18, B24, Y00, Y08, YR02
  • Branch: E35
  • Leaves: YG17, YG67
  • Berries: E07, R29
  • Flowers: R20, YR02, Y08
  • Edges: B18, B24
The image was then matted onto yellow paper and blue card.

A strip of the blue polka dot paper from the Making Memories Fresh Anthology Sydney paper pad was matted onto the blue card and across a panel of the yellow and green vine stripe paper from the K&Co Tim Coffey Daffodil paper pad, also matted onto the blue card. I haven't used these papers for ages, so decided it was time to pull them out again. I'm sure they were feeling just a little bit neglected!!!

The image panel was added over the polka dot stripe panel and Prima paper flowers, from the Prima Botanical Mix, were added over the corner of the image panel and a soft white card candy, from Craftwork Cards, added in the centre of the blue flower and smaller circles were punched from blue card candy for the centres of the smaller cream flowers.

The sentiment, from the Making Memories Express It stamp set, was stamped using Versafine Majestic Blue archival pigment ink and matted onto the yellow paper and blue card and added in the bottom right corner.

Here are the challenges I shall be entering this card into:

Tuesday, 5 October 2010

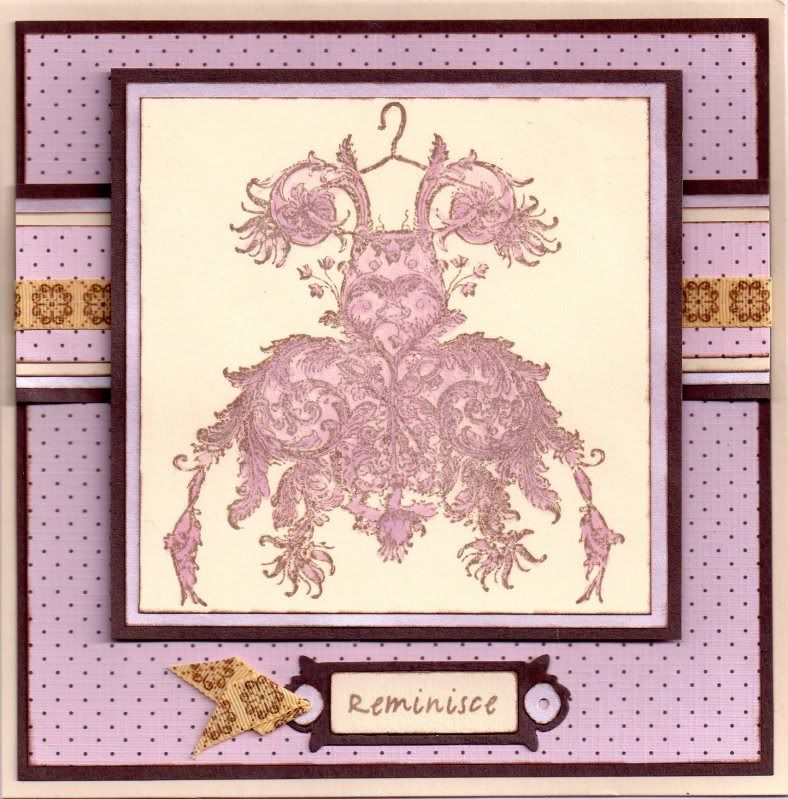
Pink and Brown Apron Dress

Another delayed upload again - but I seem to be catching up a bit on my older cards. Here is the card I made for my cardmaking matey Julie for her birthday in May. I decided to make something a bit different for me and used one of my new Stampington & Co stamps.


Firstly, the Apron image, from Stampington & Co, was stamped onto cream card using Versafine Vintage Sepia archival pigment ink and watercoloured using the Whispers Whisper Pink and Whisper Lilac permanent dye inks.

The image was matted onto a panel of Anita's pink pearlescent paper and brown card.

A panel of the pink and brown polka dot paper from the Papermania Chatsworth paper pack was matted onto the brown card. A smaller strip of the polka dot paper was matted onto the pink pearlescent paper and the brown card and a length of cream and brown medallion ribbon from the Chatterbox Chocolate ribbon pack was wrapped around the panel and attached over the larger panel towards the top.

The stamped image was then attached over the top of the ribbon panel.

The sentiment panel was created by die cutting the bookplate from the Sizzix Sizzlit Bookplate #2 die using cream and brown card and the pearlescent pink paper. The word, from the Making Memories Express It stamp set, was stamped onto the cream panel using the Vintage Sepia ink and the bookplate was assembled. A short length of the cream and brown ribbon was attached to one side of the bookplate.

Here are the challenges that I will be entering this card into:
ETA:
This card was picked by the randon number generator as the winner of the Scrap Creations Think Pink blog challenge.

Sunday, 25 July 2010

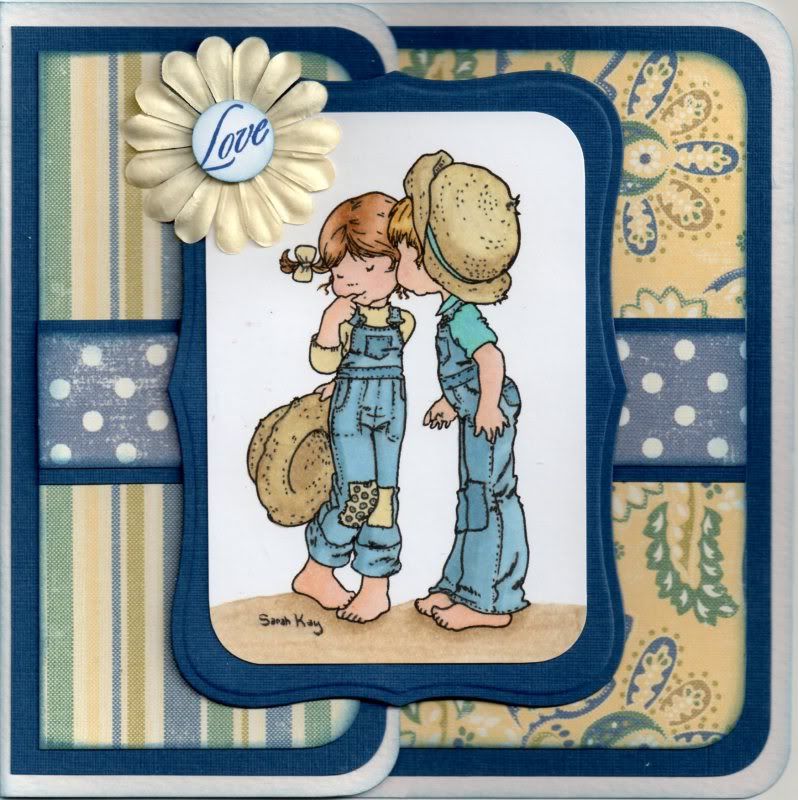
Blue, Green and Yellow Kiss For Chloe

Here is the anniversary card I made for my cousin and her husband, for their second anniversary. I love this image and think it's great for a young couple.

I have also entered it into a few blog challenges:


The Kiss For Chloe image, from Stampavie, was stamped using Versafine Onyx Black archival pigment ink and coloured with Copic sketch markers.
  • Dungarees: B41, B45, B93
  • Hats: Y00, E21, E41, E43
  • Patches/Jumper: Y00, B41
  • Shirt: BG13, B41, G02
  • Girl's Hair: E21, E35, E57
  • Boy's Hair: Y00, Y17, E41
  • Skin: E00, E21, E51, R20
  • Shadow: E41, E43
The image was then cut out and the corners rounded with the large XCut corner rounder punch. This was then matted onto a panel of blue card cut out using the Labels 8 die from Nestabilities.


A square card blank was created from white card and half of the front panel was cut off. The corners were rounded with the XCut punch.

Panels of the blue card were cut to fit the front panel and the inside of the card. A strip of the blue polka dot paper from the Making Memories Fresh Anthology Sydney paper pad was matted onto the blue card and matted onto panels of the blue and green stripe paper and the yellow paisley paper from the same paper pad.

A 15mm circle of white card was punched out using a Craft Planet punch and stamped with the Love stamp from the HOTP Sentiments stamp set using the Versafine Majestic Blue ink. The edges of the circle were then distressed with Tim Holtz Faded Jeans distress ink. The circle was then adhered to the centre of a cream Papermania Imaginisce paper flower and attached to the corner of the image panel.
 
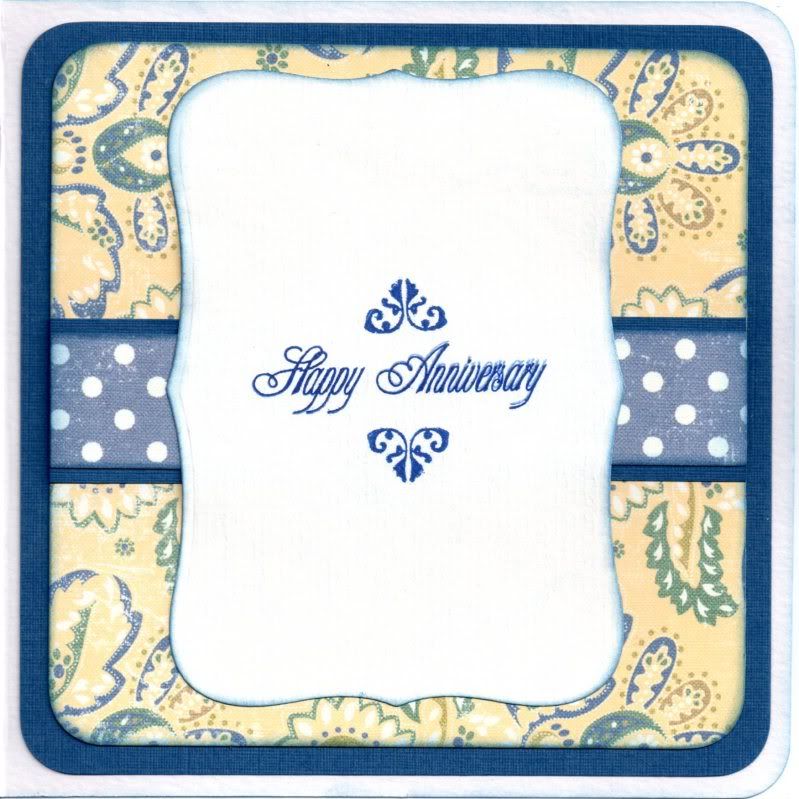
A sentiment panel was then added to the inside of the card using a panel of white paper cut out using the Nestabilities Labels 8 die and adhering it to the inside of the card directly behind the panel on the front of the card so it is not visible when the card is closed.

The sentiment was stamped using the Stamps Away Happy Anniversary stamp with the Majestic Blue ink. The mini flourish corner stamp, from the Fiskars Friends stamps set, was added above and below the sentiment using the same ink.

Friday, 11 June 2010

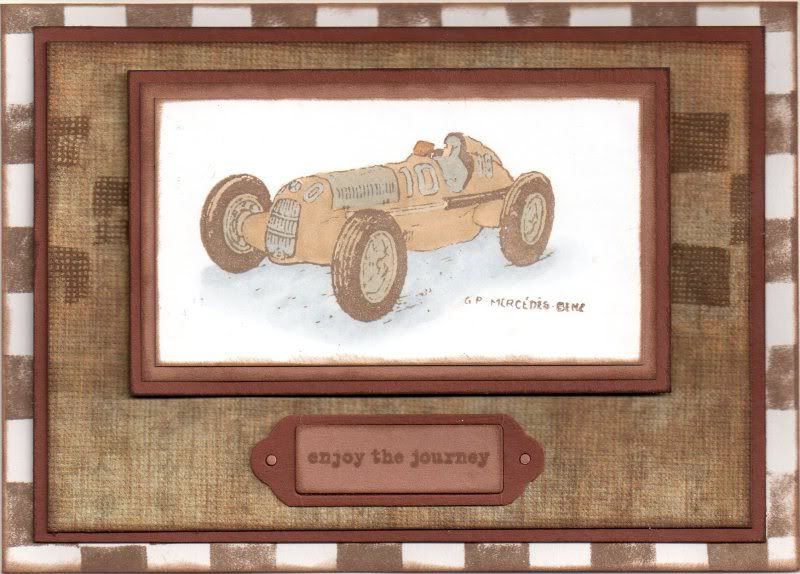
Brown and Grey Mercedes Racing Car Chequers

Here is my latest masculine offering. I bought this car stamp at the Make It show in Farnborough - I was especially looking for stamps I can use on men's cards and thought this one could be used for all ages.

I am entering  this card into a couple of blog challenges this week:


So, to begin with, the Racing Car image, from Stamps Away, was stamped using Versafine Vintage Sepia archival pigment ink and coloured using the Copic sketch markers.
  • Car: E43, E51, E57, C0, C2
  • Clothing: C0, C2
  • Skin: E51
  • Shadow: C0, C2
The image was then matted onto two cardstocks of two different shades of brown.

The base card was stamped using the Chequers stamp from the Creative Imaginations foam stamp set and the Vintage Sepia ink to represent the chequered flag (quite imaginative for me I thought - and quite impressive that I remembered I had that stamp hidden away somewhere).

The Chequers stamp was also stamped across a piece of the distressed brown paper from the DCWV The Old World paper stack and matted onto the darker brown card.

The bookplate was cut using the Sizzix Sizzlit Bookplates #2 die and the two brown cardstocks. The sentiment was stamped using a sentiment from the Making Memories Express It stamp set and the Vintage Sepia ink.

Wednesday, 26 May 2010

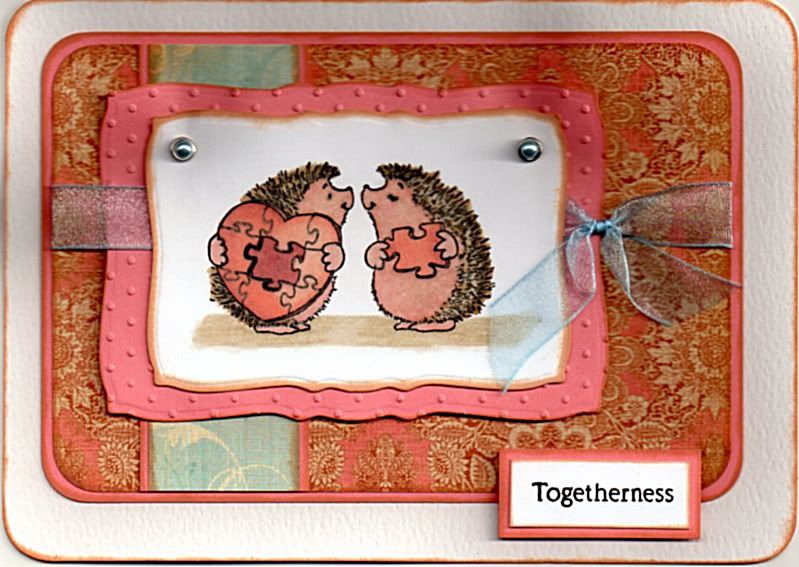
Coral Pink and Blue Jigsaw Piece Hedgehogs Anniversary

This is the card I made for the lovely Alex and her husband for their wedding anniversary recently. I am also entering it into a couple of challenges:

I started by stamping the image from the Penny Black Piece of My Heart stamp set using Versafine Onyx Black archival pigment ink and coloured using the Copic Sketch markers.

  • Hedgehogs: E57, E43, E40, E02, E00, R20

  • Jigsaw: E04, E02, E00, N9

  • Shadow: E43, E40
The image was then cut out using the Mega Curved Rectangles Nestabilities die, and aqua pearl brads from Papermania were added in the top corners.

A panel of the coral pink card was cut out and a panel of the salmon pink Brocade paper from the K&Co Classic K Bailey paper pad was matted onto it. A strip of the light blue Flourish paper from the same paper pad was matted onto the coral pink card and attached across the larger panel.

A panel of the coral pink card was cut out using the Mega Curved Rectangles die and embossed using the Cuttlebug Swiss Dots embossing folder. This was attached to the larger panel and a tied  length of light blue organza ribbon was wrapped around the panel. The image panel was attached over the ribbon.

The sentiment panel was created by stamping the word stamp from the Making Memories Express It stamp set using the Onyx Black ink onto the white card and matted onto the coral pink card.

Wednesday, 24 March 2010

Teal, Green and Pink Sitting Gorjuss Girl and By The Cute and Girly Challenge

Here is another of my Copic coloured cards - I'm very proud of this one and it uses one of my favourite colour combinations (at least for this week!)

I am also entering it into the By The Cute and Girly blog challenge (a new one for me) and their current monthly challenge is 'Spring Is In The Air'.

I started by stamping the Sitting Gorjuss Girl image from Sugar Nellie using Memento Tuxedo Black dye ink and coloured using my Copic sketch markers.
  • Hair: E02, E07, YR02
  • Face: E00, E02, E11, R20
  • Dress: BG11, BG13, BG49
  • Socks: YG11, YG17
  • Highlights: N1 (not as noticeable in the picture as in real life)
  • Shadows: N3, N5
The image was then cut out using the Nestabilities Label 3 die and matted onto a teal blue panel.
A panel was created using two co-ordinating papers from the Making Memories Funky Vintage Ruby Collection paper pad and a strip of green paper, and a length of white twill ribbon was attached across this, having been knotted first.
Three Papermania paper flowers were colour tinted with the Copic markers* and attached to the bottom corner of the card. Small self-adhesive pearls were then attached to their centres.
The sentiment tag, from Stamps Away, was stamped using Versafine Onyx Black archival pigment ink and coloured using the Copics.
  • Tag: BG11, BG13, BG49
A hole was created in the top of the tag and white embroidery thread was threaded through and attached between the flowers.
* I don't recommend this as the paper tends to fluff up and get stuck to the nib of the pen!!!

Tuesday, 22 September 2009

Brown and Teal Penny Black Garden Buggy

Here is my entry to this week's Stamp Something Blog Challenge. The theme this week is to use your favourite colours on your card. My favourite colours at the moment are teal blue and chocolate brown, which seem to be featuring increasingly in home decor.

I decided to use a new paper pad that I bought as a result of my trip to Julie's. Yes, she made me buy something else!! I saw the papers in her pad and thought 'I've got to get me some of them!'

The paper pad in question is the Making Memories Funky Vintage Ruby Collection pad. It has some beautiful bold patterned papers in there!

So, here is my card:


I started by picking out the papers that I wanted to use and coloured my image to match. The image is a Penny Black image called 'Garden Buggy' that I received from Princesskarra over on the docrafts forum. I watercoloured the image using the Whispers Brushstroke markers.

The image was matted onto a panel of the teal mini dots paper from the paper pad and green paper.

A strip of the multi stripe paper was matted onto the green paper and a length of Anita's spotted teal grosgrain ribbon was adhered across the striped paper and attached across a panel of the brown flower and berry paper.

The 'Just For You' sentiment from the Papermania 'Just For You' stamp set was stamped using Versafine Onyx Black archival pigment ink onto white card and watercoloured using the teal Whispers Brushstroke marker. This was cut out using a standard circle Nestie die and matted onto a scalloped circle of the green paper.

Craft Planet Ice Blue glitter glue was used to trace around the edge of the image panel and the sentiment circle.
I also decorated the inside of the card. This was decorated slightly differently to how I had intended to decorate it, mainly because I managed to smudge the blue ink used to edge the panel onto the white paper. So, I decided to overstamp the area with the daisy stamp from the Papermania 'Just For You' stamp set with Marvy Matchables Turquoise dye ink. A folded corner was created using the multi stripe paper from the Ruby paper pad.

Sunday, 6 September 2009

Red, White and Black Wedding Card

This is a wedding card that I made for a couple of friends who recently tied the knot.

I wanted to do something different, so I decided to use a stamp I've had for a while. Having stamped it, I realized that the bird looked a bit lonely, so I decided to stamp out a second one, cut it out and decoupaged it onto the branch.

I went with a red, white and black colour scheme as I thought it looked quite classic. Amazingly, the bride decided to wear a red wedding dress, so I made a wise choice!!

STAMPSBird on a Branch stamp - Kate Knight for Dovecraft

INKS ETCVersafine Onyx Black archival pigment ink
Brilliance Graphite Black pigment ink
Whispers Brushstroke markers
White gel pen

DIE CUTS/PUNCHESStandard Circle and Scalloped Circle Nestabilities

EMBELLISHMENTSLarge red and black brads - Papermania

OTHERSwiss Dots Embossing Folder - Cuttlebug
'Mr & Mrs' rub-on - Making Memories Wedding Wordage rub-ons

Wednesday, 2 September 2009

Purple and Blue Dragonfly Tilda

This is my entry to this weeks 'The Pink Elephant' blog challenge (#30).
This week's challenge consists of a recipe:

1 ribbon
2 squares
something that sparkles

Here is the card I produced:

The Dragonfly Tilda image, from Magnolia, is one that I stamped whilst at Julie's thanks to the lovely Alex.

It was stamped using Versafine Onyx Black archival pigment ink and watercoloured using Whispers Brushstroke markers. The wings were highlighted with Craft Planet Iridescent Sparkle glitter glue. Antennae were added using purple wire from ACE Studio Cards.

A circle of blue paper, cut using a Nestabilities die, was then embossed using the Cuttlebug Swiss Dots folder. This was matted onto a Nestabilities scalloped circle of purple card and highlighted with dots of Craft Planet Ice Blue glitter glue.

A strip of the Jardin paper from the Basic Grey Wisteria paper pad was matted across a square of the White Dynasty paper.

Using the Making Memories Notch and Die tool, two ribbon holes were punched from the scalloped circle and a length of purple metallic ribbon from Dovecraft was threaded through them and attached on the reverse of the White Dynasty paper. This was then matted onto a square of the purple card.

The Tilda image was cut out and layered onto the circles using 3D foam pads.

Purple flower gems, from Papermania, were attached in three of the corners and they were highlighted with the Ice Blue glitter glue, and the floral pattern on the Jardin paper with the Iridescent Sparkle.

The 'Happy Birthday' greeting, from the Hero Arts Birthday Messages stamp set, was stamped in the bottom right-hand corner using Versafine Imperial Purple archival pigment ink.

The inside of the card was also decorated, using the same papers as were used on the front of the card.The sentiment, also from the Hero Arts Birthday Messages stamp set, was stamped using the Imperial Purple ink.

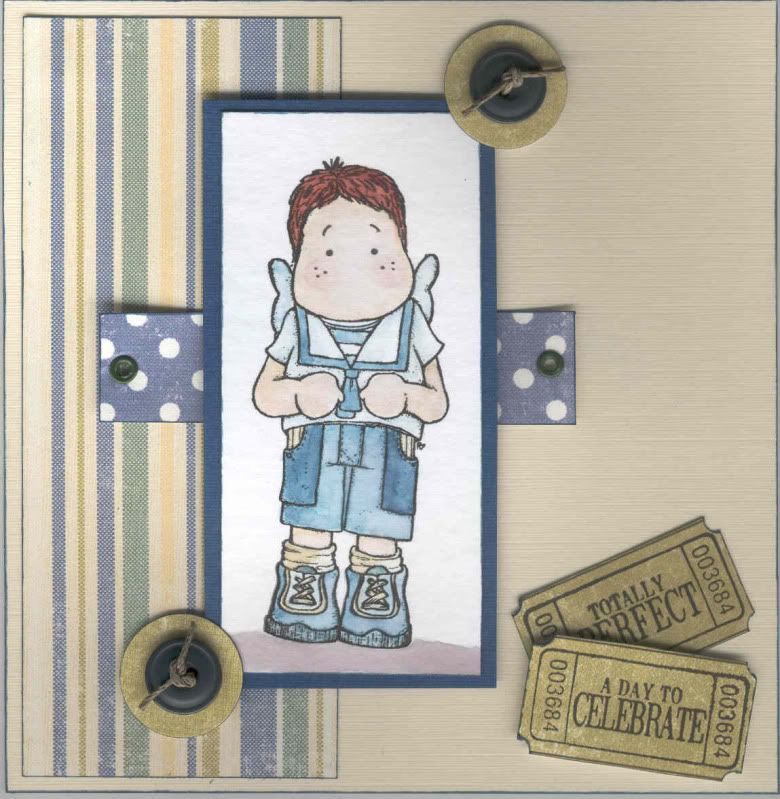
Blue, Green and Yellow Sailor Edwin

This is my entry to this week's Sketch and Stash blog challenge (#18). This is another of the NEW blog challenges that I discovered the other day and I love the idea behind this one.


The idea is to use something new and something that's been neglected from your stash. Well, I'm sure we've all got LOADS of neglected items, especially those ones we had to have but once Mr Postie brought them we had no idea how to use them!!!

Well, the sketch looked like this:

My new item is actually the papers, which are from the Making Memories Fresh Anthology Sydney paper pad. I bought these the other week, and was inspired to buy these (amongst others) by my visit to Julie's. The one I was looking for was the Ruby pad, but saw these and had to get them as well.

My neglected items are the buttons (that I bought about 4 years ago).

The Edwin stamp and the ticket stamps are also slightly neglected as this is the first time I've used the Edwin stamp that I bought months ago, and the ticket stamps that I haven't used as much as I should have!!

Anyway, the Sailor Edwin image from Magnolia was stamped using Versafine Onyx Black archival pigment ink and watercoloured using Whispers Brushstrokes markers and was then matted onto blue cardstock.

A panel of the blue stripe paper from the Sydney paper pad was attached to the left of the card blank. Two small green eyelets were set in a strip of the blue polka dot paper and attached across the centre of the card. The Edwin image was then layered over the patterned paper.

Green hemp cord (that I bought in Hobbycraft if you're interested) was threaded through two green buttons and layered onto the green brocade paper from the Sydney paper pad and added at the corners of the Edwin image.

Two of the stamps from the Autumn Leaves Ticketed stamp set were stamped using the Onyx Black ink on the green brocade paper. Holes were punched at the corners of each of the tickets using the Big Bite and then cut up. To see the tutorial on doing this from Aud Designs, click here. It's very clever.

I also decorated the inside of the card using strips of the patterned papers used on the front of the card and the Happy Birthday sentiment was taken from the Papermania Clare Curd Sentiments stamp set using the Onyx Black ink. Faux stitch doodling was added around the panel of paper to emphasize the edges.

This card was made for a friend with not a hint of irony. As you can see, there is a ticket that says 'Totally Perfect'. Well, he's not, but he thinks he is. He also thinks he's always right, but I didn't have a ticket that said that!!!

Monday, 8 June 2009

Black, White and Blue Gorjuss Girl Sitting With Bird

Here's another of those cards I've been holding on to until I know the recipient (Loretta) has received it.

I wanted to make a card for her birthday using another of my newest stamps, the Gorjuss Girl Sitting with Bird, from Sugar Nellie and available from Funky Kits.

I decided to go with a monochrome colour combo with a hint of blue.

I started by stamping the Gorjuss Girl Sitting with Bird using Versafine Onyx Black pigment ink then watercoloured it using the Whispers Brushstrokes markers. The sentiment, from the Making Memories Express It! stamp set. was then added to the image panel using the Onyx Black ink. This panel was matted onto black card.

A panel of patterned paper from the Papermania Ivory and Black Creative Tones paper pad was cut to size and the large daisy was watercoloured blue using one of the Whispers Brushstroke markers. The Making Memories Notch and Die tool was used to create slots either side of the daisy to allow the light blue organza ribbon to be threaded through and attached on the reverse of the panel. This was then matted onto a panel of the solid blue paper from the Papermania Citrus Colossal paper pack.

A scalloped circle was cut from the blue striped paper from the Papermania Citrus Colossal paper pack using one of the Nestabilities scalloped circle dies. A clear faux gem was attached within alternate scallops. This was then cut in half and attached behind the ribbon.

The image panel was attached over the semi-circles and mini clear faux gems were attached in the centre of the daisy.

For the inside of hte card, I used the outside of the scalloped circle cut for the front of card, matted over a piece of white paper and a square of black card. The sentiment was stamped using the 'Happy Birthday' stamp from the Hero Arts Birthday Messages stamp set and the Onyx Black ink. This was matted over patterned paper to match that used on the front of the card.
The 'Handmade By' medallion was attached to the reverse of the card. It was made using a 'Handmade By' stamp from Oyster Stamps and the blue stripe paper used on the front of the card.

Tuesday, 19 May 2009

Pink, Lemon and Mint Gorjuss Girl Sitting with Bird

Hopefully I've managed to get this uploaded in time!! I had finished this on Thursday but have only just managed to get it scanned into my computer!!

This is the first Sugar Bowl Challenge I've entered (mainly because I've only recently bought some Sugar Nellie stamps!), and at first I thought I'd chosen the wrong combination of papers to make it, but I actually really like it now!

The challenge this week (#10) is based on a sketch by the lovely Marlene.


I decided to use one of my new stamps, namely the Gorjuss Girl Sitting with Bird, and the Basic Grey Two Scoops paper pad. The added extra for this challenge was to use buttons, so I decided to make some from one of the papers in the paper pad to ensure that they colour matched.


The Gorjuss Girl image was stamped using Versafine Onyx Black archival pigment ink and watercoloured using the Tim Holtz Distress inks (Scattered Straw, Tattered Rose, Frayed Burlap and Milled Lavender). The bird was also watercoloured and cut out, nand the Gorjuss Girl image was cut into a rectangle.
Papers from the Basic Grey Two Scoops paper pad were colour tinted around the edges using the distress inks (Tattered Rose, Shabby Shutters and Scattered Straw) and the edges of the yellow/pink panel were also coloured using Whispers Green Green permanent dye ink. The green strips were then overstamped using the RicRac ribbon stamp from the HOTP Stitches stamp set.
A 6" square lemon yellow card blank was made from the Papermania Textured cardstock pack, and the edges were coloured using the Scattered Straw ink. The papers were then adhered to the card blank following the sketch as seen above.
Faux buttons were made from the yellow patterned paper by stamping the large button from the See D's Vintage Morsels Collection stamp set, and green embroidery thread was threaded through the holes that were made using a piercing tool.
Using the medium Flowers and Branch Sizzlit die, a branch and flowers were cut from the BG Two Scoops papers and colour tinted using the distress inks.
The 'Celebrate' word, from the Making Memories Express It! stamp set, was stamped using the Versafine Onyx Black ink and cut out into a tag shape. This was then matted onto the yellow patterned paper, and the bird image adhered to the tag.
Pictures of the inside and reverse to be added later.......

Tuesday, 24 February 2009

Tags and Tiles

I had to pack up my craft room last week as my brother-in-law and his wife announced (the day before) that they were coming to visit and stay the night. Now, technically, my craft room is the spare room but it only gets used 2-3 times a year. Unfortunately, last Thursday was one of those times.

As it was, I was going to have to tidy the room up as we had a scheduled electrical inspection on the Friday, meaning the poor electrician needed access to sockets, heaters etc, but with their impending arrival, I was actually going to have to tidy everything away, rather than make nice piles of things on my table!!!

If I get a chance, I'll take some photos of my room, if only for my own reference so I know how tidy the room can look!!!

Anyway, before I tidied everything away, I managed to make a couple of cards. They were based on a design in the Just Cards magazine, and I made a male and female version of the design.

The first was the male version.

I created a tag from brown card, and attached strips of paper from the K&Co Life's Journey Ruler pad across it and and set a large eyelet at the top. The pocket watch image was cut from the HOTP Masculine Paper Artsy book and adhered to the tag. Anita's beige polka dot grosgrain ribbon was threaded through the eyelet.

Two squares of matching patterned paper from the Ruler paper pad were distressed with ColorBox Chestnut Roan Fluid Chalk ink and layered up. Sections of the ruler paper were adhered to the left hand side and the tag on the right.

A flourish from the Making Memories Ornaments stamp set was stamped onto one of the ruler tiles using Brilliance Moonlight White pigment ink.

The design was adapted slightly for the more feminine version.

I created the tag using a scrap of paper from the K&Co Brenda Walton Lilac paper pad, which I adhered onto a piece of card to strengthen it. Strips of matching paper were attached across the tag, and an eyelet was set at the top. Lilac grosgrain ribbon was threaded through the eyelet.

The initial was cut from matching paper using the Ellison Curlie Girlie die cut set. A flower was cut out using an X Cut die, also cut from matching paper from the Lilac paper pad.

A square of the patterned paper was over stamped using the Scribble Flower and Irregular Lines foam stamps from a Creative Expressions foam stamp set using ColorBox Wisteria Fluid Chalk ink pad. This was matted onto another square of matching paper and matted onto a card blank.

Tiles of paper were cut from two matching papers from the Lilac paper pad.

The greeting was stamped onto two of the tiles using a stamp from the See D's Celebration Messages stamp set using ColorBox Wisteria fluid Chalk ink. A flourish from the Making Memories Ornaments stamp set was stamped onto the remaining three tiles using ColorBox Warm Violet Pigment ink.

Once the card was assembled, lilac teardrop gems were attached in the top right corner.

Monday, 20 October 2008

Cards Made For My Friend - Hen Party and Wedding Card

My friend asked me if I could make her a couple of cards and I jumped at the chance.

She wanted a 'Hen Party' card and a wedding card with a Winter Wonderland theme, with a colour scheme of white, silver and teal.

The Hen Party card was easy enough - a learner plate, some marabou feathers, some decorative ribbon and a crystal star gem.

I cut the letter 'L' from some read card and mounted it onto white card and added a Papermania crystal star gem to the corner.

A rectangle of cerise card was matted onto silver Constellation Shantung card, and a couple of white marabou feathers were attached below the letter panel.

The words 'Hen Party' were stamped below the letter panel using a set of the Studio G mini alphabet stamps and the Brilliance Starlight Silver ink.

A length of decorative ribbon was attached down the middle of a small tall card blank and the panel was attached over the top.

The wedding card was another story. I was trying to decide on a style and decided to adapt the design of the Summery Tilda card.

The Papermania Decorative Heart image was stamped in Metallic Silver Ink It Up! pigment ink and embossed using Personal Impressions Turquoise Sparkle embossing powder. This was cut out and watercoloured using Whispers Brushstroke markers. The image was then attached onto layered ovals cut out from teal card and Anita's Classic Silver Christmas vellum.
Two corners of a matching sheet of the vellum were stamped using one of the small Docrafts Ornate Corner stamps and ColorBox Prussian Blue Fluid Chalk ink, and embossed using clear powder. The corners were then coloured from the reverse using a metallic permanent pen and a white souffle pen.

A patterned paper from the HOTP Earth's Palette Creative paper pack was cut using the Fiskars Shapecutter and circle template. This was then stamped using the small flourish morsel stamp from the See D's Connectors Collection set, and a small snowflake stamp from the HOTP Snowflake set of stamps. These were stamped using Brilliance Moonlight White ink, and the 'True Love' sentiment was stamped using a stamp from the Making Memories 'Express It' stamp set and Marvy Matchables Turquoise dye ink, and overwritten with a clear Stardust pen.

A patterned paper from the Dovecraft Christmas Blues designer paper pack was also cut and both pieces were layered up with the stamped vellum and a piece of teal cardstock. A length of white lace was attached across this using small white Papermania brads, and the heart panel was attached over the lace.

Turquoise Papermania adhesive pearls were then added to the heart image, and to the stamped corners.

Sunday, 28 September 2008

Jewels and Tilda - what more could you want???

Here is my entry to this week's ABC Challenge. The challenge this week is 'J is for Jewels'.

The card is actually a wallet card for a fellow docrafts member (hopefully Carla/Little Miss Naughty isn't peeking or she'll spoil the surprise!) as we agreed to an image swap. She very kindly sent me some masculine stamped images and I am returning the favour with some Tildas and Kerry Jos.

The card consists of a sheet of A4 card divided into 3, with the 3rd section trimmed to create a flap inside the card to hold the stamped images.

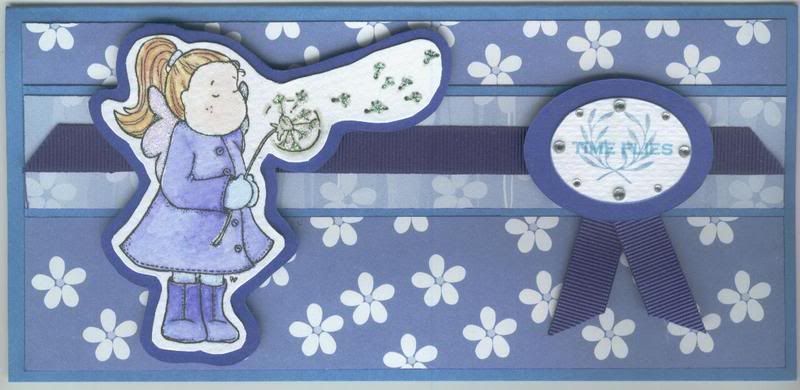
The 'Tilda with Dandelion' image was stamped using Versafine Onyx Black ink and watercoloured using Whispers Brushstroke markers. The wings and dandelion were then highlighted with Craft Planet Iridescent Sparkle glitter glue. The image was then cut out and mounted onto a piece of royal blue card and cut out again leaving a small border.

Hopefully this will not only fulfill the criteria for the challenge but Carla will also like the card.
Two ovals were cut out using the Fiskars ovals template and Shapecutter. The sentiment was stamped onto the white oval using the 'Time Flies' stamp from the Making Memories 'Express It' set and the wreath flourish was stamped over the top of the sentiment using the stamp from the Making Memories 'Ornaments' set.

Clear crystal gems were added around the edge of the sentiment oval, and royal blue grosgrain ribbon was added to create tails to the back of the oval medallion.

Large blue flower paper from the Papermania Citrus Colossal paper pack was attached to the card blank, and a strip of the large blue flower and stripe paper from the Papermania Pastel paper pack was matted over the top, having been matted onto blue card. A length of the royal blue grosgrain ribbon was attached along this strip.

Saturday, 27 September 2008

Budget Tilda with Dandelion Card

The challenge over on the Tilda and Co Blog Challenge this week is to make a card on a budget of less than £1.

I had a wallet card to make for my Docrafts Image Swap for September so decided to try and fulfil the criteria with this one.

The wallet card was made according to the instructions over on Katharina's blog, but slightly adjusted to give it a spine to accommodate the stamped images.

The 'Tilda with Dandelion' image was stamped using Versafine Onyx Black ink and watercoloured using Whispers Brushstroke markers. The wings and dandelion were highlighted with Craft Planet Iridescent Sparkle glitter glue. Whispers Azure Seas permanent ink was sponged around the Tilda image.

The dots from the 'A Little Something' stamp were selectively inked using the markers, cut out and matted onto a larger circle that was cut out using the Fiskars circles template and Shapecutter.

The sentiment was stamped using the 'Time Flies' stamp from the Making Memories 'Express It' set and the flourish was stamped over the sentiment using from Making Memories 'Ornaments' set.

Clear crystal gems were added around circle, at the corners of the Tilda panel and on Tilda's hairband.

To make up the wallet card, a strip of blue mini daisy paper from the Papermania Citrus paper pack was attached down the centre of the front, having been matted onto a piece of royal blue card.

Royal blue grosgrain ribbon was attached around the wallet card to enable it to be tied up.

Shopping List:

Card blank: box of card from Papermill Shop = £6.99/250 sheets - 1 sheet used = 2.8p
Other card (white and blue): as above - 1/2 sheet card total = 1.25p
Patterned paper: £7.99 for 100 sheets = 7.99p/sheet - 1/4 sheet paper total = 2p
Glitter glue: £1.99 for 120ml = 1.66p/ml =1p
Gems: £2.79 for 1500 = 0.19p each - 8 x0.19=1.5p
Ribbon: 20p/m - 0.5m used = 10p

Total cost: 18.55p

Sunday, 7 September 2008

Pink and Green Oriental Lady Aspire Card Wallet


Here is the card wallet that I made for Loretta over at Docrafts for the July 08 Image Swap. She received it on Wednesday so I know I can show it off here now and not spoil the surprise for her.

The Kerry Jo Oriental Girl image was stamped using Onyx Black Versafine ink and watercoloured using Whispers Brushstroke markers. The image was cut out and matted onto white card and pink paper.

The patterned paper is from the DCWV Floral Prints stack and also matted onto pink paper.

Clear crystal gems were added to a strip of the pink paper.

The 'Aspire' sentiment is from Making Memories Express It stamp set.
Blog Widget by LinkWithin