Pages

WELCOME

This blog was created to act as a record of the cards and other projects that I have made. It is for both my own reference and to help inspire anyone who wants to take a look.

I'd love it if you'd leave me a comment so that I know what you think of my projects and that you've been to visit!

Anyone can comment, even those who don't have a blog. (Just look for the word 'Comments' under the three little pictures at the end of each post). Readers without a blog can add an anonymous comment, but please leave your name (and docrafts username if applicable) so I know who you are!

Slideshows of all the cards I've uploaded to my blog can be found at the bottom of the page.


PEOPLE WHO FOLLOW MY BLOG

Wednesday, 6 May 2009

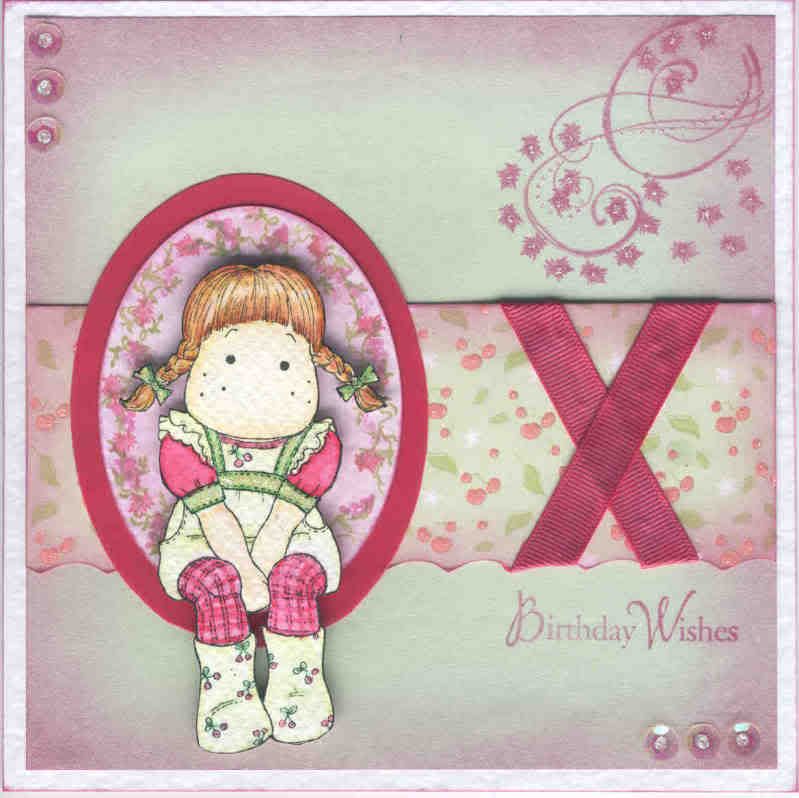
Pink and Green Cherry Tilda

I have decided this week to enter the Just Magnolia blog challenge. The challenge this week, #3, is in the form of a sketch.


This is the first Just Magnolia challenge that I have participated in, much to my shame, but this is mostly down to the fact that it is about two and a half months since I used a Magnolia stamp, and five months since I used a Tilda stamp!! (I know, how terrible of me, I should be flogged!!)

So, here is the sketch that I followed to create the card shown above:
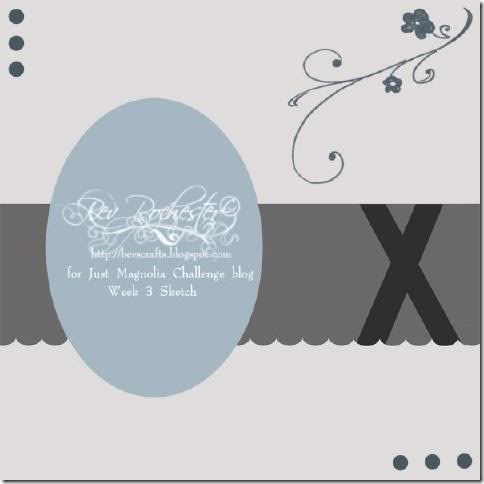


So, I decided to use the lovely Cherry Tilda stamp that the equally lovely Alex sent to me back in September last year. Please head over to her blog to see her beautiful creations. She really is a very talented lady.

The Cherry Tilda image was watercoloured using the Whispers Brushstroke markers and highlighted with Craft Planet Iridescent Sparkle glitter glue.

An oval of white hammer card was cut out using the Fiskars Shapecutter and colour-tinted with Whispers Port Wine permanent dye ink. This was then stamped around the edge to create a frame using flower and foliage morsel stamps from the See D's Tropical and Romance Collections stamp sets using Whispers Green Green, Port Wine and Grand Cranberry permanent dye inks. This was in turn matted onto an oval of Anita's dark pink vellum. The Tilda image was cut out and matted onto the ovals.

A piece of light green paper was stamped with a small flourish stamp from the Autumn Leaves Rhona Farrer Flourishes v.2 stamp set and a morsel flower stamp from the See D's Tropical Morsel Collection stamp set using the Port Wine ink, and embellished using the Iridescent glitter glue. The paper was then colour-tinted around the edges using the same ink.

A strip of the cherry paper from the DCWV Nana's Nursery Baby Girl stack was edged using the edge of the Fiskars circle template and the Fiskars Shapecutter, and similarly colour-tinted around the edges.

Strips of Dovecraft Pouty Pink grosgrain ribbon were colour-tinted with the Port Wine ink and adhered across the strip of cherry paper.

Iridescent sequins (from a bead kit from my sister) were added in the corners of the green panel, as indicated in the sketch, and highlighted with the glitter glue.

To finish the card, a sentiment was added by stamping 'Birthday Wishes' from the Hero Arts Birthday Messages stamp set below the patterned strip using the Port Wine ink.

The inside of the card was also decorated with strips of the colour-tinted green paper and the DCWV cherry paper. The flourish image was 'second-impression' stamped using the Port Wine ink, and the sentiment was stamped over the top using the same ink.


The 'Handmade By' medallion on the reverse of the card was made by stamping my new 'Handmade By' stamp from Oyster Stamps onto a circle of white card cut out using Nestabilities, which was later colour-tinted with the Port Wine ink, and matted onto a scalloped circle of the colour-tinted green paper.

Judging by the way it is stamped a bit off-centre, it looks like I might have to invest in a stamp positioner. If anyone can tell me the best-value one to get in the UK, I'd be very grateful (and please don't tell me to make one from Lego - I don't have any!!!)

Wednesday, 29 April 2009

Blue Art Nouveau Flower

The theme for this week's Stamp Something Challenge is 'Flowers or Showers'. I opted for the flowers part of the challenge and used a stamp I bought ages ago but haven't got around to using until now (sound familiar anyone?).


The flower image by Papermania was stamped onto blue card using clear pigment ink and embossed using Personal Impressions Violet Pearl embossing powder. The image was coloured using Stamps Away mica powders. The dots, from the Papermania Marie Curie Daffodil set, were stamped in the corners and clear embossed.
The image was then matted onto royal blue alchemy pearl card.

Patterned papers from the Papermania Venetian Skies Creative Tones paper pad were matted onto a blue DL card and the flower panel was added on top. Corners were die cut using the Sizzix Sizzlet Elegant Enhancement #3 die using the light blue and royal blue cardstock.


The sentiment, taken from the Papermania Jesse Edwards mini set of stamps was stamped and embossed using Versacolor Black pigment ink and the violet pearl embossing powder.


I decorated the inside of the card by adding a strip of the patterned paper stamped with the flower stamp and ColorBox Lavender pigment ink, which was also stamped in the centre of the white paper. This was over-stamped with the sentiment from the Hero Arts Birthday Messages stamp set using Versafine Imperial Purple archival pigment ink.

Brown, Green and Orange Motorbike - Colour Create Challenge #13

Here is my entry to this week's Colour Create Challenge, Challenge #13, which this week is to create a card using the colours brown, green and orange.

As I had a couple of men cards to make, and decided to drag my peel-offs out of hiding following my recent peel-off win, I went with a motorbike theme.

The Anita's gold motorbike peel-off was coloured brown using a peel-off marker pen. The inny parts of the peel-off were coloured using brown, orange and green metallic pens. This was matted onto beige card and brown cardstocks.
Patterned paper from the K&Co Basic Grey Sublime paper pad was cut into squares and matted onto the brown cardstocks. The corners were cut from the brown card using the Ellison Photo Corners die cut.
The ovals were die cut using the oval Cuttlebug stamp die and the peel-off greeting was coloured using the three pens and adhered onto it.
I decorated the inside of the card using a strip of the patterned paper and Tim Holtz Shabby Shutters distress ink.


The greeting is taken from the Hero Arts Birthday Messages stamp set and stamped using Versafine Spanish Moss archival pigment ink.

Monday, 27 April 2009

I Won Something Else - And I Forgot All About It!!

I forgot all about this! Even when it fell through the letter box with an American postmark and a customs note saying 'Stickers Book' it didn't ring any bells.

Hubby was asking me what else I'd bought and I was trying to convince him nothing. It all fell on deaf ears.

Then I opened the parcel and I remembered! When Paper Wishes launched their new forum they had a competition and so many people would be chosen to win 10 sheets of Dazzles (that's peel-offs to you and me), and a book with card designs and Hot Off The Press papers and die-cuts in it to make some cards. The examples in the book are lovely and I'm actually tempted to get some of my peel-offs out again to make some cards with. They've been very neglected over the past twelve months as I've concentrated on making good use of my many stamps!!!

Watch this space!!!

Friday, 24 April 2009

I've Won! I've Won!

Amazingly, I've won over on the Stamp Something Blog Challenge. The challenge was to create a card using the colours blue, green and yellow. You can see my entry here.

My prize is to choose three downloadable files from The Cutting Cafe. They produce printable stamped images and cutting files that can either be simply printed or cut out using an electronic cutter. (I haven't yet discovered if they will be compatible with my Craft Robo yet - I have to do a little more investigation!)

So, I am off to bed now, but I shall be checking out The Cutting Cafe's website in the morning to choose my goodies!!

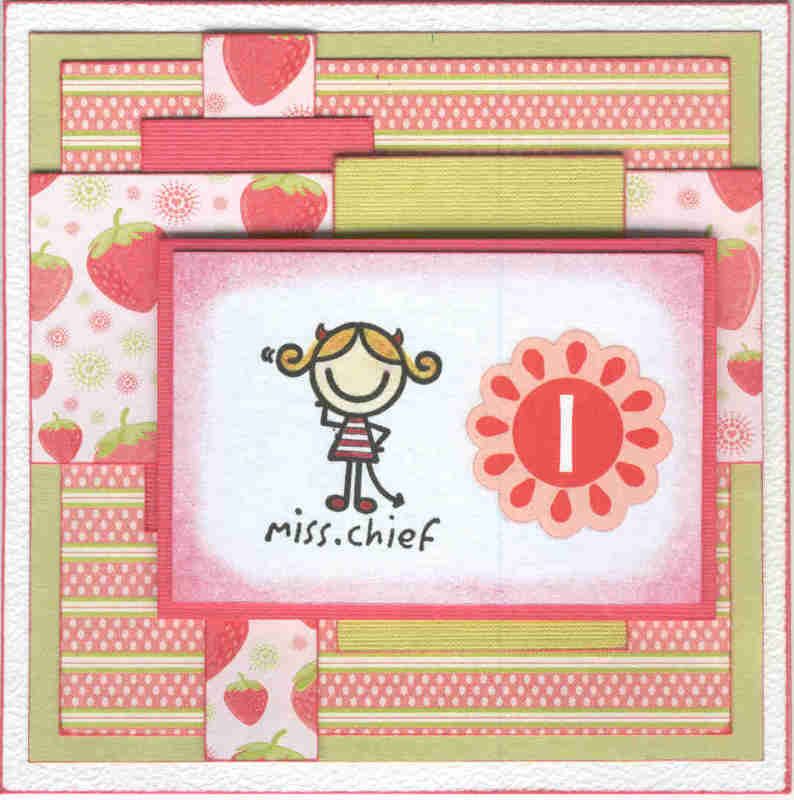
Pink and Green Strawberry Miss-Chief


Here is my entry to the current Truly Scrumptious blog challenge. This is challenge #5, and follows a sketch.

I decided to make a card for my cousin's little girl (actually I made two, one for my friend's little girl as well!)

I began by stamping the 'Miss-Chief' image from the Studio G Smirk range onto the reverse of a piece of white hammer card using Versafine Onyx Black archival pigment ink. It was then coloured using Sakura Stardust pens and Whispers Brushstroke markers. The edges of the panel were sponged using Whispers Grand Cranberry permanent dye ink.

Now I have a confession to make. About 3 and a half years ago, I saw a product spotlighted in a cardmaking magazine and thought 'Ooh, those look good!'. An internet search ensued and I found the products on ebay as part of a bumper kit. They were in the US, but I worked out how much they would cost if I bought the whole lot in the UK, and put in my maximum bid. Needless to say, I won the auction and a bumper ppack of monogram and alphabet rub-ons were winging their way across the Atlantic. Now, three and a half years later, I have actually used one of them (or two if you remember I made two cards to this design!!)

So, using one of my now quite old rub-ons from the Me And My Big Ideas Chester pack, I added an initial to the right hand side of the 'Miss-Chief' panel.

This panel was matted onto a piece of pink card from the DCWV Brights card mat stack. A selection of patterned papers from the DCWV Nana's Nursery Baby Girl mat stack and the card mat stack were then layered up according to the sketch from the blog challenge. These were in turn matted onto a piece of green paper and then onto a Craft Tonic square white card.
Blog Widget by LinkWithin