This is a card that I made at my local cardmaking group. It's a cute pop-up card using a die to create the mechanism. It was pretty simple to make, although you do have to ensure that whatever you put on the pop-up will remain within the card when closed.
I needed a 30th birthday card for my 'little' brother (how did that happen?) and thought this would make a good "special card".
The die used to create this card is the new Lots of Pops die by Karen Burniston for Elizabeth Crafts.
Firstly, the card blank and inner panel were created, with the inner panel being slightly smaller than the card blank. In this instance, the inner panel was created using a panel of paper from the First Edition Sweet Owl paper pad. To create the pop-up, place the die along the centre fold of the inner panel. Work the folds of the pop-up and then adhere to the card blank.
I decided that I would use the free owl stamp by Sugar Nellie that came with the July 2009 issue of Craft Stamper Magazine. The image was stamped using Memento Tuxedo Black dye ink and coloured using Copic markers. Highlights were added using Ranger Glossy Accents. The image was then fussy cut.
The Copic markers used are:
E41, E43, E44, E49, YR14
In the set of dies there is also a post die and a couple of different banner dies. Two of each of these were die cut, the banners being cut from patterned papers from the Sweet Owl paper pad.
The two fishtail banners were stamped on he reverse of the patterned paper using the Whimsy Letters and Numbers stamp set by See D's using Memento Teal Zeal dye ink. The banners were then attached to a length of brown embroidery thread which was then tied and adhered to the two post die cuts and these were then in turn attached to the pop-up mechanism.
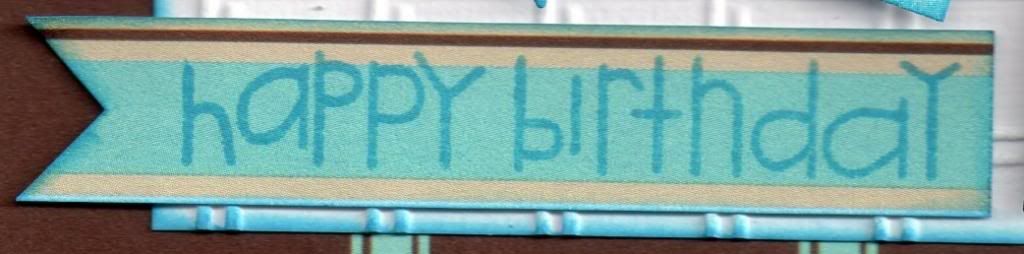
The longer fishtail ended banner was then stamped using the PSX Buttons Pixie alphabet stamps and the Teal Zeal ink. This was placed on the front pop-up, and the owl placed sitting on branches and leaves, die cut using the Sizzix Sizzlet Flowers and Branches die and the Joy! Crafts Branches die.
A strip of the brown circle paper from the Sweet Owl paper pad was matted onto the beige card and added across the inner panel. Ranger Crystal Stickles were added to the circle pattern on the patterned paper. The 'Have A Hoot...' sentiment, from the Woodware Owl stamp set, was then stamped using the Teal Zeal ink and die cut using the Nestabilities Classic Ovals die and matted onto a Labels Thirty-One shape.
Once the inside of the card was completed, the front of the card was created using the same owl stamped image and the branch and leaves die cuts. The owl image was adhered to panels of oval and Labels Thirty-One shapes.
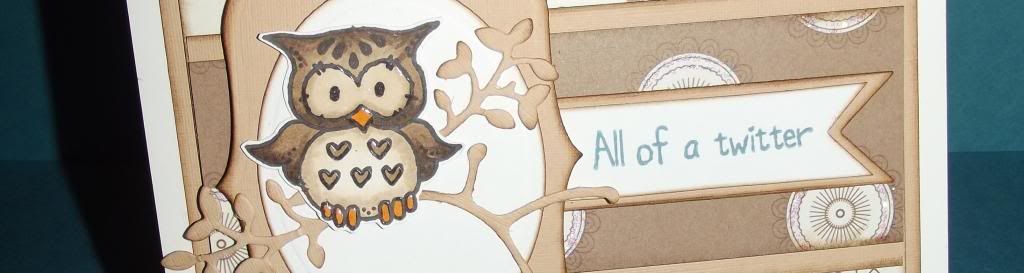
The fishtail banner from the Sizzix Framelits Banners #2 set was die cut from the beige card. The matching stamp was stamped onto white card using a pale ink and fussy cut. The 'All of a Twitter' sentiment, also from the Woodware Owl stamp set, was stamped onto the reverse of the shape and matted onto the diecut shape.
All panels and diecuts were distressed using Tim Holtz Walnut Stain distress ink.
For an area to write the greeting, a large classic oval diecut was matted onto a Labels Thirty-One diecut with a few of the leaf diecuts and adhered to the reverse of the card. The 'Happy Birthday' sentiment, from the Kanban Farmyard Animal Wobblers stamp set, was created in the same way as the 'All of a Twitter' sentiment on the front of the card.
I'm rather pleased with this card, even if I do say so myself. I love the combination of the die cut elements and the stamped elements.
Here are the blog challenges I'd like to enter this card into:
A Creative Romance - Seeing Double
Brown Sugar - #86 - Anything Goes
Craftitude - #61 - Anything Goes
Crafts4Eternity - #168 - Anything Goes
Cut It Up - #41 - Anything Goes
Fairytale - #87 - An Old Stamp
Pattie's Creations - #88 - Anything Goes
QKR Stampede - #80 - A Little Birdie Told Me
Simply Create Too - #57 - Animals
Sister Act - #49 - Anything Goes
Stampin' For The Weekend - Anything Goes
Crafty Girls - #14 - Anything Goes
Aud Sentiments - #102 - Anything Goes
Copic Marker Europe - Birthday
Red Rubber Inspirationals - #112 - Colour In The Lines
Crafter's Café - #55 - Make A Square Card
Inklings and Yarns - #48 - Anything Goes
Stampotique Designers - #139 - Masculine
Fan-Tastic Tuesday - #27 - Anything Goes
Oldie But A Goodie - Bunting (Owl Stamp)
Through The Craftroom Door - Anything Goes 18/3-24/3
Aurora Wings - #1 - Anything Goes
Crafty Bloggers Network - Nature
Crafty Boots - Feathers
Fitztown - #27 - Anything Goes
Lexi's Creations - #112 - Punches and Dies
Shabby Tea Room - #210 - Anything Goes
Paper Nest Dolls - #6 - Anything Goes
613 Avenue Create - #63 - Anything Goes
Challenges 4 Everybody - #39 - Anything Goes
Eclectic Ellapu - Wings (Pink Team)
Penny Black and More - So Sweet
Pile It On - #11 - For A Guy
Sentimental Sundays - #198 - Cute and Cuddly
Cards Galore Encore - #3 - Use Stamp or Digi
Crafts & Me - #146 - Anything Goes
Flat Friends - #18 - Cards For Men
Just B Creative Crazy - Anything Goes
Saturday, 22 March 2014
Owl Lots of Pops 30th Birthday
Posted by
Kathleen
at
3:23 am
Tuesday, 18 February 2014
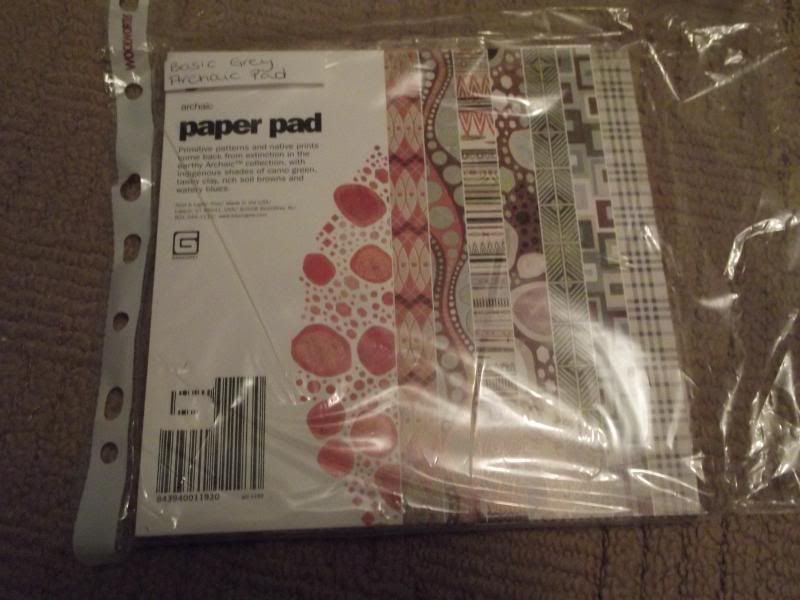
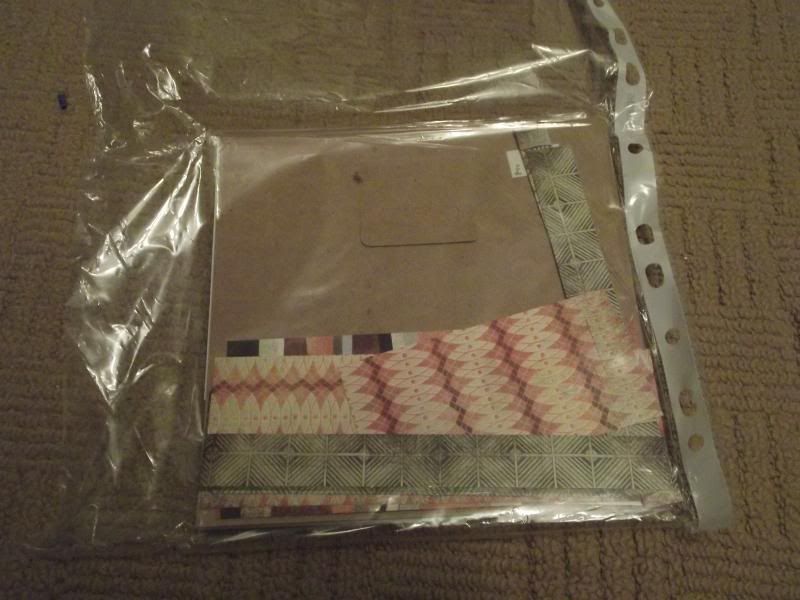
How I Store My Paper and Cardstock and Patterned Papers
I have often been asked the question "What is the best way to store paper and card?" especially by new crafters and so I thought I'd share with you the way that I store mine and the way I've done it since I started crafting nearly ten years ago.
The fact that I have stuck with it does seem to suggest that it works, at least it does for me.
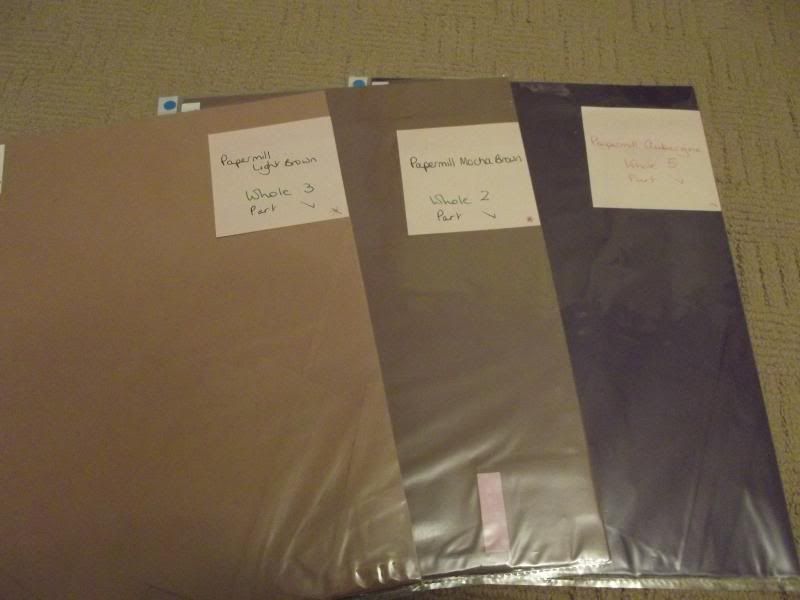
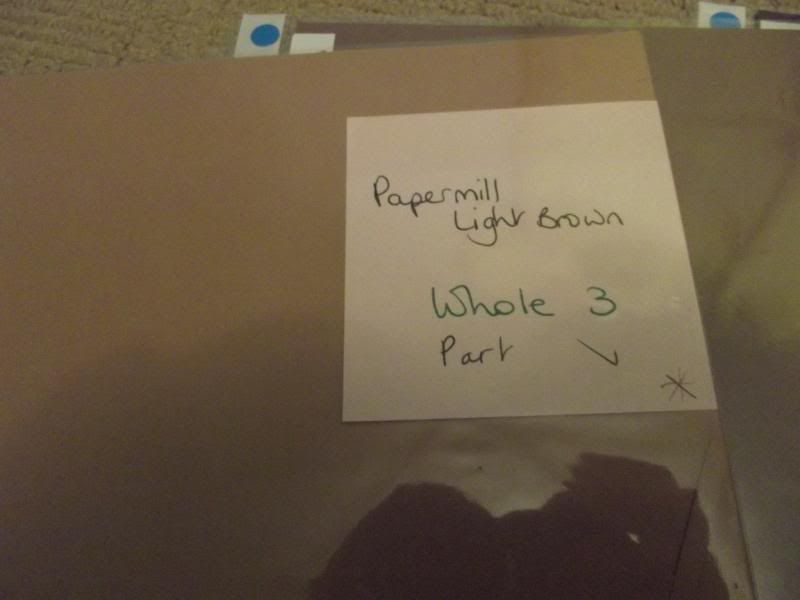
So, the majority of the cardstock I have was picked by me in the Papermill Shop and stuffed into a box. The cardstock didn't have a fancy name, so I gave it one! I'd separate out all the different types of card and paper and put each one into its own polypocket and write out a Post-It note with its new given name and how many full sheets of it I had.
Once it had been used, I'd also make a note of whether or not there were any offcuts.
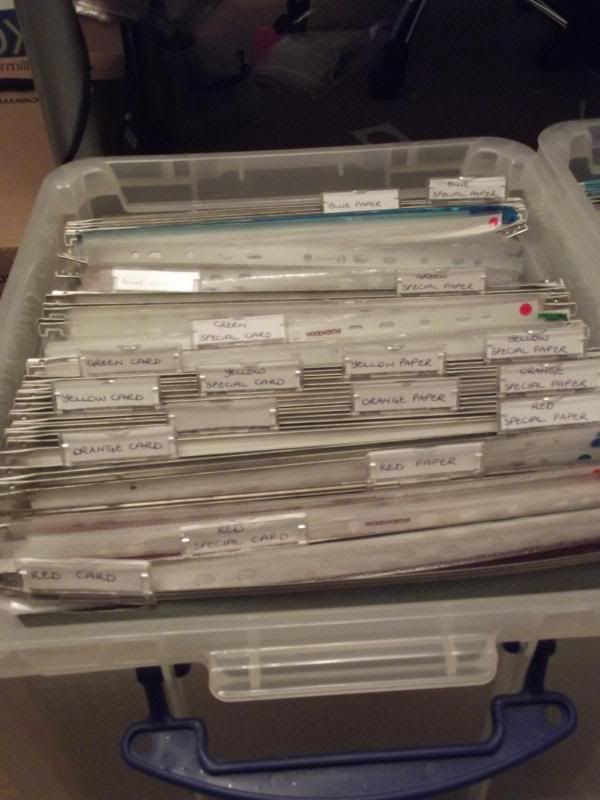
The polypockets were then sorted into colour families (red, orange, yellow, green, blue, purple, lilac, pink, brown, gold, silver, grey, black, white and cream) and then those were then sub-divided into card, special card (linen, hammer, pearl, other special finish or texture), paper and special paper.
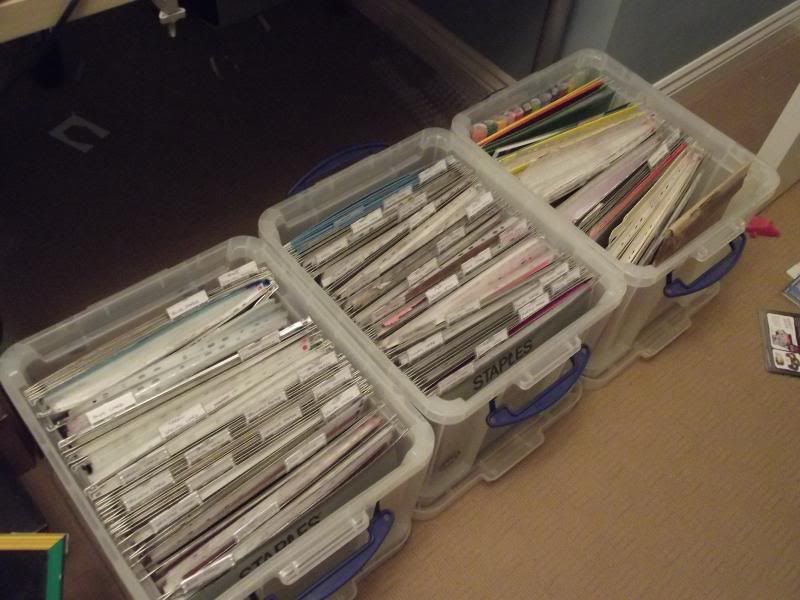
Each of these sub-categories were then given a foolscap suspension file and these were placed in 35litre Really Useful Boxes. These boxes have a section on the inside where the hooks of the suspension files can run, making them perfect!
I currently have three of the 35litre boxes and they live in front of my desk next to one another. The first box has red-blue, the second has purple-black and the third has white and cream.
I should mention that I also have larger boxes containing the cardstocks I mostly use for cardblanks, as there are too many sheets of those to store this way. They are to the side of my desk.
I also store my packs of patterned papers (6x6, 8x8, UK A5 and UK A4) in the same way. I put the pad or pack of paper into the polypocket and also put any offcuts into the back of the polypocket.
My patterned papers are then stored in cardboard CD and shoeboxes sourced from WHSmiths and Dunelm. You might also find them in Wilkinsons. They are the perfect size to store the pads stood up so that I can flick through them. I forgot to take a picture of them though! They sit on top of my rollcarts behind my desk on top of the drawers that hold my brads, eyelets and gems.
I have found that by putting the offcuts in with the full sheets of either cardstock, paper or patterned papers, I can look to see if I have a suitably sized small piece that I can use before cutting into a larger or new sheet. I keep any sized offcut that I think I can use in the future, whether that be a thin decorative strip or a panel that can be used for a small sentiment.
I hope this has helped you in your decision making process as to how to store all of your paper and cardstock and patterned papers.
Posted by
Kathleen
at
3:40 am
Monday, 17 February 2014
Kristina Werner Inspired Card #2
Well, here we are again. This time it was my turn to choose the card from Kristina that we were to CASE and here is the link to the video showing the card I chose and a link here to Kristina's blog post showing this card.
In need of a few anniversary cards, that's what I decided to make based on this card design.
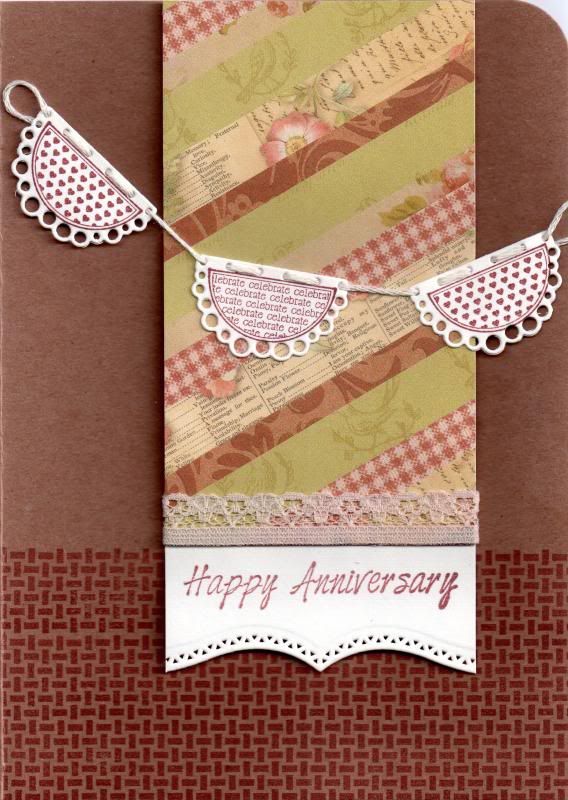
To begin with, create the patterned paper panels. To make these, cut up strips of various papers from the K&Co Brianna paper pad in varying widths. I found the easiest way to adhere these to the panel and ensure they stay attached was to cover the panel entirely with adhesive, making sure the adhesive goes right up to the edges. This is particularly important if you have small bits in the corners. Once covered, turn the panel over and trim away the overhanging bits.
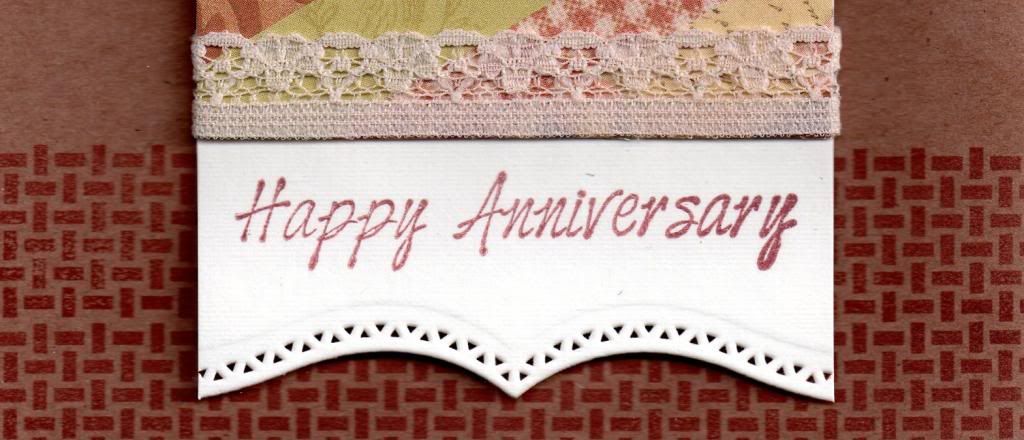
Panels of cream cardstock were then stamped using the Happy Anniversary stamp from the Kaisercraft Occasion's stamp set and the Brilliance Cocoa Bean pigment ink. The lower edge of the panel was then diecut using one of the Spellbinders Bracket Borders dies. The paper strip panel was then adhered to this diecut panel and a length of lace adhered to hide the edge of the paper strips.
The next step was to add some detail to the card blank. Using the basket weave stamp from the Waltzing Mouse Picnic Patterns stamp set and the Cocoa Bean ink, the border stamp was stamped three times across the bottom of the cardblank. Remember to mask off the left panel of the card first so the reverse of your card is protected.
Once the ink is dry, adhere the paper strip panel to the card using 3d foam.
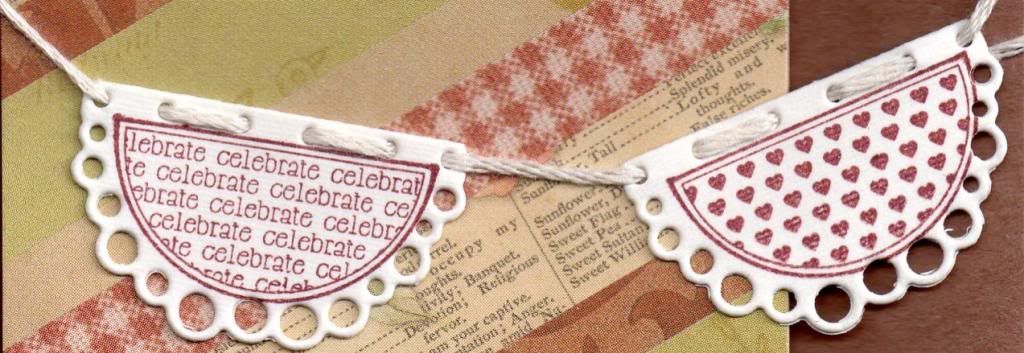
To create the banner detail, two different designs of pennants were stamped from the Whimsy Stamps Celebration Circle Pennants stamp set using the Cocoa Bean ink and die cut using the frilly Whimsy Stamps Shapeology Circle Pennants die. These were connected together using cream embroidery thread and placed across the card.
As a finishing touch, the top right corner was then punched using the WRMK Corner Chomper, using the 1/2" corner.
Here is an image of the front of the finished card.
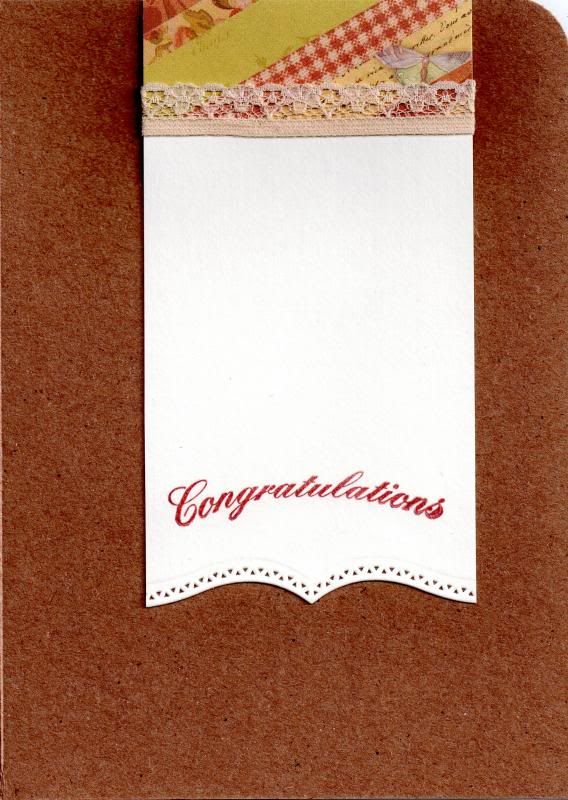
The inside of the card was also decorated to match and complement the front of the card. This time the greeting was stamped using the Congratulations stamp from the Papermania Mix and Match Scrolls and Sentiments stamp set with the Cocoa Bean ink.
Once Ali has uploaded her version, I will add a link to her creations which I'm sure are stunning!
Here is a link to Skipper's take on this card. It's a beauty!
Posted by
Kathleen
at
5:00 pm
Friday, 17 January 2014
Kristina Werner Inspired Card #1
So, I am trying to blog more, and so here goes!
This project is one that was inspired by a lady whose youtube videos I watch religiously. Namely, Kristina Werner. You can find her blog here and her youtube channel here.
I am not the only person who appreciates her work and the very talented Ali and I decided we'd challenge ourselves to select one of her projects and do our own takes on it.
So, Ali chose the first project that we'd attempt and here is the video of the project that she chose, and here is the blog post.
I decided to make birthday cards based on her design and to make a masculine and feminine version of it.
The first design was the feminine version, using the First Edition Spring Feast paper pad. These papers are perfect for girlie cards!
Having chosen the papers I wanted to use, I die cut a number of banners from them using a die from the Sizzix Banners #2 Framelits die set. Using an old XCut daisy punch, I punched a daisy from some of the banners, leaving a couple of the banners plain.
Each of the banner shapes were edged using ColorBox Chestnut Roan Fluid Chalk ink.
Two more panels of patterned papers were chosen and matted onto each other. The sentiment, from the Paper Smooches Sentiment Sampler stamp set, was stamped onto the smaller panel using the Chestnut Roan ink. A design was also pierced in two of the cornes using the Stampin' Up! Mat pack.
A thin line of Aleene's Tacky glue was run across the two panels and a length of green embroidery thread was run along it. Once dried, the ends were trimmed and the panel attached to the card blank. The banners, each trimmed to fit the panel so as not to obscure the sentiment, were then 3d mounted along the thread, and a brown Kort & Godt faux pearl was added in three corners of the smaller panel.
For the inside of the card, a panel of writing paper was matted onto a panel of matching patterned paper and adhered to the left hand side of the card. Using another of the banner dies from the Banners #2 die set and the Sentiment Sampler stamp set, the sentiment panel was stamped using the Chestnut Roan ink and placed to the right of the panel. A selection of the daisy punchouts from the banners on the front of the card were then placed around the sentiment panel.
The masculine card was made in a similar fashion, using the DCWV Retro Prints paper pad.
The smaller panel on the front of the card was this time created from white card and run through the Cuttlebug Basket Weave embossing folder. A large blue brad from Papermania was added in the top right corner. Stars were punched from the banners using a small punch I got in Tescos many years ago!
The inside of the card was created in much the same way as the feminine card, using the star punch outs around the sentiment. The sentiment was stamped onto the patterned paper using Versamark ink and heat embossed using Stampendous Detail Opaque White embossing powder.
I'm liking this idea of choosing a card and making your own version of it.
You can see Ali's versions of the card here.
It's my turn to choose the next card to be inspired by, so I'm off now to choose one.
Saturday, 9 November 2013
Bright Green Dillon
So, I have decided it is high time I posted something on my blog. This is actually a card I made a while back but as I'd sort of already written it up, it'll be easier for me to post.
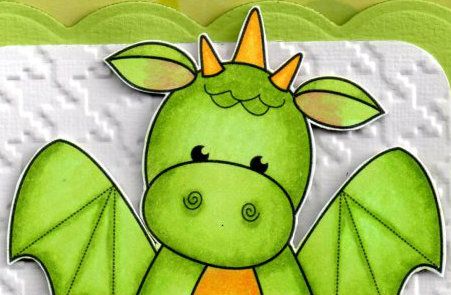
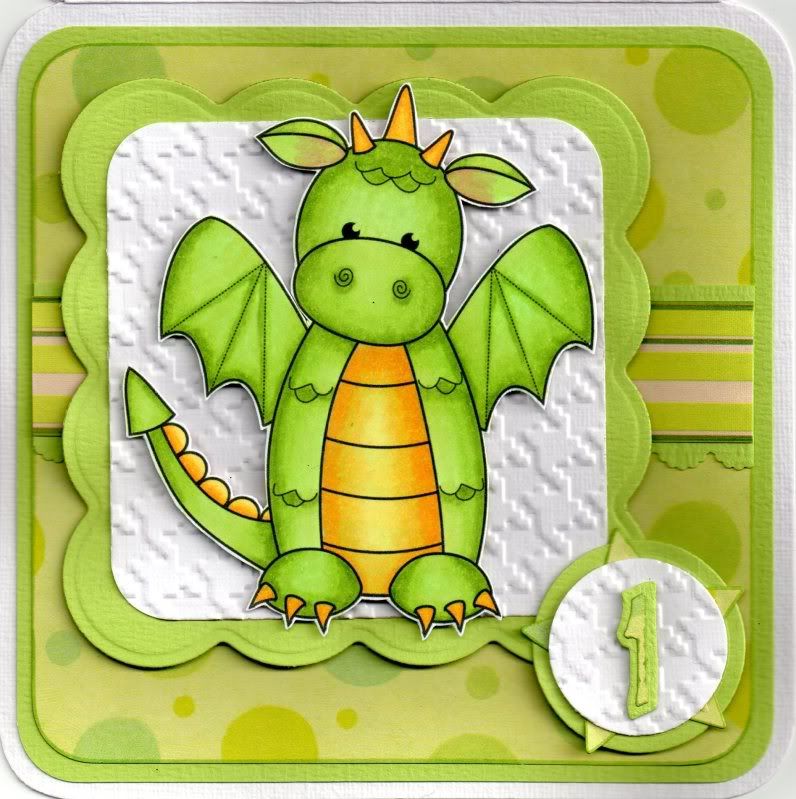
So, this is a card I was particularly pleased with from last year. It is a first birthday card I made for the son of some friends of ours. He is a lovely little boy and always so cheerful. I've only ever known him to grizzle once and only seen him cry once too (and that was only because he was hungry!)
Anyway, here is the card:
The image is a digi image called Dillon by Janet Roberts at Pink Gem Designs. It's a lovely image and I think I got it when she offered it as a freebie but you can now buy it here.
The digi image was coloured using Copic markers:
A strip of green stripe paper from the K&Co Amy Butler Belle paper pad was matted onto a strip of lime green card punched using the EK Success Scalloped Scallop border punch. This was then matted onto a panel of the green spots paper from the K&Co Tim Coffey Birthday paper pad, and also matted onto the lime green card.
Another panel of the green card was then die cut using the Big Scalloped Square Nestabilities die, and a panel of white hessian card (also used for the card blank) was embossed using the Cuttlebug Houndstooth embossing folder.
The Dillon image was then mounted onto the embossed panel using 3D foam.
To create the number 'badge', the number and shadow were cut from the spot paper and the green card using the '1' die from the Sizzix Bounce alphabet sizzlets die set. These were in turn matted onto a circle of embossed card, a star die cut from the spots paper using an XCut die and a circle of the green card.
I was really pleased with the way the image looked after I'd coloured it so hopefully Zack and his mum and dad liked it too!!!
I would like to enter this card into the following challenges:
Brown Sugar - #67 - Anything Goes
Creative Corner - Sing, Sing A Song
Jo's Scrap Shack - Things With Wings
Pattie's Creations - #79 - Birthdays
Sister Act Card Challenge - #32 - Anything Goes
Stampin With The Dragon - Dragons
Crafty Girls - #5 - Anything Goes
Milk Coffee - Fairytales (WINNER)
Seize The Birthday - Birthday + Texture
Divas By Design - Use A Digi
Inklings and Yarns - #35 - Anything Goes
Inky Impressions - #133 - Dies and Punches
Bearly Mine - #111 - Anything Goes
Crafty Sentiments Designs - For The Guys
Our Daily Bread Designs - #177 - Inspired By A Song (Puff The Magic Dragon)
Paperminutes - #294 - Movie/Cinema (Puff The Magic Dragon)
Papertake Weekly - Anything Goes
Through The Craft Room Door - Nov 5-11 - Anything Goes
Card Mania - #33 - Anything Goes
Craftin Desert Divas - #18 - Anything Goes
Love To Scrap - #17 - Anything Goes

Make It Monday - #165 - Anything Goes
My Craft Creations - 4-16/11 - Anything Goes (WINNER)
Scrapbook Stamp Society - #26 - Anything Goes
The Paper Nest Dolls - #16 - Anything Goes
613 Avenue Create - #44 - Anything Goes
Hobbycutz - #23 - Inspired By A Song/Music (Puff The Magic Dragon)
Pile It On - #44 - Animals With Character
The Squirrel and the Fox - #56 - Animal Antics
Cards Galore - Animals
Doodle Pantry - #40 - Any Digi Goes
Natalie and Amy - #14 - For The Boys
Seemacrafts - Bright and Colourful
Catch The Bug - Anything Goes
Whimsy Stamps - #65 - Anything Goes
Goodness, I'd forgotten just how time consuming this is!!!! It's taken me about 3 hours to go through all those challenges!!!!
So, this is a card I was particularly pleased with from last year. It is a first birthday card I made for the son of some friends of ours. He is a lovely little boy and always so cheerful. I've only ever known him to grizzle once and only seen him cry once too (and that was only because he was hungry!)
Anyway, here is the card:
The image is a digi image called Dillon by Janet Roberts at Pink Gem Designs. It's a lovely image and I think I got it when she offered it as a freebie but you can now buy it here.
The digi image was coloured using Copic markers:
- YG03, YG11, YG13, YG17, Y13, Y15, Y17, R02
A strip of green stripe paper from the K&Co Amy Butler Belle paper pad was matted onto a strip of lime green card punched using the EK Success Scalloped Scallop border punch. This was then matted onto a panel of the green spots paper from the K&Co Tim Coffey Birthday paper pad, and also matted onto the lime green card.
Another panel of the green card was then die cut using the Big Scalloped Square Nestabilities die, and a panel of white hessian card (also used for the card blank) was embossed using the Cuttlebug Houndstooth embossing folder.
The Dillon image was then mounted onto the embossed panel using 3D foam.
To create the number 'badge', the number and shadow were cut from the spot paper and the green card using the '1' die from the Sizzix Bounce alphabet sizzlets die set. These were in turn matted onto a circle of embossed card, a star die cut from the spots paper using an XCut die and a circle of the green card.
I was really pleased with the way the image looked after I'd coloured it so hopefully Zack and his mum and dad liked it too!!!
I would like to enter this card into the following challenges:
Brown Sugar - #67 - Anything Goes
Creative Corner - Sing, Sing A Song
Jo's Scrap Shack - Things With Wings
Pattie's Creations - #79 - Birthdays
Sister Act Card Challenge - #32 - Anything Goes
Stampin With The Dragon - Dragons
Crafty Girls - #5 - Anything Goes
Milk Coffee - Fairytales (WINNER)
Seize The Birthday - Birthday + Texture
Divas By Design - Use A Digi
Inklings and Yarns - #35 - Anything Goes
Inky Impressions - #133 - Dies and Punches
Bearly Mine - #111 - Anything Goes
Crafty Sentiments Designs - For The Guys
Our Daily Bread Designs - #177 - Inspired By A Song (Puff The Magic Dragon)
Paperminutes - #294 - Movie/Cinema (Puff The Magic Dragon)
Papertake Weekly - Anything Goes
Through The Craft Room Door - Nov 5-11 - Anything Goes
Card Mania - #33 - Anything Goes
Craftin Desert Divas - #18 - Anything Goes
Love To Scrap - #17 - Anything Goes
Make It Monday - #165 - Anything Goes
My Craft Creations - 4-16/11 - Anything Goes (WINNER)
Scrapbook Stamp Society - #26 - Anything Goes
The Paper Nest Dolls - #16 - Anything Goes
613 Avenue Create - #44 - Anything Goes
Hobbycutz - #23 - Inspired By A Song/Music (Puff The Magic Dragon)
Pile It On - #44 - Animals With Character
The Squirrel and the Fox - #56 - Animal Antics
Cards Galore - Animals
Doodle Pantry - #40 - Any Digi Goes
Natalie and Amy - #14 - For The Boys
Seemacrafts - Bright and Colourful
Catch The Bug - Anything Goes
Whimsy Stamps - #65 - Anything Goes
Goodness, I'd forgotten just how time consuming this is!!!! It's taken me about 3 hours to go through all those challenges!!!!
Wednesday, 15 May 2013
Congratulations On Becoming A Priest
Well, this is an unusual card for me. It was actually requested by a customer of my sister's over in Spain. It's for a man who is about to be ordained as a priest. It threw me a bit because I don't make religious cards and I was racking my brain trying to think what I could use on it. Then it dawned on me.....my brand new Small Gothic Window die from Poppystamps.
So, I then had to decide on a patterned paper, and having decided I wanted to add vellum behind the window, the paper sort of chose itself as I have the Papermania Exquisite Vellum pack and the matching Exquisite paper pad.
As the papers have cream as a base colour I decided to make the window gold. I had originally decided on silver, but all that changed once the papers were chosen.
So, having cut out the window shape from gold satin cardstock, I roughly cut a piece of the script vellum to fit behind.
I then cut a strip of the scroll leaf paper and matted it onto the gold satin card.
The next part was the fun part.......the Spellbinders Bracket Borders 1 dies. These are my most favourite of dies at the moment, at least until I buy some new ones, I'm very fickle like that!
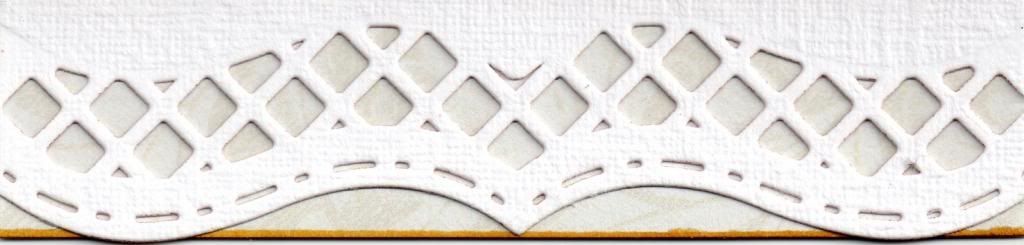
I opted for the lattice inset die as that one seemed the most masculine of the three and the dot dash edge die to go with it. Both were placed against the edge of the card blank and die cut. Not as easy as you might think in a Bigshot as these would benefit from being run through the machine lengthwise but I didn't have that luxury so I placed them on my baseplate at a slight angle and ran them through as far as they would go without damaging the edge of the card blank. I then turned the whole thing around and ran it through again. Because the rollers have a tendency to jump over the dies when they are parallel to the die, it took a few passes to get it completely cut out, but the effect it gave was well worth it.
The sentiment, from the Woodware Jane's Script sentiment stamp set, was then stamped onto the patterned paper strip using Memento Espresso Truffle dye ink. The same ink was also used to stamp the cross, a Katie & Co image, directly onto the cardblank. The image was positioned using a Stamp-a-ma-jig to ensure it was in the centre of the window once it was added over the top.
All the pieces were edged using the Y26 Copic marker to match in with the gold card stock.
For the inside, I die cut another window shape and matted my writing paper behind it that I use for the insert panels in my cards. A panel of the scroll leaf paper was die cut using the dot dash edge bracket die, as was a panel of the gold satin card. These were layered together and added to the bottom edge of the card, so that the pattern on the paper shows through the lattice design on the front.
Here are the challenges I'd like to enter this card into:
So, I then had to decide on a patterned paper, and having decided I wanted to add vellum behind the window, the paper sort of chose itself as I have the Papermania Exquisite Vellum pack and the matching Exquisite paper pad.
As the papers have cream as a base colour I decided to make the window gold. I had originally decided on silver, but all that changed once the papers were chosen.
So, having cut out the window shape from gold satin cardstock, I roughly cut a piece of the script vellum to fit behind.
I then cut a strip of the scroll leaf paper and matted it onto the gold satin card.
The next part was the fun part.......the Spellbinders Bracket Borders 1 dies. These are my most favourite of dies at the moment, at least until I buy some new ones, I'm very fickle like that!
I opted for the lattice inset die as that one seemed the most masculine of the three and the dot dash edge die to go with it. Both were placed against the edge of the card blank and die cut. Not as easy as you might think in a Bigshot as these would benefit from being run through the machine lengthwise but I didn't have that luxury so I placed them on my baseplate at a slight angle and ran them through as far as they would go without damaging the edge of the card blank. I then turned the whole thing around and ran it through again. Because the rollers have a tendency to jump over the dies when they are parallel to the die, it took a few passes to get it completely cut out, but the effect it gave was well worth it.
The sentiment, from the Woodware Jane's Script sentiment stamp set, was then stamped onto the patterned paper strip using Memento Espresso Truffle dye ink. The same ink was also used to stamp the cross, a Katie & Co image, directly onto the cardblank. The image was positioned using a Stamp-a-ma-jig to ensure it was in the centre of the window once it was added over the top.
All the pieces were edged using the Y26 Copic marker to match in with the gold card stock.
For the inside, I die cut another window shape and matted my writing paper behind it that I use for the insert panels in my cards. A panel of the scroll leaf paper was die cut using the dot dash edge bracket die, as was a panel of the gold satin card. These were layered together and added to the bottom edge of the card, so that the pattern on the paper shows through the lattice design on the front.
Here are the challenges I'd like to enter this card into:
- Through The Craftroom Door - Anything Goes
- Crafty Boots Challenges - Celebrations
- Love To Scrap - #5 - Anything Goes
- Make It Monday - #140 - Anything Goes
- Great Impressions - Celebrations
- Scrappy Frogs - Free Challenge
- That Craft Place - Makes For Men
- Hiding In My Craft Room - HIMCR #97 - Super Scraps Saturday
- My Time To Craft - #221 - Decorate The Inside To Match The Front
- Our Creative Corner - Anything Goes
- Paper Creator's Craft - #8 - For The Boys
- Crafty Catz - #182 - Anything Goes
- Inspire Me Fridays - #102 - Anything Goes
- Simply Create Too - #37 - Anything Goes
- Sister Act Card Challenge - #6 - Anything Goes
- Totally Papercrafts - #166 - CAS
- CCEE Stampers - CCEE1319 - CAS Card with Scraps
- Moving Along With The Times - CAS
- Paper Crafting Journey - Anything Goes
Posted by
Kathleen
at
3:20 am
Subscribe to:
Posts (Atom)