Pages

WELCOME

This blog was created to act as a record of the cards and other projects that I have made. It is for both my own reference and to help inspire anyone who wants to take a look.

I'd love it if you'd leave me a comment so that I know what you think of my projects and that you've been to visit!

Anyone can comment, even those who don't have a blog. (Just look for the word 'Comments' under the three little pictures at the end of each post). Readers without a blog can add an anonymous comment, but please leave your name (and docrafts username if applicable) so I know who you are!

Slideshows of all the cards I've uploaded to my blog can be found at the bottom of the page.


PEOPLE WHO FOLLOW MY BLOG

Sunday, 5 April 2015

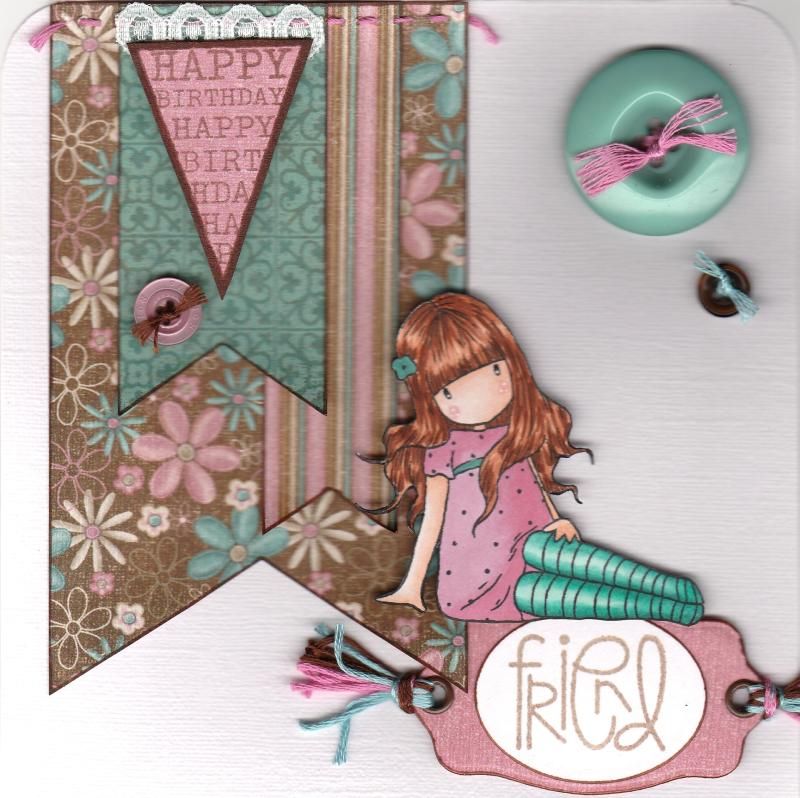
Teal Pink and Brown Sitting Gorjuss Girl with Banners

OK, so I thought I'd have another go at blogging a card as it's been so long since I last did it!
I've decided I'm going to try and blog a current card and then an older card that's still waiting to be blogged after I was offline for so long.

So, it's time to blog a current card. This is one that has been received so I know I can blog it.
 
 
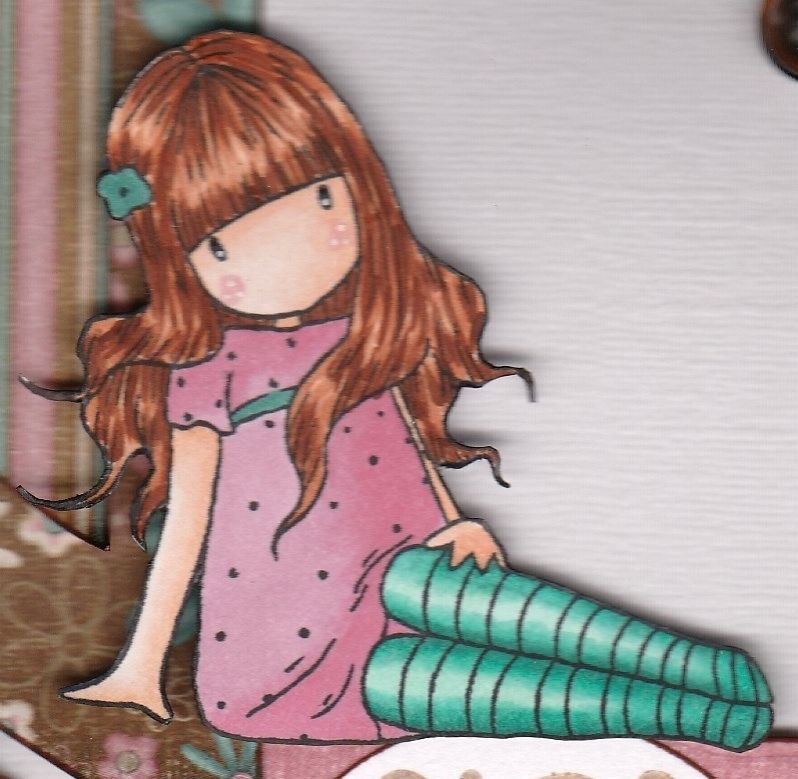
This was a card I was rather pleased with, I have to say. It used one of my older Sugar Nellie Gorjuss Girl stamps, called 'Sitting'.

The papers used on this card are from the Hot Off The Press Floral Ultimate Creative Cardmaker's Pack. There are some lovely colour combo in this paper pad.
 
 The image was stamped using Memento Tuxedo Black dye ink and coloured using Copic markers and then fussy cut.


Copics used:
Hair: E11, E13, E15, E29
Skin: E000, E00, E11, R20
Dress: RV11, RV34
Socks: BG10, BG13, BG15, BG18
Belt/Flower: BG18
 
Fishtail banners were then handcut from a few other patterned papers from the same paper pad and handstitching was added to the top of the largest one. These were then added in the top left corner of the card blank.
 
The Happy Birthday banner from the Hero Arts Friendly Flags stamp set was stamped using Versafine Vintage Sepia archival pigment ink and fussy cut. A small length of white lace was added to the reverse of the image and layered over the handcut banners.
 
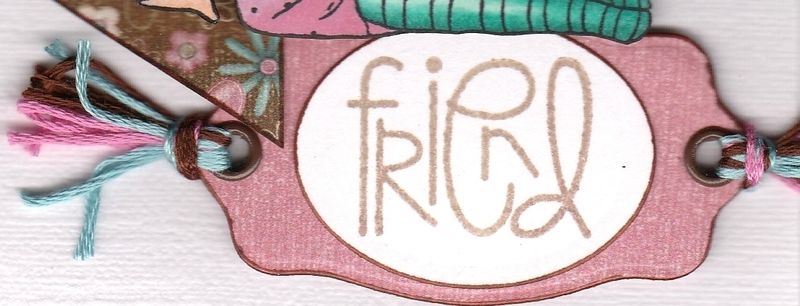
The 'Friend' sentiment from the Paper Smooches Sentiment Sampler stamp set was also stamped with the Vintage Sepia ink and was die cut using a Classic Oval Nestabilities die. This was then matted onto a bookplate diecut from a paper from the same paper pad using a die from the XCut Tags and Bookplates set of dies.
 
Brown eyelets were added through the holes of the diecut and co-ordinating embroidery threads were added.
 
 
The sentiment panel was then added in the bottom right corner of the card blank and the Gorjuss Girl image placed sitting on top of it.
A few co-ordinating buttons were threaded with the embroidery threads and added to the card blank.

Saturday, 31 January 2015

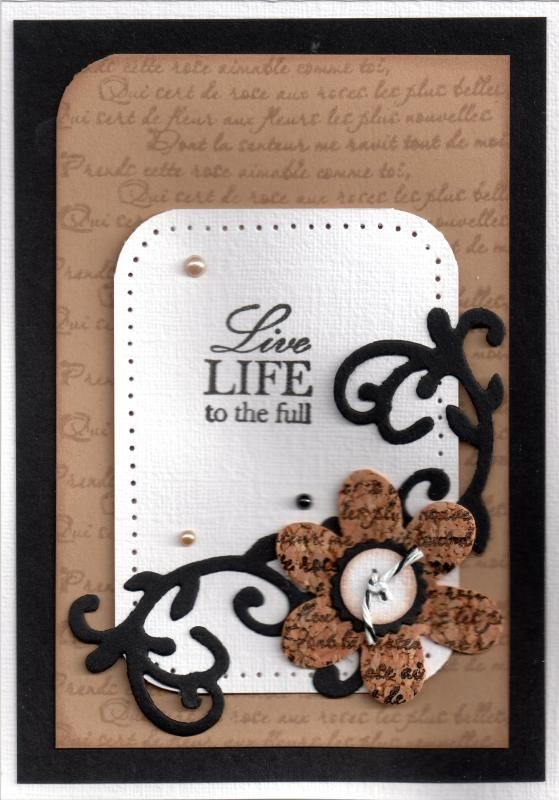
Beige White and Cork Flower and Flourish

This is a card that I made last year that was inspired by a card I saw over on Amy Rysavy's blog.
 
 
For my card, I started by creating the background. For that, I took a piece of beige card and stamped it with the French Script stamp from the Bo Bunny It Is Written stamp set using Memento Toffee Crunch dye ink for a tone-on-tone effect. I then punched the top left corner using the WRMK 1/2" Corner Chomper.
 
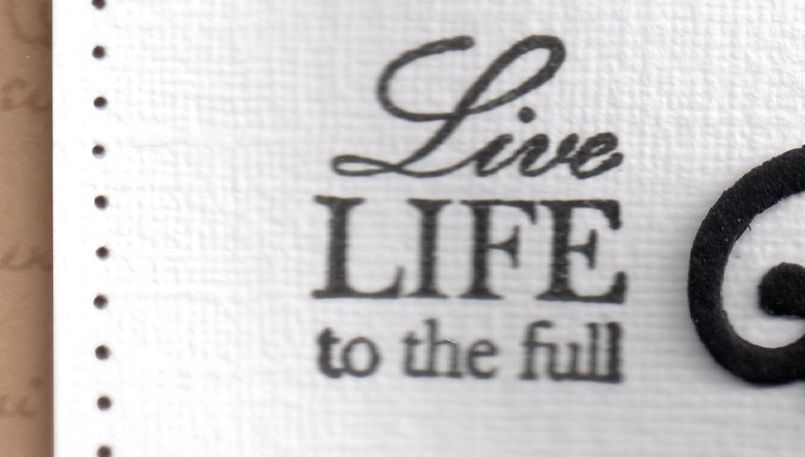
I then created a panel from white hessian effect card and added pricking detail using the Stampin' Up piercing template and a pricking tool. The sentiment, from the Kaisercraft Life Sentiments stamp set was stamped onto this panel using Versafine Onyx Black archival pigment ink.
 
 
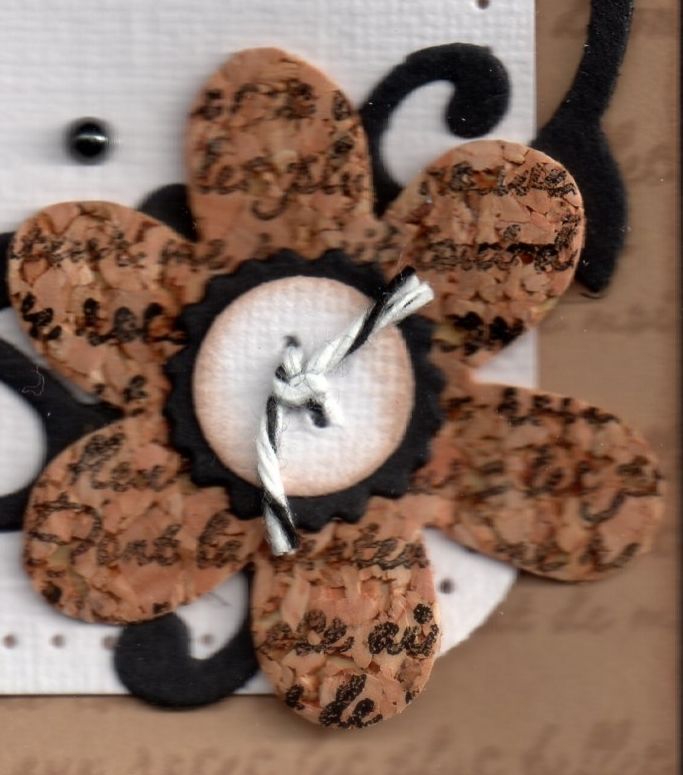
Next I created the flower detail. To do this, I die cut some Fablon self-adhesive cork sheet using the Sizzix Sizzlits Flower, Centre and Leaf die. This was overstamped using the script stamp and the Onyx Black ink. The Flower Centre, from the same die, was cut from the white hessian card and distressed with the Toffee Crunch ink, and the scalloped circle from the Sizzix Sizzlits Flower and Flourish die using black cardstock. Black and white Baker's Twine was then threaded through the centre holes.
 
 
To complete the corner detail, two flourishes were also die cut from the black card using the Sizzix Sizzlits Vine #2 die.

The card was then assembled as shown in the main picture., mounting the beige card onto black card and positioning the flourishes and flower in the bottom right hand corner.

To finish the card, flat-back pearls from the Kort & Godt Autumn Shades selection were randomly added.

Here are the challenges that I shall be entering this card into:

Art By Mi Ran - #24 - Anything Goes
Brown Sugar - #131 - 3 Embellishments
Crafts 4 Eternity - #211 - No Patterned Paper
Sister Act - #91 - Anything Goes
Stamplorations - Stamps & Inks
The Stamping Boutique - Make Your Own Background
4 Crafty Chicks - #231 - Anything Goes
Red Rubber Inspiration - #204 - CAS
Scrap & Craft - #1 - Anything Goes
Baffies Kreativladen - #40 - Anything Goes
The Crafter's Café - #101 - Make Own Background
Inspiration Destination - #18 - Anything Goes
Penny's Paper Crafty - #212 - Anything Goes
Simon Says Stamp - Anything Goes
Wonderful Wednesday - Anything Goes
Creative Moments - #60 - Anything Goes/Optional Sketch
Inky Chicks - #45 - Anything Goes
Party Time Tuesdays - #194 - Anything Goes
Through The Craft Room Door - Anything Goes
Crafting From The Heart - #44 - Anything Goes
Craft Your Passion - #246 - Anything Goes
Love To Scrap - #46 - Anything Goes
Melonheadz Friends - CAS
My Craft Creations - Anything Goes
Not Just Cards - Anything Goes
Scrapbook Stamp Society - #58 - Anything Goes/Happy Birthday
The Paper Girls - #72 - Cork
The Paper Nest Dolls - #1 - Anything Goes
The Pink Elephant - #283 - Anything Goes
Whoopsi Daisy - #1 - Anything Goes
613 Avenue Create - #108 - Anything Goes
Amusing - Anything Goes
Fairytale Stampers - #50 - Flowers
Glitter and Sparkle - #121 - Pearls and Swirls
Pile It On - #53 - Hearts and/or Flowers
Paper Creator's Crafts - #34 - Anything Goes

Sunday, 18 January 2015

Frantaged Collage and Charms Masculine Birthday

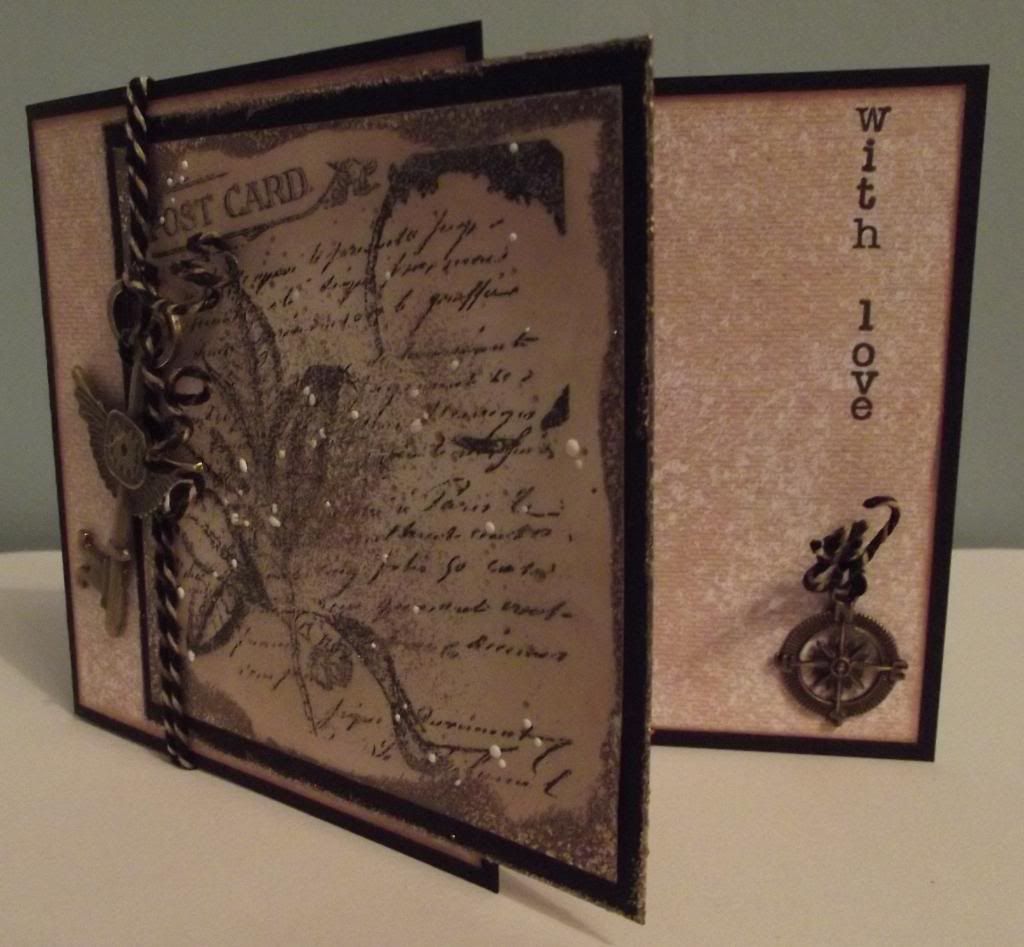
This is the card that I made for my hubby's birthday this year. It involved using the Frantage embossing powders which were new to me before making this card, although I have of course watched the demos on Create & Craft.


To begin with, I stamped the collage image of Folium from Papermania using Versafine Onyx Black archival pigment ink. The panel was then distressed using Tim Holtz Antique Linen and Walnut Stain inks. Once the distress ink was dry, Versamark was added around the edge of the panel and Aged Taupe Frantage powder was added. Once that was heat set, extra Aged Taupe and White powders were sprinkled over the centre of the panel to give a speckled appearance.

To create the card blank, a sheet of A4 card was trimmed to 5" wide and then scored at 7". Panels of beige mottled paper by Craftwork Cards were cut to fit both the front and inside of the card, the edges first being distressed with the Walnut Stain ink.

The stamped and Frantaged panel was matted onto the black card as used for the card blank and adhered overlapping the edge of the front panel.


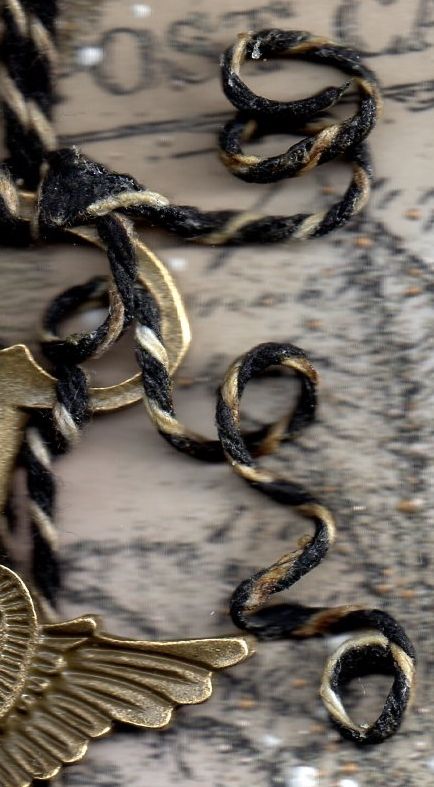
The next stage was to add the charms. These were very kindly donated by Donna at the cardmaking group that I attend. The large key charm was looped onto a length of black and white Gorjuss twine that was coloured with the Antique Linen and Walnut Stain inks, to tie it in with the rest of the card. The twine was wrapped around the front of the card and tied to the top of the charm.


The ends of the twine were then wiped with Aleene's Tacky Glue and wound around a paintbrush until the glue was dry, allowing the twists in the twine to remain. The same was done to the twine threaded through the compass charm.


The next stage was to work on the inside of the card.


The first step was to add some sentiments.


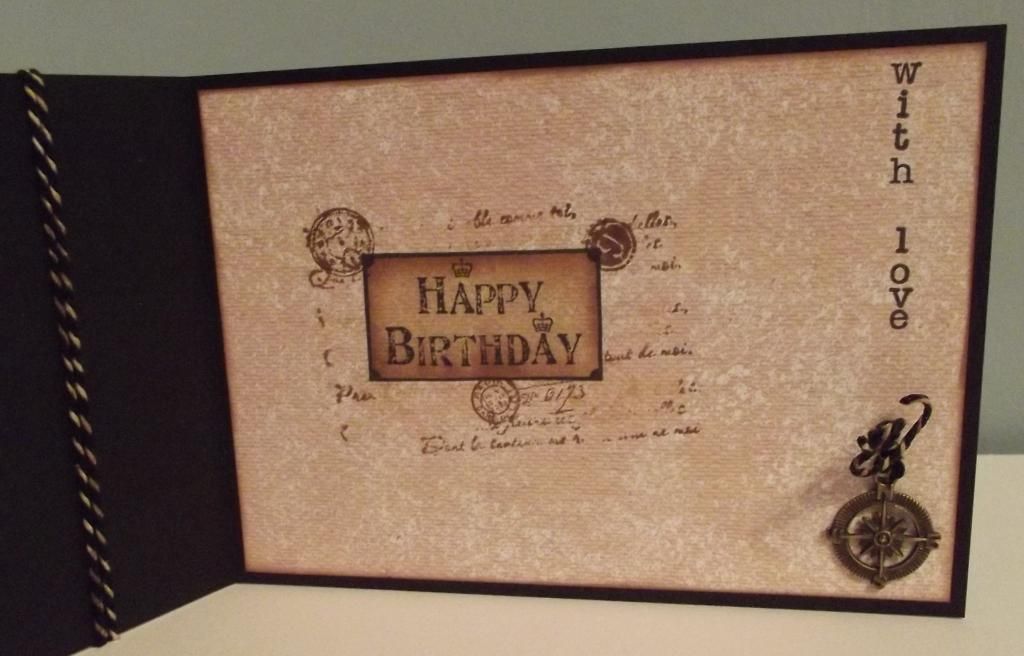
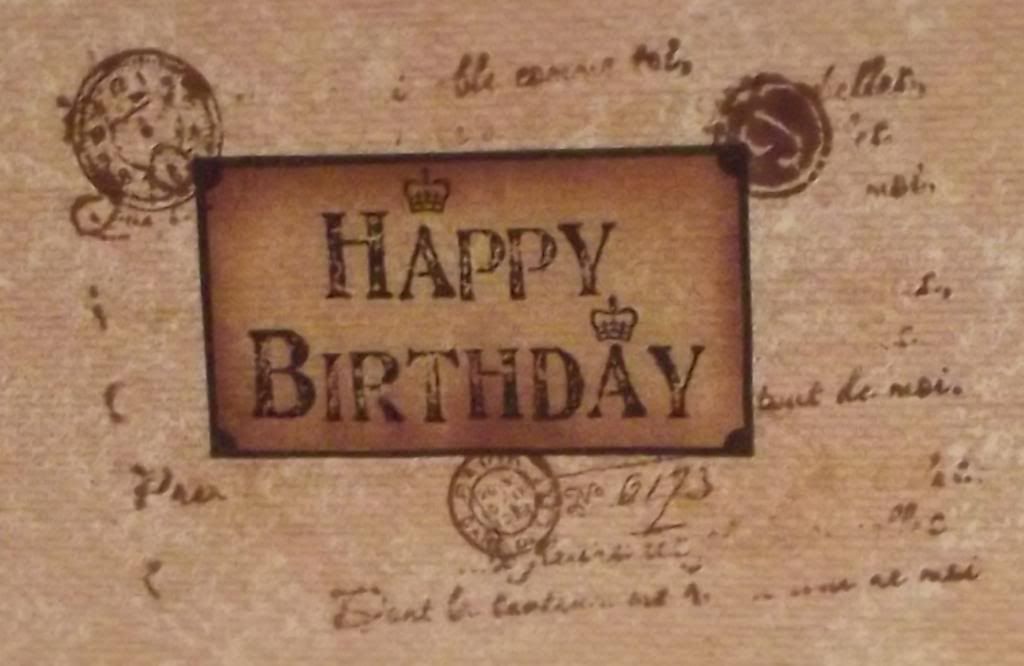
Firstly, the 'Happy Birthday' panel stamp, from the Papermania Portabello range, was stamped on the inside of the card using the Onyx Black ink. The panel was reverse masked and coloured using the Antique Linen and Walnut Stain inks. Using the positive mask, the panel was covered and overstamped using the postmark and clock stamps from the Tim Holtz Stampers Anonymous Visual Artistry stamp set, and the script stamp and number stamp from the Bo Bunny It's In The Words stamp set, all stamped using the two brown distress inks.


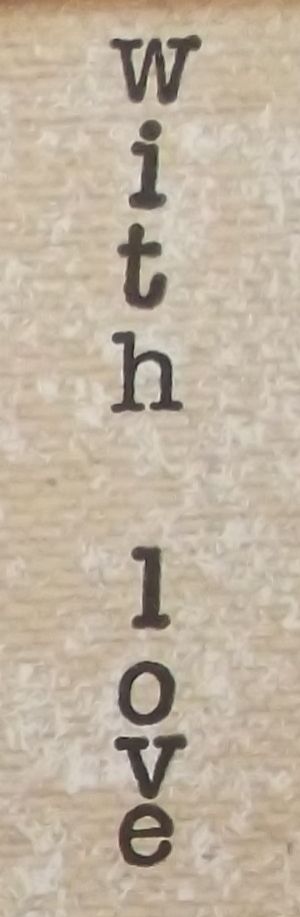
The final stage was to add a sentiment that could be read both when the card was open and closed. A line was drawn down the side of the card using a T-square ruler and a pencil, and, using individual alphabet stamps from a Studio G/Hampton Art alphabet stamp set and a Stamp-a-ma-jig, the sentiment 'with love' was stamped down the side of the card using Memento Tuxedo Black dye ink.


Versafine Onyx Black ink would have been better, but the Memento was out on my desk from when I had stamped the alphabet stamps onto the plastic sheet of the Stamp-a-ma-jig, and was used by mistake!

Here are the challenges that I am entering this card into:

A Girl Who Crafts - Anything Goes
Crafts Galore Encore - Anything Goes
Crafty Hazelnuts Patterned Paper - Anything Goes (Not Square)
Creative Craft Cottage - #31 - Anything Goes
Mema's Crafts - Anything Goes
Seema Crafts - Anything Goes
The Sisters Of Crafts - Anything Goes
Bastel - Traum - Anything Goes
Vandicrafts Artistry - Anything Goes
Sweet Stampin' - Masculine
Art By Miran - Anything Goes
Jo's Scrap Shack - #71 - Anything Goes
Sister Act - #89 - Anything Goes
Wags 'n' Whiskers - #145 - Anything Goes
Aud Sentiments - #123 - Anything Goes
Dream It Up! - Birthdays
Little Miss Muffet - #102 - Anything Goes
Scrap & Craft - #1 - Anything Goes
Baffies Kreativladen - #40 - Anything Goes
The House That Stamps Built - #114 - Black, Brown and White
Penny's Paper-Crafty - #210 - Anything Goes
Simon Says Stamp - It's A Guy Thing
Whimsy Stamps - #78 - Anything Goes
Cardz 4 Guyz - Happy Birthday
Inky Chicks - #45 - Anything Goes
Party Time Tuesdays - #194 - Anything Goes
Through The Craft Room Door - Anything Goes
Crafting From the Heart - #42 - Anything Goes
Sparkle N Sprinkle - Anything Goes (Glitter, Embossing Powders, Flock)
Squigglefly - #2 - Anything Goes
The Paper Nest Dolls - #1 - Anything Goes
Whoopsi Daisy - Anything Goes
Robyn's Fetish - #247 - Vintage Look

Thursday, 15 January 2015

Sizzix Mega Sale 2015 Haul

Well, it seems I was early to this party as I placed my order a week before most people knew this sale was even on.
I got my goodies on Wednesday and amazingly I got everything I ordered.
So, what did I get?
To begin with, I got two medium Originals dies. I desperately need a floral die, so opted for the Flower Layers with Leaf #2. It's an unusual looking flower but looks a lot more organic and realistic than a lot of the flower dies around.
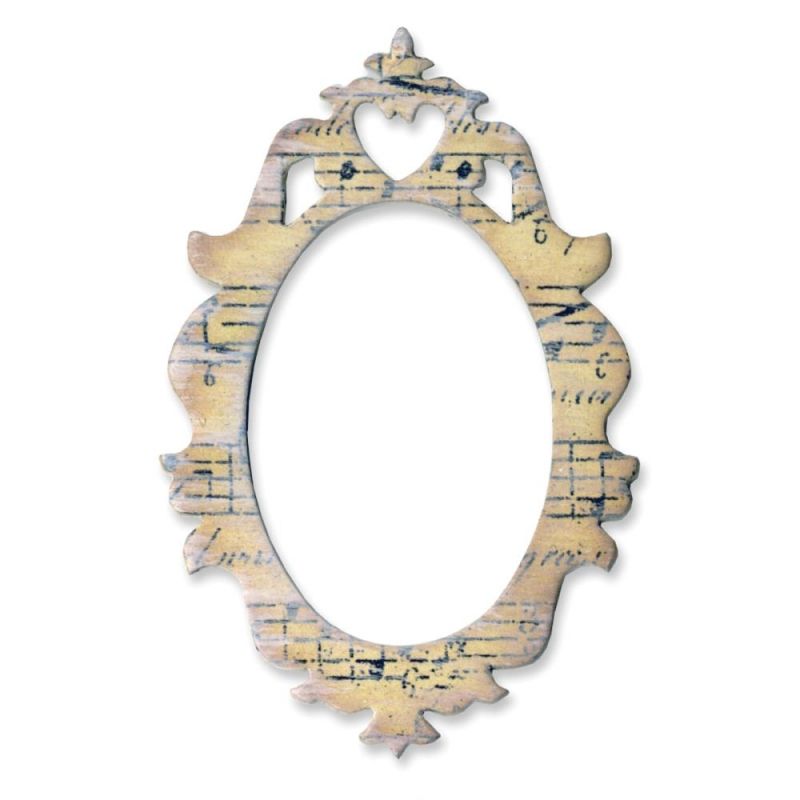
I also liked the look of the Frame, Ornate #2. A bit smaller than I thought it would be but very 'ornate' and like the look of the sample using music paper.
 
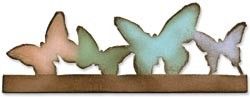
The next item was one of the On The Edge dies. Now that I've worked out the best way to use these (draw a straight line across the foam using a white gel pen to line the paper or card up against!) I'm using the ones I have a lot more, so felt justified in getting another one. The one I've been coveting for a while is the Butterflight one.
 
 
I'm looking forward to trying to paper piece the butterflies onto it using patterned papers.
 
There were also a number of Bigz dies that I wanted but had to limit myself to just (?) four.
 
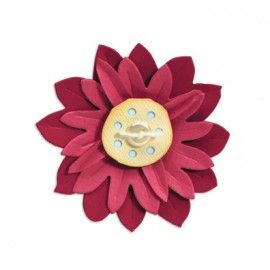
The first was another floral die. I went for Flower Layers #8. The die cut has crease lines along all the petals, adding more detail to them.
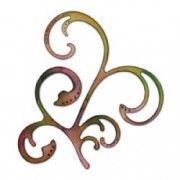
The next one I went for was a flourish die. I don't own a large one and liked the fact this one looked quite pretty rather than distressed. The one I went with was Classique, which is designed by Prima.
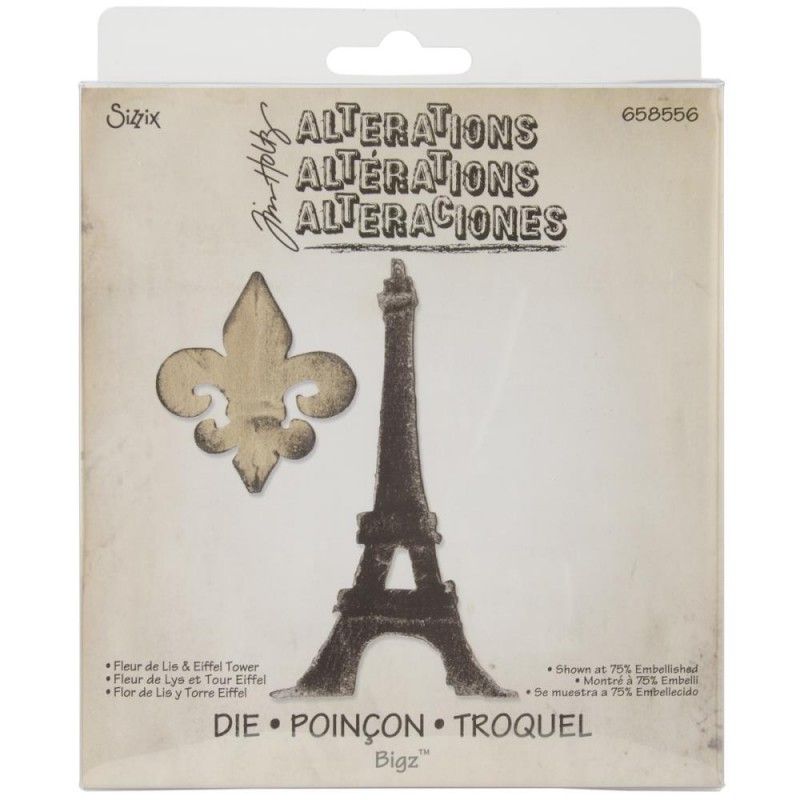
I also went for a die to complement my collection of masculine dies and stamps, namely the Fleur de Lis and Eiffel Tower die, although I suspect it's also possible to make it feminine as well.
 
 
I think this will work particularly well with my Prima paper pads.
 
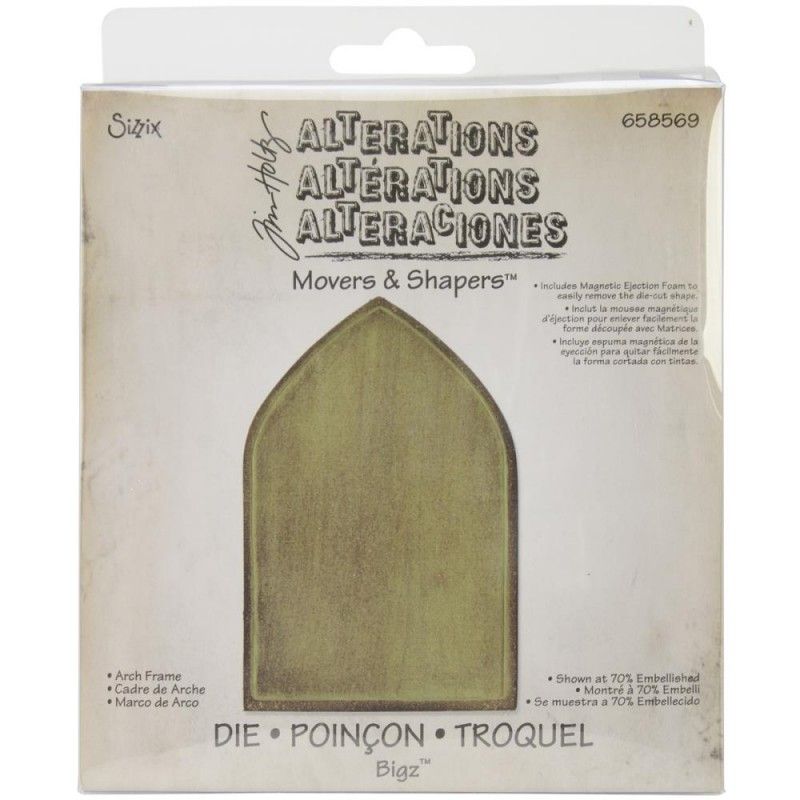
The last of the Bigz dies in my haul box was the Arch Frame Movers and Shapers die.
 
I'm looking forward to using it with the smaller Movers & Shapers dies I've got. Think I might have to look at more of those in the next sale!!!
 
The rest of the dies I got were Framelit die sets. The first was one that will suit my obsession with sentiment stamps. This set, Tags, Sentiments will allow me to die cut them out, something I like to do a lot. There are 12 dies in the set allowing for 6 layered up tags or 12 separate ones. They work well either way.
 
 
The next was the only Christmas set that I went for. It's a set of stamps with matching dies designed with Hero Arts. The set is Ornaments #3 and has 5 dies and 5 stamps.
 
 
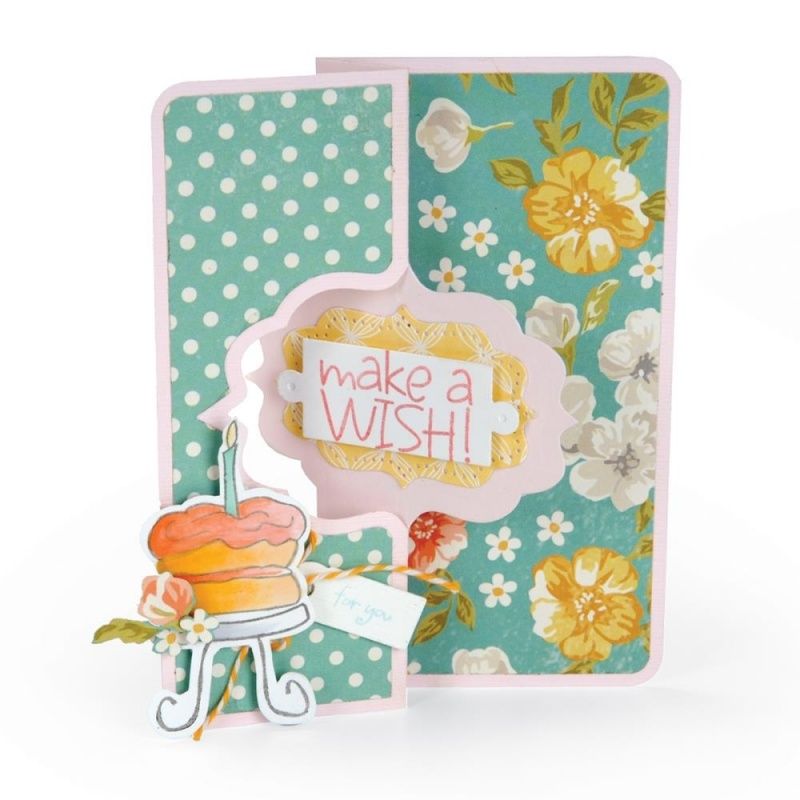
The last two are sets I've been coveting ever since I saw them over on Stephanie Barnard's website. They are Framelit Flip-It die set. Unlike the Movers and Shapers versions, these come with a selection of dies to allow you to create layers for the base card as well as a selection of dies for the focal area of the flip-it card.
 
The first of the two sets that I went for is Card, Fancy Frame Flip-Its #2.
Of course, I will now have to get the matching Framelits for the centre shape as they aren't the same as the ones I have and ideally you need a selection of sizes to properly layer up on the focal section.
The second one I got was the Card, Circle Flip-Its #2 which has a good selection of decorative circle dies including one with pricked detail. I can also use all my circle and scalloped circle dies with it.
 
I look forward to using them all!!!
 

Saturday, 23 August 2014

Mixed Media Canvas For My Gran's 90th Birthday

This is a post I've been promising to get finished for an age now.

Way back in May I think it was, I suggested to the members of a cardmaking group that I go to that maybe we would all like to have a go at making a mixed media canvas. I was prompted to do this as I was unable to attend the monthly Bristol Playday and this was their planned project and I had really been looking forward to having a go. Purely selfish reasons!! I was aware that not only was it an ambitious project for us all, but also that it wouldn't get finished in just one evening so we agreed to set aside about 3 weeks to get it done.

Inspiration for my canvas was taken from this Youtube video by Gabrielle Pollacco.

The first week consisted of die cutting a load of shapes from chipboard and mountboard in readiness for the next week when we would begin in earnest.

That was when my project hit a snag. My printer started to play up and I figured it needed a new ink cartridge. So I went to the next group meeting with a very purply tinged photograph of myself and my brother and sister so that I could use it for placement in the hope that I could get another one printed in time for the next week.

The canvas was started and I added a few different pieces of patterned paper from the Basic Grey Sugared paper pad.

Some additional items were then also adhered to the canvas, including skeleton leaves, some crêpe bandage, a heart doily, some crochet lace, some jute and some of the builders' scrim cut into irregular shapes.

The crêpe bandage was adhered down, along with all the other layers, using Mod Podge. I felt like the bandage needed more glue in order for it to stay attached, but it took forever to dry!!!!

Once the Mod Podge had finally dried, I was then able to proceed by applying some homemade texture paste through a Plaid polka dot stencil and a mask diecut using the Sizzix Brick Wall decorative strip die onto the canvas, overlapping some of the elements. I also used a strip of builders' scrim as a stencil with the texture paste.


Whilst waiting for the texture paste to dry on the canvas, I then decided to prepare some silk flowers and some bottle tops ready to be used the following week. These were covered in a layer of gesso.

When the texture paste had dried, I could then add some crochet lace, a Sizzix flourish diecut and a couple of the silk flowers.  The whole thing was then covered in a layer of gesso. In retrospect, I think this should have been watered-down gesso, but you learn from your mistakes, right??


On returning to the project the next week, I was pretty pleased with the way it was looking. However, despite new ink cartridges, I was still unable to print off the photograph so I was having to try and plan it all without the photograph being attached to the canvas.

So, the first thing I did on starting on the canvas was to adhere the flowers and bottle tops to the canvas using silicon glue. I then took a selection of buttons that have been in my stash for a very long time and coated them all in gesso. I then cut small squares of the jute fabric and adhered these inside the bottle tops, mainly because some of the buttons looked a bit lost just sitting in the bottle tops, and this helped to fill them out a little. Once the jute was well stuck into the bottle tops, I could then add the buttons.

I then die cut some circle frames from cardboard using circle and scalloped circle Nestabilities dies and added these around both buttons and flowers on the canvas.

Once the glue had set on all of the embellishments, a layer of gesso was added over all of the embellishments and diecuts that had been added.

When the gesso was dry, then I could start on the fun part........adding some colour.

I started by mixing some of the pink acrylic paint that I had (Artiste Tea Pink) with some water in a misting bottle with a small amount of the Artiste Pearl Medium paint. However, when I sprayed this onto the canvas, it hardly showed up as it was so pale. So, I added some of the Artiste Dusky Pink acrylic paint to the bottle and this gave a much better effect.


Once I was happy with the coverage of the pink paint, I then added some of the Burnt Umber paint from the same range into the mister bottle and oversprayed the canvas with that.


I was pretty pleased with the effect, but, that, unfortunately is how my canvas remained until the start of August. The printer was still out of action, despite my varied efforts to try and get it to work. After I gave up on that as a bad job, we then had to wait until after my in-laws had been for their annual visit to go and purchase a new one. On top of that, it was now only four days until we were due to go to the Midlands to celebrate my gran's 90th birthday with the whole family who were travelling from all corners of the globe and the country to help her celebrate.

So, with a new printer to try and learn how to use, after a couple of aborted attempts to print the photograph out, I succeeded and proceeded to attempt to finish my gran's canvas.

The first thing I did was to add the photograph. However, that was not as straightforward as it should have been. The photograph would have to lay over one of the diecut shapes and silk flowers that I had already affixed to the canvas, so I had to find a way to add the photograph but raise it up. I decided to cut a piece of mount board to the size of the photograph, but just a shade smaller so it wouldn't be seen, and then trim off the corners so that it would fit around the embellishments. The photograph was adhered to the mount board and was finally added to the canvas.

To draw attention to the photograph, I also added some die cut photo corners and a decorative border. To do this with the dies I have, I cut several layers of the same die and glued them together to create a sort of faux chipboard.


Whilst that was drying, I then decided I needed a few more diecuts to add around both the photograph and the edges of the canvas. I used some Sizzix Sizzlits dies and some XCut dies, creating the faux chipboard shapes. Once the shapes had been created, they were each coated in gesso and then sprayed with the Burnt Umber, Tea Pink and Pearl Medium paint mixture.

Cream pearl brads by Papermania were then added to the larger Sizzix latch die cuts and all the shapes added to the canvas, including a second Sizzix Flourish diecut. Some pink paper flowers from my stash were also added.


The next stage was to add some definition around all of the embellishments, so some of the watered-down Burnt Umber and Tea Pink acrylic was painted around the embellishments. Then another coat of the gesso was added to the embellishments so they would stand out a bit more. Some of the pink acrylic was added to some of the elements, and some metallic rub-ons were added to some of the chipboard shapes.


The next stage was to paint some of the small cotton spools by Bare Basics that I had in my stash from an earlier project with gesso and then to wrap them with some pink embroidery threads. These were then adhered to the canvas, as were a selection of pearls from Kort & Godt and Say It In Crystals. Also added was a key charm from an old HOTP kit I had. I added it using a jump ring and some of the pink embroidery thread.


The final step was to decide on a sentiment. As I hoped that this would be displayed permanently, I didn't want anything too 'birthday related' to be on it, and originally I was going to add a banner die with the words ;With Love' on it. But, once I had made it, the words weren't particularly clear, so I had to have a rethink. That's when I remembered all the word tiles that I had in an old K&Co embellishment kit that I've never used!! And I managed to find two that were perfect. Us and You.


To complete the sentiment, I used my mft small lower case alphabet die set to die cut 'from' and 'to' from medium weight card. The letters were painted with gesso and the Burnt Umber acrylic paint. The chipboard word embellishments were originally just slightly the wrong colours for the project, so I added a thin coat of gesso to them and then sprayed them with the brown acrylic paint mix used on the rest of the diecut embellishments. This helped to tie them in with the rest of the project. The letter die cuts and the edges of the chipboard word embellishments were then embellished using the metallic rub-ons.

And so here is the completed canvas in all its glory.


Thankfully, my gran really seemed to really like it, which was a big relief. My brother also seemed to like it, as I had told him earlier that I had signed the card on the gift from all three of us, but not told him what the gift actually was. (Unfortunately, my sister was unable to fly over from Spain as this is the busiest time of year for her in her shop).

And, everyone else there seemed to like it as well, and my aunt insisted on taking down one of my gran's pictures on the wall and putting it up for all to see. I've just got to pray now that bits don't start dropping off!!!!


Wednesday, 2 April 2014

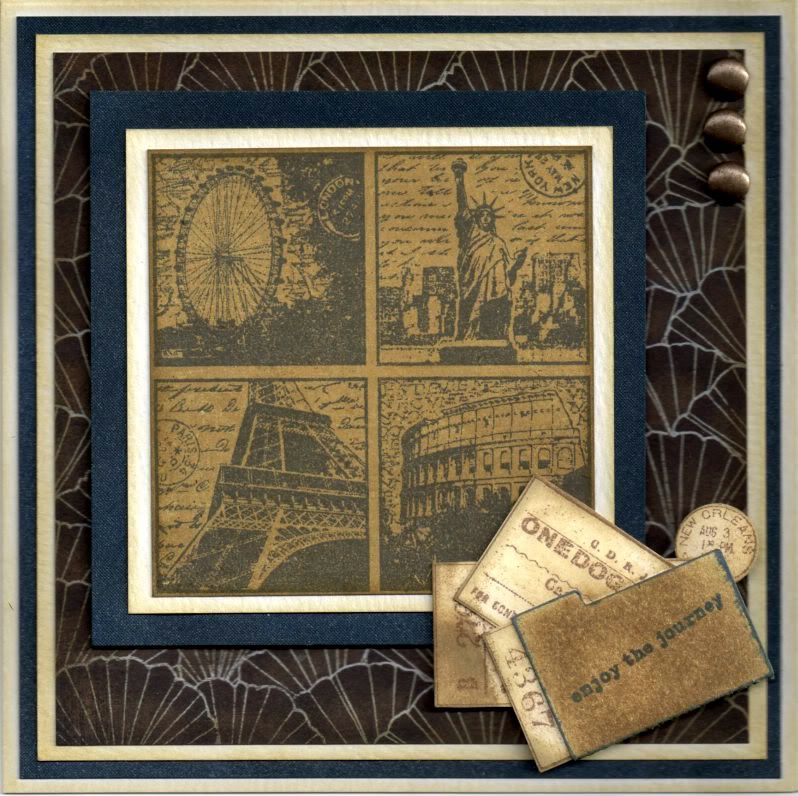
Dark Blue and Brown Landmarks and Tickets 40th

So, my latest upload is a card I made for a friend who was turning 40. He has always called me 'aunty Kathleen' ever since I used to feed him curry when we were based in Germany. Even though he is actually older than me!!


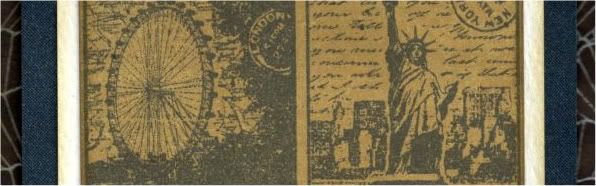
I pulled out the trusty Landmarks image, from Crafty Individuals, and stamped it onto the Honey paper from the Basic Grey Granola paper pad using Memento Paris Dusk dye ink and trimmed it up into a square. The image was then matted onto cream and navy shimmer cardstocks.

A panel of the Wild Oats paper from the same paper pad was also matted onto the cream and navy cardstocks.

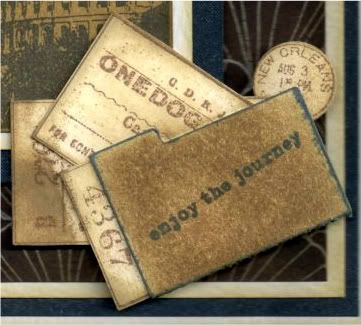
A file folder was die cut from cream card using the Sizzix Sizzlits die and coloured using Tim Holtz Frayed Burlap distress ink and stamped with a sentiment from the Making Memories Express It! stamp set using the Paris Dusk ink.


The Travel Tickets stamp, also from Crafty Individuals, was then stamped onto cream card using the Versafine Vintage Sepia archival pigment ink and the individual tickets were cut out. Tim Holtz Old Paper and Frayed Burlap distress inks were then added to distress them. The tickets were arranged inside the file folder and added at the bottom right corner of the image panel.


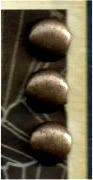
Three large old gold brads from Papermania were then added in the top right of the panel and the panel was then added to the card blank.


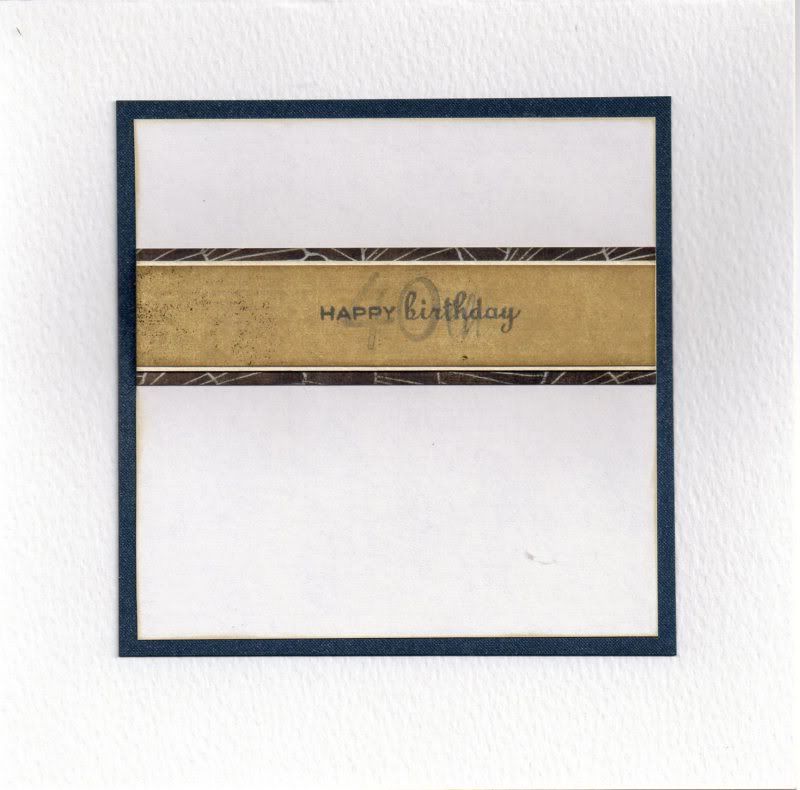
The inside of the card was also decorated using strips of the papers used on the front of the card. The sentiment was stamped across the Honey paper using the Paris Dusk ink, the Happy Birthday stamp from the Personal Impressions Paula Pascual Mix and Match Sentiments stamp set and the '4', '0' and 'th' stamps from the See D's Lower Case Script Alphabet stamp set. The '40th' text was stamped using the second generation of ink, giving it a more faded look.


Here are the blog challenges I am entering this card into:
Blog Widget by LinkWithin