Pages

WELCOME

This blog was created to act as a record of the cards and other projects that I have made. It is for both my own reference and to help inspire anyone who wants to take a look.

I'd love it if you'd leave me a comment so that I know what you think of my projects and that you've been to visit!

Anyone can comment, even those who don't have a blog. (Just look for the word 'Comments' under the three little pictures at the end of each post). Readers without a blog can add an anonymous comment, but please leave your name (and docrafts username if applicable) so I know who you are!

Slideshows of all the cards I've uploaded to my blog can be found at the bottom of the page.


PEOPLE WHO FOLLOW MY BLOG

Thursday, 30 October 2008

Ribbon Storage Solution

I don't know about anyone else, but my ribbon storage leaves a lot to be desired.

My ribbons are stored in a number of ways.

The loose ribbons, the ones I've bought from haberdashers, Hobbycraft etc, are currently wrapped around the inner tubes of toilet rolls, but no matter which tape I use (Sellotape, masking tape, magic Scotch tape), invariably they come unstuck and start to unravel. I also have some ribbon on their reels, but most of them are the Dovecraft ones, and I'm sure you're all aware just how rubbish the reels are as they fall apart at the drop of a hat. I also have some that are stored around strips of card - and they get creases in them. I've also got a box of Brenda Pinnick ribbons that are stored not only on strips of card but are also still in the cardboard box they came in.

Other than the Brenda Pinnick ribbons, all my ribbons are stored by colour in Ziploc bags, but they are now so bulky due to the toilet roll inners, that they no longer fit into the large plastic box that they've always been stored in.

So, following numerous threads over on the docrafts cardmaking forum regarding storage solutions for ribbon, I did a Google search and came across a link to an e-book which gives instructions for a ribbon hanger and at the moment there is a bonus e-book with instructions for a re-order ring, where a sample of all your ribbons are stored with the details of the ribbon such as brand (if applicable), where you bought it and how much it cost. There is also the possibility of adding how much of it you have bought and making a note of how much you use so you can see when you are running low on anything.

So, the author of this book is an English lady called Sunday and she has a blog. I think she is mainly a scrapbooker, but if her ribbon storage solutions are anything to go by, I'm sure there will be lots of other interesting posts on there.

So, onto the e-book!

I had a couple of problems getting the download but Sunday was very helpful and got back to me as soon as she got my email and sorted everything out. (I think I was maybe a bit impatient and clicked on the wrong button).

The link for the e-book is here. I paid for mine through Paypal and it came to about £4.70 I think (it will depend on the exchange rate as for some reason it is priced in US$ at $7.50). I weighed everything up and figured if I went out and bought anything it would cost more than that.

The e-book is copyrighted so unfortunately I can't just post the instructions on here for you, but I think the price tag is well worth it (assuming I can get it to work!)

The solution I had been considering is the one over on Nicole Heady's blog with the dolly pegs and glass jars - but the dolly pegs would have been about £11 for 300 if I'd got them in Wilkinson's, that's before I got the glass jars to put them in. And they take up lots of shelf space which I don't have in my room.
I also considered buying the plastic tags that hold two or three lengths of ribbon from Ribbon Oasis, but at £36 for 200, this would also start to get a bit pricey!!

So, the idea of hanging my ribbons up appealed to me. That way I'll get a better idea of what I've got, and with the re-order ring, where I got it from and how much it cost per metre for when I need to get some more. I could add a couple of hooks to the side of my shelf unit and hang them there. I might have to come up with a solution to them getting dusty - maybe a clear plastic bag over the top like dry-cleaning!

Now, I've read the instructions and they are very clear. BUT I haven't as yet made any, so this endorsement comes with a caveat - I will post again once I've made one and let you know how I get on.

Tuesday, 28 October 2008

Wedding and Hen Party Cards - SOLD!

I just wanted to update you all on the order I got from my friend for two cards, namely a hen party card and a wedding card. She came round today to collect them and she gave me the money before she'd even seen them 'in the flesh', so to speak.


I'd emailed her pictures of them but I told her she should at least look at them before giving me any money!!


Anyway, she said she loved them and, as an added bonus, her sister had told her that the card I'd made for her wedding (also for my friend) was her favourite wedding card (I can feel my head growing!!!)

So, now I'm down to making just one more card before I start on my Christmas cards - I really can't believe that it's nearly November and I haven't made a start on them yet! The card in question is an anniversary card for my DH - it's our tenth anniversary in December so it's got to be a special one. I've got a design in mind and I'm going to use some HOTP papers. I'll post it on here when I've finished it (hopefully tomorrow).

Saturday, 25 October 2008

Blog Candy From FunkyFairyInspirations - CLOSED

Funky Fairy Inspirations have got some Blog Candy up for grabs for three lucky winners. Just head over to their blog and answer the question they've set and add a comment to their post.

You can have a look here for a picture of what's up for grabs between the three winners.

This "Blog Candy" giveaway will run up to 7th November 2008 with the winners being announced on Saturday 8th November 2008.

Juliet's Blog Candy - CLOSED

Juliet is almost at 10,000 hits over on her blog and has some lovely blog candy up for grabs to celebrate the milestone.

It will be open until next Saturday when a winner will be chosen.

You can see what's up for grabs here.

Not only that, she also has some beautiful creations on her blog so pop over and have a look.

Friday, 24 October 2008

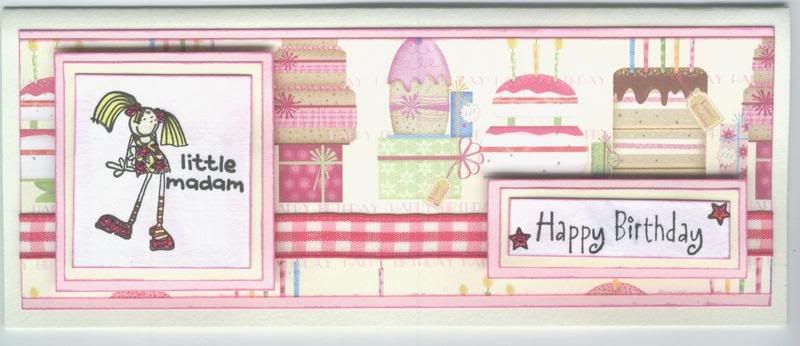
Pink Little Madam Birthday Card


This card is for my cousin's little girl who is 5 this year. She's a lovely little girl but very independent, and at times a cute 'little madam'.
It is also my entry into this week's Cute Card Thursday Blog Challenge, the theme of which is 'Stars', which are apparent on the Little Madam's dress and on the sentiment panel.

The image, from the Bang On The Door Fairy Girls and Her Friends set, was stamped and coloured using Whispers Brushstroke markers and highlighted with Craft Planet Fuchsia glitter glue. The image was then matted onto cream paper and pink card.
The sentiment and stars, from the See D's Celebration Messages set, were stamped and the stars coloured and highlighted with CP Fuchsia glitter glue.
The patterned paper, from the Dovecraft Birthday designer paper pack, was matted onto pink card and cerise gingham ribbon attached across the panel.

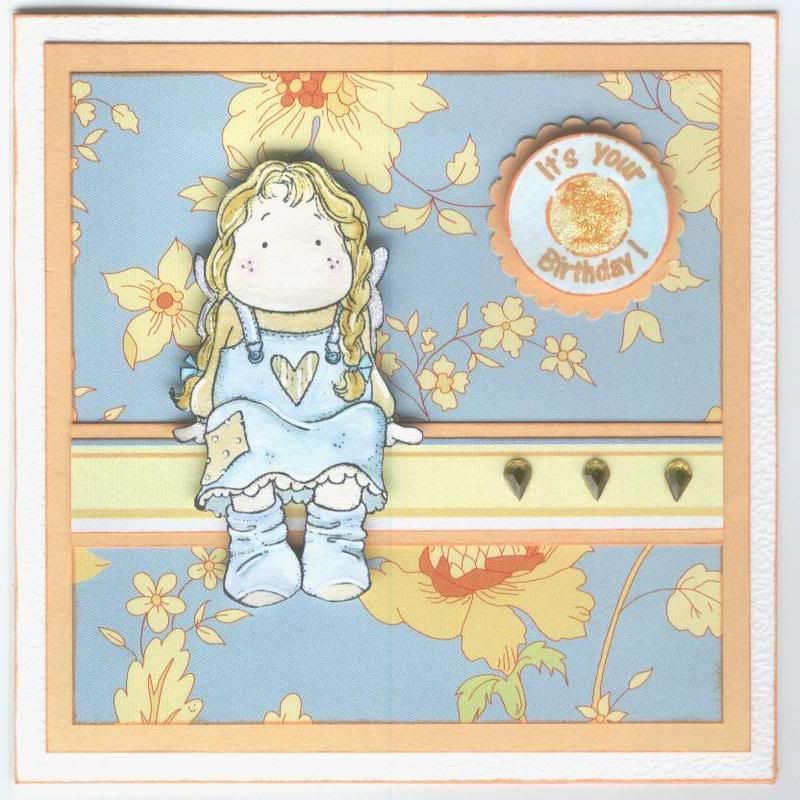
Blue and Yellow Tilda Card

The Tilda image was watercoloured using the Whispers Brushstroke markers and highlighted with white gel pen and Craft Planet Irridescent Sparkle glitter glue.

The patterned papers are from the DCWV Floral Prints paper stack, matted onto pale orange card.

The Tilda image was cut out and the card assembled. Yellow Papermania teardrop gems were added along the strip of patterned paper.

The sentiment is from the circle greetings set from Aud Designs, stamped using ColorBox Tangerine Fluid Chalk ink, watercoloured using Brushstroke markers and highlighted with Craft Planet Irridescent Sparkle glitter glue.
Blog Widget by LinkWithin